Author: Jessica Guevara

  • Haircuts for Men Over 50 With Thinning Hair (That Actually Look Full)

    Haircuts for Men Over 50 With Thinning Hair (That Actually Look Full)

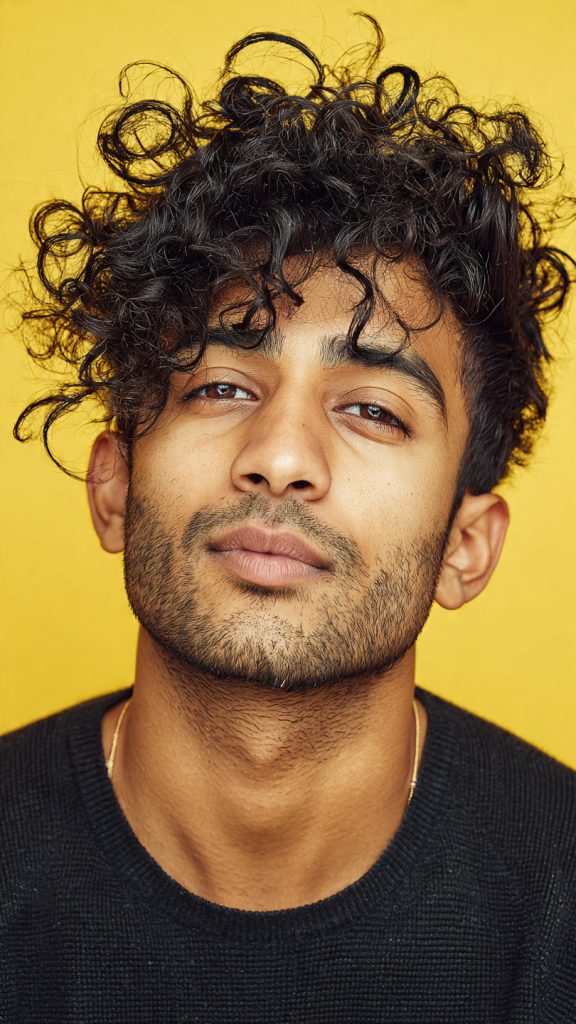
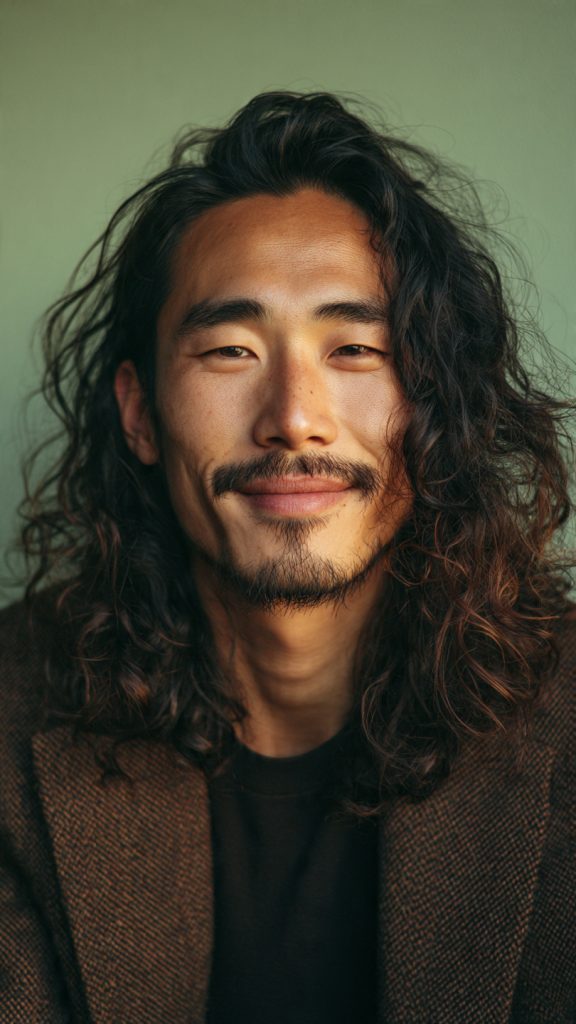
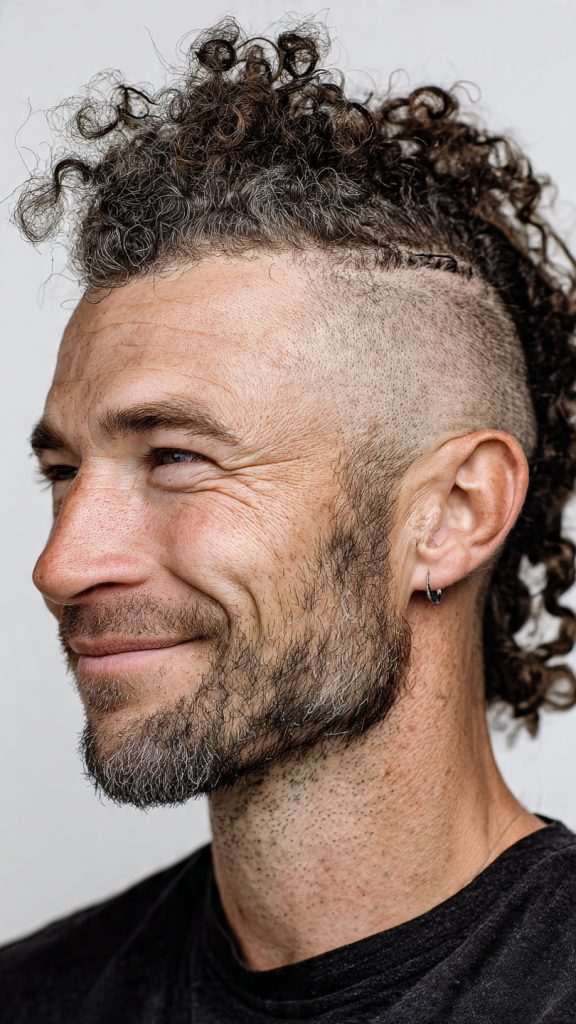
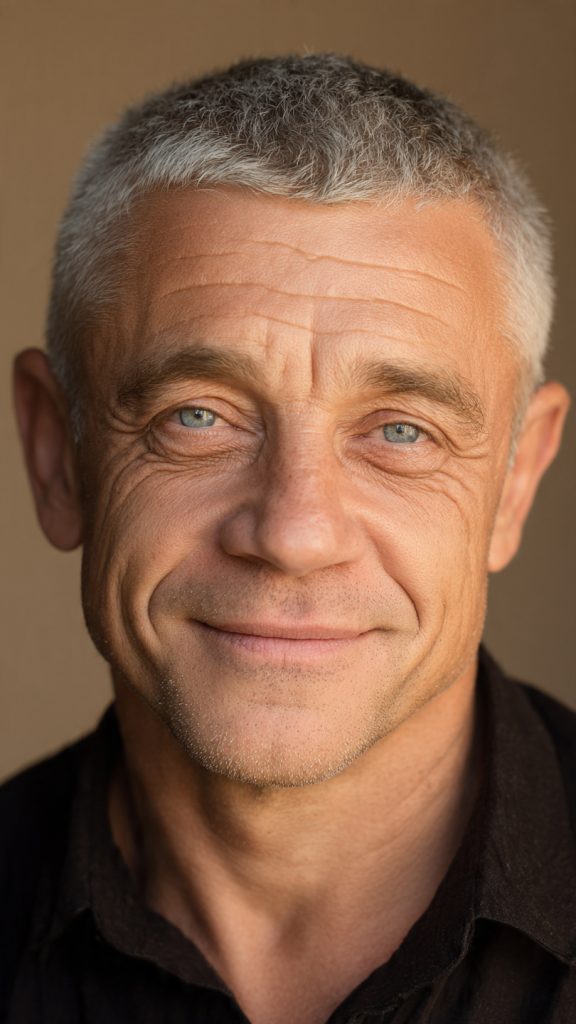
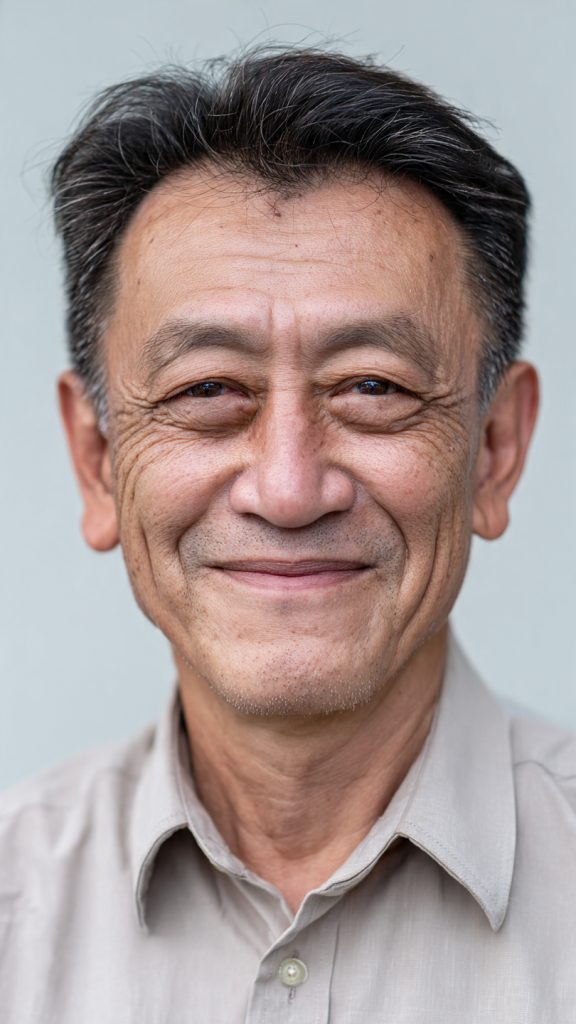
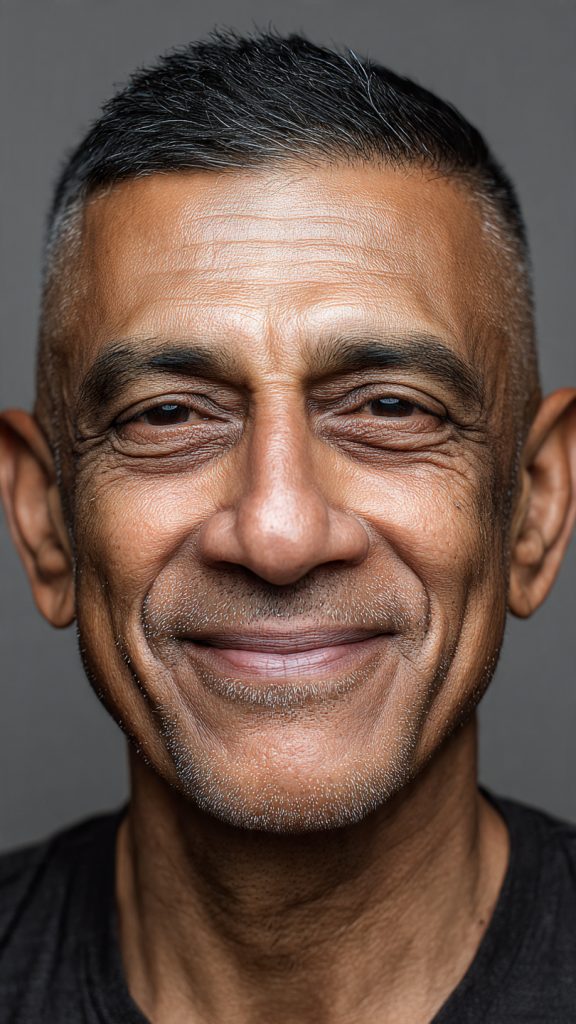
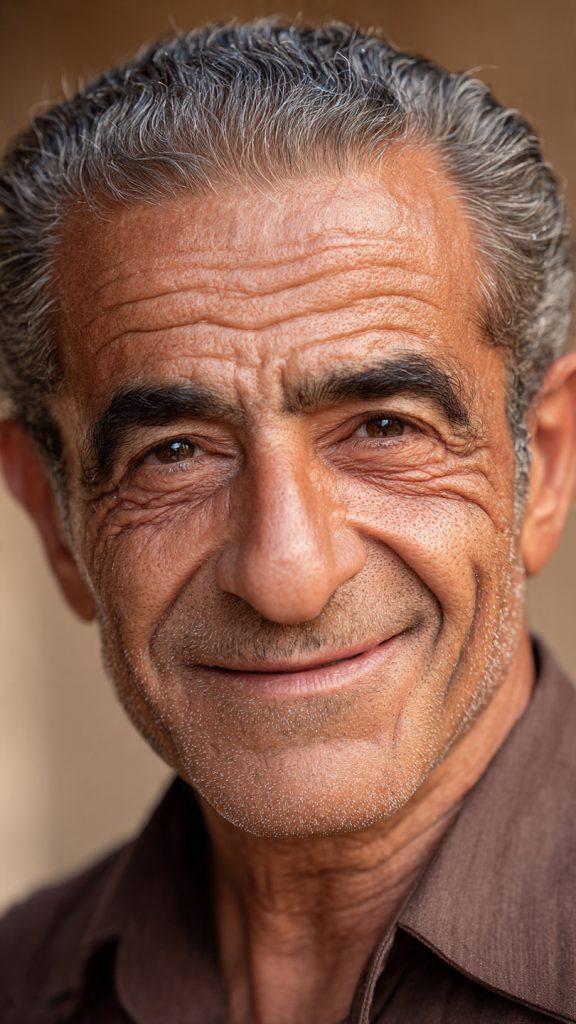
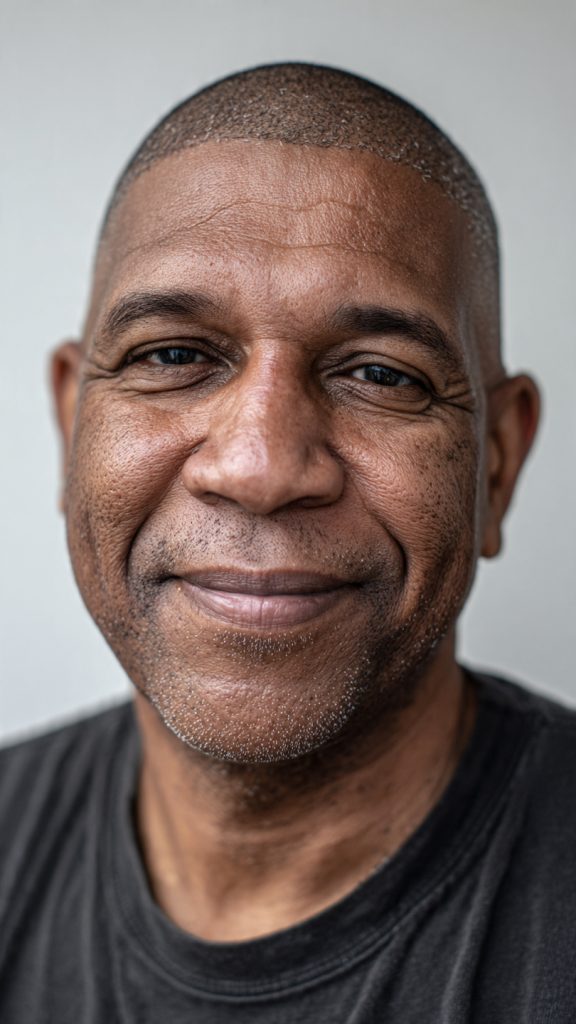
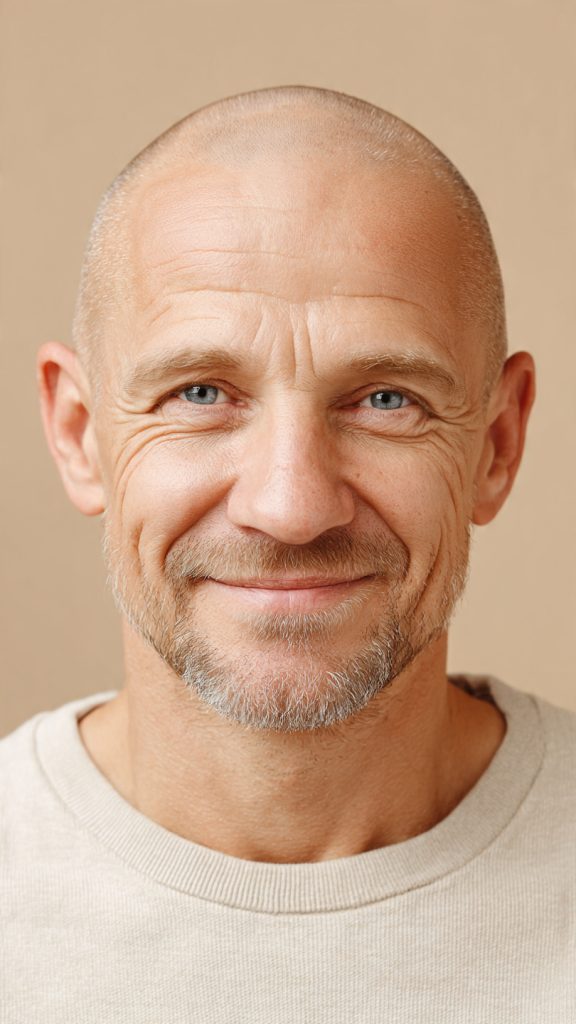
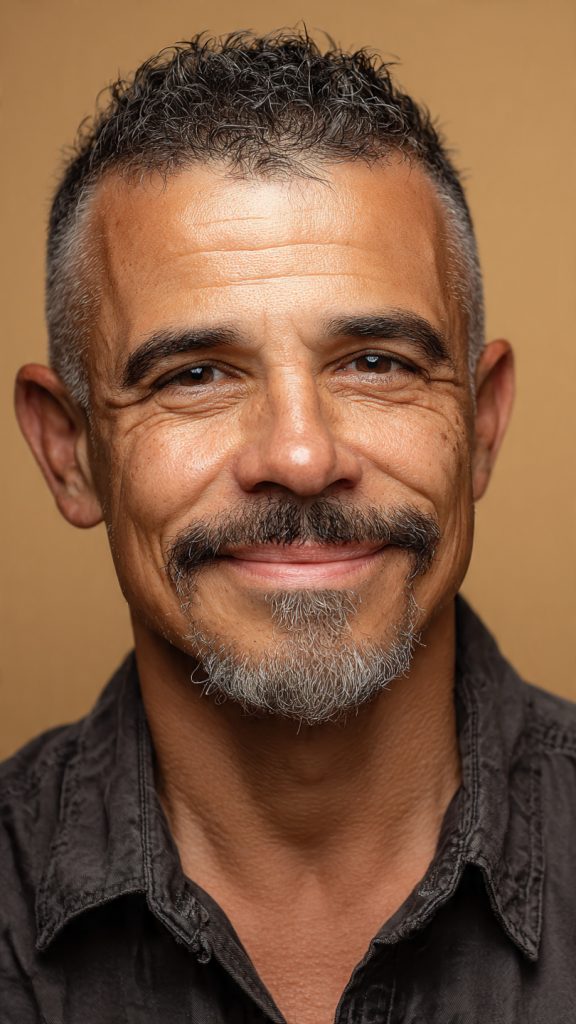
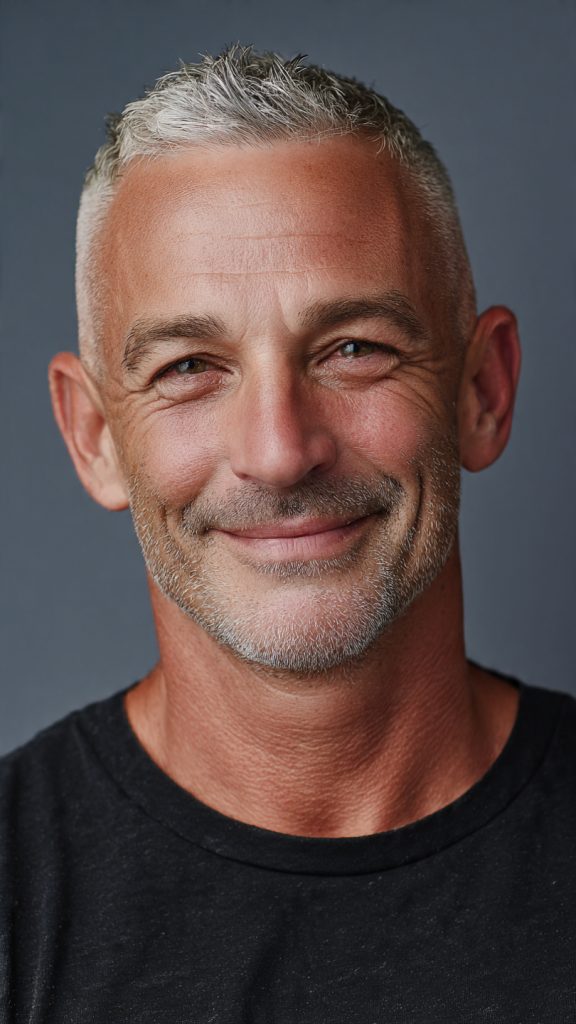
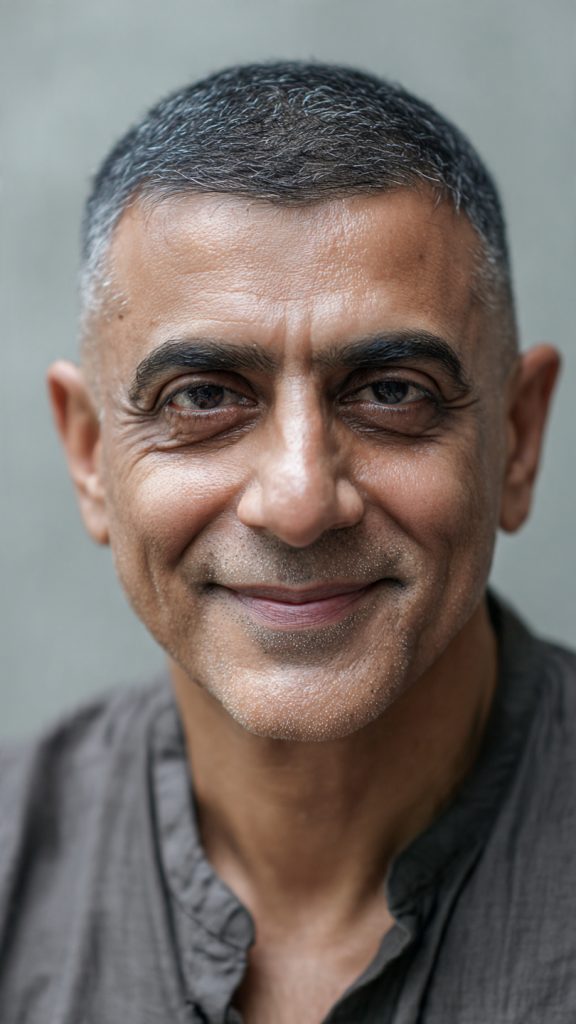
    Let’s be honest: noticing your hair get thinner isn’t easy. By the time you’re over 50, changes in density, a receding hairline, or a widening part are common. But here’s the good news—thinning hair doesn’t mean you have fewer options. In fact, the right haircut can make thinning hair look deliberately textured, modern, and thicker than it is.

    The key is working with your hair’s new pattern, not against it. That means shorter sides to create contrast, avoiding harsh lines that expose scalp, and using weight and texture to build volume on top.

    Below are 15 expertly chosen haircuts for men over 50 that minimize the look of thinning hair while keeping you sharp and confident.


    1. The Textured Crop

    • The cut: Keep the top short (1–2 inches) and ask for point cutting or shears to create soft, choppy texture. Keep the sides tight but not shaved.
    • Why it works: The irregular lengths reflect light differently across the top, breaking up the visibility of the scalp. Short sides create contrast that makes the top look intentionally fuller, not thin.

    2. The French Crop

    • The cut: Add a blunt fringe that lands just above the eyebrows. Keep the top uniform and short. Pair with faded or tapered sides.
    • Why it works: The forward-falling fringe covers a receding hairline completely. The blunt, straight-across edge creates a dense visual line, tricking the eye into seeing thicker hair than exists.

    3. The Modern Ivy League

    • The cut: Keep the top longer (1.5–2 inches) and sweep it slightly to one side. Maintain clean, tapered sides.
    • Why it works: The slight volume at the front lifts hair off the scalp, reducing visible parting. The longer top allows you to style over a thinning crown, while the tidy sides keep the overall look intentional and groomed.

    4. The Short Caesar Cut

    • The cut: Feature a short, horizontal fringe with all hair kept ½ to 1 inch long. The fringe sits forward.
    • Why it works: By removing length and weight, the hair stands up rather than lying flat against the scalp. The blunt fringe adds a strong horizontal line that distracts attention from any thin spots or recession at the temples.

    5. The Low-Fade With a Scissor-Cut Top

    • The cut: Ask for a low fade (fading starts near the ear) and scissors only on top—no clippers above the fade line.
    • Why it works: Scissors preserve weight and natural movement that clippers would strip away. The low fade keeps sides clean without exposing the temples harshly, which is ideal for men with receding hairlines who still want a crisp look.

    6. The Side-Parted Sweep

    • The cut: Grow the top to 2–3 inches, create a deep side part, and sweep the longer hair diagonally across the forehead.
    • Why it works: The diagonal sweep covers a thinning hairline and creates overlapping layers that add optical density. A deep side part also reduces the appearance of a wide center part, which often signals thinning.

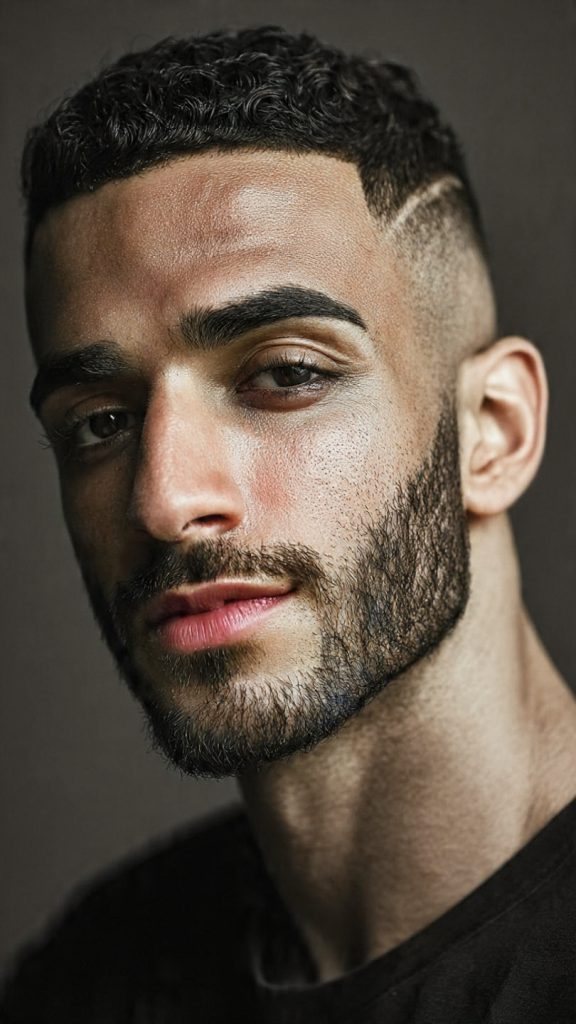
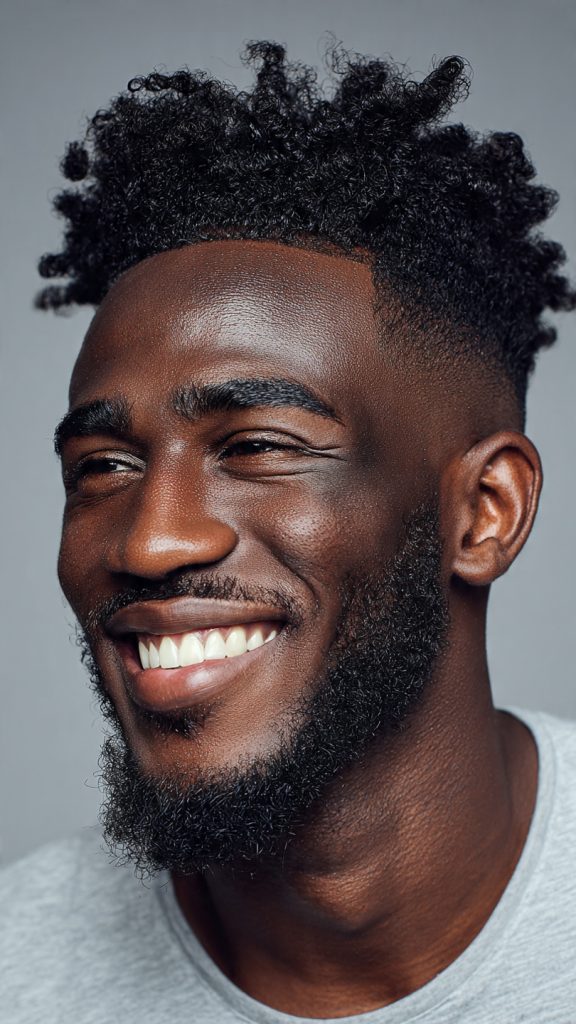
    7. The Buzz Cut (#3 or #4 Guard)

    • The cut: Use a #3 (½ inch) or #4 (½ inch) guard all over. No fades, no blending—just uniform length.
    • Why it works: Extremely short hair removes the contrast between thick and thin areas. At this length, thinning becomes uniform texture rather than a problem. It also draws attention to your face and bone structure, not your hair density.

    8. The Clipper-Grad (Induction Cut)

    • The cut: A very short cut using a #1 or #2 guard on top, graduated down to skin at the nape and sides.
    • Why it works: The graduation (subtle increase in length toward the top) creates the illusion of more hair without actual length. This is one of the best cuts for advanced thinning because there’s nowhere for thin spots to hide—and nothing to hide.

    9. The Messy French Crop

    • The cut: A longer version of the French crop (1.5 inches on top) with choppy, piece-y texture and a relaxed fringe.
    • Why it works: Deliberate messiness masks uneven density. When hair is styled to look intentionally undone, any gaps or thin patches read as “texture,” not hair loss. Ideal for men with wavy or curly thinning hair.

    10. The Short Pompadour (Low Volume)

    • The cut: Keep the top 1.5–2 inches, shorter at the crown, with tight sides. Style with a small amount of lift at the front only.
    • Why it works: A low-volume pompadour lifts hair off the forehead and crown simultaneously. Unlike a traditional high pompadour, this version requires less density because you’re only lifting the front inch of hair, not the whole top.

    11. The Taper Fade With a Textured Top

    • The cut: A taper fade (short at the nape and ears, gradually longer up) paired with a top that’s heavily textured with shears.
    • Why it works: The gradual transition on the sides prevents a harsh “helmet” line that can make thin top hair look isolated. Texture on top scatters light, reducing scalp shine and visibility.

    12. The Soft Quiff (Short Version)

    • The cut: Keep the front slightly longer (1.5 inches) graduating shorter toward the crown. Sides tight or faded. Style with a light product, lifting just the front inch.
    • Why it works: The quiff directs all visual weight to the front hairline, drawing attention away from a thinning crown or mid-scalp. Keeping it short prevents the weight that would otherwise pull hair flat.

    13. The Crew Cut (No Fade)

    • The cut: Uniform length on top (¾ to 1 inch) with a natural, un-faded transition at the sides. No hard lines.
    • Why it works: The classic crew cut is the gold standard for thinning hair because it requires zero parting, zero combing, and zero tension. Without a forced part, there’s no obvious line where hair looks thinner. Everything blends.

    14. The Layered Short Back and Sides

    • The cut: Short on the back and sides (clipper length #2 or #3), with the top cut in multiple layers using scissors.
    • Why it works: Layers create movement and air between hair strands, which actually makes fine or thinning hair look fuller. A single-length top on thin hair looks flat; layers give it life and body.

    15. The Clean-Shaven Head (Deliberate Choice)

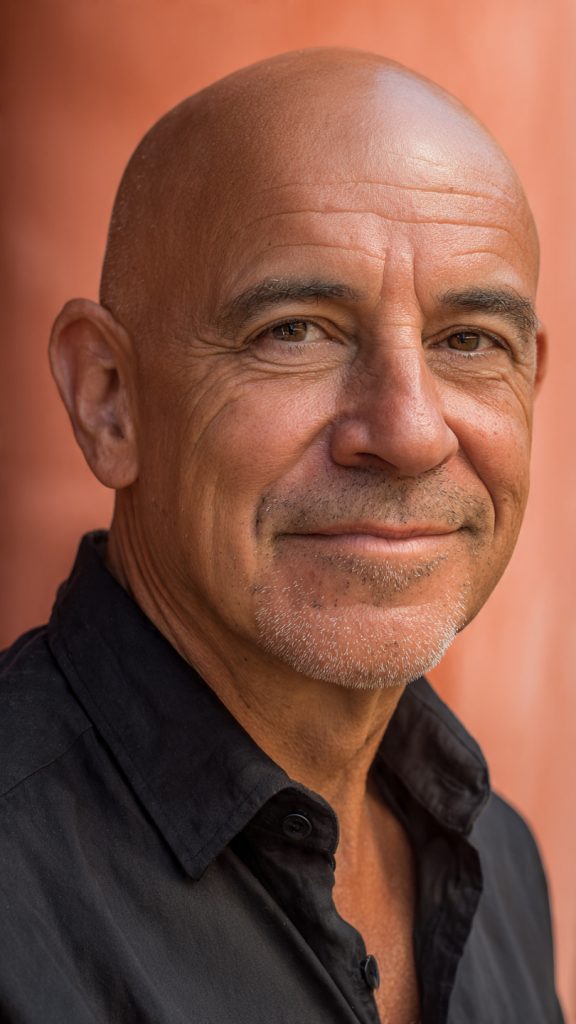
    • The cut: Use a razor or electric shaver for a completely smooth scalp. No stubble, no shadow.
    • Why it works: This isn’t a haircut—it’s a style statement. A fully shaved head removes all contrast between thick and thin areas, eliminates the need to “hide” anything, and projects confidence. For many men over 50, it’s the most liberating and attractive option of all.

    What to Tell Your Barber (Exact Phrases to Use)

    Walking into a barbershop with thinning hair can be nerve-wracking if you don’t know the right words. Use these exact phrases to get the cuts above:

    • “Use scissors on top, not clippers.” – Preserves weight and density.
    • “Point cut or texture shears only.” – Creates softness, not harsh lines.
    • “No hard part or razor lines.” – Avoids exposing scalp contrast.
    • “Keep the fringe forward and blunt.” – Best for receding hairlines.
    • “Low fade, not high fade.” – Keeps temples covered if needed.
    • “Leave the crown slightly longer.” – Hides thinning at the back.
    • “Matte finish product only, no shine.” – Reduces scalp visibility.

    Pro tip: Bring a photo. Pick one of the 15 cuts above and show your barber. A good barber will adapt it to your specific thinning pattern.


    The 5 Products That Make Thinning Hair Look Thicker

    A great haircut is only half the battle. These products are specifically formulated for thinning hair:

    Product TypeWhat It DoesWhat to Look For
    Matte clay or pasteAdds texture and grip without shineLabel says “matte,” “low shine,” or “texture”
    Volumizing powderLifts hair at the roots instantlySilica-based powders (e.g., Schwarzkopf Osis Dust)
    Thickening sprayCoats each strand for optical densitySpray into damp hair before blow-drying
    Sea salt sprayCreates gritty texture that scatters lightAvoid if hair is very dry or brittle
    Dry shampooAbsorbs scalp oils that make hair clump togetherTinted versions work best for dark hair

    What to avoid at all costs: Heavy pomades, gels, waxes, or anything with “high shine” on the label. These products flatten thinning hair and make the scalp more visible.


    Daily Styling Routine for Thin Hair (5 Minutes or Less)

    Follow this routine every morning for best results:

    Step 1 – Wash smart. Shampoo every other day (daily strips natural oils). Use a thickening shampoo with biotin or keratin.

    Step 2 – Towel dry gently. Do not rub vigorously. Pat or squeeze to avoid breakage.

    Step 3 – Apply product to damp hair. Use a dime-sized amount of matte clay or a few sprays of thickening spray. Focus on roots, not ends.

    Step 4 – Blow-dry on low heat. Use your fingers to lift hair upward and forward. Heat opens the cuticle for volume; cool air sets it.

    Step 5 – Finish with dry shampoo or powder. A tiny sprinkle at the crown adds instant lift and matte texture.

    Step 6 – Do not overcomb. Use fingers only. Combs create unnatural part lines that expose thin spots.

    Total time: 4–5 minutes.


    What to Avoid (Common Mistakes That Make Thinning Worse)

    Many men unknowingly make thinning hair look thinner. Avoid these:

    • Growing hair too long. Long, thin hair looks stringy and exposes the scalp. Shorter is always better.
    • Combing over. The classic “combover” fools no one. Embrace texture or a short crop instead.
    • Using shiny products. Gel and pomade reflect light directly off the scalp.
    • Washing daily. Shampoo strips natural oils, leaving hair flat and lifeless.
    • Skipping conditioner. Use a lightweight volumizing conditioner on ends only (never the roots).
    • Hard side parts. A deep, rigid part creates a visible line of scalp. Go for a soft, finger-swept style.
    • High fades. Fading too high on the head isolates thin top hair and makes it look thinner by contrast.
    • Dark hair colors. High contrast between dark hair and light scalp makes thinning more obvious. Consider going one shade lighter.

    When to Consider More Than a Haircut

    A great haircut works wonders, but for some men, thinning progresses beyond what styling can manage. These options are worth exploring:

    OptionBest ForWhat to Know
    Topical minoxidil (Rogaine)Early to moderate thinning at the crownTakes 4–6 months to see results; must use daily
    Finasteride (Propecia)Genetic hair loss (male pattern baldness)Prescription only; consult a doctor first
    Laser therapy capsMaintaining existing hairExpensive but no side effects
    MicroneedlingStimulating blood flow to folliclesBest done by a professional
    Scalp micropigmentation (SMP)Creating the appearance of a shaved head with densityTattooed dots that mimic hair follicles
    Hair systems (modern toupees)Full coverage for advanced thinningToday’s versions are undetectable and adhesive-based

    Important: Always speak to a dermatologist before starting any medical treatment. What works for one man may not work for another.


    Embracing Confidence: The Most Important Style Choice

    Here is the truth that no haircut can replace: thinning hair does not make you less attractive. Some of the most handsome, successful, and charismatic men over 50 have thinning hair or are fully bald. Think of Bruce Willis, Dwayne Johnson, Stanley Tucci, or Jason Statham. None of them hide it. None of them apologize for it.

    A great haircut is a tool. It helps you feel put-together and confident. But confidence itself is what people notice first. When you stop worrying about your hair and start owning your look—whatever it is—you become exponentially more attractive.

    If thinning hair is causing you stress, anxiety, or avoidance of social situations, consider speaking with a therapist or support group. Hair loss affects mental health for many men, and you do not have to go through it alone.


    Conclusion

    Thinning hair after 50 is not a problem to be solved. It is a reality to be managed with smart choices. The 15 haircuts in this article prove that you have excellent options—from the textured crop to the clean-shaven head. Each cut works with your hair’s natural pattern, not against it.

    Remember the core principles:

    • Shorter is better than longer.
    • Texture is your best friend.
    • Matte products only.
    • Scissors over clippers on top.
    • Confidence is non-negotiable.

    Take these ideas to your barber. Experiment with one of the styles above. And if none of them feel right, remember that a fully shaved head is always a handsome, powerful, and liberating choice.

    Your best look is the one that lets you stop thinking about your hair entirely. Go find it.

  • Low-Maintenance Hairstyles for Women Over 50 with Fine Hair

    Low-Maintenance Hairstyles for Women Over 50 with Fine Hair

     Fine hair after 50 often becomes thinner and more delicate, but that doesn’t mean you need to sacrifice style for hours of upkeep. The key is choosing cuts that create volume, disguise sparseness, and work with your natural texture—so you can look polished in minutes, not hours.

    Why Low Maintenance Matters for Fine Hair Over 50

    As we age, hair naturally becomes finer and more fragile due to hormonal changes, particularly during and after menopause. The hair shaft thins, growth slows, and scalp visibility may increase. High-maintenance styles that require daily heat styling, heavy products, or complex routines can lead to breakage, further thinning, and frustration. Low-maintenance cuts work with your hair’s natural limitations—not against them—preserving density while saving you time and stress.


    11 Low-Maintenance Hairstyles

    1. The Classic Pixie Cut

    This timeless short cut removes weight so fine hair appears fuller, and it air-dries in under five minutes with just a dab of texture paste.

    2. The Textured Bob

    A chin-length bob with soft, uneven layers adds movement and body, requiring only a quick finger-comb and sea salt spray to refresh.

    3. The Long Pixie with Side-Swept Bangs

    Keeping length on top allows you to sweep fine hair across the forehead, creating instant density while hiding thinning at the hairline.

    4. The Blunt Bob at the Jawline

    A straight, one-length bob makes fine hair look thicker by eliminating layers that can make ends wispy, and it stays neat for days between washes.

    5. The French Crop

    With short sides and a slightly longer, textured top, this wash-and-go style needs no blow-drying—just rough it up with your fingers.

    6. The Stacked Bob

    Shorter layers in the back naturally lift the crown, adding height without teasing or product, and it easily grows out without looking messy.

    7. The Soft Shag with Wispy Ends

    Light, feathery layers throughout remove bulk while creating gentle movement, and a quick mid-day head shake revives the shape.

    8. The Asymmetrical Cut

    A slightly longer front on one side draws the eye diagonally, breaking up the scalp’s appearance and requiring just a smoothing cream to hold.

    9. The Curly-Textured Crop

    If you have natural wave, cropping it to 2–3 inches lets curls spring up for instant volume, and you simply spritz water to reset.

    10. The Micro Bob (Earlobe Length)

    Ending just below the ears, this cut removes all dead weight so fine hair stands up at the roots, and it needs only a weekly trim to stay sharp.

    11. The Undercut Pixie

    Shaving the nape removes bulk that flattens fine hair, leaving a light, airy top that falls perfectly into place with zero blow-drying.

    What to Ask Your Stylist

    Bringing a photo is helpful, but using the right terminology ensures you leave the salon happy. Here’s what to say for fine-hair success:

    • “Keep weight in the ends” – This prevents the wispy, see-through look that plagues fine hair.
    • “Point-cut, don’t blunt-cut the layers” – Point-cutting softens edges so layers blend without losing density.
    • “Leave interior length while texturing the perimeter” – This creates movement without sacrificing overall fullness.
    • “No heavy razoring” – Razors can fray fine hair shafts, causing frizz and split ends.
    • “Show me how to style it with my fingers” – A good stylist will teach you a 60-second morning routine.

    Products That Won’t Weigh Fine Hair Down

    Skip heavy oils and butters. Instead, reach for these lightweight essentials:

    Product TypeWhat to Look ForWhat to Avoid
    ShampooVolumizing, sulfate-free, “for fine hair”“Moisturizing” or “repair” formulas (too heavy)
    ConditionerApply only to ends, rinse thoroughlyLeave-in creams or heavy butters
    Styling productTexture spray, sea salt spray, dry texture pasteGels, pomades, or oils
    FinisherLightweight dry shampoo (adds grip and volume)Shine serums or smoothing lotions

    Pro tip: Wash every other day or every two days. Fine hair gets limp faster than thick hair, but overwashing strips natural support.


    Quick Morning Routines (Under 3 Minutes)

    No time? No problem. Pick one routine based on your cut:

    • For pixies and crops: Spritz with water, rough-dry with a hand towel, rub a pea-sized amount of texture paste between palms, then scrunch through dry hair.
    • For bobs and lobs: Flip head upside down, spray dry shampoo at roots, massage scalp for 15 seconds, flip back and finger-comb.
    • For curly or wavy fine hair: Mist with water in a spray bottle, scrunch upward with a microfiber towel, air-dry while you get dressed.

    How Often to Trim Based on Your Cut

    Regular trims are non-negotiable for fine hair. Split ends travel up the shaft quickly, making thin hair look even thinner.

    HairstyleTrim Schedule
    Pixie cutEvery 4–6 weeks
    French cropEvery 5–7 weeks
    Stacked bobEvery 6–8 weeks
    Blunt bobEvery 8–10 weeks
    Soft shagEvery 8–12 weeks
    Micro bobEvery 6–8 weeks
    Undercut pixieEvery 4–5 weeks (undercut needs more frequent touch-ups)

    Common Mistakes to Avoid with Fine Hair

    • Over-layering – Too many layers remove the weight that fine hair needs to look substantial.
    • Growing hair too long – Length pulls fine hair flat, exposing the scalp. Shorter is almost always fuller.
    • Skipping heat protectant – If you must use heat, protect every time. Fine hair burns faster.
    • Using wide-tooth combs – They separate strands too much; use a soft bristle brush or your fingers instead.
    • Parting the same way daily – Change your part to train volume and prevent a visible scalp line.

    Conclusion

    Fine hair after 50 doesn’t have to mean bad hair days. The right low-maintenance cut works with your texture, hides thinning, and gets you out the door in minutes—not hours. Whether you choose a classic pixie, a textured bob, or a soft shag, the goal is the same: effortless volume that celebrates your natural beauty. Book that trim, toss the heavy products, and let your hair breathe. Simpler really is better.

  •  Modern Mullets for Women Over 50 Who Break All the Rules

     Modern Mullets for Women Over 50 Who Break All the Rules

     Forget the “business in the front, party in the back” cliché of your youth. Today’s mullet is a sophisticated, volume-boosting, and surprisingly chic haircut that works wonders for women over 50. By keeping length and softness around the face while adding texture and lift at the crown, the modern mullet offers a low-maintenance yet high-style solution for thinning hair, growing out gray, or simply embracing a bold new chapter.

    Why It Works for Common Hair Changes After 50

    • Thinning at the crown: The stacked or lifted top layers create density where you need it most, while the longer back draws the eye downward.
    • Receding hairline: Side-swept bangs or soft face-framing pieces disguise a higher forehead naturally.
    • Uneven graying: The “dramatic gray transition” and “salt-and-pepper” styles turn color inconsistency into intentional contrast.
    • Lower hair elasticity: Shorter, lighter layers move easily without tugging or breaking, unlike long, heavy cuts that pull on fragile strands.

    12 Modern Mullet Ideas for Women Over 50

    1. The Silver Siren


    Embrace your natural gray or white roots with this icy, cropped-forward mullet that uses silver tones to highlight the texture difference between the sleek top and wispy back.

    2. The Curly Q Shag


    Ideal for naturally curly or permed hair, this style keeps the front layers light and face-framing while letting the back coils spring into a soft, rounded tail that camouflages thinning areas.

    3. The Stacked Pixie-Mullet


    A hybrid of a classic stacked pixie and a mullet, this cut adds dramatic volume at the crown to create the illusion of fuller density, then feathers out into longer, delicate strands at the nape.

    4. The Glass Hair Mullet


    For the woman who prefers polish over punk, this version uses a center part and a high-gloss finish on straight, chin-length front sections that transition into a subtle, blunt longer back.

    5. The Wispy Neck-Grazer


    Short, feathered layers on top and around the ears keep the look soft and age-appropriate, while barely-there longer pieces at the back add a hint of rock-and-roll without being drastic.

    6. The Salt-and-Pepper Micro-Mullet


    A shorter, more restrained take where the front is cropped to the brows and the back extends just an inch past the hairline, perfect for highlighting contrasting dark and light strands.

    7. The Side-Swept Spectacular


    Heavy side-swept bangs cover a higher forehead, while the rest of the cut gradually shortens on one side and lengthens into an asymmetrical mullet tail on the other for modern asymmetry.

    8. The 70s Rocker Wave


    Medium-length, tousled waves are cut with a uniform texture throughout, but the back is left slightly heavier and longer, giving a disco-era feel that hides a multitude of styling sins.

    9. The Sleek A-Line Mullet


    Think of an inverted bob that suddenly grows longer in the back. This polished version keeps the front and sides smooth and chin-length, then drops into a sleek, straight tail at the nape.

    10. The Feathered Flick


    Soft, feathery layers (reminiscent of Farrah Fawcett) on top and at the crown volume are met with a barely-there elongated back that looks more like a grown-out bob than a traditional mullet.

    11. The Low-Maintenance Lift


    Specifically designed for very fine or post-menopausal hair, this cut uses internal layers to create a “hidden lift” at the roots in front, while the back is left longer but razor-textured to avoid a heavy look.

    12. The Dramatic Gray Transition


    Use growing-out roots to your advantage by cutting a sharp, dark front section that contrasts with a longer, fully-gray back section, making the two-tone process look

    What to Tell Your Stylist (The Exact Language)

    Walk into the salon with confidence. The modern mullet for women over 50 is not a drastic punk cut—it’s a strategic shape. Say this: “I want a modern shag-mullet hybrid. Keep the front soft and face-framing, add volume at the crown, and leave the back longer but lightweight. Do not cut above my ears on the sides. I want texture, not choppiness.” Bring a photo of one of the 12 styles above. A good stylist will know to point-cut rather than blunt-cut to avoid a heavy or harsh line.

    Styling in Under 10 Minutes (No Heat Damage)

    The beauty of this cut is low effort. For straight or wavy hair, apply a volumizing mousse to damp roots at the crown, then air-dry or use a round brush only on the front section. For curly or coily hair, scrunch in a lightweight curl cream, then diffuse upside down for 30 seconds to activate the mullet’s natural lift. Avoid heavy gels or oils near the crown—they flatten the signature volume. A quick finger-comb in the morning is often all you need.

    The Confidence Factor: What Real Women Say

    Across forums and salon reviews, women over 50 who switch to a modern mullet report the same feeling: unexpected freedom. One 62-year-old described it as “the haircut that finally matches my energy—fun, unapologetic, but still put-together.” Another noted that strangers stopped asking if she was tired and started asking for her stylist’s number. This cut signals that you are not fading into the background; you are simply rewriting the rules of what grown-up hair looks like.

    Who Should Skip This Cut (Honest Advice)

    The modern mullet is versatile, but not universal. If your hair is very straight and stick-fine without any natural bend, the front and back may blend into one shapeless length unless your stylist uses aggressive texturizing techniques. If you prefer slicked-back buns or daily ponytails, the shorter front layers will not reach the hair tie. And if you are growing out a very short pixie (shorter than two inches everywhere), wait three to four months before attempting a mullet—you need enough back length to create the signature tail.

    Maintaining Your Mullet: The 6-Week Rule

    Unlike longer cuts that hide growth, the mullet’s shape relies on precise proportions. Book a trim every six weeks—not eight, not twelve. The front and crown need refreshing to maintain volume, while the back can go two cycles before losing its shape. Between salon visits, use a dry texture spray at the roots to revive lift. Cost-wise, expect to pay the same as a short women’s cut ($50–$90 depending on your city), not a specialty “artistic cut” price.

    How to Adapt These Ideas for Very Short or Very Long Starting Lengths

    • Starting from a pixie (under 2 inches): Ask for a “growing-out mullet.” Your stylist will keep the front and crown short while leaving the back untouched for eight weeks. You will look a little shaggy during transition—embrace it or wear small barrettes.
    • Starting from shoulder-length or longer: You can achieve any of the 12 ideas in one appointment. Expect to lose 3–5 inches overall. The investment is worth it; long hair past 50 often reads as severe or aging, while a mullet reads as intentional and fresh.

    Conclusion

    The modern mullet for women over 50 is not a nostalgic throwback or a desperate grasp at youth. It is a strategic, confidence-boosting haircut that solves real problems—thinning crowns, growing-out grays, low morning energy—while making you look like someone who still has somewhere interesting to go. Whether you choose the silver siren, the curly Q shag, or the dramatic gray transition, you are not just changing your hair. You are changing the conversation about what women over 50 are allowed to wear, to be, and to look like. So book the appointment. Save your favorite prompt. And walk out of that salon with a little more swing in the back and a lot more light in your face.

  • How to Make Your Hair Look Thicker Over 50: 10 Simple, Stylish Tricks

    How to Make Your Hair Look Thicker Over 50: 10 Simple, Stylish Tricks


    As we age, hormonal shifts can lead to finer strands, lower density, and more visible scalp. But volume isn’t just for your twenties—with the right cuts, products, and techniques, you can create the look of dramatically thicker, fuller hair at any age.

    What Causes Hair to Look Thinner After 50 (Briefly)

    Hair naturally goes through cycles of growth, rest, and shedding. After 50, declining estrogen (during menopause) and, for some, shifting androgen levels can lengthen the resting phase and shorten the growing phase. This means slower regrowth, finer individual strands, and more visible scalp—especially at the crown and part line. Genetics, stress, nutritional changes, and certain medications also play a role.


    10 Ideas for Thicker-Looking Hair Over 50

    1. Get a blunt cut.

    Skipping layers and asking for a straight-across, blunt hemline instantly adds visual weight and density to fine or thinning hair.


    2. Use a lightweight, volumizing mousse on damp roots.

    Apply a golf-ball-sized amount to towel-dried roots before blow-drying to build lift without heavy, greasy residues.


    3. Dry your hair upside down.

    Bending forward while rough-drying directs hot air to the roots, creating natural lift and preventing flat, limp strands.


    4. Try a root-lifting powder or spray.

    Sprinkle or spray these microscopic powders onto dry roots, then massage in to double your hair’s height and texture in seconds.


    5. Swap heavy conditioners for a scalp-focused rinse.

    Condition only your mid-lengths and ends, or use a lightweight, “volumizing” conditioner to avoid weighing down the top.


    6. Add soft, face-framing highlights.

    Subtle lighter pieces around your face and crown create contrast and the illusion of extra depth and fullness beneath the color.


    7. Sleep on a silk or satin pillowcase.

    Reduced friction means less breakage and tangling, so you wake up with smoother, thicker-looking hair instead of flattened, frizzy mess.


    8. Use a small-barrel curling iron for texture.

    A one-inch or smaller barrel creates tight bends that expand into soft waves, giving limp hair instant body that lasts for days.


    9. Part your hair differently (or zigzag it).

    Changing a stark side or middle part every few weeks prevents permanent root flattening, while a zigzag part conceals scalp show-through.


    10. Add gentle, clip-in volume extensions.

    Modern clip-ins are lightweight and match your color perfectly—just two or three wefts underneath add dramatic thickness with zero damage.

    What to Avoid If You Want Thicker-Looking Hair

    • Heavy oils and butters (coconut, shea, castor oil applied near roots). They weigh fine hair down and make it look greasy and flat.
    • Over-layering. Too many layers remove density from the ends, making hair look wispy instead of full.
    • Washing every day. Daily shampoo strips natural oils, leading to dry, brittle, fragile strands.
    • High-heat styling without protection. Heat damage causes breakage, which directly reduces visible thickness.
    • Tight ponytails, buns, or braids. Traction over time thins the hairline and temples permanently.

    Daily & Weekly Routine for Maximum Thickness

    Daily (5 minutes or less):

    • Brush gently with a boar-bristle or wide-tooth comb to distribute scalp oils.
    • Apply a pea-sized root-lifting product to dry roots.
    • Flip head upside down and shake with fingers for 10 seconds.

    Weekly (30–60 minutes):

    • Use a clarifying shampoo once a week to remove product buildup.
    • Do a lightweight protein treatment to strengthen fine strands.
    • Sleep with a silk or satin bonnet or pillowcase every night.

    Monthly:

    • Trim ¼ inch to keep blunt ends clean.
    • Re-evaluate your part and switch if needed.
    • Consider demi-permanent color or highlights (color coats the cuticle, adding temporary diameter to each strand).

    When to See a Professional

    If you notice sudden, patchy, or rapid thinning, or if you develop scalp itching, redness, or flaking, see a dermatologist or trichologist. These could be signs of alopecia areata, scarring alopecia, thyroid disorders, iron deficiency, or autoimmune conditions—all treatable when caught early.

    Also consult a stylist who specializes in fine or aging hair for a custom cut or to discuss semi-permanent options like microbead extensions, toppers, or scalp micropigmentation.


    Conclusion

    Making your hair look thicker after 50 isn’t about fighting age—it’s about working smarter with the hair you have today. A blunt cut, lightweight volumizing products, small changes like sleeping on silk, and simple styling tricks (dry upside down, zigzag your part) can transform fine or thinning hair into full, bouncy, confident hair.

    Remember: no single trick works alone. Combine a few of these 10 ideas that fit your lifestyle, protect your strands from damage, and embrace the texture you have. Thicker-looking hair at 50, 60, 70, and beyond isn’t a fantasy—it’s just a routine away.

  •  Men’s Curly Haircuts: 14 Fresh Looks for Every Texture

     Men’s Curly Haircuts: 14 Fresh Looks for Every Texture


    For too long, men with curly hair were told to tame, flatten, or hide their natural texture. But here’s the truth: curls are a superpower. Whether you have loose waves, tight coils, or something in between, the right haircut can transform your look from “messy” to “intentional.” The key is working with your curl pattern, not against it. In this guide, we break down 14 versatile, stylish curly haircuts for men—ranging from low-maintenance fades to bold, shoulder-length styles. No more bad hair days. Let’s find your next cut.


    14 Curly Haircut Ideas for Men

    1. The Curly Crop

    • Best for: Loose to medium curls (type 2B–3A).
    • The look: Short on the sides, slightly longer on top (about 1–2 inches). The top is cut bluntly to encourage volume without length.
    • Why it works: Low maintenance, dries quickly, and creates a rounded, neat silhouette. Just add a little mousse and go.

    2. The High Taper with Curly Fringe

    • Best for: Tight curls and coils (type 3B–4A).
    • The look: Skin fade or high taper on the back and sides, leaving 3–4 inches of curls on top that fall forward into a soft fringe.
    • Why it works: The contrast between the sharp fade and soft, bouncy fringe is modern and edgy. Keeps hair off your forehead.

    3. The Modern Mullet (Curly Edition)

    • Best for: Medium to tight curls (type 3A–3C).
    • The look: Short on the sides and crown, with length kept at the back and a slightly longer top. Curls give the mullet a softer, rock-and-roll feel.
    • Why it works: It’s rebellious but wearable. Great for guys who want length without the “boring” shape.

    4. The Mid-Length Shag

    • Best for: Wavy to curly hair (type 2C–3B).
    • The look: Layers throughout, with curtain bangs and volume at the crown. Length usually reaches the ears or jawline.
    • Why it works: Layers remove bulk and prevent the dreaded “triangle head.” Perfect for growing out a shorter cut.

    5. The Undercut with Defined Curls

    • Best for: Loose to medium curls (type 2B–3A).
    • The look: Sides and back shaved or buzzed (e.g., #2 guard), while the top is left long enough to show curl definition (4–6 inches).
    • Why it works: Dramatic contrast that highlights your curl pattern. Style with a curl cream for definition and a side part.

    6. The Short Caesar Curl

    • Best for: Wavy or loose curls (type 2A–2C).
    • The look: Cut uniformly short (about 1 inch) all over, with a forward-falling fringe that’s cut straight across.
    • Why it works: A classic, no-fuss cut that controls frizz. Ideal for guys who want to acknowledge their texture without spending time on styling.

    7. The Tapered Afro

    • Best for: Tight coils and kinks (type 4A–4C).
    • The look: A rounded, full shape on top that gradually tapers down to skin at the sides and neckline.
    • Why it works: Keeps the natural volume of an afro but adds a clean, polished edge. Shape it with a pick and shea butter.

    8. The Slicked-Back Curls

    • Best for: Longer, loose curls (type 2B–3A).
    • The look: Length on top (5+ inches) with shorter sides. Curls are brushed back while wet and held with a gel or pomade.
    • Why it works: Transforms curls into a sophisticated, vintage-inspired style. Great for formal events or professional settings.

    9. The Curly Burst Fade

    • Best for: Tight curls and coils (type 3B–4B).
    • The look: A fade that curves around the ears (like a semi-circle), leaving a rounded patch of curls on top and a defined hairline.
    • Why it works: One of the most artistic fades. It frames the face beautifully and keeps bulk off the ears.

    10. The Messy Curly Top

    • Best for: All curl types, especially 3A–3C.
    • The look: Sides are clipped short (but not faded), top is left longer (3–5 inches) and cut with point-cutting for texture. No parting.
    • Why it works: Effortless and young. Use a salt spray and scrunch – the goal is controlled chaos.

    11. The Long Flowing Curls

    • Best for: Loose to medium curls (type 2B–3A) with healthy density.
    • The look: Shoulder-length or longer, with minimal layering to avoid shrinkage. Often worn with a center part.
    • Why it works: A bold, romantic look. Requires commitment to conditioning, but the payoff is unmatched volume and movement.

    12. The Temple Fade with Hard Part

    • Best for: Medium tight curls (type 3A–3B).
    • The look: A fade only at the temples (not the whole side), leaving side length. A razor-sharp hard part separates the top curls from the fade.
    • Why it works: Professional yet stylish. The hard part gives a geometric edge that contrasts nicely with soft curls.

    13. The Box Fade (Curly Version)

    • Best for: Tight coils (type 4A–4B).
    • The look: A flat, squared-off top (like a box) with faded sides. Curls are shaped into a crisp, horizontal line on top.
    • Why it works: A bold, architectural shape. Ideal for guys who want a sharp, clean look that still celebrates their texture.

    14. The Curly Mohawk (Frohawk)

    • Best for: Medium to tight curls (type 3B–4C).
    • The look: Sides are faded or shaved completely. A strip of longer curls runs from the forehead to the nape. Can be worn defined or picked out.
    • Why it works: Maximum drama with minimal side bulk. You can blend it in for work, then pick it out for the weekend.

    How to Communicate with Your Barber (Crucial for Curly Hair)

    Curly hair behaves differently when wet, dry, and stretched. A miscommunication can lead to a disaster. Use this script:

    • Ask for a dry cut first. Many curly specialists cut hair dry to see the true spring pattern. Wet cuts can shrink unevenly.
    • Say “cut to shape, not to length.” You want the barber to follow your curl pattern, not fight it.
    • Bring a photo. Describe what you like: “I want volume here, less bulk here.”
    • Specify the fade level. “Skin fade,” “low taper,” or “#2 on the sides” leaves no confusion.
    • Mention your styling routine. “I air-dry and use gel” vs. “I blow-dry” changes how they cut.

    The 3 Golden Rules of Curly Hair Maintenance

    Once you have the cut, keep it looking fresh with these non-negotiable rules:

    RuleWhy It MattersQuick Action
    1. Never brush dry curlsIt creates frizz and breaks the curl patternUse a wide-tooth comb only when wet, with conditioner
    2. Sleep on satinCotton pillowcases absorb moisture and cause tanglesBuy a satin pillowcase or bonnet ($10–15)
    3. Refresh with water, not productAdding more cream or gel leads to buildupSpray with plain water and scrunch to revive day-old curls

    Styling Products by Curl Type (A Simple Chart)

    Your Curl TypeBest ProductApply ToAvoid
    Loose waves (2A–2B)Mousse or sea salt sprayDamp hairHeavy butters
    Medium curls (2C–3B)Curl cream + light gelSoaking wet hairAlcohol-based sprays
    Tight coils (3C–4C)Leave-in conditioner + shea butterWet, detangled hairDry shampoos

    When to Get a Touch-Up (A Realistic Schedule)

    • Tight fades and tapers: Every 2–3 weeks (the sharpness fades fast)
    • Curly crops and Caesar cuts: Every 4–5 weeks
    • Longer styles (shag, flowing curls): Every 8–10 weeks (just a dusting of ends)
    • At-home maintenance: Never cut your own curls. But you can trim a single stray curl that hangs lower than the rest.

    Common Curly Hair Mistakes Men Make (And How to Fix Them)

    • Mistake: Washing hair every day with shampoo.
      • Fix: Shampoo twice a week. Use conditioner or co-wash on other days.
    • Mistake: Towel-drying aggressively.
      • Fix: Scrunch with an old cotton t-shirt or microfiber towel.
    • Mistake: Picking the wrong haircut photo.
      • Fix: Search for “men’s curly [name of cut] + [your hair type]” not just any curly photo.
    • Mistake: Avoiding layers because they think it reduces length.
      • Fix: Layers actually add volume and remove the heavy “helmet” look.

    Conclusion

    Curly hair is not a problem to be solved—it’s a feature to be showcased. The 14 haircuts above prove that there is a stylish, intentional look for every curl pattern, face shape, and lifestyle. Whether you choose the clean lines of a tapered afro, the rock-and-roll energy of a curly mullet, or the effortless mess of a curly top, the rules are the same: work with your texture, communicate clearly with your barber, and stick to a simple moisture-first routine.

    You don’t need straight hair to look polished. You need the right cut, the right products, and the confidence to let your curls do what they do naturally. Book that appointment, show your barber the photo, and walk out knowing that your hair is no longer an afterthought—it’s your best accessory.

  • lattering Medium Length Hairstyles for Thick Hair – Tame the Volume in Style

    lattering Medium Length Hairstyles for Thick Hair – Tame the Volume in Style

    If you have thick hair, you know the struggle is real. While others chase volume, you’re often battling bulk, unwanted triangle shapes, and morning frizz. The good news? Medium length is your hair’s best friend. Long enough to pull back, but short enough to lighten the load, shoulder-grazing cuts work with your density, not against it. Strategic layers, texturizing techniques, and specific shapes can transform heavy manes into lightweight, movement-filled styles.

    Below are 18 expertly curated ideas to help you embrace—not fight—your natural thickness.


    1. The Textured Lob (Long Bob)

    Cut just above the shoulders, the lob removes significant weight while keeping styling easy. Ask for internal point-cutting to break up density. The result: a bouncy, airy shape that dries faster and holds curls beautifully.

    2. Layered Shag with Curtain Bangs

    A shag is thick hair’s dream. Choppy layers through the crown and ends eliminate bulk, while wispy curtain bangs soften the face. The “messy” nature of this cut means less precision styling—perfect for natural waves.

    3. Blunt Cut with Undercut Layer

    Keep the exterior blunt for a strong perimeter, but request a hidden undercut layer (just at the nape). This secretly removes 30-40% of bulk, reduces overheating, and makes ponytails feel weightless—all without changing the visible shape.

    4. Beveled A-Line Bob

    Longer in the front, shorter in the back, this angled bob prevents the dreaded pyramid effect. The beveled (curved-under) finish encourages the ends to tuck inward, controlling stubborn thick strands that want to flip out.

    5. Mid-Length Butterfly Cut

    Inspired by the viral trend, this cut uses short, face-framing layers on top and longer, feathery layers underneath. It “opens” like butterfly wings, removing heaviness from the sides while preserving length and adding incredible movement.

    6. Italian Bob

    A chic, rounded bob that sits between the chin and shoulders. It features soft, uniform layers and a slight undercurve. For thick hair, the key is asking for “light slicing” through the ends—this creates that polished, vintage volume without looking boxy.

    7. Medium Length with Caramel Babylights & Long Layers

    Heavy hair needs dimension. Fine, caramel babylights woven through long layers create visual breaks, making the hair look softer and more textured. The layers themselves should be cut with a razor to prevent blunt, heavy ends.

    8. The Curly Mid-Length DevaCut

    Specifically for natural curls or coils. This dry-cut technique shapes each curl individually, removing bulk from the densest areas (often the crown and sides). The result is a rounded, springy shoulder-length style that won’t weigh itself down.

    9. Modern Mullet (The “Wolf Cut”)

    Yes, for thick hair. The wolf cut combines a shaggy top with a slightly longer, wispier back. Extreme texturizing removes weight from the sides, leaving a rock-and-roll silhouette that’s edgy and surprisingly low-maintenance.

    10. Sliced Layers with Micro-Fringe

    “Slicing” (cutting vertical notches into the hair) is a game-changer for thickness. Combined with a bold micro-fringe (short, blunt bangs), the overall shape feels intentional and artistic. The sliced ends prevent the “helmet head” look.

    11. One-Length Collarbone Cut

    A single, uniform length can work for thick hair if it falls right at the collarbone. This placement uses gravity to naturally elongate and slim the shape. Keep ends super sharp (no layering) and style sleek with a heat protectant for a high-fashion look.

    12. Inverted Bob with Disconnected Underside

    An inverted bob stacks weight in the back. For thick hair, ask your stylist to “disconnect” the underside—meaning the bottom layer is cut much shorter than the top layer. This removes bulk internally while the top remains smooth and full.

    13. Shoulder-Length with Face-Framing Feathers

    Long, feathery pieces that start at the cheekbones and blend into the length. This technique opens up the face, lightens the front heaviness, and allows thick hair to tuck behind ears easily. It’s an ideal “wash-and-go” for straight or wavy textures.

    14. The Mid-Length Hime Cut

    Adapted from Japanese street style. Thick hair is perfect for this blunt, geometric cut: straight-across ends, cheek-length “side slices,” and micro-bangs. The weight of thick hair holds the sharp lines perfectly, creating a striking, architectural look.

    15. Rounded Layered Cut (The “Priscilla”)

    Think Priscilla Presley’s 80s volume, but modernized. A soft, rounded shape with evenly distributed layers from ear to ends. Use a round brush to blow-dry; thick hair will hold this voluminous, bouncy shape for days without falling flat.

    16. Asymmetrical Textured Cut

    One side slightly longer (by 1-2 inches), both sides heavily textured with a razor. The asymmetry distracts from any bulkiness, and the uneven weight distribution makes the hair feel lighter. Style with a deep side part for maximum effect.

    17. Mid-Length with Nape Undercut (Patterned)

    For the bold: shave a small, geometric pattern (like a zigzag or chevron) into the underlayer at the nape. This removes significant bulk where thick hair is densest. When hair is down, it’s invisible; when in an updo, it’s a hidden surprise.

    18. The “Bottleneck” Cut

    A cross between curtain bangs and a shag. The bangs start narrow at the hairline (like a bottleneck) and widen into face-framing layers that hit the shoulders. This cut naturally funnels thick hair away from the face, reducing weight at the front hairline.

    Who This Medium-Length Cut Is For

    This article is for anyone who:

    • Has dense, heavy hair that feels like a helmet when worn long
    • Struggles with triangle-shaped hair (wide at the ends, flat on top)
    • Spends 30+ minutes blow-drying because thickness holds water
    • Wants versatility – ability to wear hair down, in a ponytail, or half-up
    • Desires movement and bounce without losing the feeling of length
    • Has straight, wavy, curly, or coily texture (all are covered here)

    If you’ve ever been told “you have too much hair for that cut,” these 18 styles prove otherwise.


    Why Medium Length Wins for Thick Hair

    Problem with Long Thick HairProblem with Short Thick HairMedium Length Solution
    Heavy, pulls at rootsCan look like a mushroomWeight balanced across shoulders
    Tangles easilyLimited updo optionsEasy to pin up or leave down
    Dries in 1+ hoursRequires frequent trimsDries in 15-20 minutes
    Loses curl quicklyShows every cowlickHolds style without fighting texture

    The sweet spot: Between the chin and two inches below the collarbone. This range uses your hair’s own density for volume at the crown while removing bulk where it matters most – the ends.


    What to Tell Your Stylist (Exact Phrasing)

    Walk into the salon with these exact phrases. Do not say “thin it out” – that creates frizz.

    Say this instead:

    “I want to keep my length at the collarbone, but please remove weight using internal layering and point-cutting. Do not use thinning shears near my roots. Leave the perimeter blunt or softly textured, but take out bulk from the mid-lengths and ends.”

    Additional requests by technique:

    • For less volume: “Carve out the underside with a razor cut.”
    • For more movement: “Use slide-cutting to break up the ends.”
    • For curly hair: “Cut my hair dry, curl by curl, and remove weight from the crown.”
    • For straight fine-but-dense hair: “Add long, invisible layers – nothing shorter than my chin.”

    What to avoid:
    ✗ Thinning shears (cause frizz and split ends)
    ✗ Over-texturizing the top (creates flyaways)
    ✗ A single length without any layering (creates the triangle)


    Pro Stylist Tips for Managing Thick Medium Hair

    1. The 70% Dry Rule

    Never fully dry thick hair with a towel. Stop at 70% dry, then apply product. Thick hair absorbs product better when slightly damp, not sopping wet.

    2. Section into Four Quadrants

    Thick hair laughs at one-section styling. Clip hair into four sections (top left, top right, bottom left, bottom right) and work each separately. This cuts styling time in half.

    3. Invest in a Wide-Tooth Comb + Boar Bristle Brush

    • Wide-tooth comb: Detangle wet hair without breakage
    • Boar bristle brush: Distribute natural oils from roots to ends (prevents the “dry ends, oily roots” paradox of thick hair)

    4. Sleep on Satin – Not Silk

    Satin is more durable for thick hair and creates less friction than silk. Use a satin pillowcase or a “pineapple” ponytail on top of your head with a satin scrunchie.

    5. Ask for a “Weight Line” Check

    Before your stylist finishes, have you flip your head upside down and stand up. If the hair feels heavy on one side, ask them to “check the weight line” – this balances density left to right.


    Daily Routine & Product Picks for Thick Medium Hair

    Morning Routine (5-10 minutes)

    StepActionProduct Type
    1Spray damp hair with leave-in conditionerLeave-in mist
    2Apply a pea-sized smoothing cream to endsAnti-frizz cream
    3Blow-dry roots only (let ends air dry)Lightweight heat protectant
    4Finish with a drop of hair oil on palms, scrunch endsArgan or jojoba oil

    Product Formulations That Work Best

    TextureBest Product FormulaAvoid
    Straight thickLightweight serums, mousseHeavy creams
    Wavy thickCurl cream + gelDry shampoos (cause buildup)
    Curly/coily thickLeave-in conditioner + oil sealantAlcohol-based sprays

    Three Budget-Friendly Tools That Save Time

    1. Extra-long clip hair clips – Regular clips can’t hold thick hair. Look for 3-inch or longer.
    2. Ionic hair dryer – Reduces drying time by 40% compared to standard dryers.
    3. Wet brush for thick hair – The original Wet Brush is too flimsy. Get the “thick hair” version with firmer bristles.

    How Often to Cut Thick Medium Hair

    Hair TypeTrim Frequency
    Straight or wavyEvery 8-10 weeks
    Curly (3A-3C)Every 10-12 weeks
    Coily (4A-4C)Every 12-14 weeks
    Heat-styled dailyEvery 6-8 weeks

    Thick hair hides split ends well, but the weight makes them travel up the shaft faster. Don’t skip trims.


    Conclusion

    Thick hair is not a problem to be solved – it’s an asset to be shaped. The right medium-length cut transforms density from a daily battle into your best feature: volume that doesn’t quit, movement that turns heads, and a silhouette that looks expensive with zero effort.

    The 18 styles above prove there’s no single “correct” way to wear thick hair. Whether you choose a blunt collarbone cut, a textured shag, or a curly DevaCut, the principle is the same: work with your density, not against it. Use internal layering to remove bulk, keep the perimeter intentional, and never let anyone talk you into thinning shears.

    Your perfect cut is somewhere between your chin and collarbone. Book the appointment, bring a photo from this article, and walk out wondering why you waited so long to go medium.

    Final thought: The most beautiful thing about thick hair isn’t the amount – it’s the shape. Give it the right architecture, and it will do the rest.


  • The 15 Most Trending Kinky & Coily Hairstyles of 2026

    The 15 Most Trending Kinky & Coily Hairstyles of 2026


    Gone are the days when “polished” hair meant forcing curls into submission. In 2026, the kinky and coily community is celebrating volume, shrinkage, and raw texture like never before. From futuristic accessories to gravity-defying sculptural shapes, this year’s trends prove that the bigger, the bolder, and the more unapologetically natural, the better.

    Whether you rock a teeny-weeny afro or waist-length coils, here are the 15 hairstyles dominating feeds, fashion weeks, and street style right now.


    1. The Cloud Cut

    A rounded, ultra-soft afro with subtly faded sides that mimics the shape of a fluffy cumulus cloud.

    2. Frosted Tips on Coils

    Only the very ends of your two-strand twists or coils are bleached or painted pastel for a 2026 update on a 90s classic.

    3. Sculpted Coil Pile-Up

    Coils are finger-twisted and pinned to stack vertically on top of the head, creating a living sculpture.

    4. Glossy Wet-Look Kinks

    High-shine gel is raked through shrunken coils to create a “just-stepped-out-of-the-rain” effect that lasts all day.

    5. Chain-Linked Bantu Knots

    Small Bantu knots are connected with delicate gold or silver hair chains, turning each knot into a link of wearable art.

    6. The Chiseled Afro-Mullet

    Short, tight coils on the crown and sides transition into a longer, kinky tail in the back—business in front, party behind.

    7. Negative Space Shaved Designs

    Geometric or organic shapes (zigzags, crescent moons, freehand swirls) are shaved into one side of a full afro.

    8. Tucked Faux Hawk with Raw Edges

    The sides are pinned flat in coils, while the center strip stands tall and unsmoothed for a punk, unfinished texture.

    9. Floating Ring Toss Coils

    Small, clear silicone rings are threaded onto individual coils every inch or so, making the hair look like a kinetic mobile.

    10. Split-Tone Marble Twists

    Two contrasting colors (e.g., deep burgundy and creamy blonde) are twisted together in one strand for a swirled, marble effect.

    11. The Puff Cloche

    A single, extra-large puff is shaped into a perfect dome that sits low on the forehead, mimicking a vintage 1920s cloche hat.

    12. Frayed Twist-Out Ends

    Instead of sealing the ends, they are left intentionally frizzy and separated after a twist-out for a dandelion-seed finish.

    13. Coily Ladder Cut

    Layers are cut so dramatically that the coils form distinct horizontal “rungs” when stretched, creating a ladder-like silhouette.

    14. Pearl-Sprinkled Finger Coils

    Tiny, flat-backed pearls are adhered to the center of individual finger coils, adding a delicate, reptilian-like sparkle.

    15. The “No-Part” Freeform

    No combs, no defined parts—just hours of separating and fluffing with fingers to encourage a wild, topographical map of coils.

    What You’ll Need: Essential Tools & Products for 2026 Kinky/Coily Styles

    Before you book your appointment or clear your Sunday afternoon, gather these 2026 essentials. The right tools make the difference between a style that lasts three days versus three weeks.

    1. A Good Leave-In Conditioner with Slip
    Look for lightweight formulas with aloe, marshmallow root, or slippery elm. You need enough slip to finger-detangle without snapping coils.

    2. High-Hold, Non-Flaking Gel
    For wet-look styles and slicked edges, opt for clear, alcohol-free gels. Avoid anything that dries to a white crust.

    3. Silicone Hair Rings & Hair Chains
    These are the breakout accessories of 2026. Buy assorted sizes of clear silicone rings and detachable chain links specifically rated for natural hair.

    4. A Wide-Tooth Comb (or Just Your Fingers)
    Many 2026 trends actively reject combs. But for the styles that need one, choose seamless, wide-tooth combs to prevent snagging.

    5. Satin or Silk Scarf / Bonnet
    Non-negotiable for preserving sculptural shapes overnight. Look for extra-large bonnets that can accommodate a full puff or piled-up coils.

    6. Refreshing Spray (Water + Glycerin)
    Second-day coils need hydration without rewashing. A simple spray bottle with distilled water, a drop of glycerin, and aloe juice will revive frizz.


    Step-by-Step Maintenance: Keeping Your Style Fresh

    Trendy doesn’t mean high-maintenance, but these 2026 looks do require specific care. Follow this simple weekly rhythm.

    Daily (5 minutes)

    • Shake and fluff with fingers only (no combing).
    • Mist with refreshing spray, then gently scrunch.
    • Smooth edges with a dab of gel and a soft toothbrush or edge brush.

    Every 3–4 Days (15 minutes)

    • For twist/braid styles: Re-twist any loose sections near your hairline and nape.
    • For afros and puffs: Finger-pick from the roots to redistribute volume.
    • For accessory styles (rings, chains): Check for tangles and remove any rings that have slipped too low.

    Weekly Reset (1–2 hours)

    • Wash with a sulfate-free shampoo focusing on your scalp.
    • Deep condition with heat for 20 minutes.
    • Detangle in sections while conditioner is still in.
    • Re-style from scratch (or refresh an existing style by re-wetting and re-shaping).

    Pro Tip: If you have chain-linked or pearl-sprinkled styles, wash in a mesh cap or stocking to prevent accessories from slipping down the drain.


    Who These Styles Work For: Texture & Length Considerations

    Not every 2026 trend suits every coil pattern. Here’s a quick breakdown so you can choose wisely.

    StyleBest ForAvoid If
    The Cloud CutType 4b/4c, medium to dense hairVery fine or sparse hair (lacks volume)
    Frosted TipsType 3c/4a, medium lengthSeverely damaged or over-bleached hair
    Sculpted Coil Pile-UpType 4a/4b, shoulder-length or longerShort hair (less than 4 inches)
    Glossy Wet-Look KinksAll Type 4, especially shrunken coilsLow porosity that repels gel
    Chain-Linked Bantu KnotsType 4a/4b, medium densityVery fine or fragile knots (chains add weight)
    Chiseled Afro-MulletType 4c, thick hairThin edges or receding hairline
    Negative Space ShavedType 4b/4c, any densityAnyone not ready for commitment (requires shaving)
    Tucked Faux HawkType 3c/4a, medium to longVery short hair (can’t tuck sides)
    Floating Ring TossType 4a/4b, stretched coilsTightly shrunken coils (rings won’t slide)
    Split-Tone MarbleAll Type 3/4, healthy hairRecently bleached or damaged hair
    The Puff ClocheType 4b/4c, very thick and fullThin or fine hair (won’t hold dome shape)
    Frayed Twist-OutAll Type 4, especially 4cSplit ends (fraying will worsen damage)
    Coily Ladder CutType 3c/4a, stretched stylesType 4c with no visible curl definition
    Pearl-SprinkledType 3c/4a, defined finger coilsActive lifestyle (pearls may fall off)
    No-Part FreeformType 4b/4c, patient naturalAnyone who likes clean parts or symmetry

    Cost & Commitment Guide

    Be real with yourself before you book. Here’s what each trend will cost you in time and money (2026 estimates).

    Budget-Friendly (Under $50, 1–3 hours)

    • Glossy Wet-Look Kinks (just gel + diffuser)
    • Frayed Twist-Out Ends (free if you already twist)
    • No-Part Freeform (literally free – just stop combing)
    • The Puff Cloche (one hair tie + shaping)

    Mid-Range ($50–$150, 3–5 hours)

    • The Cloud Cut (barber/stylist cut)
    • Floating Ring Toss (accessories cost $15–$30)
    • Tucked Faux Hawk (pinning + gel)
    • Pearl-Sprinkled Finger Coils (pearls + adhesive)

    Investment ($150–$400, 5–8 hours)

    • Frosted Tips (bleach + tone + maintenance)
    • Split-Tone Marble Twists (color + twist time)
    • Chain-Linked Bantu Knots (chains + knotting time)
    • Coily Ladder Cut (precision cutting by a specialist)

    High Commitment ($400+, 8+ hours, regular upkeep)

    • Negative Space Shaved Designs (needs reshaving every 2–3 weeks)
    • Sculpted Coil Pile-Up (requires weekly re-pinning)

    Where to Wear: Occasion Guide

    Not sure if a style is office-appropriate or weekend-only? Use this guide.

    StyleBest ForAvoid For
    Cloud CutEverything – work, weddings, grocery runsNothing – it’s universally flattering
    Wet-Look KinksNight outs, date nights, editorial looksConservative offices (reads as “not done”)
    Chain-Linked BantuFestivals, concerts, partiesSleeping (chains tangle)
    Afro-MulletCreative workplaces, casual daysFormal events, court, funerals
    Shaved Negative SpaceBold self-expression, summerJob interviews (if conservative industry)
    Pearl-SprinkledWeddings, galas, brunchGym or swimming (pearls fall off)
    No-Part FreeformWeekends, creative fields, homeProfessional settings with dress codes

    Conclusion

    The kinky and coily hairstyles trending in 2026 send a clear message: our texture is not something to be tamed, smoothed, or hidden. It is architecture. It is art. It is identity worn proudly at eye level.

    From the soft, cloud-like simplicity of the Cloud Cut to the meticulous, chain-linked detail of Bantu knots, this year’s trends celebrate every level of effort—from five-minute fluff-and-go to six-hour sculptural installations. What ties them all together is an unapologetic embrace of shrinkage, frizz, volume, and raw edges. The glossy, glass-hair era is over. The era of texture as statement has arrived.

    Whether you choose a low-commitment wet-look for a night out or a high-investment ladder cut that turns heads at every angle, the most important accessory is confidence. These styles don’t ask you to look like anyone else. They ask you to look like you—just bigger, bolder, and more brilliantly coiled than ever before.

    So go ahead. Show your stylist that photo. Buy those silicone rings. Bleach those tips if you dare. In 2026, the crown is kinky, the coil is king, and the only rule is this: never apologize for your texture again.

  • Buzzcut Grade 2: The Clean, Low-Maintenance Look That Works for Every Man

    Buzzcut Grade 2: The Clean, Low-Maintenance Look That Works for Every Man

    The grade 2 buzzcut—where hair is clipped to ¼ inch (6mm) using a #2 guard—sits at the sweet spot between a full shave and a longer buzz. It’s neat enough for the boardroom, rugged enough for the gym, and requires almost zero styling, making it a top choice for men who want to look put‑together without the daily fuss.

    What Exactly Is a Grade 2 Buzzcut?

    A “grade” refers to the guard size attached to clippers. A grade 2 leaves exactly ¼ inch (6mm) of hair. This length is short enough to feel tidy and cool in summer, but long enough to avoid visible scalp irregularities or the constant upkeep of a full shave. It’s the most requested buzzcut length for first-timers for good reason.


    11 Well‑Structured Ideas for a Grade 2 Buzzcut

    1. The uniform grade 2 all over

    Keep the entire head at a single grade 2 length for a timeless, military‑inspired look that’s clean, balanced, and virtually mistake‑proof.


    2. Grade 2 with a skin fade

    Shorten the sides and back down to the skin, blending up to the grade 2 on top for a sharp, modern contrast that adds structure to the face.


    3. Textured grade 2 crop

    Ask your barber to use point‑cutting or texturing shears on the grade 2 length, which breaks up the density and gives a softer, more lived‑in finish.


    4. Grade 2 with a low, natural hairline

    Instead of a hard line, keep the front hairline slightly uneven or rounded—great for men with receding temples who want a less harsh edge.


    5. The tapered grade 2

    Gradually shorten the grade 2 down to a #1 or #0.5 at the nape and around the ears, creating a tidy, gradual transition that wears well for weeks.


    6. Grade 2 with a hard part

    Add a razor‑sharp side part line while keeping the rest at grade 2; this small detail instantly elevates the buzzcut into a statement style.


    7. Disconnected grade 2 top

    Keep the top a grade 2 but shave the sides completely with a foil shaver, creating a bold, edgy contrast that works well with beards or bold accessories.


    8. Grade 2 with a rounded crown blend

    Ask your barber to leave slightly more length (e.g., grade 3) right at the crown and blend down to grade 2, which helps balance a flat or prominent occipital bone.


    9. The sun‑bleached grade 2

    On lighter hair, a grade 2 is short enough to show natural sun highlights; for darker hair, a subtle powder bleach or silver toner can add dimension without looking dyed.


    10. Grade 2 with a wet‑look finish

    Apply a dab of matte clay or water‑based pomade to damp, grade‑2 hair and comb forward; the short length still allows a sleek, retro side‑sweep effect.


    11. The self‑maintained grade 2

    Buy a good pair of clippers with a #2 guard, go over your whole head every 7–10 days in the mirror, and you’ll save hundreds per year on barber visits.

    Who Suits a Grade 2 Buzzcut Best?

    Almost any man can wear a grade 2 well. It flatters oval, square, and round face shapes when paired with the right fade or taper. Men with thinning hair benefit enormously because the uniform short length disguises patchiness. Those with thick, coarse hair will find the grade 2 tames bulk while keeping texture visible. The only consideration? A very prominent brow ridge or extremely sharp temples may benefit from a slightly longer top (grade 3) blended down.


    Tools You Need to Maintain a Grade 2 at Home

    • Clippers – Wahl, Andis, or Oster with a detachable or adjustable blade.
    • #2 guard – Usually included with most clipper kits.
    • Handheld mirror – To see the back of your head.
    • Barber cape or old towel – Catching clippings saves cleanup time.
    • Clipper oil – A drop before each use keeps blades sharp and quiet.

    Step-by-Step: How to Give Yourself a Grade 2 Buzzcut

    1. Start with clean, dry hair – Damp hair clumps and leads to uneven cuts.
    2. Attach the #2 guard – Double-check it’s locked in place.
    3. Go against the grain – Move clippers from front to back on top, bottom to top on sides.
    4. Use overlapping strokes – Each pass should half-overlap the previous one.
    5. Check with a handheld mirror – Inspect the back and crown for missed spots.
    6. Touch up the neckline – Remove the guard and carefully clean up the nape.
    7. Rinse and pat dry – Feel for any rough patches and correct them immediately.

    Common Mistakes to Avoid

    • Using a dull clipper – It pulls hair and leaves an uneven cut. Oil your blades.
    • Going too fast – Slow, deliberate strokes prevent tramlines (visible strip lines).
    • Forgetting the crown – The crown has swirls; go over it from multiple directions.
    • Skipping the neckline – A clean neckline separates a buzzcut from a “messy short cut.”
    • Not maintaining regularly – A grade 2 starts looking shaggy after 10–14 days.

    How Often Should You Refresh a Grade 2?

    Every 7–10 days maintains that crisp, just-cut look. At 14 days, the hair reaches a grade 3–4 length (⅜ to ½ inch), which begins to lose the clean silhouette. If you prefer a softer look, stretch to 3 weeks, but expect to lose the defined edges.


    Grade 2 Buzzcut vs. Other Short Lengths

    LengthGuardLookBest For
    Grade 0No guardNear-shaved, scalp visibleVery bold or balding men
    Grade 1#1 (3mm)Velvet texture, scalp shows slightlySummer, athletic builds
    Grade 2#2 (6mm)Clean, versatile, scalp hiddenMost men, all occasions
    Grade 3#3 (10mm)Fuzzy, longer, more weightMen with cowlicks or flat heads
    Grade 4#4 (13mm)Brushed look, needs stylingFirst-time short-hair users

    Celebrity and Cultural References for the Grade 2

    David Beckham wore a grade 2 with a skin fade during his early Madrid years. Michael B. Jordan sports a clean grade 2 on many red carpets. In military settings, the grade 2 is the standard “peacetime” buzzcut—professional without being boot camp severe. Musicians like Kid Cudi and Travis Scott have also popularized the textured grade 2 crop.


    Pros and Cons of the Grade 2 Buzzcut

    Pros:

    • Zero daily styling time
    • No shampoo or product dependency
    • Keeps you cool in hot weather
    • Hides thinning or uneven hairlines
    • Cheap to maintain (or free at home)

    Cons:

    • Requires touch-ups every 1–2 weeks
    • Exposes scalp moles or scars
    • Can feel “too plain” without a fade or detail
    • Cold in winter without a hat

    What to Tell Your Barber for a Perfect Grade 2

    Say exactly this: “Grade 2 on top, blend it down. Skin fade on the sides or tapered? Natural hairline or lined up? No hard edges unless I ask.” Bring a reference photo if possible. Most barbers appreciate clarity over vague requests like “short on the sides, a little off the top.”


    Styling Products That Work on a Grade 2

    • Matte clay – Adds grip and texture without shine.
    • Sea salt spray – Light texture for a sun-dried finish.
    • Water-based pomade – For the wet-look (idea #10).
    • Nothing – Truly works perfectly fine for most days.

    Avoid heavy waxes, gels, or oils—they just sit on the scalp or clump in short hair.


    Conclusion

    The grade 2 buzzcut is proof that simple doesn’t mean boring. With just ¼ inch of hair, you unlock a style that’s clean, confident, and incredibly practical. Whether you choose a skin fade, a hard part, or a uniform trim, this cut works across all races, face shapes, and lifestyles. It saves you time, money, and morning stress. And best of all—you can do it yourself in your own bathroom with a $40 set of clippers. If you’ve been thinking about going short, start with a grade 2. You can always go shorter. But chances are, you won’t want to.

  • The Grown Out Shag for Men: Effortless Edge, Messy Texture & 10 Ways to Wear It

    The Grown Out Shag for Men: Effortless Edge, Messy Texture & 10 Ways to Wear It


    The grown out shag has quietly become the ultimate antidote to rigid, high-maintenance men’s haircuts. Far from being an awkward in-between stage, this look embraces length, layers, and a deliberate “undone” quality—giving you a rock-and-roll silhouette that works just as well with a leather jacket as it does with a knit sweater.

    Why the Grown Out Shag Works for Modern Men

    The grown out shag isn’t just a haircut—it’s a low-stakes commitment to ease. Unlike rigid fades or precision crops that demand a barber visit every two weeks, the shag thrives on imperfection. It hides grown-out roots, forgives uneven growth, and actually looks better with a little bedhead. For men tired of chasing “clean,” this style offers freedom without looking lazy.

    Here are 10 smart ways to style, refine, and own the grown out shag.


    1. The Curtain Fringe Combo

    Let the front layers part naturally in the middle, sweeping across your forehead like soft curtains that frame the eyes and add instant dimension.


    2. Messy Texture Spray

    Skip the heavy pomades; a quick spritz of sea salt or texture spray into damp hair amplifies the shag’s natural movement without making it look wet or stiff.


    3. The Tucked-Behind-the-Ears Variation

    Tuck the longer side pieces behind your ears to open up your face while keeping the shaggy back and crown intact—perfect for workdays that need a slight lift.


    4. Air Dry Only

    Blow-dryers and brushes fight the shag’s nature. Letting it air dry with a little scrunching encourages organic waves and cowlicks that become charming, not chaotic.


    5. The Micro-Fade Nape

    Clean up just the very bottom of the neckline with a subtle fade or taper, leaving the rest shaggy. It looks intentional and keeps the back from turning into a full mullet.


    6. Heavy Bangs Brushed Forward

    If your shag still has dense length on top, push the bangs straight down toward the brows for a moody, 70s-era Lou Reed feel that works best with straighter hair.


    7. The Slicked Shag (For Contrast)

    On dressier occasions, run a dime-sized amount of matte cream through the sides and top, smoothing just enough to control the chaos while keeping visible layering.


    8. The Half-Bun Escape

    When the grown out length gets in your eyes, gather the top crown section into a small, loose bun or twisted knot—leaving the sides and nape free for that effortless shag contrast.


    9. Salt Spray + Diffuser for Curly Shags

    For curly or wavy hair, use a diffuser on low heat after salt spray to encourage defined ringlets within the shaggy shape, avoiding frizz while maximizing volume.


    10. The Accidental Part

    Instead of forcing a perfect line, run your fingers roughly through dry hair and let the hair fall where it wants. An “accidental” side or middle part often looks more authentic than a deliberate one.

    Who This Haircut Suits Best

    The shag is surprisingly democratic. It works on straight, wavy, curly, and coily textures—though the styling approach changes. Men with fine hair get volume from the layers. Men with thick hair get weight relief. Round faces benefit from height on top. Oval and angular faces are softened by the fringe. The only real prerequisite? Patience during the awkward middle phase (usually weeks 3 to 6 after your last cut).


    How to Explain This Cut to Your Barber

    Walk in with clear terms to avoid disaster. Say: “Keep the length on top and in the back. Cut shallow, disconnected layers throughout. Leave the perimeter messy—don’t blunt the ends. Soften the fringe so it touches my brows but doesn’t blind me. Clean up the neckline just a little, but no hard lines.” Bring a reference photo if you can. Avoid the word “mullet” unless you actually want one.


    Maintenance Without the Fuss

    You won’t need much. Wash 2–3 times a week to preserve natural oil. Use a light conditioner only on the ends. Restyle with just water and your fingers on non-wash days. A trim every 8 to 10 weeks is plenty—just to reshape the layers and clean the nape. Buy one product: texture spray or sea salt spray. That’s it.


    What to Avoid

    Don’t over-shampoo—it creates frizz without volume. Don’t use heavy waxes or pomades—they flatten the shag into a helmet. Don’t brush it dry (use wide-tooth combs or your fingers). And don’t panic when it looks weird in week four. That’s normal. Push through.


    Conclusion

    The grown out shag for men isn’t a trend you chase—it’s a rhythm you fall into. It asks for almost nothing and gives back texture, movement, and a quiet kind of confidence that polished cuts often kill. Whether you air dry it, tuck it behind your ears, or throw it into a half-bun on humid days, the shag meets you where you are. Let the layers do the work. Stop fighting your hair. And trust the grown out phase—because sometimes the best style isn’t fresh off the clippers. It’s the one that’s been living with you for a while.

  • 4C Hairstyles Ideas: 18 Looks That Celebrate Your Natural Texture

    4C Hairstyles Ideas: 18 Looks That Celebrate Your Natural Texture


    4C hair is uniquely beautiful, characterized by its tight, springy coils and incredible volume. While it requires extra moisture and gentle handling, this texture is actually one of the most versatile for styling—from defined wash-and-gos to protective looks.

    Why 4C Hair Deserves Celebration

    For too long, 4C hair was labeled “difficult” or “unmanageable” simply because it doesn’t fit Eurocentric beauty standards. The truth is that 4C hair is strong, resilient, and full of personality. Its tight coil pattern holds styles exceptionally well, from twists to braids to afros. Celebrating 4C hair means embracing shrinkage as a feature (not a flaw), loving the volume, and recognizing that washday is an act of self-care. When you work with your texture instead of against it, 4C hair becomes a crown, not a chore.

    Below are 18 creative 4C hairstyle ideas, each with a simple explanation to help you switch up your routine.


    1. High Puff

    Gather all your hair to the crown of your head with a satin scrunchie to create a bold, rounded puff that highlights your facial features.


    2. Flat Twists with Curly Ends

    Two-strand flat-twist the front sections of your hair toward the nape, leaving the ends loose and defined for an elegant updo.


    3. Mini Twists

    Divide damp, moisturized hair into small sections and two-strand twist each one for a low-manipulation style that can last up to two weeks.


    4. Wash-and-Go with Gel

    Apply a botanical gel to soaking-wet, leave-in-conditioned hair and scrunch upward to encourage clumped coil definition.


    5. Faux Hawk

    Flat-twist or braid the sides inward and fluff the middle section upward, creating a center ridge that mimics a mohawk.


    6. Bantu Knot-Out

    Section hair into small squares, twist each section into a tight knot, let dry completely, then unravel for a stretched, crimped texture.


    7. Cornrowed Crown

    Braid four to six straight-back cornrows starting from the hairline, leaving the middle or nape out for a stylish contrast.


    8. Marley Two-Strand Twists

    Use Marley hair to extend your natural two-strand twists for a chunky, bohemian look that also protects your ends.


    9. Pineapple Updo

    Gather your hair loosely at the very top of your head and secure with a soft scrunchie, perfect for preserving curls overnight or as a daytime style.


    10. Side-Swept Finger Coils

    Coil small sections of damp hair around your finger from root to tip, then sweep everything to one side for a polished, defined look.


    11. Chunky Flat Twists into a Bun

    Create two large flat twists along your hairline, gather the remaining hair into a low bun, and tuck the twist ends underneath.


    12. Afro with Defined Edges

    Pick out your dry afro into a rounded shape, then use edge control and a small brush to lay your baby hairs in swoops or curves.


    13. Crochet Braids (4C Texture)

    Install crochet braids using a kinky or curly hair extension that matches your 4C pattern for a protective style that looks effortlessly natural.


    14. Half-Up Half-Down Twists

    Grab the top half of your mini or medium twists and secure them at the crown, leaving the rest hanging freely.


    15. Twist-Out on Stretched Hair

    Blow-dry or band your hair first for length, then two-strand twist and unravel the next day for a fluffy, elongated twist-out.


    16. Low Bun with Satin Ribbon

    Smooth your hair into a low bun at the nape, then wrap a satin ribbon around it for a chic, gentle-on-edges finish.


    17. Halo Braid

    Cornrow around your hairline in a circular motion, tucking the end behind your ear to create a crown-like “halo” effect.


    18. Rod-Set Curls

    Wrap small sections of damp, moisturized 4C hair around perm rods, sit under a dryer, and remove for bouncy, heatless ringlets.

    Essential Prep for 4C Hairstyling

    Before diving into any of the 18 styles below, proper preparation makes all the difference. Here’s what you need:

    StepWhat to DoWhy It Matters
    CleanseUse a sulfate-free shampoo followed by a moisturizing conditionerRemoves buildup without stripping natural oils
    DetangleWork in small sections with a wide-tooth comb or your fingers, starting from ends to rootsPrevents breakage and reduces shedding
    Deep ConditionApply a deep conditioner with heat for 20-30 minutesRestores elasticity and moisture to tight coils
    Leave-In & SealApply a water-based leave-in, then lock moisture with an oil or butter (shea, jojoba, or castor)Keeps hair hydrated for days, preventing dryness and brittleness
    Stretch (Optional)Use banding, African threading, or a low-heat blow-dryer with a comb attachmentReduces tangles and makes styling easier without heat damage

    Tools to keep on hand: Satin scrunchie, spray bottle, wide-tooth comb, denman brush (optional), edge control, and a satin bonnet or pillowcase.

    How to Make Your 4C Style Last Longer

    Once you’ve invested time in a gorgeous style, you want it to last. Follow these longevity tips:

    • Nighttime protection is non-negotiable. Always sleep with a satin bonnet or on a satin pillowcase to prevent friction, frizz, and moisture loss.
    • Refresh strategically. Between wash days, mist your hair with a water-and-leave-in conditioner mix. For twist-outs or braid-outs, re-roll sections around your finger to redefine curls.
    • Avoid heavy product buildup. Use lightweight, water-based products and clarify every 2-4 weeks with an apple cider vinegar rinse or clarifying shampoo.
    • Keep your hands out. Constant touching creates frizz and transfers oils. Try the “set it and forget it” mindset.
    • Oil your scalp, not your strands. Use a dropper bottle to apply lightweight oil (like jojoba or almond) directly to your scalp to avoid greasy, weighed-down curls.

    Common 4C Mistakes to Avoid

    Even experienced naturalistas make these errors. Here’s what to watch out for:

    MistakeWhy It HurtsWhat to Do Instead
    Detangling dry hairCauses breakage and painAlways detangle with conditioner or a slippery leave-in
    Skipping deep conditioningLeads to dryness and single-strand knotsDeep condition every wash day or at least biweekly
    Using combs on dry shrinkageCreates tangles and pulls out hairStretch hair first with banding or threading
    Over-manipulating edgesCauses thinning and breakageStyle edges gently, no more than 2-3 times per week
    Sleeping without protectionCreates dryness, tangles, and flattened stylesUse a satin bonnet, scarf, or pineapple method

    Conclusion

    4C hair is not limited—it is limitless. From the bold height of a high puff to the defined precision of finger coils, every style on this list proves that tight coils offer endless creativity. The key is working with your texture: keeping it hydrated, protecting it at night, and choosing low-manipulation styles that allow your hair to thrive.

    Whether you’re protecting your ends with Marley twists, showing off volume with a washed-and-gelled afro, or preserving length with crochet braids, your 4C hair deserves to be worn with pride. Try one new style from this list each month, and you’ll discover just how versatile your crown truly is.

    Your hair is not “hard to manage.” It simply has its own language—and now you have 18 ways to speak it.