Author: Jessica Guevara

  • Stunning Gray Hair Highlight Ideas That Embrace the Silver

    Stunning Gray Hair Highlight Ideas That Embrace the Silver


    For decades, gray hair was treated as something to “fix”—a weekly battle against nature involving permanent dyes and tedious root touch-ups. But the tide has turned. Today, gray hair is celebrated as a symbol of confidence, wisdom, and unique beauty. However, transitioning to gray or enhancing your natural silver doesn’t mean you have to live with a one-dimensional color. Enter: gray hair highlights. Whether you’re fully silver, 50% gray, or just starting to see those first shimmering strands, the right highlights can add depth, texture, and a modern edge.

    From icy platinum ribbons to subtle champagne strokes, here are nine expertly structured ideas to revolutionize your gray look.

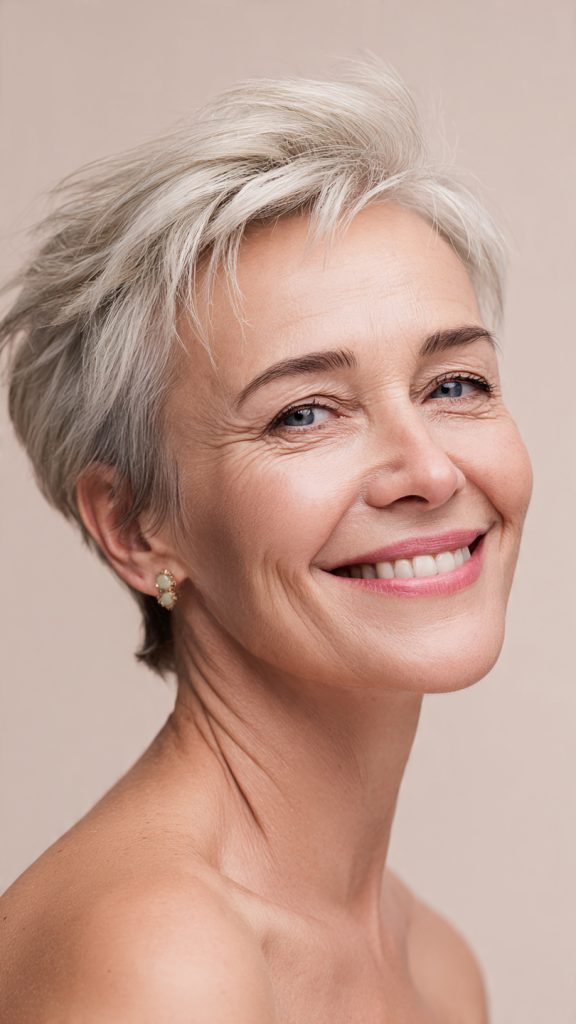
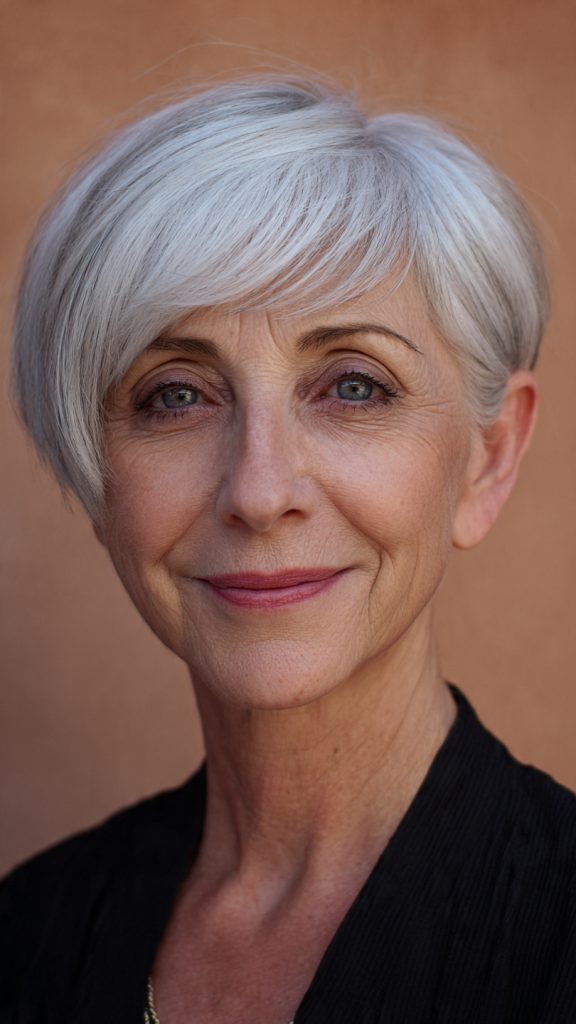
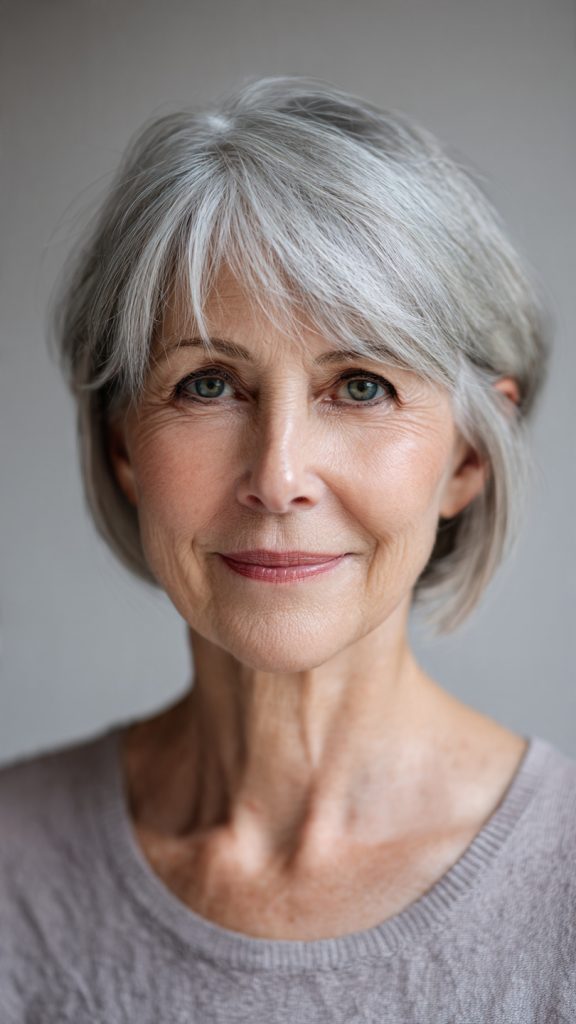
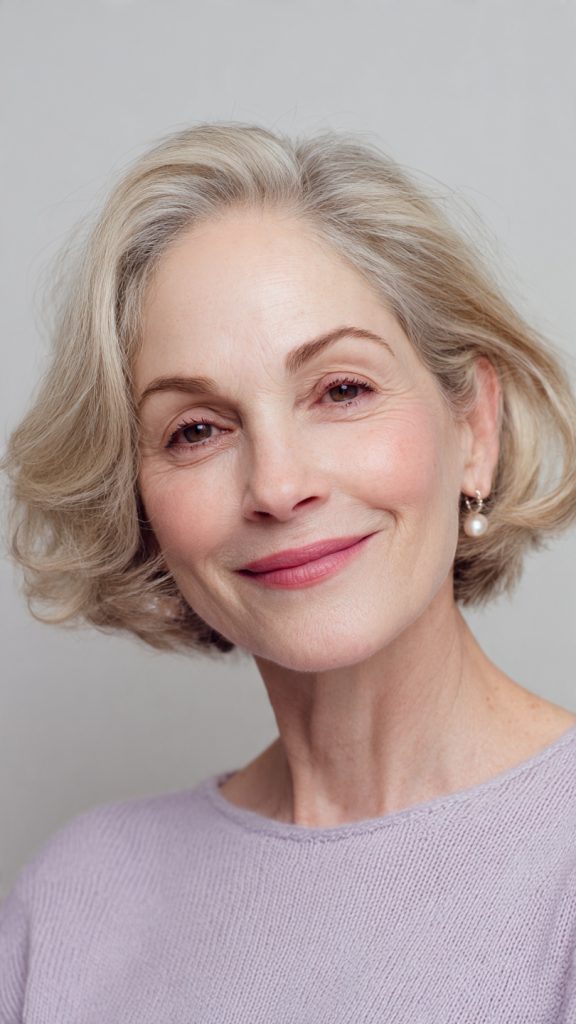
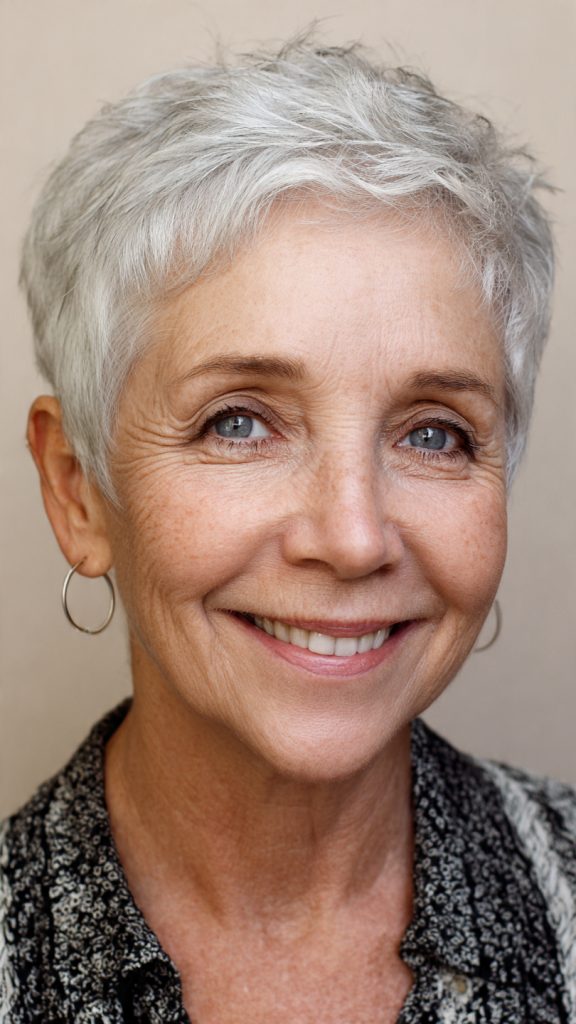
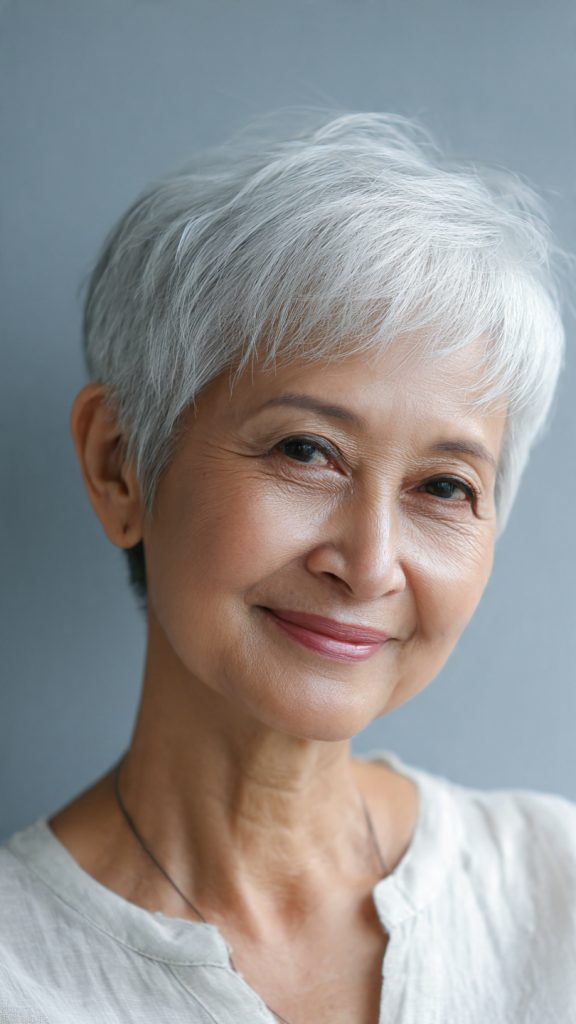
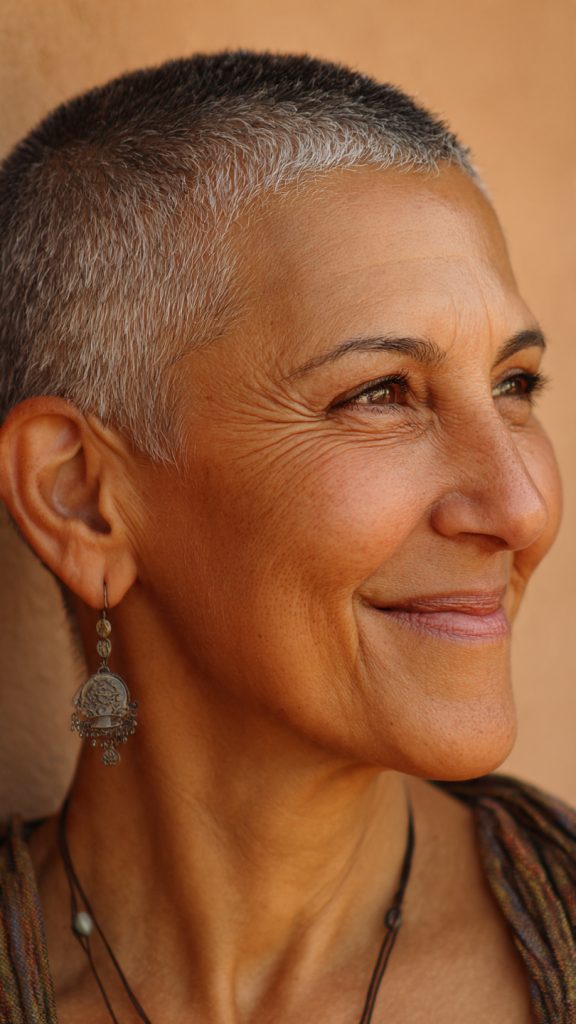
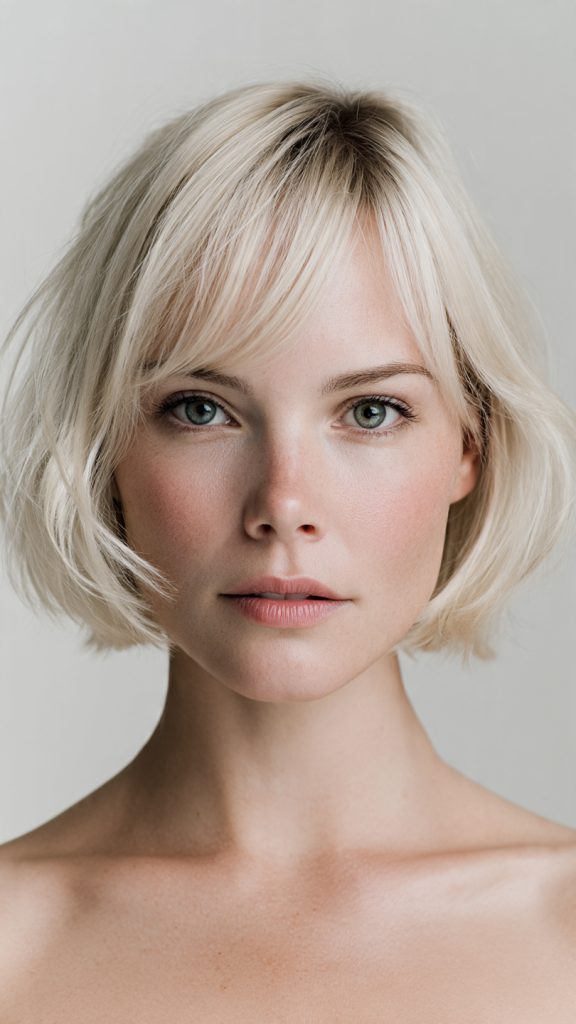
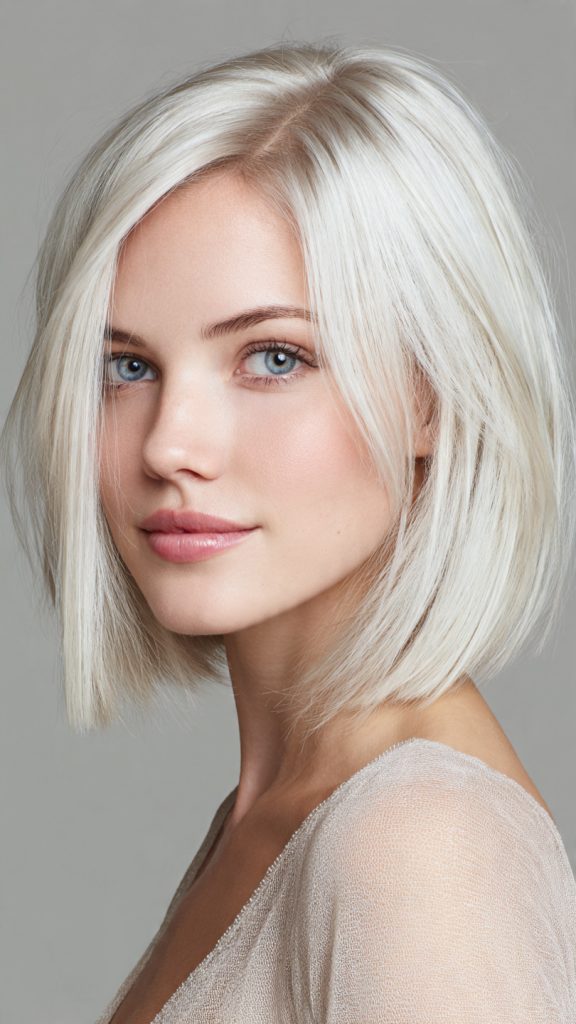
    1. Icy Platinum & Silver Blending

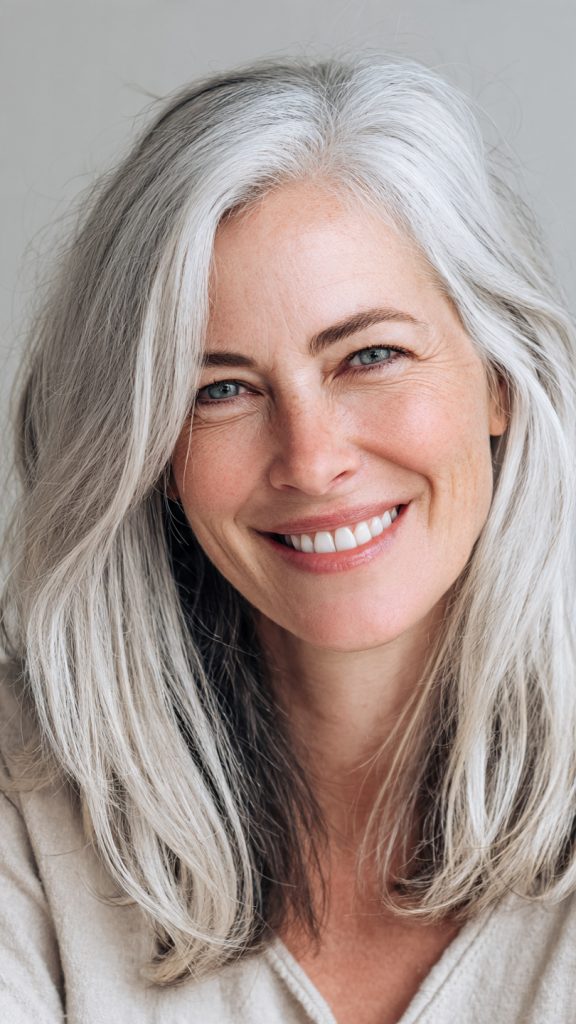
    This technique is for those who want to go all in on cool tones. Instead of hiding your gray, you amplify it. Use platinum and silver highlights throughout the entire head to create a seamless, high-gloss metallic finish. The key is to place highlights very close together (a “heavy foil” or “full blend”) so there are no harsh lines between your natural gray and the colored pieces. The result is a sophisticated, futuristic look that shimmers like polished chrome.

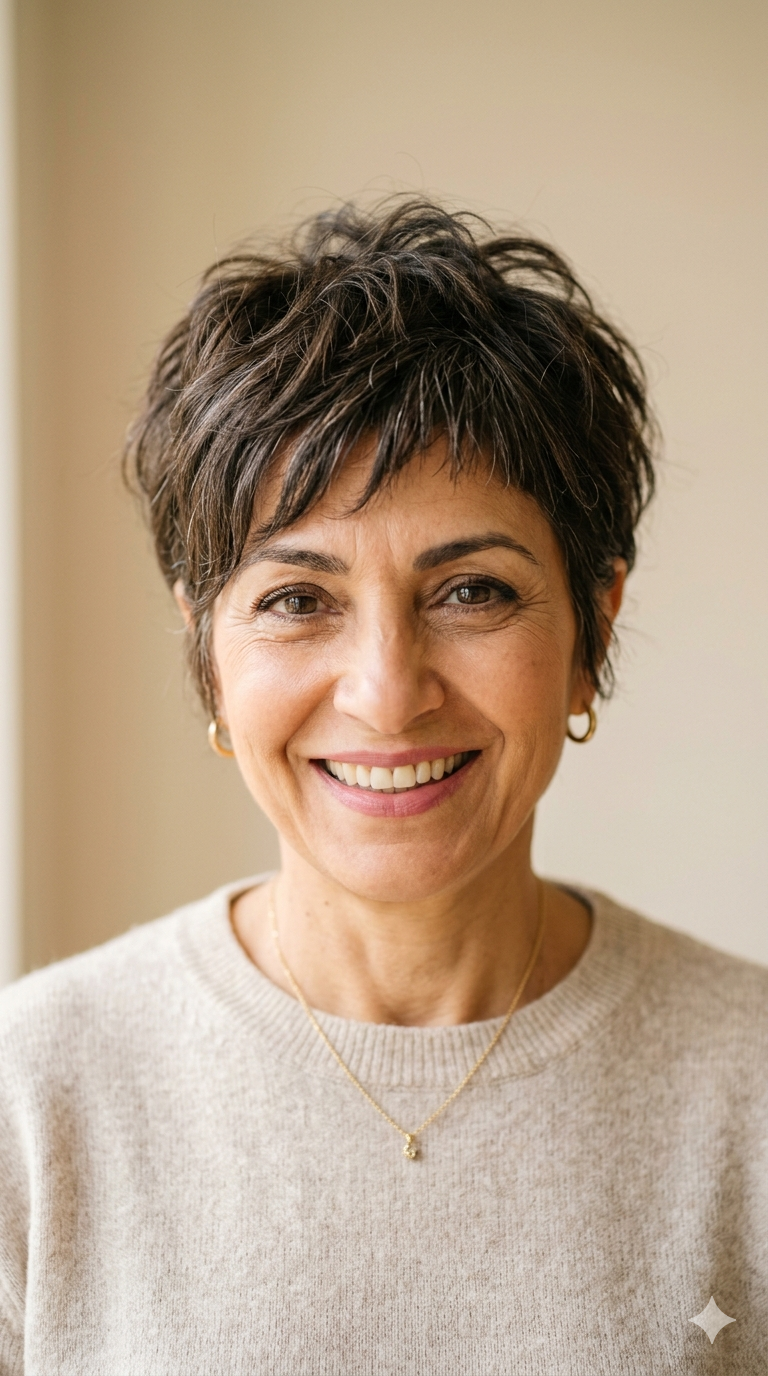
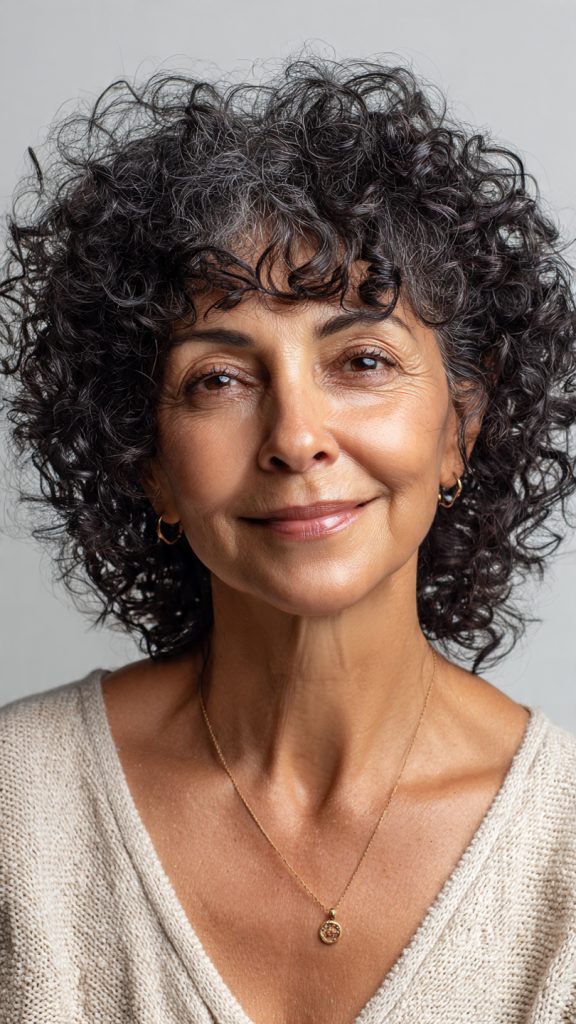
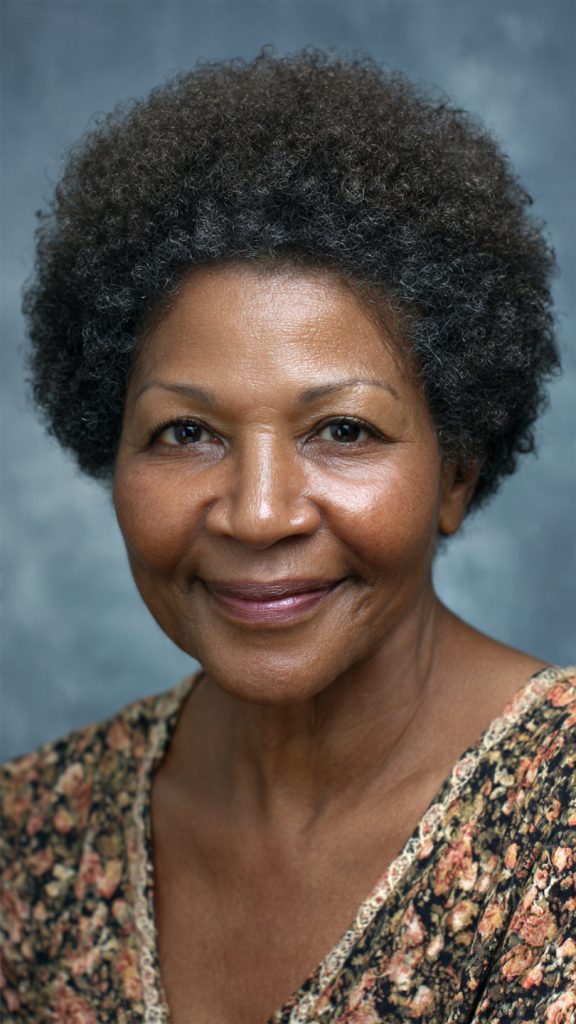
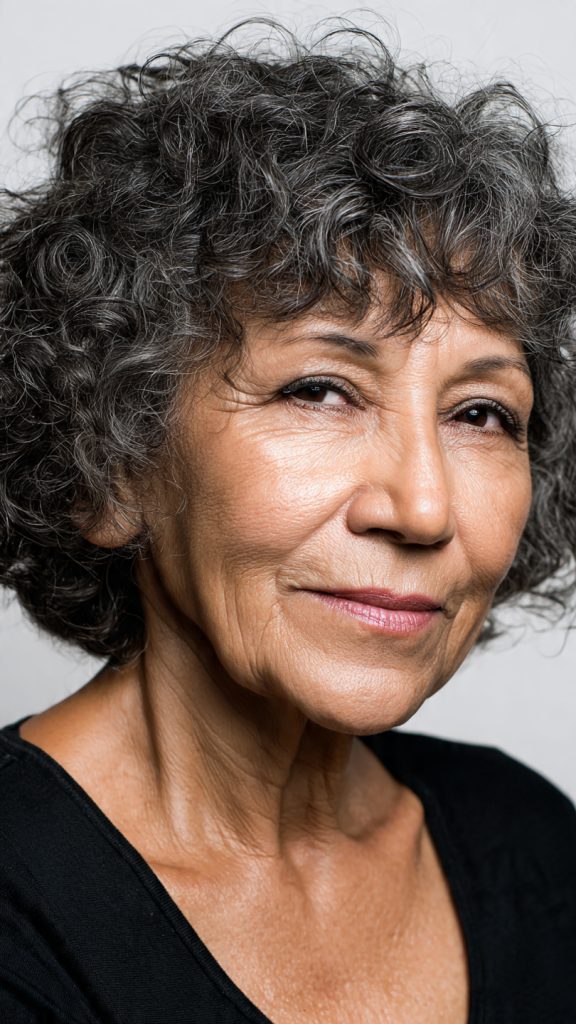
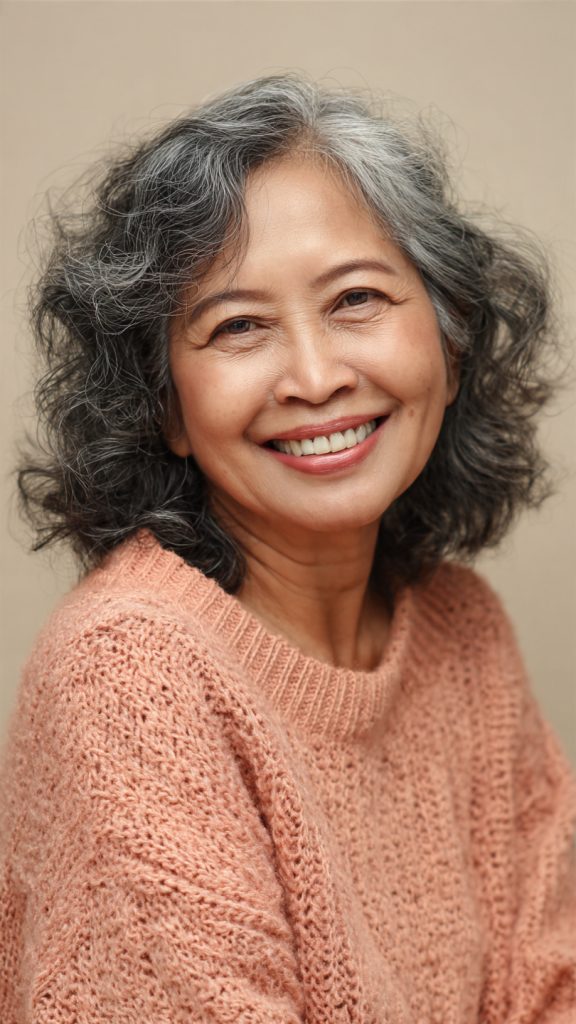
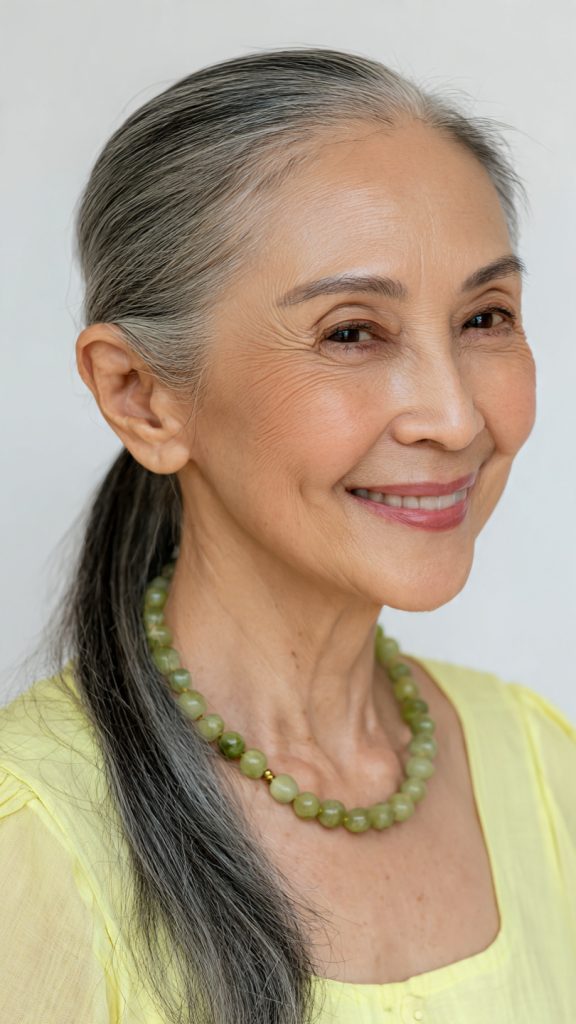
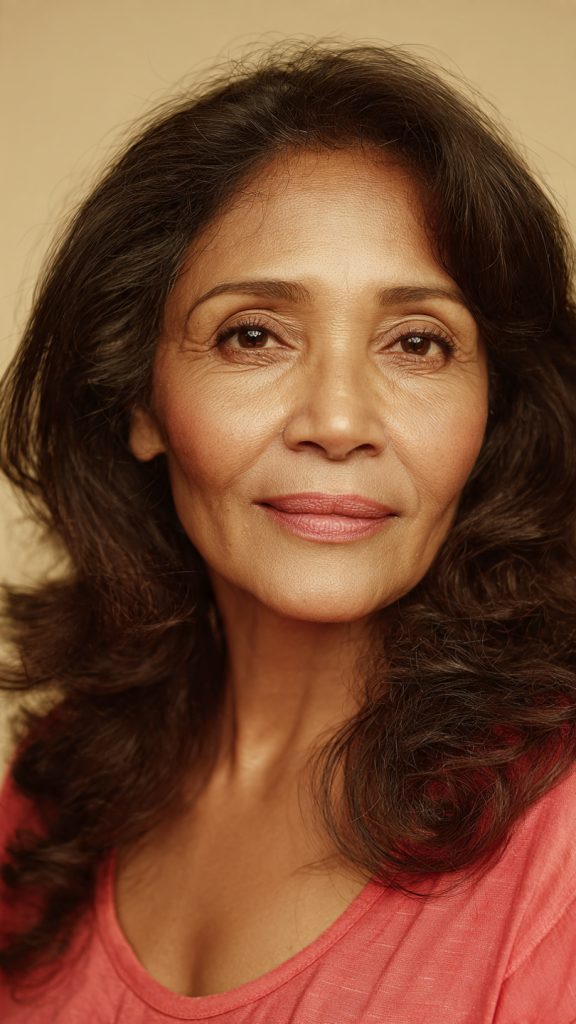
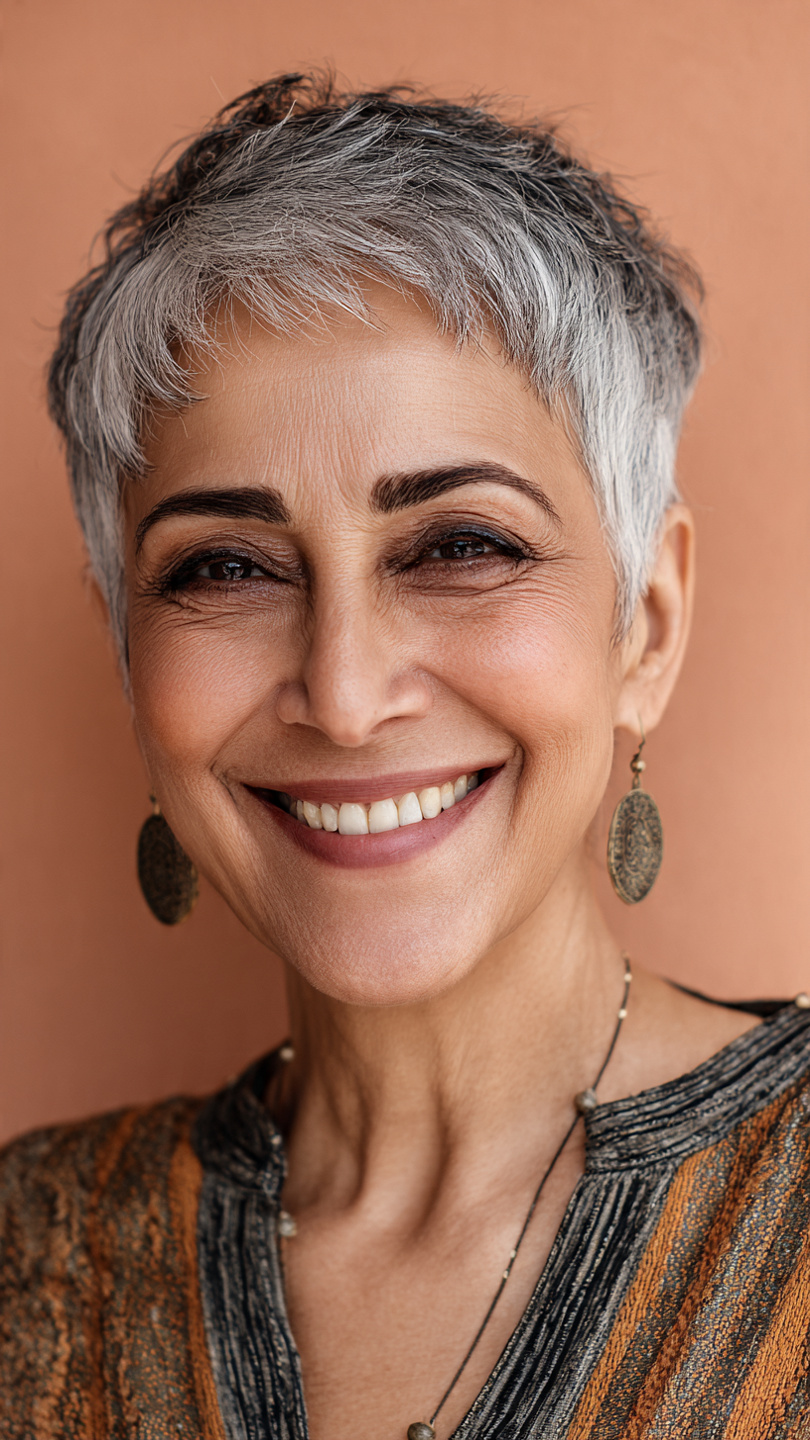
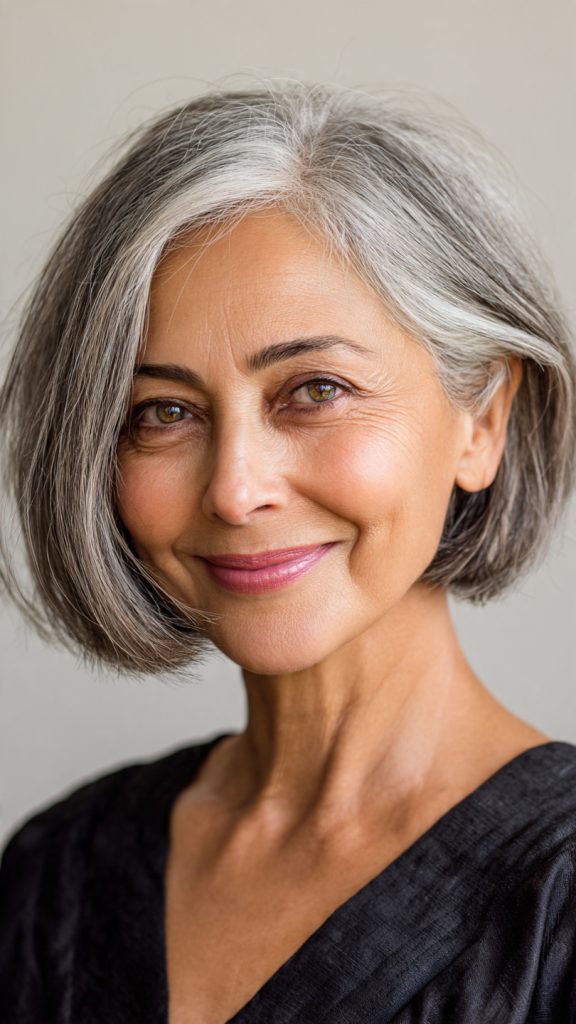
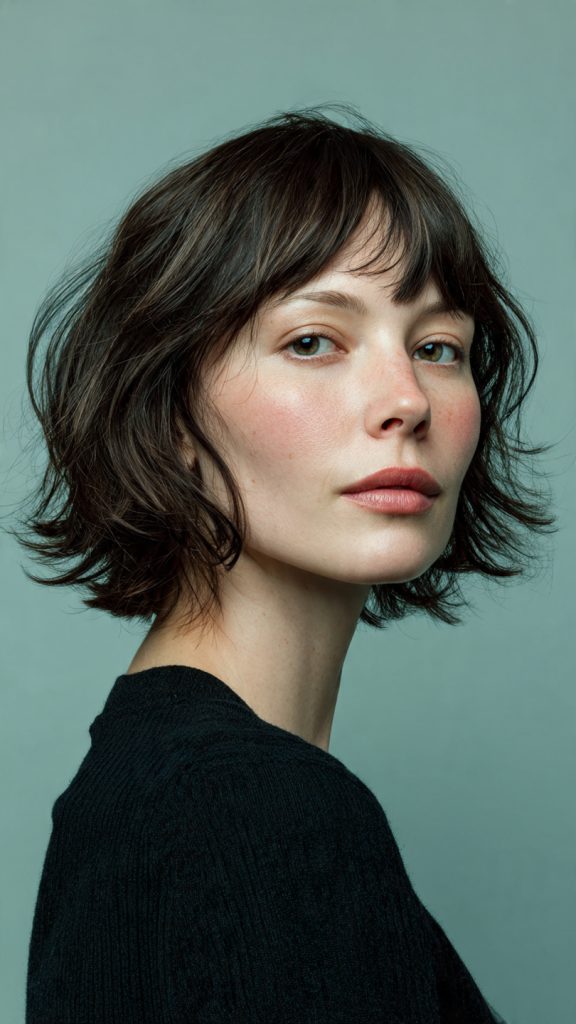
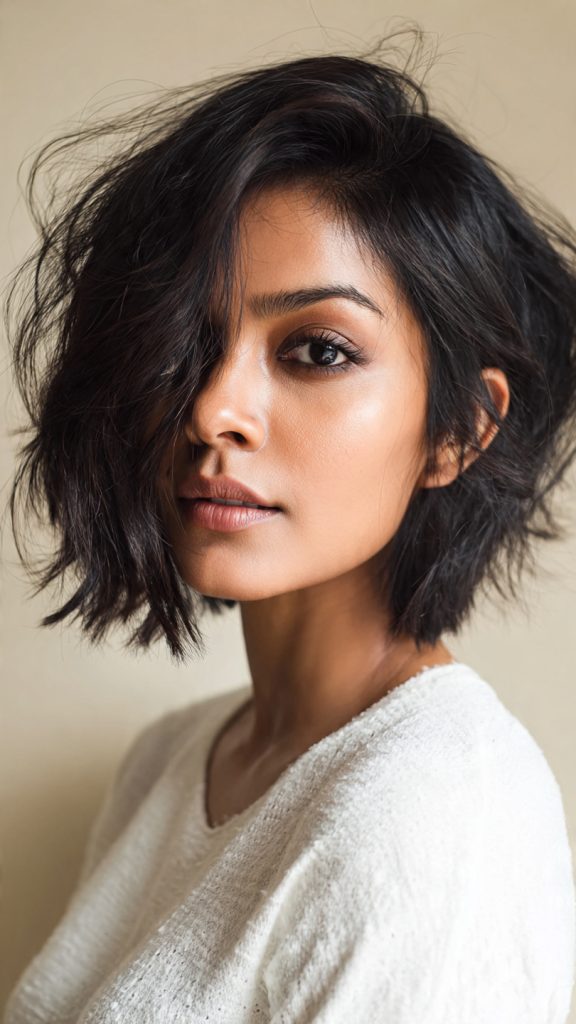
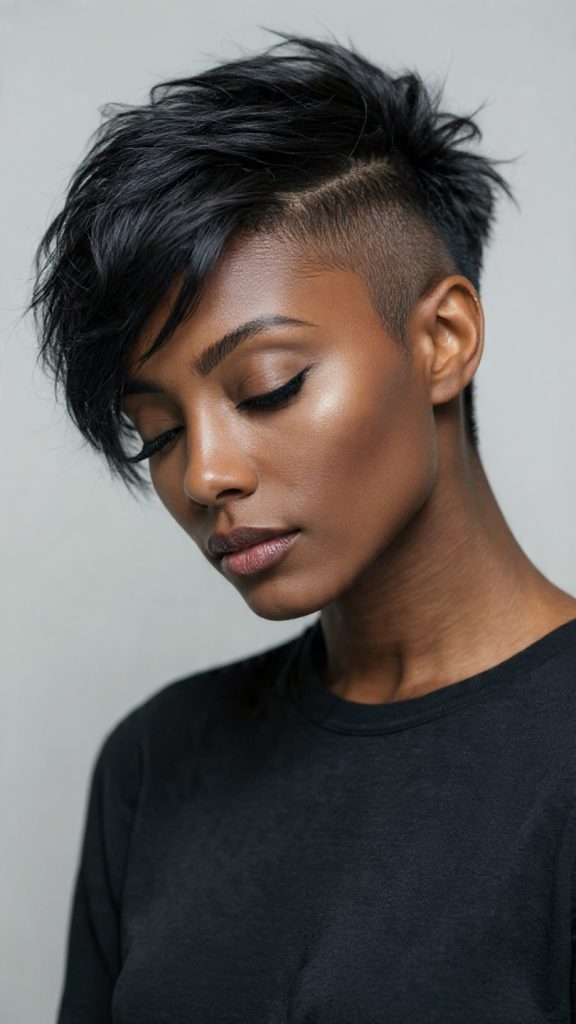
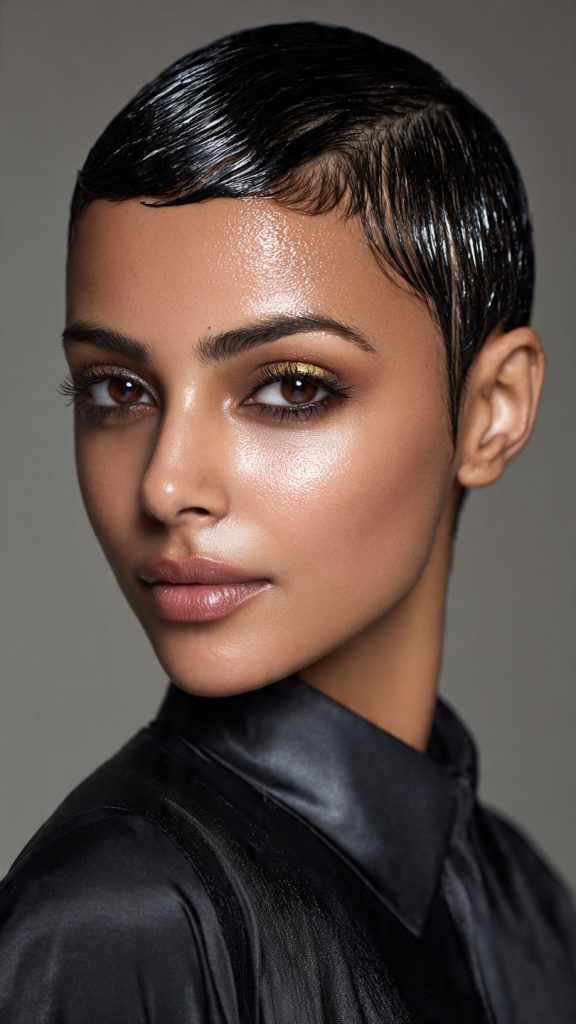
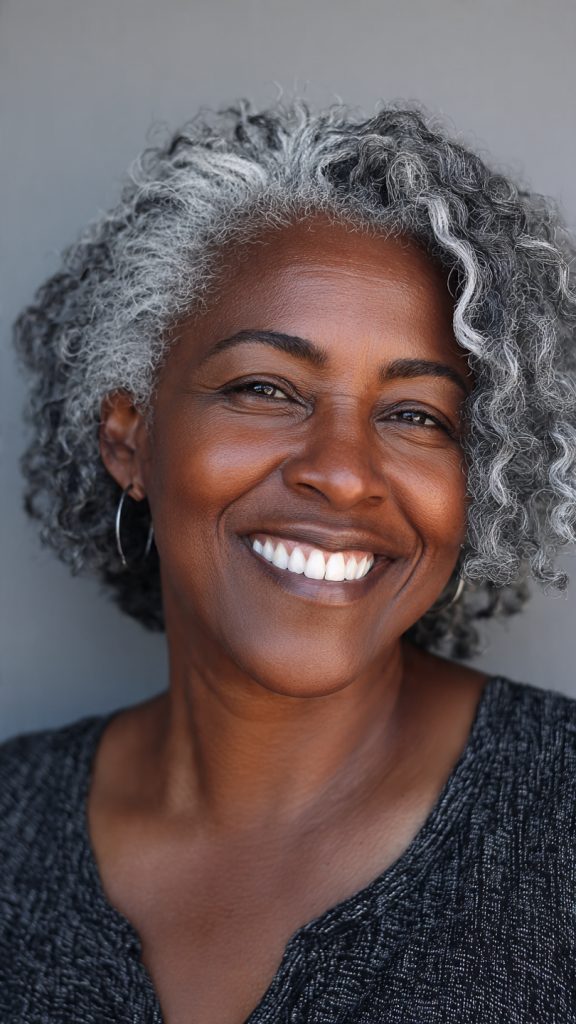
    2. The Salt-and-Pepper “Pepper” Boost

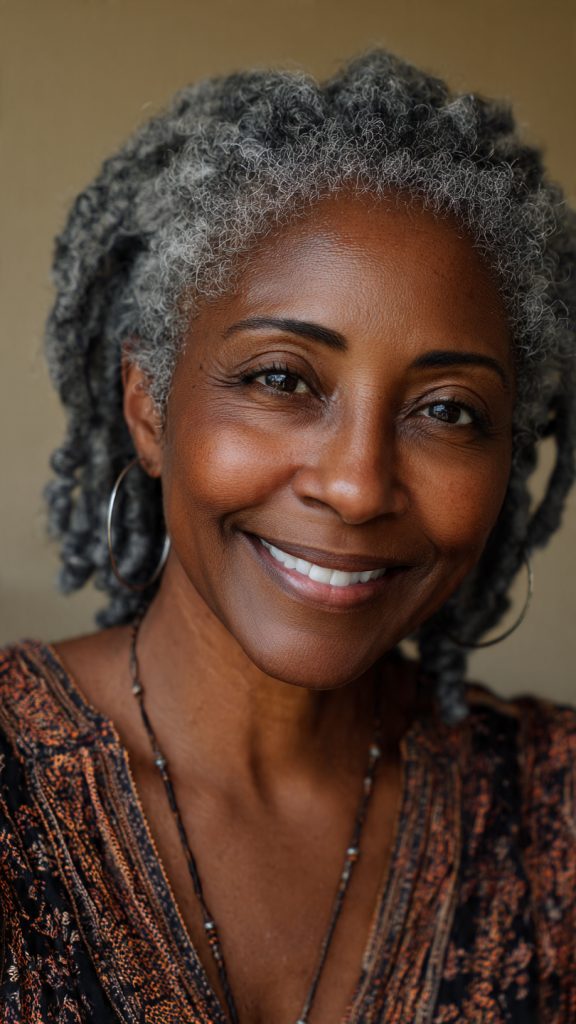
    If your natural gray is coming in as a soft salt-and-pepper, the “pepper” can often look muddy. To fix this, ask for very fine, dark charcoal or soft black lowlights (not highlights). This trick adds contrast by deepening the remaining dark strands, making the gray pop brighter. It’s a low-commitment, high-reward idea that revives the edgy contrast of youthful hair without looking harsh or dyed.

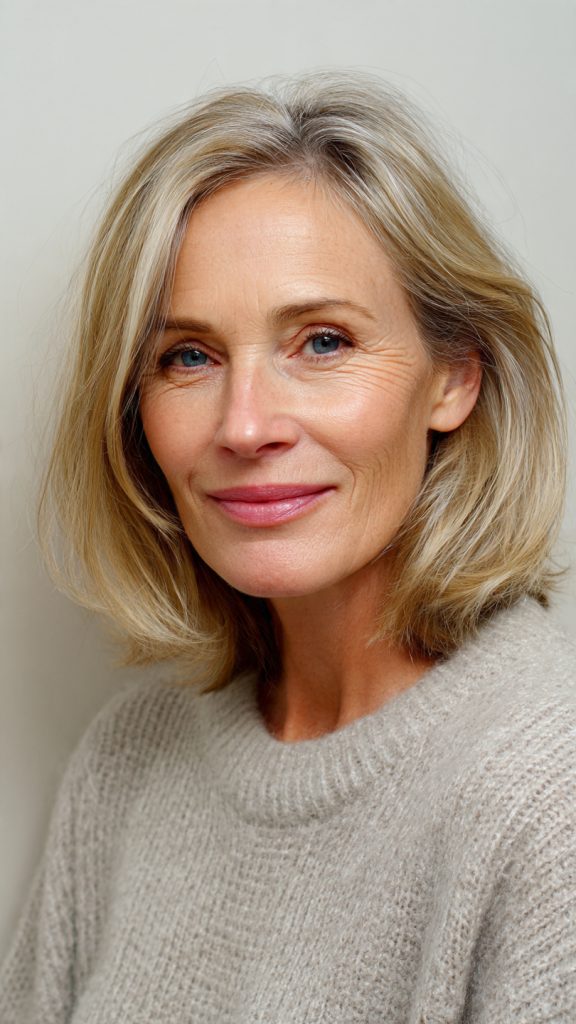
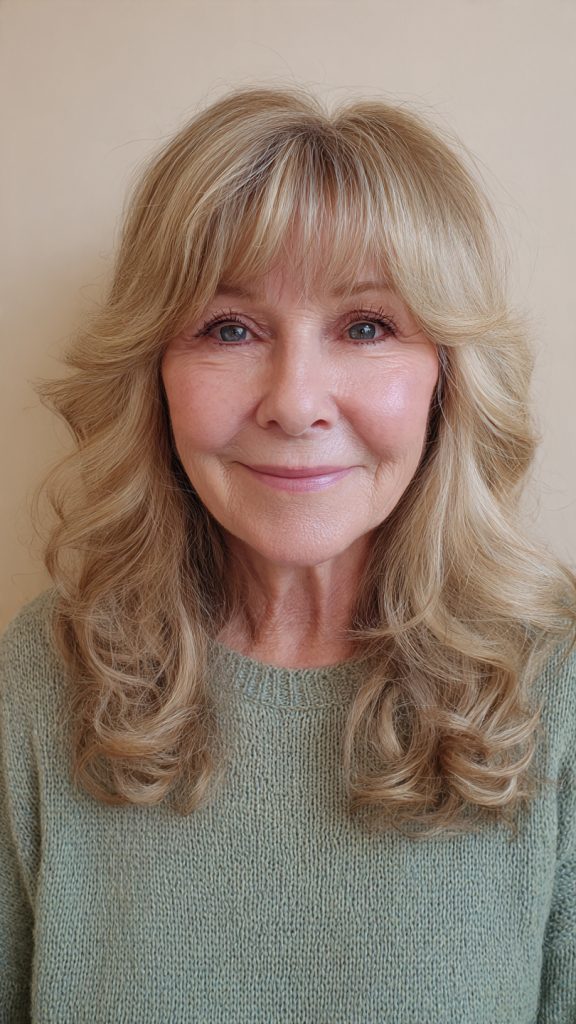
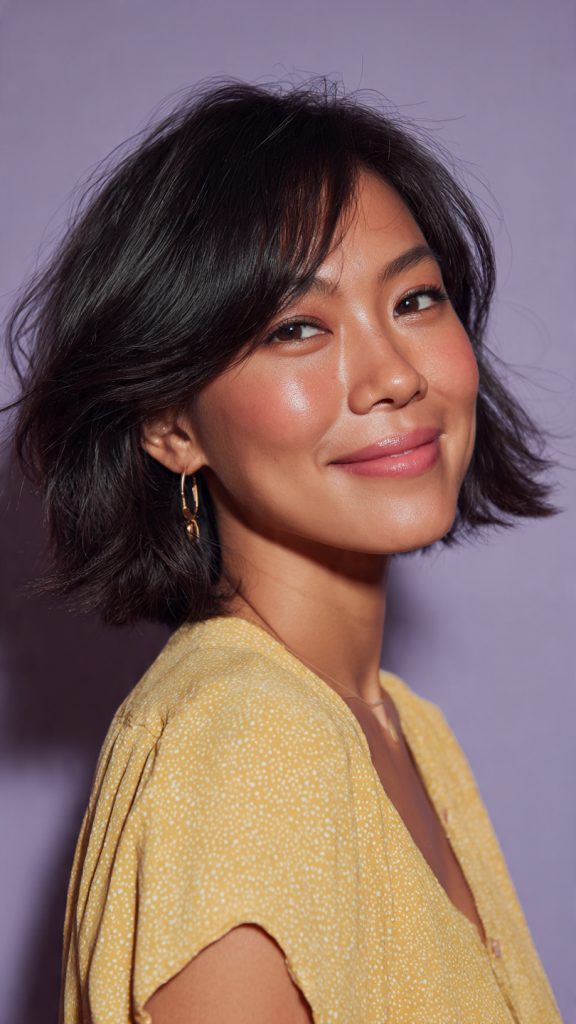
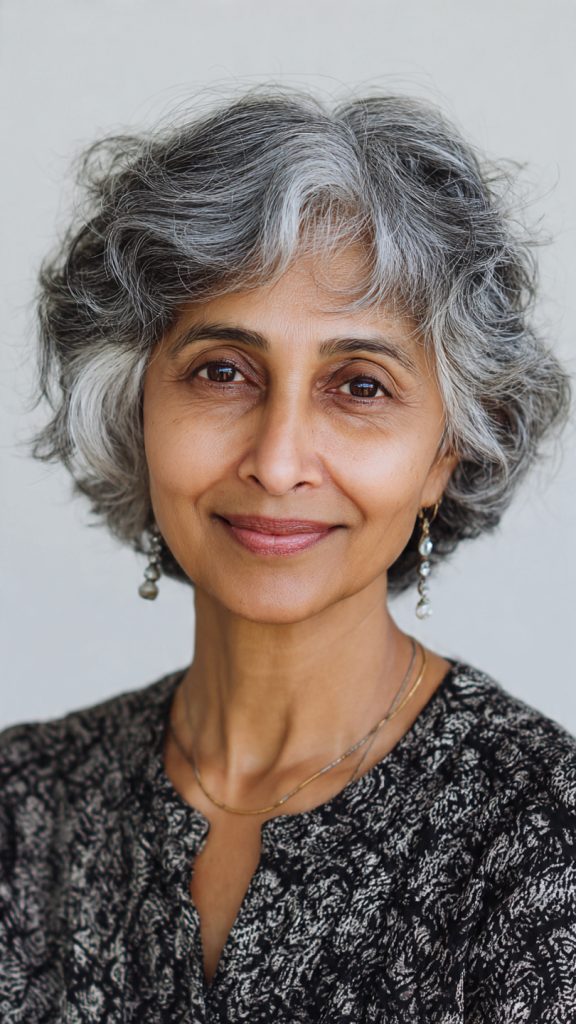
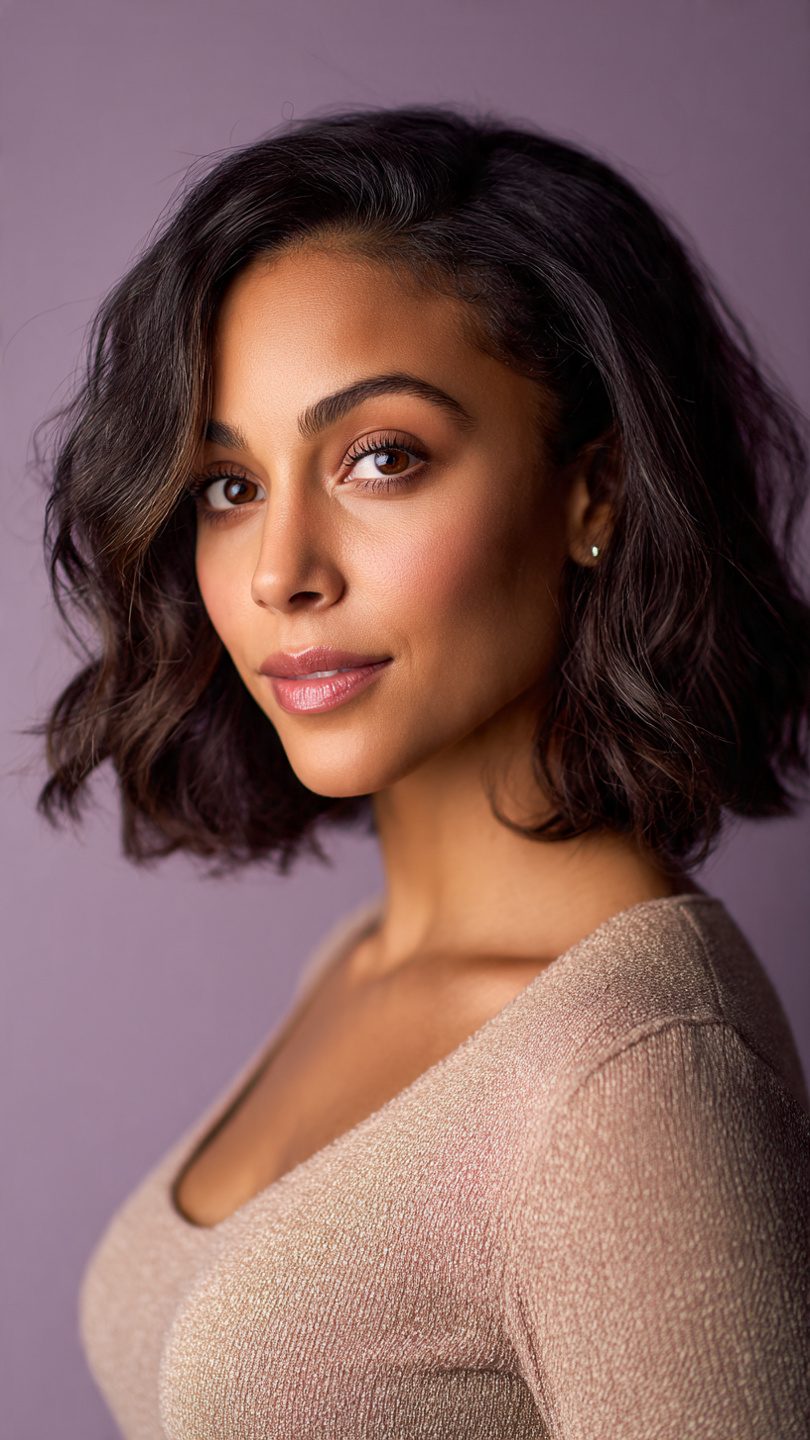
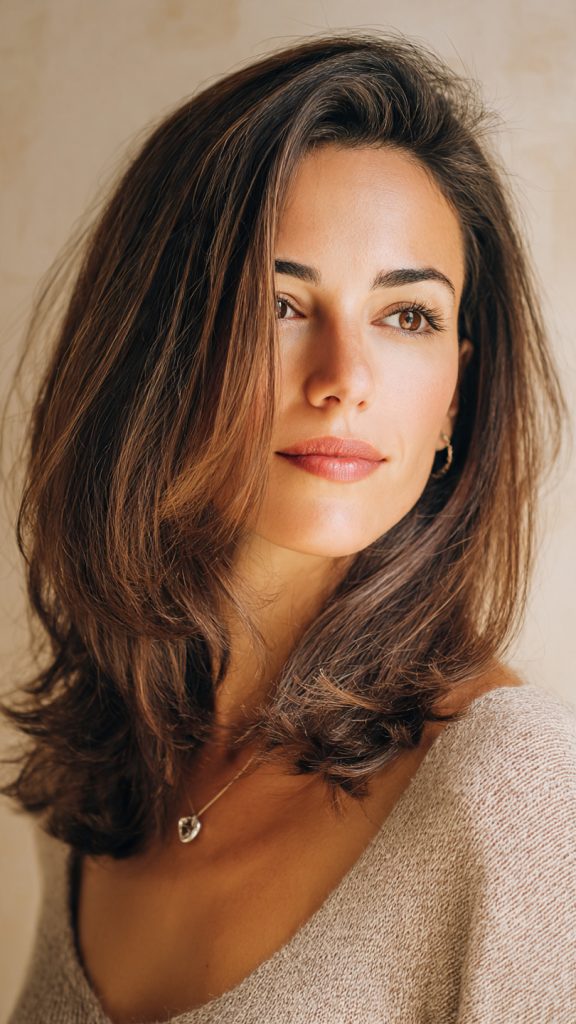
    3. Champagne & Beige (The Warm Gray Alternative)

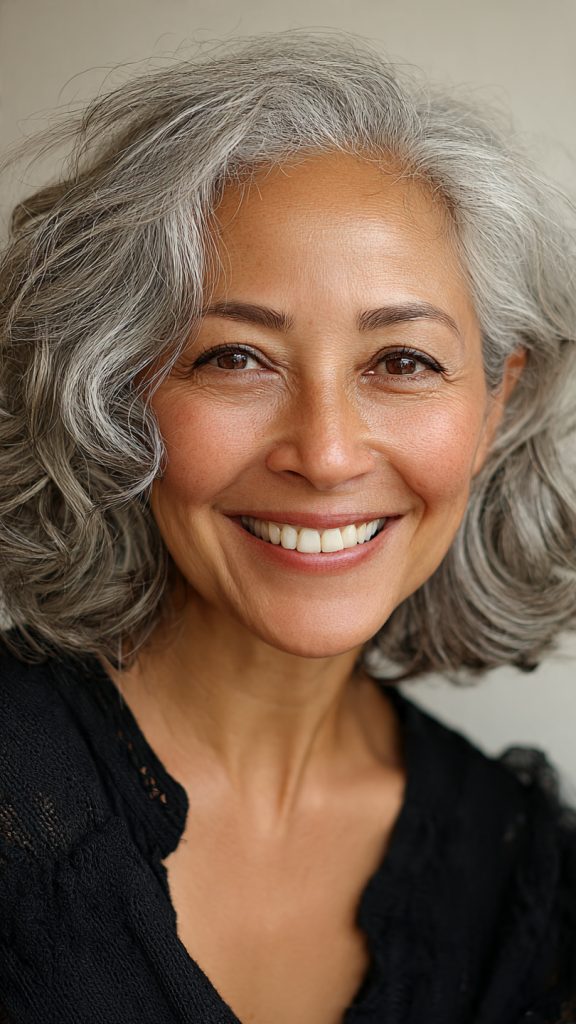
    Not everyone looks good in cool silver. If you have a warm skin tone or yellow undertones, icy grays can wash you out. Instead, opt for champagne or beige blonde highlights. These are warm, creamy, gold-infused tones that blend softly with gray hair, neutralizing any unwanted brassiness while adding a gentle, sun-kissed glow. This is the perfect “transition gray” highlight for women leaving behind dark brown or golden blonde dyes.

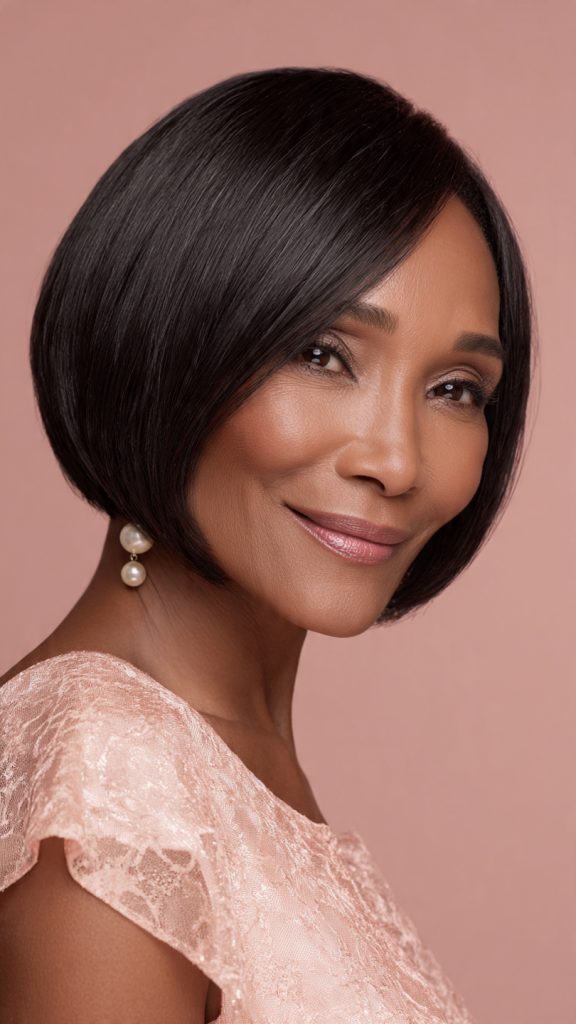
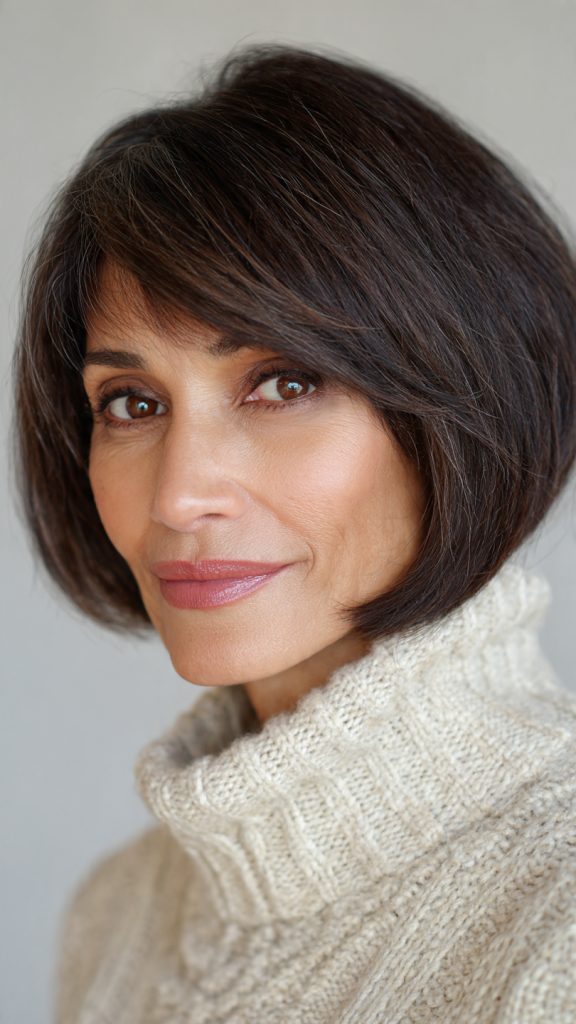
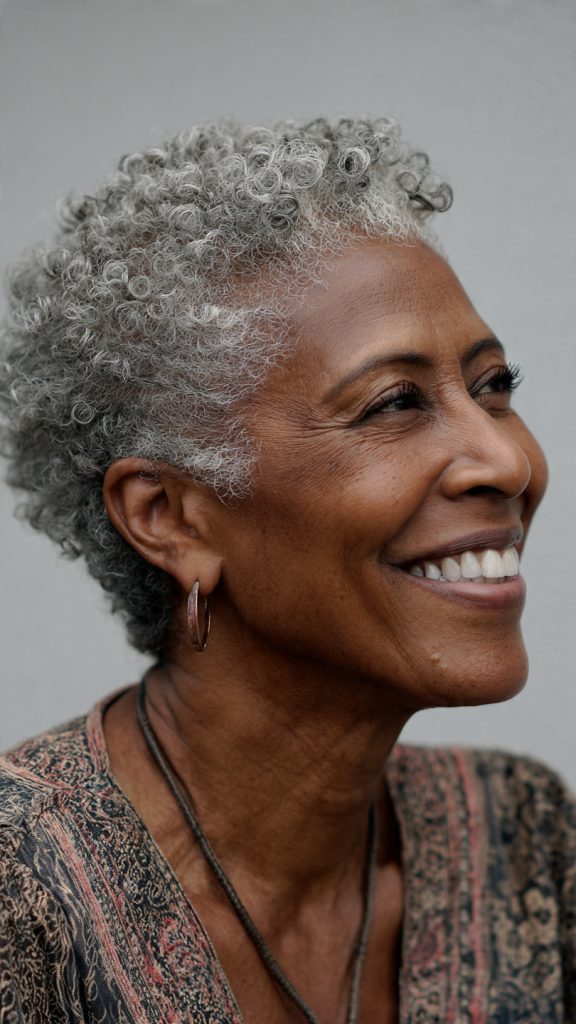
    4. Face-Framing “Money Piece” Silver

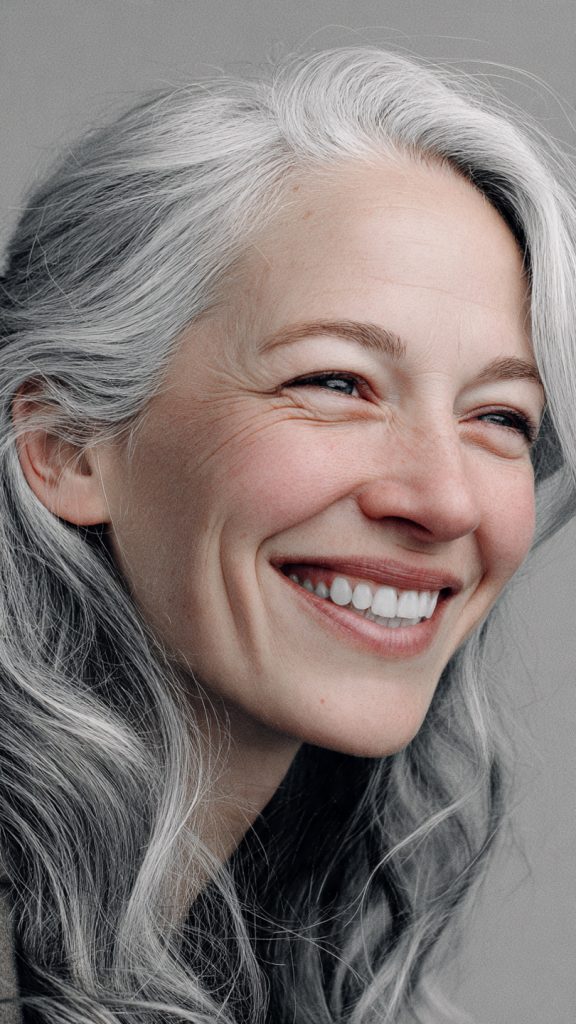
    You don’t need a full head of highlights to make a statement. The “money piece” (the strands around your face) is a powerful tool for gray hair. Keep the back and sides your natural gray or dark color, but paint bold, bright silver or white highlights around your hairline and temples. This instantly brightens your complexion, draws attention to your eyes, and gives the illusion of expensive, intentional gray streaks—think Stacey London or Emmylou Harris.

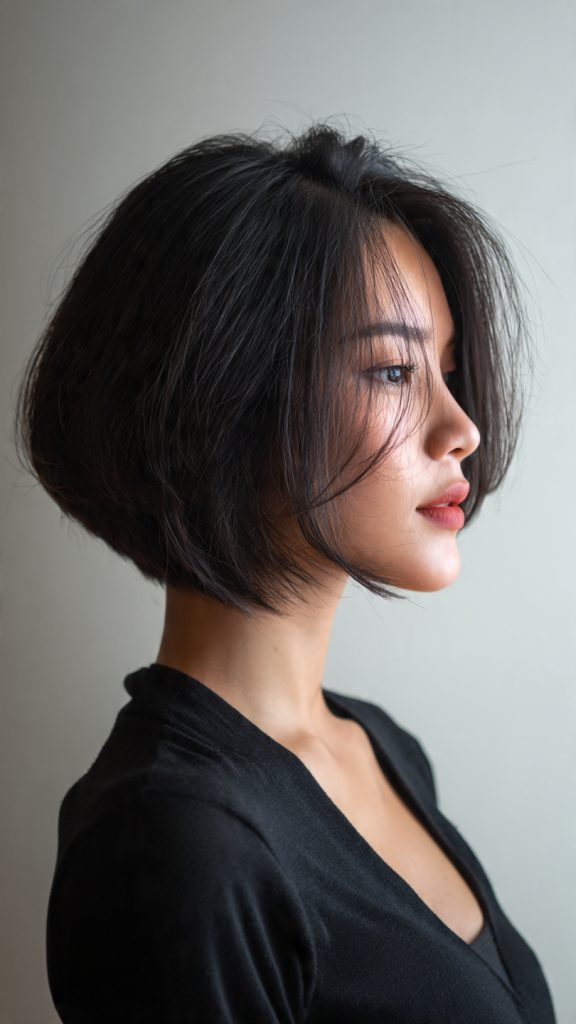
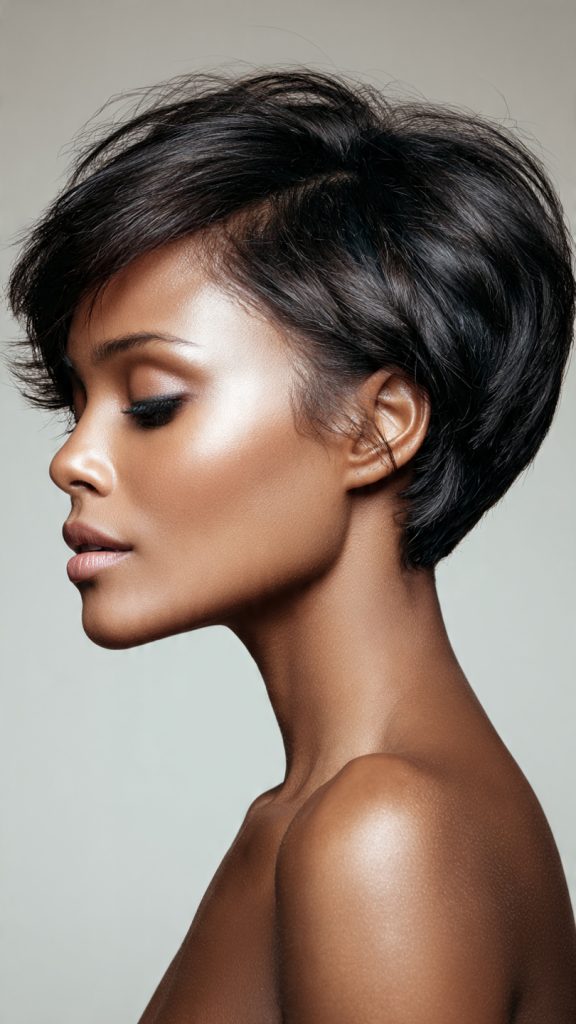
    5. The Shadow Root Silver Melt

    One of the biggest fears with gray hair is the dreaded “grow-out line.” Solve this with a shadow root. This technique keeps your natural dark roots (or a dyed dark brown/black root) but melted directly into silver or gray mid-lengths and ends. The highlights are concentrated from the mid-shaft down. The result is a trendy, lived-in “sombre” (subtle ombre) where regrowth looks like a deliberate style choice rather than a maintenance failure.

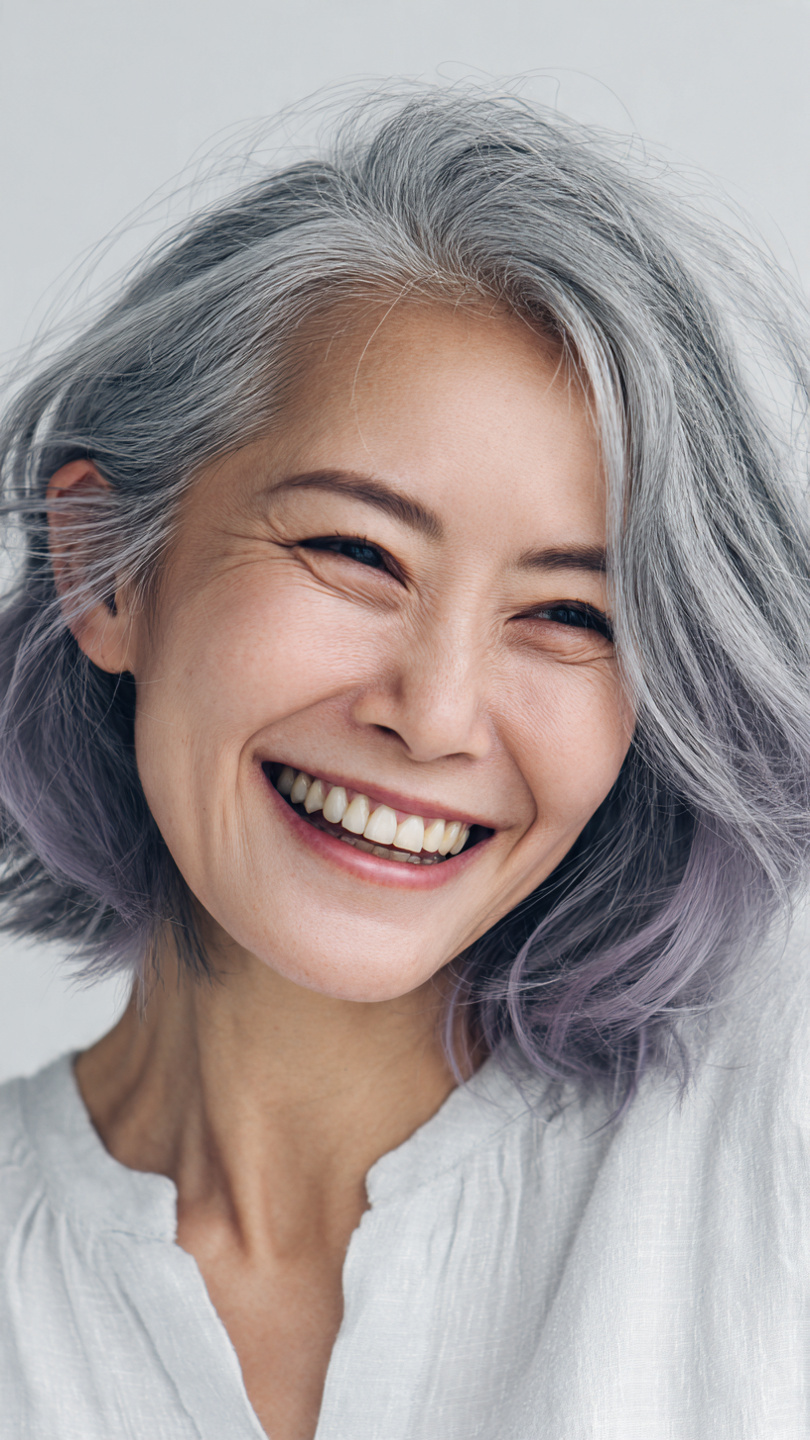
    6. Peek-a-Boo Violet & Lavender Tones

    Gray hair is essentially a blank canvas because it holds pastel tones beautifully. Without bleaching, natural gray strands can be tinted with semi-permanent lavender, lilac, or pale violet highlights. These colors neutralize yellow brassiness (purple is opposite yellow on the color wheel) and add a whimsical, ethereal shine. In sunlight, the highlights flash a magical fairy-tale hue; indoors, they read as cool silver. This is a temporary, fun option that fades gracefully.

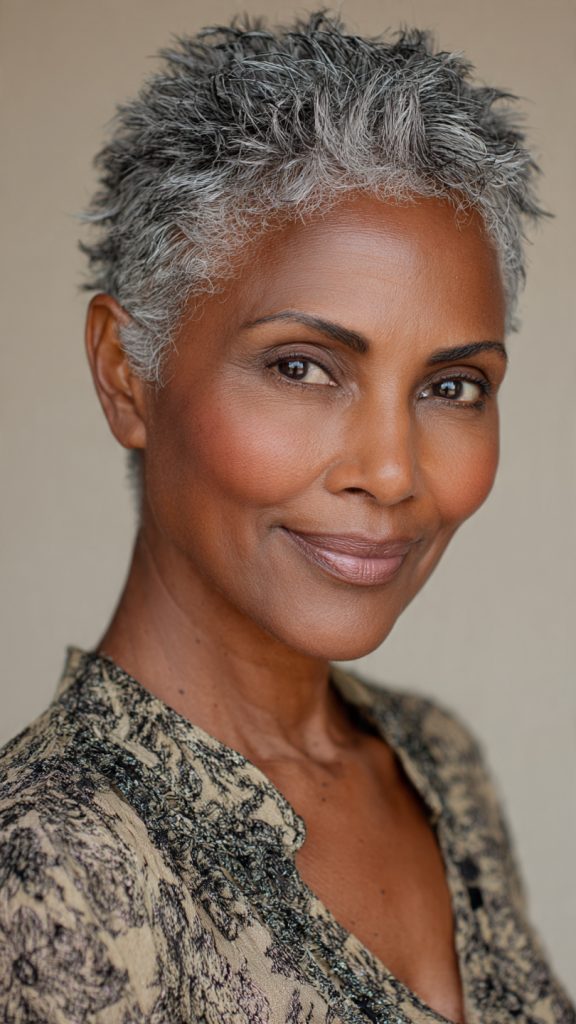
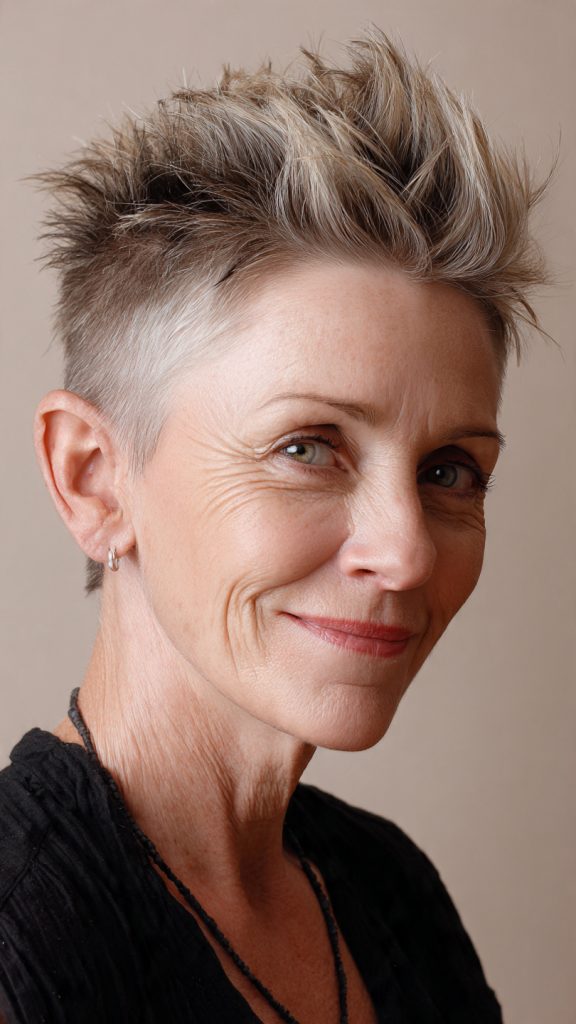
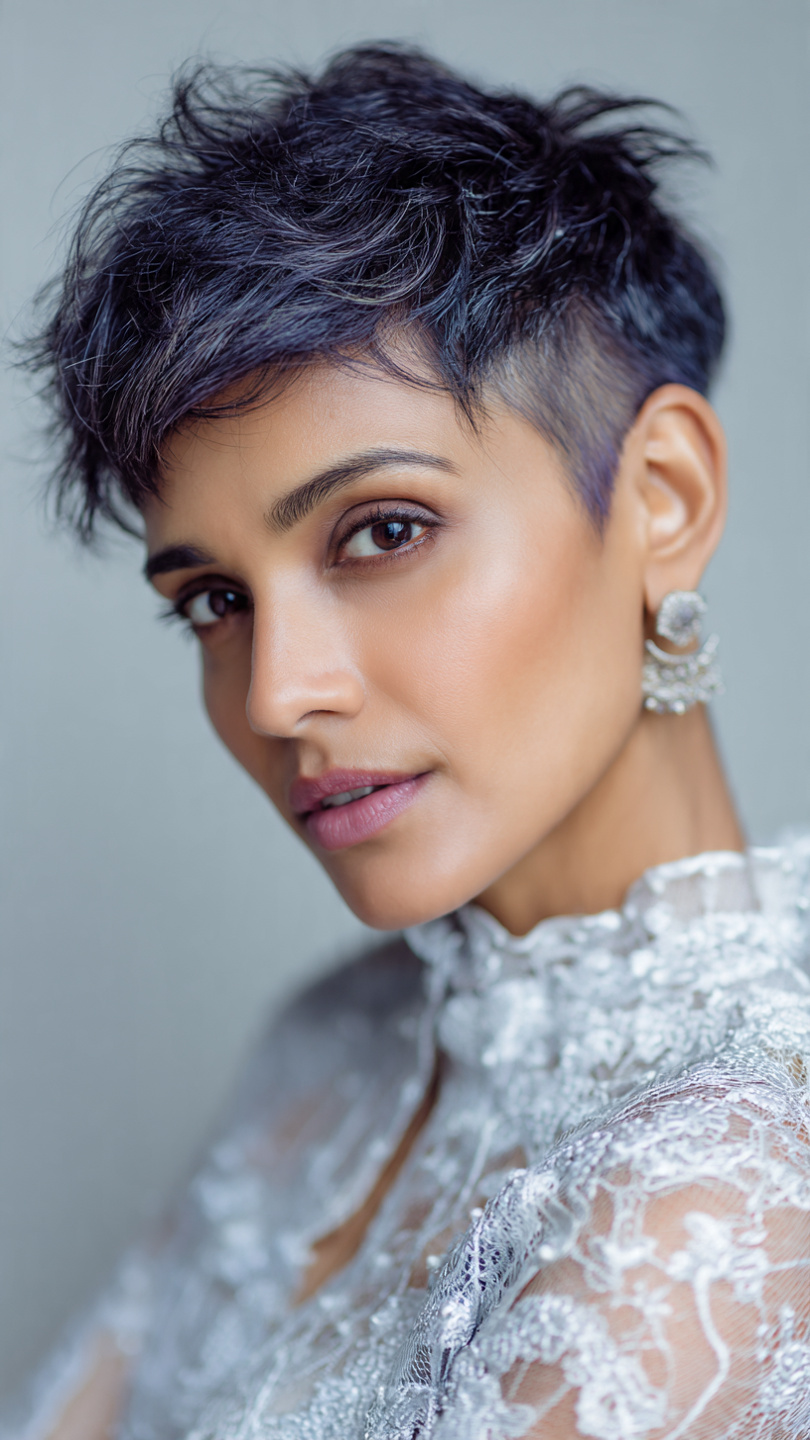
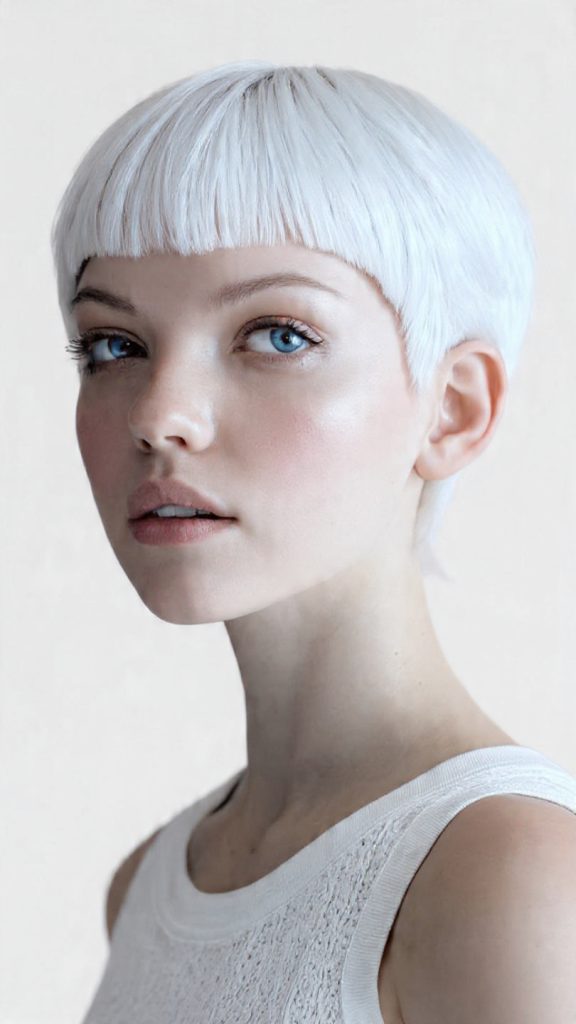
    7. The “Skunk Stripe” (Bold Chunky Highlights)

    Subtlety isn’t for everyone. The bold chunky highlight—dubbed the “skunk stripe” or “cruella stripe”—is back in style. This involves painting very thick, blocky sections of pure white or bright silver through dark or salt-and-pepper hair. The high-contrast look is punk, editorial, and undeniably confident. It works best on straight or slightly wavy hair where the stripe can be seen clearly. This is the ultimate “I own my gray” power move.

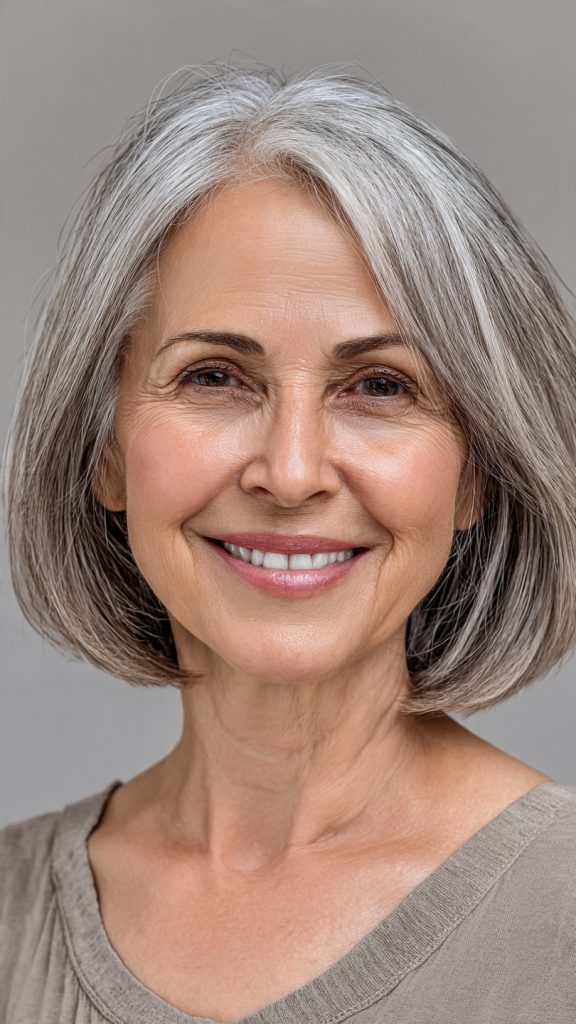
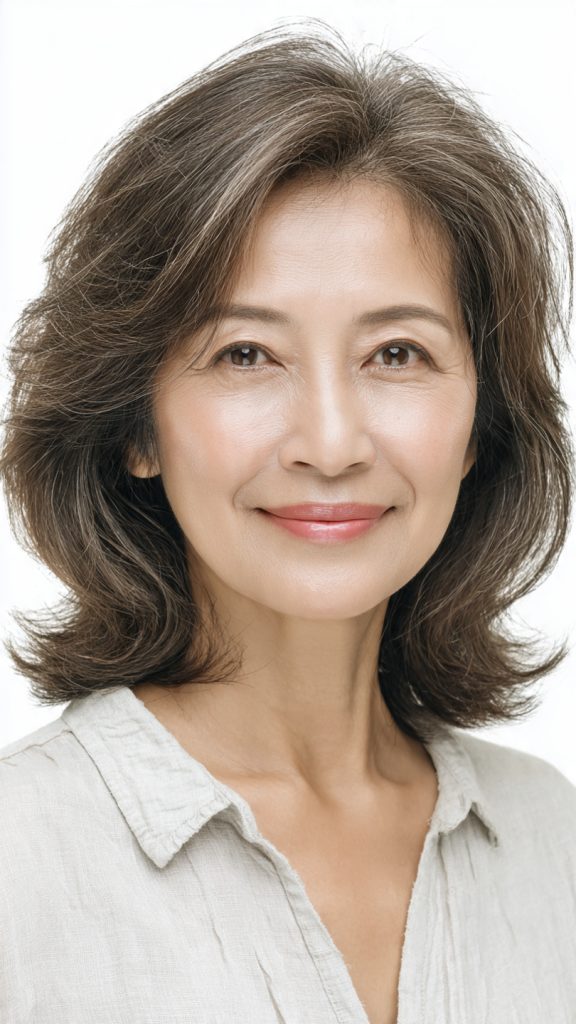
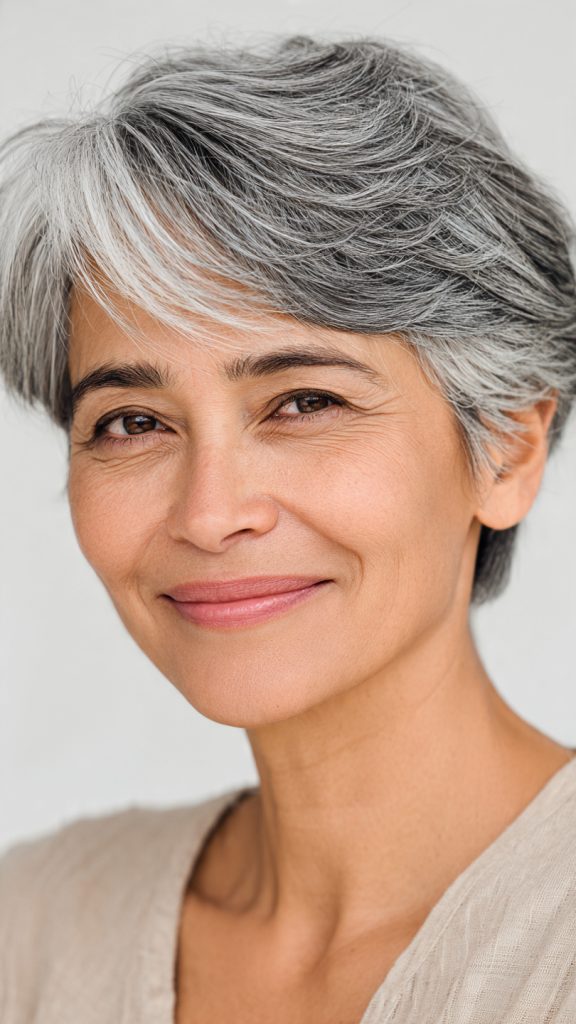
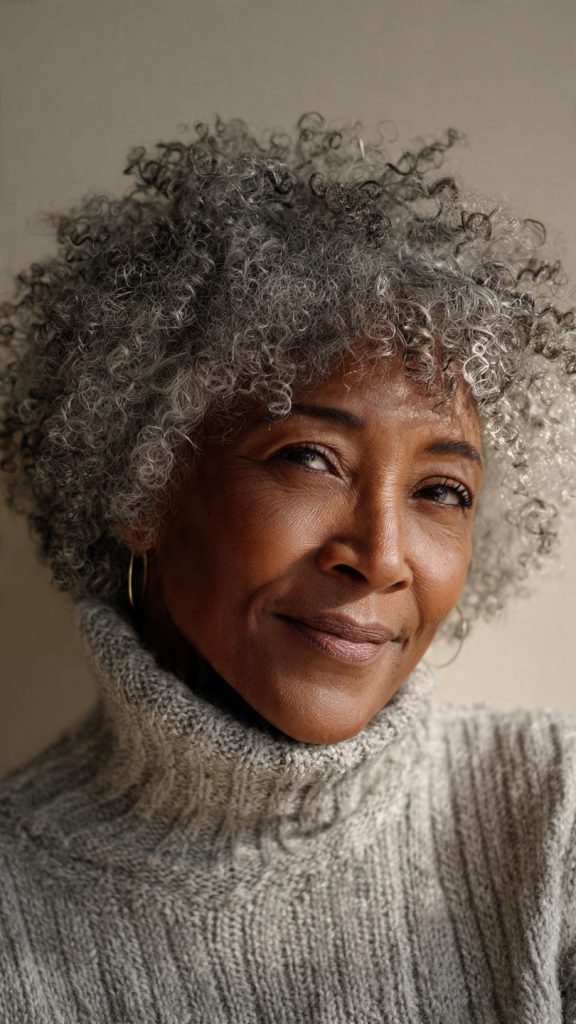
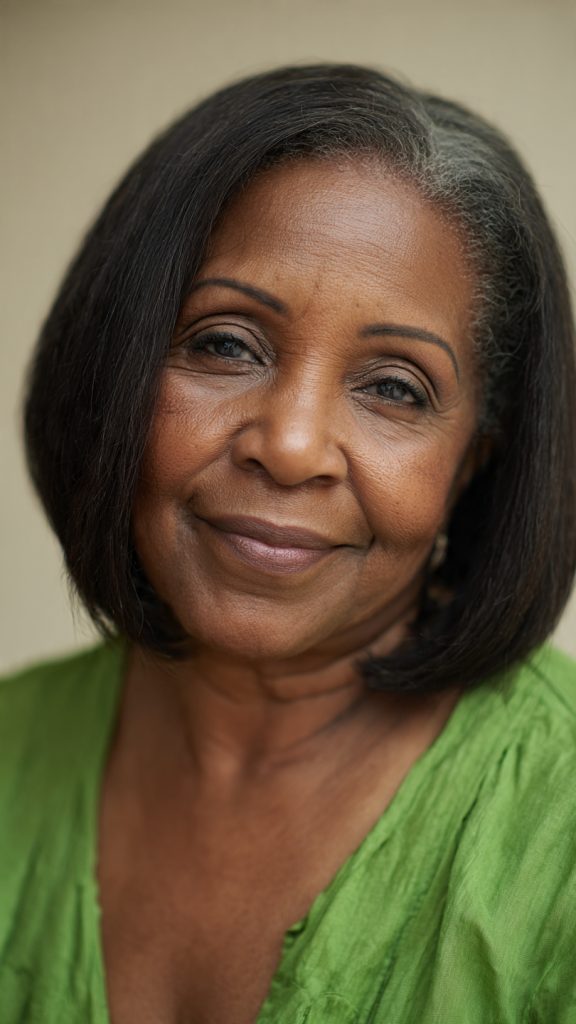
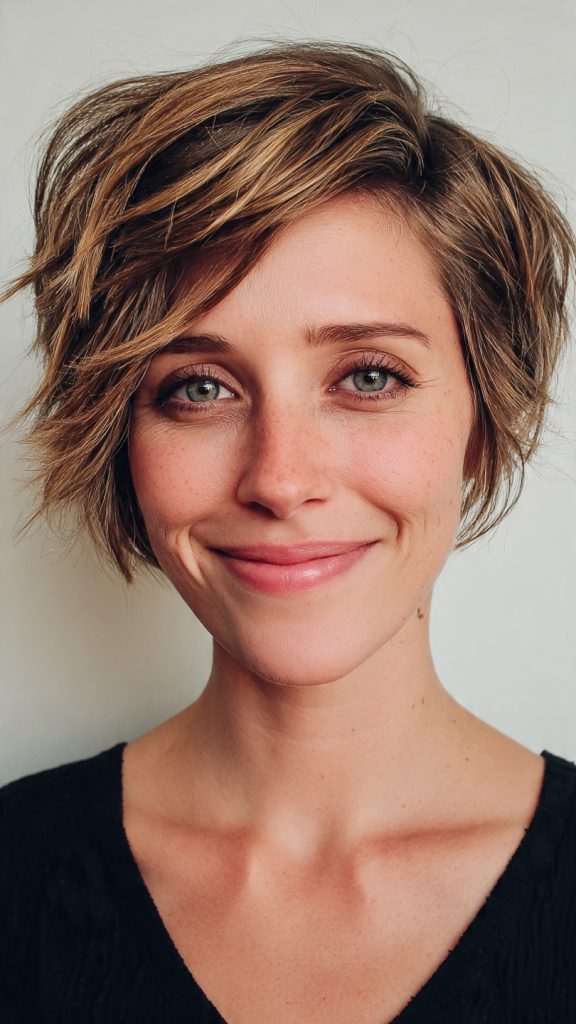
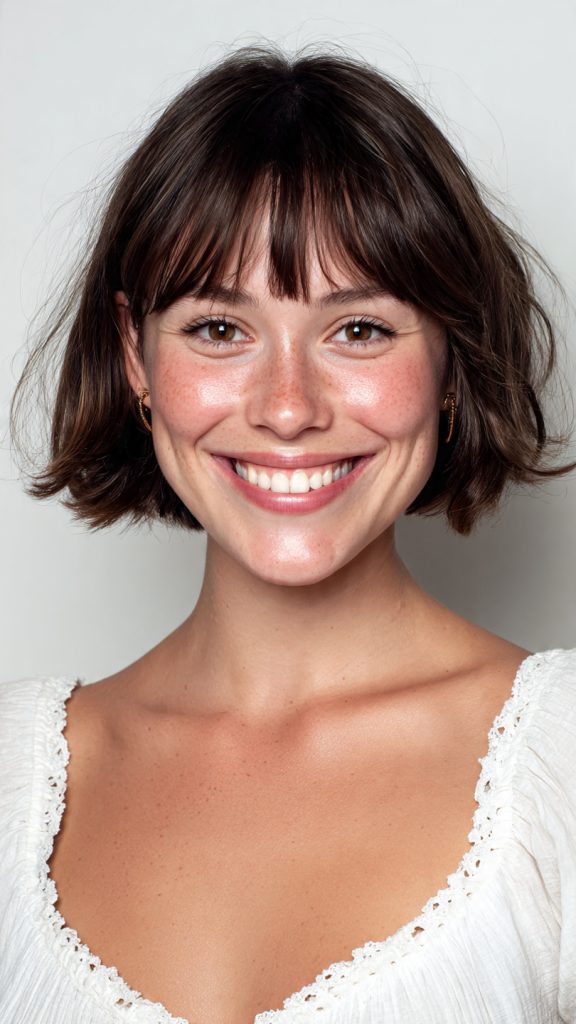
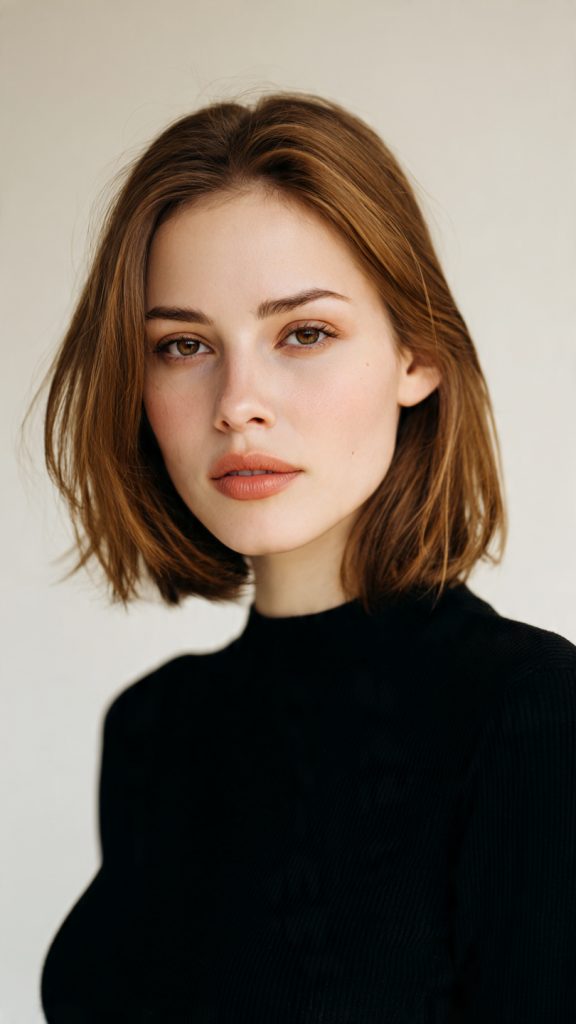
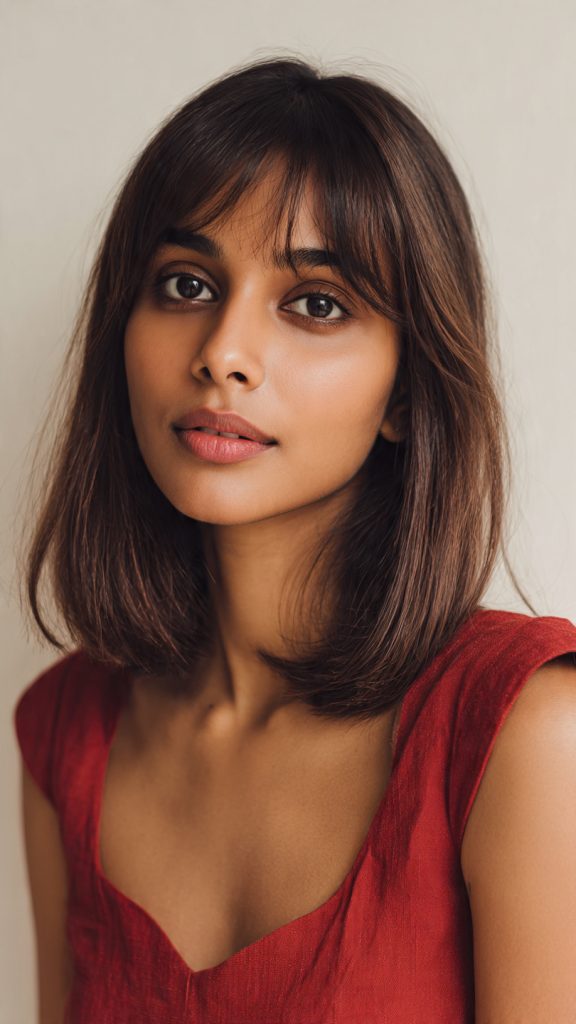
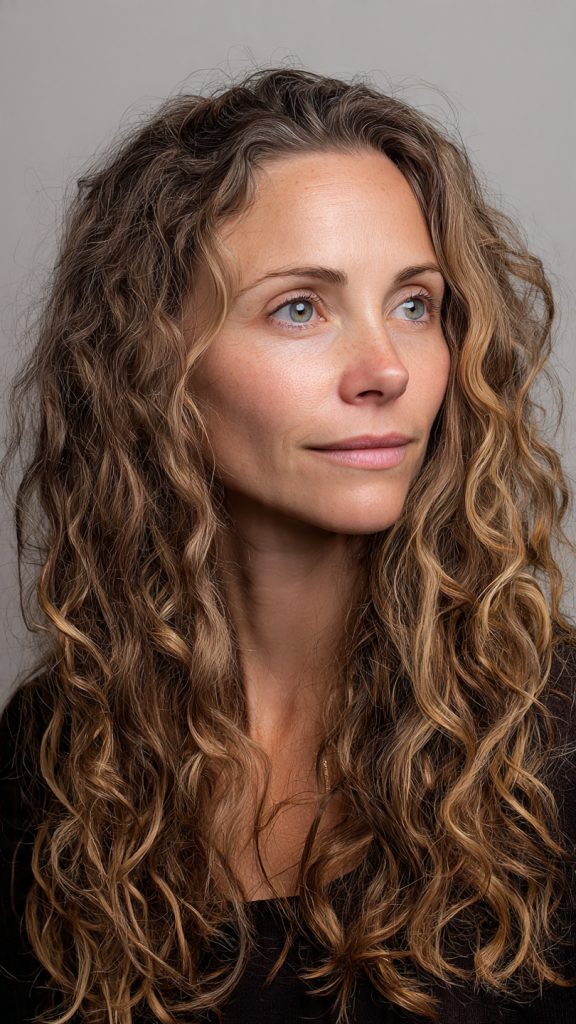
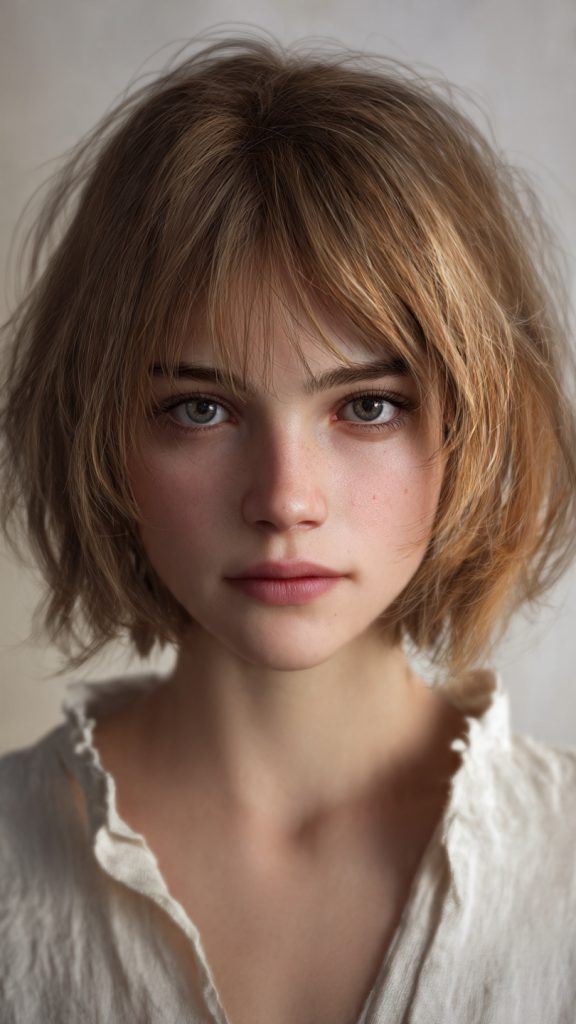
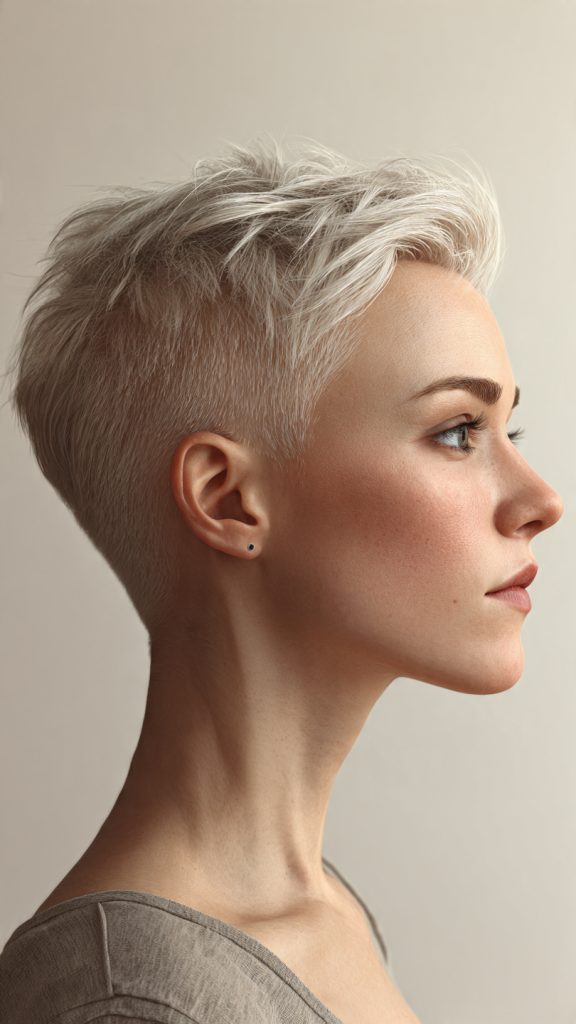
    8. Low-Contrast “Baby Light” Weaving

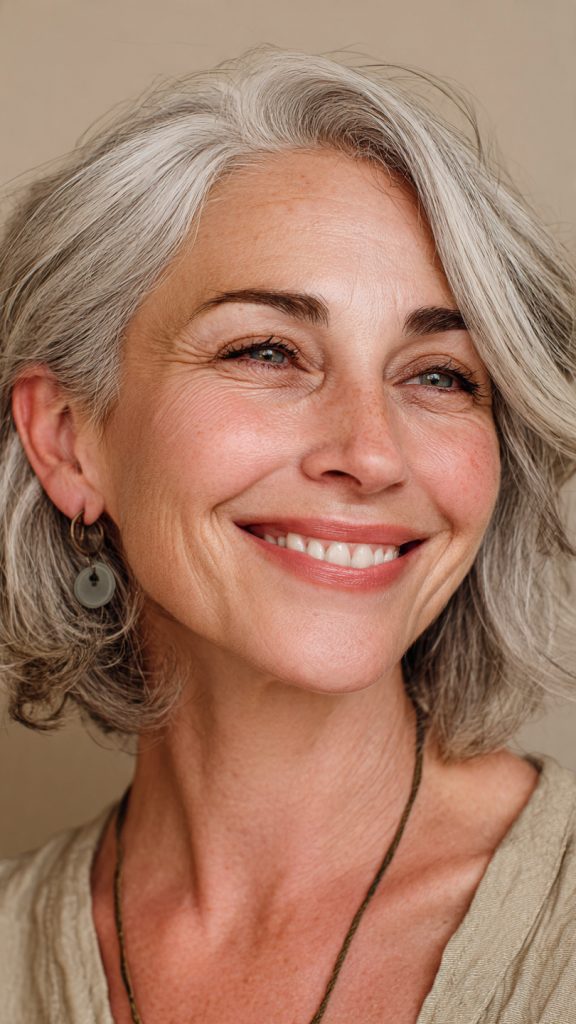
    For those who want a natural, “grown-up gray” that looks like virgin hair, ask for baby lights. These are ultra-fine, micro-thin highlights woven through the top layer only. They are typically only 1-2 shades lighter than your base gray. The goal is not contrast, but texture. Baby lights break up solid blocks of gray, mimic natural sun variation, and make hair look thicker and multidimensional. It’s the no-makeup makeup of hair highlighting.

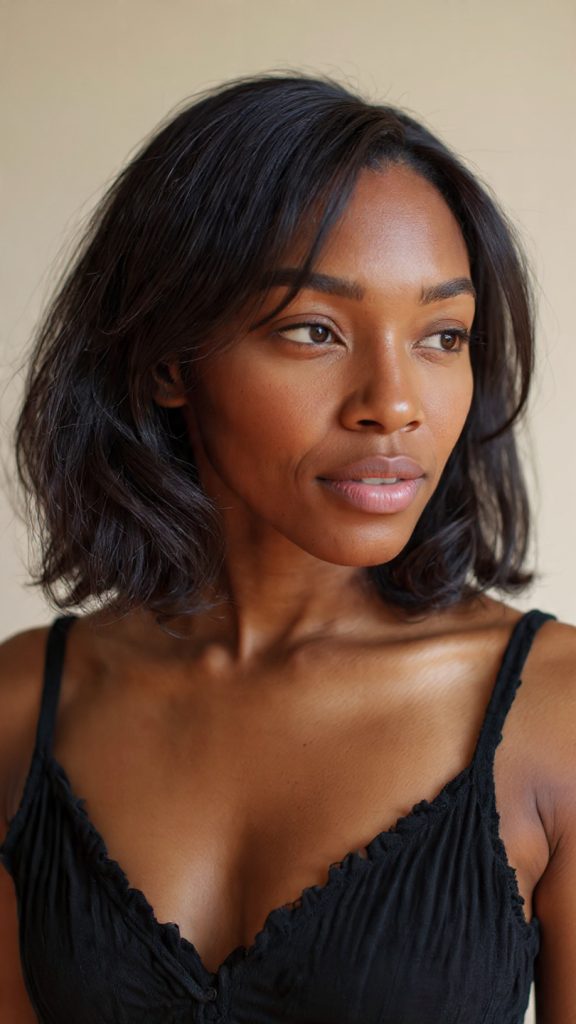
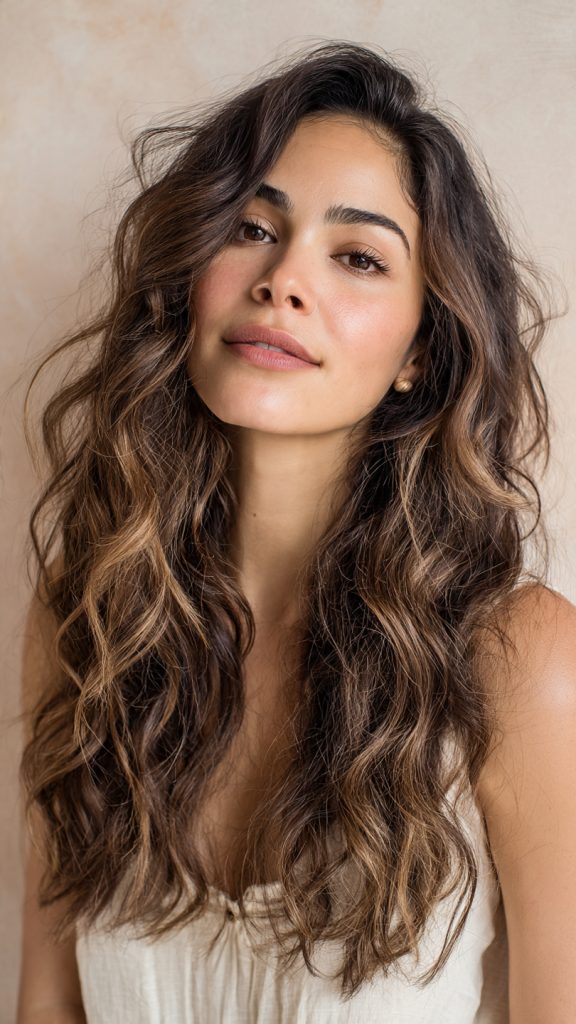
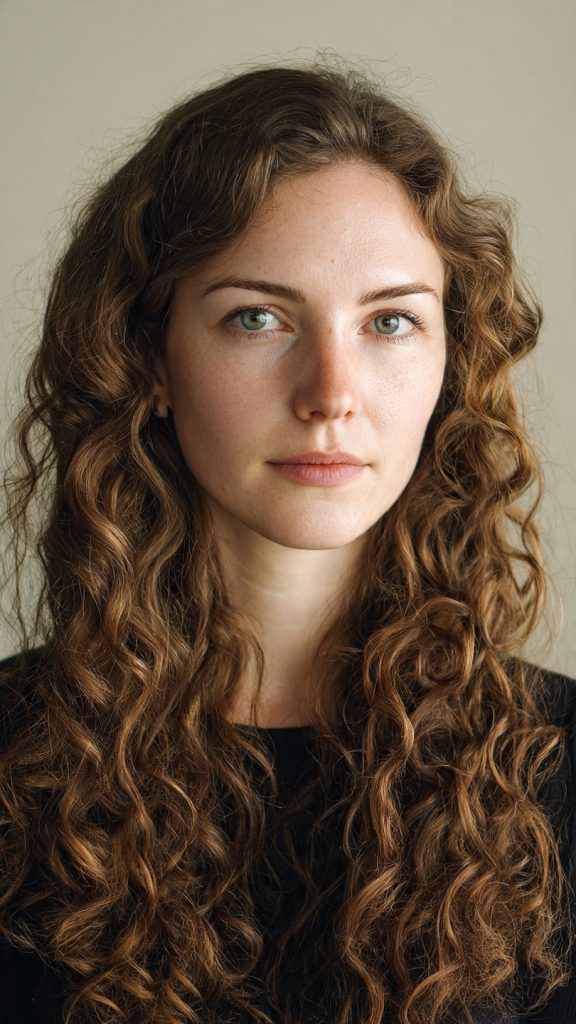
    9. Two-Tone Dimensional Ends

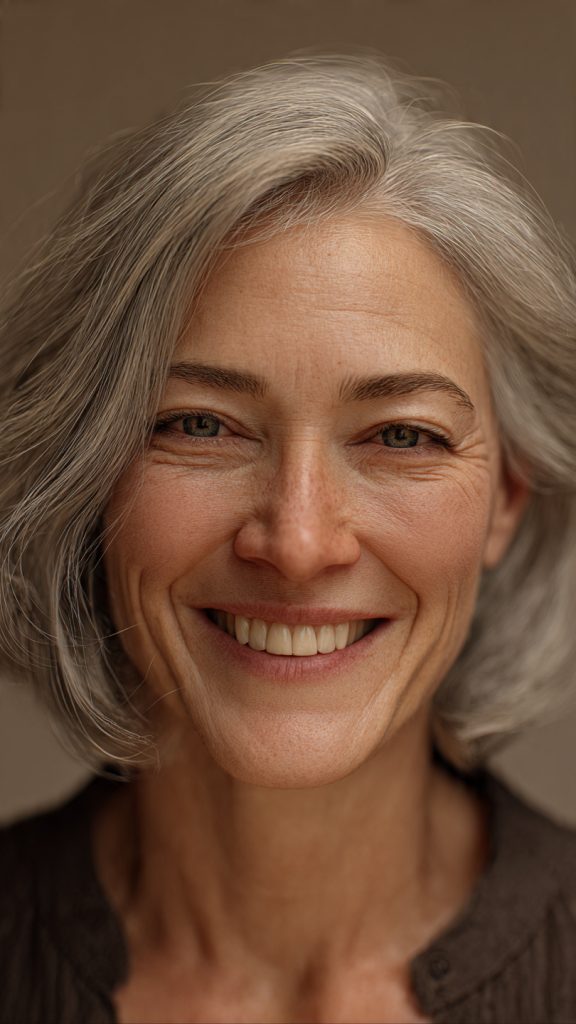
    If your hair is long, your ends are likely the most damaged and the lightest. Lean into that. Keep your roots and mid-lengths a rich, deep charcoal or dark steel gray. Then, concentrate very bright silver or white highlights only on the last 3-4 inches of your hair. This creates a two-toned, dip-dye effect that is modern and artistic. It also allows you to trim off the highlighted ends later without affecting the overall style, making it a smart choice for fine or fragile graying hair.

    Before You Book: What to Know About Gray Hair Highlights

    Not all gray hair is created equal, and not every highlighting technique will work for your specific texture or transition stage. Here are three critical factors to discuss with your colorist before committing.

    1. Your Gray Percentage Matters

    • Less than 30% gray: You can use traditional foil highlights to blend silver strands into your base color.
    • 30-70% gray: This is the ideal range for most highlighting techniques. Your natural gray acts as a built-in highlighter.
    • Over 70% gray: Consider using lowlights instead of highlights to add depth, or opt for all-over silver blending.

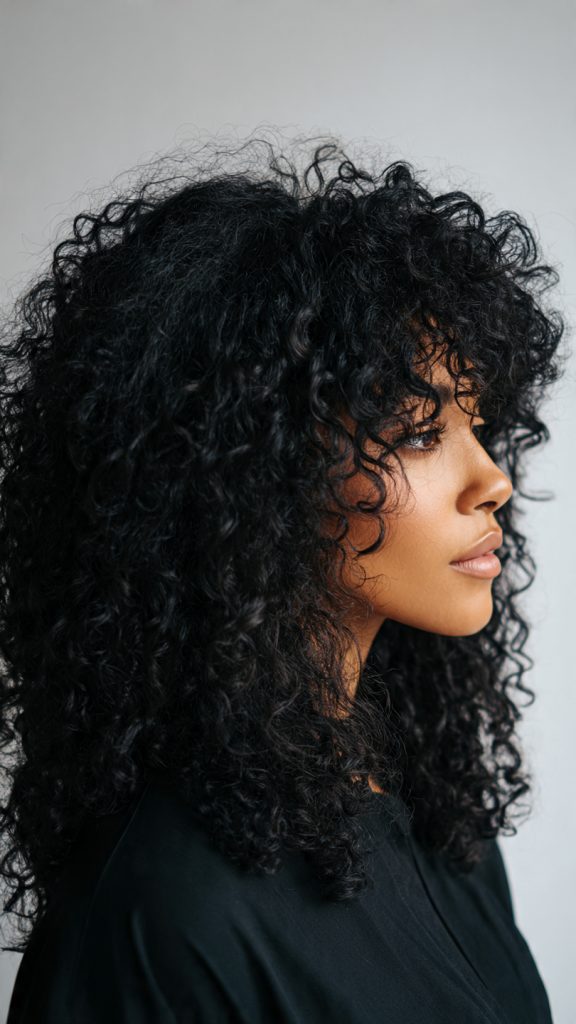
    2. Texture Changes with Gray Hair

    Gray hair is often coarser, more wiry, and more resistant to color than pigmented hair. It may require:

    • Longer processing times
    • Bond-building additives (like Olaplex)
    • A gloss or toner afterward to seal the cuticle

    3. The “Grow-Out” Reality Check

    Even the best gray highlights will eventually show a line of demarcation. For lowest maintenance, choose techniques with a shadow root or lived-in placement (see Ideas #5 and #8).


    Maintenance & Care: Keeping Your Gray Highlights Bright

    Gray hair highlights require specific care to stay brilliant and avoid the two biggest enemies: yellowing and brassiness.

    Do ThisAvoid This
    Use a purple shampoo once weekly (leave on for 3-5 minutes)Daily washing (strips toner fast)
    Apply a heat protectant before stylingHigh heat from flat irons (yellowing occurs)
    Get a gloss or glaze every 6-8 weeksHard water (install a shower filter)
    Use silk or satin pillowcasesChlorine pools (wear a cap)
    Deep condition weeklySulfate-based shampoos

    Pro Tip: Keep a purple conditioning mask in your shower. For a quick refresh between salon visits, mix a few drops of purple direct dye into your regular conditioner.


    Who Should Avoid Gray Highlights? (Honest Advice)

    Gray highlights are transformative, but they aren’t for everyone. Consider these alternatives if:

    • Your hair is extremely fragile or damaged: Bleach or high-lift color can cause breakage. Try demi-permanent silver gloss instead.
    • You have less than 10% gray: Traditional highlights on dark hair may look stripey. Opt for a full silver melt or balayage.
    • You want zero maintenance: No highlighting technique is maintenance-free. A purple shampoo routine is non-negotiable.
    • Your skin has strong warm undertones: Icy silver may clash. Stick to champagne or beige tones (Idea #3).

    Frequently Asked Questions (Quick Answers)

    Q: Can I get gray highlights on unbleached dark hair?
    A: No. Gray highlights require lifting (lightening) your natural pigment first, unless your hair is already naturally gray or white.

    Q: How much do gray highlights cost?
    A: Expect $150–$400 depending on your location, hair length, and technique. A full silver blend costs more than face-framing money pieces.

    Q: How long does the appointment take?
    A: Typically 2.5 to 4 hours for full highlights on gray hair due to longer processing times.

    Q: Will gray highlights damage my hair?
    A: Any lightening causes some damage, but a skilled colorist using bond builders can keep hair healthy. Avoid DIY bleach at home.

    Q: Can I go from box dye to gray highlights?
    A: Possibly, but it’s a process. Dark box dye often requires multiple sessions of color removal before highlighting. See a professional.

    Conclusion

    Gray hair is no longer a secret to hide—it’s a statement to celebrate. The nine highlighting ideas in this article prove that silver strands can be dimensional, modern, and uniquely yours. Whether you choose icy platinum blending, playful lavender peek-a-boos, or a bold skunk stripe, the right highlights will transform your gray from “aging” to “editorial.”

    Remember: the most beautiful gray hair is healthy, well-maintained, and worn with confidence. Don’t let fear of the transition hold you back. Start small with face-framing money pieces, or go all in with a full silver melt. Find a colorist who specializes in gray hair (check their portfolio for silver work), bring your reference photos, and walk out feeling like the brilliant, bold woman you are.

    Your gray isn’t a flaw. It’s a highlight. Literally.

  • Wash-and-Wear Hairstyles for Women Over 50

    Wash-and-Wear Hairstyles for Women Over 50


    There’s a beautiful kind of freedom that comes with age—the freedom to prioritize what truly matters. For many women over 50, that means trading high-maintenance, heat-heavy routines for hairstyles that celebrate natural texture, save time, and look fantastic straight out of the shower. The myth that “wash-and-wear” means “boring” or “unstyled” couldn’t be further from the truth. Today’s cuts work with your hair’s natural movement, grey patterns, and changing texture to create looks that are polished, modern, and incredibly low-effort.

    Whether you have fine, thinning, thick, or curly hair, here are 15 wash-and-wear hairstyles designed to let you wake up, spritz, shake, and go.

    1. The Classic Pixie Cut


    The ultimate low-maintenance champion. A classic pixie keeps hair short around the back and sides with slightly more length on top. After washing, simply towel-dry, rub a dab of lightweight mousse through the top, and let it air-dry. The natural movement of the top layers creates volume and softness without any blow-drying.

    2. The Textured Crop


    Ideal for fine or thinning hair, the textured crop uses point-cutting techniques to remove bulk and create a “messy-chic” finish. The uneven ends disguise a lack of density. Wash, apply a pea-sized amount of texture paste, and scrunch. It dries into a piece-y, modern look that feels young and fresh.

    3. The Silver Bob (Chin-Length)


    A blunt, chin-length bob is a powerhouse for grey or white hair, which tends to be coarser. The weight of the blunt line forces the ends to tuck under naturally as they dry. Use a leave-in conditioner to keep silver strands hydrated, then comb through. No heat needed—the bob’s geometry does the work.

    4. The Layered Lob (Long Bob)


    Falling between the chin and collarbone, the layered lob offers versatility without length-related tangles. Long layers encourage natural wave and prevent the “triangle head” effect. Wash, apply a sea salt spray, twist sections loosely, and let it air-dry for soft, beachy waves that last for days.

    5. The Curly Shag


    For women with natural curls or perms, the shag is a godsend. It features short, choppy layers throughout and often includes wispy bangs. The layers remove weight so curls spring up higher and dry faster. After washing, scrunch in a curl cream and flip your head upside down for two minutes—done.

    6. The Side-Swept Crop


    This is a variation of the pixie where the top fringe is grown out slightly and swept to one side. It is incredibly flattering for softening forehead lines and drawing attention to the eyes. It air-dries naturally because the side-swept shape has a natural “set” that falls perfectly into place with a single comb-through.

    7. The Sleek Angled A-Line


    Short in the back, longer in the front (pointing toward the chin). This cut works best on straight to wavy hair. Because the back is very short, it never gets the “bedhead bump.” You wash, apply a smoothing serum, and let it air-dry. The forward angle creates a polished, facelift-like effect without product.

    8. The Natural Curly Afro (Short to Medium)


    For women with tight coils or kinky textures, embracing the natural shape is the ultimate wash-and-wear. Keep the hair shaped into a soft, round silhouette (about 1-3 inches long). Wash, apply a leave-in conditioner and light oil, then finger-comb. The curls will dry into a defined, fluffy halo that requires zero heat.

    9. The Wash-and-Wear Wedge


    The wedge cut is stacked in the back (layers piled high) and smoother on the sides. This built-in architecture means it dries upward and outward, giving instant crown volume to flat hair. A drop of volumizing lotion is all you need. As it dries, the stacked layers naturally lift away from the neck.

    10. The Wispy Bangs + Short Bob


    Fear not the bang! Wispy, eyebrow-grazing bangs (cut with thinning shears) hide a multitude of sins—forehead lines, uneven hairlines, or a lack of brow definition. Paired with a short bob, you just wash both the bangs and the body, shake out the bangs with your fingers, and let the bob do its thing.

    11. The One-Length Crop (The “Helmet” No More)


    Modern one-length crops are soft and rounded, not hard. By keeping the hair exactly one length (usually 1.5 to 2 inches all over), the hair has no weak points to stick up. It simply lies flat in a sleek, cap-like fashion. It is ideal for very active women—wash with a cleansing conditioner and go.

    12. The Tousled French Boy


    A longer pixie that is deliberately uneven—longer in the crown, choppy at the fringe, slightly exposed ears. This cut mimics that “just rolled out of a French bed” look. Use a dry conditioner spray after washing (it adds grit without weight), then rake fingers through it. The messier, the better.

    13. The Soft Perm on Fine Hair


    If your hair is limp and straight, a modern body wave perm (large rods only) gives you permanent bend. Once permed, you can wear it in a short, rounded shape. Wash, blot with a microfiber towel (no rubbing), and scrunch. The curls reform themselves every single time without rollers.

    14. The Faux Hawk Pixie


    For the bold older woman, this cut keeps the sides very short (clipped) and leaves a strip of longer, textured hair down the center. Because the sides are so short, they dry instantly. The center strip can be spiked up, laid flat, or swooped—all without a blow dryer. It’s rebellious, clean, and effortless.

    15. The Shoulder-Grazing Uncut


    Not ready for scissors? Keep hair at shoulder length with long, face-framing layers. The trick is the “plop” method: after washing, flip your hair onto a cotton t-shirt (not a terry towel) and tie it up for 15 minutes. Remove, shake, and let the rest air-dry. The t-shirt prevents frizz, leaving soft, straight-ish waves.

    What to Tell Your Stylist (The Cut is Everything)

    A true wash-and-wear style isn’t magic—it’s geometry. The cut you walk out of the salon with determines 90% of how your hair will behave when wet. Here’s what to say:

    • For fine or thinning hair: “Use internal layering to create volume, but keep the perimeter strong. No razors—they cause frizz.”
    • For thick or coarse hair: “Remove weight with deep point-cutting. I want movement, not a triangle shape.”
    • For curly or wavy hair: “Cut it dry, curl by curl. I need shape when it shrinks, not when it’s pulled straight.”
    • For grey or silver hair: “Use texturizing shears at the ends only. My hair is drier now, so blunt ends look healthier.”
    • Universal request: “I will never blow-dry this cut. Please design it to air-dry beautifully.”

    Bring a photo from this article to your appointment. A great stylist will thank you.


    The 5-Minute Post-Wash Routine (No Heat Required)

    Wash-and-wear does not mean “do nothing.” It means a 60-second ritual that sets your hair up for success. Follow this order:

    1. Towel smartly: Use a microfiber towel or an old cotton t-shirt. Terry cloth causes friction, which creates frizz and breaks delicate older hair. Gently squeeze—never rub.
    2. Detangle in the shower: With conditioner still in, run a wide-tooth comb through. Rinse cool. This seals the cuticle and adds shine without products.
    3. Apply one product only: Choose based on your texture:
      • Fine hair: Volumizing mousse or salt spray
      • Curly hair: Leave-in conditioner or curl cream
      • Coarse grey hair: Lightweight smoothing serum or argan oil
      • Straight hair: Anti-frizz lotion
    4. Shake and go: Flip your head upside down, shake at the roots with your fingers, then flip back. Do not touch again until 80% dry. Touching creates frizz.
    5. The 15-minute rule: If you have 15 minutes, twist sections and clip them loosely on top of your head. Unclip when you’re dressed. You’ll have soft, uniform waves without heat.

    Nighttime Preservation (Wake Up and Go)

    Wash-and-wear works best when you don’t have to re-wet your hair every morning. Protect your style while you sleep:

    Hair TypeNighttime ToolMorning Refresh
    Short (pixie, crop)Silk pillowcase onlySpritz with water, shake
    Bob or lobLoose high ponytail with silk scrunchieSmooth with dry conditioner spray
    Curly or coily“Pineapple” (high loose ponytail at crown) + satin bonnetFluff with fingers, no water
    Fine or straightWrap hair in silk scarfBrush through, done

    Avoid: Tight elastics, cotton pillowcases, sleeping with damp hair (causes tangles and mildew smell).


    When Wash-and-Wear Doesn’t Work (And How to Fix It)

    Sometimes hair has its own plans. Here are common problems and simple solutions:

    ProblemLikely Cause10-Second Fix
    Flat on one sideYou slept on that sideMist with water, flip head, clip the flat side up for 5 minutes
    Frizzy haloHumidity or dry grey hairRub one drop of serum between palms, smooth over top layer only
    Sticking up in backCut is too short or too bluntWet just the back, smooth down with a dab of gel, let air-dry
    No shape at allProduct buildupUse a clarifying shampoo once per week (not daily)
    Curls are stringyTouched them while wetRe-wet completely, add leave-in, scrunch once, then don’t touch

    When all else fails: Wet it completely and start over. It takes 3 minutes. That’s the beauty of wash-and-wear.


    Product Recommendations (Drugstore to High-End)

    You don’t need 12 bottles. You need 3. Invest in these categories:

    1. The Right Shampoo & Conditioner

    • For grey hair: Purple shampoo once a week (prevents yellowing) + moisturizing conditioner
    • For fine hair: Volumizing shampoo (no heavy “moisture” formulas)
    • For curly hair: Sulfate-free cleansing conditioner (“co-wash”)
    • For all: Avoid “2-in-1” products—they leave invisible film that kills air-dry texture

    2. The One Styler You Actually Need

    • Best for pixies & crops: Texture paste or wax (tiny amount)
    • Best for bobs & lobs: Sea salt spray or air-dry cream
    • Best for curls: Leave-in conditioner + gel (scrunch out the crunch)
    • Best for frizz-prone: Silicone-free smoothing serum

    3. The Emergency Refresh Spray
    Mix in a small spray bottle: ¾ water + ¼ leave-in conditioner. Shake. Use daily to reactivate your style without a full wash.

    Affordable lines: Not Your Mother’s, OGX, L’Oréal Elvive, Cantu (for curls)
    Mid-range: Bumble and Bumble, Living Proof, Moroccanoil
    Splurge: Oribe, R+Co, Aveda


    Frequently Asked Questions (From Real Women Over 50)

    Q: I’ve used a blow-dryer every day for 40 years. Can I really stop?
    A: Yes. The first week will feel strange. By week two, your hair’s natural texture will “remember” itself. By week three, you’ll wonder why you ever spent 30 minutes with a hot tool.

    Q: My grey hair is wiry and sticks out everywhere. What works?
    A: Grey hair has a rougher cuticle. You need a heavier leave-in conditioner and a silk pillowcase. Also, ask your stylist for “slide cutting”—it softens the ends so they lie flat.

    Q: I have a bald spot or thinning crown. Can I still do wash-and-wear?
    A: Absolutely. A textured pixie or crop with a side sweep covers thinning areas naturally. Avoid long hair—it pulls away from the scalp and makes thinning more visible. Also consider tinted dry shampoo (like Batiste Dry Shampoo for Dark/Light Hair) to camouflage scalp shine.

    Q: How often should I actually wash my hair with these styles?
    A: Less than you think. Wash-and-wear hair looks better on day two and three because natural oils settle the flyaways. Aim for 2-3 times per week. In between, use your refresh spray and a silk scarf at night.

    Q: What if I have a formal event? Can I still style it?
    A: Yes! Wash-and-wear is your everyday default. For a wedding or party, add one step: Use a 1-inch curling iron on three or four face-framing pieces, or pin one side back with a decorative clip. Ten seconds of effort. Then go back to your easy routine tomorrow.


    Conclusion: The Freedom of “Good Enough”

    There is a quiet revolution happening in bathrooms across the country—women over 50 are putting down their blow-dryers, hiding their curling irons, and stepping into the light with hair that is perfectly imperfect. And something beautiful happens when they do. They gain back time. They lose the shoulder tension from holding a dryer for twenty minutes. They stop chasing an unattainable standard of “done” that was invented by product companies, not by women living real lives.

    The truth is this: A wash-and-wear hairstyle doesn’t just save you minutes. It saves you mental energy. Energy you can spend on a morning walk, a phone call with a grandchild, an extra sip of hot coffee, or simply sitting in stillness before the day begins. Your hair will never be perfect—and that is precisely why it is beautiful. The slight wave that goes left instead of right. The silver curl that springs up on humid days. The texture that is unmistakably, unapologetically yours.

    So choose a cut from this list. Book the appointment. Toss the heat tools in a drawer (or better yet, give them away). And wake up tomorrow knowing that your best hair day doesn’t require effort—it requires only the courage to let go. You’ve earned that. Now go enjoy your morning.

  • Flattering Medium Length Hairstyles for Older Women That Prove Age Is Just a Number

    Flattering Medium Length Hairstyles for Older Women That Prove Age Is Just a Number

    There is a common misconception that as women age, their hair options shrink. Many believe you must choose between a severe short crop or letting long, thinning locks drag down your features. Nothing could be further from the truth. The sweet spot—literally and figuratively—lies in the middle.

    Medium length hairstyles are the ultimate workhorse for women over 50, 60, and beyond. Why? Because this length offers the best of both worlds. It is long enough to pull back into a sophisticated twist or low ponytail, yet short enough to hold volume, disguise thinning areas, and soften the jawline. It frames the face without overwhelming it.

    Whether you have naturally curly, pin-straight, or fine, fragile hair, a shoulder-grazing cut can add movement, reduce weight, and shave years off your appearance.

    Below are 9 stunning, low-maintenance ideas designed to celebrate texture, boost confidence, and make morning styling a breeze:


    1. The Classic Layered Lob (Long Bob)

    The lob remains the undisputed champion of mature hair. Hitting somewhere between the chin and the collarbone, this cut uses subtle, long layers to remove bulk while retaining shape.

    • Why it works: The layers create natural lift at the crown, which prevents the dreaded “flat-top” look. For women with fine hair, internal layers make the hair look thicker. For those with thick hair, they remove weight so the style doesn’t look triangular.
    • Styling tip: Blow-dry with a large round brush, turning the ends under for a polished look, or use a flat iron to create a messy, textured bend for everyday ease.

    2. The Textured Shag

    Don’t let the name scare you—the modern shag is sophisticated, not messy. This style features choppy layers, wispy bangs, and plenty of movement.

    • Why it works: As hair naturally loses density with age, blunt cuts can look severe and limp. The shag uses texture to create the illusion of density. The shorter layers on top boost volume, while the longer bottom keeps the length.
    • Styling tip: This is the ultimate “wash and wear” cut. Apply a texturizing spray or sea salt spray to damp hair, scrunch, and let it air dry. The imperfect finish looks intentional and youthful.

    3. The Curly Shoulder-Length Cut

    For women with natural curls or perms, cutting to a medium length relieves the “triangle head” effect (wide at the bottom, flat on top) that happens when curls grow too long.

    • Why it works: Cutting to the shoulders allows curls to spring up and bounce. The weight of the hair pulls the roots slightly, which prevents the curls from getting too tight against the scalp, creating a beautiful oval silhouette.
    • Styling tip: Use a microfiber towel to dry curls and a lightweight leave-in conditioner. Avoid brushing; use fingers to shape the curls. A side part often works better than a center part to frame the face.

    4. The Angled A-Line Bob

    This is a sharper, more dramatic take on the lob. It is cut shorter in the back (at the nape of the neck) and gradually longer in the front (toward the collarbone).

    • Why it works: The angle creates a “lift” effect. The shorter back removes bulk where hair tends to look thin or scraggly, while the longer front elongates the neck and draws the eye down, creating a slimming effect on the face.
    • Styling tip: This cut requires precision. Have your stylist keep the back very tight and clean. Style it smooth with a shine serum to emphasize the architectural line.

    5. The Soft Blowout with Curtain Bangs

    This style is all about glamour without the fuss. It involves a single-length or subtly layered cut with face-framing curtain bangs that part in the middle.

    • Why it works: Curtain bangs are a miracle for aging features. They sweep across the forehead to hide fine lines and crow’s feet, but because they part in the middle, they don’t look childish or heavy. The medium length allows the blowout to hold its shape all day.
    • Styling tip: You don’t need a salon blowout. Use Velcro rollers on the crown and bangs while you do your makeup. When you take them out, you’ll have a soft, voluminous wave that looks expensive.

    6. The Blunt Cut with Soft Ends

    Contrary to popular belief, older women can wear a blunt cut—provided the ends are not razor-sharp. A blunt line with a slight “dusting” of texture removes weight without losing the solid perimeter.

    • Why it works: A blunt perimeter makes the hair look incredibly healthy and dense. If you have good hair density but struggle with frizz, this cut keeps the ends from splitting and looking dry.
    • Styling tip: Keep the length at the collarbone or just below. Use a flat iron to create a very slight bend (not a curl) at the ends. This prevents the “chopped off” look and adds modern softness.

    7. The Sleek Low Ponytail (Using Length)

    Just because you cut your hair to medium length doesn’t mean you lose updo options. A sleek, low ponytail or chignon is incredibly elegant for women over 60.

    • Why it works: Medium length is actually the ideal length for a low ponytail. Long hair creates a heavy, sagging tail; short hair can’t reach. Medium hair sits perfectly at the nape of the neck. Pulling the hair back gives an instant face-lift effect.
    • Styling tip: Use a boar bristle brush to smooth the hair back. To add volume at the crown, gently “pancake” (pull apart) the hair just behind the hairline before securing with a satin scrunchie.

    8. The Side-Swept Deep Part

    This is less of a “cut” and more of a styling technique, but it works best on medium-length hair. By shifting all the hair to one side and using a deep side part, you change the geometry of the face.

    • Why it works: A severe center part can accentuate asymmetry in the face and draw attention to a widening hairline. A deep side part adds height to the crown, covers sparser areas at the temples, and casts a flattering shadow across one side of the face.
    • Styling tip: Ask your stylist to cut the hair with a “weight line” on one side so it naturally falls that way. Use a light-hold hairspray to keep the side-swept volume in place during windy days.

    9. The Gentle Wavy Bob (The “Roman Holiday”)

    Inspired by classic Hollywood, this style uses a 1-inch curling iron to create soft, uniform waves that sit just off the shoulders.

    • Why it works: Very tight curls can look aging, and very straight hair can look severe. The “in-between” wave—loose, soft, and S-shaped—adds texture and romance. It softens every hard line on the face, from the jaw to the brow.
    • Styling tip: Curl one-inch sections away from the face. Let the curls cool completely, then run your fingers (not a brush) through them to break them into waves. Finish with a flexible hairspray so the hair moves naturally.

    What to Consider Before Choosing Your Medium Length Cut

    Before you book that salon appointment, take five minutes to evaluate these three factors. The right cut isn’t just about trends—it’s about your lifestyle and biology.

    1. Your Hair Texture & Density

    • Fine hair: Avoid too many layers, which can make hair look wispy. Opt for a blunt lob or soft blowout with curtain bangs.
    • Thick hair: Embrace internal layers or a shag to remove weight. An A-line bob works beautifully.
    • Curly hair: Shoulder-length is your best friend. Too short and curls shrink too much; too long and they pull flat.

    2. Your Face Shape

    • Round face: An angled A-line bob or deep side part elongates the face.
    • Oval face: Almost anything works, but a classic layered lob is particularly harmonious.
    • Square face: Soft waves and curtain bangs soften a strong jawline.
    • Heart-shaped face: Volume at the chin (like a curly shoulder-length cut) balances a wider forehead.

    3. Your Daily Commitment Level

    • Low maintenance (5 minutes): Textured shag, curly shoulder-length cut, or side-swept deep part. Air-dry friendly.
    • Medium maintenance (15 minutes): Classic layered lob, gentle wavy bob. Requires a quick blow-dry or curling iron.
    • Higher maintenance (20+ minutes): Sleek low ponytail (needs smoothing), blunt cut with soft ends (needs precision styling).

    How to Communicate With Your Stylist (A Script)

    The biggest mistake older women make is saying “just give me something easy.” Stylists need specifics. Use this script:

    “I want a medium length cut that hits between my chin and collarbone. Please keep weight at the crown for volume, and soften the perimeter so it doesn’t look blunt or severe. I do [not] want bangs. I style my hair [air-dry / blow-dry / curly method] most days.”

    Three key phrases to use:

    • “Remove bulk but keep length” (for thick hair)
    • “Add internal layers for movement” (for fine hair)
    • “No harsh lines around my face” (for a softer look)

    Bring a photo. Save one of the nine images you generate using the prompts above and show it directly to your stylist. A picture is worth a thousand confusing descriptions.


    Product Recommendations for Medium Length Mature Hair

    As hair changes with age (thinner strands, more dryness, less natural oil), your products should change too. Here is a simple three-step system.

    Product TypeWhat to Look ForDrugstore OptionProfessional Option
    ShampooSulfate-free, volumizingL’Oréal EverPure VolumeAveda Pure Abundance
    ConditionerLightweight, apply only to endsPantene Daily Moisture RenewalOlaplex No. 5 Bond Maintenance
    Leave-in TreatmentHeat protectant + hydrationGarnier Fructis Sleek & ShineMoroccanoil Treatment Light
    Styling ProductFlexible hold, not crunchyNot Your Mother’s All Eyes On MeOribe Dry Texturizing Spray

    One tool worth investing in: A medium-sized round boar bristle brush (2.5 inches wide). It grips fine hair better than plastic and distributes natural oils from root to tip.


    Common Mistakes Older Women Make With Medium Hair (And How to Fix Them)

    MistakeWhy It HappensThe Fix
    Letting the ends get see-throughInfrequent trimsTrim every 8-10 weeks, no exceptions
    Using heavy oils or serumsTrying to tame frizzSwitch to a lightweight spray; heavy oils flatten medium hair
    Sticking to the same part for decadesHabitTry a deep side part once a week—it instantly changes your look
    Blow-drying upward onlyChasing volumeBlow-dry roots upward, but ends downward to avoid a mushroom shape
    Coloring too darkBelieving dark looks youngerGo one or two shades lighter than your natural color; softer shades are more forgiving on aging skin

    How Often to Maintain Your Medium Length Cut

    Unlike very short hair (which needs trims every 4 weeks) or very long hair (which can go 12 weeks), medium length sits in the Goldilocks zone.

    • Trim schedule: Every 8 to 10 weeks. Set a calendar reminder.
    • Signs you’re overdue: Ends look thin or “whispy,” the style has lost its shape, or you’re tying it back every day.
    • Color touch-ups: Every 6 to 8 weeks if covering grey; every 10 to 12 weeks if blending with highlights.

    Pro tip: Book your next appointment before you leave the salon. Medium cuts look amazing for 8 weeks, then degrade quickly. Don’t let yourself slide.


    Conclusion

    Your hair is not a relic of your youth—it is a living accessory that should make you feel seen, confident, and beautiful right now. The nine styles above prove that medium length is not a compromise or a “transition” cut. It is a destination.

    Whether you choose the effortless texture of a shag, the polished architecture of an A-line bob, or the romantic softness of gentle waves, the goal is the same: less time fighting your hair and more time living your life. You have earned the right to simplicity without sacrificing style.

    So put down the fear of change. Show your stylist a photo. Buy the lightweight texturizing spray. And walk out of that salon with your head held high—because a great cut at the right length doesn’t just frame your face. It frames your entire attitude.

    Now go book that appointment. Your best hair decade is still ahead of you.

  • The Short Layered Bob with Bangs: 11 Fresh Ways to Rock the Ultimate Chic Cut

    The Short Layered Bob with Bangs: 11 Fresh Ways to Rock the Ultimate Chic Cut

    The short layered bob with bangs is more than just a haircut—it’s a statement of confidence, versatility, and modern elegance. This timeless style has evolved from a classic pageboy into a dynamic, textured look that suits nearly every face shape and hair type. By combining the airy movement of layers with the framing power of bangs, you get a cut that feels both edgy and soft, low-maintenance yet high-impact.

    Whether you’re considering the chop or looking for fresh ways to style your current bob, these 11 ideas will inspire you to make the most of this iconic hairstyle.


    1. The Textured Pixie-Bob Hybrid


    Push the boundaries of the classic bob by adding choppy, disconnected layers throughout the crown and nape. Pair this with piece-y, side-swept bangs that graze the brows. The result is a shaggy, undone look that works beautifully for fine hair (adds volume) and thick hair (removes bulk). Style with a dab of texture spray and finger-tousle for effortless, rock-and-roll energy.

    2. The Sleek Asymmetrical Bob with Blunt Bangs


    For a sharp, editorial vibe, keep the layers minimal and the lines precise. Cut one side slightly longer than the other, then add dense, blunt bangs that stop right at the eyebrows. The layers should be concentrated at the ends to create a soft inward curve. This style shines on straight, glossy hair—use a flat iron and a shine serum for a mirror-like finish.

    3. The Curly or Wavy Layered Bob with Curtain Bangs


    Embrace natural texture by asking for “dry-cut” layers that follow your curl pattern. The layers should be staggered to prevent triangle-head, while the bangs are cut as soft, face-framing curtains that part in the middle. When styled, the curls or waves bounce around chin length, and the curtain bangs blend seamlessly into the sides. Diffuse with a curl cream for a romantic, bohemian look.

    4. The Messy, Bed-Head Bob with Micro Bangs


    Short, choppy layers combined with ultra-short bangs (1–2 inches above the brows) create a playful, rebellious feel. The key is keeping the perimeter slightly uneven and the layers heavily texturized. To style, spray sea salt spray on damp hair, scrunch, and air-dry. This low-effort, high-personality cut is perfect for those who want to wake up and go.

    5. The Volume-Boosted Bob for Fine Hair


    If you have thin or fine hair, use short, stacked layers at the back crown to create lift and body. The bangs should be wispy, eyebrow-skimming, and lightly feathered. Avoid heavy, blunt cuts that weigh hair down. Blow-dry with a round brush, lifting the roots upward, and finish with a volumizing powder at the crown. You’ll instantly gain the appearance of twice the thickness.

    6. The French-Girl Bob with Long, Effortless Bangs


    Channel Parisian chic with a one-length bob that hits between the ear and chin, then add soft, overgrown layers that are barely there. The bangs are longer (just below the brows) and side-swept, often falling into the eyes. The secret is imperfection: let the ends flick out naturally, and skip heavy products. A bit of dry shampoo at the roots gives that iconic undone polish.

    7. The Angled Bob with Feathered Bangs


    Create drama by cutting the bob shorter in the back (stacked) and longer in the front (graduated angle). The layers are feathery, light, and blended to avoid harsh lines. Bangs are also feathered—thinner at the center, thicker at the temples. This combination elongates the neck and softens a square or round face. Blow-dry using a vent brush for a smooth, aerodynamic silhouette.

    8. The Grown-Out Bob with Bottleneck Bangs


    Ideal for transitioning from a longer style, keep the bob’s layers longer (collarbone-grazing in front, shorter in back) and add bottleneck bangs—wider at the cheekbones and narrow at the center part. These bangs act like a frame that opens up the face. The layers add movement without sacrificing length. Style with a large-barrel curling iron for soft bends, leaving the ends straight for a modern contrast.

    9. The Choppy, Razor-Cut Bob with Baby Bangs


    Ask your stylist to use a razor instead of shears to create extreme, jagged layers that look almost shredded. The bangs are cut into “baby” length (half an inch to an inch above the brows) with a jagged edge. This avant-garde style works best on straight, medium-to-thick hair. Use a matte paste to separate the tips for a punk-meets-minimalist aesthetic.

    10. The Layered Bob with Side-Swept, Deep-Volume Bangs


    For a red-carpet-worthy look, keep the layers long and smooth, concentrated around the mid-lengths and ends. The bangs are swept dramatically to one side, with the longest point reaching the cheekbone. The key is volume at the root: blow-dry the bangs with a round brush, directing them across the forehead, and set with a large roller. This style frames the eyes beautifully and works for all ages.

    11. The Low-Maintenance Bob with Wispy, See-Through Bangs


    Perfect for the busy minimalist, this cut uses very light, airy layers that don’t require daily styling. The bangs are “see-through”—sparse, with spaces between the hairs, stopping just above the lashes. The overall shape is soft and rounded. Let it air-dry with a leave-in conditioner, then tuck one side behind an ear. It’s the ultimate “I didn’t try, but I look great” cut.

    What to Ask Your Stylist Before Getting the Cut

    To ensure you leave the salon with a short layered bob with bangs that truly works for you, communication is key. Bring reference photos (use the prompts above to generate them) and discuss these four points:

    1. Your face shape – Ask: “Will this length and bang style flatter my jawline and forehead?” A skilled stylist may adjust the layering or bang angle to suit oval, round, square, heart, or long faces.
    2. Your hair density and texture – Fine hair needs lighter, wispier layers and bangs to avoid looking sparse. Thick or coarse hair benefits from internal layering (removing bulk from inside) so the bob doesn’t become a pyramid.
    3. Your daily commitment – Be honest: Do you have 5 minutes or 20? A messy, textured bob dries quickly with minimal effort, while a sleek, blunt version requires heat styling and product.
    4. Bang maintenance – Ask your stylist to show you exactly how to trim your bangs at home between appointments (usually every 2–3 weeks). Also discuss whether your bangs will be cut dry or wet – curly hair should always be cut dry.

    Pro tip: Schedule your cut when your hair is in its natural state (washed and air-dried, no product). This gives the stylist the truest canvas.


    Styling Tools and Products You’ll Need

    Having the right tools makes the difference between a “good hair day” and a great one. Here is a simple starter kit for your short layered bob with bangs:

    Essential Tools

    • Small round brush (1–1.5 inches) – Perfect for directing bangs and adding subtle volume at the crown.
    • Flat iron (1 inch wide) – Ideal for smoothing stubborn layers or creating a sleek finish. Look for adjustable heat settings.
    • Wide-tooth comb – Use this on damp hair to detangle without breaking up your natural wave or curl pattern.
    • Microfiber towel or cotton t-shirt – Reduces frizz and speeds up air-drying for textured bobs.

    Recommended Products by Style

    If you want…Use these products
    Messy / texturedSea salt spray, texture powder, matte paste
    Sleek / polishedHeat protectant, shine serum, smoothing cream
    VoluminousVolumizing mousse, root lift spray, dry shampoo
    Curly / wavyLeave-in conditioner, curl cream, diffuser attachment
    Low-maintenanceAir-dry cream, lightweight oil (argan or jojoba)

    A note on bangs specifically: Keep a small bottle of dry shampoo and a mini flat iron near your bathroom mirror. Bangs get oily faster than the rest of your hair – a quick dry shampoo refresh plus a 10-second flat iron pass will save your look between full washes.


    Daily Styling Routine (Under 10 Minutes)

    Follow this simple step-by-step routine for a beautiful short layered bob with bangs, whether you have straight, wavy, or curly hair.

    Step 1 – Start with damp, detangled hair
    After washing (or wetting down), gently comb through with a wide-tooth comb. Apply a pea-sized amount of leave-in conditioner or air-dry cream from mid-lengths to ends, avoiding the roots if you have fine hair.

    Step 2 – Focus on the bangs first
    Blow-dry your bangs using a small round brush. Direct the air downward and roll the brush slightly under for a soft curve. If you have curly hair, diffuse your bangs on low heat without stretching them – let them curl naturally.

    Step 3 – Add volume or texture

    • For volume: Flip your head upside down and blow-dry the roots with a round brush or your fingers. Apply volumizing mousse to damp roots before drying.
    • For waves/curls: Scrunch in a curl cream and either diffuse or air-dry. Do not brush once dry.
    • For straight sleekness: Use a flat iron on small sections (1 inch wide), gliding from roots to ends. Finish with a drop of shine serum.

    Step 4 – Finish and set
    Mist lightly with a flexible hold hairspray (avoid stiff formulas). If you have bangs that tend to separate, twist them gently while damp to encourage them to fall as one piece. For a messy look, shake your head and run texture powder through the ends.

    Step 5 – Between washes
    On day two or three, spray dry shampoo at the roots and bangs. Massage in with fingertips. Re-curl or re-flatten any wonky layers using a flat iron or curling wand – just one or two passes, not a full restyle.


    How to Adapt the Cut for Different Face Shapes

    Not all short layered bobs with bangs are created equal. Use this quick guide to request small adjustments that make a big difference.

    Face ShapeBest Layering StrategyBest Bang StyleWhat to Avoid
    Oval (most versatile)Any – chin-length to croppedAny – blunt, side-swept, curtain, microNothing – you can wear almost everything
    RoundLonger front layers that graze the jawSide-swept or curtain bangs with height at the crownBlunt bangs that cut straight across; short, stacked backs
    SquareSoft, feathered layers to reduce angularityWispy, eyebrow-skimming bangs with rounded edgesHeavy, blunt bangs; harsh straight-across cuts
    HeartVolume at the lower half (chin to shoulders)Side-swept or curtain bangs that taper longer at the templesShort, full bangs that widen the forehead
    Long / OblongShorter, stacked layers at the crown to add widthBlunt, straight-across bangs that shorten the faceLong side-swept bangs that elongate further
    DiamondLayers that add width at the jaw and templesCurtain bangs or soft, parted-in-the-middle stylesVery short micro bangs that emphasize cheekbones

    Remember: These are guidelines, not rules. Your personal style and confidence matter most. Bring a photo of what you love and ask your stylist for their professional opinion.


    Maintenance Schedule: Keeping Your Bob Fresh

    A short layered bob with bangs is low-maintenance in daily styling but requires regular upkeep to avoid looking shaggy or overgrown. Follow this simple timeline.

    TimeframeTask
    Every 2–3 weeksTrim bangs at home or pop into a salon for a “bang trim” (often free or low-cost)
    Every 4–6 weeksFull haircut to maintain the shape and layers. Pushing to 8 weeks will change the silhouette significantly
    Every wash (2–4 days)Use a lightweight shampoo and conditioner. Avoid heavy, oily formulas that weigh down layers
    Once a weekClarifying shampoo to remove product buildup, especially from dry shampoo and texture sprays
    Once a monthDeep conditioning mask (avoid roots if you have fine hair) to keep ends healthy and frizz-free

    Signs you’re overdue for a cut: Your bangs poke your eyes, the back feels heavy or shapeless, or your layers no longer “bounce” when you shake your head.


    Common Mistakes to Avoid

    Even a perfect short layered bob with bangs can go wrong. Steer clear of these five pitfalls.

    1. Cutting bangs too thick – Dense, heavy bangs can overwhelm a short bob, especially on fine hair. Ask for “see-through” or “wispy” bangs first – you can always add more thickness later.
    2. Skipping the nape taper – A blunt cut at the back of the neck can look boxy. A good stylist will taper or soften the nape so the bob curves gently against your skin.
    3. Over-washing – Short hair and bangs get oily faster, but washing daily strips natural oils and causes frizz. Train your hair to every 2–3 days using dry shampoo in between.
    4. Using too much product – Short hair has less surface area. Start with a pea-sized amount of any product (serum, cream, oil) and add more only if needed. Over-product makes layers look greasy and limp.
    5. Cutting your own bangs without guidance – It’s tempting, but one crooked snip can ruin weeks of growth. Watch professional tutorials or, better yet, visit a salon for bang trims. If you must DIY, cut them longer than you think and use proper hair shears (never kitchen scissors).

    Conclusion

    The short layered bob with bangs is far more than a passing trend – it’s a enduring haircut that celebrates texture, frames the face with intention, and adapts to virtually any hair type or personal style. Whether you choose a choppy pixie-bob hybrid, a sleek asymmetrical cut, or a low-maintenance wispy version, the key lies in customization: the right layers for your density, the right bangs for your face shape, and the right routine for your lifestyle.

    Throughout this article, we’ve explored 11 distinct ways to wear this versatile cut, from curly curtain bangs to razor-sharp baby bangs. We’ve also covered what to ask your stylist, which tools and products deliver the best results, and how to maintain your shape week after week. Most importantly, we’ve emphasized that a beautiful, friendly face – of any race or background – is the only true requirement to pull off this look with confidence.

    So go ahead: book that appointment, save your favorite AI-generated reference image, and step into the salon with clarity and excitement. The short layered bob with bangs is waiting to become your most flattering, freeing, and fun haircut yet.

  • Short Hairstyles for Older Women That Bring Modern Sophistication: Ageless & Elegant

    Short Hairstyles for Older Women That Bring Modern Sophistication: Ageless & Elegant


    There’s a common misconception that getting older means having to settle for a single, “safe” haircut—often the short, tightly permed style of decades past. But today, age is no longer a rulebook for your hair. In fact, many women find that their 60s, 70s, and beyond are the perfect time to embrace a short hairstyle that is not only easier to manage but also more chic, confident, and liberating than anything they’ve tried before.

    The right short cut can illuminate your features, add volume where texture has thinned, and frame your face in a way that softens fine lines. Whether you have naturally straight, wavy, or curly hair, the key is choosing a cut that works with your texture and lifestyle.

    Below are 10 well-structured ideas to inspire your next trip to the salon—from wash-and-wear pixies to sophisticated bobs.


    1. The Classic Pixie Cut

    • Why it works: This timeless cut removes bulk and weight, making fine hair look thicker. By keeping the back and sides short while leaving a bit more length on top, it draws the eye upward, creating a lifted, youthful effect.
    • Best for: Straight to slightly wavy hair; oval and heart-shaped faces.
    • Styling tip: Use a dab of texture paste on fingertips to piece out the top layers for a modern, undone feel.

    2. The Textured Crop

    • Why it works: Unlike a uniform short cut, a textured crop uses point-cutting and layering to create movement and volume. The irregular lengths disguise thinning areas and give a soft, effortless silhouette.
    • Best for: Fine or thinning hair; round and square faces (the height on top adds length).
    • Styling tip: Blow-dry forward with your fingers for a messy-chic look, or smooth with a flat brush for a sleeker finish.

    3. The Long Pixie with Side-Swept Bangs

    • Why it works: Keeping a little extra length at the front and sweeping it to the side is incredibly flattering. It covers a higher forehead, softens crow’s feet, and adds asymmetry that breaks up facial roundness.
    • Best for: All face shapes, especially those with prominent foreheads or fine lines around the eyes.
    • Styling tip: Ask your stylist for a “sweeping fringe” that hits just above the brow. A light-hold hairspray on a small round brush will lock the sweep in place.

    4. The Chin-Length Bob with Undercut

    • Why it works: This modern twist on the bob keeps the exterior soft and classic while shaving or closely cropping the hair underneath. The result is less bulk (great for thick hair) and a cooler, lighter feel.
    • Best for: Thick, heavy hair; long or square faces.
    • Styling tip: Keep the top layer smooth and glossy. The undercut stays hidden unless you tuck your hair behind your ears—then it becomes a playful surprise.

    5. The Curly TWA (Tiny Winona Afro)

    • Why it works: For women with naturally tight curls or coils, letting go of length and embracing a TWA (Teeny Weeny Afro) is liberating. It showcases the beauty of your natural texture, requires no heat, and frames the face like a soft halo.
    • Best for: Type 3b to 4c curly hair; all face shapes, particularly round and diamond.
    • Styling tip: Keep curls hydrated with a leave-in conditioner and a light gel. Use a pick to lift the roots for even more volume.

    6. The Sleek Silver Bob (Blunt Cut)

    • Why it works: There is nothing more powerful than a clean, blunt bob on naturally gray or white hair. The sharp line of the cut contrasts beautifully with soft facial features, while the monochromatic color makes the hair look dense and healthy.
    • Best for: Straight, fine to medium hair; square or strong-jawed faces (the soft ends of a blunt bob can actually balance a strong jaw).
    • Styling tip: Use a flat iron on low heat and a shine serum to get a mirror-like finish. The cleaner the line, the more modern the look.

    7. The Wavy Shag (Short Version)

    • Why it works: A short shag is built on layers, texture, and often a fringe. The choppy layers remove weight and add incredible movement, making limp waves look full of life. It’s a “rock and roll” cut that feels energetic at any age.
    • Best for: Wavy or slightly curly hair; oblong or rectangular faces (the width at the sides balances length).
    • Styling tip: Scrunch in a salt spray or mousse while damp and air-dry. The messier the shag, the better it looks.

    8. The Asymmetric Cut

    • Why it works: An asymmetric cut (shorter on one side, longer on the other) is visually dynamic. It draws the eye diagonally across the face, which can minimize the appearance of sagging jowls or a less defined jawline.
    • Best for: Straight or blown-out hair; round and heart-shaped faces.
    • Styling tip: The shorter side should sit above the ear, while the longer side grazes the chin. Use a round brush to tuck the longer side under slightly.

    9. The Voluminous French Bob

    • Why it works: The French bob is a short bob that ends right at the jawline or earlobe, often with a deep side part. Its built-in volume at the roots (via a technique called “over-directing”) creates a lifted crown that counteracts age-related flatness.
    • Best for: Fine to medium hair that lacks volume; oval and heart faces.
    • Styling tip: Blow-dry the roots in the opposite direction of your part, then flip them back. Finish with a velcro roller on the crown for five minutes.

    10. The Low-Maintenance Buzz Cut

    • Why it works: This is the ultimate statement of confidence. A uniform buzz cut (¼ to ½ inch long) removes all concern about styling, color, and thinning. It highlights your bone structure, eyes, and smile—the true markers of beauty. Many women say it feels like a complete reset.
    • Best for: Any hair type or texture; women who value convenience or are undergoing medical treatment; strong bone structure.
    • Styling tip: Keep your scalp moisturized with a non-greasy lotion or SPF. Emphasize earrings and bold lipstick to create beautiful contrast against the short length.

    What to Consider Before Going Short

    Making the leap to a short hairstyle is exciting, but a few practical considerations will ensure you love your new look.

    1. Face Shape

    • Oval: Almost any short cut works—pixies, bobs, crops.
    • Round: Look for height on top (textured crop, French bob) to elongate the face.
    • Square: Soft, layered cuts (wavy shag, long pixie) soften a strong jawline.
    • Heart: Side-swept bangs and chin-length styles balance a narrower chin.
    • Long/Oblong: Styles with volume at the sides (blunt bob, curly TWA) add width.

    2. Hair Texture & Density

    • Fine/thinning hair: Textured crops and classic pixies add volume. Avoid heavy blunt cuts that can look flat.
    • Thick hair: Undercuts, shags, and layered bobs remove bulk while keeping shape.
    • Curly/coily hair: TWAs, short shags, and French bobs work with your natural spring.
    • Straight hair: Sleek bobs and asymmetric cuts show off clean lines beautifully.

    3. Maintenance Level

    • Low maintenance: Buzz cut, curly TWA, textured crop (wash and go).
    • Medium maintenance: Classic pixie, French bob (needs trimming every 4–6 weeks).
    • Higher maintenance: Sleek silver bob, asymmetric cut (requires styling and regular salon visits).

    4. Your Lifestyle

    • Active women who exercise often love wash-and-wear crops.
    • Professional settings suit sleek bobs and classic pixies.
    • Low-energy or health-related needs are perfectly met by a buzz cut or TWA.

    5. The Importance of a Good Stylist
    Not all stylists excel at short haircuts. Look for someone who:

    • Specializes in short, modern styles (check their portfolio).
    • Has experience with your hair type (fine, curly, thick, etc.).
    • Listens to your daily routine and offers honest advice.

    How to Transition from Long to Short Hair

    Cutting off significant length can feel emotional. Here’s how to make the transition smooth and positive.

    Step 1: Try a “Medium” First
    If you’ve had long hair for decades, don’t go straight to a pixie. Try a shoulder-length lob, then a chin-length bob, then shorter. This gradual approach prevents shock.

    Step 2: Bring Visuals
    Use the 10 prompts above to generate images. Show 2–3 favorites to your stylist. Point out specific elements: “I like the volume on top here” or “I love how the bangs sweep here.”

    Step 3: Discuss the “In-Between” Phase
    Short cuts grow out quickly. Ask your stylist: “What will this look like at 4 weeks? 8 weeks?” A good cut has a graceful grow-out.

    Step 4: Prepare for a Different Morning Routine
    Short hair often takes less time, but it may be different. You might trade 20 minutes of blow-drying long hair for 3 minutes of texture paste. Ask your stylist to show you exactly how to style it before you leave the chair.

    Step 5: Embrace the Emotional Shift
    Many women report feeling lighter, freer, and more visible after going short. But if you feel initial regret, give it two weeks. Short hair grows on you—literally and figuratively.


    Common Concerns (And Truths)

    ConcernThe Truth
    “Short hair will make me look older.”The wrong short cut can. But a modern, textured, age-appropriate short cut often looks younger than long, thin, dragged-down hair.
    “I don’t have the face for short hair.”Almost every face shape has a flattering short cut. It’s about proportion, not perfection.
    “I’ll miss being able to pull my hair back.”You can still pin back a pixie or bob. And many women find they no longer want to hide behind a ponytail.
    “My husband/kids/friends won’t like it.”This is your hair. That said, most loved ones adapt quickly—and many end up loving the confident version of you that emerges.
    “Short hair is harder to style.”False for most textures. Short hair dries faster, uses less product, and can look intentional with minimal effort.
    “I have scalp issues or thinning spots.”A skilled stylist can work around these. Very short cuts can actually make thinning less noticeable by removing weight that exposes the scalp.

    Styling Products for Short Hair (By Look)

    For Volume & Lift

    • Powder volumizer (e.g., Schwarzkopf Dust It) – shake into roots.
    • Small round brush + blow-dryer.
    • Velcro rollers on the crown for 5 minutes.

    For Texture & Piece-y Looks

    • Texture paste or clay (matte finish).
    • Sea salt spray on damp hair, then air-dry or scrunch.
    • Finger-combing only—no brush.

    For Sleek & Smooth

    • Shine serum (one drop, rubbed between palms).
    • Flat iron on low heat (use protectant).
    • Boar bristle brush for polishing.

    For Curls & Coils

    • Leave-in conditioner.
    • Light gel or curl cream (avoid heavy butters that weigh short curls down).
    • Pick or wide-tooth comb for shaping.

    For Hold Without Crunch

    • Flexible hold hairspray (hold the can 12 inches away).
    • Light mousse for fine hair.

    How Often to Maintain Each Style

    HairstyleTrim FrequencyNotes
    Classic PixieEvery 4–5 weeksGrows out fast; shape is key
    Textured CropEvery 5–6 weeksMessy texture forgives a little growth
    Long PixieEvery 5–6 weeksFront bangs may need more frequent trims
    Chin Bob with UndercutEvery 6 weeksUndercut needs touch-ups if visible
    Curly TWAEvery 6–8 weeksCurls hide some growth
    Sleek Silver BobEvery 6 weeksBlunt line needs precision
    Wavy ShagEvery 6–8 weeksLayers grow out gracefully
    Asymmetric CutEvery 5 weeksUneven lines become obvious quickly
    French BobEvery 5–6 weeksJawline length is critical
    Buzz CutEvery 2–4 weeksVery fast grow-out; home trims possible

    Conclusion

    Short hair for older women is not a surrender—it is a statement. It says you value your time, you know your face, and you refuse to be weighed down by outdated rules. From the wash-and-go ease of a textured crop to the bold confidence of a silver buzz cut, there is a short style for every woman, every texture, and every lifestyle.

    The ten ideas in this article are starting points, not prescriptions. The best cut is the one that makes you look in the mirror and smile—not because you look younger, but because you look like you. Bright-eyed, capable, and beautifully friendly.

  • Medium-Length Hairstyles for Thin Hair That Create Volume and Movement

    Medium-Length Hairstyles for Thin Hair That Create Volume and Movement

    If you have fine or thin hair, you’ve likely heard the myth that cutting it short is the only way to create fullness. But the truth is, medium-length hairstyles—typically from the collarbone to just above the shoulders—offer the perfect sweet spot. This length is long enough to pull back into a ponytail or twist into an updo, yet short enough to prevent the weight from pulling hair flat against your scalp.

    The right medium-length cut adds instant volume, texture, and the illusion of density. With strategic layering, blunt ends, and subtle styling tricks, thin hair can look remarkably thick, bouncy, and full of life.

    Below are 17 carefully chosen styles designed to maximize body and movement for fine hair:


    1. The Blunt Lob (Long Bob)

    A blunt, one-length cut that ends between your chin and collarbone removes see-through ends and creates a solid, weighty line. Ask your stylist to avoid internal layers, which can make thin hair look sparser.

    2. Textured Shoulder-Length Cut with Point Cutting

    Instead of traditional layers, point-cutting adds soft, choppy texture that breaks up the ends without sacrificing density. This technique creates the appearance of ruching—fabric gathered to look fuller—especially when styled with a light texturizing spray.

    3. The Inverted Bob

    Shorter in the back and gradually longer toward the front, the inverted bob stacks weight at the nape, instantly lifting the crown. The angled front pieces also frame the face, drawing attention away from thinness at the roots.

    4. Soft Beach Waves (No Heat Damage)

    Loose, S-shaped waves create pockets of air between strands, making hair look twice as thick. Use a large-barrel curling wand or heatless methods (like braiding damp hair overnight). Avoid tight curls, which can expose gaps.

    5. The Shag Cut (Modern Version)

    A modern shag with wispy, disconnected layers works beautifully on thin hair when kept above the shoulders. The key is keeping the ends “whisper-thin”—feathery tips that move together, creating the illusion of more hair.

    6. Curtain Bangs with a Collarbone Cut

    Curtain bangs that part in the middle and sweep to the sides add width at the temples. Paired with a blunt collarbone-length cut, they redirect volume away from a flat crown and toward the face.

    7. Asymmetrical Lob

    An uneven hemline—slightly longer on one side—creates visual interest that distracts from low density. The asymmetry tricks the eye into seeing movement and body where there might otherwise be limp strands.

    8. The “Italian” Cut (Round Layers)

    This technique uses rounded, internal layers that are barely visible from the outside. The layers are stacked to push hair upward from the roots. Ask your stylist for a “round layering” or “volume layering” cut.

    9. Deep Side Part with Voluminous Roots

    A severe side part (rather than a center part) instantly lifts the crown. Blow-dry the roots in the opposite direction of the part, then flip them over. This simple change can double perceived volume on fine hair.

    10. French Twist Ponytail (Styled, Not Pulled Back)

    Gather your medium-length hair into a low, loose ponytail, then twist it upward and pin. This style creates a rolled effect that adds bulk. Leave a few face-framing pieces loose to soften the look.

    11. The “Bixie” (Bob + Pixie Hybrid)

    Longer than a pixie but shorter than a traditional bob, the bixie hits just below the ears. The cropped length removes weight entirely, allowing thin hair to stand up at the roots naturally. Ideal for very fine hair types.

    12. Knotted Half-Up Style

    Take two small sections from the front, twist them back, and tie them into a loose knot at the crown. This pulls hair up and away from the scalp, creating immediate height. The rest of the hair stays down, preserving length.

    13. Layered Lob with Face-Framing Highlights

    Strategic highlights—especially babylights around the face—add contrast and depth, making each strand appear thicker. When light catches the different layers, the hair looks multi-dimensional and fuller.

    14. Voluminous Blowout with a Round Brush

    This is a styling technique as much as a cut. Using a medium round brush, lift sections at 90 degrees and dry from roots to ends. The result is a bouncy, salon-style blowout that can make thin hair look three times as dense.

    15. Tucked-Behind-the-Ears Look (Sleek, Not Slicked)

    This no-cut “style” works because it creates clean lines. Lightly tuck one side behind your ear while leaving the other side loose. The asymmetry adds shape, and the ear exposure emphasizes the jawline, drawing attention from thin ends.

    16. Cropped Mullet (Soft, Not Extreme)

    A soft, modern mullet with shorter layers on top and longer, wispy ends in the back adds unexpected volume at the crown. The key is keeping the transition gentle—not dramatic—so it adds body without looking severe.

    17. Wispy Ends with Dry Texture Spray

    Any of the above cuts can be finished with a dry texture spray or volumizing powder at the roots. Then, flip your head upside down and lightly tease the ends. The wispy, separated finish creates the illusion of dozens of fine strands moving together—like a feather boa, not a frayed rope.

    What to Avoid When Styling Thin Hair at Medium Length

    Even with the perfect cut, certain habits and products can undo all your volume. Avoid these common mistakes:

    • Heavy oils and butters – Coconut oil, shea butter, and argan oil weigh thin hair down, making it look flat and greasy within hours.
    • Over-layering – Too many layers remove the weight needed to keep ends looking full. Stick to blunt or subtle point-cut ends.
    • Center parts – A middle part exposes the scalp and accentuates thinness. A deep side part or zigzag part is always more flattering.
    • Long hair past the collarbone – Once hair grows beyond medium length, gravity pulls it flat. Stick to shoulder-length or shorter for maximum volume.
    • Skipping trims – Thin hair shows split ends and see-through tips faster than thick hair. Trim every 6–8 weeks without exception.
    • Washing too often (or too little) – Daily washing strips natural oils, making hair limp. But waiting 5+ days allows oil to clump strands together, making thinness more visible. Every other day is ideal.

    The Best Products for Medium-Length Thin Hair

    Use lightweight, volume-building products specifically formulated for fine hair. Avoid anything labeled “smoothing,” “nourishing,” or “repairing” unless it specifies “for fine hair.”

    Product TypeWhat to Look ForExample Ingredient
    ShampooVolumizing, clarifyingRice protein, keratin
    ConditionerApply only to endsHydrolyzed wheat protein
    MousseRoot-lifting, alcohol-freeVP/VA copolymer
    Dry shampooTinted or translucentRice starch, oat flour
    Texture sprayLightweight, no stickinessSilica, magnesium carbonate
    Heat protectantSpray, not creamPanthenol

    Application order for maximum volume:
    Shampoo roots only → Condition ends only → Mousse on damp roots → Blow-dry upside down → Texture spray on dry ends → Optional: dry shampoo at roots for extra lift


    How to Sleep on Thin Hair Without Ruining Volume

    Overnight friction flattens thin hair and creates tangles. Use these techniques:

    1. Pineapple method – Gather hair into a very loose, high ponytail right at the top of your head using a silk scrunchie. This preserves lift.
    2. Silk or satin pillowcase – Reduces friction and prevents the “bed head” flattening that cotton causes.
    3. Dry texture spray before bed – Lightly mist ends before sleeping. It absorbs oil overnight and refreshes volume by morning.
    4. Avoid braids or tight buns – These create crease marks that make thin hair look kinked, not voluminous.

    Quick Fixes for Second-Day Thin Hair

    Day-old thin hair often looks flatter than day one. Try these 60-second fixes:

    • Flip and shake – Bend forward, spray dry shampoo at the roots, massage with fingertips, then flip back and shake.
    • Tease gently – Backcomb just the crown section with a fine-tooth comb. Smooth the top layer over it.
    • Change your part – Switch from a left side part to a right side part (or vice versa). The roots instantly stand up.
    • Dampen the ends – Lightly mist ends with water and scrunch. This reactivates texture spray without washing.
    • Add a tiny ponytail – Gather the top crown section into a mini ponytail (hidden underneath top hair). This creates an internal “pillow” of volume.

    When to See a Professional (And What to Ask For)

    Not all stylists specialize in thin hair. Book a consultation first and ask these exact questions:

    • “Do you have experience cutting fine or thin hair?”
    • “Will you use blunt ends or point-cutting?”
    • “Can you show me a photo of a past client with thin hair you’ve cut?”
    • “Do you recommend a lob, bixie, or shag for my face shape?”

    Red flags to walk away:
    A stylist who immediately suggests “lots of layers,” reaches for thinning shears, or tells you to grow your hair longer to hide thinness.


    Conclusion

    Thin hair is not a limitation—it’s a different texture with its own strengths. It dries faster, holds a curl more easily than coarse hair, and can look effortlessly elegant when cut and styled correctly. The key is choosing a medium length that removes weight without sacrificing body, and using techniques that create lift at the roots rather than pulling hair down.

    From the blunt lob and inverted bob to the modern shag and bixie, the 17 styles above prove that thin hair can look full, bouncy, and dynamic. Pair your chosen cut with lightweight volumizing products, a silk pillowcase, and a 6–8 week trim schedule, and you’ll never feel limited by your hair texture again.

    Remember: volume isn’t about how much hair you have. It’s about how well you work with what you have. And with the right medium-length cut, thin hair doesn’t just look thicker—it looks intentional, stylish, and completely confident.

  • Long Curly Haircuts with Layers for Women

    Long Curly Haircuts with Layers for Women

    Curly hair is a crown of personality, volume, and movement—but without the right cut, those beautiful spirals can turn into a heavy, shapeless triangle. Enter the layered long curly haircut. Layers are a curly girl’s secret weapon: they remove excess weight, allowing your curls to bounce higher, breathe easier, and fall into a more defined, flattering shape. Whether you have loose beachy waves or tight corkscrew curls, the right layering technique can transform your length from drab to dynamic.

    Below, you’ll find 22 distinct ideas to bring to your stylist, ranging from subtle face-framing to dramatic shags, each designed to celebrate your natural texture:


    Classic & Timeless Layers

    1. The Long Bouncy Layered Cut


    Uniform layers throughout the length that start around the chin. Ideal for thick hair, this cut removes bulk while keeping a traditional, rounded curly silhouette.

    2. Invisible Layers


    Ultra-subtle internal layering that you can’t see but can definitely feel. It reduces weight at the ends without changing the outer shape—perfect for fine curls that need volume without losing density.

    3. The Curly U-Shape Cut


    Layers are cut so the back falls into a soft “U” rather than a straight line. This creates a gentle, romantic cascade of curls and works beautifully on waist-length hair.

    4. Long Steep Layers


    Layers begin low (around the shoulder blades) and are cut at sharp angles. This keeps maximum length while adding movement and preventing the dreaded “pyramid head.”

    Face-Framing & Curtain Layers

    5. Curtain Bangs with Long Layers


    Face-framing pieces that part in the middle, blending seamlessly into longer layers. They soften the face and work for all curl types, from wavy to coily.

    6. The Disconnected Face Frame


    Shorter, piece-y layers right around the cheekbones that “disconnect” from the rest of the length. It adds an edgy, modern contrast to otherwise uniform curls.

    7. Tear-Drop Layers


    The shortest layers sit at the crown and around the temples, tapering down like a teardrop around the face. Excellent for adding height and drawing attention to the eyes.

    8. Side-Swept Layered Fringe


    Long, deep side-swept bangs cut into the main layer structure. This breaks up a round face shape and adds instant drama.

    Voluminous & Big-Curly Layers

    9. The Round Layered Cut


    Layers are stacked internally to create a globe-like, 360-degree volume. Best on medium-to-tight curls (type 3a to 3c) that can support the shape.

    10. Double-Layered Curls


    Two distinct lengths: a shorter under-layer and a longer over-layer. This gives a peek-a-boo effect, massive body, and a controlled shape that resists frizz.

    11. The Curly Wolf Cut


    A shag-meets-layer hybrid with heavy texture on top and wispy, thinned-out ends. It’s wild, youthful, and excellent for creating a “messy volume” look.

    12. Step-Cut Layers


    Distinct “steps” or shelves of curls, popular in Latin and Mediterranean curly styling. Each step is blunt-cut for definition, resulting in a bold, sculpted look.

    Low-Maintenance & Wash-and-Go Layers

    13. The Beveled Layer Cut


    The ends of each layer are slightly beveled (rounded under) instead of point-cut. This encourages curls to clump and spiral naturally with zero styling effort.

    14. Dry-Cut Layers


    Not a style per se, but a technique: layers cut curl-by-curl when dry. This ensures every ringlet lands exactly where it should, making morning refresh a breeze.

    15. The One-Length-With-Texture Cut


    Only the last 2–3 inches of the hair are layered. You keep the weight of long hair, but the ends are light enough to flip and move freely.

    16. Vacation Layers


    Extra-long, widely spaced layers designed to look good even after swimming or sleeping on damp hair. Ask for “beach layers” – they start at collarbone level and are deeply point-cut.

    Modern & Trend-Driven Layered Curls

    17. The Curly Butterfly Cut


    Inspired by the Korean “butterfly” technique: short, airy layers on top that lift like wings, while longer layers preserve length. Amazing for fine curly hair.

    18. Asymmetric Long Layers


    One side cut slightly shorter and layered more heavily than the other. It’s a subtle but striking way to add interest without committing to a full chop.

    19. Curly Mullet (Modern Version)


    Short, stacked layers on top and at the crown, with long, wispy layers in the back. When done on loose curls, it reads as edgy rocker-chic, not retro.

    20. Spiral Tip-Layered Cut


    Each individual curl’s tip is lightly dusted and layered at a diagonal. This takes hours to do but results in perfectly spiraling ends that never look blunt.

    Protective & Transitioning Layers

    21. The Hydro-Layered Cut


    Layers are cut while hair is soaking wet and loaded with conditioner. This prevents shrinkage surprises and is ideal for transitioning from relaxed to natural curls.

    22. Inward Long Layers (for shrinkage management)


    The shortest layers are on the underside of the hair, near the nape. This creates an invisible lift that pushes curls outward and upward, combating shrinkage while keeping length visible.

    Before You Go to the Salon: Essential Prep

    A great layered curly cut starts long before the scissors touch your hair. Use this checklist to ensure you leave the chair happy.

    1. Find a curl specialist. Not all stylists are trained in dry or curly cutting. Look for certifications like DevaCut, Rezo Cut, or Ouidad, or read reviews from other curly clients.

    2. Come with styled, dry curls. For most curly layering techniques (especially dry cuts), your stylist needs to see your natural pattern. Avoid pulling hair back or using heavy products that change your curl shape.

    3. Bring reference photos – including the prompts above. Show your stylist 2–3 of the 22 ideas above. Point to what you love (e.g., “the face-framing from #6”) and what you don’t want.

    4. Learn the key words. Say “volume,” “weight removal,” “bounce,” or “shrinkage management” instead of just “layers.” Avoid “thin out” – that often means texturizing shears that create frizz.

    5. Ask for a consultation before the wash. A good stylist will touch your dry curls, discuss your at-home routine, and show you where the layers will fall before cutting.


    Maintenance & Styling Tips for Layered Long Curls

    Layers need love to look their best. Follow these tips between salon visits.

    1. Refresh with water, not just product. Mist your curls lightly with a spray bottle, then scrunch. This reactivates old product and resets layer separation without buildup.

    2. Dry with a diffuser upside down. This lifts the roots and allows each layer to curl independently. Use low heat and medium speed to avoid frizz.

    3. Trim every 8–12 weeks. Layered curls lose shape faster than one-length cuts. A “dusting” (micro-trim of just the ends) preserves length while keeping layers defined.

    4. Sleep on silk or satin. A silk pillowcase or bonnet prevents friction that flattens top layers and creates frizz at the shorter, more fragile layered pieces.

    5. Avoid heavy butters and oils on the top layers. These weigh down the shortest, most visible layers. Apply lightweight products (mousse, foam, or spray leave-in) from mid-lengths to ends.

    6. Scrunch out the crunch. If you use gel, wait until hair is 100% dry, then gently scrunch upward to break the cast. This reveals soft, bouncy layers – not stiff ones.

    7. Pineapple at night. Gather all curls into a loose, high ponytail on top of your head. This protects the shape of long layers and prevents tangling at the nape.


    Which Layered Cut Is Right for You? (Quick Decision Guide)

    Use this simple flowchart in prose form to narrow down your choice.

    • If your hair is very thick and heavy: Choose #1 (Long Bouncy Layers), #10 (Double-Layered Curls), or #12 (Step-Cut Layers) to remove bulk.
    • If your hair is fine or thin: Choose #2 (Invisible Layers), #13 (Beveled Cut), or #17 (Butterfly Cut) to add volume without losing density.
    • If you want to keep maximum length: Choose #3 (U-Shape), #4 (Long Steep Layers), or #15 (One-Length-with-Texture).
    • If you have a round or heart-shaped face: Choose #5 (Curtain Bangs), #7 (Tear-Drop Layers), or #8 (Side-Swept Fringe).
    • If you want the lowest maintenance possible: Choose #14 (Dry-Cut Layers), #16 (Vacation Layers), or #21 (Hydro-Layered Cut).
    • If you want something trendy and bold: Choose #11 (Curly Wolf Cut), #18 (Asymmetric Layers), or #19 (Modern Curly Mullet).

    Common Mistakes to Avoid with Long Layered Curls

    Even with a perfect cut, these errors can ruin your results.

    MistakeWhy It HurtsBetter Alternative
    Brushing dry curlsBreaks up layer definition, creates frizzDetangle only when wet with conditioner and a wide-tooth comb
    Layering too short on topCreates a “shelf” or gap between layersAsk for graduated, blended layers – not disconnected unless intentional (#6)
    Using a regular towelRoughs up the cuticle, frizzes layered endsMicrofiber towel or soft cotton t-shirt (plopping method)
    Skipping trims for 6+ monthsLayers grow out uneven, shape becomes triangularSchedule dusting every 2–3 months
    Applying product from rootsFlattens crown layers and builds greaseApply from mid-lengths down, then scrunch upward
    Blow-drying without a diffuserBlows layers apart into undefined, stringy piecesAlways use a diffuser on low speed

    How to Communicate with Your Stylist (Script Included)

    Don’t leave it to chance. Use this script or adapt it to your needs.

    “I want to keep my length overall, but I need layers to remove weight and add bounce. Please show me where the shortest layer will fall before you cut. I do not want a blunt cut or thinning shears. I want my curls to spiral together, not separate into individual strings. Can we start with a dry cut so you see my natural pattern?”

    Additional phrases to use:

    • “Round shape, not flat.”
    • “Point-cut the ends, please – no blunt lines.”
    • “Keep my crown layers lighter, not shorter.”
    • “I want my curls to clump, not frizz.”

    Phrases to avoid:

    • “Just take off the dead ends” (you’ll get no layers)
    • “Make it thinner” (may result in texturizing shears)
    • “I want it like the picture” (without discussing your different curl type)

    Product Recommendations for Layered Long Curls

    These product types work especially well with layered cuts because they enhance separation and bounce.

    Product CategoryWhy It Helps Layered CurlsExample Ingredients/Types
    Lightweight leave-in conditionerDefines each layer without weighing downSpray or milk formulas
    Curl foam or mousseLifts roots and supports shorter top layersVolumizing foams
    Flexible hold gelCreates a cast that, when scrunched, reveals springy layersFlaxseed or aloe-based gels
    Curl refresher sprayResets layer separation between washesWater-based with a little emollient
    Anti-humidity sealantPrevents frizz from attacking individual layersSilicone-free oil or serum (applied sparingly to ends)

    What to avoid with layered curls: Heavy coconut oil, shea butter-based creams on top layers, waxes, and anything labeled “ultra hold” unless you plan to diffuse immediately.


    Conclusion

    Long curly hair is a gift, but layers are what truly set it free. Without them, even the most beautiful spirals can feel heavy, flat at the crown, and shapeless at the bottom. With the right layering technique – whether that’s a classic bouncy cut, a trendy wolf cut, or a protective hydro-layer – your curls will gain movement, volume, and a silhouette that frames your face instead of hiding it.

    The 22 ideas above give you a roadmap, but the real magic happens when you bring your unique curl pattern to a skilled stylist and communicate clearly. Remember: the best layered cut is one that works with your natural texture, your daily routine, and your personal style. Don’t chase a look that requires 45 minutes of heat styling. Instead, choose a cut that makes your curls look their best on a simple wash-and-go Tuesday morning.

  • Bob Haircuts for Round Faces That Create Instant Angles

    Bob Haircuts for Round Faces That Create Instant Angles

    Finding the perfect haircut when you have a round face isn’t about hiding your shape—it’s about celebrating it with strategic structure. Characterized by soft curves, full cheeks, and a width that’s roughly equal to the length, a round face benefits immensely from the right bob. Why the bob? Because its inherent versatility allows you to create vertical lines, expose the neck, and add sharp, slimming angles where you want them most. The golden rule for round faces is length and layering: you want cuts that elongate, de-emphasize width, and draw the eye downward or diagonally.

    Below are 17 expertly crafted bob ideas, ranging from subtle tweaks to dramatic transformations, all designed to make your round face look longer, leaner, and utterly chic.


    1. The Classic Long Bob (Lob)

    Hitting just above the collarbone, the lob is the safest and most effective choice. Its extended length pulls the face down visually, counteracting roundness. Keep the ends blunt for weight and a sleek, elongating line.


    2. The Asymmetrical Bob

    Sharp angles are your best friend. An asymmetrical bob (shorter in back, longer in front, with one side slightly longer than the other) breaks the face’s natural symmetry and creates a diagonal tension that instantly slims.


    3. The Jaw-Length Blunt Bob

    Precision is key. A blunt bob that ends exactly at the jawline works like a contour line. Ensure it’s cut below the chin, not at the fullest part of the cheek, to frame the jaw without emphasizing width.


    4. The Textured Shag Bob

    Add choppy, piece-y layers throughout a chin-length bob. The texture disrupts the soft circular outline of a round face, adding edgy, vertical movement that tricks the eye into seeing more length.


    5. The Deep Side-Parted Bob

    A deep, dramatic side part (instead of a center part) creates an immediate diagonal line across your forehead, shifting volume to one side and elongating the face. Pair with any bob length.


    6. The Angled Bob (A-Line)

    Shorter in the back and gradually longer in the front, the A-line bob creates a steep, slanted line that directs the eye downward. The sharper the angle, the more elongation you achieve.


    7. The Stacked Bob

    Stacked layers in the back add volume at the crown, lifting the hair upward. This vertical lift makes the face appear longer and more oval. Keep the front pieces longer to frame the cheeks.


    8. The Curly Bob with Height

    For natural curls, avoid width at the sides. Instead, ask for a bob that is shorter at the crown to create volume on top, with the length falling just below the chin. This draws the eye up and down, not side to side.


    9. The Wavy Lob with Face-Framing Layers

    Soft, face-framing layers that start at the cheekbones and angle downward create diagonal lines across the widest part of a round face. Waves add movement without adding width.


    10. The Inverted Bob

    Similar to the A-line but more dramatic, the inverted bob features extreme stacking in the back and sharp, forward-angled front pieces. The steep incline visually stretches the face.


    11. The Undercut Bob

    Removing bulk from the nape of the neck (an undercut) reduces overall volume at the sides and back, creating a sleeker silhouette. This allows the longer top and front pieces to hang straight down, enhancing length.


    12. The Sleek, Center-Parted Lob

    While center parts can be risky, a sleek, flat-ironed lob with a precise center part works if the length passes the collarbone. The clean, vertical line down the middle of the face elongates rather than widens.


    13. The Bob with Wispy Bangs

    Wispy, see-through bangs that are side-swept or curtain-style break up the forehead’s roundness without adding heaviness. Avoid blunt, straight-across bangs, which can shorten the face.


    14. The Graduated Bob

    A graduated bob has shorter layers underneath and longer layers on top, creating a curved, stacked shape at the back. This lifts the hair away from the neck, adding vertical height and a more oval appearance.


    15. The Blunt Micro-Bob

    Bold and chin-grazing, a blunt micro-bob works best on smaller round faces. Keep the line extremely sharp and pair with a deep side part. The stark, geometric line contrasts beautifully with soft curves.


    16. The Messy, Tousled Bob

    Imperfection is an asset. A messy, tousled bob with piece-y ends and root lift creates vertical texture and disheveled height. Avoid smooth, rounded styles that mirror the face’s shape.


    17. The Bob with Long, Angled Side Bangs

    Long side bangs that sweep across the forehead and blend into the longer front pieces create one continuous diagonal line from crown to collarbone. This is one of the most slimming options for round faces.

    Why Length Matters: The Science of Round Faces

    Before diving into your next salon visit, understand the core principle: round faces need vertical lines. A round face typically has equal width and height, with soft, curved edges and full cheeks. The goal of any bob is to create the illusion of length and angularity. Shorter bobs (chin to jaw-length) work best when they have blunt edges or deep side parts. Longer bobs (collarbone-length) naturally elongate. Avoid bobs that end exactly at the widest part of your cheeks—that’s the one place where roundness meets roundness, creating an unwanted circle effect.


    Bangs or No Bangs? The Round-Face Guide

    Bangs can be your best friend or your worst enemy. Here’s a quick cheat sheet:

    Good Bangs for Round FacesBangs to Avoid
    Wispy, see-through curtain bangsThick, blunt straight-across bangs
    Deep side-swept bangsShort baby bangs (micro bangs)
    Long, angled side bangs that blend into layersDense, heavy bangs that end at eyebrow level

    The rule: any bang that creates a diagonal or vertical line across your forehead is flattering. Any bang that creates a horizontal line across the widest part of your forehead will shorten and widen your face.


    Styling Tips to Maximize Your Bob for a Round Face

    Even the perfect haircut needs the right styling technique. Follow these tips daily:

    1. Blow-dry with a round brush, lifting at the crown. Height on top elongates your entire face.
    2. Always dry your roots in the opposite direction of your part. This adds instant volume and vertical lift.
    3. Avoid curling the ends under in a perfect “C” shape. That adds width at your jawline. Instead, curl ends slightly outward or leave them straight and blunt.
    4. Use a texturizing spray at the roots. Grit and texture create piece-y separation, which breaks up round outlines.
    5. If you have curls, diffuse upside down. This maximizes crown volume and minimizes side width.
    6. Keep your sideburns slightly longer. A tiny triangle of hair in front of each ear creates a slimming, face-elongating line.

    What to Ask Your Stylist (Exact Phrases)

    Take this cheat sheet to your salon appointment. Say these exact phrases:

    • “I have a round face and want to elongate it.”
    • “Keep volume at my crown, not at my sides.”
    • “Cut my bob below my chin, not at my cheekbones.”
    • “Give me a deep side part or long angled bangs.”
    • “Avoid rounding out the shape—keep edges sharp or textured.”
    • “Please show me the back with a mirror before you finish.”

    Common Mistakes to Avoid

    Even well-intentioned stylists can make these errors. Watch out for:

    MistakeWhy It Hurts
    A bob that ends at the widest part of your cheeksMirrors and exaggerates roundness
    A perfectly rounded, “helmet-like” shapeRepeats the circular outline of your face
    Center parts without enough lengthSplits the face into two equal halves, emphasizing width
    Blunt, straight-across bangsShortens the forehead and makes the face appear squarer and rounder
    Too much volume at the jawlinePulls the eye sideways instead of up and down
    A chin-length bob with no layers or textureCreates a heavy, blunt circle around your face

    Best Hair Colors to Enhance Your Bob for Round Faces

    While the cut does the heavy lifting, strategic color can add even more slimming dimension:

    • Balayage or highlights placed along the top and front pieces draw the eye vertically.
    • Darker roots with lighter ends (reverse ombré) pull attention downward.
    • Face-framing brighter pieces create diagonal lines of light.
    • Avoid solid, all-over dark colors on very short bobs—they can make the face appear wider by eliminating dimension.
    • Money pieces (bright highlights around the face) work beautifully when angled diagonally from root to tip.

    Maintenance Guide: How Often to Trim Your Bob

    Bob TypeTrim EveryWhy
    Blunt bob (any length)4-6 weeksBlunt lines lose their precision quickly
    Layered or textured bob6-8 weeksLayers grow out more gracefully
    Curly bob8-10 weeksCurls hide minor growth, but shape still matters
    A-line or inverted bob4-5 weeksThe angle is the whole point—don’t let it flatten

    Conclusion

    A round face is not a limitation—it’s a beautiful canvas that simply requires the right architectural approach. The perfect bob doesn’t hide your features; it enhances them by adding angles, length, and strategic structure where you want it most. Whether you choose a sleek, jaw-length blunt cut, a textured shag, or a collarbone-grazing lob with curtain bangs, the principles remain the same: create vertical lines, add height at the crown, keep volume off the sides, and never end at the widest point of your cheeks.

    The 17 ideas above give you a roadmap, but the best bob is the one that makes you feel confident the moment you look in the mirror. Take these prompts to your stylist, experiment with styling techniques, and remember: the most flattering haircut is the one that moves with you, frames your smile, and lets your natural beauty take center stage. Your round face deserves a bob that celebrates every curve—with sharp, stunning precision.

  • Choppy Bob Hairstyles for Fine Hair That Instantly Add Volume and Texture

    Choppy Bob Hairstyles for Fine Hair That Instantly Add Volume and Texture

    If you have fine hair, you know the struggle all too well: limp strands, lackluster volume, and styles that fall flat within an hour. Enter the choppy bob—a game-changing cut that uses strategic layers, disconnected ends, and textured edges to create the illusion of thickness and movement. Unlike blunt cuts that can make fine hair look even sparser, a choppy bob removes weight without sacrificing length, allowing your hair to lift, bounce, and hold shape. Whether you prefer a sleek, edgy look or soft, beachy waves.

    These 17 choppy bob variations will give your fine hair the volume boost it desperately needs:


    1. The Classic Chin-Length Choppy Bob

    Falling right at the chin, this cut uses subtle, jagged ends to break up the perimeter. The choppiness prevents the hair from lying too flat, while the chin-grazing length elongates the neck and draws attention to the jawline. Perfect for straight or slightly wavy fine hair.

    2. Textured Lob with Face-Framing Chops

    A longer bob (lob) that hits between the chin and collarbone, with choppy layers concentrated around the face. The disconnected pieces soften the features and create movement at the front, giving the illusion of denser hair without losing length.

    3. Asymmetrical Choppy Bob

    One side slightly longer than the other, both cut with razor-sharp choppy ends. The asymmetry tricks the eye into seeing more volume and dimension. Ideal for fine hair that lacks natural body, as the uneven lengths create lift on the shorter side.

    4. Stacked Choppy Bob in the Back

    A classic stacked bob with a twist: the underlayer is cut into choppy, texturized points rather than a smooth slope. This removes bulk from the interior while keeping the stacked shape, resulting in a rounded, voluminous back that stays bouncy all day.

    5. Wispy Micro-Chop Bob

    For the bold, this ultra-short bob sits above the jawline (earlobe to mid-cheek). The ends are wispy and severely chopped, almost feathered. On fine hair, this extreme texturizing makes each strand stand out, creating a cloud-like, airy volume.

    6. Deep Side-Parted Choppy Bob

    A simple cut—jaw-length with uneven ends—transformed by a deep side part. The weight shift from one side to the other instantly creates a voluminous dome on top. The choppy layers prevent the longer side from looking stringy.

    7. Choppy Inverted Bob

    Shorter in the back, longer in the front, with the entire perimeter cut at harsh, uneven angles. The inversion naturally lifts the back of fine hair, while the choppy front pieces add texture. Use a volumizing mousse to amplify the stacked effect.

    8. Messy Bedhead Bob

    This style relies on deliberately uneven, razor-cut chops throughout. No two strands are the same length. On fine hair, this chaotic layering creates natural-looking texture and grip, making it easy to achieve that “just rolled out of bed” volume without teasing.

    9. Curled Under Choppy Bob

    Cut with blunt-but-chunky choppy ends, then styled by curling the ends under with a round brush or flat iron. The internal choppiness provides hold, so the curled-under shape doesn’t collapse. Adds a retro, polished volume perfect for fine hair that holds curl poorly.

    10. Piece-y Pixie Bob

    A hybrid between a pixie and a bob—shorter at the nape (like a pixie) but longer on top and around the ears. The top section is chopped into separate, piece-y strands. This gives fine hair extreme lift at the roots and a structured, edgy texture.

    11. Choppy Bob with Hidden Undercut

    Fine hair often lacks density, so a full undercut is risky. Instead, ask for a “hidden” undercut: the bottom half-inch at the nape is shaved or closely cropped, while the top choppy layers fall over it. This removes weight from the densest area, allowing the top to float with volume.

    12. Soft Rounded Choppy Bob

    Unlike sharp, edgy chops, this version uses soft, rounded choppy layers on a chin-length bob. The ends are still disconnected but curved inward slightly. It creates a gentle, fluffy volume that works beautifully on very fine, straight hair that needs subtle body.

    13. Angled Choppy Bob with Long Bangs

    A steep angle (short back, long front) combined with choppy layers and long, texturized bangs that sweep to the side. The bangs add weight and movement at the crown, while the angled shape prevents the fine hair from clinging to the face. Blow-dry with a round brush for maximum lift.

    14. Blunt Choppy Bob (The “Chunk Cut”)

    Paradoxically, a blunt perimeter with interior choppiness. The outline is clean and strong, but inside, the hair is heavily point-cut. This gives fine hair the illusion of thick ends (from the blunt line) while the interior texture provides actual lift and bounce.

    15. Tousled Beach Wave Choppy Bob

    The cut itself is a standard choppy bob (any length). The style is key: use a salt spray and scrunch to create disjointed, wavy texture. The choppy layers grab the waves better than a blunt cut, resulting in a fuller, messier look that doubles the visual density of fine hair.

    16. Choppy Bob with Micro-Fringe

    A very short, choppy bob (ear-length) paired with an eyebrow-skimming micro-fringe that is also texturized. The short length reduces weight on fine hair, while the micro-fringe adds a focal point that distracts from any thin areas. Best for those with strong facial features.

    17. The One-Length Choppy Bob (Deconstructed)

    A modern take on the classic one-length bob. The bottom line is cut as one length, but then the stylist “deconstructs” it by snipping vertical chops into the ends. This keeps the heavy look of a one-length cut but removes enough weight to give fine hair swing and subtle movement.

    Before You Book: What to Tell Your Stylist

    Getting a choppy bob on fine hair is not the same as getting one on thick hair. If your stylist over-texturizes, you’ll end up with wispy, see-through ends. If they under-texturize, you’ll lose all volume. Use this checklist during your consultation:

    • Ask for “point cutting” or “slide cutting” – not thinning shears. Thinning shears remove weight from the middle of the strand, which collapses fine hair. Point cutting creates vertical chops at the ends, preserving density while adding movement.
    • Specify “internal layering” only. Layers should be cut inside the hair, not all the way to the perimeter, to keep the outline strong.
    • Request a dry cut after the wash. Fine hair changes shape dramatically when dry. A final dry trim ensures the choppy ends land exactly where they should.
    • Bring a reference photo. Use the prompts above to generate your ideal look. Stylists work best with visuals.
    • Avoid razors on very fragile fine hair. A razor can cause frayed, split ends on delicate strands. Sharp shears are safer.

    The Best Styling Products for a Choppy Bob on Fine Hair

    The wrong products will flatten your choppy bob before you leave the bathroom. Focus on lightweight, texturizing formulas that build grip without grease.

    Product TypeWhat to Look ForWhat to Avoid
    Volumizing mousseAlcohol-free, lightweight foam. Apply to damp roots.Heavy creams or butters.
    Texturizing spraySea salt or rice protein based. Use on dry ends for separation.Oily shine sprays.
    Dry shampooPowder or aerosol with clay. Adds grip and second-day volume.Conditioning sprays.
    Root lift sprayHeat-activated formula. Spray directly at roots before blow-drying.Ointment-like serums.
    Light hold hairsprayFlexible, non-crunchy finish. Mist from 12 inches away.Super-hold or wet-look sprays.

    Pro tip: Skip conditioner on your roots entirely. Apply it only from the mid-lengths to ends. Fine hair gets weighed down instantly.

    How to Style Your Choppy Bob in Under 5 Minutes

    Fine hair’s biggest enemy is time. These three methods work with your choppy cut, not against it.

    Method 1: The Round Brush Blowout (for smooth volume)

    1. Towel-dry hair until damp, not dripping.
    2. Apply a dime-sized amount of mousse to roots.
    3. Use a small (1.5-inch) round brush. Lift each section up and forward, rolling the ends under.
    4. Direct heat from the roots to ends, never the reverse (that flattens cuticles).
    5. Finish with a cool shot and texturizing spray on the choppy ends.

    Method 2: The Diffuser “Scrunch” (for messy, beachy texture)

    1. Scrunch in a golf-ball-sized amount of mousse on soaking wet hair.
    2. Flip your head upside down.
    3. Use a diffuser on low heat, medium speed. Cup sections of hair up toward your scalp.
    4. Once 80% dry, stop touching it. Let the last 20% air-dry to prevent frizz.
    5. Break up the cast with a drop of lightweight hair oil on your palms (rub them together first).

    Method 3: The Overnight Twist (no heat)

    1. Dampen hair slightly at night.
    2. Divide into 4–6 small sections.
    3. Twist each section loosely and pin it flat against your head.
    4. Sleep on a silk pillowcase to reduce friction.
    5. Shake out in the morning. The choppy layers will hold the twist pattern for hours.

    Maintenance Schedule: Keeping Your Choppy Bob Alive

    Fine hair grows out fast because there’s less weight to hold it down. A choppy bob loses its shape quicker than a blunt cut.

    TaskFrequency
    Trims to refresh choppy endsEvery 4–6 weeks
    Clarifying shampoo (remove buildup)Once every 2 weeks
    Dry shampoo applicationEvery other day
    Deep conditioning mask (lightweight)Once a month (skip roots)
    Full product strip & reset washEvery 10–14 days

    Warning sign: When your choppy ends start looking transparent or wispy instead of textured, it’s time for a trim.

    Who Should Avoid a Choppy Bob?

    As good as this cut is for fine hair, it’s not for everyone. Consider a different style if:

    • Your hair is chemically damaged or over-processed. Choppy layers expose the most fragile ends. Bleach-damaged fine hair will look frayed, not textured.
    • You have a very round or very long face shape without bangs. The choppy bob can widen or lengthen features if not balanced with face-framing pieces or bangs.
    • You refuse to use any styling products. A choppy bob on fine hair needs at least a texturizing spray or dry shampoo to hold its shape.
    • You want a zero-maintenance cut. This cut is low-effort, not no-effort. Without any styling, fine hair will fall flat within hours.

    The Best Variations for Specific Hair Types (Fine Hair Subcategories)

    Fine hair is not all the same. Match your sub-type to the right choppy bob:

    Fine Hair TypeBest Choppy Bob MatchWhy
    Straight & silkyWispy micro-chop bob (#5) or soft rounded choppy bob (#12)These styles add grip to slippery strands.
    Wavy & fineMessy bedhead bob (#8) or tousled beach wave bob (#15)The waves lock into choppy layers naturally.
    Curly & fineChoppy inverted bob (#7) or angled bob with long bangs (#13)Inversion lifts curls at the crown; bangs prevent triangle head.
    Thinning or age-related fine hairDeep side-parted choppy bob (#6) or piece-y pixie bob (#10)Deep parts and short lengths maximize existing density.
    High-density but fine strandsBlunt choppy bob (#14) or one-length deconstructed bob (#17)Strong perimeters contain the fine strands without collapse.

    Common Mistakes to Avoid

    Even with the perfect cut, small errors ruin the look. Avoid these:

    • Over-washing. Fine hair gets oily fast, but daily washing strips natural texture. Switch to every other day with dry shampoo in between.
    • Using heavy oils or butters. Coconut oil, shea butter, and argan oil (pure) are too dense. If you must use oil, choose grapeseed or jojoba – one drop only.
    • Blow-drying downward. Always lift roots upward and forward. Drying downward flattens fine hair against your scalp.
    • Skipping heat protectant. Fine hair burns faster than coarse hair. Use a lightweight spray protectant every single time.
    • Asking for “lots of layers.” That often leads to over-texturizing. Say “choppy ends, not thinned out.”

    Conclusion

    Fine hair does not have to mean flat hair. The choppy bob works because it accepts the nature of fine strands—lightweight, soft, and movable—and uses those qualities to create volume rather than fighting them. By removing weight strategically through disconnected, jagged ends, this cut tricks the eye into seeing thickness while giving you effortless bounce and texture.

    The 17 ideas above offer a starting point, but the real magic happens when you match the right choppy bob to your specific face shape, hair type, and lifestyle. Whether you choose a chin-length classic or a deconstructed one-length lob, remember three things: protect your ends with regular trims, use lightweight texturizing products, and never underestimate the power of a deep side part.

    Your fine hair can look fuller tomorrow than it does today—with the right cut, a few minutes of styling, and a choppy bob that finally works with your hair, not against it.

  • Stunning Ways to Rock a Pixie Cut with Shaved Sides

    Stunning Ways to Rock a Pixie Cut with Shaved Sides

    The pixie cut has long been a symbol of confidence and rebellion, but the modern iteration—the pixie with shaved sides—takes that energy to an entirely new level. By buzzing one or both sides close to the scalp while leaving length on top, you create instant contrast, edge, and versatility. Whether you have fine hair that needs volume, thick hair that needs taming, or you simply want a low-maintenance look that turns heads, this hybrid style delivers.

    From subtle undercuts to dramatic designs, here are 20 creative ideas to inspire your next salon visit:

    1. The Classic Undercut Pixie


    Shave both sides from the temple down to the nape, leaving 2–3 inches of soft texture on top. Sweep the top to one side for a timeless, polished rebel look.

    2. The Asymmetrical Shave


    Shave only the left side (or right) and keep the opposite side longer. Part your top layers dramatically over the shaved side for a high-fashion, off-kilter effect.

    3. The Curly Top Fade


    If you have natural curls, shave the sides into a skin fade and leave the crown curly and full. The contrast between tight coils and bare scalp is striking.

    4. The Disconnected Pixie


    Keep a very long, choppy top that dramatically overhangs completely shaved sides. This “floating” effect looks editorial and works well with bold hair colors.

    5. The Nape Undercut (Hidden Surprise)


    Shave only the back (nape area) while leaving side lengths intact. When your hair is down, it looks like a normal pixie; pull it up or turn your head to reveal the secret shave.

    6. The Temple Taper


    Instead of shaving full sides, ask for a high taper that goes from skin at the temples up into longer hair. It’s softer than a full undercut but still edgy.

    7. The Design Shave (Lines & Shapes)


    Once the sides are shaved, ask your barber to etch a design—lightning bolt, zigzag, dots, or a geometric line—into the buzzed area for personalized art.

    8. The Platinum Contrast


    Dye the longer top platinum blonde (or pastel pink) and leave the shaved sides in your natural dark color. The high-contrast color emphasizes the cut’s structure.

    9. The Finger-Waved Top


    On the longer section, set your hair in vintage finger waves or pin curls. The juxtaposition of old Hollywood glamour with shaved sides is unforgettable.

    10. The Messy Spiked Pixie


    Apply a matte paste or wax to the top and messily spike it upward. Shaved sides make spikes look intentional and clean rather than juvenile.

    11. The Deep Side-Swept Bang


    Keep the top long enough to form heavy, side-swept bangs that graze one eyebrow. Shave the opposite side completely—the asymmetry frames the face beautifully.

    12. The Bleached Buzzed Sides


    Shave the sides to a #1 or #2 guard, then bleach them platinum while keeping the top a natural brunette. It creates an optical illusion of more volume on top.

    13. The Velvet Buzz


    For a softer take, shave the sides but leave ½ inch of length (a “velvet” buzz cut length). The texture feels fuzzy and feminine while still bold.

    14. The Tucked-Behind-the-Ear Pixie


    Shave only the area just above and behind one ear. Style the top so it naturally tucks behind that same ear, showing off the shaved patch as an accent.

    15. The Razored Layers on Top


    Have your stylist use a razor (not scissors) on the top section for wispy, piece-y texture. Shaved sides highlight every feathery layer.

    16. The Grown-Out Undercut


    Start with a fully shaved side that has grown to 1 inch. Leave it longer and texturize it. This “messy grow-out” phase has its own cool, grunge appeal.

    17. The Colored Root Smudge


    Shave the sides and dye the longer top a vivid color (cobalt blue, emerald green). Then, smudge a darker shade into the roots of the top for a seamless blend into the shaved area.

    18. The Slicked-Back Wet Look


    Use gel or pomade to comb the longer top flat and slick against your head. The shaved sides become sharp architectural lines—perfect for formal events.

    19. The Micro-Fringe Pixie


    Cut the top into a short, blunt baby bang (micro-fringe) that sits 1 inch above your eyebrows. Shave both sides for a futuristic, mod-inspired silhouette.

    20. The Accessorized Shave


    Once sides are shaved, decorate the buzzed area temporarily with metallic temporary tattoos, stick-on jewels, or colored hair powder. Change the design weekly for a new look.

    What to Ask Your Stylist Before You Commit

    Before you go under the clippers, book a consultation and bring these questions with you:

    • “What is my face shape, and how short should the sides go?” – Round faces often benefit from more height on top; oval faces can handle a full skin fade.
    • “How much length will you leave on top?” – Longer tops (3–4 inches) offer more styling versatility; shorter tops (1–2 inches) are lower maintenance.
    • “Will you use clippers, a razor, or scissors for the sides?” – Clippers give a clean, uniform shave; razors create softer, blurred transitions.
    • “How often will I need a touch-up?” – Shaved sides grow out visibly every 2–3 weeks. Budget for regular maintenance trims.
    • “Can you show me photos of your previous pixie undercuts?” – Always check a stylist’s portfolio for evidence of clean, even clipper work.

    Who This Haircut Works Best For

    The pixie with shaved sides is surprisingly adaptable, but it shines brightest on:

    • Women with thick or coarse hair – Shaving the sides removes bulk and makes styling faster.
    • Women with fine, limp hair – The contrast of bare scalp against textured top creates instant volume illusion.
    • Women who wear glasses or bold earrings – Shaved sides frame accessories beautifully.
    • Women with active lifestyles – Less hair means less sweat, less drying time, and less product.
    • Women going through a style reinvention – This cut announces confidence and a fresh start.

    That said, if you have very sparse hair on top or significant scalp sensitivity, talk to your stylist about a softer taper instead of a full shave.

    Daily Styling & Maintenance Routine

    Keeping your pixie with shaved sides looking sharp requires minimal effort but specific steps:

    Morning routine (5 minutes):

    1. Spritz the longer top with water or a refresh spray.
    2. Apply a pea-sized amount of matte paste, wax, or lightweight pomade.
    3. Use your fingers to shape—sweep, spike, or tousle depending on your look.
    4. Optional: Run a trimmer over the shaved sides every 3–4 days to keep lines crisp.

    Weekly maintenance:

    • Shampoo 2–3 times per week (less often for curly or dry hair).
    • Use a boar bristle brush on the shaved sides to exfoliate the scalp.
    • Re-shave designs or lines at home with a detail trimmer, or visit your barber.

    Every 2–3 weeks:

    • Professional touch-up for the shaved areas ($15–$30 depending on your city).

    Products to Keep on Hand

    Product TypeRecommended ForExample
    Matte paste or clayMessy, textured, spiked looksAmerican Crew Fiber, Hanz de Fuko Claymation
    Pomade (medium hold)Slicked-back, polished stylesSuavecito, Layrite
    Sea salt sprayAdding grit and volume to the topNot Your Mother’s Beach Babe
    Buzzer/trimmerAt-home side maintenanceWahl Lithium Ion or Philips Norelco
    Dry shampooAbsorbing oil on the shaved sidesBatiste, Klorane

    Common Concerns (And Honest Answers)

    “Will it make me look too masculine?”
    Not at all—the pixie with shaved sides reads as edgy and fashion-forward, not masculine. Keep the top longer and softer, or add earrings and makeup to balance as you prefer.

    “How bad is the grow-out phase?”
    Honestly, it can be awkward. The shaved sides will puff out like a mushroom for about 6–8 weeks. Plan for a “transition cut” (like a stacked bob) or use headbands and clips during that time.

    “Can I still put my hair in a ponytail?”
    Only if the top is at least 4–5 inches long. Most pixies with shaved sides won’t pull back fully, but you can use bobby pins or small claw clips to lift the top.

    “Will it damage my hair?”
    No. Shaving doesn’t damage hair; it only removes already-grown strands. In fact, giving your ends a break from heat and color can improve overall hair health.

    Adapting for Different Hair Textures

    • Straight hair: Works beautifully but shows every line. Ask for a precise, clean fade.
    • Wavy hair: Ideal. Waves add movement on top while sides stay sharp.
    • Curly hair (type 3a–4c): Stunning. Keep the top hydrated with leave-in conditioner. Curls will shrink, so ask for more length than you think you need.
    • Coily/kinky hair: A fade on the sides looks incredible. Use a sponge brush or curl definer on top.

    Conclusion

    The pixie cut with shaved sides is far more than a trend—it’s a statement of personal freedom, practicality, and style. Whether you choose a dramatic undercut with platinum color, a soft velvet buzz with natural curls, or a hidden nape shave that only you know about, this haircut delivers on every front: low maintenance, high impact, and endlessly customizable.

    The 20 ideas above prove there’s a version for every woman—White, Black, Latina, Asian, Middle Eastern, and every identity in between. With the right stylist, the right products, and a little daily finger-styling, you’ll walk out of the salon feeling lighter, bolder, and undeniably yourself.

    So go ahead. Book the appointment. Let the clippers buzz. And enjoy the most liberating haircut of your life.