Author: Jessica Guevara

  • Essential Women’s Haircuts for 2026

    Essential Women’s Haircuts for 2026

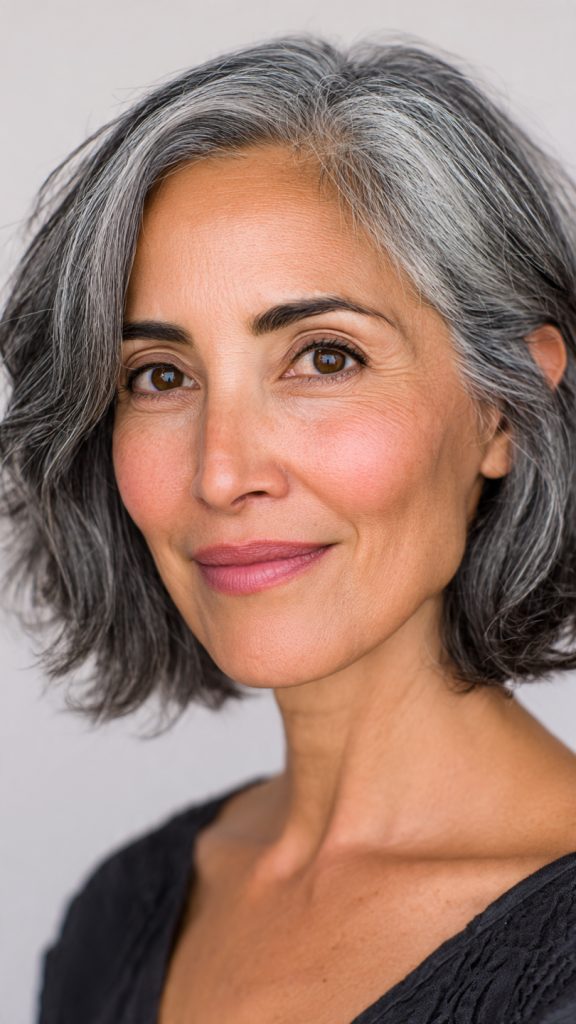
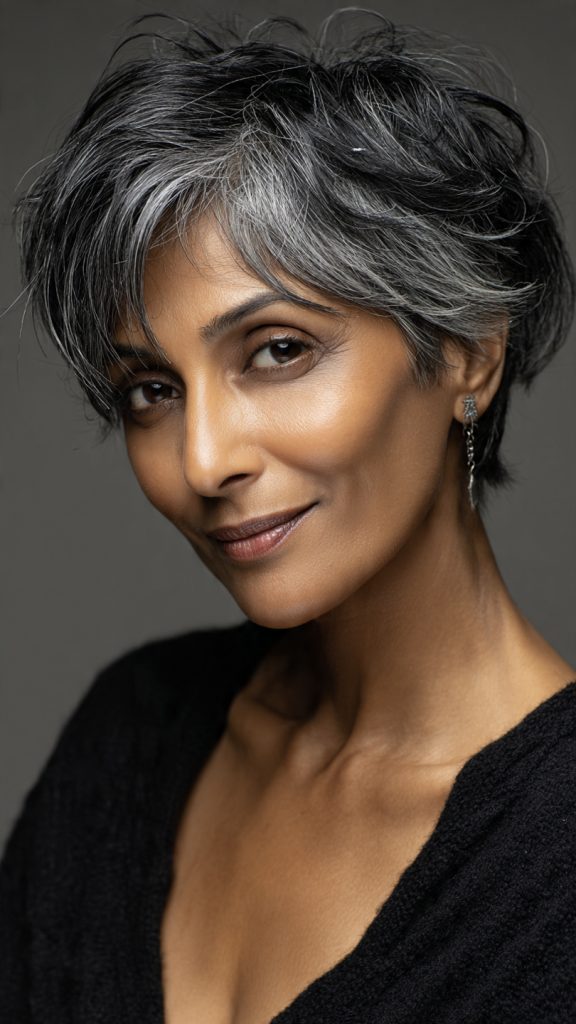
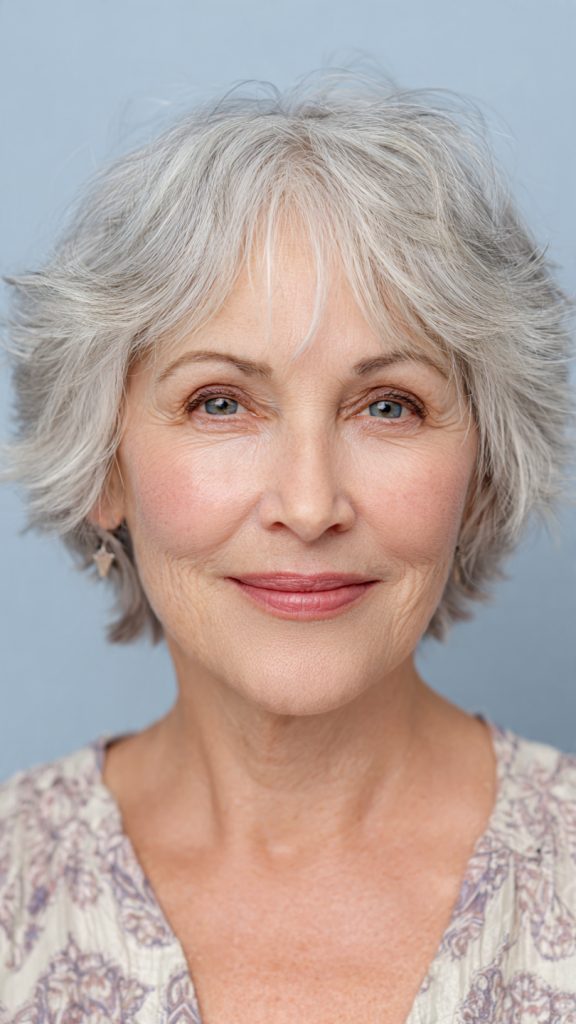
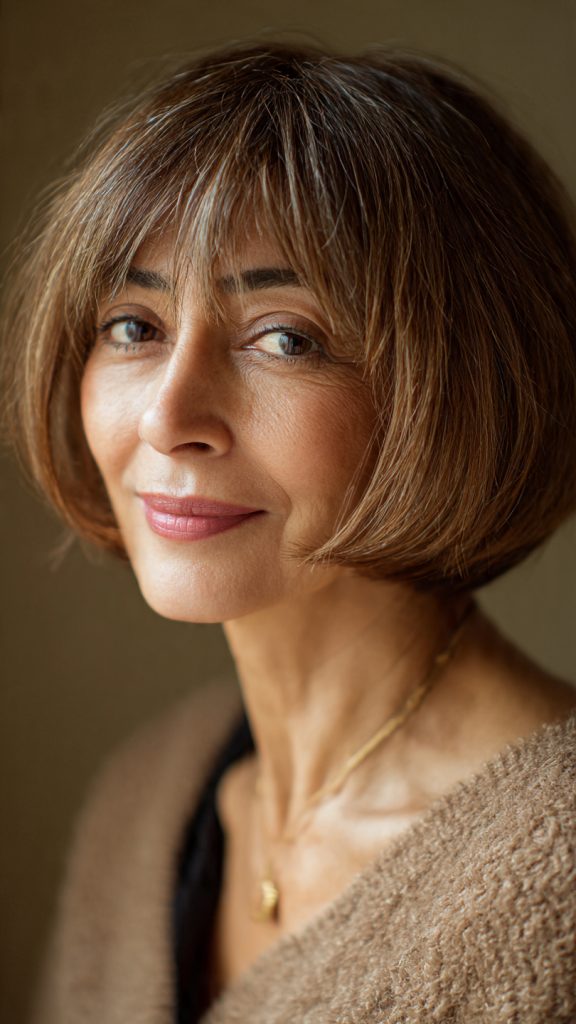
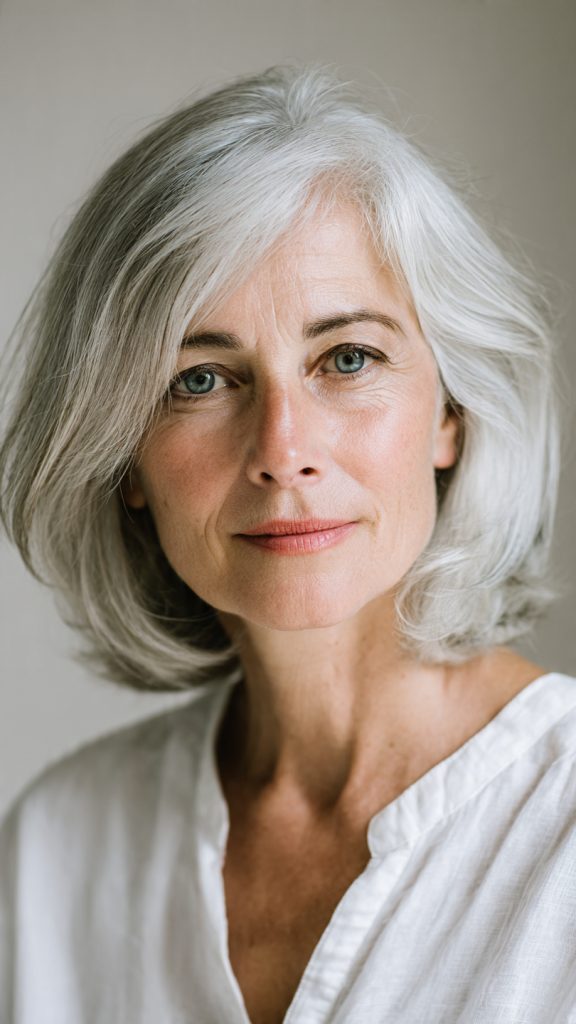
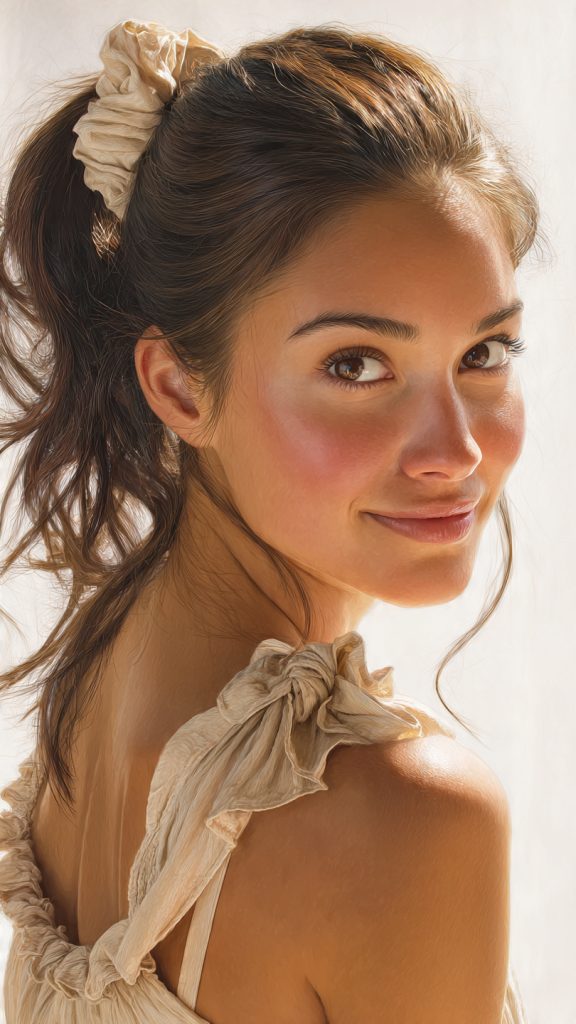
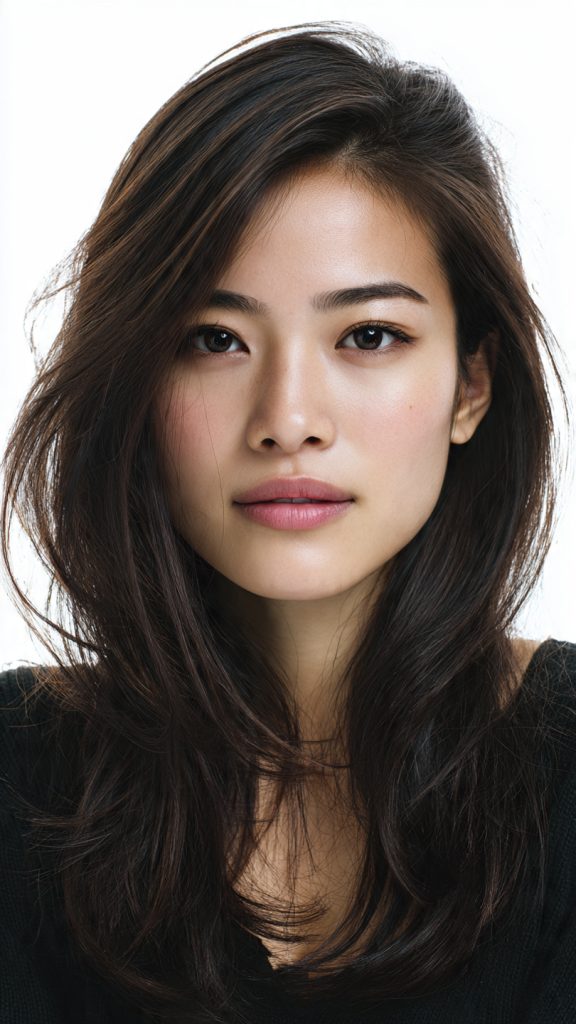
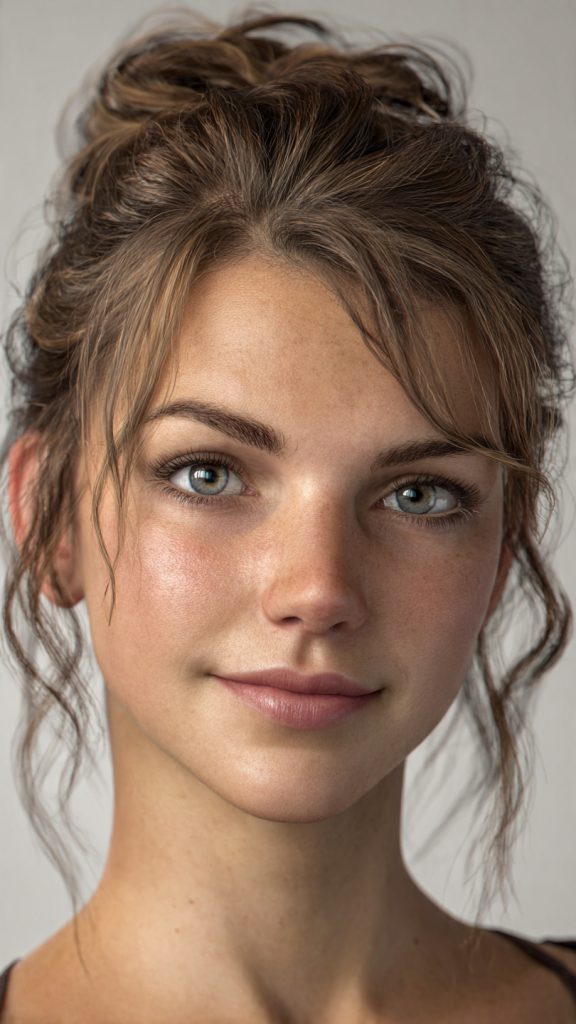
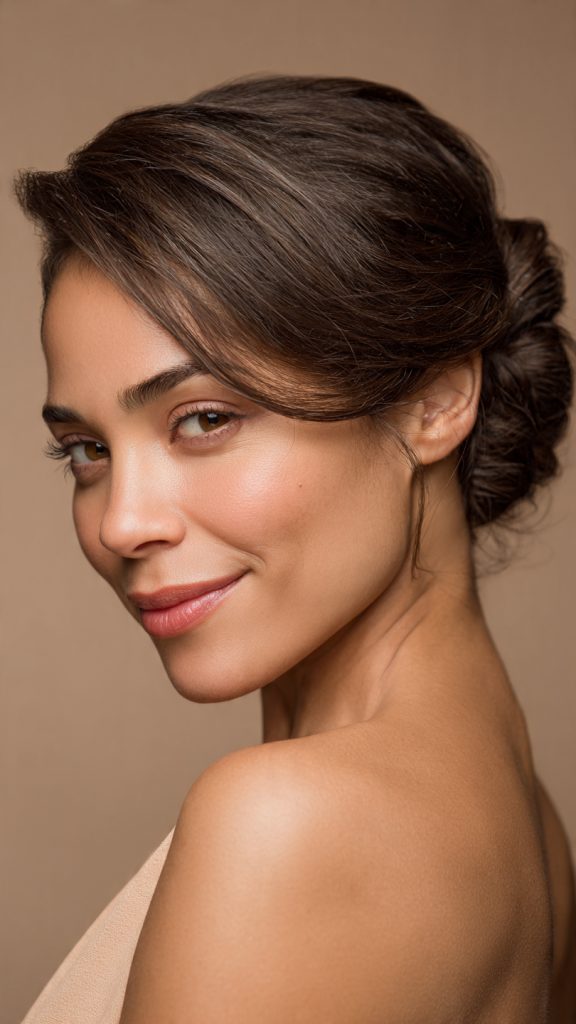
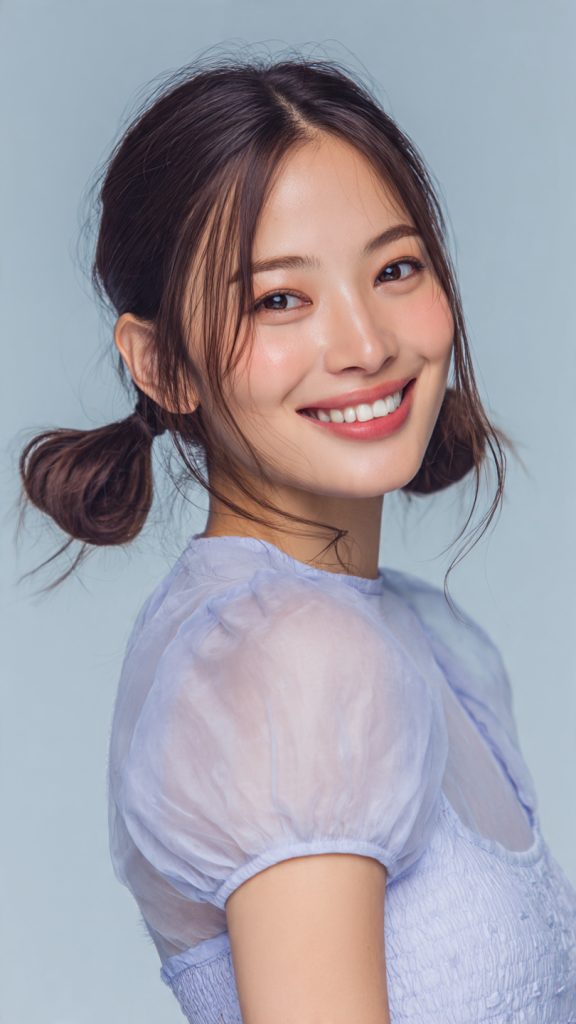
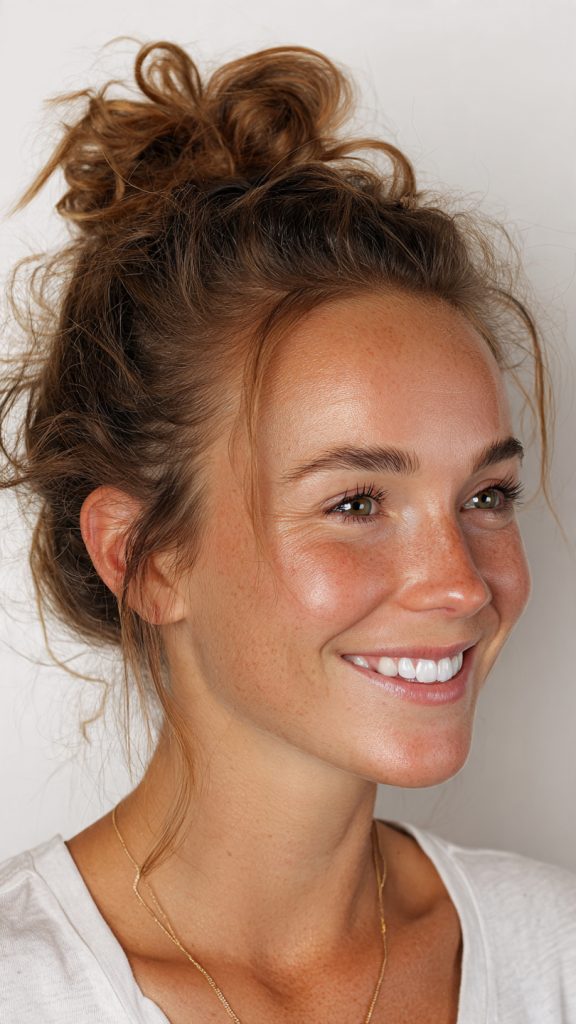
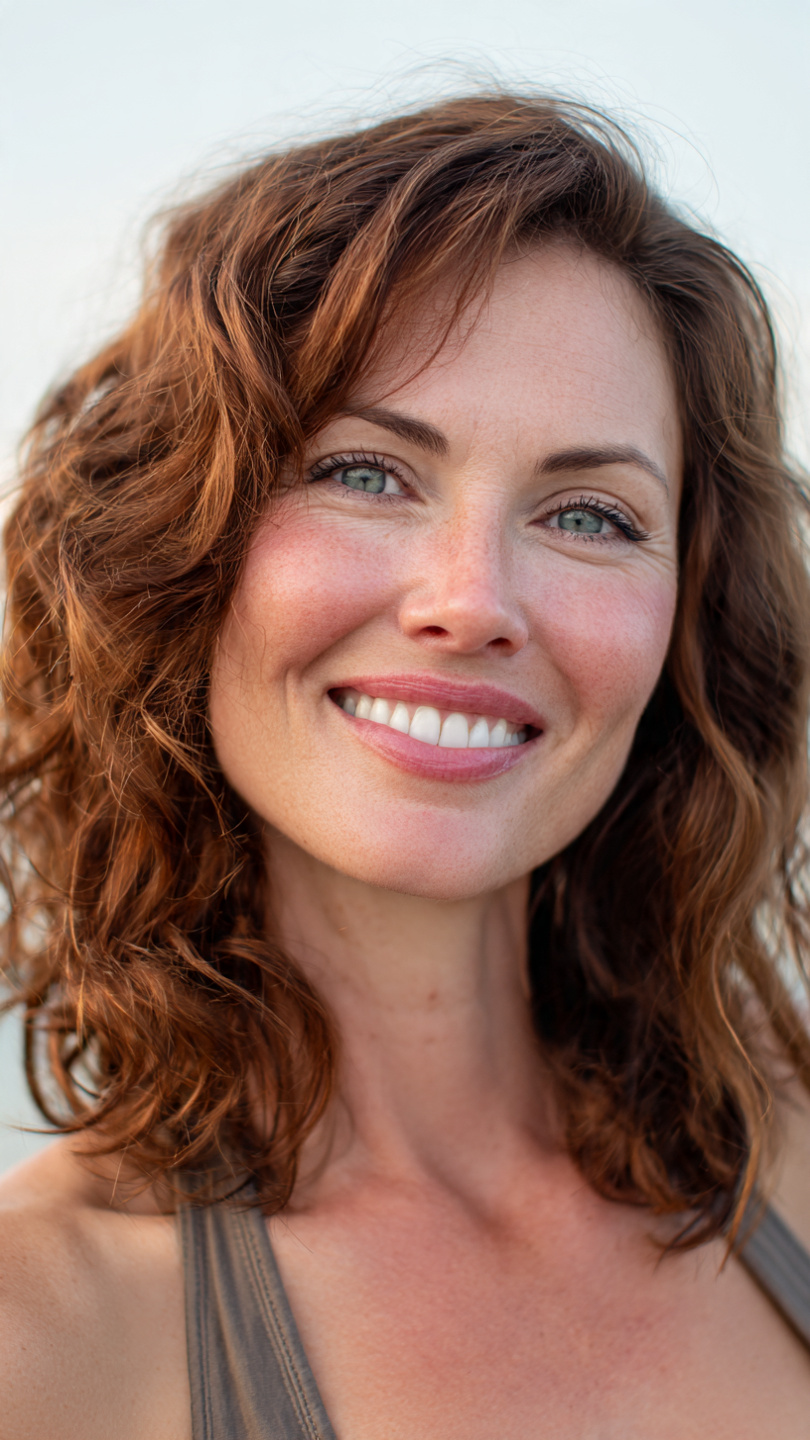
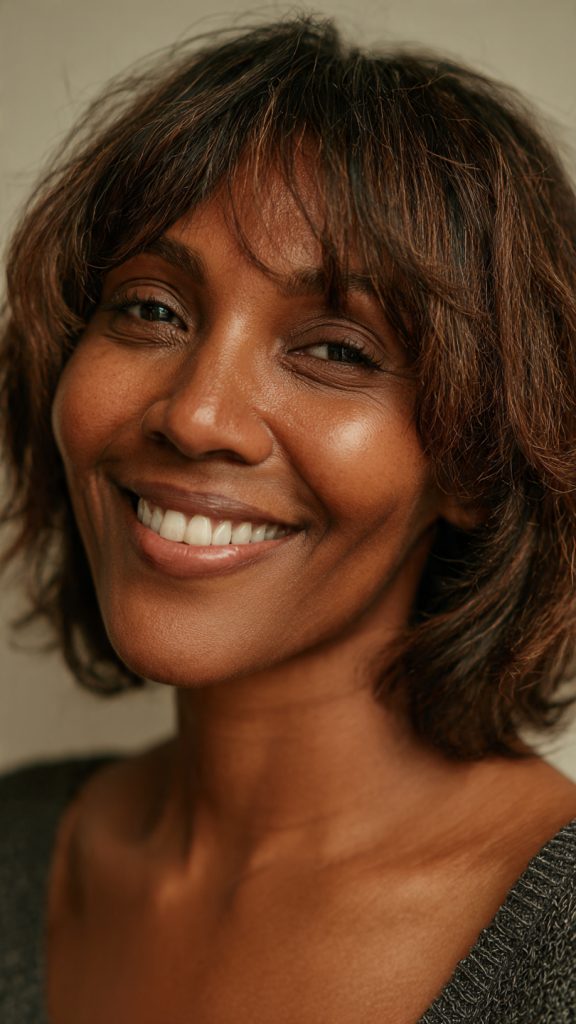
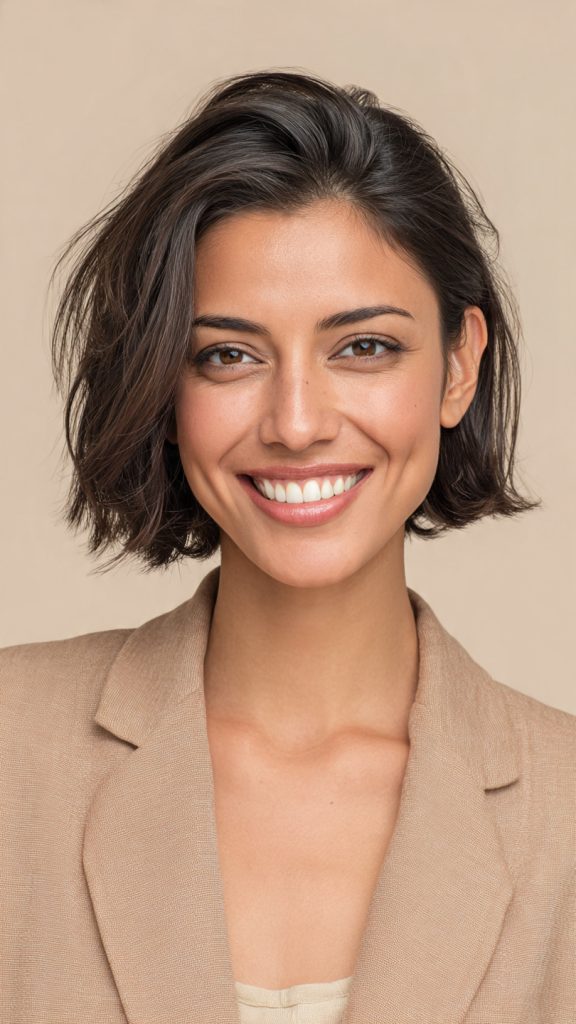
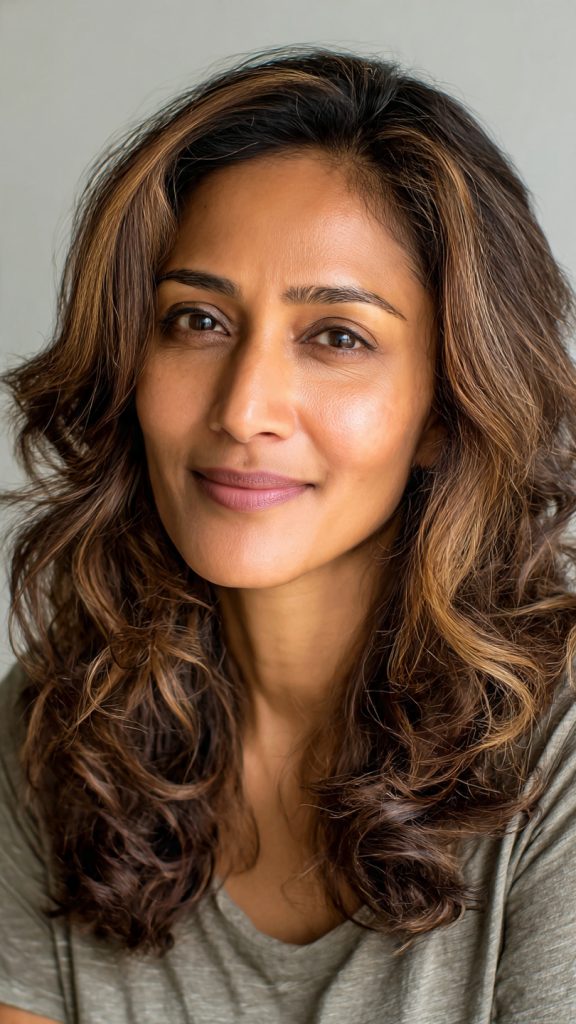
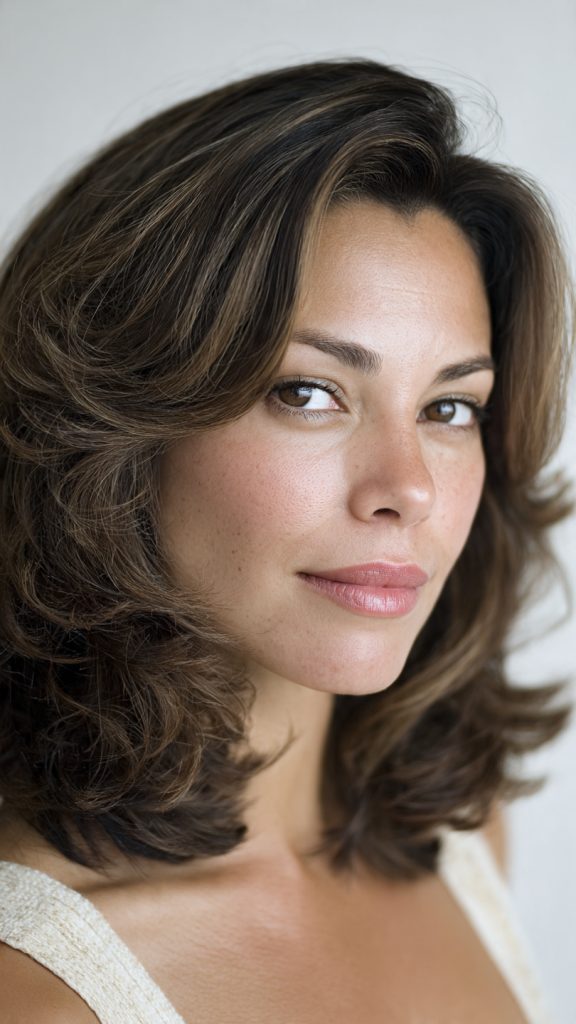
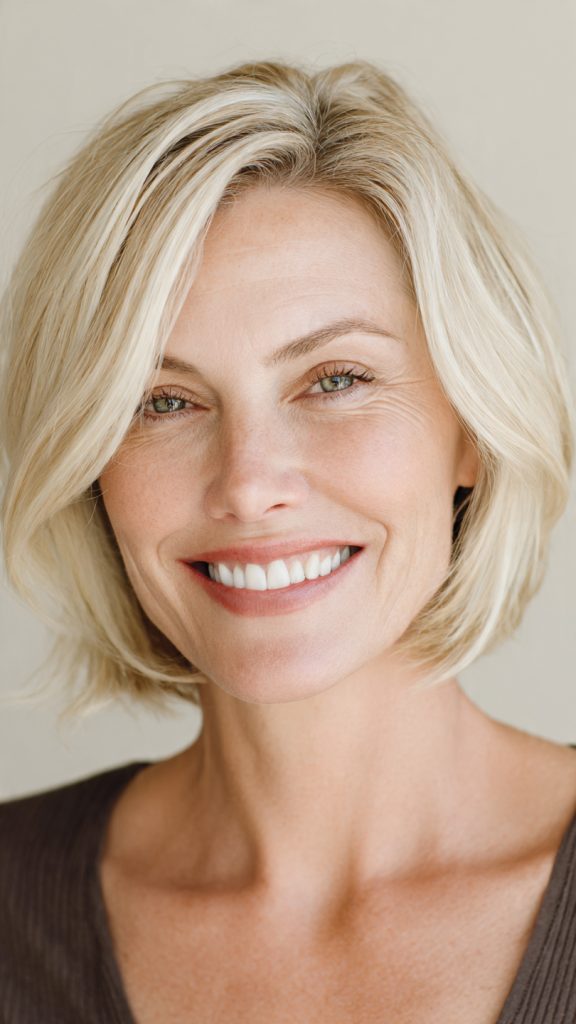
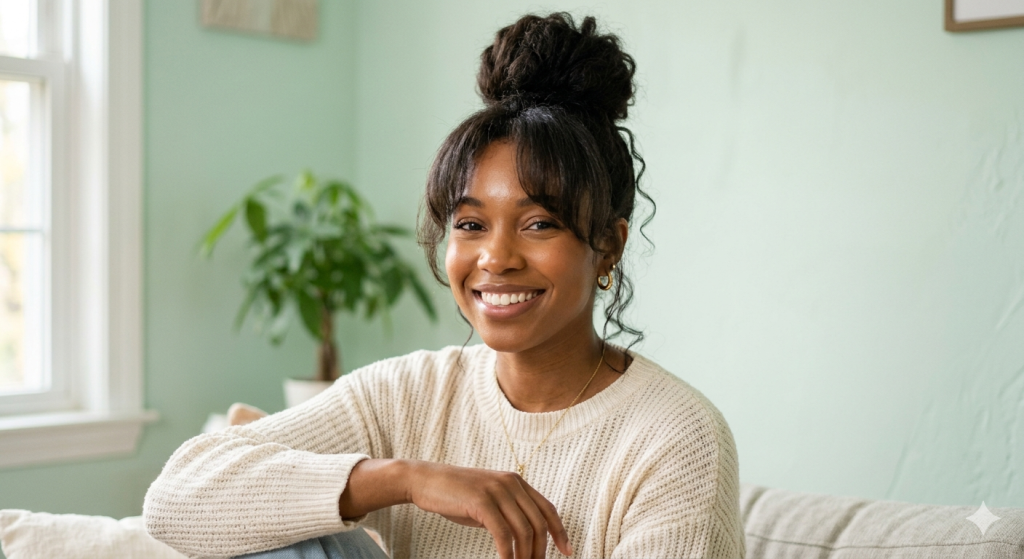
    Welcome to the hair horizon of 2026, where the pursuit of “perfectly undone” has finally won. This year, women’s haircuts are rejecting rigid, high-maintenance shapes in favor of styles that celebrate natural texture, strategic weight, and biological rhythm—think cuts designed to look their best 48 hours after washing. From the corporate bob to the ethereal pixie, the dominant philosophy is bio-mobility, meaning your style moves with your day, your cowlicks, and your real life.

    Why These Cuts Define 2026

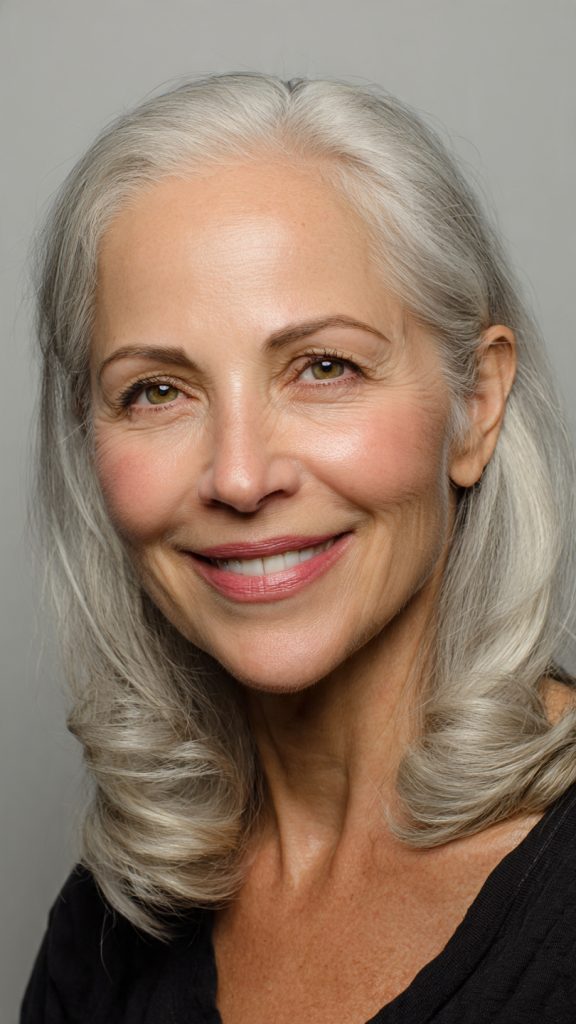
    Unlike previous years where trends were driven solely by red carpets or TikTok virality, 2026’s haircut landscape is shaped by three cultural shifts: the return to office (but not to rigid styling), the rejection of heat damage, and the celebration of hair diversity. Each cut listed above serves a specific lifestyle—whether you’re a corporate professional needing a polished bob that air-dries perfectly, a curly girl tired of hour-long routines, or someone simply embracing their grey, thinning, or baby-fine hair without shame.

    10 Women’s Haircut Ideas for 2026

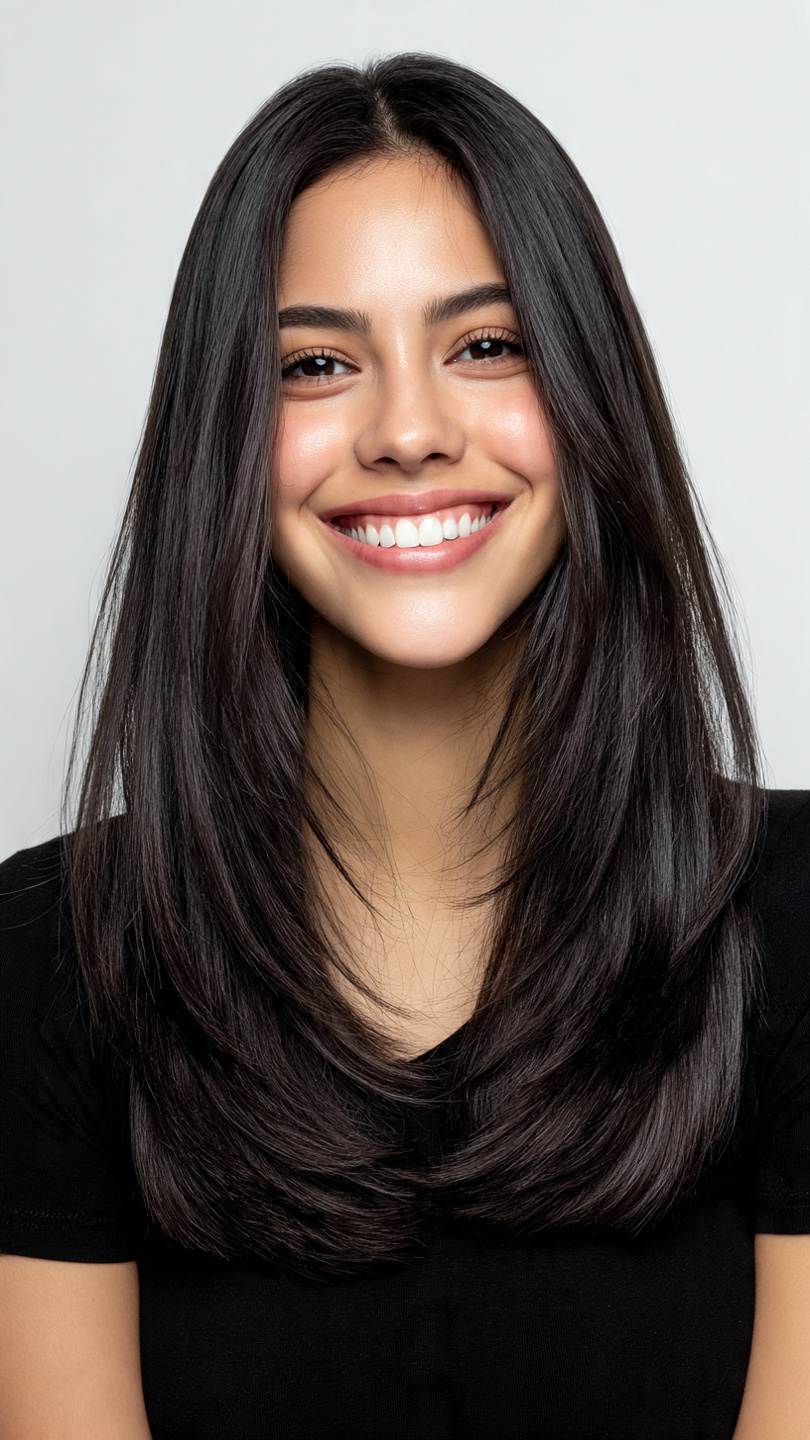
    1. The Liquid Lob (Long Bob)

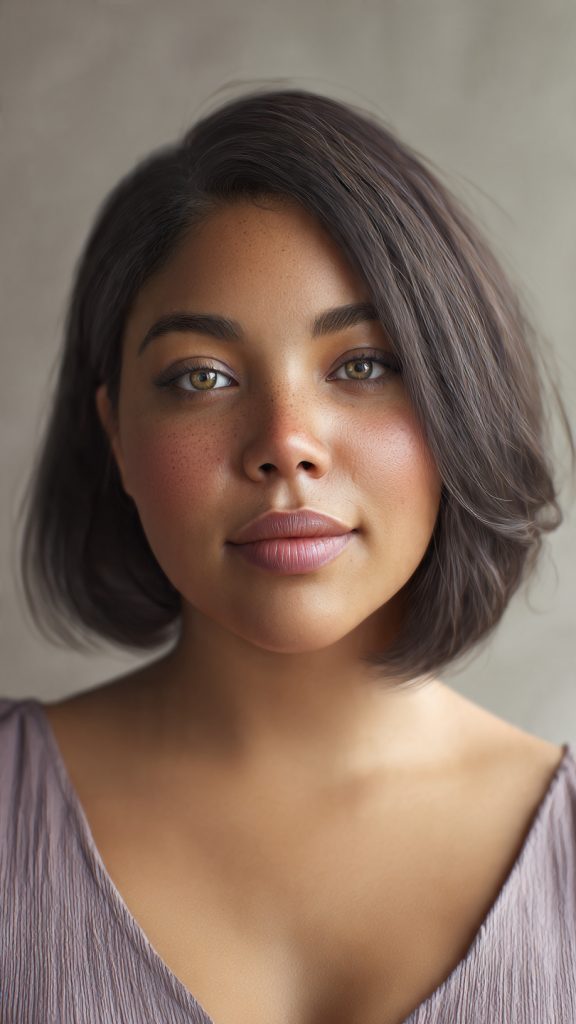
    A precision-cut, chin-to-collarbone length with invisible internal layers that create a “waterfall” effect, giving fine hair immense movement without losing density.

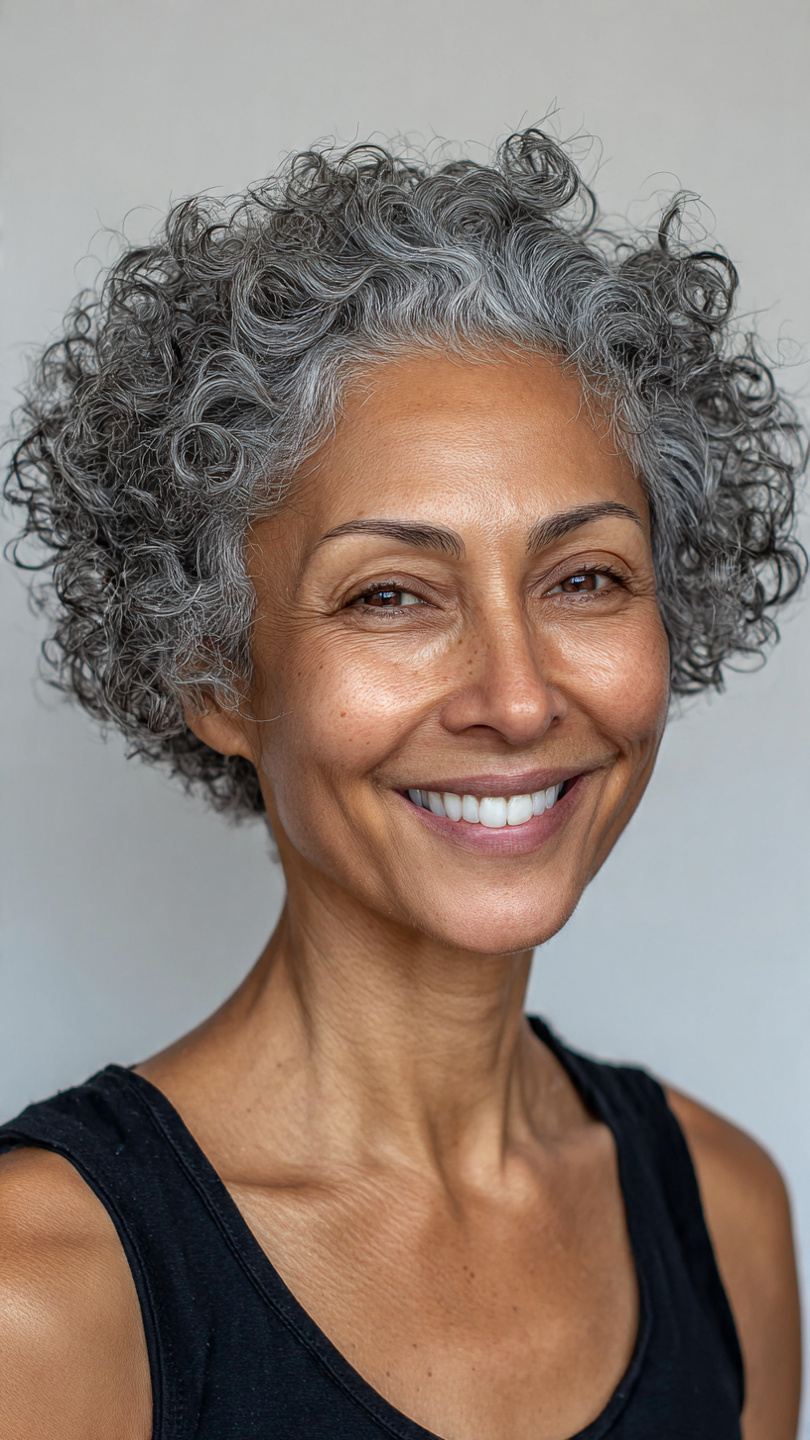
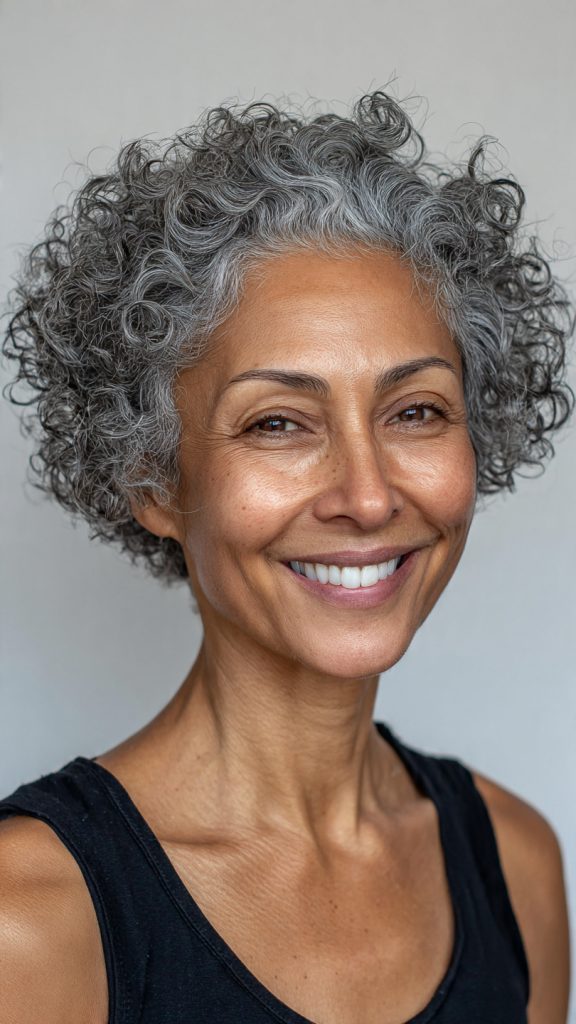
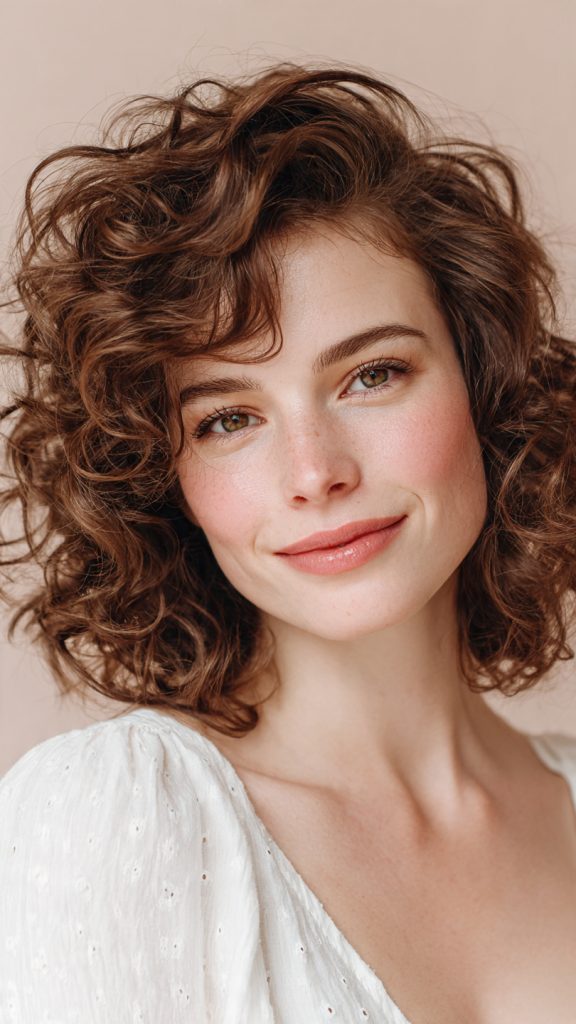
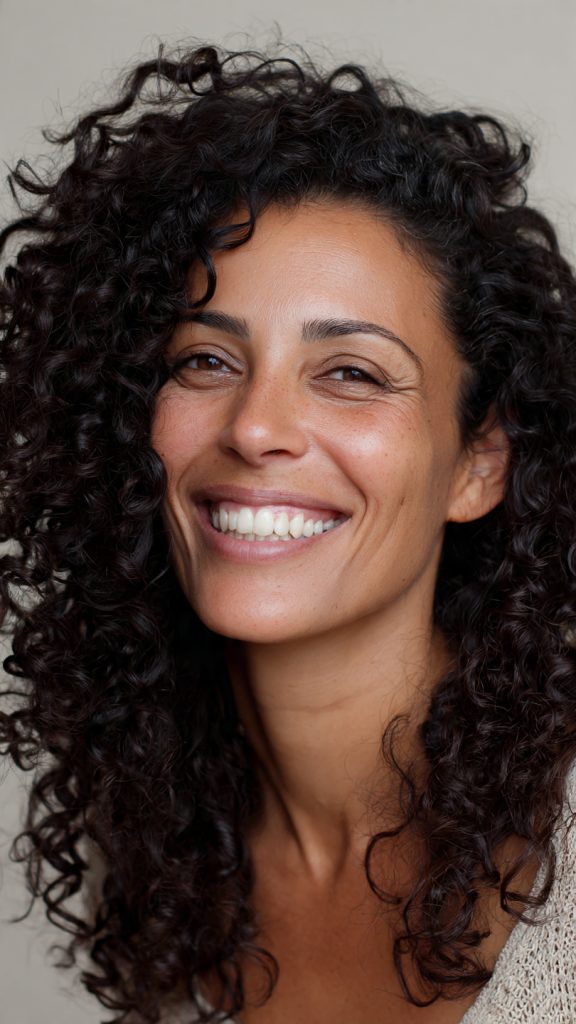
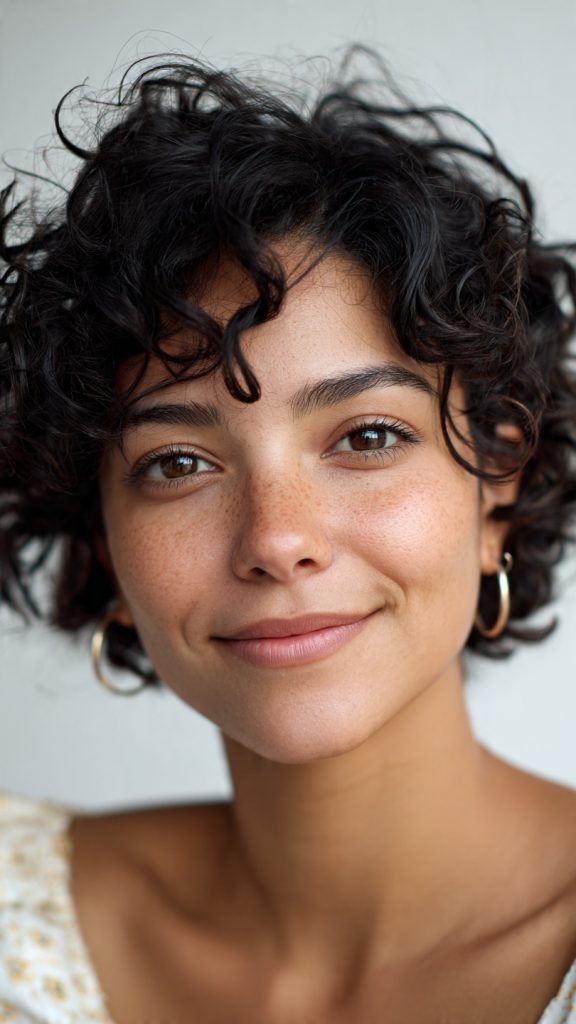
    2. The Curl-Sculpted Box Cut

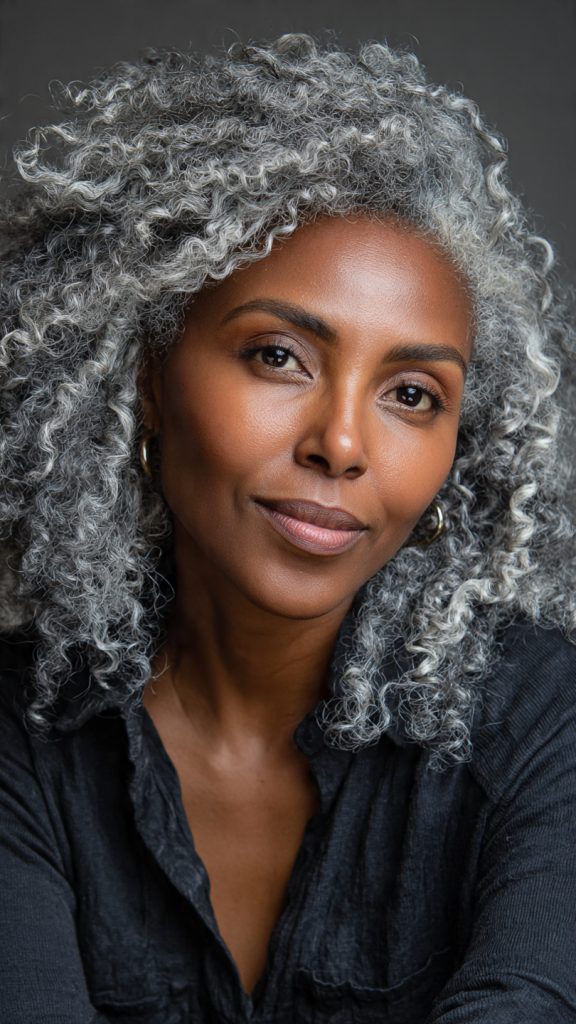
    Specifically for type 3 and 4 curls, this cut shapes each curl clump into a soft geometric block, reducing bulk while amplifying volume at the crown for a defined, cloud-like silhouette.

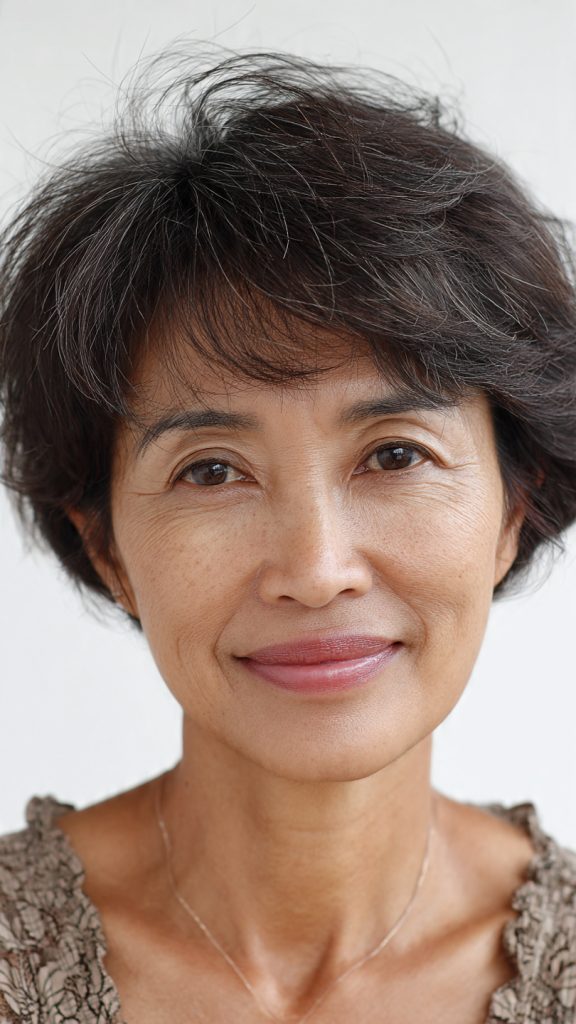
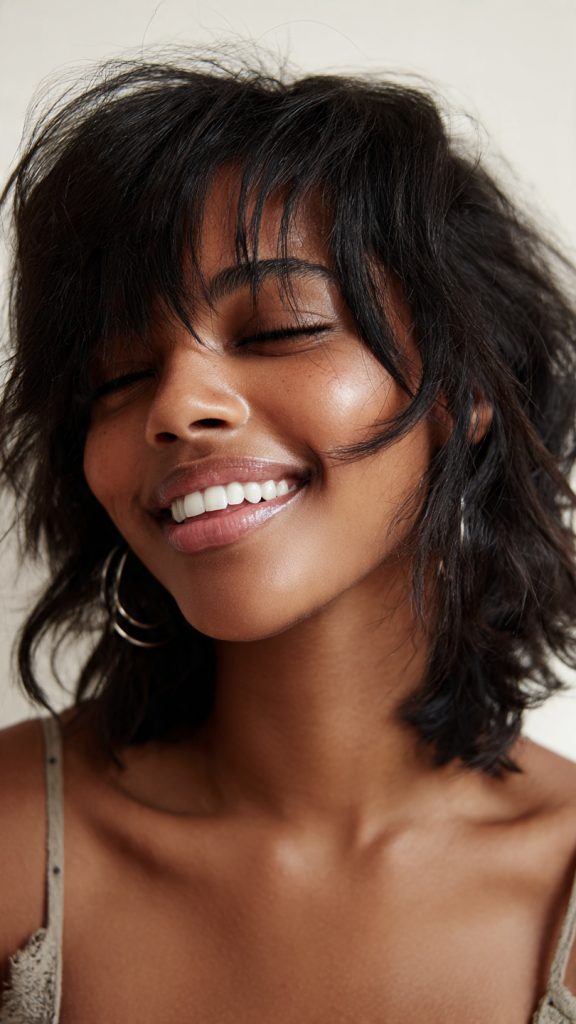
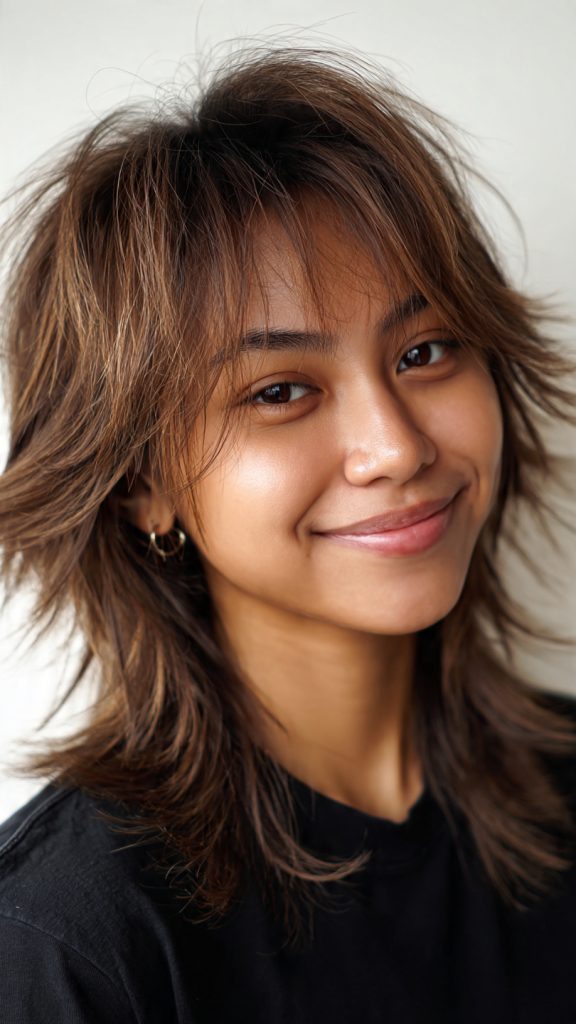
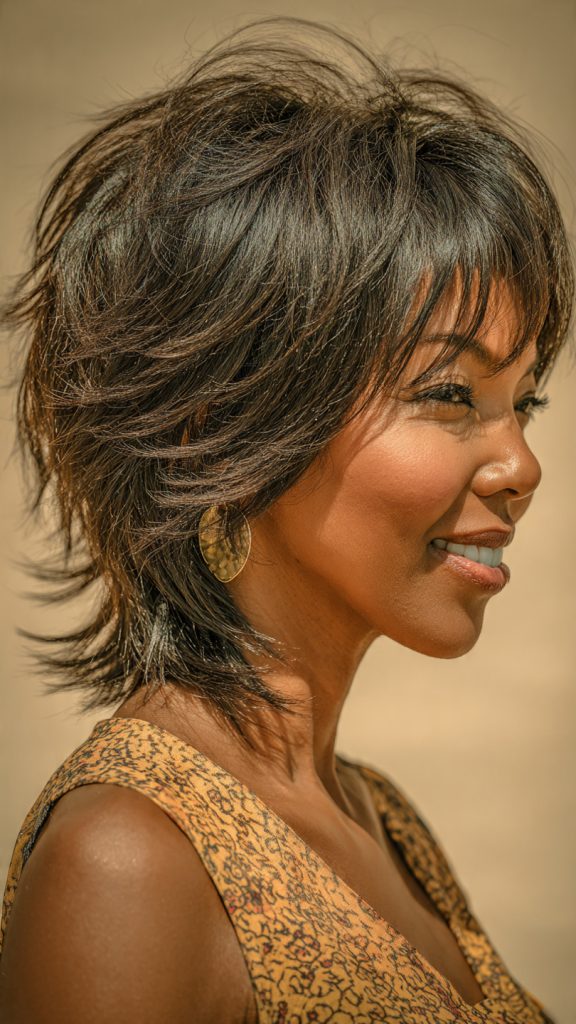
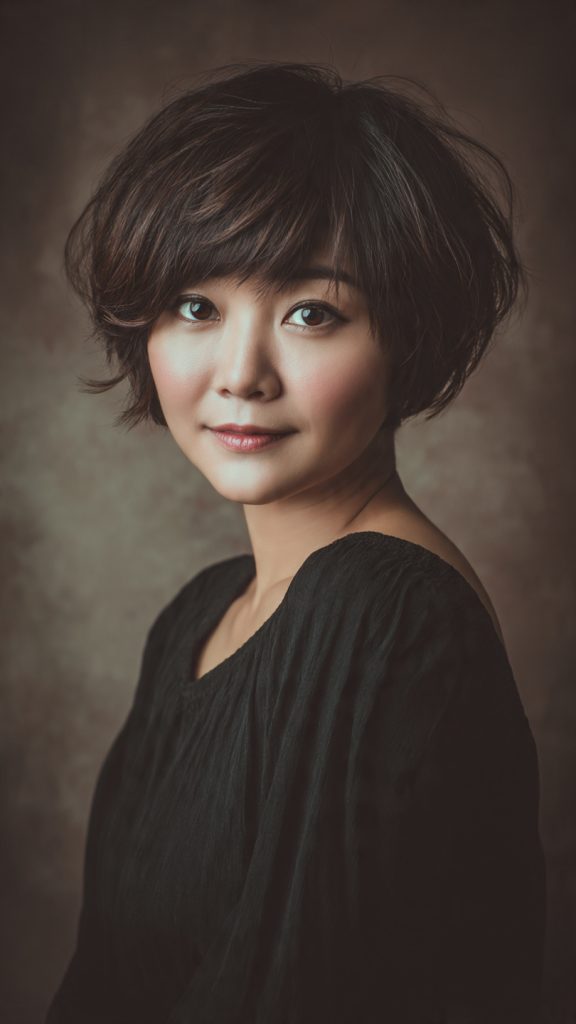
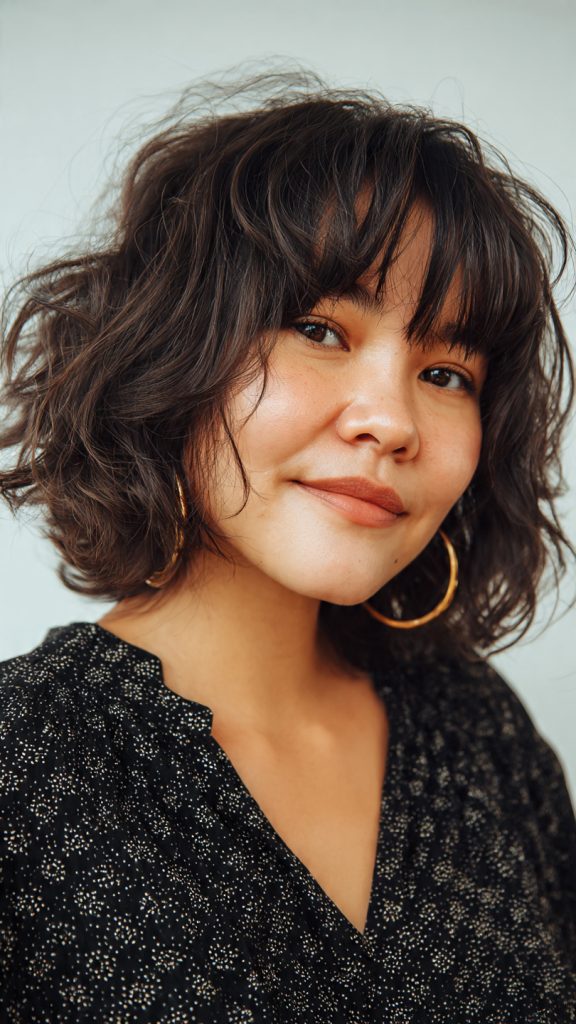
    3. The ‘Second-Day’ Shag

    Designed to live in dry shampoo, this heavily textured, mullet-adjacent cut features micro-fringe and exaggerated face-framing pieces that look intentionally slept-in and edgy.
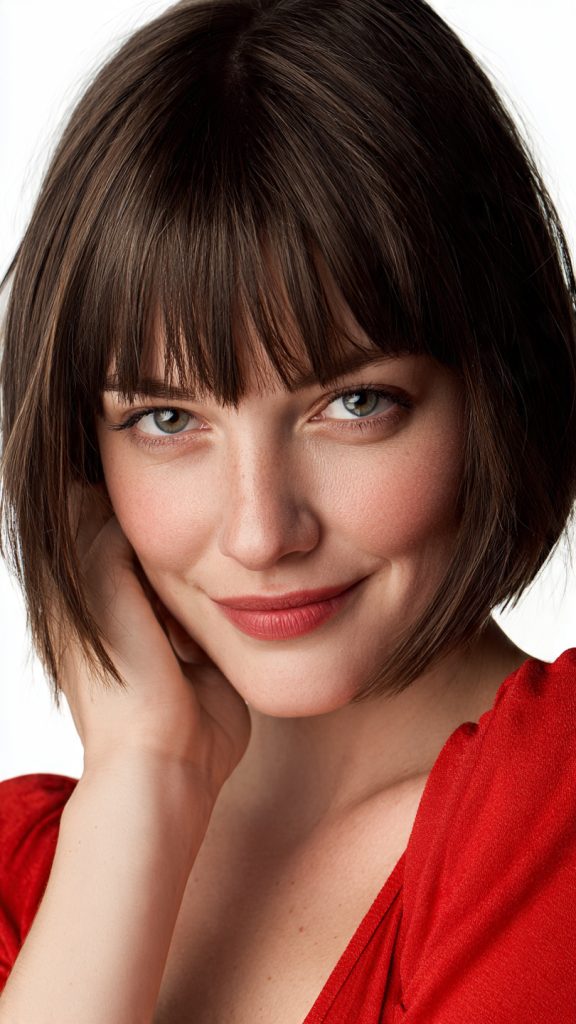
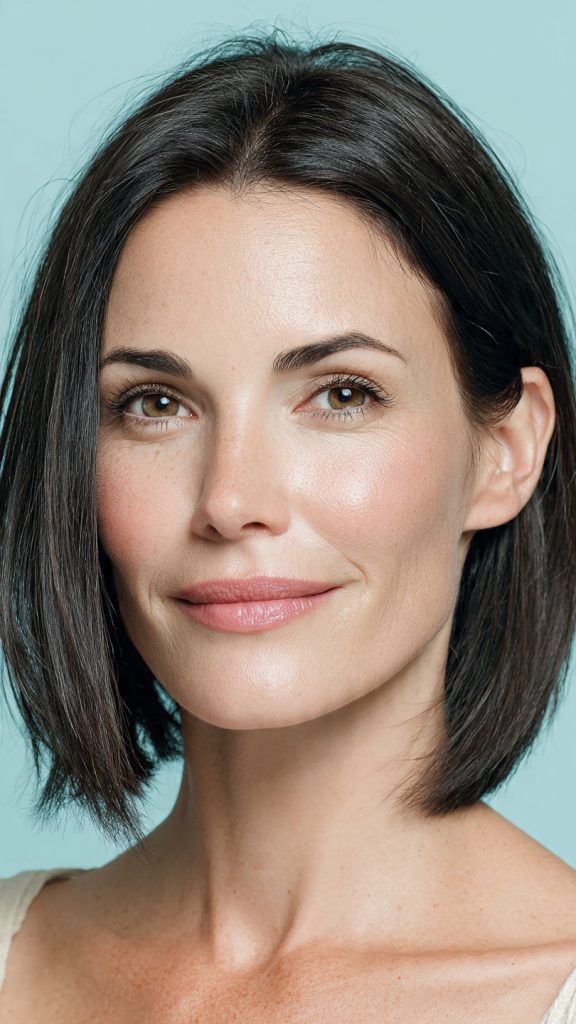
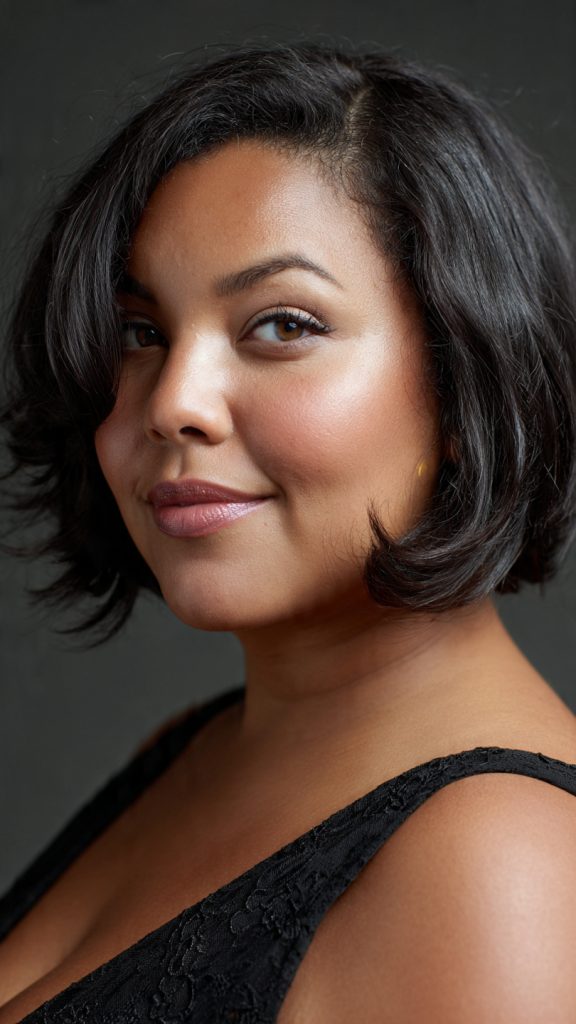
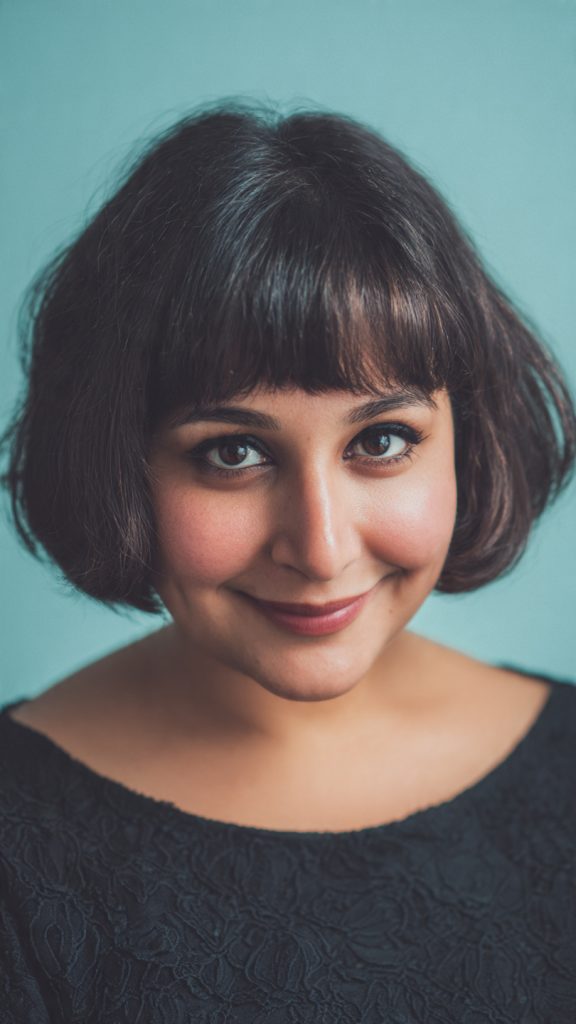
    4. The Glass Bob

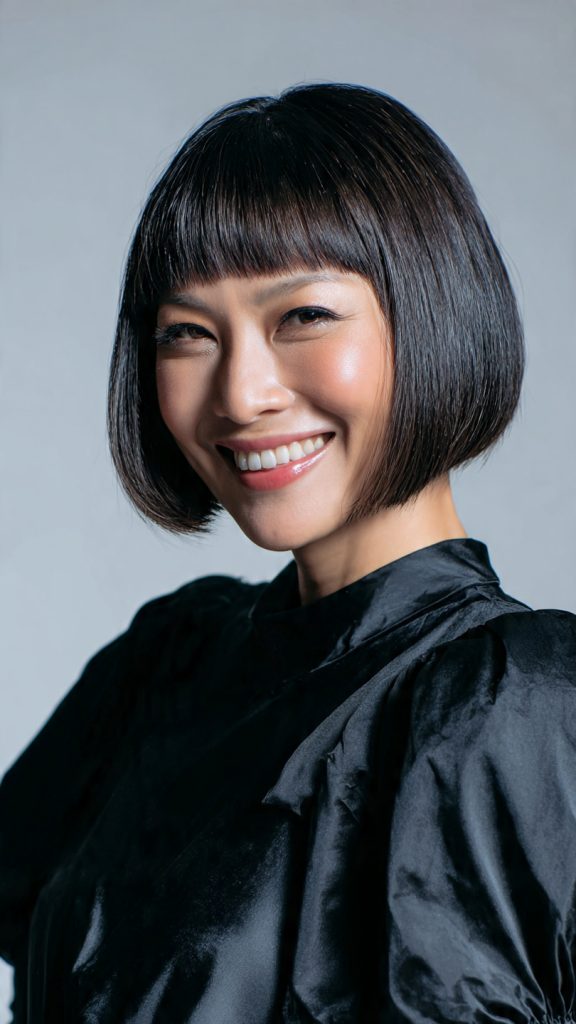
    A sharp, ultra-blunt one-length cut (usually jaw or nape-length) with zero layering, relying on high-gloss finishes and the “glass hair” trend to make the shape look liquid and reflective.

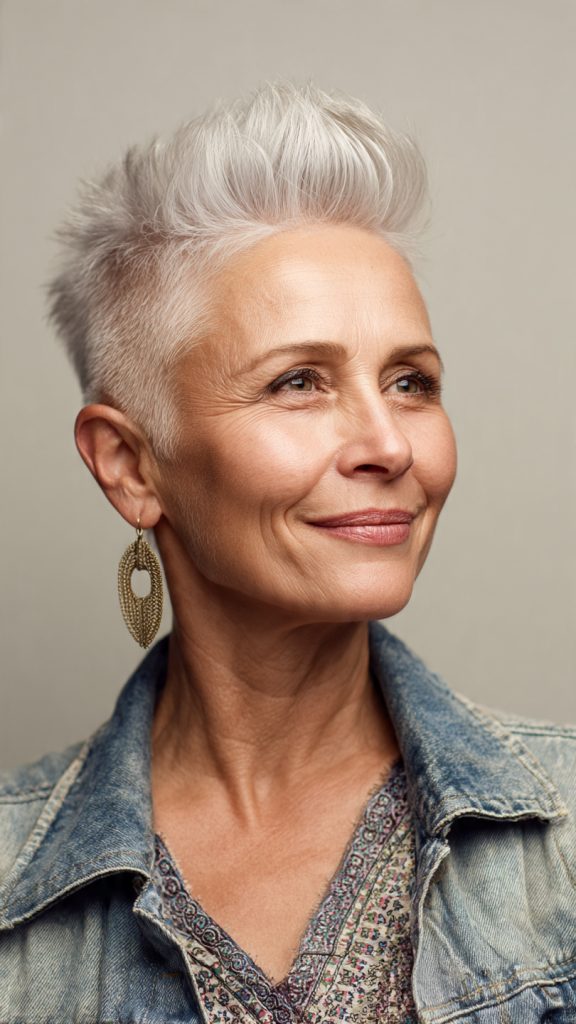
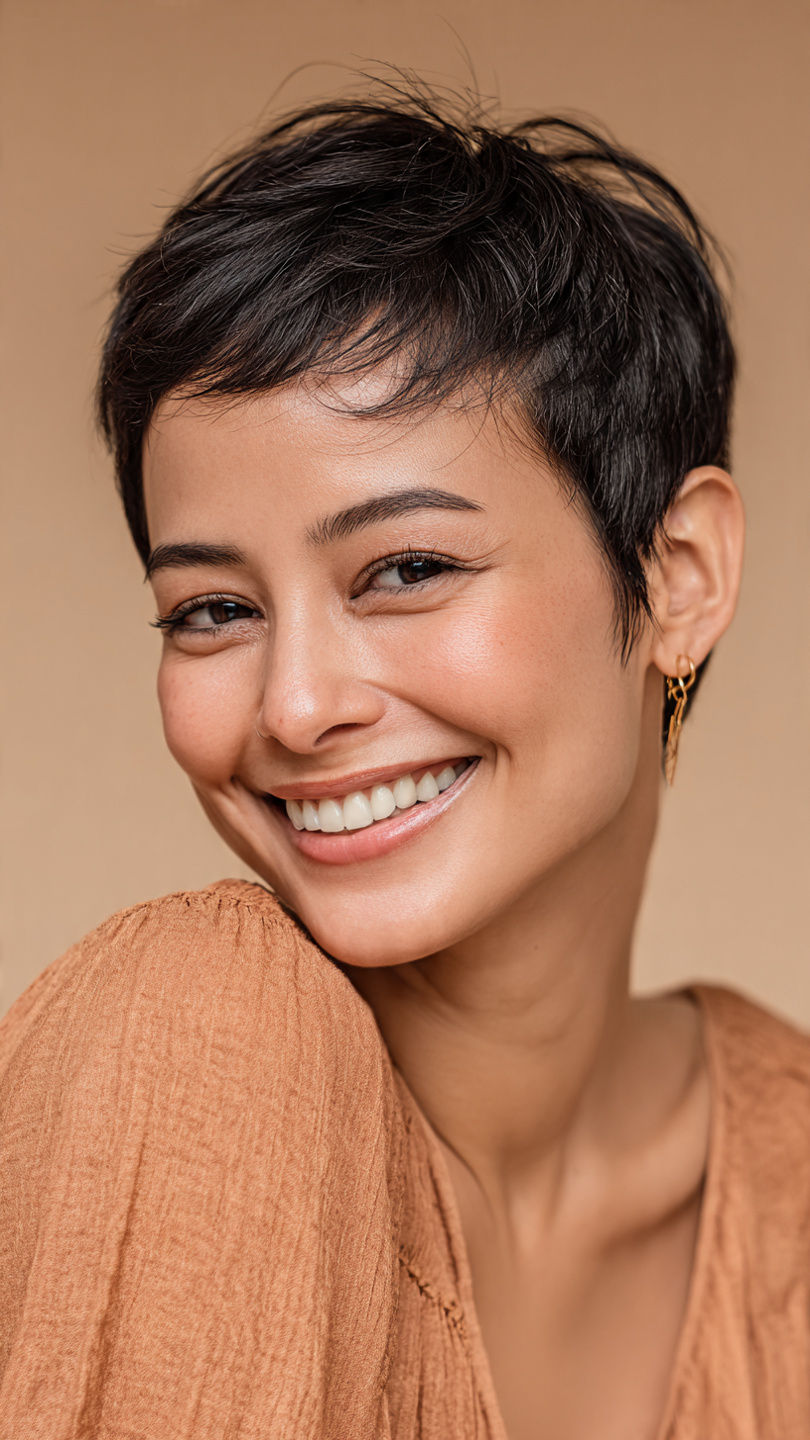
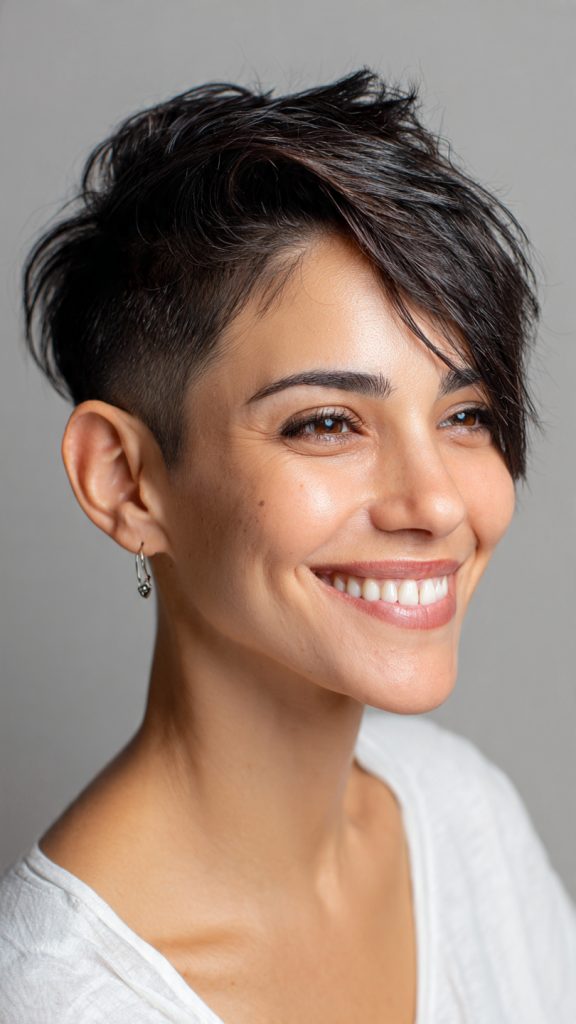
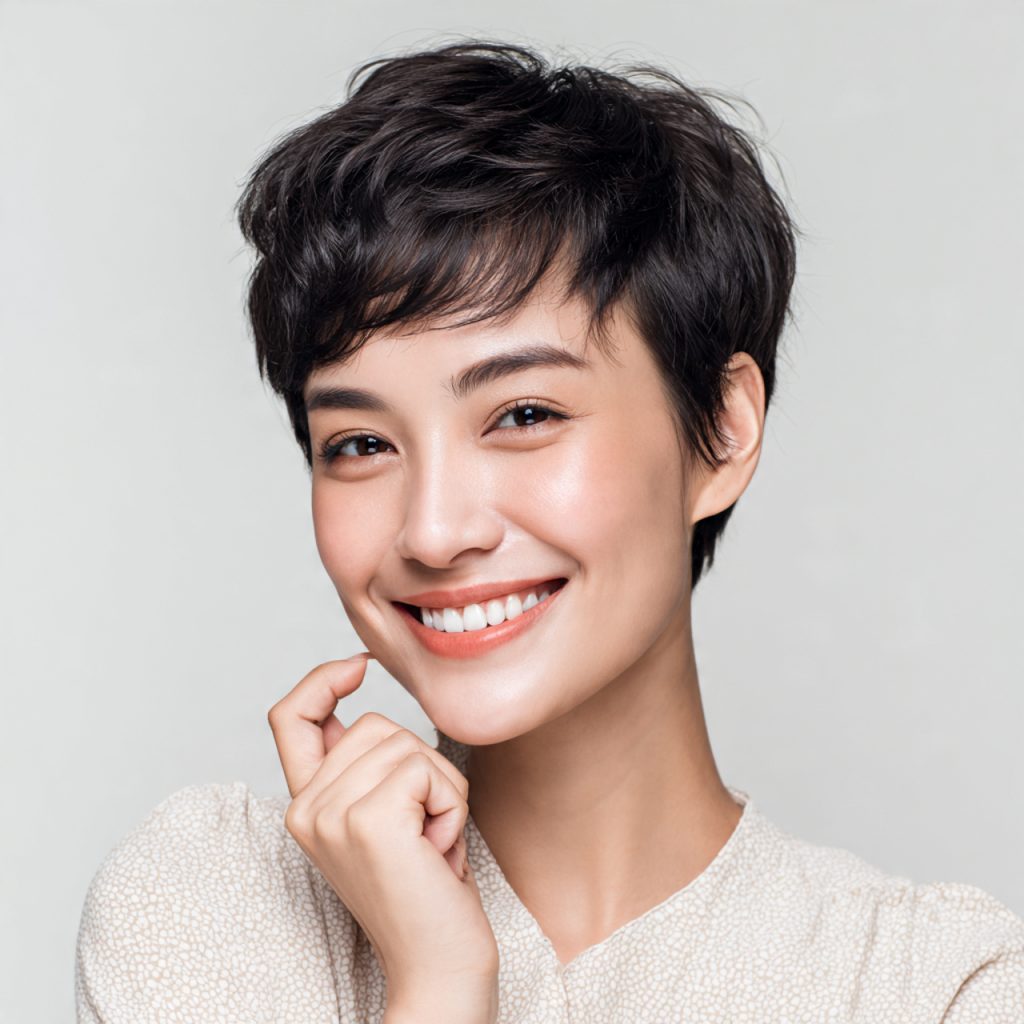
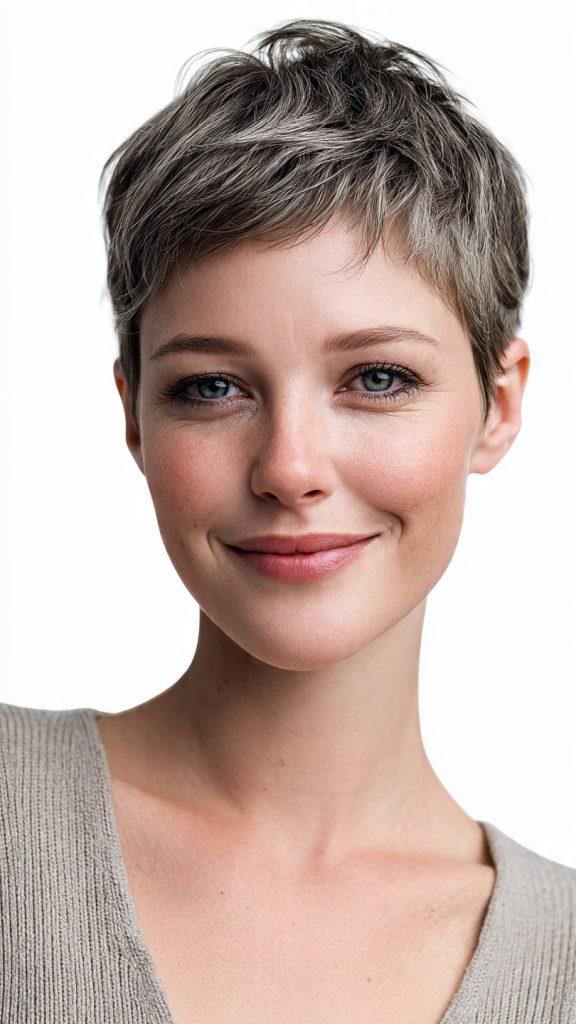
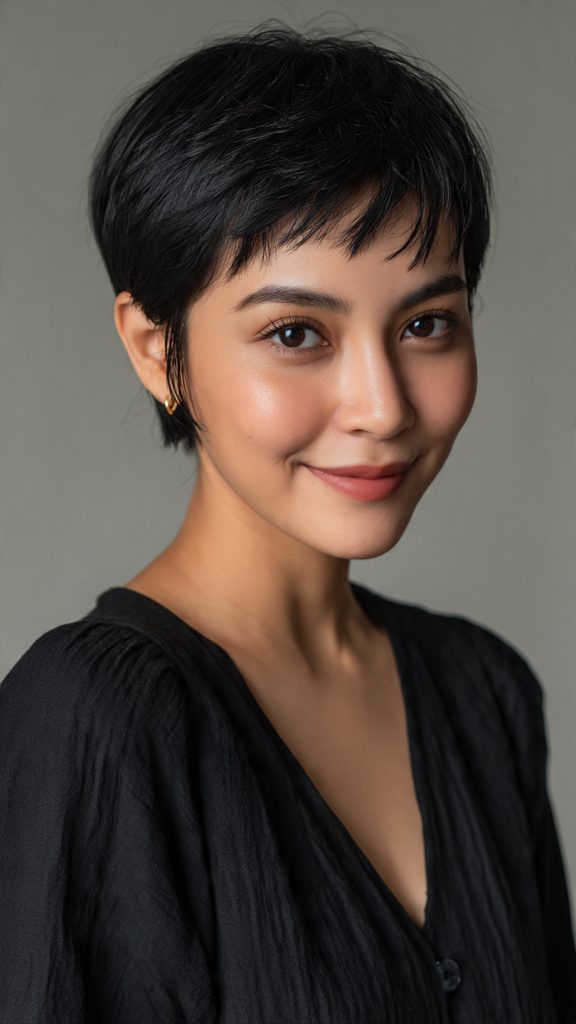
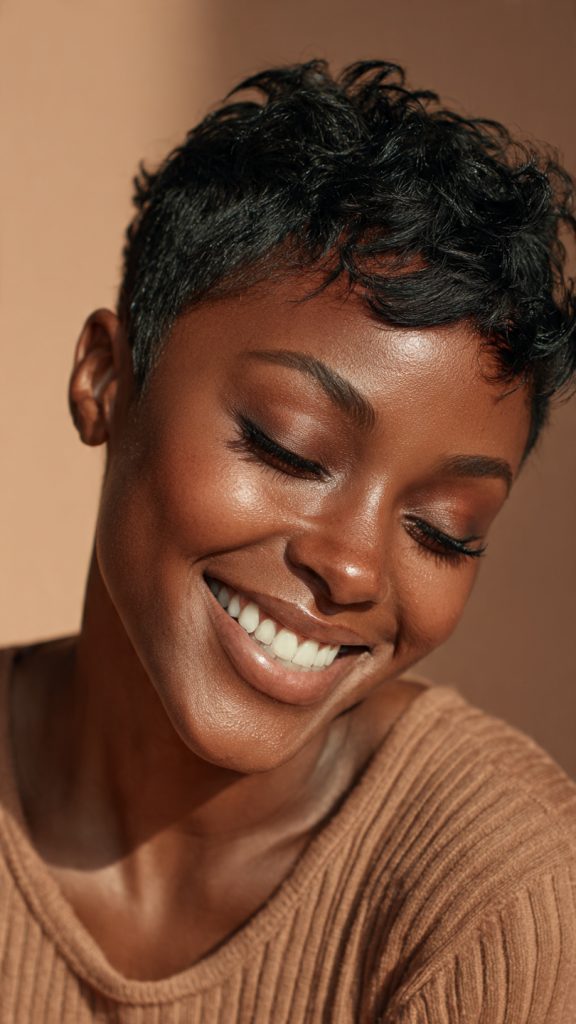
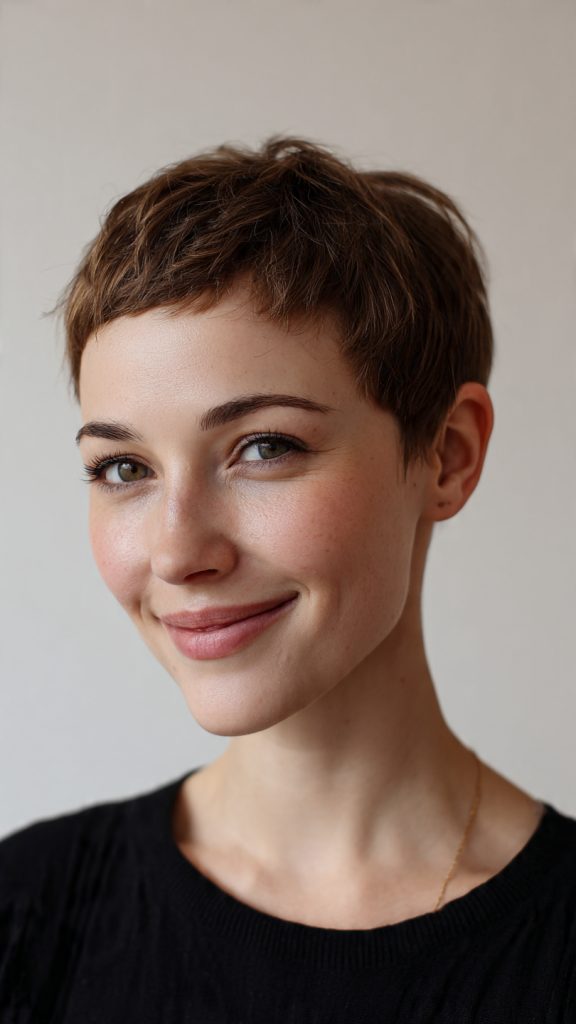
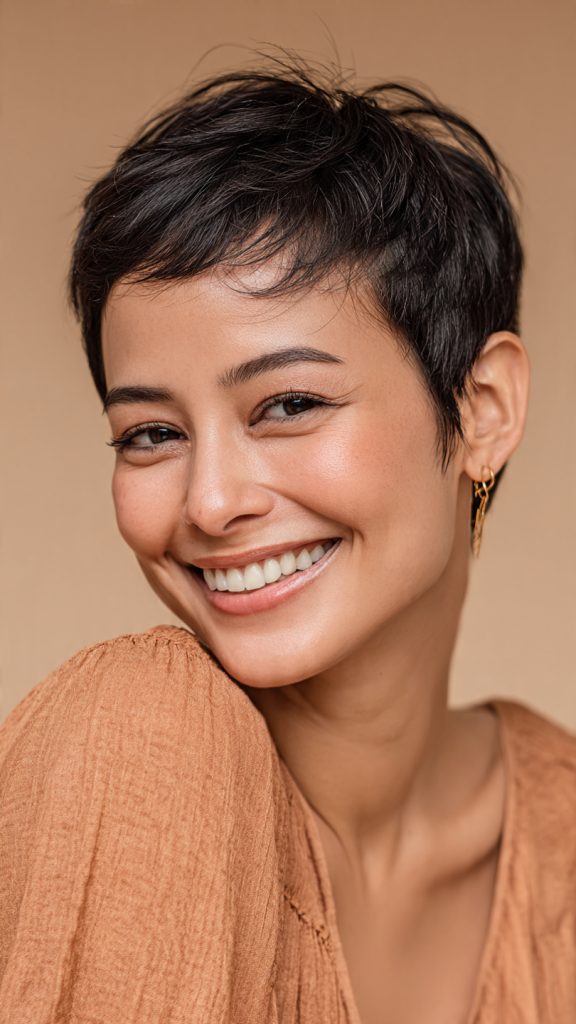
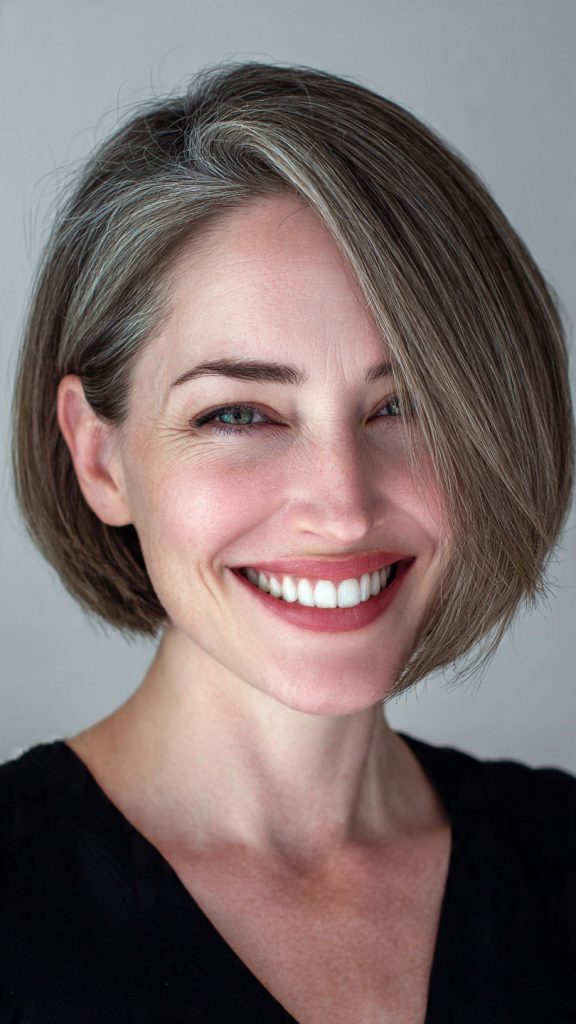
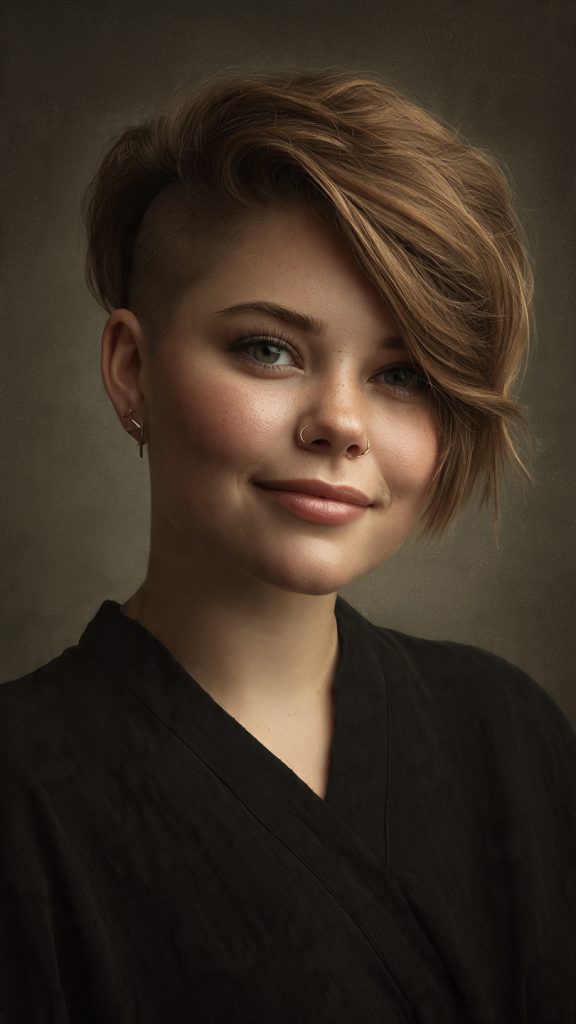
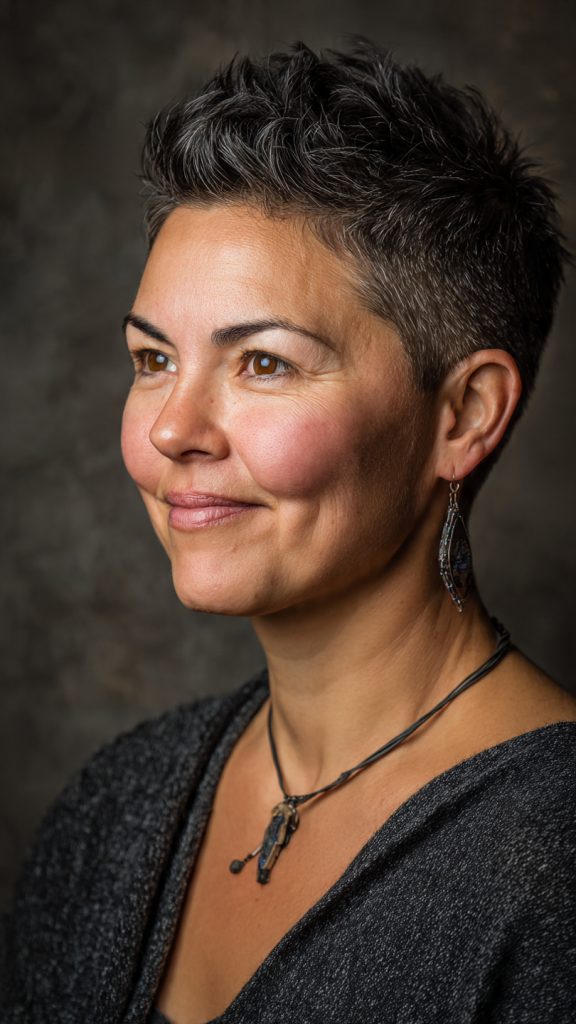
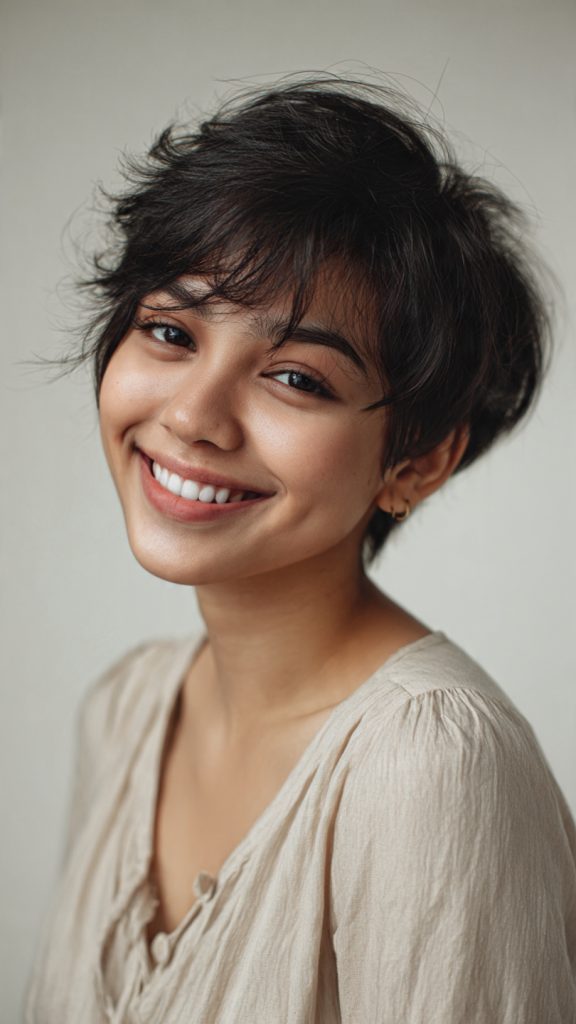
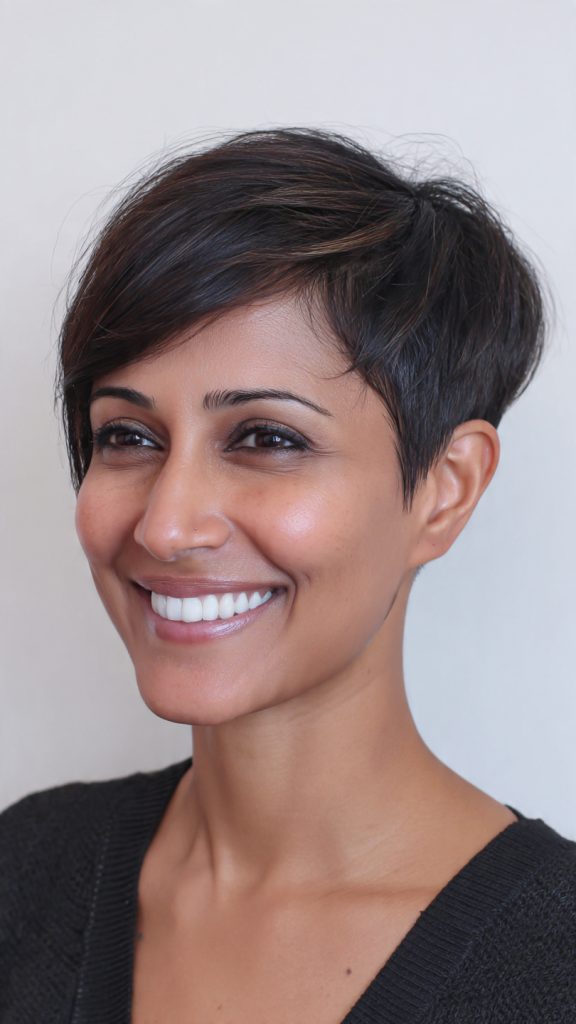
    5. The Bi-Layer Pixie

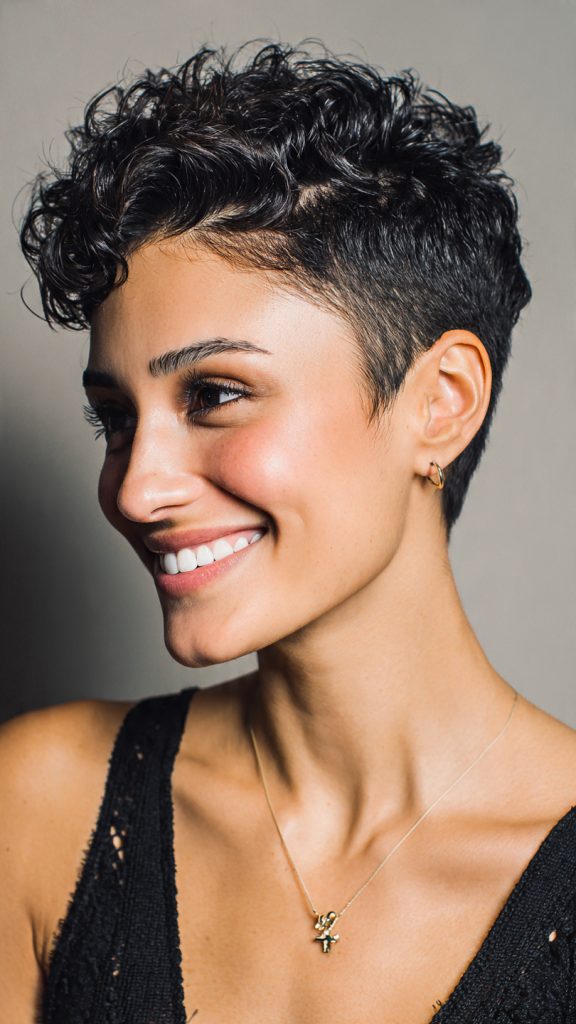
    Short and buzzed on the underside but grown into a soft, finger-wave top layer, this cut mimics a natural undercut that you can sweep side-to-side for two different looks in one.

    6. The Bento Box Fringe

    A graphic, blunt micro-bang that sits half an inch above the brows, cut with a slight inward curve to frame the eyes like a “window,” paired with sleek, sharp cheek-length layers.

    7. The 2026 Butterfly Cut

    An evolution of the 2020s version, this long-length cut uses deeper, hidden interior layering so the top “wings” (crown layers) float completely free from the longer bottom, creating airy, disconnected volume.
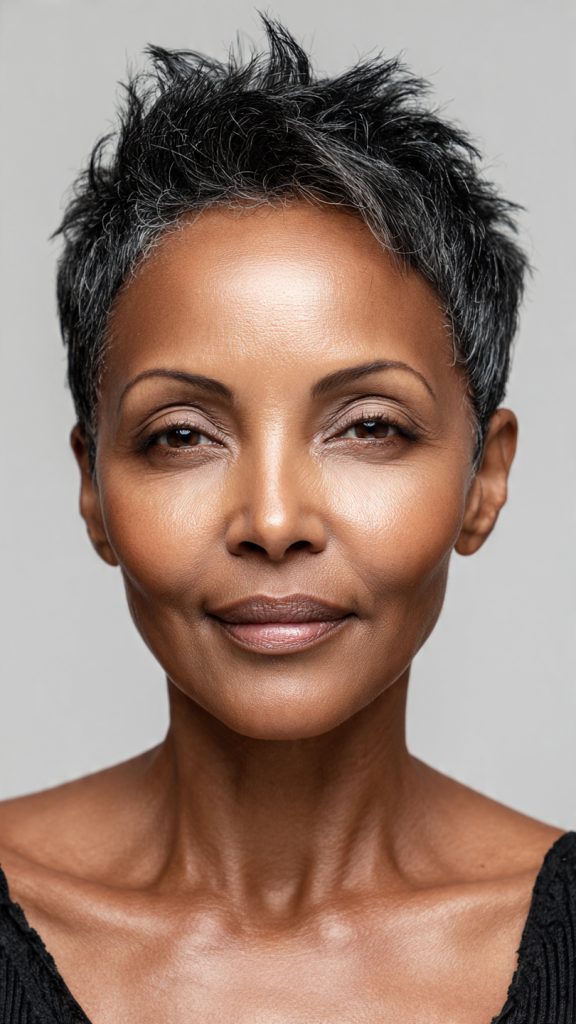
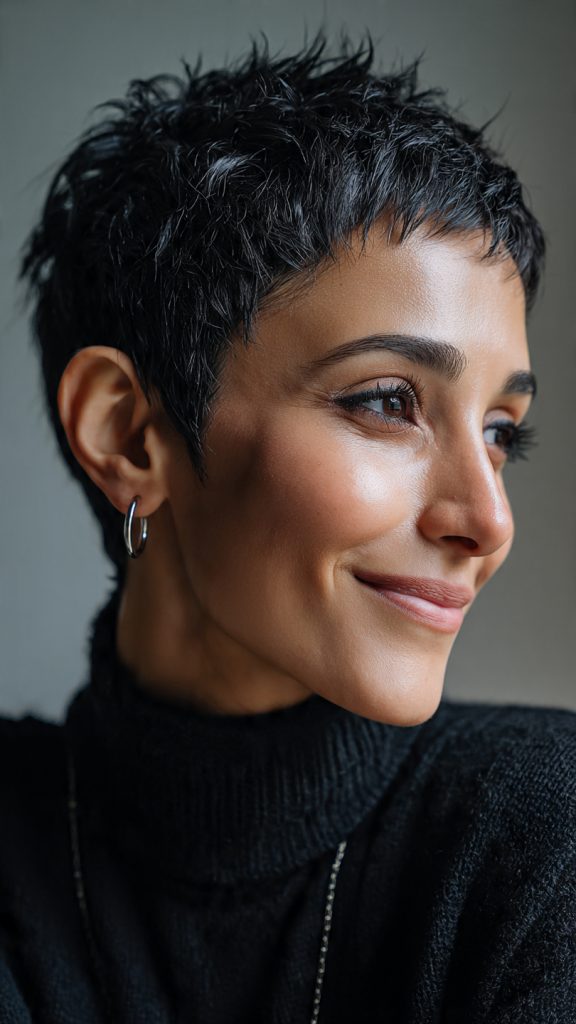
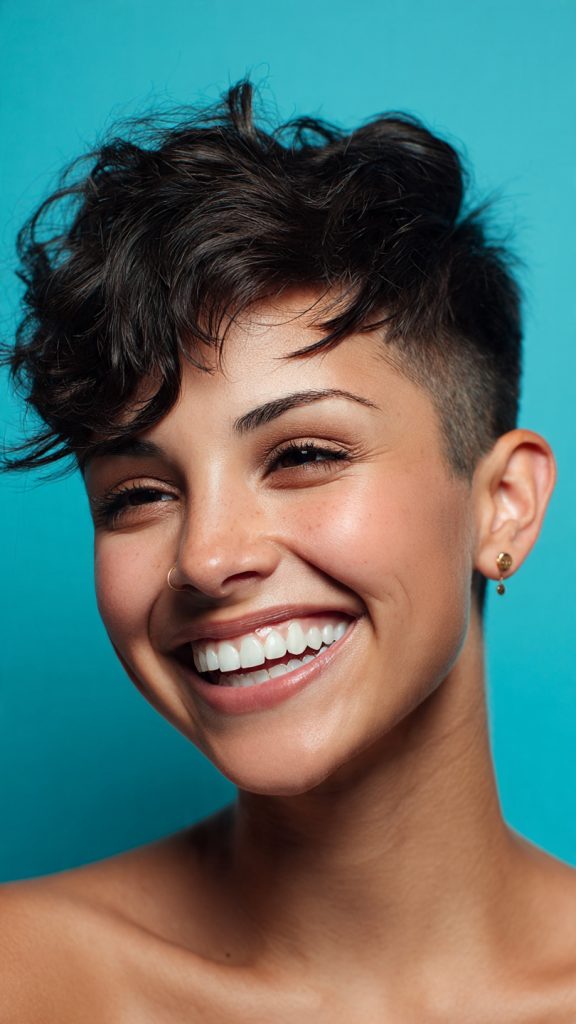
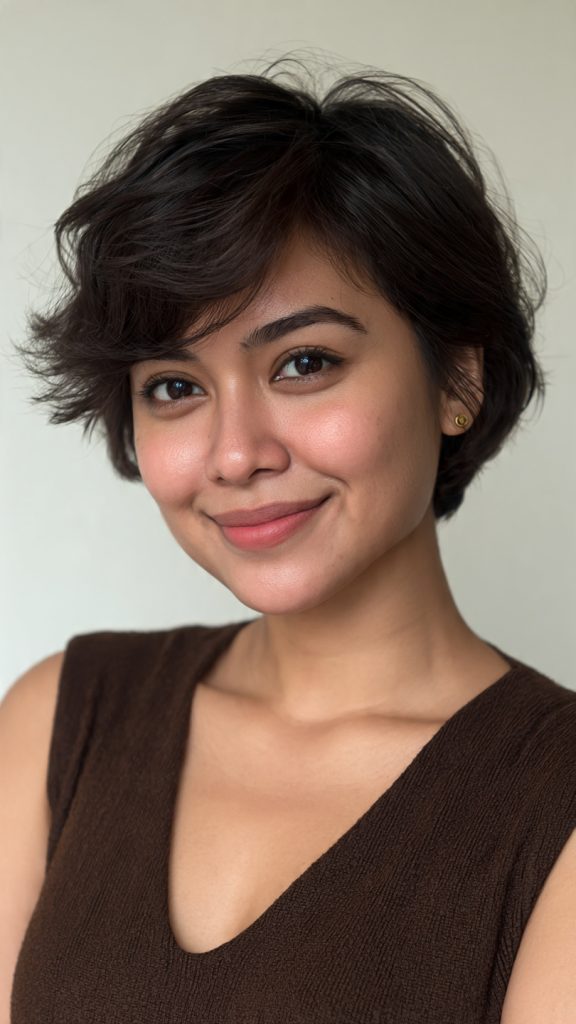
    8. The E-Girl Taper

    A low-maintenance, slightly grown-out tapered cut where the nape and sides are faded into the skin, but the top is left long, wispy, and unstyled, perfect for hats, headphones, or a lazy ponytail.

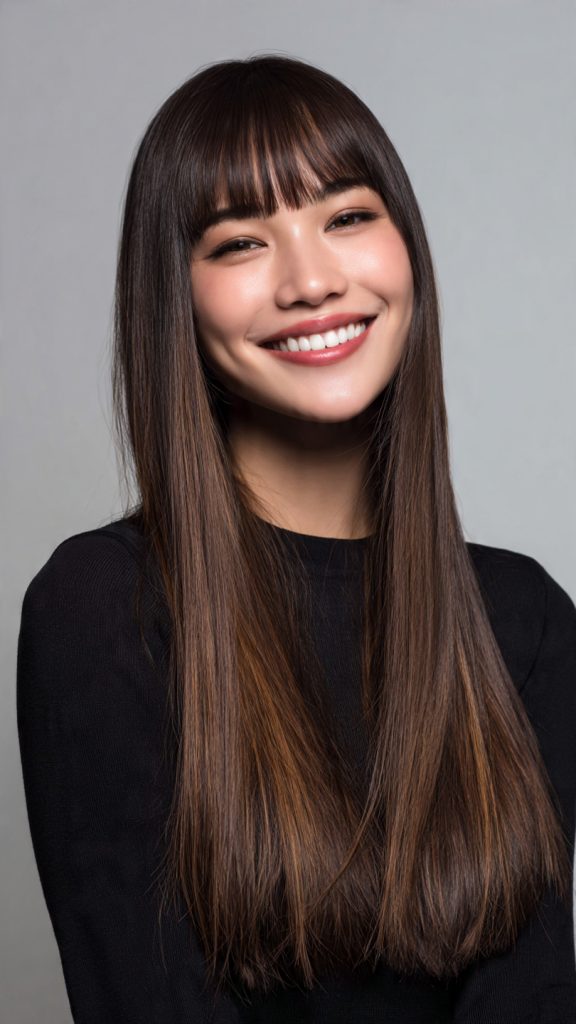
    9. The Uni-Length Fold

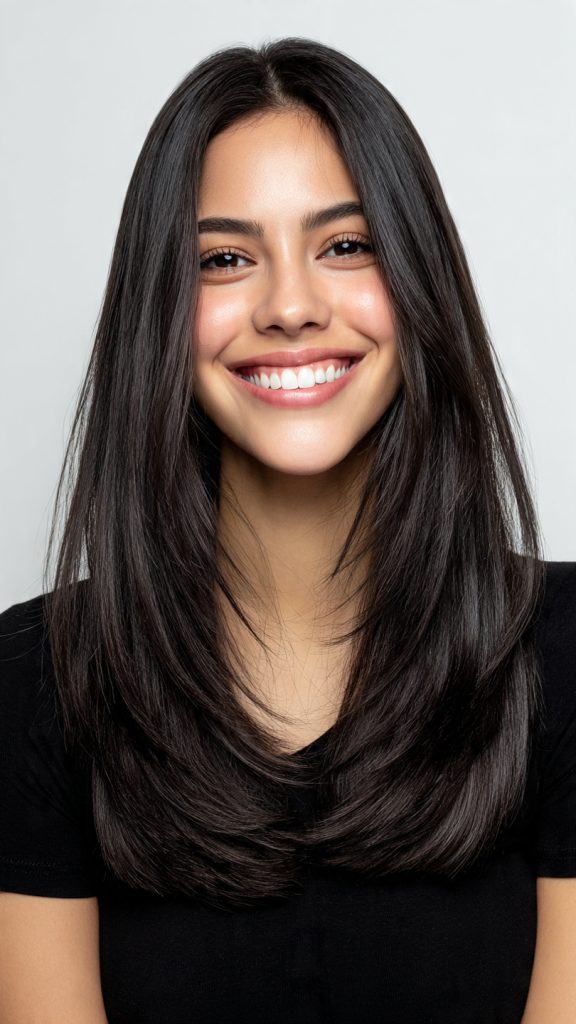
    A single-length mid-back cut with no layers whatsoever, relying instead on a subtle concave shape at the ends to encourage the hair to fold inward naturally when worn forward.

    10. The Hemline Fade

    An A-line bob where the back is faded extremely close to the nape, but the front angles down to a long, razor-cut point at the collarbone, blending a bold undercut with soft, romantic length.

    How to Choose the Right Cut for Your Face Shape

    While 2026 is about personal expression, a few timeless guidelines still help:

    • Round faces: The Liquid Lob and Hemline Fade add angular length and slim the silhouette.
    • Oval faces: Almost everything works, but the Glass Bob and Bento Box Fringe look especially striking.
    • Square faces: The Bi-Layer Pixie and Second-Day Shag soften strong jawlines with texture and height.
    • Heart-shaped faces: The Curl-Sculpted Box Cut and 2026 Butterfly Cut balance a wider forehead with volume at the chin.
    • Long faces: The Uni-Length Fold and E-Girl Taper add width and fullness to shorten the appearance of length.

    Maintenance Level at a Glance

    HaircutMaintenance LevelBest For
    Liquid LobLowFine, straight to wavy hair
    Curl-Sculpted Box CutMedium (shape-ups every 6-8 weeks)Type 3 & 4 curls
    Second-Day ShagVery LowOily scalps, dry shampoo lovers
    Glass BobHigh (needs frequent trims + gloss treatments)Straight, thick hair
    Bi-Layer PixieMedium (undercut touch-ups every 4 weeks)Bold, low-styling days
    Bento Box FringeHigh (bangs trim every 2-3 weeks)Sleek, straight hair
    2026 Butterfly CutLowLong, thick or layered hair
    E-Girl TaperVery LowTextured, wavy, or messy styles
    Uni-Length FoldLowStraight, heavy, or thick hair
    Hemline FadeMedium (fade touch-ups every 4 weeks)Straight to wavy hair

    Styling Products to Use in 2026

    To make these cuts shine without heat or heavy effort, stylists recommend:

    • For Liquid Lob & Glass Bob: Lightweight silicone-free serums for mirror shine.
    • For Curl-Sculpted Box Cut: A curl cream with “memory foam” technology that resets clumps with water mist.
    • For Second-Day Shag & E-Girl Taper: Tinted dry shampoo (roots only) and texture spray.
    • For Bi-Layer Pixie & Hemline Fade: Matte pomade or molding paste for separation and control.
    • For Bento Box Fringe: Mini flat iron (on low heat) or roller set for 2 minutes each morning.
    • For 2026 Butterfly Cut & Uni-Length Fold: Leave-in conditioner spray and a wide-tooth comb only.

    When to See Your Stylist

    A great cut in 2026 is designed to grow out gracefully, but certain trims are non-negotiable:

    • Every 2-3 weeks: Bento Box Fringe (bangs only)
    • Every 4 weeks: Bi-Layer Pixie (undercut line), Hemline Fade (nape fade)
    • Every 6-8 weeks: Curl-Sculpted Box Cut, Glass Bob
    • Every 10-12 weeks: Liquid Lob, Second-Day Shag, 2026 Butterfly Cut, E-Girl Taper, Uni-Length Fold

    Conclusion

    The woman of 2026 has stopped fighting her hair. She no longer wakes up at 6 a.m. to chase a blowout that dies in humidity, nor does she force her curls into submission with scorching irons. Instead, she chooses a cut that works with her biology—her cowlick, her wave pattern, her second-day oil, even her laziness. From the weightless drama of the 2026 Butterfly Cut to the rebellious ease of the E-Girl Taper, these ten hairstyles share one common philosophy: beauty that breathes. So book the appointment, bring a photo of the cut that calls to you, and walk out knowing that the best version of your hair has just begun—no blowout required.

  • The Octopus Haircut for Women Over 50: Why This Bouncy, Youthful Chop Is Trending

    The Octopus Haircut for Women Over 50: Why This Bouncy, Youthful Chop Is Trending


    Forget the notion that women over 50 need to “shorten and settle.” The Octopus haircut—a choppy, layered style that’s short on top with wispy, tentacle-like lengths below—is redefining modern aging. It offers volume where age-related thinning often strikes (the crown) and movement where it flatters (the jawline and shoulders).

    Why the Octopus Haircut Works Specifically for Women Over 50

    Unlike many trendy cuts that look great on 20-year-olds but fall flat on mature hair, the Octopus was practically designed for age-related changes. As we age, hair often becomes finer, loses density at the crown, and grows unevenly due to hormonal shifts. The Octopus haircut solves all three: the short, dense top layer creates instant crown volume; the disconnected layers hide uneven growth patterns; and the wispy ends reduce the “stringy” look that plagues thin hair. It’s biology-friendly fashion.

    Here are 18 smart ways to tailor this trend to mature hair, proving that bold, textured style only gets better with decades.


    1. The Silver-Toned Tentacle Cut


    Let your natural gray or white roots shine; the octopus’s disconnected layers create dazzling light refraction on silver strands, making hair look glassy and expensive.

    2. Crown Volume for Thinning Hair


    The signature short top layer mimics a volumizing hairpiece, lifting fine or thinning hair at the crown without needing heavy products or backcombing.

    3. The Soft Jawline Sweep


    Ask your stylist to keep the “tentacles” grazing your jawline; this softens age-related jowls and draws the eye upward to your cheekbones.

    4. Low-Maintenance Grown-Out Pixie


    If you’re tired of monthly pixie trims, the octopus allows a longer nape and sides, stretching salon visits to 8–10 weeks while keeping shape.

    5. Heatless Wave Activation


    On naturally wavy or permed hair, the octopus’s internal layers spring up into defined S-waves without curling irons—just scrunch and go.

    6. The Dramatic Fringe Opt-Out


    For those who hate hair in their eyes, skip the curtain bangs; keep the top short and longer sides swept back with a pin or light pomade.

    7. Color-Popping Hidden Tips


    Because the under-layers are longer and visible, dip-dye just the “tentacles” in a fun pastel or copper—low commitment, high personality.

    8. The All-One-Length Illusion


    From the front, the octopus reads as a chic bob; only when you turn does the layered depth appear—perfect for conservative workplaces with a hidden playful edge.

    9. Gravitropism Styling


    Use a lightweight mousse on damp roots, then flip your head upside down and blow-dry; the short top will “float” up, mimicking octopus posture naturally.

    10. The Sensitive Scalp Saver


    With minimal product needed on the roots (focus on mid-lengths and ends), this cut reduces buildup and irritation for those with psoriasis or dermatitis.

    11. Glasses-Friendly Architecture


    The cropped top and sides mean no bulk pushing your glasses’ earpieces outward; the longer back pieces drape behind frames elegantly.

    12. The 5-Minute Power Blowout


    Because only the top layer needs drying for shape (the tentacles look better air-dried or barely touched), you cut morning styling time by half.

    13. Dual-Texture Embrace


    Let your natural gray roots (often coarser) form the short top, while your finer, lower pigmented lengths become the soft tentacles—celebrating two textures in one cut.

    14. The Scarf and Turtleneck Best Friend


    Unlike sleek bobs that bunch up under collars, the wispy octopus ends sit lightly on scarves and turtlenecks, never losing shape.

    15. Nighttime Pineapple Protection


    Gather the longer tentacles into a loose, high ponytail (the “pineapple”) while sleeping; the short top stays friction-free, preserving volume until morning.

    16. The Dry-Cut Advantage


    Find a stylist who cuts hair dry; they can see exactly how your 50+ hair (which often changes curl pattern) will settle without the shock of wet-to-dry shrinkage.

    17. Sweat-and-Humidity Proofing


    On active women or hot climates, the octopus’s separation means sweat evaporates at the roots; no flat, clingy helmet-head after a walk or gym session.

    18. The Age-Inversion Illusion


    By creating vertical lines (short to long) rather than horizontal blocks, the octopus hairstyle elongates the face and neck—an instant visual “lift” without surgery.

    The 7 Best Styling Products for Your Octopus Cut (Over 50 Edition)

    Product TypeWhy It WorksWhat to Look For
    Volumizing mousseLifts the short crown layer without weighing it downAlcohol-free, light hold
    Texture sprayDefines the “tentacles” without crunchSea salt or rice protein based
    Dry shampooAbsorbs oil at the roots between washesTinted for gray or dark hair
    Lightweight hair oilAdds shine to wispy ends onlyArgan or jojoba, one drop only
    Root lift sprayApplied damp, gives 24-hour crown heightHeat-protectant formula
    Flexible hold hairsprayKeeps shape without helmet headBrushable, medium hold
    Satin scrunchieFor “pineapple” nighttime protectionNo elastic bands, snag-free

    What to Tell Your Stylist: A Script for the Octopus Cut

    Walk into the salon prepared. Say this:

    “I want the Octopus haircut. Please keep the top layer short and dense—about two to three inches. The middle layer should graze my ears. The bottom ‘tentacle’ layer should be wispy and light, reaching my collarbone or just below. Do not blunt-cut the ends. Use deep, choppy internal layering. I want a rounded silhouette from the front, but a longer, separated look from the back. I do not want a uniform length anywhere.”

    Three things to emphasize if you have thinning hair:

    • “Keep the crown layer shorter so it stands up, not lies flat.”
    • “Remove weight, not length, from the bottom tentacles.”
    • “No razors—use shears for cleaner, less damaging ends.”

    Before You Book: 4 Honest Self-Checks

    Ask yourself these questions before committing:

    1. Do I have at least shoulder-length hair now? The Octopus needs existing length for the tentacles. If your hair is pixie-short, expect a 4-6 month grow-out first.
    2. Am I willing to style the crown daily? The short top layer requires 2-3 minutes of lift product and blow-drying. It is not a wash-and-go cut for pin-straight hair.
    3. Do I have enough density? Very fine hair (seeing scalp clearly when dry) may need a lighter version—ask your stylist for a “modified octopus” with fewer drastic layers.
    4. Am I ready for compliments? This cut draws attention. If you prefer to blend in, choose a softer, less architectural layered bob instead.

    The Octopus Haircut vs. Other Popular Over-50 Cuts

    CutVolume at CrownMovementMaintenance LevelBest For
    OctopusHighVery highMedium (6-8 weeks)Fine to medium hair, active women
    Classic PixieMediumLowHigh (3-4 weeks)Very thin hair, low patience for styling
    Long Bob (Lob)LowMediumLow (8-10 weeks)Thick hair, wash-and-go preference
    ShagMediumHighMedium (6-8 weeks)Wavy or curly hair, boho style
    Layered Bowl CutLowLowMediumStraight hair, minimal volume needed

    The Octopus wins on crown volume and movement, but requires more frequent trims than a lob.


    Real Talk: What Nobody Tells You About This Cut

    The awkward grow-out phase is real. Between weeks 5 and 7, the top layer and tentacles can look disconnected in a bad way—like a mullet’s shy cousin. Schedule your trims at exactly 6 weeks to avoid this.

    Your part line may shift. Because the top is cut shorter and layered, your natural part might disappear. Some women love the freedom; others miss their familiar side part. Ask your stylist to leave a subtle parting guide.

    It photographs smaller than it looks in person. The dense crown creates volume that reads as “neat” in selfies, not big. Do not panic if your reflection looks bigger than your photos—that is normal.

    Wind is your friend. Unlike sleek bobs that blow into tangles, the Octopus’s separated layers settle back into place with one shake. Breezy days actually improve the cut.


    How to Transition from Other Cuts to the Octopus

    From a Pixie: You will grow out the top and crown for 3-4 months while keeping the back shorter. Ask for a “grown-out pixie with mullet shaping” as your interim cut.

    From a Bob: You have the easiest transition. Your stylist will remove interior weight and add short, choppy layers on top while keeping your existing length at the bottom tentacles.

    From Long Layered Hair: You will lose significant length on the crown layer (up to 5 inches). Be emotionally prepared. The result is worth the chop.

    From a Shag: You are 80% there. Your stylist will shorten the top further and texturize the ends more aggressively to create true “tentacles” rather than standard shag fringe.


    5 Common Mistakes Women Over 50 Make with This Cut (And How to Avoid Them)

    MistakeWhy It HappensThe Fix
    Asking for “soft” layersTrying to play it safeBe direct: “I want visible choppy layers, not subtle ones.”
    Letting the tentacles get too longNot trimming bottom frequentlyTrim bottom tentacles every other crown trim (12 weeks)
    Using heavy oils or buttersOld habit from longer hairSwitch to sprays and mists only
    Blow-drying all hair forwardApplying younger styling techniquesDry crown upward, tentacles downward separately
    Going to a “trim-only” stylistLoyalty to a conservative cutterFind a specialist in shag, wolf, or octopus cuts

    Conclusion: Why the Octopus Haircut Is More Than a Trend for Women Over 50

    The Octopus haircut is not just another fleeting social media fad. For women over 50, it represents a quiet rebellion against the idea that aging hair requires shrinking, softening, and disappearing. This cut says: I still have volume. I still have movement. I still have something to say.

    Yes, it requires a skilled stylist. Yes, you will need to learn a new 5-minute morning routine. And yes, you will likely scare your conservative salon friends the first time they see you. But the women who have made the switch report the same three things: they touch their own hair more often (because it feels good), they receive compliments from strangers (not just polite friends), and they finally stopped envying their daughter’s haircut.

    Your hair at 50, 60, and beyond has history, texture, and character that no 20-year-old can fake. The Octopus haircut simply gives that history a modern, confident frame. Whether you are silver, dyed, natural, or permed—whether your hair is thin, thick, straight, or wavy—there is a version of this cut waiting for you. You just need the courage to ask for choppy layers and the patience to find a stylist who knows what “tentacles” actually means.

    Book the appointment. Bring the photos. And when someone asks, “Is that the Octopus cut?” smile and say yes.

  • Beautiful Layered Hairstyles for Women Over 50 with Thin, Fine Hair (That Actually Create Volume)

    Beautiful Layered Hairstyles for Women Over 50 with Thin, Fine Hair (That Actually Create Volume)

    If you’re a woman over 50 with thin, fine hair, you’ve likely heard the old myth that “layering will make your hair look even thinner.” The truth? Strategic layering is one of the best things you can do. The key is not how many layers you add, but where and how they are cut.

    When fine hair is left all one length, it often falls flat, clinging to the scalp. The right layers remove excess weight, allowing the hair to lift at the roots and move with natural body. They create the illusion of density, texture, and bounce—without sacrificing the integrity of your ends.

    Below are 19 expertly crafted layered hairstyles, from wash-and-wear short cuts to soft, face-framing longer styles. Each idea focuses on volume, easy maintenance, and modern sophistication.


    1. The Short, Layered Pixie with Fringe

    • Why it works: Short layers remove maximum weight, lifting fine hair instantly. A textured fringe (bangs) conceals a thinning hairline and adds density around the forehead.
    • Styling tip: Rub a pea-sized amount of volumizing mousse into damp roots. Blow-dry forward with a small round brush.

    2. The Classic Layered Bob (Chin-Length)

    • Why it works: A chin-length bob with subtle internal layers prevents the “triangle head” effect. The layers are stacked slightly at the back for nape lift.
    • Styling tip: Use a vent brush while blow-drying to keep roots upright. Finish with a light dry texture spray.

    3. The “Piecy” Crop with Disconnected Layers

    • Why it works: Disconnected (choppy) layers create deliberate separation, making fine hair look edgy and full rather than sparse.
    • Styling tip: Work a tiny amount of pliable paste between fingertips and pinch ends into pieces.

    4. The Long-Layered Lob (Long Bob)

    • Why it works: A lob that falls just above the shoulders uses long, gentle layers. This keeps the perimeter weighty while adding movement through the mid-lengths.
    • Styling tip: Add velcro rollers at the crown for 10 minutes after blow-drying for lasting lift.

    5. The Asymmetrical Layered Cut

    • Why it works: One side slightly longer than the other tricks the eye into seeing more volume. Asymmetry also distracts from any uneven density.
    • Styling tip: Tuck the shorter side behind one ear to highlight the angle.

    6. The Feathered Shag

    • Why it works: A modern shag uses wispy, feathery layers throughout. The abundance of texture gives fine hair a “bedhead” fullness that doesn’t look thin.
    • Styling tip: Scrunch in a salt-free wave spray and air-dry for effortless volume.

    7. The Layered French Bob (Ear-Length)

    • Why it works: This blunt-but-layered bob ends at the earlobe. Micro-layers underneath prevent the cut from looking heavy, while the blunt edge creates the illusion of thicker ends.
    • Styling tip: Keep the fringe soft and piecey. A flat iron is too harsh—use a round brush only.

    8. The Graduated Stacked Bob

    • Why it works: Stacked layers in the back create a shelf of volume at the crown. The front remains slightly longer for softness around the face.
    • Styling tip: Blow-dry the stacked area with a small brush, rolling under slightly at the nape.

    9. The Wispy Layered Cut with Side-Swept Bangs

    • Why it works: Fine, wispy layers throughout the top and sides reduce bulk while side-swept bangs add diagonal movement, drawing eyes away from thinning areas.
    • Styling tip: Blow-dry bangs to the opposite side first, then sweep back for extra lift at the root.

    10. The Mini-Mullet (Modern, Subtle Version)

    • Why it works: A soft mullet keeps short, tight layers on top and longer, thinner pieces at the nape. This preserves volume where you need it most—the crown.
    • Styling tip: Use a root-lifting powder at the crown for instant grit and height.

    11. The Layered Italian Bob

    • Why it works: The Italian bob is rounded and slightly longer in front. Internal layers are cut with a razor (on fine hair, carefully) to create soft, airy movement without losing shape.
    • Styling tip: Blow-dry with a mixed-bristle round brush, directing all hair slightly forward.

    12. The Textured Bowl Cut (Grown-Up Version)

    • Why it works: Yes, a bowl cut—but modernized. The key is heavy, textured layering through the crown and nape so it looks intentional and chic, not severe.
    • Styling tip: This cut shines with a glossy serum on the ends and a matte texture on the roots.

    13. The Soft Mohawk (Layered Fade)

    • Why it works: A strip of longer, layered hair down the center of the head, with very short or faded sides. This central volume creates dramatic fullness on fine hair.
    • Styling tip: Use a tiny bit of volumizing foam only on the center strip, then blow-dry straight up.

    14. The Long Layered Cut with Curtain Bangs

    • Why it works: For women who prefer shoulder-length or longer, long layers prevent the hair from clinging to the scalp. Curtain bangs open up the face and add width at the temples.
    • Styling tip: Blow-dry curtain bangs away from the face using a large round brush, rolling backward.

    15. The Cropped, Layered “Boy Cut” with Texture

    • Why it works: Extremely short on the sides and back, with finger-length layered pieces on top. This removes all weight, so fine hair stands up naturally.
    • Styling tip: Rub a drop of grooming tonic between palms and rake through the top layers.

    16. The Layered A-Line Bob

    • Why it works: Shorter in the back, longer in the front. The stacked layers in the back create crown volume, while the angled front adds length and sophistication.
    • Styling tip: Flat iron only the front longer pieces; leave the back naturally blown-dry for body.

    17. The “Lived-In” Layered Cut (Minimalist Styling)

    • Why it works: This cut uses soft, rounded layers that follow your natural growth patterns. No harsh lines means fine hair doesn’t look “cut thin.”
    • Styling tip: Wash at night, sleep on slightly damp hair, and shake out in the morning. No heat needed.

    18. The Layered Bixie (Bob + Pixie Hybrid)

    • Why it works: Longer than a pixie but shorter than a bob. Dense layering through the crown and nape provides the best of both worlds: the lift of a pixie and the softness of a bob.
    • Styling tip: Use a small flat brush to lift roots while blow-drying forward, then tousle with fingers.

    19. The Curly or Wavy Layered Cut (for Naturally Textured Fine Hair)

    • Why it works: If your fine hair has any wave or curl, dry-cutting layers by curl pattern releases spring and volume. Layers prevent the curls from being pulled straight by their own weight.
    • Styling tip: Diffuse upside down with a heat protectant, then scrunch out the crunch with a drop of lightweight oil.

    What to Ask Your Stylist (The Exact Language for Thin, Fine Hair)

    Bringing a photo is helpful, but knowing the words to say is powerful. Use these phrases during your consultation:

    • “I want internal layers, not surface layers.” (Internal layers are hidden underneath the top layer of hair. They remove weight without making the top look choppy or thin.)
    • “Please point-cut, don’t slide-cut.” (Point-cutting creates soft, textured ends that blend together. Slide-cutting on fine hair can create visible lines that look sparse.)
    • “Keep the perimeter weight line strong.” (Even with layers, you want the outer shape to look dense. A stylist can layer the inside while preserving a blunt or softly rounded edge.)
    • “Lift at the crown is my priority.” (Tell them exactly where you need volume. A good stylist will concentrate short, supportive layers in the crown area.)
    • “No heavy texturizing shears near my scalp.” (Over-thinning the roots destroys the only volume fine hair has. Ask for shears to be used only on mid-lengths and ends.)

    The 5 Golden Rules for Styling Layered Fine Hair at Home

    Layers give you the potential for volume. These rules help you keep it.

    1. Always Start with a Volumizing Product at the Roots

    Fine hair needs grip. Apply a lightweight mousse, root-lifting spray, or volumizing foam to damp roots only. Avoid the ends—they need moisture, not lift.

    2. Blow-Dry Upside Down or Side to Side

    Never blow-dry your hair hanging straight down. Flip your head forward, or tilt it side to side. This trains the roots to stand up, not lie flat.

    3. Use the Right Brush (Hint: Not a Paddle Brush)

    A small-to-medium round brush (1.5 to 2 inches) gives fine hair bend and body. A vent brush is great for rough-drying. Avoid large paddle brushes—they pull layers flat.

    4. Finish with a Dry Texture Spray, Not Hairspray

    Traditional hairspray weighs fine hair down. Dry texture sprays, volumizing powders, or even a light sea salt spray (used sparingly) add grit and separation between layers, making hair look twice as thick.

    5. Wash Less Often (and Use Dry Shampoo Strategically)

    Fine hair gets oily fast, but over-washing strips natural support. Wash every other day or every two days. On day two, spray dry shampoo before you see oil—only at the roots—and massage in. This adds instant lift.


    The Best Products for Layered, Thin, Fine Hair (Over 50)

    Your hair has changed. Your products should too. Look for these keywords: volumizing, lightweight, thickening, root-lifting, texturizing.

    Product TypeWhat to Look ForExample Ingredients to Seek
    ShampooClear, sulfate-free, volumizingRice protein, biotin, panthenol
    ConditionerApply only from ears downAvoid silicones near roots
    Root lifter / MousseLight foam, not heavy creamHydrolyzed wheat protein
    Heat protectantSpray, not oil-basedPolyquaternium-55
    Dry shampooPowder or aerosol, matte finishRice starch, tapioca
    Texture sprayDry finish, no stickinessSilica, magnesium carbonate

    What to avoid: Heavy creams, butters, coconut oil, “repair” masks (use once a month maximum), and anything labeled “smoothing” or “anti-frizz”—these flatten fine layers instantly.


    Common Mistakes That Ruin Layers on Fine Hair (Even Good Ones)

    Even a perfect layered cut can look thin if you make these errors.

    • ❌ Growing out layers too long between cuts. Fine hair needs layering refreshed every 4–6 weeks. At 8 weeks, the weight returns and volume disappears.
    • ❌ Using heavy oils or serums on the roots. One drop of oil belongs only on dry ends. Roots + oil = flat.
    • ❌ Parting your hair in the same place every day. This trains roots to fall in a deep crease. Switch your part weekly, or change it mid-day for instant lift.
    • ❌ Skipping heat protectant because hair is thin. Fine hair burns and breaks faster than coarse hair. Always protect before any heat.
    • ❌ Sleeping on cotton pillowcases. Cotton creates friction, flattening layers and causing breakage. Switch to silk or satin—it preserves your cut and volume overnight.

    How to Adapt These 19 Cuts for Different Face Shapes

    Your layered haircut should flatter your unique features. Here is a quick guide:

    Face ShapeBest Layered Styles from the ListWhy
    Round#5 Asymmetrical, #11 Italian Bob, #16 A-Line BobAngles and asymmetry create length, breaking up the circle.
    OvalAlmost all 19 styles workOval faces are the most versatile. Avoid very short, blunt fringes.
    Square#4 Long-Layered Lob, #9 Wispy Cut with Side-Swept Bangs, #14 Curtain BangsSoft, wispy layers around the jawline soften strong angles.
    Heart#1 Pixie with Fringe, #7 French Bob, #18 BixieVolume at the crown balances a narrower chin. Fringe shortens a wide forehead.
    Long / Rectangular#8 Graduated Stacked Bob, #12 Textured Bowl Cut, #13 Soft MohawkWidth at the sides and fullness at the ears shorten the appearance of length.

    Frequently Asked Questions (Layered Hair for Women Over 50)

    Q: Will layers make my thin hair look even thinner?
    A: Only if done poorly. Bad layers (heavy, uneven, too many) can expose the scalp. Good layers (internal, point-cut, concentrated at the crown) create the illusion of density. The 19 styles above are chosen for the latter.

    Q: How short should I go?
    A: There is no rule. However, fine hair shorter than 2 inches often lacks enough length for layers to “sit.” The sweet spot is 2 to 6 inches overall length. That is why pixies, bobs, and lobs work so well.

    Q: Can I have long hair with layers if mine is very thin?
    A: Yes, but with caveats. You need long, very gentle layers and a strong blunt perimeter. Hair longer than your collarbone will still look thin at the ends. Consider clip-in extensions for special occasions if you want long, full-looking hair.

    Q: Do I need to color my hair to make layers look better?
    A: No, but a little dimension helps. Single-process color or subtle highlights can create the illusion of depth and texture between layers. Grey hair is beautiful, but fine grey hair can be more wiry or more slippery—ask your stylist to adjust cutting technique accordingly.

    Q: How do I add volume without backcombing (teasing)?
    A: Teasing damages fine hair. Instead, use a root-lifting powder or spray, then use a small round brush to roll sections forward at the crown. Pin each rolled section with a clip until cool. Remove clips—you have volume without breakage.


    Conclusion

    Layered hairstyles are not the enemy of thin, fine hair over 50. In fact, when chosen and cut correctly, they are your single best tool for creating the volume, movement, and youthful energy you want.

    The 19 ideas above give you a roadmap—from the shortest pixie to a longer lob, from straight fine hair to naturally wavy textures. You saw specific cuts for Black women, White women, Asian women, Latinas, South Asian women, Middle Eastern women, Indigenous women, and mixed race women because beautiful layered hair is not one-size-fits-all.

    Remember the three pillars of success:

    1. The right cut (internal layers, crown focus, point-cut ends)
    2. The right products (lightweight, texturizing, root-lifting)
    3. The right techniques (blow-dry upside down, dry shampoo before oil appears, silk pillowcase)

    You do not need thick hair to have gorgeous hair. You need strategic layers, a few minutes of daily styling, and the confidence that comes from knowing what works for your hair at this stage of life.

    Take these 19 ideas to your stylist. Try one of the prompts to generate an image first. And the next time someone tells you that layers will thin your fine hair, smile and show them this article.

    Your best volume is ahead of you.

  •  Gray Blending Ideas for Cool-Toned Blondes:Ash Meets Ash

     Gray Blending Ideas for Cool-Toned Blondes:Ash Meets Ash

    For women with naturally ash blonde hair, graying is often a subtle, gradual process. Unlike those with darker hair, your silver strands don’t create harsh contrast—they simply look like a lighter, cooler version of your existing color. But the challenge remains: regrowth lines can still feel stark, and the wrong highlights can turn your cool blonde into a muddy or brassy mess.

    The secret lies in gray blending, not full coverage. This technique leverages your natural silver streaks as a built-in highlighting tool.

    Below are 16 strategic ideas designed specifically for ash blonde bases—using cool-toned dyes, baby lights, and strategic placement to merge the gray with the blonde, reducing maintenance while amplifying that icy, sophisticated look.


    1. The Silver Root Smudge


    Ask your colorist for a cool-toned demi-permanent smudge at the roots. This blends the line between your natural ash blonde and incoming gray, creating a soft, 3D shadow that grows out seamlessly for 8–10 weeks.

    2. Icy Baby Lights


    Instead of chunky highlights, weave in ultra-fine baby lights using a level 9 or 10 ash-violet toner. These mimic the random pattern of natural gray hairs, giving an all-over sparkle without the stripe effect.

    3. The Platinum Melt


    If your gray is concentrated at the front hairline, melt a creamy platinum shade into your mid-lengths. The result is a gradient where gray transitions into ash blonde—no hard line, no frequent touch-ups.

    4. Pearl-Toned Lowlights


    Break up excessive gray with pearl-ash lowlights (one shade darker than your base). This adds depth and prevents the “washed out” look that can happen when ash blonde turns more than 50% gray.

    5. The Tinsel Highlight Technique


    Use a gloss with blue-violet undertones only on your natural gray strands. This neutralizes any yellowing and makes the silver appear brighter and intentionally highlighted—like tinsel woven through ash hair.

    6. Strategic Face-Framing Silver


    Ask for chunky, cool-toned silver highlights around the face only. This creates a bright, youthful glow and draws attention to your features, while the rest of your hair stays a low-maintenance ash base.

    7. The Gray Root Stretch


    Extend your root color by 2–3 inches using a level 7 ash toner. This turns the “regrowth” period into a fashionable, lived-in shadow root that blends seamlessly with both your ash lengths and new gray growth.

    8. Cool Beige Blending


    For ash blondes whose gray comes in warm or yellow-toned, use a cool beige highlight (ash with a whisper of gold). It bridges the gap between cool silver strands and warmer ash pieces without clashing.

    9. The Icy Ombré


    Keep your ends a level 9 ash blonde, but paint your mid-lengths and roots with a sheer silver toner. This reverses the typical ombré, making the gray look like an intentional, expensive color melt.

    10. Ashy Balayage on Gray Regrowth


    Have your colorist paint vertical strokes of a level 8 ash-violet dye through your gray roots and down 4 inches. This mimics natural sun-kissed silver and eliminates the “skunk line” common in gray blending.

    11. The Lavender Ash Overlay


    For stubborn yellowing in gray strands, add a pastel lavender-ash toner over everything. Purple neutralizes yellow, while the ash base keeps it cool—the result is a silvery, pearlized finish that looks deliberate.

    12. Shadowed Lowlights at the Crown


    Darken the underlayer at your crown (using a level 6 ash brown) while keeping surface gray bright. This creates contrast that makes the silver pop, and because the dark is underneath, regrowth is invisible.

    13. The Salt-and-Pepper Micro-Foil


    For ash blondes with less than 30% gray, use micro-foils to place alternating ash-blonde and silver-white pieces. This builds a natural-looking salt-and-pepper effect that grows out as your real gray increases.

    14. Cool-Toned Gloss Glaze


    Every 6 weeks, apply a clear or silver-toned gloss over all your hair. This doesn’t add new highlights but blends existing ash, gray, and bleached pieces into one cohesive, shiny, cool-toned unit.

    15. The Ashy Money Piece


    Bleach two wide sections at the front hairline to a level 10 ash-white. As your natural gray grows in, it merges with this money piece, creating a seamless bright frame that needs toning only every 2–3 months.

    16. Greyvection (Gray + Balayage)


    Combine gray blending with a full balayage: paint level 9 ash-violet through the ends, but leave your roots and emerging grays untouched. The gray roots act as a natural shadow root, making the balayage look high-end and low-maintenance.

    Before You Book: Key Considerations for Ash Blonde Gray Blending

    1. Understanding Your Gray Percentage

    • Under 20% gray: Baby lights and glosses are enough. Avoid heavy coverage.
    • 20–50% gray: Use root smudges, lowlights, and strategic highlights.
    • Over 50% gray: Embrace silver blending with all-over cool toners and face-framing brightness.

    2. The Importance of Toner for Ash Blondes

    Ash blonde hair naturally wants to turn yellow or brassy over time. Gray blending requires a cool-toned toner (violet, blue-violet, or pearl) every 4–8 weeks. Without it, your gray strands will look dull yellow instead of luminous silver.

    3. Maintenance Schedule at a Glance

    ServiceFrequencyBest For
    Cool-toned gloss or glazeEvery 4–6 weeksAll ash blondes with gray
    Root smudge or shadow rootEvery 8–10 weeks20–50% gray
    Full highlight refreshEvery 12–16 weeksOver 50% gray
    Purple shampoo at home1–2 times per weekMaintaining cool tones between salon visits

    4. Products Every Ash Blonde with Gray Needs

    • Purple or blue-violet shampoo – Neutralizes yellow in both ash and gray strands.
    • Silver-enhancing conditioner – Adds reflective shine to gray hairs.
    • Heat protectant with violet undertones – Prevents brassiness from styling tools.
    • Weekly cool-tone mask – Keeps hair hydrated without warming up the color.

    5. What to Ask Your Colorist (Exact Phrases)

    • “Use a demi-permanent color at my roots so there’s no harsh line when gray grows in.”
    • “Please add violet or blue undertones to my toner to cancel yellow.”
    • “I want to blend my gray, not cover it completely.”
    • “Keep my highlights fine and cool-toned—no gold, no beige.”
    • “Show me my gray percentage before we start so we choose the right technique.”

    6. Common Mistakes Ash Blondes Make with Gray Blending

    • Using warm blonde highlights – Turns gray into a muddy, yellowish mess.
    • Covering gray completely with permanent dye – Creates a harsh line of regrowth every 2 weeks.
    • Skipping toner for too long – Ash blonde + gray without toner = dull, flat, yellow hair.
    • Going too dark at the roots – A dark root looks harsh against bright gray; stick to level 7–8 ash.
    • Using cheap purple shampoo – Some leave a purple tint on gray strands; opt for professional silver shampoos.

    Realistic Results: Before and After Expectations

    What Gray Blending Will Do ✅

    • Soften the contrast between your natural ash base and silver strands
    • Extend time between salon visits to 8–16 weeks
    • Create a modern, intentional “silver sister” or “icy blonde” look
    • Make your hair appear brighter, cooler, and more dimensional

    What Gray Blending Will NOT Do ❌

    • Completely hide every single gray hair
    • Look exactly like your natural color from age 25
    • Work without regular toning (purple shampoo is non-negotiable)
    • Suit warm-toned skin without adjustments (ask for pearl or beige-ash instead)

    Adapting Gray Blending for Different Skin Tones (Ash Blonde Context)

    Your ash blonde base and gray strands interact with your skin’s undertone. Here is a quick guide:

    Skin UndertoneBest Ash Blending FormulaWhat to Avoid
    Cool (pink, red, blue)Pure ash, violet-ash, platinumAny warmth (gold, honey)
    NeutralPearl-ash, silver-ash, cool beigeOverly violet (can look ashy in a sick way)
    Warm (yellow, peach, olive)Beige-ash, mushroom ash, soft pearlStark platinum or blue-violet (washes you out)

    Note: If you have warm undertones but love ash blonde, ask your colorist for a “beige ash” or “mushroom blonde” instead of a true icy ash.


    Frequently Asked Questions (FAQs)

    Q: Will gray blending damage my hair less than full coverage dye?
    A: Yes. Gray blending often uses demi-permanent color, glosses, and strategic highlights—less bleach and less frequent full-coverage dye means significantly less damage.

    Q: Can I gray blend at home?
    A: Not recommended. Gray blending requires precise placement, cool-toned formulas, and understanding of your gray percentage. One mistake can turn your ash blonde orange or muddy.

    Q: How do I know if I’m truly “ash blonde” vs. “beige” or “golden” blonde?
    A: Ash blonde has no red, orange, or yellow warmth. Hold a piece of white paper next to your hair. If you see any gold, you’re beige or golden. If you see gray, silver, or muted taupe, you’re ash.

    Q: What if my gray comes in wiry or coarse?
    A: This is common. Ask your colorist for a demi-permanent gloss with conditioning properties. At home, use a silver-safe smoothing serum and a boar bristle brush to tame texture.

    Q: Can I switch from full-coverage dye to gray blending without cutting my hair?
    A: Usually yes, but it takes 1–2 transition appointments. Your colorist will strip or fade the old dye, then add lowlights and a root smudge to mimic natural gray growth. Be patient—the first result may look darker than expected, but it will soften beautifully.

    Q: How much does professional gray blending cost?
    A: Expect $150–$400 depending on your city, salon, and gray percentage. Maintenance glosses run $60–$120. This is often cheaper than full-coverage color every 4–6 weeks.


    A Note on Confidence and Going Gray

    Let go of the idea that gray hair means “giving up.” For ash blonde women, silver strands are not a flaw—they are a built-in highlighting system. The most beautiful gray blending results come from women who embrace the cool, bright, icy tones that only ash blondes and silver sisters can wear.

    You are not hiding your age. You are enhancing your natural palette. And when your ash base meets your silver growth with the right cool-toned technique, the result is striking, low-maintenance, and unmistakably intentional.


    Conclusion

    Ash blonde women have a secret advantage when it comes to gray hair: your natural cool tones already live in the same color family as silver. The goal of gray blending is not to fight nature, but to orchestrate it—using root smudges, icy baby lights, pearl lowlights, and violet-based glosses to turn every new gray strand into a deliberate, dimensional highlight.

    Whether you choose the Tinsel Technique for shimmer, Greyvection for a bold balayage, or simply a cool-toned glaze every six weeks, the path forward is the same: stop covering, start blending. Work with a colorist who understands ash undertones. Invest in a quality purple shampoo. And walk into every room knowing that your silver-ash mane looks expensive, modern, and completely, beautifully you.

    Your gray is not a problem to solve. It is a palette to paint with. And ash blonde? That is the perfect canvas.

  • Medium Hairstyles for Busy Women Who Want to Look Polished in 5 Minutes

    Medium Hairstyles for Busy Women Who Want to Look Polished in 5 Minutes


    Between the morning school run, back-to-back Zoom calls, and squeezing in a workout, who has time for a 45-minute blowout? The good news is that you don’t have to sacrifice style for sanity. Enter the “Power Chop”: medium-length hair.

    Falling just above the shoulders to a few inches past the collarbone, medium hair is the ultimate multitasker. It is long enough to pull back into a ponytail, yet short enough to dry faster than Rapunzel locks. It holds curls better than long hair and has enough weight to prevent the “triangle head” look of short bobs.

    Whether you have fine, thick, curly, or straight hair, these 17 low-maintenance, high-impact styles are designed for women who want to look like they tried, even when they barely had time to brush their teeth.


    1. The “Wash and Go” Lob (Long Bob)


    The holy grail of busy hair. Ask your stylist for a blunt cut that ends right at your collarbone. This style works with your natural texture—straight, wavy, or slightly frizzy—and looks intentional without any heat.

    2. The Italian Blowout Bob


    This is a specific cut, not a daily routine. It features rounded, face-framing layers that naturally curve inward. Because of the way it is cut, it falls perfectly into place with just a quick rough-dry with a hairdryer.

    3. The Undone Low Ponytail


    Medium hair is perfect for this because it isn’t heavy enough to pull on your temples. Use a velvet scrunchie (less breakage), pull hair back loosely, and leave two face-framing pieces out. Takes 20 seconds; looks like a model.

    4. The Deep Side Part


    Never underestimate the power of changing your part. If your hair is second-day dirty, a dramatic deep side part adds instant volume and hides greasy roots. Spray a little dry shampoo first for texture.

    5. The Claw Clip Twist (The “Kitchen Sink”)


    Gather all your hair, twist it upwards, and clamp a medium-sized claw clip over the twist. Let the ends fan out like a waterfall. It keeps hair off your neck during cooking or working and releases into perfect waves afterward.

    6. The Slicked-Back Wet Look


    Use a strong-hold gel or mousse on damp hair, comb it straight back behind the ears, and let it air dry. This “executive realness” look is incredibly chic and survives intense humidity or workouts.

    7. The Textured Shag


    If you hate brushing your hair, get a shag. This cut uses choppy layers and curtain bangs. The messier it gets, the better it looks. Just spray in some sea salt spray, scrunch, and go.

    8. The “Barely There” Braid


    A single, loose Dutch or French braid. Because your hair is medium length, the braid won’t get stuck under your backpack straps or pull your head back. Stop braiding 2 inches from the end and leave the tail loose for a romantic vibe.

    9. The Half-Up Top Knot


    Pull the top half of your hair (from ear to ear) straight up to the crown of your head and twist it into a tiny bun. Leave the bottom half down. This lifts your face instantly and hides the fact that the bottom layer hasn’t been washed in three days.

    10. The Invisible Bobby Pin Halo


    For those “I need to exercise” or “I need to wash my face” moments. Twist small sections of hair from your temples and pin them horizontally at the back of your head. It creates a pseudo-crown braid without any braiding skill.

    11. The “Sleeping” Heatless Curls


    Put your hair in a heatless curl rod or robe tie before bed. In the morning, shake it out. You have voluminous, bouncy medium hair that lasts two days. Zero heat damage, zero morning effort.

    12. The Modern Mullet (The “Wolf Cut”)


    Don’t fear the name. The wolf cut is highly layered, keeping weight off the bottom. For busy women, this means you can air dry it and it dries in 10 minutes with a cool, rock-and-roll texture that doesn’t need flat ironing.

    13. The Pearl Pin Accent


    Keep a pack of vintage pearl or gold bobby pins in your car. When your hair is a mess, simply twist two random sections from the front and pin them back. It elevates a messy bun to “wedding guest” level in 10 seconds.

    14. The Blunt Cut with Micro-Fringe


    Counter-intuitively, a blunt cut with short bangs saves time. Why? You never have to style your length. The sharp line of the cut creates an architectural look that works even when air-dried. The bangs hide forehead lines and require just a quick comb.

    15. The Side-Swept Roll


    Grab a 2-inch section from your left temple. Twist it toward the back of your head and pin it behind your right ear. Repeat on the other side. This creates an elegant, Grecian look that keeps hair entirely out of your face for work.

    16. The Pigtail Loop


    Split hair down the middle. Put each side into a tiny ponytail, but on the last pull-through, don’t pull the ends all the way out (leave a loop). This creates “bubble” pigtails. It sounds childish, but on medium hair, it looks like a trendy balletcore style.

    17. The Strategic “Messy Bun”


    Forget the top-of-head ballerina bun. For medium hair, the trick is to place the bun at the nape of your neck. Gather hair, twist tightly, wrap into a tight knot, and secure. Because the hair is shorter, the “flyaways” look like intentional texture rather than a failing ponytail.

    How to Choose the Right Medium Hairstyle for Your Hair Type

    Not all medium hairstyles work for every hair texture. Here is a quick cheat sheet to save you from a bad cut.

    If You Have…Choose This Style…Avoid This Style…
    Fine, thin hairBlunt lob, deep side part, strategic messy bunHeavy shag, wolf cut (too much layering removes bulk)
    Thick, dense hairTextured shag, Italian blowout bob, wolf cutBlunt cut without layers (can look like a helmet)
    Curly/coily hairWash and go lob, claw clip twist, pigtail loopsSlicked-back wet look (requires too much product)
    Wavy hairHeatless curls, undone low ponytail, invisible bobby pin haloMicro-fringe (needs daily straightening)
    Straight, slippery hairDeep side part, pearl pin accent, half-up top knotMessy bun (falls out easily without texture spray)

    The 5-Minute Morning Routine for Medium Hair

    You are a busy woman. You do not have 20 minutes. Follow this order:

    1. Dry shampoo first (30 seconds) – Spray at the roots before you even get out of bed. Let it sit while you brush your teeth.
    2. The shake-out (15 seconds) – Flip your head upside down and shake vigorously at the roots. This adds volume to flat overnight hair.
    3. Choose your weapon (2 minutes) – Pick ONE:
      • Dirty hair → Deep side part + pearl pins
      • Clean but frizzy → Claw clip twist
      • Second-day perfect → Undone low ponytail
    4. The finishing spritz (15 seconds) – Light hairspray or texturizing spray, held at arm’s length.
    5. Go (1 second) – Walk out the door. Do not look in another mirror.

    Products Every Busy Woman Needs for Medium Hair

    You do not need 12 products. You need 4.

    ProductWhy You Need ItBest For
    Dry shampooAbsorbs oil, adds texture, creates volumeAll styles, especially day 2-3 hair
    Texturizing sprayGives grip for braids, buns, and claw clipsFine hair, slippery hair, updos
    Light-hold hairsprayKeeps flyaways down without crunchHalf-up styles, pearl pins, side rolls
    Sea salt sprayCreates “lived-in” waves for wash-and-go stylesWavy and straight hair, shag cuts

    Pro tip: Keep a mini dry shampoo and a pack of bobby pins in your glove compartment. Emergency hair rescue takes 10 seconds.


    When to Wash Medium Hair (The Real Schedule)

    Stop washing every day. Here is the realistic routine for busy women:

    • Day 1 (wash day): Wear it down – wash and go lob or Italian blowout bob
    • Day 2: Half-up top knot or pearl pin accent (hides second-day flatness)
    • Day 3: Claw clip twist or slicked-back wet look (hides oil perfectly)
    • Day 4: Undone low ponytail or messy bun (add dry shampoo tonight)
    • Day 5: Braid or pigtail loops (distraction style – nobody looks at texture)

    If you exercise daily: Rinse with water only on non-wash days, then apply a pea-sized amount of conditioner to the ends. No shampoo. Your hair will thank you.


    How to Communicate with Your Stylist (So You Actually Get What You Want)

    Busy women cannot afford a bad haircut and two weeks of hiding it. Say these exact phrases:

    If You Want…Say This to Your Stylist…
    The wash and go lob“Blunt cut, collarbone length, no layers. I want to air dry it.”
    The Italian blowout bob“Rounded shape, face-framing layers that curve inward. No texturizing shears.”
    The textured shag“Choppy layers, curtain bangs, lots of movement. I want it to look messy on purpose.”
    The wolf cut“Heavy layering on top, keep weight at the perimeter. Think Joan Jett but softer.”
    The blunt cut with micro-fringe“Blunt line, short bangs above the eyebrows. I will not style it with heat.”

    One more thing: Always bring a photo. Your words + their eyes = miscommunication. Save one of the AI-generated images you create from this article and show your stylist directly.


    The “Emergency 60-Second Fix” for Each Style

    When your hair betrays you right before a meeting, use this table:

    StyleDisaster60-Second Fix
    Wash and go lobOne side flips out, one side flips inWet your hands, run them over the disobedient side, tuck behind ear
    Undone low ponytailToo loose, slipping outAdd two small clear elastics – one at the nape, one two inches lower
    Claw clip twistClip is falling, hair is saggingTwist tighter, insert clip from the bottom up (not top down)
    Half-up top knotBun is lopsidedPull out two tiny face-framing pieces on the heavier side to balance visually
    Messy bunLooks like a rat’s nest, not chicSmooth the top with a wet brush, then mess up only the ends with your fingers

    Conclusion

    You do not need long hair to look feminine. You do not need short hair to look polished. You need medium hair – the goldenilocks zone for the woman who has a full life and an empty calendar.

    These 17 styles share one thing in common: they work with your reality, not against it. They accept that you slept on wet hair, that you have a lunch meeting in 12 minutes, and that you would rather spend your energy on literally anything other than a curling iron.

    The most powerful thing you can do is stop chasing “perfect” hair. Perfect hair takes an hour. Good enough hair takes five minutes. And as you have seen here, good enough – a textured shag shaken out with dry shampoo, a claw clip twist thrown up while the coffee brews, a deep side part hiding day-three roots – actually looks intentional. Effortless. Even beautiful.

    So pick one style from this list. Just one. Try it tomorrow morning. If it fails, try another. Within two weeks, you will have your “uniform” – the haircut and the 90-second routine that makes you look like you have a stylist on retainer.

    You are busy. You are important. And now, you are five minutes away from great hair.

    Now go chop it off. Your morning self will thank you.

  • Short Pixie Cuts That Transform Fine, Flat Hair Into Bold, Voluminous Style

    Short Pixie Cuts That Transform Fine, Flat Hair Into Bold, Voluminous Style

    If you have fine, flat hair, you’ve likely heard the same myth over and over: “Cut it short, and you’ll have even less to work with.” The truth is exactly the opposite. A well-executed pixie cut removes excess weight that pulls hair down, allowing fine strands to spring up and appear fuller. The key lies in the cut—strategic layers, texture, and shape can create the illusion of thickness that long hair simply cannot achieve. In this article, we’ll explore 12 smart pixie variations designed specifically to add volume, movement, and attitude to fine, flat hair. Whether you want soft and romantic or edgy and modern, there’s a pixie here for you.


    12 Well-Structured Cuts

    1. The Textured Cropped Pixie

    • Why it works: Ultra-short length removes maximum weight. Texturizing scissors create “grip” between strands, preventing clumping.
    • Styling tip: Rub a pea-sized amount of matte paste between your fingers and scruff through dry hair for piece-y separation.

    2. The Asymmetrical Pixie

    • Why it works: One side longer than the other tricks the eye into seeing depth and movement. The imbalance distracts from flatness.
    • Styling tip: Keep the longer side slightly wispy, not blunt, to maintain softness.

    3. The Tousled Pixie With Micro-Bangs

    • Why it works: Micro-bangs (above the eyebrows) add a focal point, while a disheveled top layer creates lift at the crown without backcombing.
    • Styling tip: Use a small round brush on the top section while blow-drying forward, not backward.

    4. The Side-Swept Pixie With Undercut

    • Why it works: Shaving or closely clipping the nape and one side reduces density, allowing the top layer to float freely and look thicker.
    • Styling tip: Sweep the long top piece across the forehead at a 45-degree angle to hide any thin spots.

    5. The Finger-Waved Pixie

    • Why it works: Vintage finger waves sculpt fine hair into structured “S” shapes that reflect light, creating the illusion of body.
    • Styling tip: Apply a lightweight mousse to damp hair, then pinch waves into place and let air-dry or use a low-heat dryer.

    6. The Spiky Pixie

    • Why it works: Short, upright spikes eliminate any chance of flatness. Each spike acts as a tiny column of volume.
    • Styling tip: Use a strong-hold but lightweight spray wax—avoid gels that can weigh fine hair down.

    7. The Pixie With Long, Wispy Crown Layers

    • Why it works: Keeping some length on top while taking the sides and back very short creates a height-to-density ratio that flatters fine textures.
    • Styling tip: Blow-dry the crown section straight up using a concentrator nozzle, then let the ends fall naturally.

    8. The Choppy Pixie With Razored Ends

    • Why it works: Razor-cutting (not scissors) frays the ends, making each strand look airier and less blunt. Chopped layers prevent flat spots.
    • Styling tip: Avoid heavy serums; instead, use a volumizing powder at the roots for all-day lift.

    9. The Curled-Under Pixie

    • Why it works: A subtle curl or bend at the ends creates a rounded silhouette that mimics thicker hair. Fine hair holds small curls well.
    • Styling tip: Wrap ½-inch sections around a tapered curling iron for just 5 seconds, then finger-comb gently.

    10. The French Girl Pixie (Cropped Sides, Fuller Top)

    • Why it works: This classic shape keeps the perimeter close to the head while the top is cut in disconnected, soft layers. It’s low-maintenance but high-impact.
    • Styling tip: Air-dry with a salt spray, then tuck one side behind an ear for effortless texture.

    11. The Pixie Bob Hybrid (Pixie Length in Back, Bob Length in Front)

    • Why it works: The gradual lengthening toward the face adds weight only where you want it (front), while the back stays light. Great for transitioning from longer hair.
    • Styling tip: Blow-dry with a flat paddle brush to keep the front pieces smooth, then rough-dry the back.

    12. The Disconnected Undercut Pixie

    • Why it works: An undercut removes 50% of your hair’s bulk from underneath, so the top layer instantly lifts. The “disconnected” look means no blending—sharp lines add modern volume.
    • Styling tip: Use a dry texture spray only on the top section; keep the undercut clean-shaven for contrast.

    Before You Book: What to Tell Your Stylist

    Walking into a salon with fine, flat hair can feel intimidating, but the right consultation makes all the difference. Use these exact phrases to ensure you leave with a pixie that works with your texture, not against it.

    • “I want weight removed from the interior.” – This tells your stylist to use point-cutting or slicing techniques, not blunt scissors.
    • “Keep the perimeter soft, not harsh.” – A blunt outline will make fine hair look thinner. Soft, broken edges create volume.
    • “Elevate the crown more than the nape.” – This builds height where fine hair flattens most easily.
    • “No heavy products after cutting.” – Ask for a lightweight mousse or spray finish, not creams or oils.

    Also, bring 2–3 reference photos from this article. Visuals communicate better than words alone.


    Daily Styling Routine for Fine, Flat Pixies

    A great cut is only half the story. Follow this 5-minute routine to maintain volume from morning to night.

    StepProduct TypeAction
    1Volumizing mousse (golf-ball sized)Apply to damp roots only, not ends
    2Heat protectant sprayMist lightly over entire head
    3Blow-dry upside down30 seconds on warm, focusing on the crown
    4Small round brushLift sections at the root while drying forward
    5Dry texture spray or powderTarget only the roots; let sit 30 seconds, then finger-scruff
    6Flexible hairsprayLight mist from 12 inches away – no hard helmets

    Avoid: Conditioner on the roots, heavy oils, gels, or cream-based pomades. These collapse fine hair within an hour.


    Product Picks That Won’t Weigh You Down

    Not all volumizing products are created equal. For fine, flat hair in a pixie cut, look for these keywords on labels: weightless, root-lifting, powder, spray, mousse, dry texture. Avoid anything that says nourishing, repairing, smoothing, or oil-infused.

    Here are proven product types that work:

    • Best mousse: Lightweight, alcohol-free, with “volume” as the first claim.
    • Best dry shampoo: Powder-based (not aerosol) for grip without residue.
    • Best texture spray: Salt-free or low-salt options to avoid drying out fine strands.
    • Best finishing touch: Matte paste or clay (use half a pea size, rubbed warm between fingers).

    When in doubt, try travel sizes first. Fine hair reacts differently than thick hair, and what works for a friend may not work for you.


    Common Mistakes to Avoid

    Even with a perfect pixie, these errors will flatten your style fast.

    MistakeWhy It HurtsFix
    Skipping trimsEnds become heavy and pull the cut downTrim every 4–6 weeks
    Over-washingStrips natural grip, making hair too slipperyWash every other day or less
    Using a boar bristle brushSmoothes hair flat against the scalpUse a small plastic or mixed-bristle round brush instead
    Sleeping without protectionFriction flattens the crownSleep on a silk pillowcase or wrap hair in a silk scarf
    Touching hair constantlyOils from fingers transfer and weigh strands downSet with spray and leave it alone

    Who Should Avoid a Pixie? (Honest Advice)

    A pixie cut is beautiful, but it’s not for everyone. Consider these factors before making the chop:

    • If you have a cowlick that you hate: A pixie will expose it, not hide it. Work with a stylist who knows how to cut with your cowlick.
    • If you cannot commit to frequent trims: Pixies need shaping every 4–6 weeks. Letting it grow out often looks messy, not effortless.
    • If you have a very round or very long face shape: Some pixies can exaggerate these proportions. Look specifically for asymmetric or high-top styles to balance.
    • If you rely on ponytails or buns for bad hair days: A pixie has nowhere to hide. Bad hair days become “hat days.”

    That said, thousands of women with fine, flat hair thrive with pixies. The key is honesty about your lifestyle and face shape.


    Conclusion

    Fine, flat hair is not a limitation—it’s a starting point. The right short pixie cut removes the weight that suffocates your strands and replaces it with intentional shape, visible texture, and daily volume that lasts. From the spiky edge of a cropped cut to the soft romance of finger waves, each of the 12 styles we’ve explored offers a unique path away from flatness.

    Remember: the magic happens in three places. First, in the consultation chair, where you ask for weight removal and soft perimeters. Second, in your product cabinet, where lightweight mousses and texture sprays replace heavy creams. And third, in your mirror each morning, where five minutes of the right routine transforms a good cut into a great one.

    If you’ve been told that fine hair can’t hold a pixie, you’ve been told wrong. Fine hair is light, agile, and responsive—perfectly suited for short shapes that rely on lift, not length. Take these 12 ideas to your stylist, choose the one that makes you feel bold, and watch your flat hair stand up with a confidence you didn’t know it had.

    Your fine hair isn’t fragile. It’s freedom.

  • Medium Length Hairstyles for Women Over 40:Flattering & Fresh

    Medium Length Hairstyles for Women Over 40:Flattering & Fresh

    Turning 40 is a milestone that often brings a new sense of confidence, style, and self-awareness. When it comes to your hair, this is the perfect time to move away from high-maintenance, overly long locks or severe short cuts that may have felt “safe” in your 30s. Enter the medium length—the “goldilocks” of hairstyles. Not too long, not too short, it offers the perfect balance of versatility, manageability, and youthful movement.

    Medium length hairstyles (typically from the collarbone to just above the shoulders) are incredibly flattering for women over 40. They can soften fine lines, add volume where needed, frame the face beautifully, and allow for everything from sleek ponytails to tousled beach waves. Whether you have fine, thick, curly, or straight hair, there is a medium cut waiting to refresh your look.

    Why Medium Length is the Sweet Spot After 40

    Before diving into the styles, it’s worth understanding why this length works so well for women over 40:

    • Lifting Effect: Medium lengths naturally draw the eye upward, subtly lifting the appearance of the jawline and neck.
    • Versatility: You can wear it up, down, half-up, curly, straight, or in a ponytail—unlike a very short crop.
    • Low Commitment: Growing out a medium cut is easy if you change your mind; cutting it shorter is always an option.
    • Volume Control: Layers can add volume to fine hair or remove weight from thick hair with precision.
    • Age Inclusivity: This length looks equally stunning on a 40-year-old, a 60-year-old, or beyond.

    Below are 17 expertly curated ideas to inspire your next salon visit.


    1. The Long Bob (Lob)

    The undisputed champion of medium cuts. The lob hits right between the chin and collarbone. It’s modern, chic, and works on every face shape. For women over 40, a lob creates the illusion of a lifted neckline and jawline.

    2. Textured Shag with Curtain Bangs

    This cut is all about effortless volume. Layers are cut throughout to create a rock-and-roll texture, while soft curtain bangs part in the middle to frame the eyes and cheekbones. It’s perfect for fine hair that needs body.

    3. Soft Blunt Cut

    Don’t fear a blunt edge. A soft blunt cut (no extreme layers) keeps the hemline thick and healthy looking. Ask for light internal points to remove bulk without losing shape. This style looks incredibly polished and sophisticated.

    4. The Italian Bob

    A more structured cousin of the classic bob. The Italian bob is shorter in the back and slightly longer in the front, with a rounded, voluminous shape. It has a glamorous, old-Hollywood feel that looks stunning on thick, straight hair.

    5. Wavy Mid-Length with Face-Framing Highlights

    Keep your length at the collarbone and add long, sweeping layers. The magic here is in the color: subtle, face-framing highlights that brighten your complexion and draw the eye upward, away from any neck concerns.

    6. The Modern Mullet (For the Bold)

    Yes, it’s back. But for 40+, think “soft mullet” or “wolf cut.” It features shorter, choppy layers on top and at the crown, with longer, wispy lengths in the back. It’s edgy, low-maintenance, and incredibly freeing.

    7. Sleek Center-Parted Lob

    Nothing says confidence like a sleek, straight lob with a dead-center part. This style requires a good flat iron and smoothing serum. The severe symmetry highlights your bone structure and looks incredibly powerful for the workplace or a night out.

    8. Curly Mid-Length with a Deep Side Part

    For natural curls or permed hair, let your volume shine. Cut your curls so they fall just past the shoulders (they will spring up shorter). A deep side part instantly creates asymmetry, which lifts the face and adds drama.

    9. The Layered Midi with Bottleneck Bangs

    Bottleneck bangs are shorter in the center (like curtain bangs) but curve longer toward the ears. Combined with soft layers through the mid-lengths, this style adds major movement and hides forehead lines beautifully.

    10. Asymmetrical Cut

    One side slightly longer than the other (by one or two inches) creates a modern, artistic silhouette. This draws the eye diagonally across the face, creating a slimming effect and adding interest to straight, fine hair.

    11. The “Pushed-Back” Style (Volume at Crown)

    The cut itself is simple: one-length at the collarbone. The style is the hero. Use a volumizing mousse and a round brush to push all your hair back and up off the forehead, creating a 1960s-inspired bouffant at the crown. It’s an instant facelift without surgery.

    12. Textured Ends (Point Cutting)

    If you like your length but hate the “triangle head” look, ask your stylist for point-cut, textured ends. This removes weight from the bottom 2 inches of your hair, allowing it to swing and move freely. Ideal for thick, heavy hair.

    13. The Low-Maintenance A-Line

    Slightly shorter in the back, longer in the front. The A-line bob creates a sharp, angled line that elongates the neck. Keep the back stacked for lift and the front long enough to tuck behind your ear.

    14. Soft Round Layers

    Perfect for women with oval or heart-shaped faces. This cut uses round layers all over the head to create a soft, halo-like shape. It adds width where you want it (to balance a long face) and softens sharp features.

    15. The One-Length Wavy Cut

    No layers. Just healthy, wavy hair cut straight across at the collarbone. This relies on your natural texture. It creates a beautiful, heavy swing and is incredibly romantic. Best for those with naturally wavy or slightly curly hair.

    16. Swoopy Side-Swept Bangs with Length

    Keep your length at the shoulders but add long, side-swept bangs that graze the eyelashes. This is the ultimate “hide the forehead wrinkles” trick. It’s also very forgiving as the bangs grow out.

    17. The Tucked Under Lob

    A styling trick, not a cut. Take your lob and tuck one side behind your ear, letting the other side fall forward over your cheek. Use a bit of gel to keep the tucked side in place. This creates an elegant, asymmetrical look in seconds that emphasizes your jawline and earrings.

    How to Choose the Right Medium Length Cut for Your Face Shape

    Not every medium cut suits every face shape. Use this quick guide:

    Face ShapeBest Medium Length Styles
    OvalAlmost anything works. Try the Italian Bob, Sleek Lob, or Soft Round Layers.
    RoundGo for asymmetry and height. Asymmetrical Cut, Pushed-Back Style, or Deep Side Part.
    SquareSoftness is key. Textured Shag, Wavy Mid-Length, or Soft Blunt Cut.
    HeartBalance a wider forehead with chin-length or longer. Layered Midi with Bangs, Long Bob.
    Long/OblongAdd width with volume. Curly Mid-Length, Soft Round Layers, or One-Length Wavy Cut.

    Styling Tips for Medium Length Hair Over 40

    A great cut is only half the story. These styling habits will keep your medium length hair looking its best:

    1. Invest in a Good Round Brush – Essential for creating volume at the crown and tucking under ends.
    2. Use Volumizing Products at the Roots – Mousse or root-lifting spray prevents flat, limp hair.
    3. Embrace Dry Shampoo – Medium length can get oily at the roots. Dry shampoo adds texture and grip.
    4. Protect from Heat – Always use a heat protectant spray before blow-drying or flat ironing.
    5. Sleep on Silk – A silk pillowcase reduces frizz and prevents breakage at the ends.
    6. Refresh with Waves – If your hair falls flat, a 1-inch curling iron or beach wave spray adds instant life.
    7. Keep Ends Trimmed – Medium lengths show damage faster than long hair. Trim every 6-8 weeks.

    Color Ideas to Complement Your Medium Cut

    The right hair color can enhance your chosen style and brighten your complexion:

    • Soft Highlights – Frame the face and add dimension without harsh lines.
    • Balayage – Grown-out, natural-looking lightness that’s low-maintenance.
    • Glossing/Glazing – Adds shine and blends grays seamlessly between full color appointments.
    • Warm Tones – Caramel, honey, and golden blonde warm up aging skin.
    • Cool Tones – Platinum, silver, and ash brown look striking on cool undertones.
    • Root Shadowing – Darker roots create depth and make a sleek lob look modern.

    Maintenance Guide: How Often to Service Your Medium Length Cut

    ServiceFrequency
    Trim (to maintain shape)Every 6-8 weeks
    Full colorEvery 4-6 weeks
    Highlights or balayage touch-upEvery 8-12 weeks
    Gloss/glaze for shineEvery 4 weeks
    Deep conditioning treatmentWeekly at home
    Professional blowoutOptional, every 1-2 weeks

    Frequently Asked Questions

    Q: Will medium length hair make me look older?
    A: No, if cut correctly. Avoid one-length, chin-grazing bobs that can look severe. Opt for soft layers, face-framing pieces, or waves to keep the look youthful.

    Q: Is medium length good for thin hair?
    A: Yes. A textured lob or shag with light layers creates the illusion of fullness. Avoid over-layering, which can make thin hair look wispy.

    Q: Is medium length good for thick, heavy hair?
    A: Absolutely. Ask for internal layers or point-cutting to remove bulk while keeping the length. The Italian Bob and Textured Ends are excellent choices.

    Q: Can I still put my hair in a ponytail?
    A: Yes. A lob at collarbone length will just reach a low ponytail. For a higher ponytail, keep length at shoulder level or longer.

    Q: How do I deal with grays at this length?
    A: Embrace them with a silver-toned gloss, or blend them with highlights. Medium length makes root touch-ups easier than very long hair.

    Q: What if I don’t want to use heat tools every day?
    A: Choose a cut that works with your natural texture. Curly girls should try the Curly Mid-Length cut. Straight-haired women can opt for the Soft Blunt Cut or One-Length Wavy style.


    Conclusion

    Turning 40 isn’t about playing it safe with your hair—it’s about playing it smart. The medium length range offers endless possibilities to express your personality while working with the natural changes your hair may be experiencing. Whether you choose a sleek, polished lob for the boardroom, a textured shag for weekend errands, or soft romantic waves for date night, there is a medium cut that will make you feel confident, beautiful, and unmistakably yourself.

    Remember: the best hairstyle is the one that makes you smile when you look in the mirror. Use the 17 prompts above to visualize your options, take them to your stylist, and don’t be afraid to experiment. Healthy hair, a flattering cut, and a beautiful friendly face are all you need to shine at any age.

    Your next great haircut is just 6–8 weeks away. Go get it.

  • Long Hairstyles with Curtain Bangs That Are Effortlessly Chic

    Long Hairstyles with Curtain Bangs That Are Effortlessly Chic

    Curtain bangs have made a major comeback—and for good reason. Softer and more versatile than blunt fringe, they frame the face beautifully, blend seamlessly into long hair, and work with nearly every texture. Whether you’re looking for volume, movement, or a low-maintenance update, pairing curtain bangs with long lengths creates a look that’s both modern and timeless.

    Below are 13 fresh ideas to inspire your next salon visit or styling routine.


    1. The Classic Long Layered Cut

    Soft, face-framing layers throughout the length keep curtain bangs from looking disconnected. This style adds movement and reduces weight, making it ideal for thick hair. Blow-dry the bangs with a round brush for that signature “swoop.”

    2. Beachy Waves with Curtain Bangs

    Loose, undone waves create a relaxed, boho feel. Use a large-barrel curling iron or sea salt spray. The curtain bangs add softness around the eyes, balancing the texture of the waves perfectly.

    3. Sleek and Straight

    For a polished, high-contrast look, keep your long hair pin-straight with a center or slightly off-center part. The curtain bangs act as a gentle frame, preventing the sleekness from looking too severe. A drop of hair oil adds shine.

    4. High Ponytail with Bangs Swept Back

    Pull long hair into a high ponytail, but leave the curtain bangs out. Sweep them to the sides and lightly pin or let them fall naturally. This keeps the style playful and youthful while highlighting the cheekbones.

    5. Half-Up Half-Down with Twisted Sides

    Take two small sections from above your ears, twist them back, and secure with a clip or elastic. Leave the rest of your long hair down. The curtain bangs soften the front, making this an easy romantic style for work or weekends.

    6. Low Messy Bun with Face-Framing Pieces

    Gather hair into a low, loose bun at the nape of your neck. Pull out a few wispy strands around the ears and let your curtain bangs fall naturally. This undone look is elegant yet effortless—perfect for long hair days.

    7. Deep Side Part Vintage Waves

    Create a deep side part, then use a 1.5-inch curling iron to make glamorous, old-Hollywood waves. Brush through gently. The curtain bangs, swept to the heavier side, give a sultry, retro update to long hair.

    8. Bubble Braid or Pigtails

    Divide long hair into two low pigtails or a single bubble ponytail (using elastics every few inches). Curtain bangs prevent the style from feeling childish—instead, it becomes trendy and playful. Great for second-day hair.

    9. Textured Braided Crown

    Braid two sections from the temples toward the back of your head, pinning them to form a faux crown. Leave the rest of your hair loose and wavy. The curtain bangs peek out beneath the braids, adding softness around the forehead.

    10. Long Shag with Curtain Fringe

    The shag cut features choppy layers, lots of texture, and often a rounded shape. When paired with curtain bangs, it enhances volume at the crown and gives a rock-and-roll edge. Style with a texture spray for best results.

    11. Side-Swept Curtain Bangs on Straight Hair

    Instead of parting in the middle, sweep both curtain bangs to one side and pin them slightly behind your ear. The rest of your long hair stays straight or has a subtle bend. This is a quick way to change up your look without cutting anything new.

    12. High Bun with Nape Curtain

    Pull all your long hair into a topknot or high bun. Allow your curtain bangs to hang loose, but also let a few longer face-framing pieces from the nape fall down. This creates an airy, ballet-core aesthetic that works for both casual and dressy occasions.

    13. Glass Hair + Minimalist Curtain Bangs

    “Glass hair” refers to ultra-sleek, glossy, almost reflective long hair. Curtain bangs here are cut very subtly—just grazing the brows. Use a flat iron and shine spray. The result is futuristic, clean, and undeniably chic.

    How to Style Curtain Bangs with Long Hair (Daily Routine)

    Curtain bangs look best when they have a gentle “swoop” away from the face. Follow this 3-minute routine:

    1. Dampen just the bangs with a spray bottle.
    2. Blow-dry using a small round brush, directing each side away from the center part.
    3. Cool-shot the bangs with cold air to set the shape.
    4. Finish with a lightweight texture spray or dry shampoo at the roots to prevent oiliness.

    For no-heat days: Twist damp bangs together to one side and pin for 15 minutes, then release.


    Best Face Shapes for Curtain Bangs + Long Hair

    Face ShapeWhy It WorksTip
    OvalAlmost any curtain bang length worksTry shorter bangs above brows
    RoundVertical center part + long bangs slim the faceKeep bangs past cheekbones
    HeartCurtain bangs soften a wider foreheadGo for wispy, light texture
    SquareSoft, curved bangs balance a strong jawAvoid blunt cuts
    LongWide-swept bangs shorten the face visuallyAdd volume at the temples

    Curtain bangs are forgiving – if you’re unsure, start longer. You can always cut more later.


    Maintenance & Trims – What to Expect

    • Trim schedule: Every 4–6 weeks to keep bangs from poking your eyes.
    • At-home dusting: Trim a tiny amount between salon visits – cut dry, point your scissors vertically, and take off 1/8 inch at a time.
    • Washing: You can wash just your bangs in the sink between full hair washes. Blow-dry them while the rest of your hair stays dry.
    • Products to use:
      • Lightweight mousse for volume
      • Round brush (1.5-inch barrel)
      • Heat protectant spray
      • Dry shampoo for bangs only

    Common Mistakes to Avoid

    • ❌ Cutting bangs too short – Curtain bangs should start at the chin or cheekbone when pulled straight.
    • ❌ Skipping the blow-dry – Air-dried curtain bangs often fall flat or separate into awkward pieces.
    • ❌ Using heavy products – Oils and serums will make curtain bangs look greasy within hours.
    • ❌ Parting too deep – A severe side part can break the “curtain” effect. Stick to center or gentle off-center.
    • ❌ Getting them too thick – Curtain bangs should blend with side layers. If they look like a solid block, they’re too dense.

    Which Hair Textures Work Best?

    TextureWorks?Notes
    Straight✅ YesEasy to style, needs volume spray
    Wavy✅ IdealNatural movement enhances the curtain effect
    Curly✅ YesCut bangs dry and longer – they will spring up
    Coily✅ YesGreat with stretched styles or when blown out
    Fine✅ YesKeep bangs wispy, avoid heavy layers
    Thick✅ YesAsk your stylist to thin the bangs slightly

    Pro tip: If you have curly or coily hair, blow-dry just the bangs straight for a softer face frame, or leave them curly for a bold, voluminous look.


    Conclusion

    Curtain bangs are one of the most flattering, low-commitment ways to refresh long hair. Unlike heavy blunt bangs, they grow out gracefully, work across all hair types and face shapes, and can be styled in dozens of ways – from sleek ponytails to messy buns to vintage waves.

    The 13 ideas above give you a roadmap, whether you want something romantic, edgy, or minimal. And with the included styling routine, maintenance tips, and texture guide, you have everything you need to make curtain bangs work for your real life – not just a Pinterest board.

    So go ahead: book that trim, save your favorite prompt, and enjoy the effortless glow that long hair with curtain bangs brings. One small change to your fringe can completely transform how you feel about your hair every single day.

  • Short Haircuts for Chubby Faces That Redefine Angles

    Short Haircuts for Chubby Faces That Redefine Angles


    Having a round or chubby face is often seen as a challenge when choosing a haircut, but in reality, it’s a wonderful canvas for bold, short styles. The goal isn’t to “hide” your face—it’s to create beautiful balance, elongation, and structure. The right short haircut will highlight your cheekbones, define your jawline, and draw attention to your best features (like your eyes or smile).

    Whether you have fine, thick, curly, or straight hair, these 11 well-structured ideas will prove that short hair is not just an option; it’s a game-changer for chubby faces.


    1. The Textured Pixie with Height on Top

    This is the gold standard for round faces. By keeping the sides short and adding significant volume and texture on the crown, you create the illusion of length.

    • Why it works: The vertical height stretches the face vertically, counteracting the width of chubby cheeks.
    • Styling tip: Use a volumizing mousse on damp roots and blow-dry the top section upward using a round brush.

    2. The Asymmetrical Bob (A-Line Bob)

    An A-line bob is cut shorter in the back and gradually longer in the front, with one side slightly longer than the other for the asymmetrical effect.

    • Why it works: The diagonal lines break the symmetry of a round face, creating sharp angles that slim down the appearance of fullness.
    • Styling tip: Keep the longest point grazing your collarbone, and ask your stylist for a deep side part to maximize the angular effect.

    3. The Curly Cropped Cut

    For naturally curly or coily hair, a short crop (2–4 inches long) that is rounded but not flat is ideal. Think of a tapered afro or a curly pixie.

    • Why it works: The volume sits away from the scalp and cheeks, widening the eyes and balancing the face without adding bulk to the jawline.
    • Styling tip: Define curls with a leave-in conditioner and gel, then use a pick at the roots for gentle lift without making the sides too wide.

    4. The Jaw-Length Blunt Bob with a Center Part

    This cut ends exactly at your jawline and is cut in a perfectly straight, heavy line. It pairs best with a precise center part.

    • Why it works: The sharp, horizontal line of the blunt edge creates a “stop” at the jaw, visually squaring off the roundness. The center part elongates the nose-to-chin line.
    • Styling tip: Flat iron the ends to ensure they are razor-sharp. This style relies on precision, so regular trims are a must.

    5. The Side-Swept Undercut Pixie

    Bold and edgy, this style keeps one side very short (shaved or buzzed) while sweeping a longer top section dramatically across the forehead to the opposite side.

    • Why it works: The deep side sweep covers part of the forehead and cheek on one side, while the exposed undercut on the other side reveals bone structure, creating a strong diagonal line.
    • Styling tip: Use a strong-hold pomade to sweep the long top piece across and pin it behind the ear on the heavier side.

    6. The Shaggy Pixie Bob (The “Pix-bob”)

    A hybrid between a pixie and a bob, this cut features choppy, layered ends that fall around the ears and cheekbones. It has a messy, effortless vibe.

    • Why it works: The layers break up the solid mass of hair, preventing a “bowl” effect. Disconnected pieces frame the face in soft, jagged points rather than a continuous curve.
    • Styling tip: Apply a texture spray to dry hair and scrunch with your fingers to enhance the piece-y, messy texture.

    7. The Classic French Bob with Micro-Bangs

    This is a short bob that hovers right below the ear lobes, often paired with bangs that are cut straight across but very short (half an inch above the eyebrows).

    • Why it works: Contrary to instinct, micro-bangs reveal more forehead, which lengthens the face. The short bob exposes the neck and ears, removing visual weight from the lower face.
    • Styling tip: Keep the bob one-length (no layers) and tuck one side behind the ear for an instant face-lifting effect.

    8. The Deep Side-Parted Lob (Long Bob)

    While technically “long” for short hair, a lob (chin to shoulder length) with extreme side volume is a top choice. Angle the front pieces so they are longer than the back.

    • Why it works: The deep side part creates a high arch of hair on one side of the head, adding asymmetry and height. The longer front pieces draw the eye downward.
    • Styling tip: Blow-dry the roots on the heavier side straight up and back to create a “swoop” that covers the temple.

    9. The Softly Layered Bowl Cut (Modern Version)

    Forget the harsh helmet look. A modern bowl cut for chubby faces uses soft, see-through layers and a relaxed, curved silhouette that hugs the head like a cloud.

    • Why it works: Because the layers are wispy and light, the round shape of the cut actually mirrors the face’s shape in a harmonious way rather than contrasting it. It works best on fine or thin hair.
    • Styling tip: Keep the ends feathered and dry with a diffuser for a soft, airy finish. Avoid heavy products that weigh it down.

    10. The Tapered Nape Pixie

    This style keeps length on top and around the forehead, but tapers the hair very short (almost to the skin) at the nape of the neck and behind the ears.

    • Why it works: By removing all bulk from the lower back of the head, the eye is drawn up to the volume on top. This sleek, clean neckline visually elongates the entire profile.
    • Styling tip: Ask for a “shadow taper” (where the skin shows through) and keep the sideburns pointed rather than rounded.

    11. The Wavy Cropped Shag

    This is a shorter version of the 70s shag, featuring choppy layers, a wispy fringe (curtain bangs), and lots of texture throughout.

    • Why it works: The curtain bangs open up the center of the face, while the side layers hit at the cheekbones and chin, creating multiple horizontal break points. Wavy texture adds vertical movement.
    • Styling tip: Use a salt spray on damp hair and let it air dry. Use a flat iron to give the curtain bangs a soft “C” shape away from the face.

    What to Avoid with a Chubby Face

    While many short cuts work beautifully, a few common mistakes can work against your goals. Here’s what to steer clear of:

    1. One-Length, Blunt Cuts That End at the Widest Part of the Cheeks

    • Why: This creates a perfect circle effect, making the face appear rounder. If you love a blunt bob, ensure it ends at the jawline or below the chin, not at cheek level.

    2. Very Short, Uniform Curls All Over (No Shape)

    • Why: Without height on top or tapering at the sides, a uniformly rounded curly cut can mirror the shape of a round face. Always ask for a tapered or asymmetrical curly cut.

    3. Heavy, Straight-Across Bangs

    • Why: Flat, thick bangs cut straight across shorten the forehead and widen the appearance of the mid-face. If you want bangs, opt for side-swept, curtain, or wispy micro-bangs instead.

    4. Excess Volume on the Sides Only

    • Why: Hair that puffs out widely at ear level (like a round mushroom shape) adds horizontal width. Keep volume concentrated on the crown or one side.

    5. Extremely Long Hair with No Layers

    • Why: While this article focuses on short cuts, it’s worth noting that very long, heavy, one-length hair can drag the face downward and emphasize roundness. Short cuts actually offer more control for chubby faces.

    How to Communicate with Your Stylist

    Getting the perfect short cut for a chubby face is 50% style choice and 50% communication. Use these phrases when booking or sitting in the chair:

    Say ThisInstead of This
    “I want height on top and tighter on the sides.”“Just give me a pixie.”
    “Please keep length at the jawline or below.”“Cut it to my cheeks.”
    “I’d like soft, face-framing layers.”“Layer it all over evenly.”
    “Can we do a deep side part?”“Part it in the middle.”
    “Show more of my neck and nape.”“Keep it heavy around the back.”

    Bonus tip: Bring 2–3 reference photos of women with similar face shapes (round/chubby), not just the haircut you like on a different face shape.


    Maintenance & Styling Tips for Short Hair on Chubby Faces

    Short haircuts require upkeep, but the daily styling is often faster than long hair. Here’s how to keep your cut looking its best:

    Frequency of Trims

    • Pixie cuts: every 3–4 weeks
    • Bobs and lobs: every 6–8 weeks
    • Shags and textured cuts: every 8–10 weeks

    Daily Styling Shortcuts (Under 5 Minutes)

    1. Dry shampoo at the roots – Adds instant height and texture.
    2. A tiny dab of pomade or wax – Define piece-y ends and keep side-swept bangs in place.
    3. Blow-dry upward – Never down. Use a small round brush or your fingers to lift roots away from the scalp.

    Products That Help Elongate a Chubby Face

    • Volumizing mousse (applied to damp roots)
    • Texturizing spray (for piece-y, angular movement)
    • Lightweight hairspray (to hold height without stiffness)

    Products to Use Lightly or Avoid

    • Heavy creams or butters (they flatten and weigh down short cuts)
    • High-shine gels (they emphasize the rounded outline of the face)

    Adapting These Cuts for Different Hair Textures

    Not all short cuts behave the same way on straight, wavy, curly, or coily hair. Here’s a quick texture guide for the 11 ideas above:

    Hair TextureBest Cuts from the ListAdjustment Needed
    Fine / StraightTextured pixie, blunt bob, tapered nape pixieAsk for texturizing shears to remove bulk; avoid one-length heavy cuts.
    Medium / WavyWavy cropped shag, asymmetrical bob, French bobEmbrace the wave; use salt spray for definition.
    Curly (Type 3a–3c)Curly cropped cut, tapered nape pixie, shaggy pixie bobKeep length slightly longer to prevent shrinkage; prioritize height on top.
    Coily / Kinky (Type 4a–4c)Curly cropped cut, undercut pixie, tapered napeStretch curls slightly with a blowout or banding method for more visible shape.

    Confidence is the Real Secret

    The most flattering short haircut in the world won’t work if you don’t feel like yourself. A chubby face is not a problem to be solved—it’s a feature that reads as warm, youthful, and approachable. Short hair has a way of revealing your bone structure, your expressions, and your confidence. When you walk out of the salon loving your reflection, that energy will outshine any “rule” about face shapes.


    Conclusion

    A chubby face and short hair are not only compatible—they’re a powerful combination. The 11 cuts outlined here prove that with the right structure, texture, and styling, short hair can elongate, define, and celebrate rounder features rather than hiding them. From the height of a textured pixie to the sharp angles of an asymmetrical bob, every cut on this list serves one purpose: to make you look and feel beautiful, friendly, and confident.

    Remember these three core principles as you choose your next haircut:

    1. Add height on top to stretch the face vertically.
    2. Create asymmetry (side parts, uneven lengths) to break the circle.
    3. Reveal bone structure (neck, jawline, ears, forehead) instead of covering everything.
  • Medium Hairstyles for Women Over 50:Timeless & Trendy

    Medium Hairstyles for Women Over 50:Timeless & Trendy

    Turning 50 isn’t about stepping back from style—it’s about stepping into a look that celebrates confidence, wisdom, and ease. While short crops and long locks each have their merits, medium-length hair (typically from the chin to just below the shoulders) is the true sweet spot for women over 50. Why? It’s versatile enough to soften fine lines, lightweight enough to add volume to thinning hair, and practical enough for a busy lifestyle.

    Whether you prefer sleek polish or undone texture, here are 16 expertly curated medium hairstyles to inspire your next salon visit.


    1. The Long Bob (“Lob”)

    The lob hits right between the chin and collarbone. It’s universally flattering because it elongates the neck and draws the eye upward.

    • Best for: All face shapes, especially round or square.
    • Styling tip: Add beachy waves with a 1-inch curling iron for movement.

    2. Soft Face-Framing Layers

    Instead of heavy bangs, ask for delicate layers that start at the cheekbones. This softens jawlines and highlights your eyes.

    • Best for: Women with fine hair who need movement.
    • Styling tip: Blow-dry with a round brush, tucking ends under slightly.

    3. Textured Shag with Wispy Bangs

    The modern shag is back—and it’s perfect for 50+. Think choppy ends, volume at the crown, and airy, see-through bangs.

    • Best for: Thick or wavy hair that needs weight removed.
    • Styling tip: Use a texturizing spray and scrunch with fingers, no heat needed.

    4. The Sleek Center-Parted Lob

    A sharp middle part with pin-straight or gently blown-out hair reads as chic and sophisticated. It’s a powerful, polished look.

    • Best for: Oval or long faces; straight or slightly wavy hair.
    • Styling tip: Apply a smoothing serum before flat-ironing for mirror shine.

    5. Curly Shoulder-Length Cut

    Let natural curls shine at medium length. Keeping the shape rounded (not triangular) prevents a “pyramid” effect.

    • Best for: Naturally curly or coily hair types 3A to 4C.
    • Styling tip: Use a leave-in conditioner and diffuse upside down for bounce.

    6. The Italian Bob

    This is a shorter, fuller bob that curves under at the jaw—like Sofia Loren’s iconic cut. It has vintage glamour with modern edge.

    • Best for: Fine to medium hair; heart-shaped faces.
    • Styling tip: Blow-dry with a vented brush for a rounded, inward bend.

    7. Piece-y, Choppy Ends (No Blunt Cuts)

    Blunt cuts can look severe on mature features. Ask for “notched” or “point-cut” ends to create soft, piece-y texture.

    • Best for: Thinning hair (it creates the illusion of density).
    • Styling tip: Rub a dab of pomade between fingers and pull ends apart.

    8. Low-Maintenance A-Line Bob

    Shorter in the back, longer in the front. The angle slims the face and adds instant lift at the crown.

    • Best for: Round or full faces; straight to wavy hair.
    • Styling tip: Wash-and-go friendly—let it air dry for a lived-in look.

    9. Silver or Grey Layered Cut

    Embrace your natural silver with a layered medium cut. The layers reflect light, making grey hair look luminous rather than dull.

    • Best for: Women transitioning to full grey or white.
    • Styling tip: Use a purple shampoo weekly to banish brassiness.

    10. The “Midi” with Curtain Bangs

    Curtain bangs (long, parted in the middle) blend seamlessly into shoulder-length hair. They hide forehead lines while keeping the face open.

    • Best for: Forehead wrinkles or wider foreheads.
    • Styling tip: Blow-dry bangs away from the face using a small round brush.

    11. Voluminous Blowout with Side Part

    A deep side part + a round-brush blowout = instant volume at the roots. The height lifts the entire face.

    • Best for: Flat, limp, or fine hair.
    • Styling tip: Set with velcro rollers while cooling for all-day lift.

    12. Effortless “Undone” Waves

    Think loose, messy waves that look like you just left the beach. This style softens harsh lines and looks youthful without trying.

    • Best for: Medium to thick hair with natural bend.
    • Styling tip: Braid damp hair overnight, then finger-comb in the morning.

    13. Asymmetrical Bob (Subtle)

    One side slightly longer than the other—by just an inch—adds intrigue and draws the eye diagonally, which is lengthening.

    • Best for: Oval or angular faces.
    • Styling tip: Keep the rest of the cut smooth to let the asymmetry stand out.

    14. Cropped French Bob (Chin-Length)

    A shorter medium cut (right at the chin) with no heavy layers. It’s Audrey Hepburn meets 2024—clean, bold, and elegant.

    • Best for: Petite frames; straight or fine hair.
    • Styling tip: Tuck one side behind the ear for a casual French-girl feel.

    15. Wavy Lob with Hidden Undercut

    For thick, unruly hair, ask for a light undercut (only at the nape). It removes bulk while keeping the length visible.

    • Best for: Very thick, coarse, or curly hair.
    • Styling tip: You’ll use half the blow-dry time—apply a heat protectant and go.

    16. Retro Rolled Ends (Classic)

    Inspired by the 1960s, this style has a smooth top and ends that flip outward or under. It’s playful and very figure-flattering.

    • Best for: Special occasions or daily glamour; straight hair.
    • Styling tip: Use a large-barrel curling iron horizontally, then brush out for a soft roll.

    How to Choose the Right Medium Hairstyle for Your Face Shape

    Your face shape is the best guide to finding your most flattering cut.

    • Oval face: Almost anything works. Try a center-part lob or textured shag.
    • Round face: Go for length below the chin, side parts, and A-line bobs to create vertical lines.
    • Square face: Soft layers, wispy bangs, and rounded ends soften a strong jawline.
    • Heart-shaped face: Chin-length bobs, curtain bangs, and volume at the ends balance a wider forehead.
    • Long face: Avoid excessive height. Opt for blunt ends, face-framing layers, and styles with width at the sides.

    Texture & Density Considerations (What to Tell Your Stylist)

    Be honest about your hair’s real behavior—not what you wish it did.

    • Fine or thinning hair: Ask for blunt ends with light internal layers. Avoid over-layering, which can make hair look sparser. A lob or A-line bob adds perceived density.
    • Thick or coarse hair: Request weight removal through undercutting or deep internal layers. The textured shag or wavy lob with hidden undercut are excellent choices.
    • Curly or coily hair: Shoulder-length cuts prevent triangle-head. Dry cuts (cutting hair while dry and curly) are essential. The curly shoulder-length cut is ideal.
    • Straight hair: Sleek bobs and retro rolled ends hold their shape beautifully. Add waves with heat tools for variety.
    • Wavy hair: Almost every style works. The undone waves and Italian bob are particularly low-maintenance options.

    Maintenance & Styling Commitments (Be Realistic)

    How much time are you truly willing to spend?

    StyleDaily Styling TimeSalon Visit Frequency
    Sleek center-parted lob10–15 min (blow-dry + flat iron)Every 6–8 weeks
    Textured shag5 min (scrunch + spray)Every 8–10 weeks
    Undone waves2 min (finger comb)Every 10–12 weeks
    Retro rolled ends15–20 minEvery 6 weeks
    Curly shoulder-length cut5–10 min (diffuse or air dry)Every 8–12 weeks

    Pro tip: Ask your stylist for a “maintenance demonstration” before you leave the salon. Have them show you exactly how to recreate the look at home with your own tools.

    Best Products for Medium Hair Over 50

    Invest in formulas that address mature hair concerns (dryness, thinning, grey texture).

    • Shampoo & Conditioner: Purple shampoo once weekly for silver/white hair; moisturizing sulfate-free formulas for dry or color-treated hair.
    • Volume boosters: Root-lifting spray or mousse applied to damp roots before blow-drying.
    • Texture sprays: Sea salt or sugar sprays for undone waves and shags (use sparingly to avoid dryness).
    • Serums & oils: Lightweight argan or jojoba oil on ends only—never at the roots.
    • Heat protectant: Non-negotiable if you use any hot tools.
    • Finishing touches: Dry texture powder for crown lift; light-hold hairspray that brushes out easily.

    When to Say No to a Trend (And What to Ask Instead)

    Not every Instagram style suits real life. Here’s how to adapt.

    Trend to avoidWhyWhat to ask for instead
    Heavy blunt bangsAccentuate forehead lines and require daily stylingWispy or curtain bangs
    Extreme asymmetryCan look severe and dated quicklySubtle asymmetry (1-inch difference max)
    Overly piece-y, “spiky” endsLooks messy rather than chicSoft point-cutting for movement without spikes
    Super slick, gelled-down stylesEmphasizes every scalp imperfectionLight hold products with natural movement
    One-length, no-layer cutsFlat and heavy on mature facesSoft internal layers for bounce

    Working With Your Stylist: A Script

    Bring photos of the 16 styles above. Then say this:

    “I want a medium-length cut that works with my natural texture. Please show me where the layers will fall before cutting. I prefer low daily maintenance but want to look polished. What do you recommend for my face shape and hair density?”

    Red flags: A stylist who insists on cutting first without consultation, or who pushes you toward a drastically shorter length “because of your age.”

    Green flags: A stylist who asks about your lifestyle, demonstrates the cut on dry hair first, and offers a realistic maintenance plan.


    Conclusion

    Turning 50 doesn’t mean surrendering to a “mom cut” or hiding behind safe, boring hair. The medium-length hairstyle you choose should do three things: lift your features, simplify your mornings, and make you feel genuinely excited when you pass a mirror.

    Whether you gravitate toward the sleek confidence of a center-parted lob, the playful ease of undone waves, or the bold elegance of a silver layered cut, the right style honors the woman you’ve become—not the woman society thinks you should be at a certain age.

    Your hair has lived through perms, butterfly clips, flat irons, and probably a few regrettable bangs. Let it be easy now. Let it be soft. Let it be you—unapologetically visible, beautifully friendly, and fully in charge.

    So go ahead. Book the appointment. Show your stylist that photo. And when you walk out with your fresh medium cut, hold your head a little higher. You’ve earned every single wave, layer, and silver strand.

    Now go love your hair.