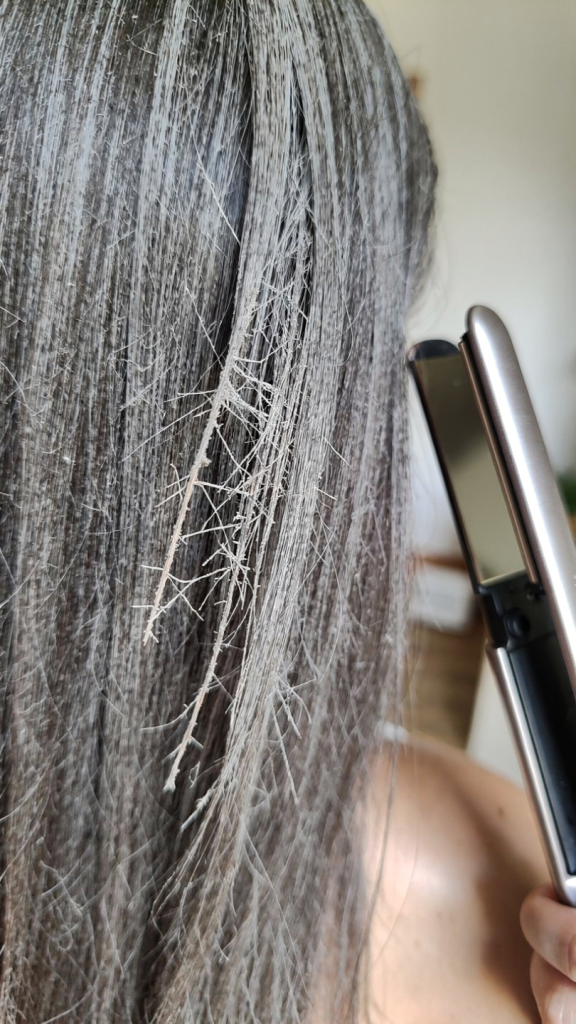
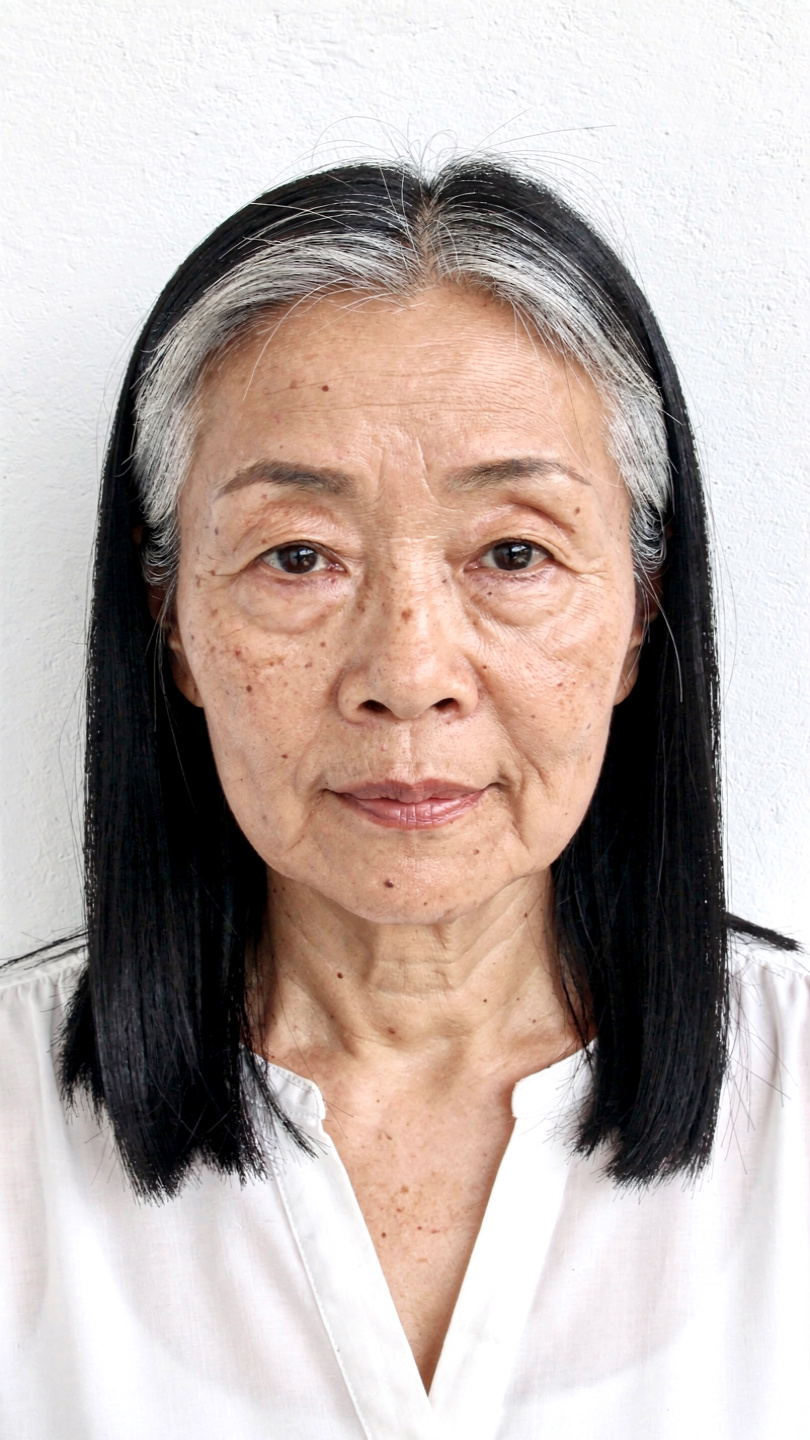
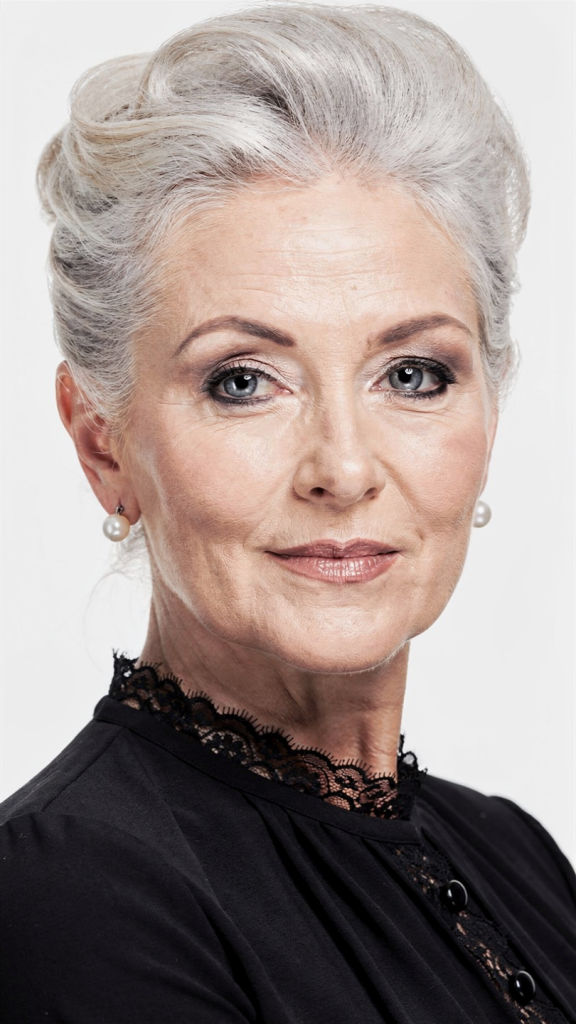
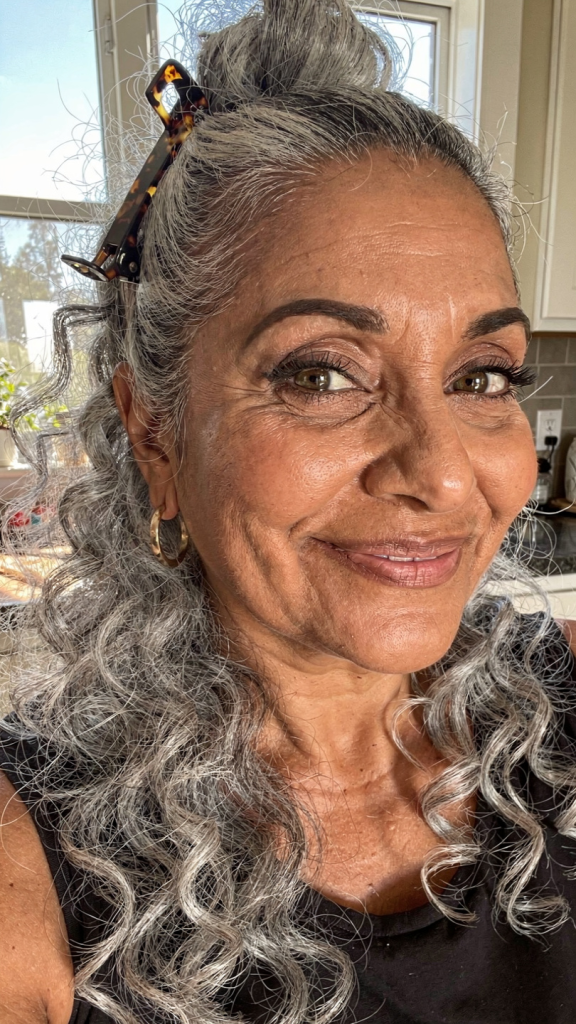
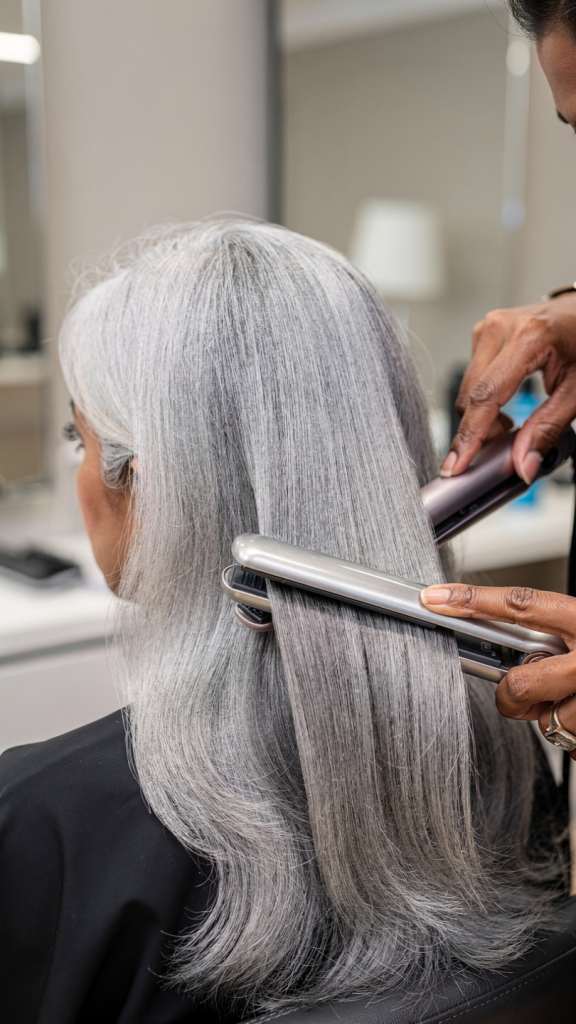
Many women with grey hair reach for a flat iron daily, believing sleek, pin-straight strands are the only “polished” look. But excessive heat does more damage than you might realize—especially to delicate grey hair. Here are three key reasons to stop flat ironing your grey hair and let its natural beauty shine.
Why Heat Protection Isn’t Enough (And What to Do Instead)
Many women think a heat protectant spray makes flat ironing safe. For grey hair, that’s a myth. Heat protectants reduce some surface damage, but they cannot prevent the internal weakening of low-melanin, coarse, or fine grey strands. Instead of relying on sprays, try air-drying with a lightweight leave-in conditioner, or use soft rollers for gentle, heat-free shaping.
3 Reasons to Stop Flat Ironing Your Grey Hair
1. Grey hair is naturally more fragile and prone to breakage.
Without its usual melanin, grey hair has a finer texture and reduced elasticity, making it far more vulnerable to heat damage and splitting.
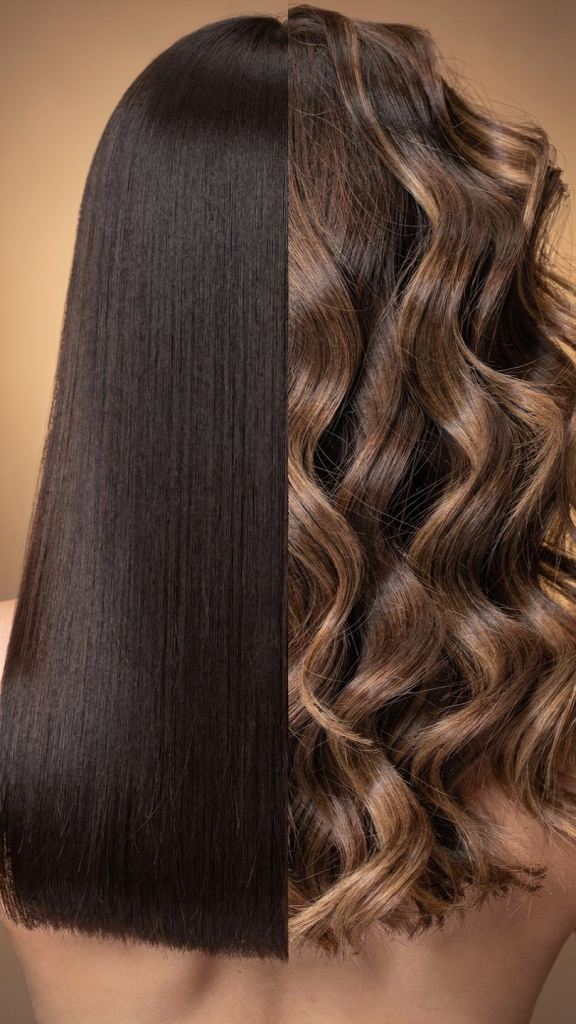
2. Flat ironing cancels out the beautiful volume and texture of natural grey.
Embracing your grey allows you to enjoy its natural wave, body, and dimension—qualities that heat styling often flattens into a limp, one-dimensional look.
3. Less heat means healthier, shinier hair in the long run.
Ditching the flat iron preserves your hair’s moisture and natural oils, preventing the dry, brittle feel that heat tools often cause on grey strands.
How to Style Grey Hair Without a Flat Iron (3 Quick Alternatives)
Finger-coiling damp hair – Twist small sections of damp grey hair around your finger and let it air-dry for defined, frizz-free waves.
Overnight braids – Braid your slightly damp grey hair before bed, undo in the morning, and shake gently for natural, voluminous texture.
Velcro rollers on dry hair – Roll sections of dry grey hair with large velcro rollers, leave for 10 minutes, then remove for smooth, lifted volume without heat.
Signs You’ve Already Damaged Your Grey Hair from Heat
Your hair feels like straw or cotton when dry.
Strands stretch and snap instead of bouncing back.
You see more short, broken pieces around your hairline and part.
Your grey looks dull, yellowed, or ashy despite using purple shampoo.
If you notice these signs, stop using heat immediately and switch to deep conditioning masks with ingredients like shea butter, argan oil, or keratin.
The Emotional Shift: Letting Go of “Perfectly Straight” Grey Hair
There is often an emotional attachment to flat ironing—it can feel like control over aging, frizz, or change. But constantly fighting your grey hair’s natural texture is exhausting and unnecessary. Letting go of the flat iron is not about giving up; it’s about giving your hair (and your peace of mind) a break. Many women report feeling lighter, more confident, and more authentic once they embrace their natural grey texture.
Conclusion
Flat ironing your grey hair might offer a few hours of sleekness, but the long-term price is brittle breakage, lost volume, and unnecessary stress on already delicate strands. Your grey hair is not a problem to be fixed—it is a unique texture that deserves care, not heat. By putting down the flat iron, you give your hair the chance to be healthier, shinier, and full of natural movement. Make the switch today, and in a few weeks, you won’t miss the iron—but you will notice the difference in every strand.
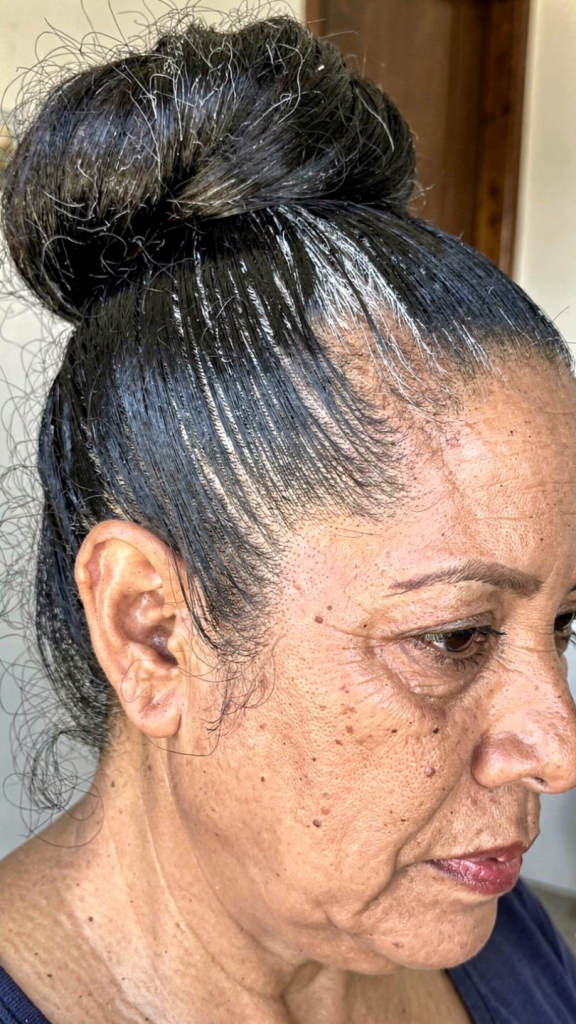
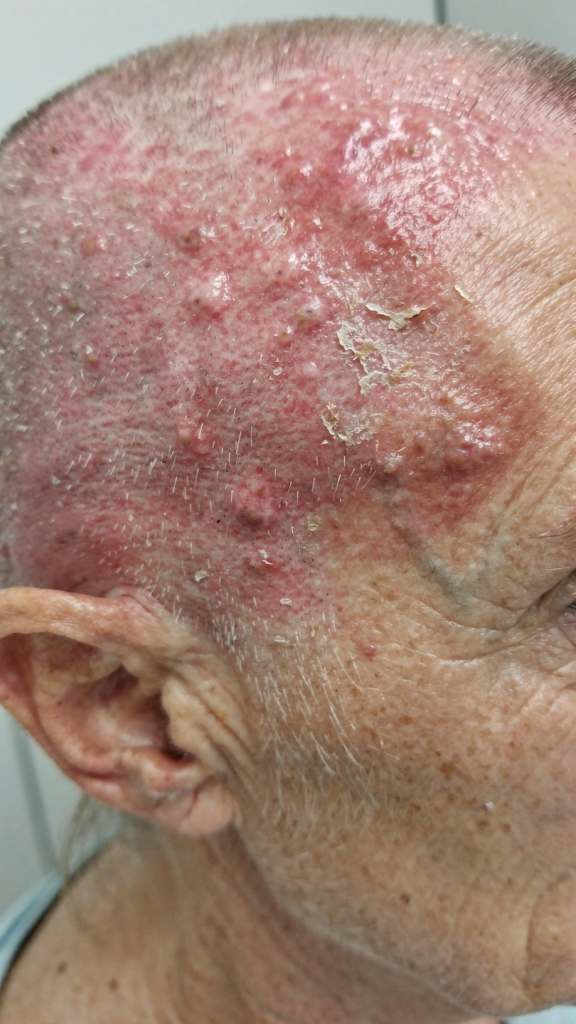
For decades, the sleek, tight bun has been a go-to hairstyle for older women, prized for its elegance and practicality. What many don’t realize, however, is that this seemingly harmless style can cause lasting damage to both hair and scalp health.
Who Is Most at Risk?
While any woman who frequently wears tight buns is at risk, older women face unique vulnerabilities. Age-related hormonal changes (especially during and after menopause) naturally thin hair density and reduce sebum production. Combined with decades of repetitive tension from the same hairstyle, this creates a “perfect storm” for irreversible hair loss. Women with fine or fragile hair textures, as well as those using chemical relaxers or dyes, face even greater risks.
Signs You’ve Already Done Damage
Recognizing early warning signs can prevent permanent hair loss. Look for these red flags:
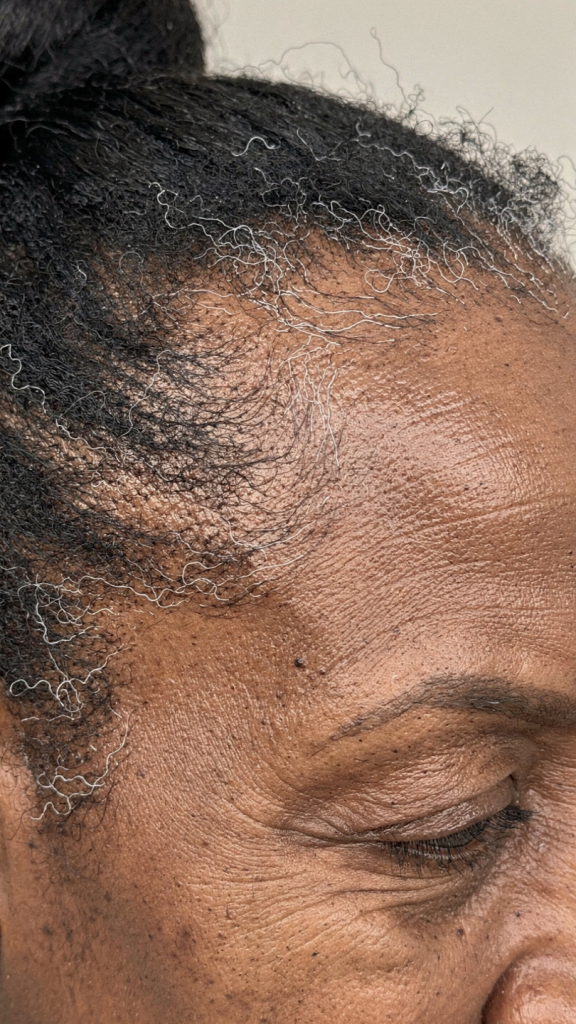
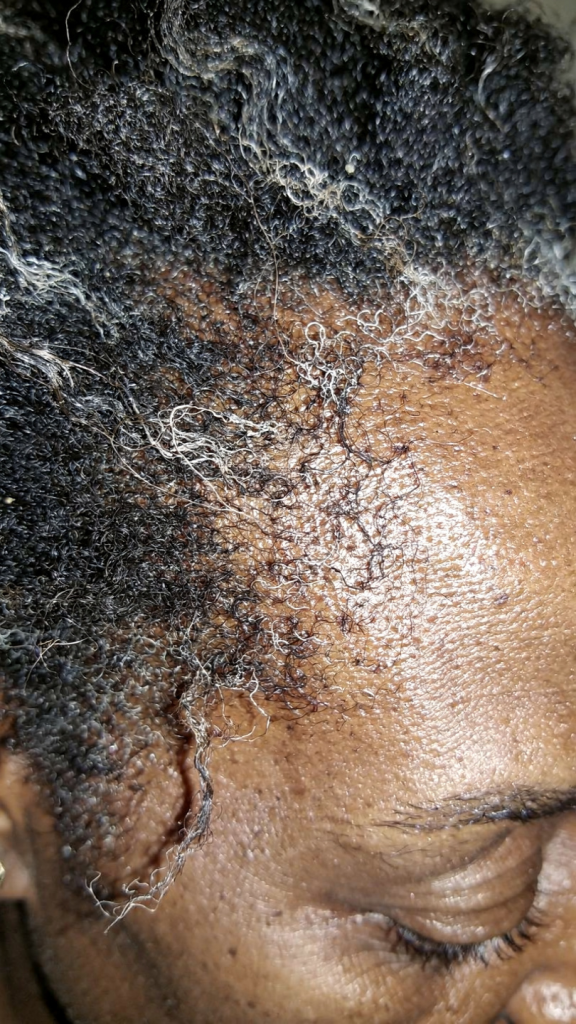
Forehead expansion: A noticeably higher hairline than five years ago
“Fringe sign”: Short, broken baby hairs along the forehead that never grow long
Scalp soreness: Tenderness that lasts hours after removing a bun
Visible gaps: Small bald patches around the temples or crown
Itching or burning: Persistent scalp irritation where tension is highest
If you experience two or more of these signs, it’s time to change your hairstyle immediately.
Below are 7 compelling reasons to retire the tight bun and embrace gentler alternatives:
1. Traction Alopecia (Receding Hairline)
Constant tension pulls hair follicles away from the scalp, leading to permanent hair loss along the hairline and temples.
2. Increased Scalp Pain & Headaches
Prolonged tension on the hair roots can trigger sensitive nerve endings, resulting in chronic scalp tenderness and tension headaches.
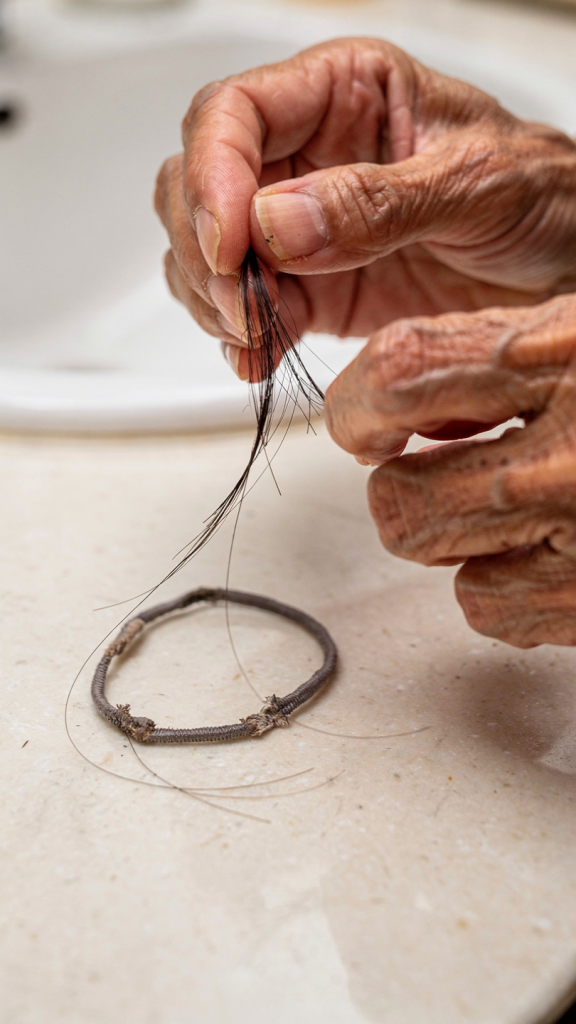
3. Weakened, Brittle Hair Shafts
The repetitive stress and friction from elastic bands weaken the hair cuticle, causing mid-shaft breakage and split ends.
4. Reduced Natural Oil Distribution
A tight bun restricts sebum (scalp oil) from traveling down the hair strand, leaving the ends dry, frizzy, and prone to snapping.
5. Exacerbation of Age-Related Thinning
As hair naturally becomes finer and sparser with age, tight buns expose more scalp and make thinning areas dramatically worse.
6. Poor Circulation to Hair Follicles
Constant tension compresses blood vessels in the scalp, reducing oxygen and nutrient flow to follicles needed for healthy growth.
7. Forehead Wrinkles from Skin Pulling
The backward pull of a severe bun can accentuate forehead furrows and temple hollows, subtly accelerating facial aging signs.
Gentle Alternatives to Tight Buns
You don’t have to abandon buns entirely—just modify them. Try these hair-friendly options:
Style
How to Do It
Benefit
Loose, low bun
Secure at the nape with a soft scrunchie, leaving 1-2 inches of slack
No tension on crown or hairline
Silk/satin scrunchie
Replace elastic bands with fabric-covered scrunchies
Reduces friction and breakage
Braided low ponytail
Weave a loose side braid instead of twisting into a bun
Evenly distributes weight
Claw clip twist
Twist hair loosely and secure with a large claw clip
Zero tension, easy removal
Silk scarf wrap
Wrap hair in a silk scarf and tie loosely at the nape
Protects hair while sleeping or during the day
Crucial rule: Never wear the same style two days in a row. Rotate between loose styles to give pressure points time to recover.
How to Reverse Damage Already Done
The good news: Early to moderate damage can be reversed. Follow this three-month recovery plan:
Month 1: Stop all tension. Switch entirely to loose, heat-free styles. Massage your scalp daily for 5 minutes using circular motions to boost blood flow.
Month 2: Rebuild hair strength. Use a biotin or peptide serum on thinning areas. Eat protein-rich foods (eggs, fish, legumes) to support new growth.
Month 3: Stimulate regrowth. Apply rosemary oil diluted with jojoba oil to the hairline three times weekly. Consider minoxidil (Rogaine) after consulting a dermatologist.
When to see a doctor: If no baby hairs appear after four months, or if bald spots are completely smooth and shiny (indicating scarred follicles), seek a dermatologist. Steroid injections or platelet-rich plasma (PRP) therapy may help.
A Note on Cultural and Personal Identity
For many older women, the tight bun is more than a habit—it’s tradition. From ballerinas to nurses, from grandmothers to corporate executives, the bun represents discipline, professionalism, and heritage. This article isn’t about shaming those choices. Instead, it’s about informed adaptation. You can honor your cultural or personal style by simply loosening the bun by one inch, switching to softer materials, and varying your placement. Tradition and health can coexist.
Conclusion: Loosen Up for Lasting Hair Health
Your hair tells the story of your life—don’t let a tight bun write a tragic ending. The elegance of a bun comes not from its severity, but from its intention. By loosening your grip just slightly, rotating styles, and listening to your scalp’s signals, you can preserve your hair for decades to come. Remember: every ponytail holder is a choice between temporary sleekness and long-term health. Choose wisely, age gracefully, and let your hair—and your hairline—breathe.
Final call to action: Today, take a photo of your hairline. Switch to a loose style for one month. Take another photo. The difference will surprise you. Your future self will thank you.
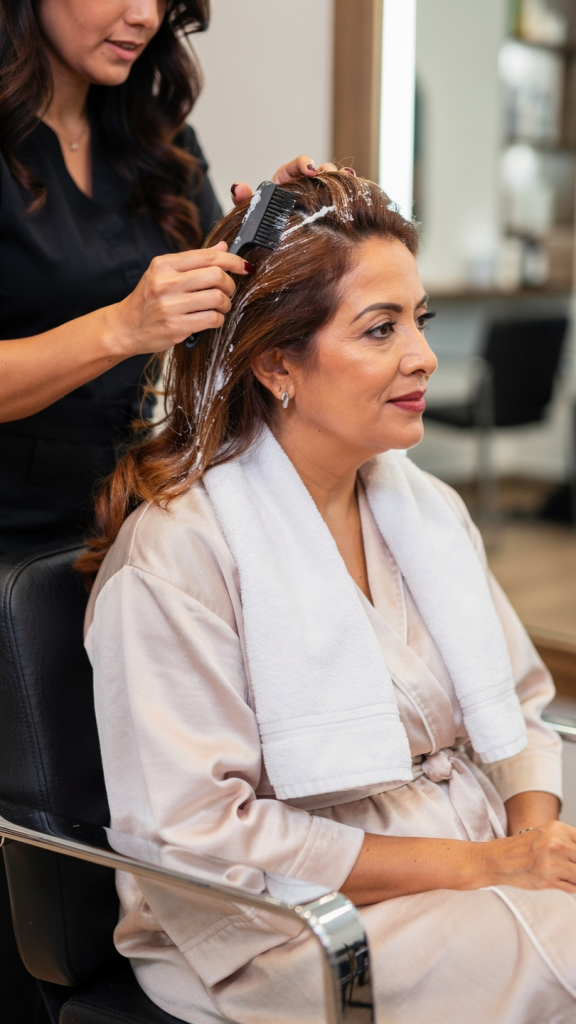
As we age, our hair changes in texture, thickness, and color—yet many over 60 continue using the same box dyes they relied on in their 40s and 50s. While convenient and cheap, box dyes can pose unique problems for mature hair and scalp health, making it time to explore better alternatives.
3 Reasons to Stop Using Box Dye After 60
1. Increased risk of scalp irritation and allergies
With age, skin becomes thinner and more sensitive, making harsh chemicals in box dyes—such as PPD and ammonia—more likely to cause burning, itching, or long-term allergic reactions.
2. Unflattering, one-tone color that looks unnatural
Grey roots and lighter aging hair react differently to box dyes, often resulting in flat, opaque color that lacks natural highlights and lowlights, exaggerating rather than softening signs of age.
3. Higher chance of hair breakage and dryness
Mature hair retains less moisture and natural oils, so strong peroxide-based dyes can strip the cuticle, leaving hair brittle, wiry, and prone to split ends instead of soft and manageable.
Who Is Most at Risk? Box dye affects women differently based on hair type and health history. Women over 60 with existing scalp conditions (eczema, psoriasis, dermatitis) face the highest irritation risk. Those who have been dyeing continuously for 30+ years may also develop sudden new allergies due to cumulative chemical exposure. Additionally, women taking blood thinners or thyroid medications should consult a doctor before using box dye, as chemical absorption through the scalp can interact with certain drugs.
The False Economy of Box Dye After 60 While a box dye costs 10–15versus60–150 for a salon visit, the hidden costs add up quickly. Treating chemical burns, buying restorative serums for breakage, or seeing a dermatologist for allergic reactions often exceeds salon prices. Furthermore, failed box dye results (orange tones, patchy grey coverage, or too-dark color) frequently require a costly salon correction that doubles the original professional price. In the long run, cheaper dye rarely means cheaper care.
How to Talk to Your Stylist About Alternatives If you are nervous about switching from box dye, use this simple script when booking a consultation: *”I’m over 60 and have been using box dye for years. I want to protect my scalp health and hair texture. Can you recommend a gentle, low-ammonia option or help me transition to working with my natural grey?”* A good stylist will perform a strand test, assess your scalp sensitivity, and show you color swatches before applying anything. Do not hesitate to ask for a patch test 48 hours in advance, even in a salon.
Quick Reference: Box Dye vs. Better Options After 60
Feature
Box Dye
Salon Semi-Permanent
Natural Gray Blending
Scalp irritation risk
High
Low
None
Grey coverage
Harsh, opaque
Soft, natural
Embraces grey
Damage to mature hair
High
Minimal
Zero
Cost per application
$10–15
$50–80
One-time styling
Maintenance frequency
Every 3–4 weeks
Every 6–8 weeks
Every 10–12 weeks
Final Reminder: The 48-Hour Patch Test Even if you have used the same box dye brand for decades, always perform a patch test before each application after age 60. Aging can suddenly trigger allergies to ingredients that never bothered you before. Apply a small amount behind your ear or on your inner elbow, wait 48 hours, and check for redness, swelling, or itching. If any appears, discard the box immediately.
Conclusion Reaching your 60s is a milestone worth celebrating with hair that looks healthy, feels soft, and truly suits you. Box dye may have been a practical solution in younger years, but mature hair deserves a gentler, more thoughtful approach. By switching to safer alternatives, working with your natural grey, and listening to your scalp’s changing needs, you can achieve vibrant, age-appropriate color without the hidden risks. Your hair has carried your story for six decades—it’s time to treat it with the care it has earned.
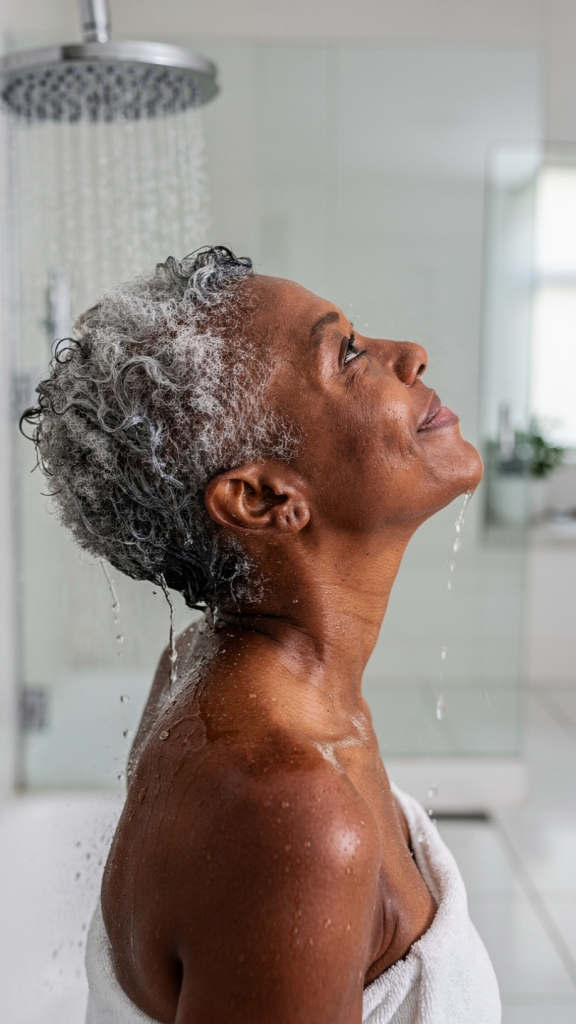
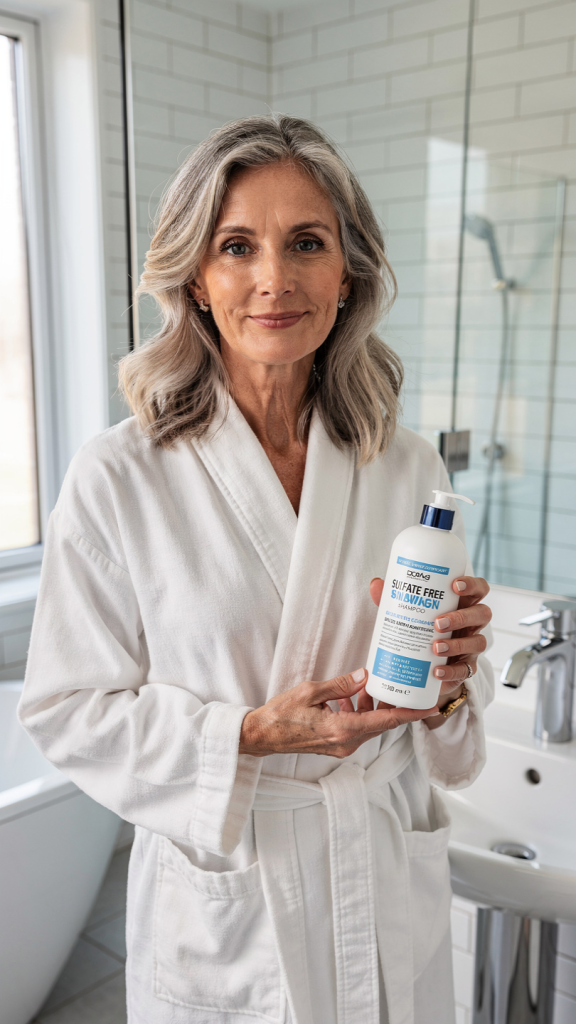
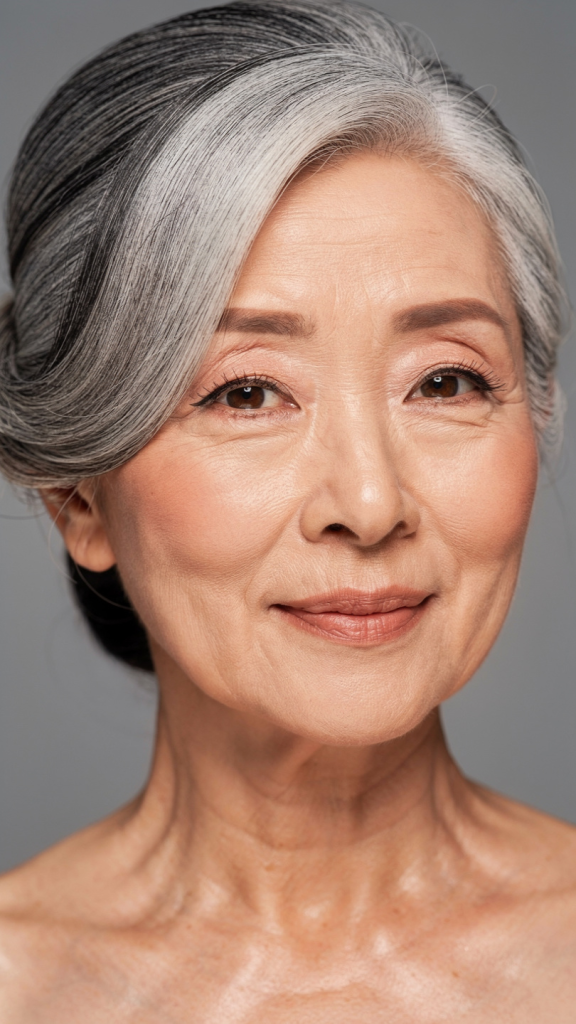
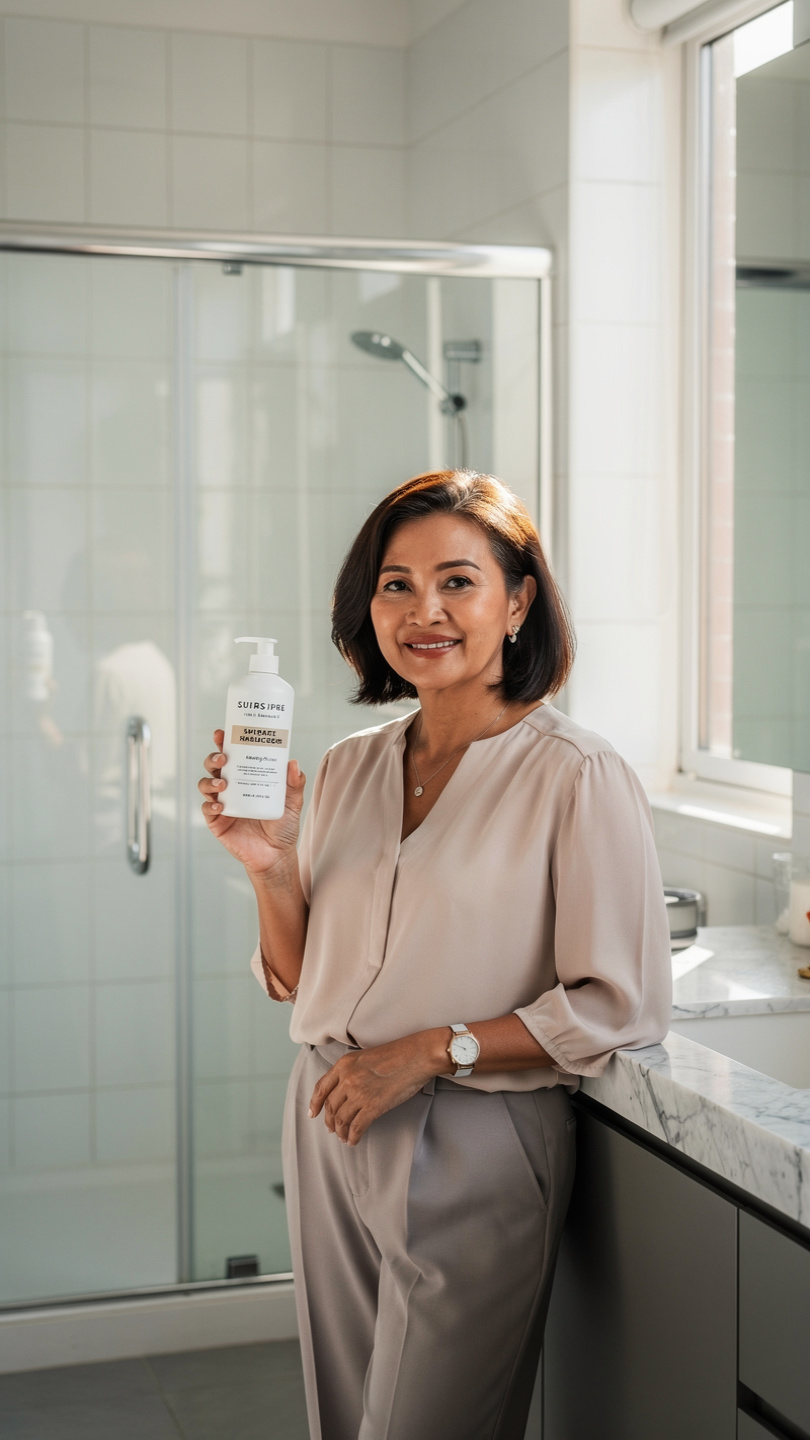
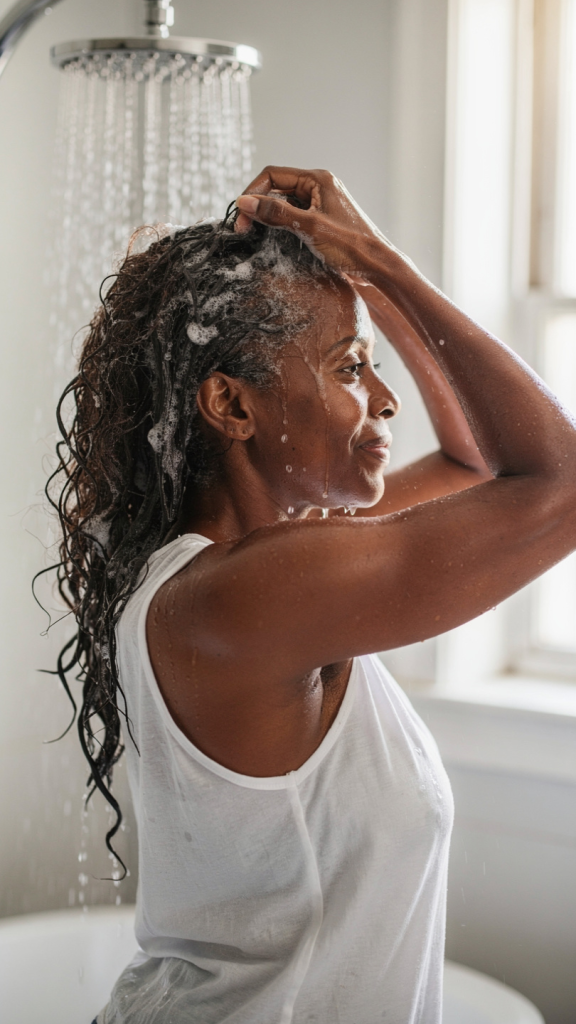
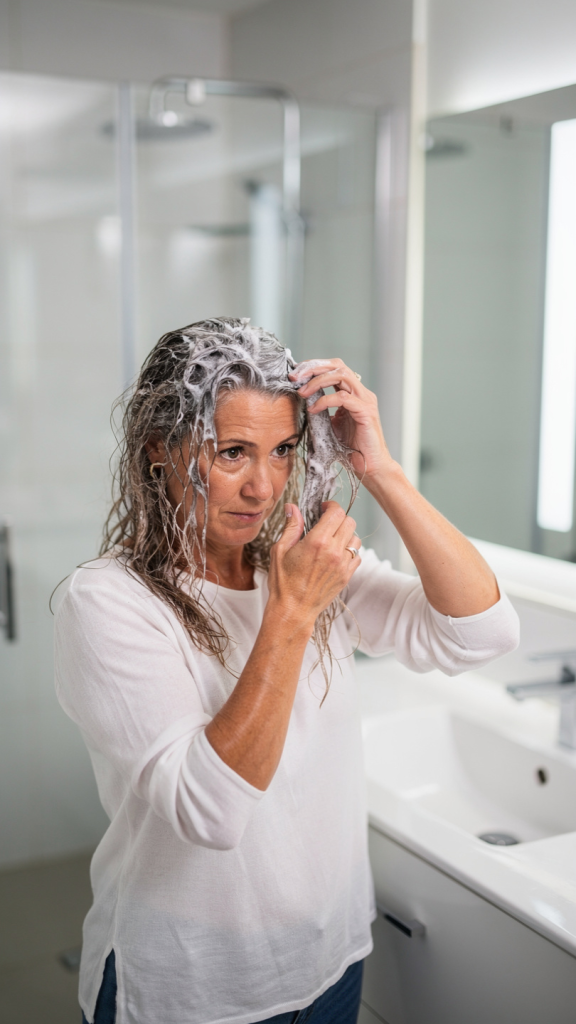
As we age, our hair naturally becomes drier, finer, and more fragile due to declining estrogen levels and a slower oil production cycle. While traditional shampoos create a satisfying lather using strong detergents called sulfates (like SLS and SLES), these same ingredients can strip mature hair of its precious moisture, leading to brittleness, frizz, and even colour fade. Switching to a sulfate-free formula helps preserve your scalp’s natural barrier, retain colour, and promote softer, more resilient strands.
How to Choose the Right Sulfate-Free Shampoo for Your Hair Type
Not all sulfate-free shampoos are created equal. Look for these ingredients based on your specific needs:
For dry, brittle hair: Seek out shampoos with shea butter, argan oil, or glycerin.
For fine, thinning hair: Choose lightweight formulas with biotin, saw palmetto, or rice protein.
For curly or coily grey hair: Opt for creamy cleansers with coconut oil or aloe vera.
For sensitive scalp: Avoid fragrances and essential oils; look for oat extract or chamomile.
Below are 10 compelling reasons why women over 50 should make the switch—and how to choose the right formula.
1. Preserve Natural Oils to Combat Dryness
Sulfates strip away sebum aggressively, but a sulfate-free cleanser removes dirt without eliminating the natural oils mature hair desperately needs to stay supple.
2. Protect Colour-Treated or Highlighted Hair
If you cover greys or add highlights, sulfates accelerate fading by opening the hair cuticle; sulfate-free formulas lock in colour vibrancy for weeks longer.
3. Reduce Scalp Irritation and Sensitivity
Menopausal and post-menopausal scalps often become more sensitive or prone to flaking; sulfate-free cleansers are gentler, reducing itchiness and inflammation.
4. Maintain Volume Without Heavy Buildup
Many women fear sulfate-free shampoos will flatten fine hair, but modern lightweight formulas remove residue without weighing hair down, preserving natural lift.
5. Keep Keratin or Smoothing Treatments Intact
If you’ve invested in a smoothing or anti-frizz treatment, sulfates will dissolve it prematurely; sulfate-free washing extends the life of these professional services.
6. Improve Manageability for Curly or Textured Grey Hair
As hair naturally coarsens with age, sulfates cause frizz and tangling; a sulfate-free routine leaves curl patterns defined and easier to detangle.
7. Prevent Split Ends and Breakage
By preserving moisture and the hair’s outer cuticle layer, sulfate-free shampoos reduce friction and snapping, especially around the hairline and nape.
8. Support a Healthier Microbiome on the Scalp
Harsh detergents disrupt the scalp’s protective acid mantle, which can worsen conditions like seborrheic dermatitis; gentler cleansing allows beneficial microbes to thrive.
9. Extend Time Between Washes
Because sulfate-free shampoos don’t over-strip oils, your scalp won’t overcompensate by producing excess grease, letting you wash every 2–3 days instead of daily.
10. Layer Easily with Anti-Aging Hair Serums
Sulfate-free shampoos leave the hair slightly more porous for subsequent products, allowing restorative serums (with peptides or biotin) to penetrate deeper for better results.
Key Ingredients to Look For (And What to Avoid)
Look for these gentle cleansers:
Decyl glucoside
Coco-glucoside
Sodium cocoyl isethionate
Disodium cocoyl glutamate
Avoid these harsh sulfates:
Sodium lauryl sulfate (SLS)
Sodium laureth sulfate (SLES)
Ammonium lauryl sulfate (ALS)
Bonus beneficial ingredients for women over 50:
Peptides (stimulate hair follicles)
Niacinamide (soothes scalp inflammation)
Ceramides (repair the hair cuticle)
How to Transition to Sulfate-Free Shampoo (First 2 Weeks)
Many women experience an adjustment period. Here’s what to expect and how to manage it:
Week 1: Your hair may feel waxy or heavy. This is normal—sulfate-free formulas don’t strip everything, and your scalp is rebalancing oil production.
Week 2: You might need to double-cleanse (wash, rinse, repeat) if you have product buildup from silicones or hairsprays.
Tip: Do a final “clarifying wash” with a sulfate shampoo before switching. Then commit to sulfate-free for at least 14 days before judging results.
The Best Application Technique for Mature Hair
How you apply shampoo matters just as much as what you use:
Wet hair thoroughly with lukewarm water (hot water strips oils).
Dilute the shampoo with a little water in your hands before applying.
Focus on the scalp only—let the suds run down the lengths.
Massage gently with fingertips (never nails) for 60 seconds.
Rinse with cool water to seal the cuticle and boost shine.
Common Myths About Sulfate-Free Shampoo Debunked
Myth 1: “It doesn’t lather, so it isn’t cleaning.” Truth: Sulfates create foam for psychological effect, not cleaning power. Sulfate-free cleansers work without the bubble show.
Myth 2: “It’s only for curly or coloured hair.” Truth: Women over 50 with straight, fine, or thinning hair benefit equally from gentler cleansing.
Myth 3: “It leaves buildup over time.” Truth: Only if you use silicones. Pair sulfate-free shampoo with a silicone-free conditioner for best results.
Myth 4: “It’s too expensive.” Truth: Many drugstore brands (like OGX, Love Beauty and Planet, SheaMoisture) offer affordable sulfate-free options under $10.
When to Avoid Sulfate-Free Shampoo (Yes, Exceptions Exist)
Sulfate-free isn’t for everyone in every situation:
If you use heavy oils or waxes (like some natural hair butters), a sulfate shampoo once a month may be needed for deep cleansing.
If you have severe dandruff caused by malassezia yeast, some medicated shampoos require sulfates to deliver active ingredients.
If you swim in chlorinated pools frequently, a sulfate shampoo helps remove chlorine buildup (follow with a sulfate-free moisturizing wash).
In these cases, use a sulfate shampoo occasionally—not daily.
Conclusion
Turning 50 isn’t about accepting dull, dry, or fragile hair. It’s about understanding how your body has changed and choosing products that work with your biology, not against it.
Sulfate-free shampoo is a small switch with outsized results. By preserving your scalp’s natural oils, protecting colour investments, reducing irritation, and extending time between washes, you’re not just buying a different bottle—you’re embracing a gentler, smarter approach to hair care.
Your hair deserves the same respect and care you give your skin. After all, both are living barriers that age beautifully when treated kindly.
Start with one sulfate-free wash. Give it two weeks. Then run your fingers through softer, stronger, healthier strands—and wonder why you didn’t switch sooner.
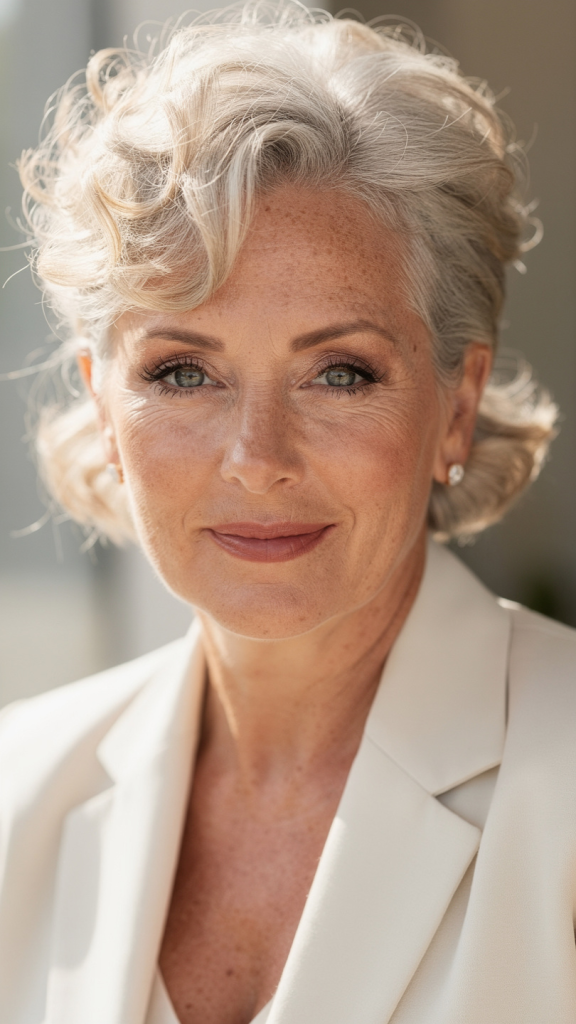
Finding the perfect updo after 50 is not about hiding your age—it’s about celebrating your confidence, lifestyle, and face shape. The right style can lift your features, smooth fine lines, and look effortlessly polished, whether you’re heading to a wedding, a business lunch, or a casual brunch.
What to Consider Before Choosing an Updo
Face Shape
Round face: Go for height at the crown (soft pompadour, voluminous French twist) to elongate. Avoid wide, flat buns at the nape.
Oval face: Almost anything works, but low chignons and sleek knots highlight your balance beautifully.
Here are 15 versatile updos that balance sophistication with ease, proving that chic hair has no expiration date.
15 Updo Ideas for Women Over 50
1. The Low Twisted Chignon
A classic gathered at the nape, this style softens the neckline and works beautifully with fine or medium hair.
2. The Voluminous French Twist
Backcomb gently at the crown for lift, then twist and pin—perfect for black-tie events or anniversary dinners.
3. The Textured Messy Bun
Loosely wrap hair into a high or mid bun, letting a few face-framing strands free for a modern, forgiving look.
4. The Side-Swept Roll
Brush hair to one side, roll it inward from the ends, and pin; this hides thinning spots and adds romantic volume.
5. The Braided Crown
Create two small braids from the temples and pin them across the top of the head—ideal for outdoor weddings or garden parties.
6. The Faux Bob Updo
Fold longer hair under and secure with pins at the back to mimic a short bob, giving you a dramatic style change without a cut.
7. The Pin-Curl Accent Twist
Take front sections, pin-curl them flat against the scalp, and gather the rest into a low ponytail—great for fine hair that needs texture.
8. The Rope Twist Bun
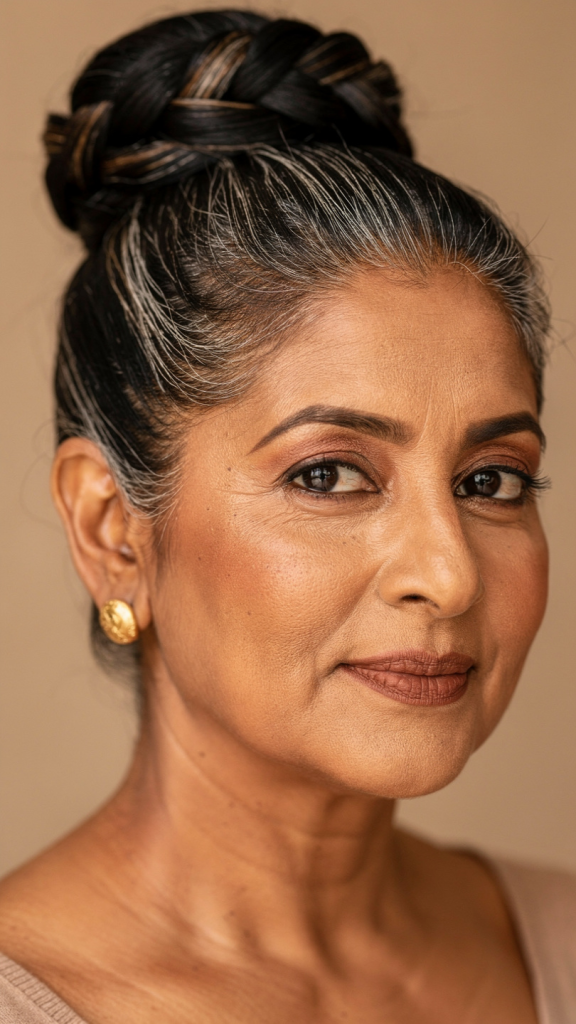
Divide hair into two strands, twist each, then twist them together before coiling into a bun; it looks intricate but takes minutes.
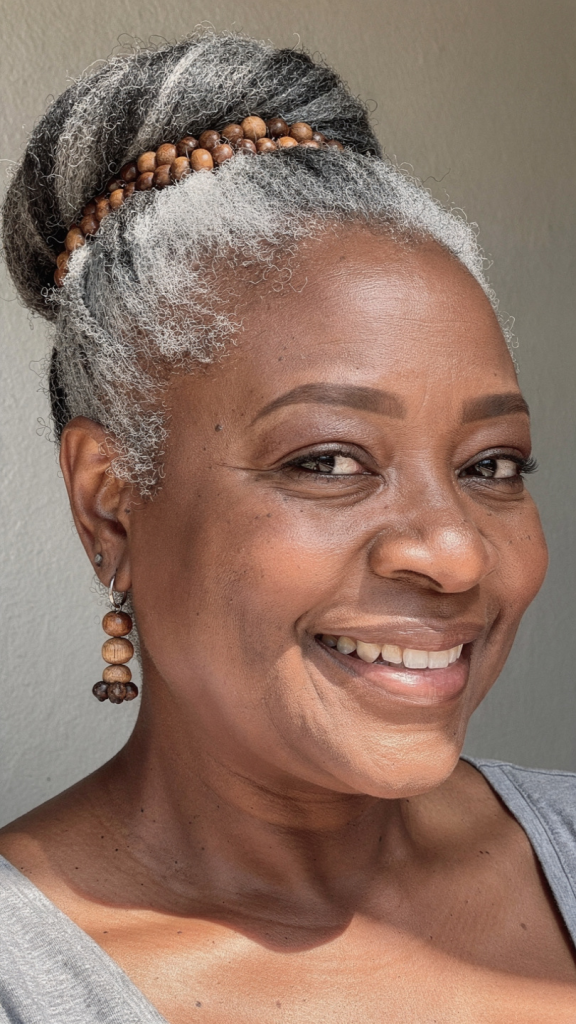
9. The Beaded Low Ponytail Wrap
Gather hair at the nape, wrap a small strand around the elastic, and add a single decorative bead or clip—casual yet intentional.
10. The Knotted Updo
Tie your hair into one or two loose knots (like tying a ribbon), then pin flat—perfect for wavy or naturally textured gray hair.
11. The Soft Pompadour
Tease just the front section gently, smooth over, and pin into a low bun; this vertical lift opens up the eyes and cheekbones.
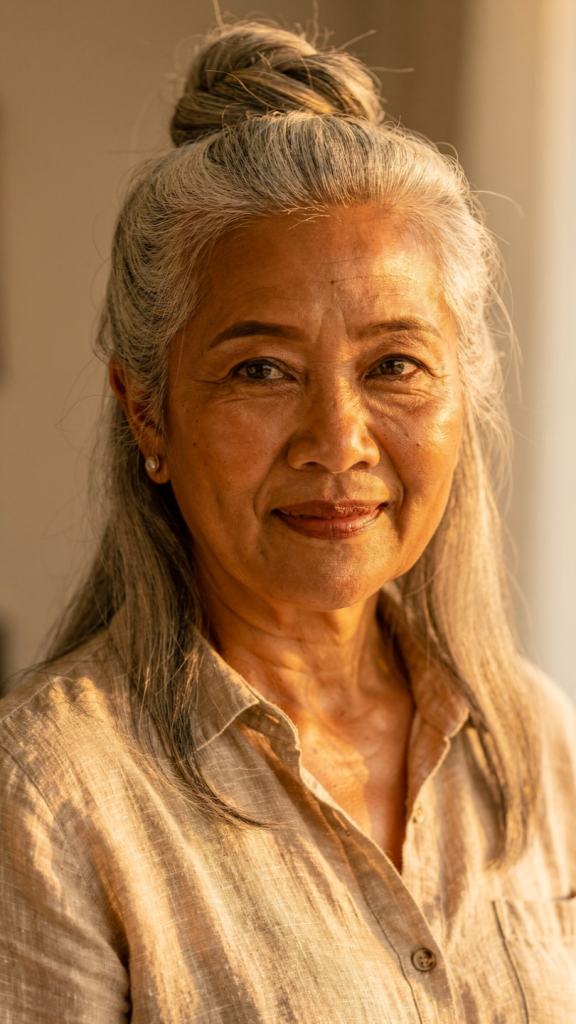
12. The Half-Up Twist with Volume
Pin only the top half into a small twist or bun, leaving the bottom loose—effortless for daytime occasions like coffee dates or gallery openings.
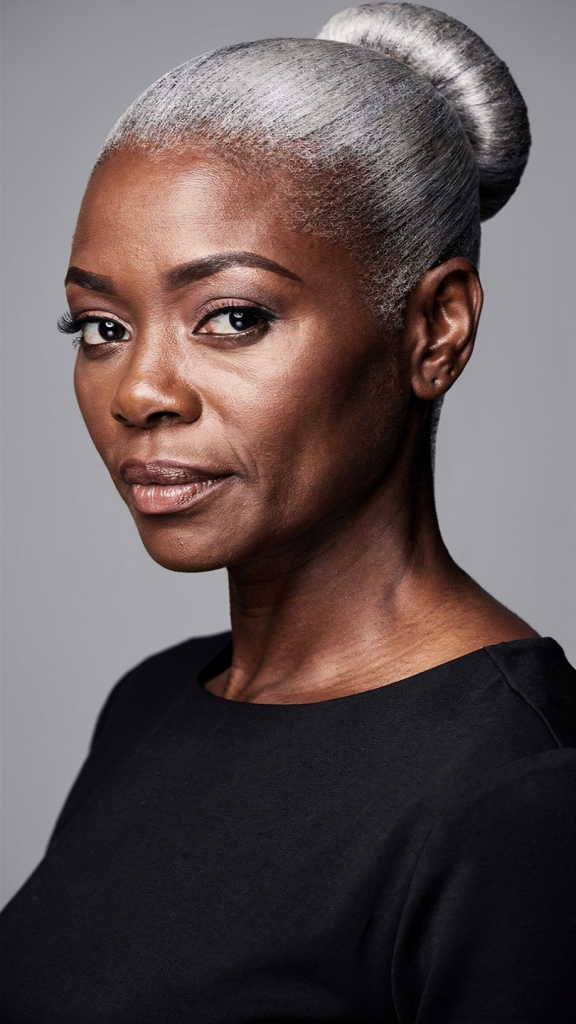
13. The Sleek Low Knot with a Deep Side Part
A deep side part combed into a tight low knot at the nape reads as modern, architectural, and works beautifully with silver or white hair.
14. The Double-Strand Wrap
Divide hair into two sections, wrap each around the other like a rope, then coil into a flat bun—excellent for medium-density hair.
15. The Accessorized Claw-Clip Updo
Twist hair upward and secure with a decorative claw clip at the crown; it takes 10 seconds but looks intentional, especially with pearl or tortoise accents.
Essential Products & Tools for Updos After 50
Product
Why It Helps
Best For
Volumizing mousse
Adds grip and lift at the crown
Fine or limp hair
Texturizing spray
Creates friction so pins stay put
Slippery or silky hair
Rattail comb
Teases gently and creates clean parts
All hair types
Bobby pins (matte, non-slip)
Hold securely without slipping
Thin or thick hair
Flexible hairspray
Holds shape without crunch
All updos, especially loose styles
Silk scrunchie
Prevents breakage for base ponytails
Fragile or color-treated hair
Decorative clips or combs
Adds polish and covers thin spots
Fine hair or short transition lengths
Pro tip: Avoid rubber bands and metal clips with sharp edges. They snap fine hair and damage the cuticle over time.
Step-by-Step: How to Get a Salon-Quality Updo at Home (In 10 Minutes)
Prep second-day hair – Clean hair is often too slippery. Lightly mist with texturizing spray or use dry shampoo at the roots.
Add gentle volume – Flip your head over and spray mousse at the crown. Blast with cool air for 10 seconds.
Create a stable base – For most updos, start with a low, loose ponytail at the desired height. Use a silk scrunchie.
Twist, roll, or pin – Follow your chosen style. If hair feels thin, pancake (gently pull apart) each section for fullness.
Soften the finish – Pull out two or three small strands around the face. This instantly modernizes any updo and softens fine lines.
Lock without stiffness – Hold hairspray 12 inches away and mist lightly. Tap any visible pins with a drop of hair oil to hide shine.
Common Mistakes to Avoid
Pulling too tight – Causes headaches and emphasizes every wrinkle around the eyes. Leave ½ inch of softness at the hairline.
Skipping texture products – Without grip, updos unravel or slip down within an hour, especially on fine or color-treated gray hair.
Using old or cheap pins – Rusty or flimsy pins won’t hold. Invest in smooth, sturdy bobby pins that match your hair color.
Forgetting the nape – Loose hair at the back of the neck makes any updo look messy, not intentional. Pin it flat.
Over-teasing – Excessive backcombing breaks fragile hair. Two gentle lifts at the crown are enough.
How to Adapt Any Updo for Short or Growing-Out Hair
Short (chin to shoulder length): Use a claw clip or small jaw clip to twist and secure just the top sections. Let the bottom hang or curl under. The faux bob updo and half-up twist work best.
Growing-out layers: Braid the shorter front sections separately and pin them into the main bun. Those little braids turn “awkward” into “intentional.”
Very short (pixie to ear length): Focus on pin curls and finger waves at the front. A decorative side comb or beaded clip gives the illusion of a full updo without needing length.
Conclusion
Turning 50 doesn’t mean turning away from beautiful, creative hairstyles—it means you finally know exactly what works for you. The right updo can lift your mood as much as your features, taking seconds off your morning routine and years off your face. Whether you choose a sleek low knot for a business dinner, a messy bun for a weekend farmers’ market, or a braided crown for your daughter’s wedding, these 15 styles prove that elegance, ease, and confidence only get better with time.
The golden rule: Never sacrifice comfort for style. If an updo pulls, pinches, or takes longer than 15 minutes, modify it. Your best accessory at any age is the quiet confidence of a woman who knows she looks good without trying too hard. Now go pin, twist, and twirl—beautifully and unapologetically.
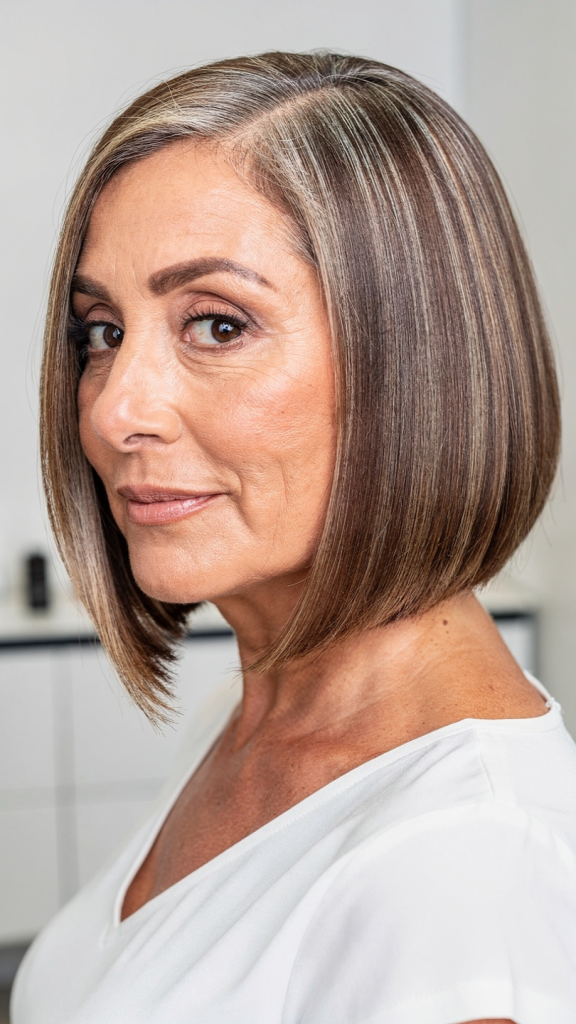
Finding the perfect haircut after 50, especially with thinning hair, isn’t about hiding—it’s about smart styling that creates instant volume and movement. The bob remains the ultimate solution because its weight can be expertly distributed to make fine hair look fuller, healthier, and effortlessly chic.
Below are ten tailored bob ideas that add texture, lift, and modern elegance to thin hair.
10 Bob Ideas for Thin Hair Over 50
1. The Textured French Bob
A chin-length bob with soft, choppy ends and no heavy layering creates the illusion of density while keeping a sophisticated, low-maintenance shape.
2. The Inverted Bob
Shorter in the back and slightly longer in the front, this cut naturally stacks weight at the crown, giving thin hair an instant lift without teasing or product buildup.
3. The Blunt One-Length Bob
Cut straight across at the jawline with no layers, this bob uses clean lines to make fine strands appear thicker and more substantial from every angle.
4. The Angled Lob (Long Bob)
Grazing the collarbone with a subtle forward angle, this longer version of the bob adds movement and weight at the ends, preventing thin hair from looking wispy.
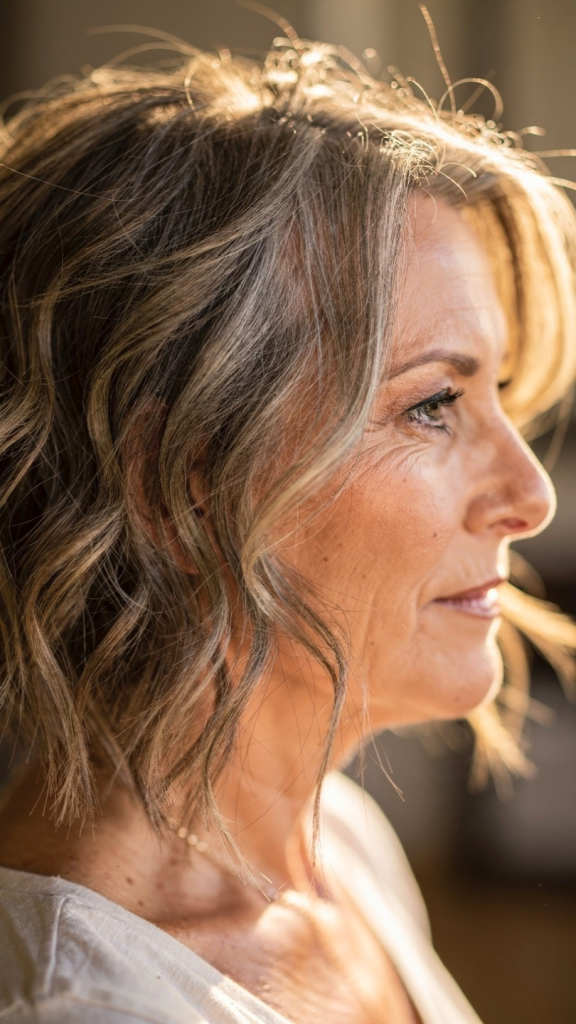
5. The Messy Wavy Bob
Soft, undone waves broken up with point-cutting remove excess bulk in a smart way, creating texture that tricks the eye into seeing twice the volume.
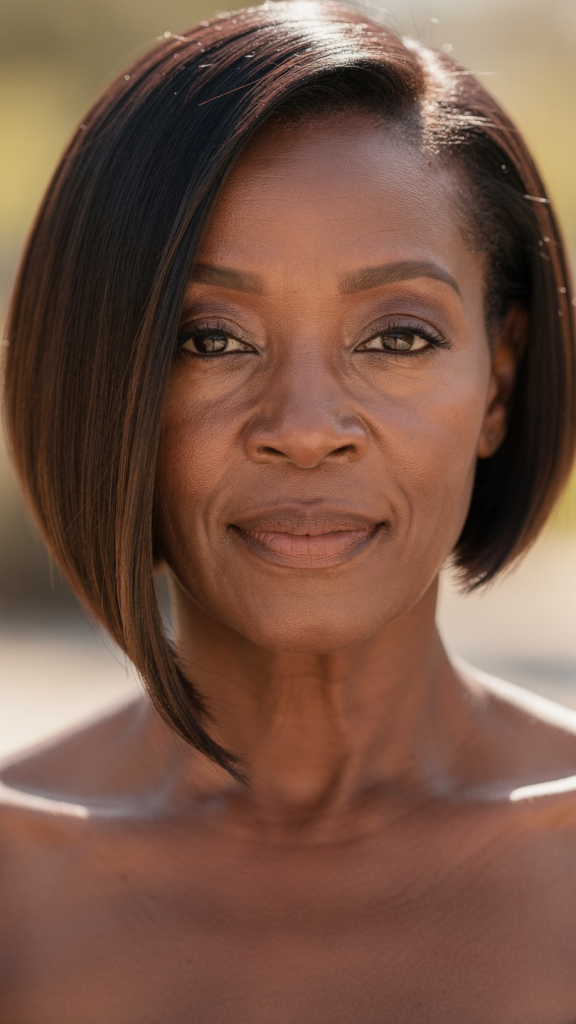
6. The Asymmetrical Bob
One side slightly longer than the other shifts visual focus away from thin areas and adds modern asymmetry, which makes hair look deliberately edgy rather than sparse.
7. The Layered Bob with Fringe
Fine, wispy bangs combined with light internal layers give thin hair directional flow and frame the face, reducing the appearance of scalp showing through.
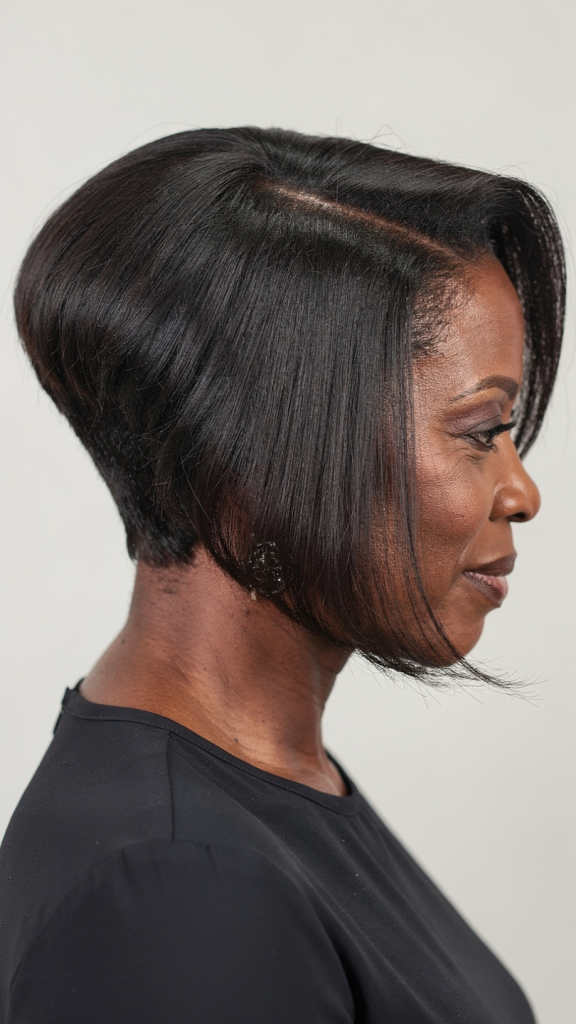
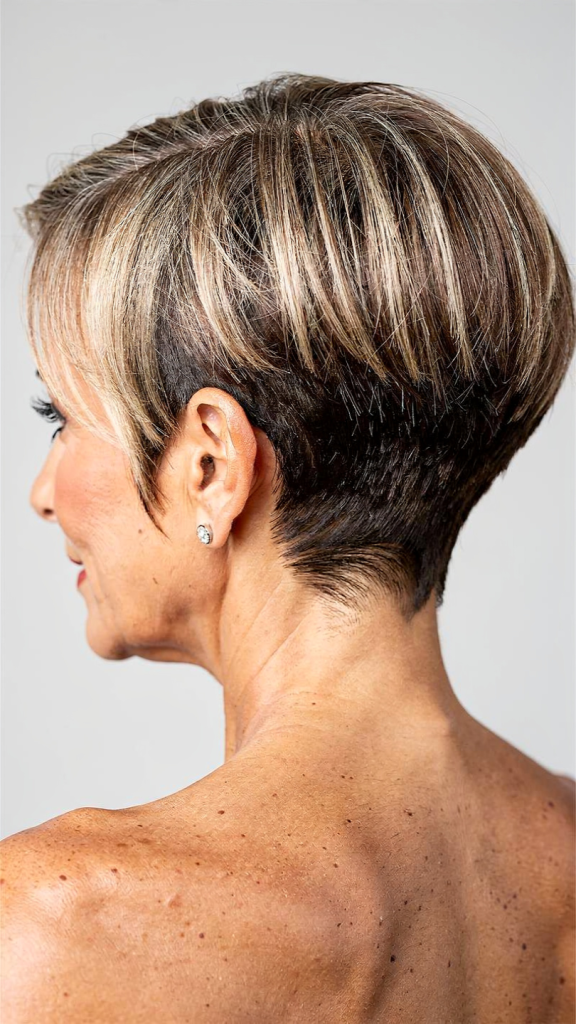
8. The Stacked Bob
Dense, precision stacking at the nape of the neck creates a rounded, pillow-like back that supports the rest of the hair, perfect for very fine or thinning hair.
9. The Clean-Cut Micro Bob
Cropped right at the ear lobe with no graduation, this ultra-short bob eliminates long, thin ends that can look stringy, keeping all the visual weight low and dense.
10. The Side-Parted Deep Wave Bob
A deep side part paired with soft, loose waves (created with a large-barrel iron) adds instant root lift and disguises uneven density across the crown.
What to Tell Your Stylist Before the Cut
Communication is everything when you have thin hair. Walk into the salon with these exact phrases:
“Use point-cutting, not thinning shears.” Thinning shears remove bulk you can’t afford to lose. Point-cutting adds texture while keeping density.
“Keep weight in the perimeter.” Ask your stylist to avoid over-layering the bottom edge so the haircut looks solid, not wispy.
“Elevate the back for subtle stacking.” A small amount of stacking at the crown creates lift without exposing the scalp.
“Leave the length at the nape soft.” A harsh, shaved nape can make thin hair look even thinner. Soft, tapered edges are more forgiving.
Styling Products That Add Instant Volume to Thin Hair
Using the wrong products weighs fine hair down. Stick to these lightweight, volume-building essentials:
Product Type
What to Look For
What to Avoid
Shampoo
Volumizing, sulfate-free, lightweight
Heavy moisturizing or “smoothing” formulas
Conditioner
Apply only to ends, rinse quickly
Heavy butters or oils near the scalp
Mousse
Foam texture, alcohol-free
Cream mousses or lotions
Root lifter
Spray formula with heat protection
Oily or greasy sprays
Dry shampoo
Tinted or translucent powder
Aerosol sprays with heavy fragrance
Finishing spray
Flexible hold, non-sticky
Hard-hold hairsprays that crack
Pro tip: Always blow-dry your roots in the opposite direction of your natural part before flipping back. This alone creates 30% more visible volume.
Daily Styling Routine for Thin Hair Over 50
Follow this 5-minute routine to maximize volume and minimize damage:
Step 1: Wash with volumizing shampoo – Focus on the scalp only. Use lukewarm water (hot water strips natural oils).
Step 2: Condition only the ends – From the ears down. Never apply conditioner to the crown or roots.
Step 3: Towel-dry gently – Pat, don’t rub. Rubbing causes breakage and frizz.
Step 4: Apply a golf-ball-sized amount of mousse – Distribute evenly from roots to mid-lengths.
Step 5: Blow-dry upside down – Bend at the waist for 30 seconds to lift roots away from the scalp.
Step 6: Use a round brush on the crown – Lift each section straight up, then cool with the cold shot button.
Step 7: Finish with dry shampoo at the roots – Even on clean hair. This adds grip and texture that lasts all day.
Maintenance Schedule for Thin Hair Bobs
Thin hair shows every split end and uneven cut. Stick to this schedule:
Every 4–6 weeks: Trim to maintain the bob’s shape. Waiting longer allows ends to become wispy and transparent.
Every 2–3 months: Clarifying shampoo treatment to remove product buildup that flattens thin hair.
Every 6 months: Assess if the bob length still works for your face shape and density (thinning can progress over time).
Common Mistakes That Make Thin Hair Look Thinner
Avoid these traps at all costs:
Over-layering: Too many layers expose the scalp and remove weight needed for volume.
Growing hair too long: Length pulls thin hair down, making it look stringy and see-through.
Using heavy oils or serums: These coat fine strands and make them cling together, revealing gaps.
Skipping trims: Even one extra month of growth can turn a chic bob into a flat, shapeless cut.
Washing every day: Over-washing strips natural sebum that gives thin hair slight grip and body.
Product Recommendations for Each Bob Type
Bob Style
Best Styling Product
Application Trick
Textured French Bob
Sea salt spray (light)
Spray on damp hair, scrunch, air-dry
Inverted Bob
Root lifting spray
Focus on the stacked back section only
Blunt One-Length Bob
Weightless shine serum (one drop)
Rub between palms, smooth over finished style
Angled Lob
Volumizing foam
Apply from mid-shaft to ends, avoid roots
Messy Wavy Bob
Texture spray
Spray on dry hair, twist small sections
Asymmetrical Bob
Flexible hold hairspray
Spray on the longer side only for contrast
Layered Bob with Fringe
Dry shampoo powder
Dust onto bangs to keep them piecey
Stacked Bob
Lift spray gel
Apply directly to the nape area before blow-drying
Clean-Cut Micro Bob
Matte pomade (tiny amount)
Warm between fingers, pinch ends
Side-Parted Deep Wave Bob
Heat protectant + wave spray
Apply before using a 1.5-inch curling iron
Conclusion
Turning 50 doesn’t mean settling for flat, lifeless hair. The right bob haircut—cut with intention and styled with lightweight products—can make thin hair look twice as full, twice as healthy, and twice as chic. The ten bobs outlined here work because they respect the science of fine hair: keep weight where it counts, add texture without bulk, and never sacrifice shape for length.
Remember, the most important tool isn’t your scissors or your blow-dryer—it’s your confidence. A bob is bold, modern, and unapologetic. Wear it like you mean it. Whether you choose a blunt one-length cut, a stacked nape, or a messy wave, own the fact that less hair can absolutely mean more style. Book that trim, buy that mousse, and step into your fifties with the best damn bob of your life.
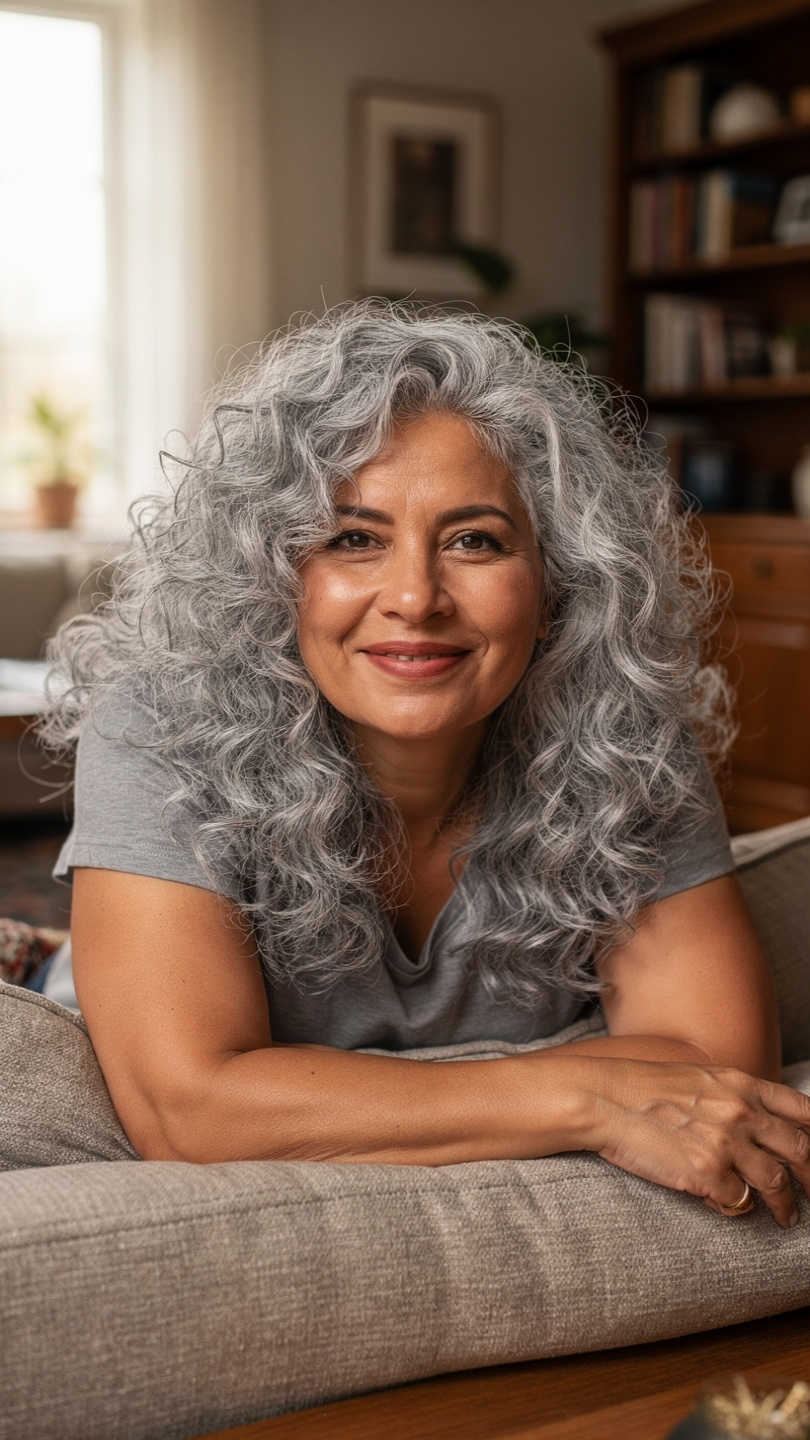
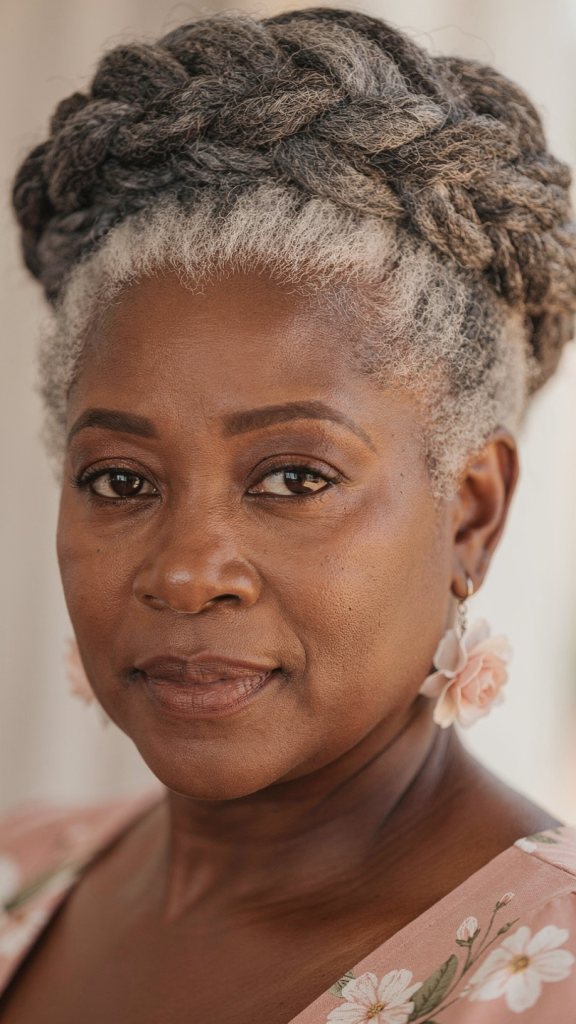
Entering your 50s is a celebration of wisdom, confidence, and embracing your authentic beauty—and there’s no better way to express that than with short, natural 4C hair. These low-maintenance, high-impact styles not only celebrate your unique texture but also offer comfort, versatility, and an elegant frame for your features, proving that short hair can be both powerful and practical at any age.
Why Go Short with 4C Hair After 50
Choosing a short natural hairstyle in your 50s and beyond comes with unique advantages:
Less Physical Strain – Shorter hair means lighter weight on your scalp, reducing tension headaches and neck fatigue.
Faster Routine – Wash, moisturize, and style in under 30 minutes most days.
Healthier Ends – Regular trims keep split ends at bay, allowing your 4C coils to thrive.
Cooler & More Comfortable – Perfect for hot flashes or warm climates, short hair offers better airflow.
Spotlights Your Face – Short styles draw attention to your eyes, cheekbones, and smile.
Celebrates Gray Naturally – 4C texture beautifully showcases silver, white, and salt-and-pepper patterns without constant dyeing.
10 Short 4C Natural Hairstyles
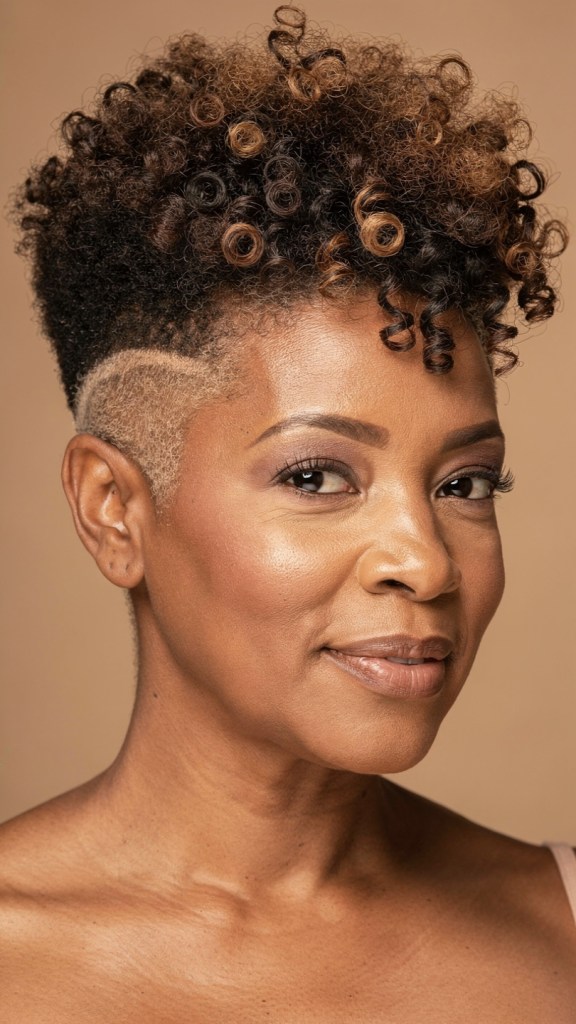
1. Tapered Natural Fro
Keep the sides and back tapered short while leaving more volume on top for a classic, polished fro that requires minimal daily fuss.
2. Finger-Coiled Pixie
Define your 4C curls into small, tight finger coils all over for a structured, sophisticated pixie that lasts for over a week.
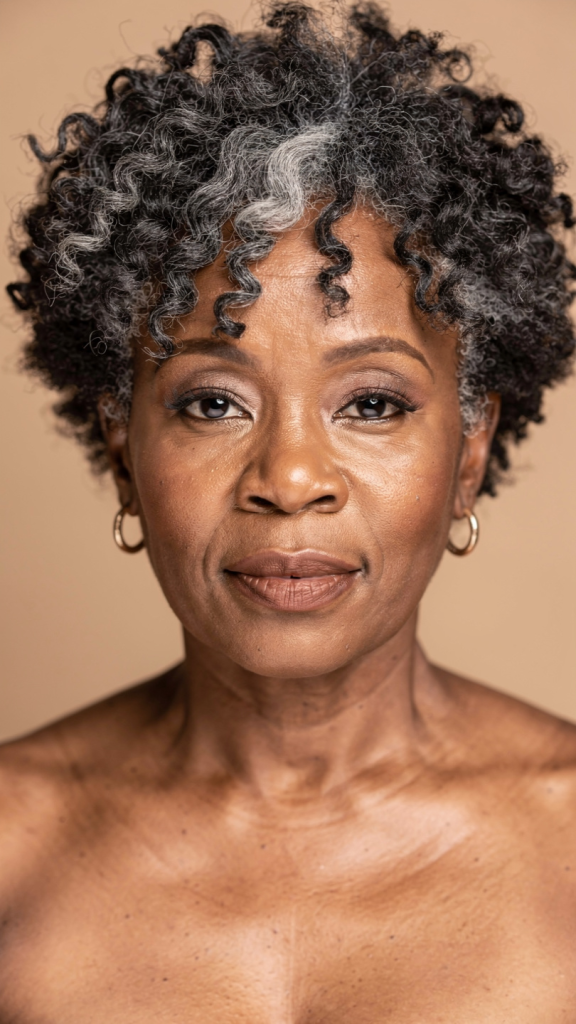
3. Salt-and-Pepper Teeny Weeny Afro (TWA)
Embrace your grays with a super-short, evenly rounded TWA that highlights your natural color and bone structure with effortless grace.
4. Sleek Pin-Curled Cap
Set damp hair into flat pin curls using gel, then release into a smooth, wavy cap that sits close to the head—elegant and heat-free.
5. Twist-Out on a Cropped Cut
On a short, uniform length, apply a twisting cream, do small two-strand twists overnight, then unravel for a soft, fluffy texture with defined waves.
6. Side-Swept Bang Fro
Shape your fro so that the front section falls slightly longer and sweeps across the forehead, softening wrinkles and adding a youthful asymmetry.
7. Rod-Set Curly Top
Roll small sections of your crown hair on perm rods, let dry, then remove for bouncy, springy ringlets while keeping the sides closely faded.
8. Headband-Coasted Wash-and-Go
Moisturize your 4C hair, define with a light gel, and pull a soft, wide headband over the hairline to create a neat, pulled-back look in under five minutes.
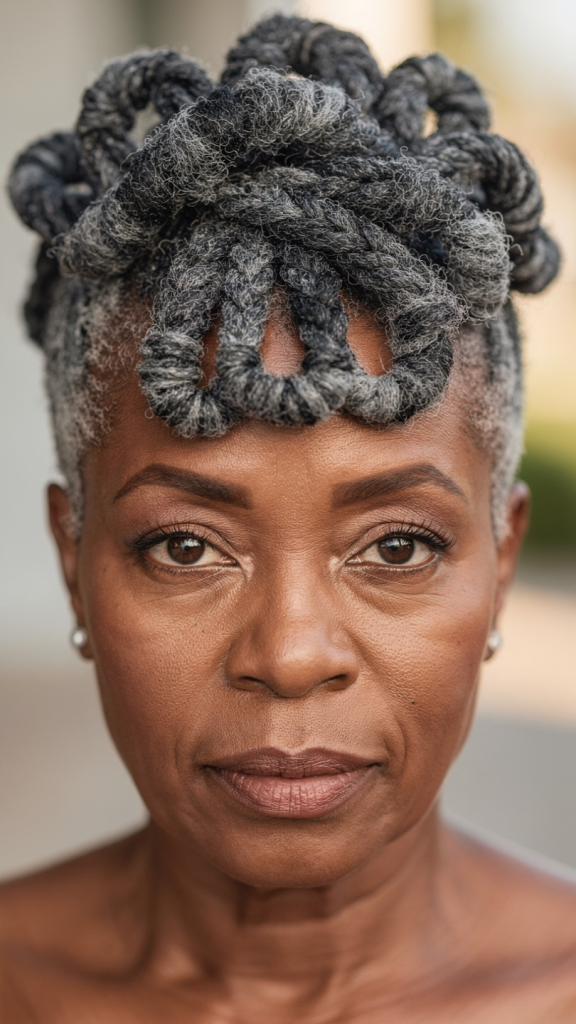
9. Chunky Pin-Knots
Part dry hair into large sections, twist each section into a flat knot against the scalp, and secure with pins for an artistic, gravity-defying updo on short hair.
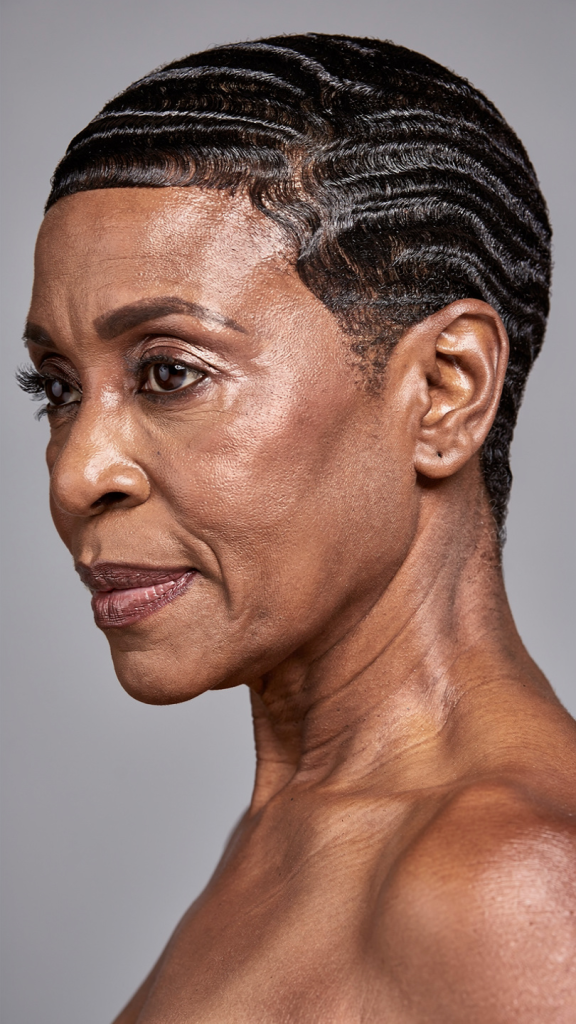
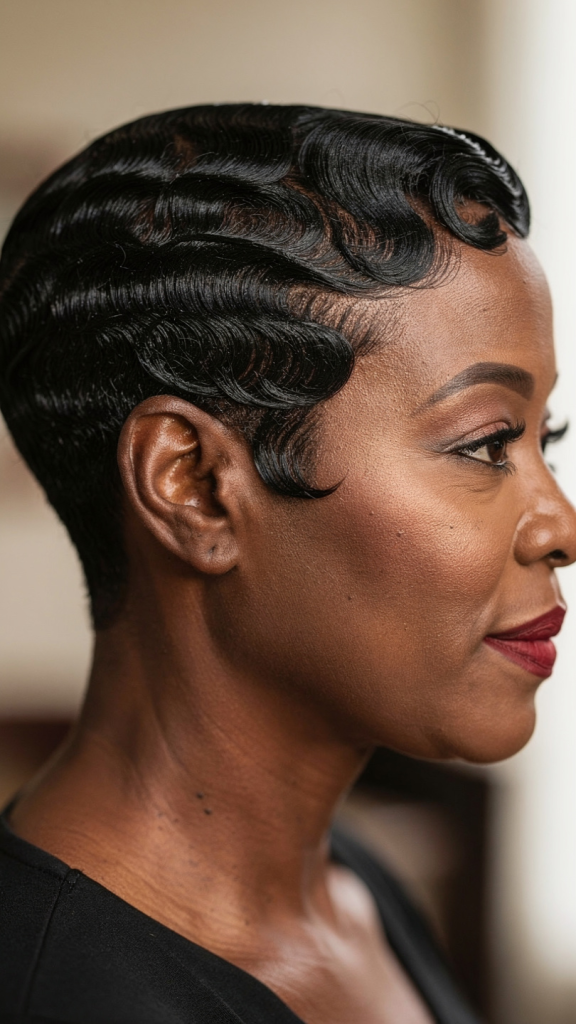
10. Clipper-Cut Finger Waves
Have your barber or stylist use clippers to carve deep, sculpted finger waves into very short 4C hair, resulting in a glossy, retro, low-maintenance style.
Essential Maintenance Tips for Short 4C Hair Over 50
To keep your short natural style looking fresh and healthy:
Tip
Why It Matters
Moisturize daily
4C hair is prone to dryness; use a water-based leave-in and seal with oil
Sleep with satin
Satin bonnets or pillowcases prevent breakage and preserve your style
Wash weekly
Use sulfate-free shampoos to avoid stripping natural oils
Deep condition bi-weekly
Adds elasticity and softness to aging hair strands
Trim every 4-6 weeks
Keeps shapes crisp and removes thinning ends
Protect edges
Avoid tight pulling; use edge control gently to prevent traction alopecia
Embrace low heat
Air-dry or use hooded dryers on cool settings to prevent heat damage
What to Tell Your Stylist
Before trying any of the 10 styles above, have this conversation with your barber or stylist:
“I want to keep my 4C texture intact – no chemical relaxers.”
“Please show me the length before cutting more.”
“Can you recommend a shape that suits my face and thinning areas (if any)?”
“How often should I come back for maintenance on this style?”
“What products do you suggest for my aging scalp and hair density?”
A good stylist will also check for any scalp conditions common with age (dryness, sensitivity, or thinning) before cutting.
Styling Products to Keep on Hand
For short 4C hair over 50, stock your bathroom with:
Leave-in conditioner (water-based, for daily moisture)
Curl cream or butter (thick enough to define 4C coils)
Light gel or mousse (for hold without crunch)
Natural oil (jojoba, coconut, or argan for sealing)
Edge control (non-flaking, alcohol-free)
Satin scarf or bonnet (nighttime protection)
Avoid products with alcohol, sulfates, or heavy silicones, which can dry out mature hair and scalp.
How to Transition from Long to Short 4C Hair
If you’re currently wearing longer natural hair and considering the chop:
Go gradually – Try a medium-length bob first to adjust to less hair.
Donate if possible – Some organizations accept natural hair donations.
Document the process – Take photos at each length to see what suits you.
Give yourself two weeks – Shock is normal; allow time to fall in love with your new look.
Buy a few headbands and scarves – Accessories ease the transition during awkward in-between stages.
Conclusion
Turning 50 doesn’t mean turning away from bold, beautiful hair—it means finally wearing what makes you feel like you. Short 4C natural hairstyles offer the perfect blend of practicality, elegance, and self-expression for women over 50. Whether you choose a classic tapered fro, playful finger coils, or a chic set of pin-knots, each style celebrates your texture, your journey, and your crown. The best part? These looks work with your hair’s natural pattern, not against it—saving you time, money, and unnecessary stress. So book that stylist appointment, save your favorite AI prompts for inspiration, and step into this chapter with your coils held high. You’ve earned every single one.
Finding the perfect hairstyle when you wear glasses can feel like a puzzle—frames compete with your hair for attention, and the wrong cut can overwhelm your face. But for women over 50, the right combination of cut, texture, and frame style creates a polished, youthful, and confident look.
How to Choose the Right Hairstyle for Your Face Shape & Frames
Before booking a salon appointment, consider two key factors: your face shape and your glasses style.
Round faces benefit from angular cuts (pixie, asymmetrical bob) that add structure.
Square faces look softer with layered lobs or waves that round out strong jawlines.
Oval faces can wear almost any style, from blunts to shags.
Heart-shaped faces shine with side-swept bangs or chin-length bobs that balance a wider forehead.
Thin, delicate frames pair beautifully with textured or voluminous cuts (curly pixie, blowout).
Cat-eye or angular frames harmonize with soft waves or rounded bobs.
Round frames look striking against structured cuts like the inverted bob or pixie.
Whether you have reading glasses, blue-light blockers, or stylish prescription frames, these 12 hairstyles work with your glasses to highlight your best features.
1. The Textured Pixie Cut
The short, piece-y layers of a pixie keep hair off your lenses and draw attention to your eyes, making it a perfect match for bold or cat-eye frames.
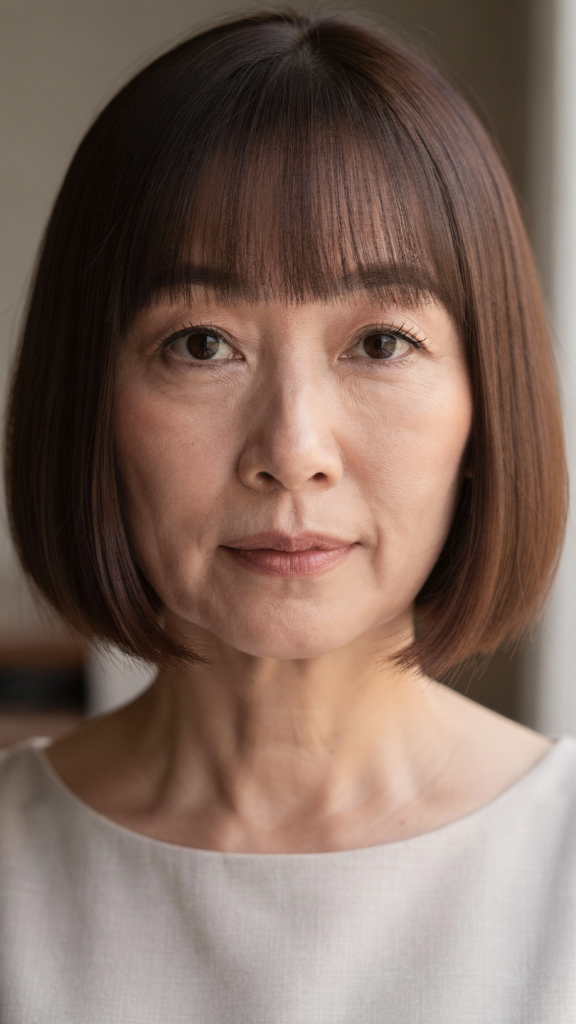
2. The Classic Blunt Bob (Chin-Length)
A clean, blunt bob that ends right at your chin creates a strong horizontal line that balances most glasses and gives a sleek, sophisticated silhouette.
3. The Layered Lob (Long Bob)
Falling just above the shoulders, a layered lob softens square or angular frames and offers versatility to wear hair tucked behind your ears or forward.
4. Soft Waves with Side-Swept Bangs
Loose, gentle waves paired with side-swept bangs prevent glasses from getting lost in heavy fringe, while the movement adds a flattering, youthful lift.
5. The Cropped Shag with Wispy Fringe
A modern shag with short, choppy layers and barely-there bangs blends seamlessly with frames, reducing bulk where glasses rest on your ears.
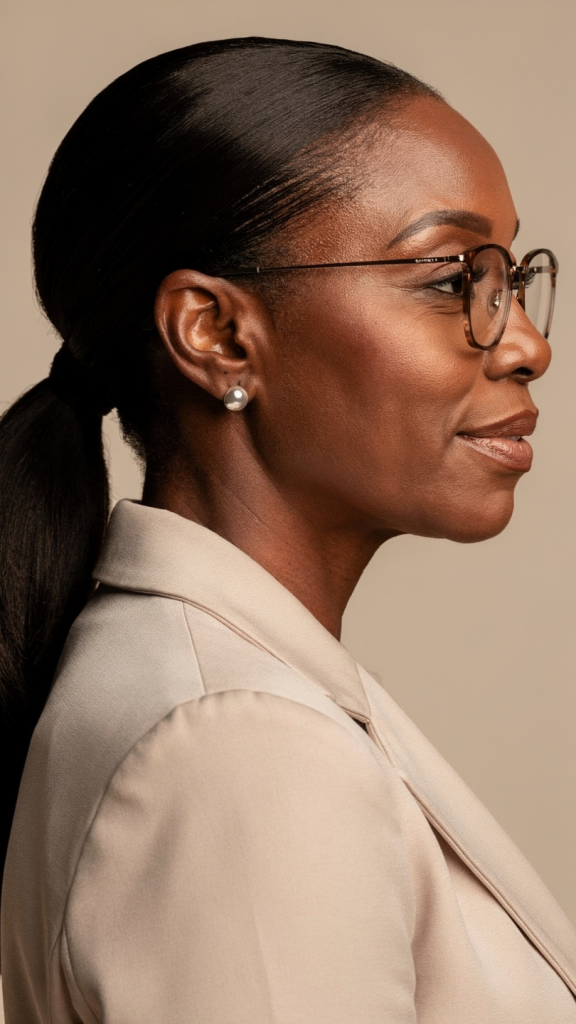
6. The Sleek Low Ponytail
Smoothing hair into a low ponytail at the nape of your neck eliminates side-volume that competes with glasses, creating an elegant, minimalist look.
7. The Curly Pixie Cut
Natural curls or permed texture in a pixie cut adds volume on top, lifting your face and preventing curls from tangling around your frames.
8. The Asymmetrical Bob
An angled bob that is shorter in the back and longer in the front draws the eye diagonally across your face, complementing both round and rectangular glasses.
9. The Chin-Length Inverted Bob
Stacked layers in the back with a slightly longer front creates a sharp, modern line that echoes the structure of most glasses frames.
10. Tucked-Behind-the-Ears Straight Lob
Straight, flat-ironed hair tucked behind your ears lets your glasses become the focal point, ideal for women with statement or colorful frames.
11. The Voluminous Blowout (Shoulder-Length)
Big, bouncy blow-dried layers add height at the crown, which balances heavier frames and prevents glasses from visually shortening your face.
12. The Micro Bob with Deep Side Part
A very short bob (earlobe to mid-cheek) parted deeply on one side creates asymmetry that softens the symmetry of glasses, reducing forehead shadows.
Quick Styling Tips for Women Over 50 with Glasses
Keep hair off your ears if your frames have thick temples — a pixie or tucked lob prevents pinching and breakage.
Use volumizing products at the crown to counteract the visual weight of glasses.
Avoid heavy, straight-across bangs — they clash with frames and can constantly fall into your lenses.
Embrace natural gray or silver — it pairs beautifully with modern frames and reduces maintenance.
Ask your stylist to cut your hair while you wear your glasses — this ensures the length and layers actually work with your frames.
Conclusion
Turning 50 isn’t about fading into the background — it’s about owning your look with confidence. Your glasses are part of your signature style, not an obstacle. The right haircut works with your frames to brighten your eyes, lift your face, and simplify your morning routine. Whether you choose a bold pixie, a soft lob, or elegant waves, the key is texture, shape, and proportion. Don’t be afraid to experiment — and remember, the most flattering hairstyle is the one that makes you feel like you. Now go book that appointment, and wear your glasses like the statement piece they are.
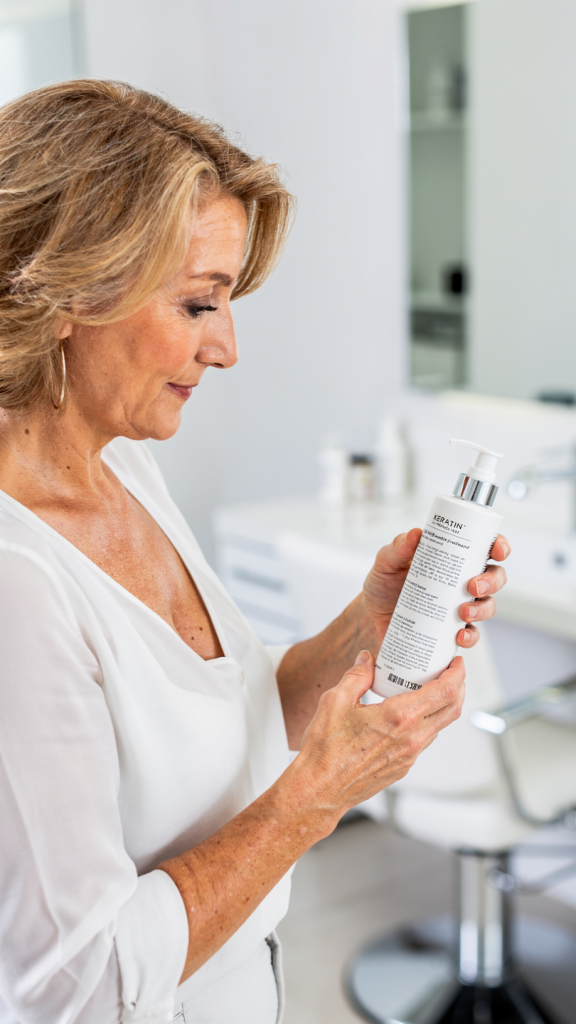
If you’re a woman over 50 dealing with frizz, humidity-induced puffiness, or thinning hair that has lost its youthful bounce, you’ve likely heard about keratin treatments. But what exactly is this smoothing process, and more importantly, is it safe for aging hair that may be more fragile, drier, or even color-treated? In a nutshell, a keratin treatment is a semi-permanent straightening or smoothing service that infuses liquid keratin into the hair cuticle. When done correctly with the right formulation, it is not only safe for women over 50 but can also be transformative—making hair shinier, easier to manage, and visually fuller.
Who Should Avoid Keratin Treatments Over 50
Women with very advanced hair loss or bald patches should skip it. Keratin treatments can irritate exposed scalps and won’t revive dead follicles; consult a trichologist first.
Those with scalp psoriasis or eczema need medical clearance. The heat and chemicals can trigger flare-ups; a dermatologist should approve any smoothing treatment.
If you’re undergoing chemotherapy or have recently finished, avoid keratin. Scalps are hypersensitive and hair is in a regrowth phase; wait at least six months post-treatment.
Below are 10 essential ideas to guide you through the decision.
10 Ideas: Keratin Treatments for Women Over 50 – Safety & Practicalities
1. Keratin treatments rebuild lost protein.
After 50, natural keratin production slows, leaving hair porous and weak; a treatment replenishes this protein, temporarily restoring strength and elasticity.
2. Not all keratin treatments contain harsh chemicals.
Avoid older formulas with high levels of formaldehyde or methylene glycol—instead, look for “formaldehyde-free” or “glyoxylic acid–based” treatments designed for sensitive or mature hair.
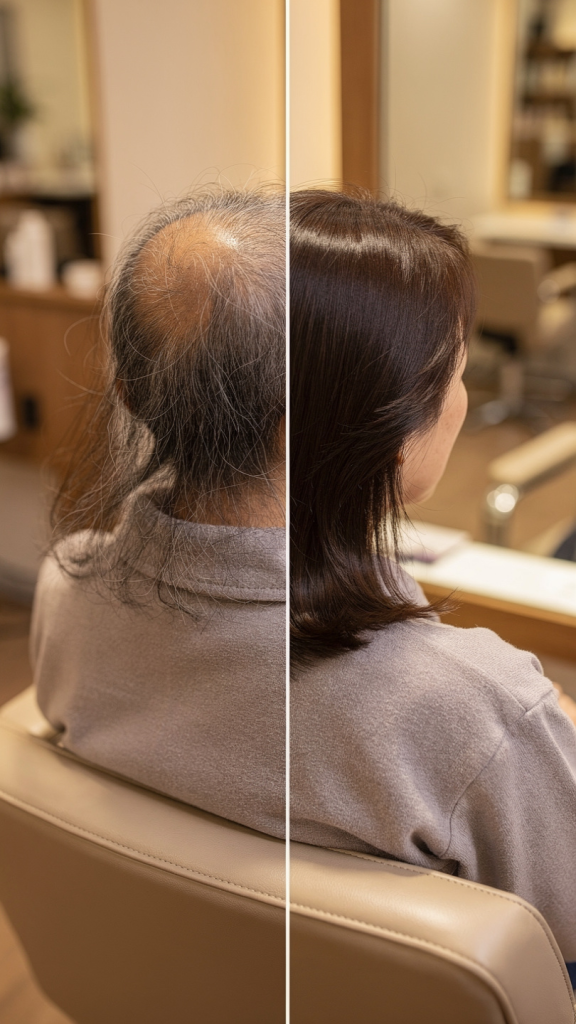
3. The treatment can make thinning hair look fuller.
By smoothing the cuticle and eliminating frizz, individual strands lie closer together, creating the optical illusion of denser, healthier hair.
4. It is safe for colored or highlighted hair if done correctly.
Many sodium-free keratin treatments are formulated to lock in color rather than strip it, but always wait at least two weeks after a fresh dye job.
5. Over-50 scalps are often more sensitive—so patch-test first.
Thinner skin and potential hormonal dryness make patch-testing crucial; apply a small amount behind your ear 48 hours before the full treatment.
6. Heat setting must be lowered for fragile grey or silver hair.
Grey hair tends to be more wiry and brittle; a skilled stylist should use a flat iron at 350–400°F (not the typical 450°F) to prevent breakage.
7. You will lose some volume at the roots—consider a layered cut.
Keratin weighs hair down, which is great for frizz but can flatten crown volume; ask for long layers to keep lift where women over 50 want it most.
8. Aftercare requires sulfate-free and sodium chloride–free products.
Harsh shampoos strip the keratin, causing rapid re-frizzing; using gentle, moisturizing shampoo and conditioner makes the treatment last 3–5 months.
9. The “no-wash waiting period” (48–72 hours) is non-negotiable.
Washing, tucking hair behind ears, or using clips too soon will create dents and reduce longevity—pin hair up loosely and avoid humidity during this window.
10. Consult a stylist who specializes in mature hair before booking.
A specialist will assess your hair’s porosity, breakage patterns, and scalp health to choose the lowest-risk keratin formula and heat settings for your age group.
How to Choose the Right Salon and Stylist Over 50
Ask for a patch test and a strand test before booking the full service. A reputable salon will happily test a small hidden section to check for breakage or allergic reaction.
Read online reviews specifically mentioning “mature hair” or “grey hair.” Other women over 50 will reveal whether the stylist is gentle, knowledgeable, and uses safe formulas.
Avoid salons that push “extra strong” or “permanent straightening.” Those terms often hide harsh relaxers or high-formaldehyde formulas unsafe for aging hair.
Alternatives to Keratin Treatments for Women Over 50
Try a keratin-infused deep conditioner mask once a week. It offers temporary smoothing without heat or chemicals, ideal for very sensitive scalps.
Use a ceramic or tourmaline blow-dry brush for at-home frizz control. These tools seal the cuticle naturally without chemical straighteners, reducing damage over time.
Apply a few drops of argan or marula oil to damp hair daily. Natural oils mimic keratin’s smoothing effect by coating the cuticle, with zero risk of chemical irritation.
Consider a “keratin express” or “blowout” treatment instead of full straightening. These lighter versions last 4–6 weeks, use lower heat, and are gentler on fragile over-50 hair.
Before-and-After Expectations – What Real Women Over 50 Report
Before the treatment: hair feels dry, frizzy, and unmanageable in humidity. Many women say they spend 30+ minutes daily just trying to tame flyaways.
After the treatment: hair dries 50–70% faster and needs little to no styling. Most users report cutting their morning routine in half and feeling more confident.
Results fade gradually over 3–5 months, not abruptly. You won’t wake up one day with full frizz; the smoothness slowly softens, which feels natural.
Second and third treatments often last longer than the first. As protein builds up in the hair shaft, many women over 50 report 5–6 months of results.
Cost and Maintenance Realities for Women Over 50
Expect to pay 150–150–500 depending on hair length and formula. Long or very thick hair costs more; formaldehyde-free versions are usually pricier but safer.
Budget for sulfate-free shampoo, conditioner, and a silk pillowcase. These aftercare items add 50–100 upfront but double the treatment’s lifespan.
Avoid swimming in chlorine or saltwater for at least two weeks post-treatment. Both strip keratin rapidly; wear a swim cap if you must swim, and rinse immediately after.
Re-touch only the regrowth (roots) after 3–4 months, not the whole head. This saves money and prevents over-processing the already-treated lengths.
Conclusion
Keratin treatments can be a safe, confidence-boosting option for women over 50—provided you choose the right formula, stylist, and aftercare routine. Aging hair is often drier, more fragile, and more sensitive than younger hair, but that doesn’t mean you have to live with frizz or daily styling battles. By opting for formaldehyde-free treatments, lowering heat settings, patch-testing first, and committing to sulfate-free maintenance, you can enjoy smoother, shinier, and more manageable hair for months at a time. However, if you have significant hair loss, scalp conditions, or recent chemotherapy, alternatives like keratin masks, natural oils, or express blowouts may be wiser first steps. Ultimately, listen to your hair and consult a stylist who respects mature hair’s unique needs. With the right precautions, a keratin treatment can help you look and feel like the vibrant, polished woman you are—at 50, 60, 70, and beyond.
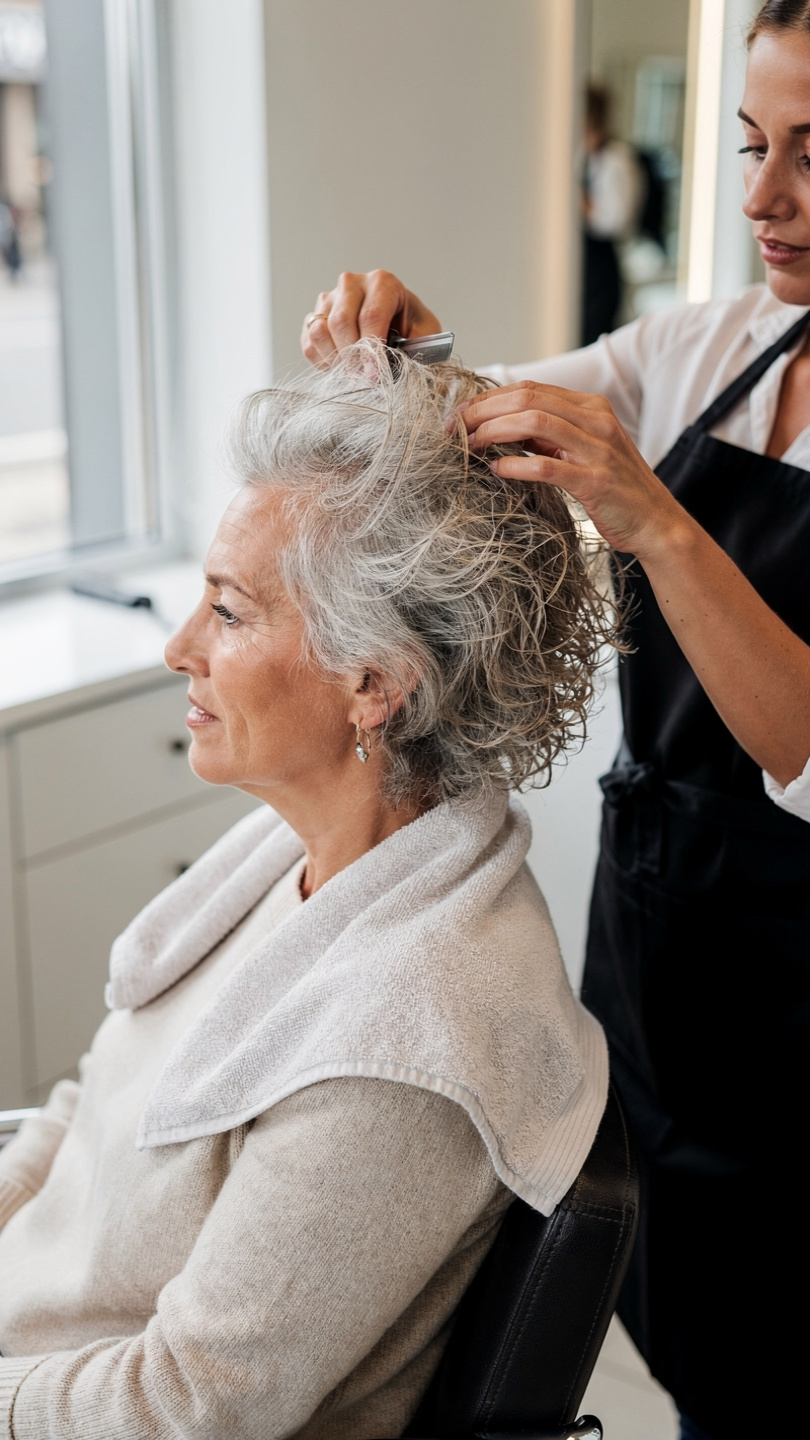
As we age, hormonal changes (especially during and after menopause) can make hair drier, finer, and more prone to frizz. But frizz isn’t something you have to live with—by adjusting your hair care routine to focus on moisture, gentle handling, and the right products, you can restore smoothness, shine, and manageability at any age.
Best Product Ingredients to Look For
AI image search prompt: “Flat lay of hair care products for frizzy hair including argan oil, shea butter, and silk pillowcase”
Ingredient
Benefit for Women Over 50
Argan oil
Seals moisture, adds shine without heaviness
Shea butter
Deeply hydrates coarse, dry strands
Keratin
Repairs protein loss, smooths cuticle
Glycerin
Attracts moisture from air (good for low humidity)
Coconut oil
Penetrates hair shaft to reduce protein loss
Aloe vera
Soothes scalp and adds lightweight hydration
Avoid: Sulfates, alcohol (Denat., SD alcohol), silicones (if not water-soluble), and synthetic fragrances.
10 Ideas to Get Rid of Frizzy Hair for Women Over 50
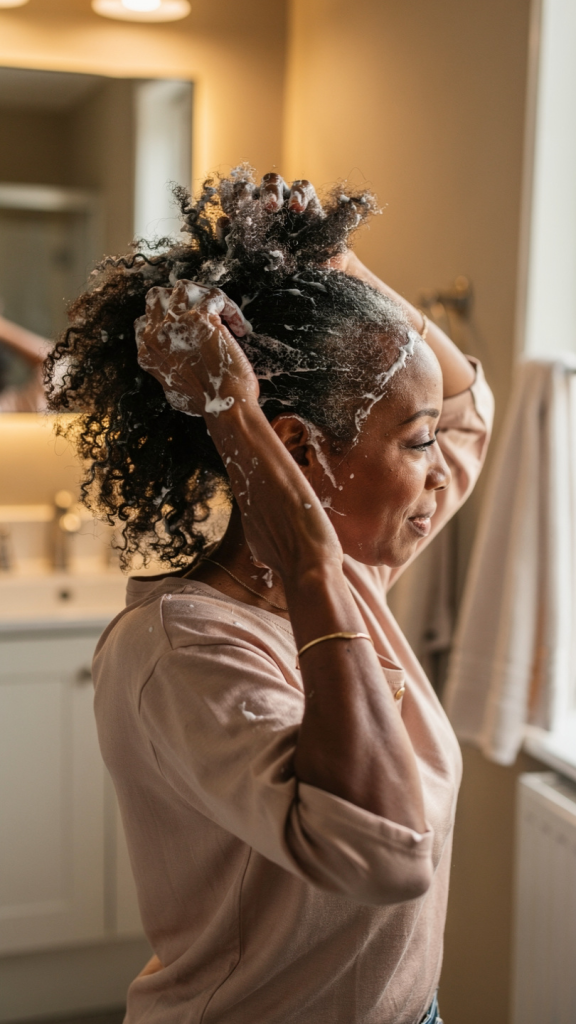
1. Switch to a sulfate-free, moisturizing shampoo.
Sulfates strip natural oils, worsening dryness and frizz; a gentle, hydrating shampoo preserves your hair’s protective barrier.
2. Always use a nourishing conditioner, focusing on mid-lengths to ends.
Conditioner seals the cuticle and adds essential moisture—older hair needs this step more than ever to prevent flyaways.
3. Apply a leave-in conditioner or frizz serum on damp hair.
These products create a weightless shield against humidity and lock in hydration without weighing down fine, mature hair.
4. Replace regular towels with a microfiber towel or soft T-shirt.
Rough terry cloth fibers lift the cuticle and cause friction; microfiber gently absorbs water without creating static or breakage.
5. Limit heat styling and always use a heat protectant.
Heat accelerates moisture loss and brittleness; a protectant spray or cream buffers hair from damage while smoothing the shaft.
6. Sleep on a silk or satin pillowcase.
Cotton creates friction overnight, leading to bedhead frizz—silk reduces tugging, preserves hairstyles, and keeps hair sleek.
7. Deep condition weekly with a hydration mask.
A weekly mask replenishes lipids and proteins that naturally decline after 50, repairing dryness at the source.
8. Get regular trims every 6–8 weeks.
Split ends travel up the hair shaft, making frizz look worse; frequent trims keep ends blunt, healthy, and smooth.
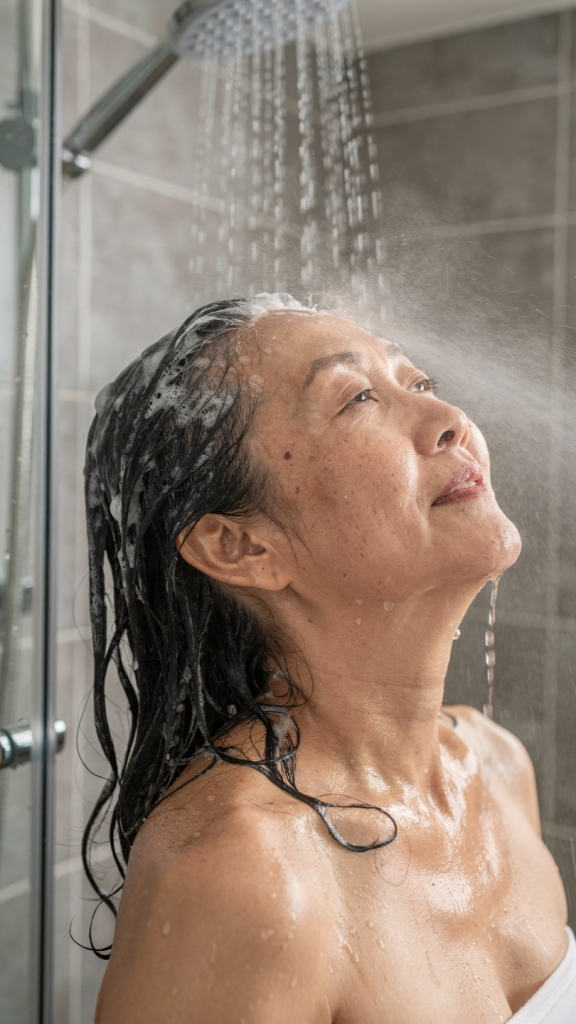
9. Rinse with cool (not cold) water after conditioning.
Cool water flattens the hair cuticle, trapping moisture inside and boosting shine without shocking the scalp.
10. Try a lightweight, non-greasy oil (like argan or jojoba) on dry ends.
A drop or two of oil seals split ends instantly, adds softness, and controls flyaways without flattening volume.
Lifestyle & Diet Tips for Frizz Control
AI image search prompt: “Woman over 50 drinking water and eating salmon and walnuts at kitchen table, healthy lifestyle”
Stay hydrated: Drink 8+ glasses of water daily to keep hair hydrated from within.
Boost omega-3s: Salmon, walnuts, and flaxseeds nourish hair follicles and reduce dryness.
Take biotin or collagen supplements: Supports hair strength and elasticity (consult your doctor first).
Use a humidifier at home: Adds moisture to dry indoor air, preventing static frizz.
Avoid over-brushing: Brush only when necessary using a boar-bristle brush to distribute natural oils.
Quick Morning Frizz Fix (Under 5 Minutes)
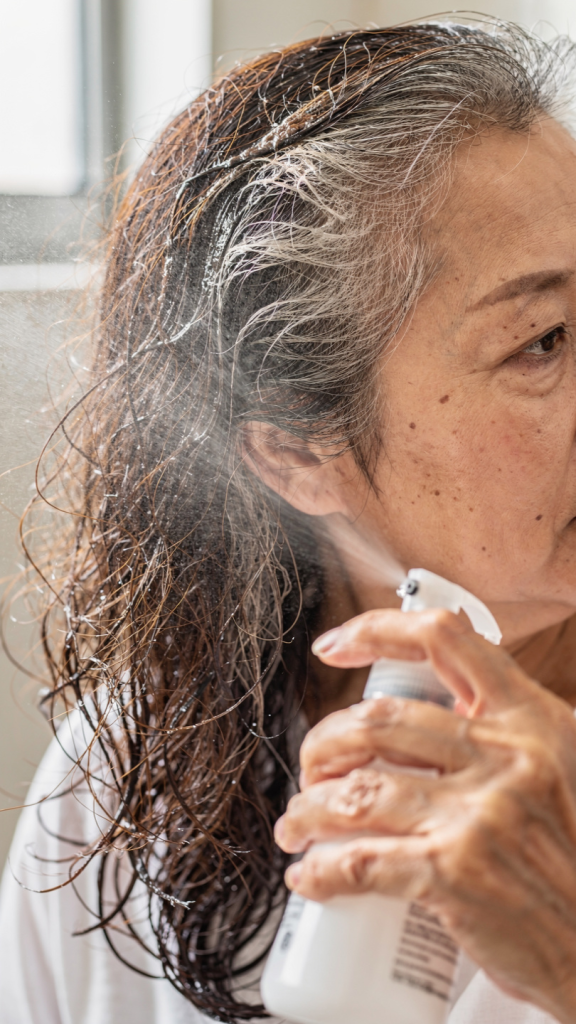
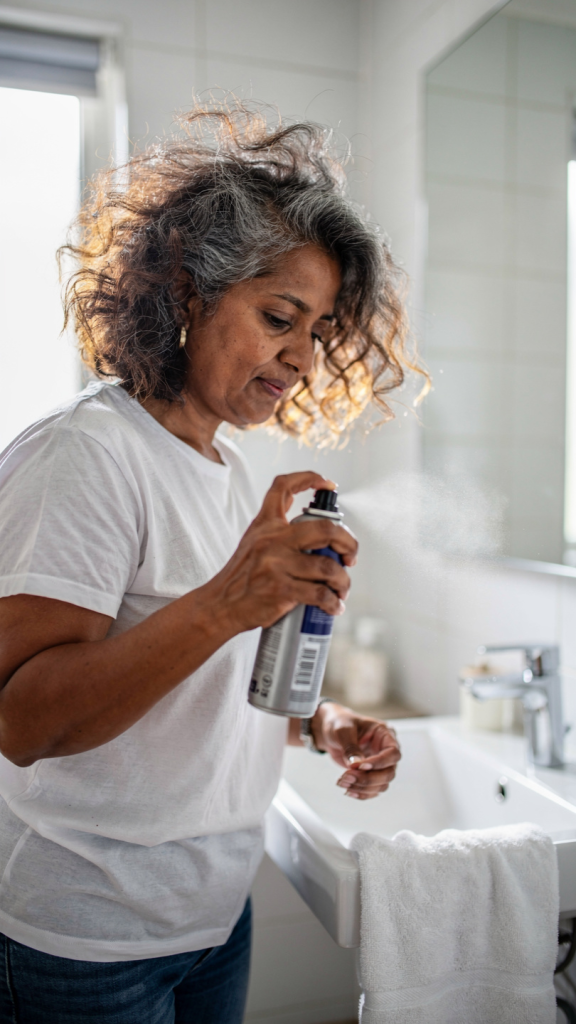
AI image search prompt: “Woman over 50 spraying water bottle on frizzy hair and smoothing with hands, morning routine”
Lightly mist hair with water or a mix of water + leave-in conditioner.
Smooth a pea-sized amount of anti-frizz serum or argan oil over the surface.
Gently finger-comb or use a wide-tooth comb.
If needed, use a cool shot from a hairdryer (with nozzle attachment) to seal cuticles.
Conclusion
Frizzy hair after 50 isn’t a sign of aging poorly—it’s simply a sign that your hair needs a different kind of care. By switching to moisturizing, sulfate-free products, adopting gentle drying and sleeping habits, and incorporating weekly deep conditioning, you can dramatically reduce frizz and restore softness, shine, and manageability. Remember that consistency matters more than any single product. Start with two or three changes from this list, then build from there. Your hair at 50+ can be just as smooth, vibrant, and beautiful as it was in your younger years—sometimes even more so, because now you know exactly what it needs.