
The shoulder-length haircut is the “goldilocks” of hairstyles—not too long, not too short, but just right. When you add layers to this versatile length, something magical happens. Layers remove bulk, add dynamic movement, frame the face beautifully, and create volume where it’s needed most. Whether you have fine, straight hair craving body or thick, wavy hair needing shape, a layered shoulder-length cut offers endless styling possibilities.
Below are 10 well-structured ideas to inspire your next trip to the salon:
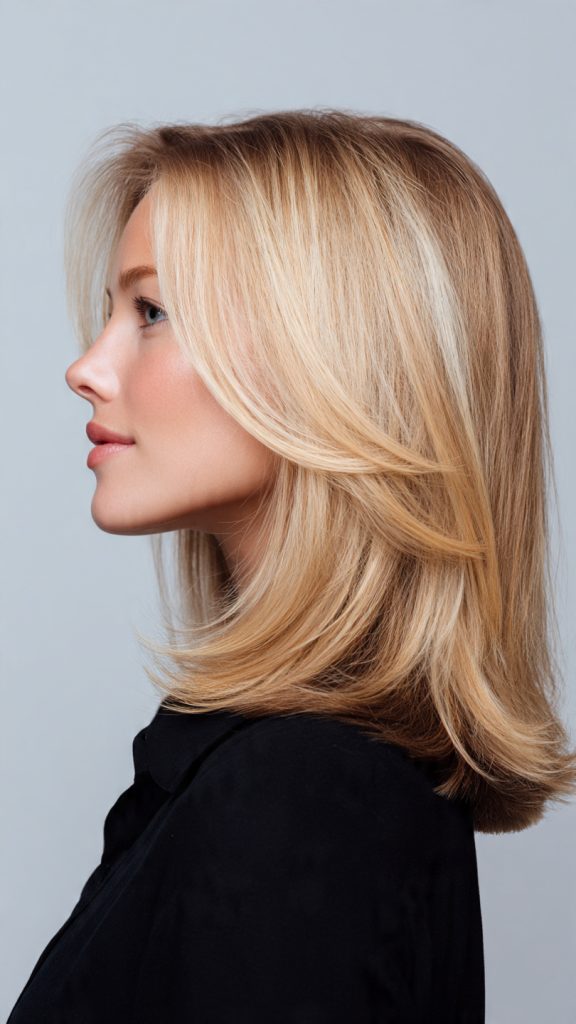
1. The Classic Long Layered Cut

This is the foundation of all layered shoulder-length styles. Long layers are cut throughout the hair, with the shortest layer falling just below the chin. This technique removes weight while keeping the overall shape intact. Best for: Fine to medium hair that needs volume without losing length. Styling tip: Blow-dry with a round brush for a bouncy, polished finish.
2. The “Butterfly” Cut

Inspired by the viral trend, this cut uses two distinct layers: a short, face-framing top layer (the “wings”) and a longer bottom layer. When styled, the shorter pieces curl away from the face, creating a winged, ethereal effect. Best for: Adding instant volume and a romantic feel. Styling tip: Use a small curling wand to curl pieces away from your face.
3. Invisible Layers (Micro-Layers)
These are ultra-subtle, barely-there layers cut into the interior of the hair. From the outside, the hair looks like a blunt one-length cut, but the hidden layers prevent the ends from flipping out awkwardly and add gentle internal movement. Best for: Fine, straight hair that needs a little lift without looking choppy. Styling tip: Air-dry with a light mousse for effortless, natural texture.
4. Choppy, Textured Layers
Think rock-and-roll. This style uses point-cutting techniques to create jagged, disconnected ends. The layers are more visible and dramatic, giving a piece-y, undone finish. Best for: Thick hair that needs weight removed, or anyone wanting an edgy, low-maintenance look. Styling tip: Work a texturizing paste or sea salt spray through dry hair to emphasize the separation.
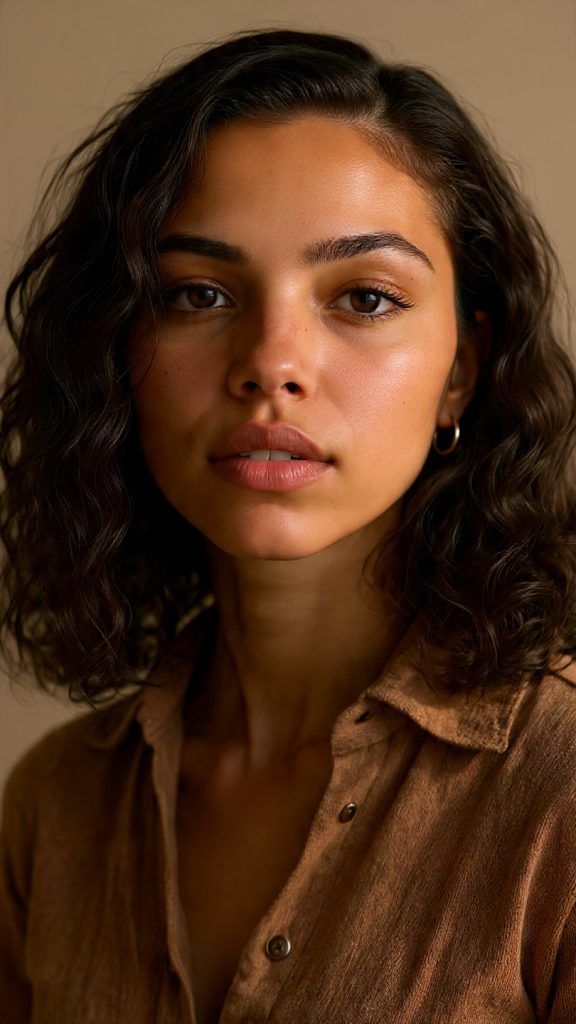
5. Face-Framing Curtain Layers
The layers are concentrated heavily around the front, starting at the cheekbones or jawline and cascading down to blend with the shoulder-length back. This creates a soft, “curtain” effect that opens up the face. Best for: Round or heart-shaped faces, as it visually lengthens and slims. Styling tip: Blow-dry the front pieces away from your face using a large round brush.
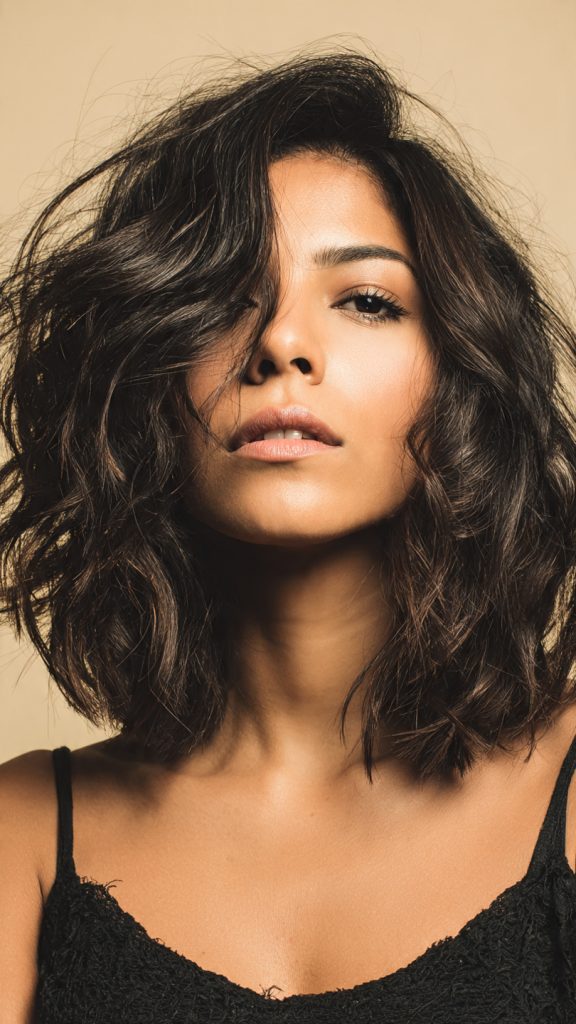
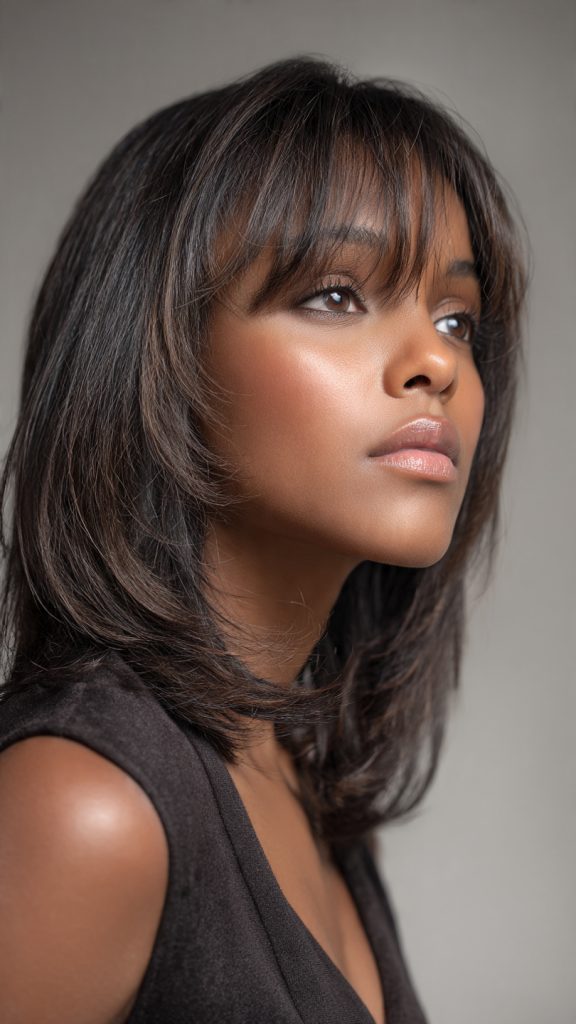
6. The Shag (Modern Version)
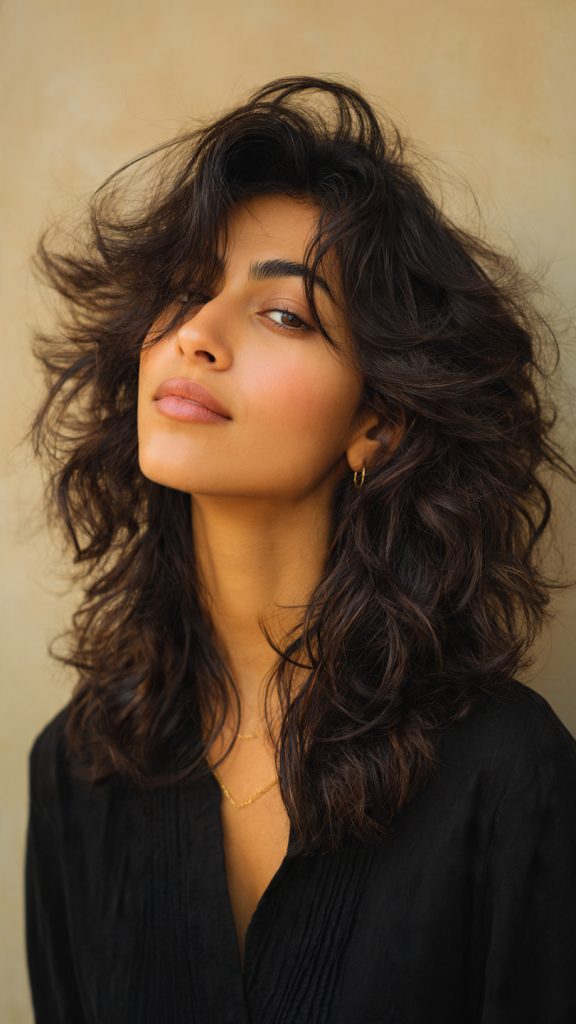
A modern shoulder-length shag features shorter layers throughout the crown, wispy bangs (optional), and a slightly disconnected look. Unlike the 70s version, today’s shag keeps the ends less feathered and more blunt for a chic, cool-girl vibe. Best for: Wavy or curly hair; also great for adding volume to flat hair. Styling tip: Scrunch in curl cream and let it air-dry for that effortless, lived-in look.
7. Graduated Layers (Angled)
This cut is shorter in the back and slightly longer in the front, with layers that “graduate” in length. The stacking of layers in the back creates significant lift and volume at the crown, while the front remains soft. Best for: Fine hair that falls flat, and those who want a more structured, polished silhouette. Styling tip: Use a vented brush and blow-dry the back section upward to maximize volume.
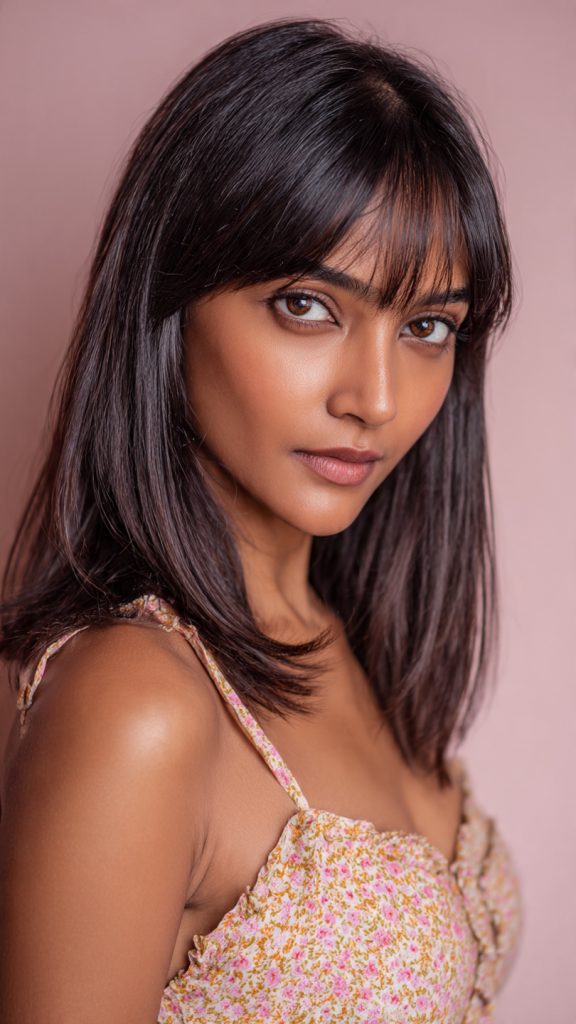
8. Wispy Layers with Bottleneck Bangs
Combine shoulder-length layers with “bottleneck” bangs—bangs that are shorter in the center and blend into longer curtain pieces at the sides. The layers in the body of the hair are cut wispy (soft and airy) to match the lightness of the bangs. Best for: High foreheads or anyone wanting to soften strong features. Styling tip: A quick pass with a flat iron to bend the bangs outward creates the perfect bottleneck shape.
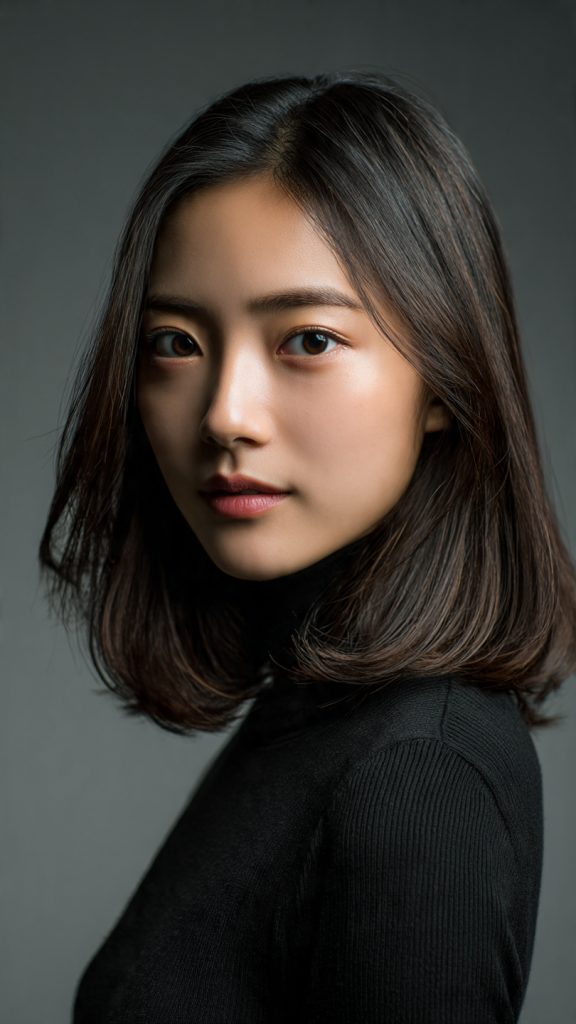
9. The Beveled Layered Bob (Lob)
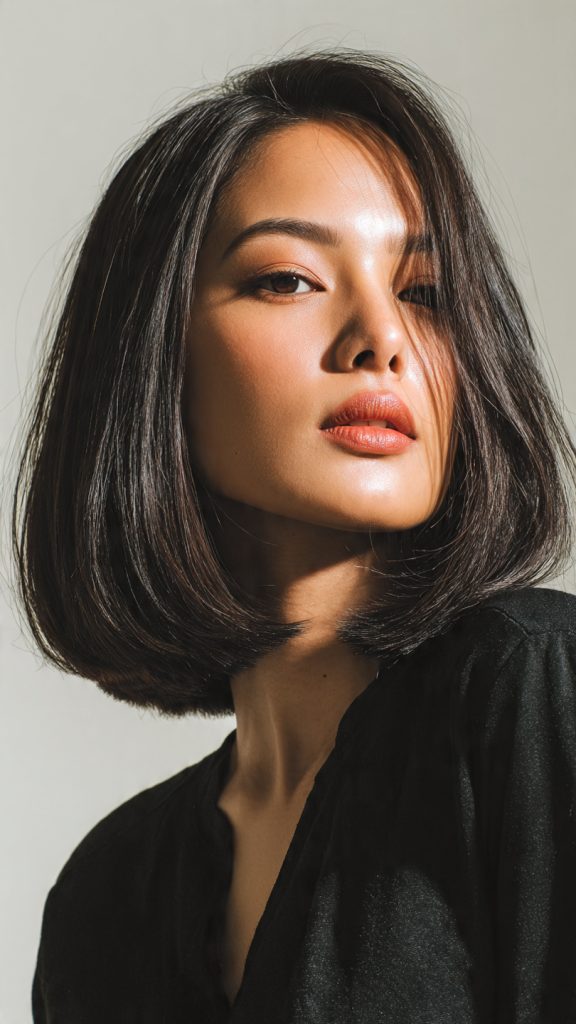
A longer bob that hits just above or at the shoulders, with internal layers that are slightly heavier at the bottom. The ends are “beveled” (tucked under) while the internal layers add roundness. This is the polished, professional’s choice. Best for: Straight to slightly wavy hair; perfect for corporate or elegant settings. Styling tip: Use a paddle brush and a round brush to tuck the ends under smoothly.
10. Air-Layer Cut (Weightless Layers)
Popularized by Korean hair styling, this technique removes weight from the inside of the hair shaft rather than the ends. The hair is held vertically and sliced into, creating pockets of air. The result is a silky, weightless finish with no visible layer lines. Best for: All hair types, especially thick or heavy hair that feels dense. Styling tip: A simple air-dry with a lightweight oil will showcase the cut’s feathery movement.
What to Ask Your Stylist (Without Getting Lost in Jargon)
Before you sit in the salon chair, know these three key terms. They will help you communicate exactly what you want.
- “Point-cutting” – Ask for this if you want soft, textured ends rather than a blunt line. It creates that airy, modern feel.
- “Internal layers” – Say this when you want volume and weight removal inside the hair without changing the outer shape. Perfect for thick hair.
- “Elevation” – The higher your stylist lifts your hair while cutting, the shorter and bouncier the layers. For subtle, shoulder-length layers, ask for low to medium elevation.
One golden rule: Always bring a reference photo. The prompts above can generate exactly that.
How to Choose the Right Layered Cut for Your Face Shape
Not every layered shoulder-length cut suits every face. Use this quick guide:
| Face Shape | Best Layered Cut from the 10 Ideas |
|---|---|
| Oval | Any style works. Try the Classic Long Layers (Idea 1) or the Butterfly Cut (Idea 2). |
| Round | Face-Framing Curtain Layers (Idea 5) or Graduated Layers (Idea 7) to lengthen the face. |
| Square | Wispy Layers with Bottleneck Bangs (Idea 8) or the Modern Shag (Idea 6) to soften a strong jaw. |
| Heart | The Beveled Lob (Idea 9) or Invisible Layers (Idea 3) – both add width near the chin to balance a narrower jaw. |
| Long/Oblong | Choppy Textured Layers (Idea 4) or the Butterfly Cut (Idea 2) to add width and break up length. |
Styling & Maintenance: Keep Your Layers Looking Fresh
Layered cuts are low-maintenance but not no-maintenance. Follow these rules.
Daily Styling (5 minutes or less)
- For volume: Flip your head upside down and blow-dry the roots with a round brush. Focus on the crown where layers start.
- For texture: Spray dry texture spray or sea salt spray into damp hair, then scrunch. Air-dry for that “undone” layered look.
- For smoothness: Use a flat iron only on the ends of each layer. Ironing the whole strand flattens the dimension layers create.
The 8-Week Rule
Layers grow out faster than one-length cuts. After 8–10 weeks, your shortest layer will drop by about an inch, and the shape will start to feel heavy. Book a “dusting” (micro-trim) every 2 months – not a full cut.
Product Picks for Layered Shoulder-Length Hair
| Hair Type | Avoid | Use Instead |
|---|---|---|
| Fine | Heavy oils, creamy leave-ins | Volumizing mousse, lightweight sea salt spray |
| Thick | Silicone-heavy serums (they weigh layers down) | Lightweight curl cream, texturizing powder |
| Curly/Wavy | Brushing dry (it destroys the layer definition) | Wide-tooth comb in the shower, diffuser attachment |
Common Mistakes to Avoid with Layered Shoulder-Length Hair
Even a great cut can look wrong if you make these errors.
- Asking for “layers” without specifying length – The shortest layer matters. If you don’t give a reference point (e.g., “shortest layer at my chin”), you might end up with very short top layers that don’t blend.
- Cutting wet hair too uniformly – Wavy and curly hair shrinks when dry. Always get layered cuts on dry hair or ask for a “dry cut” after the initial wet cut.
- Using too much product near the roots – Layers are designed to create natural lift. Heavy root products (butters, thick creams) collapse that lift within an hour.
- Skipping the consultation photo – “Shoulder-length layers” means different things to different stylists. Never assume. Show a photo.
- Letting the back grow too long – Shoulder-length layers look unbalanced if the back reaches your bra strap while the front stays at your collarbone. Trim the back more often.
Adapting These Cuts for Different Hair Textures
The same layered cut behaves very differently on straight, wavy, curly, and coily hair. Here is how to adjust each idea for your texture.
| Hair Texture | Modification to Make |
|---|---|
| Straight (fine or medium) | Add invisible or micro-layers (Idea 3). Avoid choppy layers – they look stringy on stick-straight hair. |
| Wavy (type 2A–2C) | The Shag (Idea 6) and Butterfly Cut (Idea 2) are your best friends. Waves catch beautifully on disconnected layers. |
| Curly (type 3A–3C) | Ask for long layers only. Short layers on curly hair create a triangular “pyramid” shape. Stick with Classic Long Layers (Idea 1) or Air-Layer (Idea 10). |
| Coily (type 4A–4C) | Graduated Layers (Idea 7) work beautifully because the stacked back adds height. Also try the Beveled Lob (Idea 9) for a structured shape. |
Conclusion: Why This Cut Deserves a Spot on Your Inspiration Board
The layered shoulder-length haircut is not a trend – it is a timeless, adaptable solution for almost every hair type, face shape, and lifestyle. Unlike a pixie, it does not demand weekly trims. Unlike waist-length hair, it does not tangle or weigh you down. And unlike a blunt bob, it actually moves when you turn your head.
The 10 ideas in this article give you a roadmap. The prompts give you visuals. And the sections above give you the confidence to walk into any salon and leave with a cut that feels custom-made for you.
Whether you choose the romantic Butterfly Cut, the edgy Choppy Layers, or the polished Beveled Lob, one thing is certain: shoulder-length with layers is the haircut that keeps giving. It looks just as good air-dried on a Tuesday morning as it does blown out for a Friday night.
So save your favorite prompt. Book that appointment. And get ready to flip your hair with intention – because now, every layer has a purpose.
Leave a Reply