5minutesready

menu icon
go to homepage
  • Hairstyles
  • Skin Care
  • Contact
  • Our AI Policy
search icon
Homepage link
  • Hairstyles
  • Skin Care
  • Contact
  • Our AI Policy
×
Home

Stunning Ways to Rock a Pixie Cut with Shaved Sides

April 19, 2026 by Jessica Guevara Leave a Comment

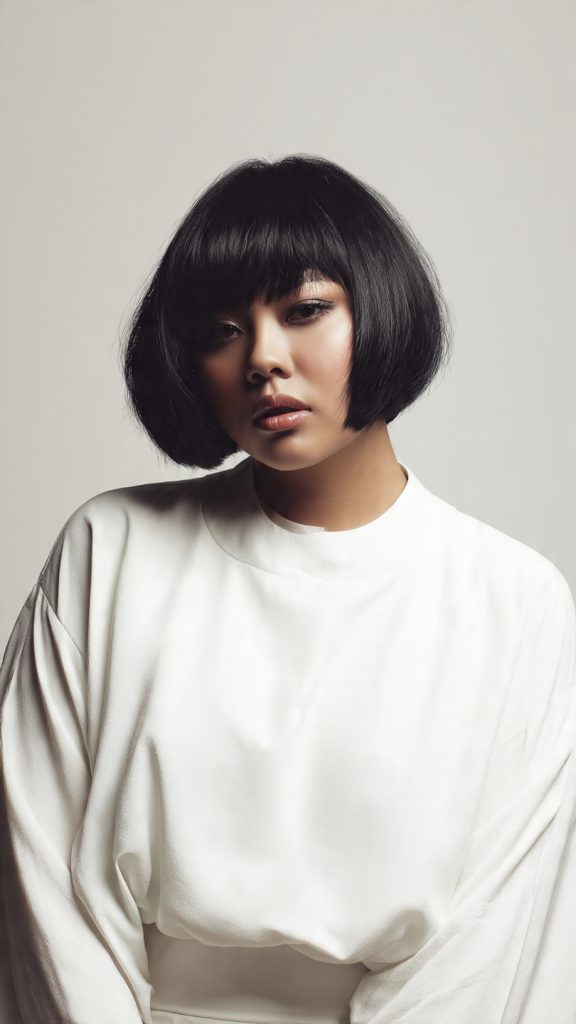
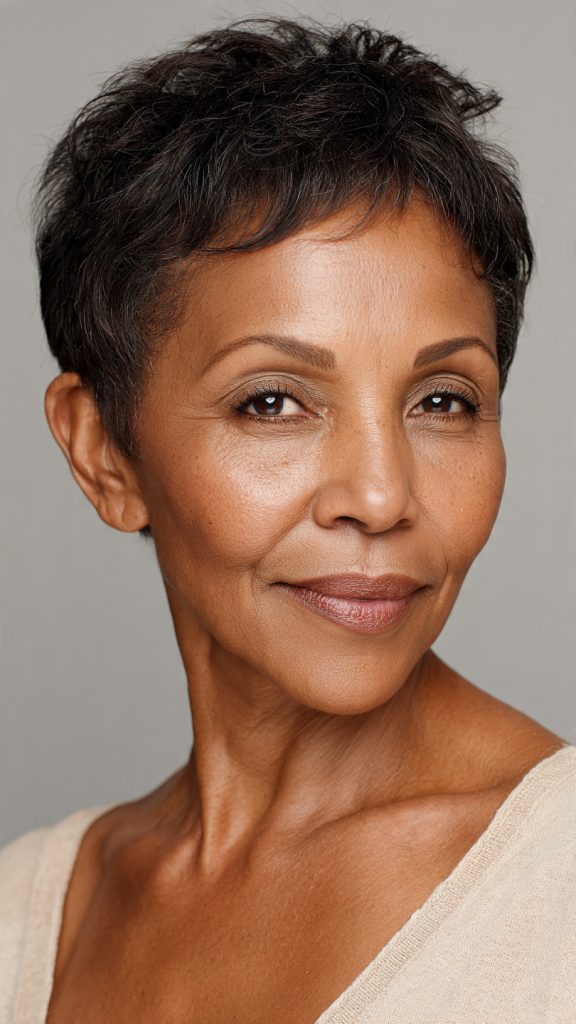
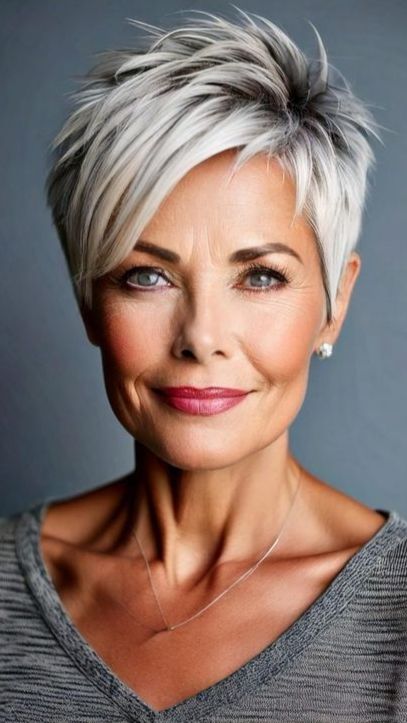
The pixie cut has long been a symbol of confidence and rebellion, but the modern iteration—the pixie with shaved sides—takes that energy to an entirely new level. By buzzing one or both sides close to the scalp while leaving length on top, you create instant contrast, edge, and versatility. Whether you have fine hair that needs volume, thick hair that needs taming, or you simply want a low-maintenance look that turns heads, this hybrid style delivers.

From subtle undercuts to dramatic designs, here are 20 creative ideas to inspire your next salon visit:

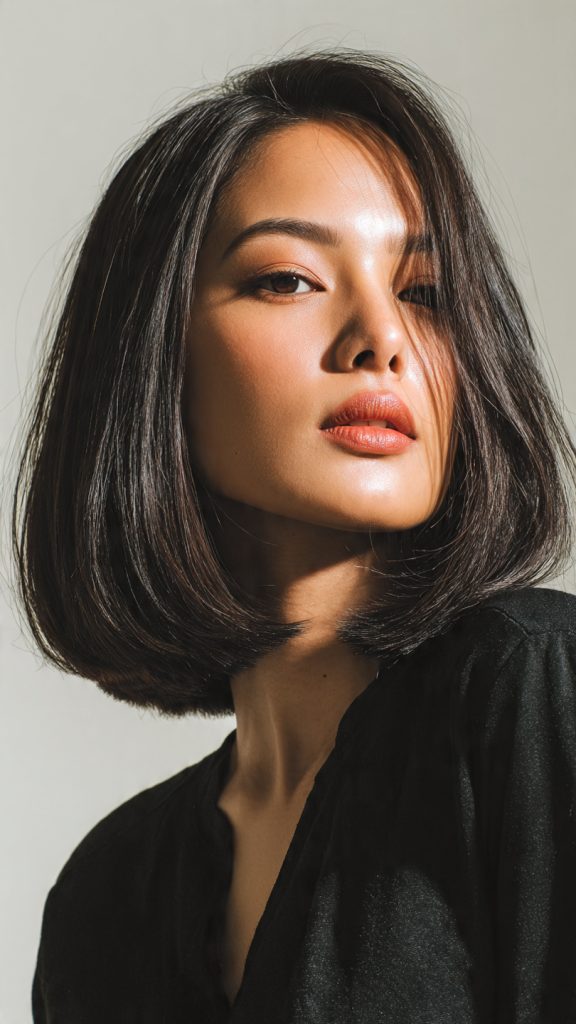
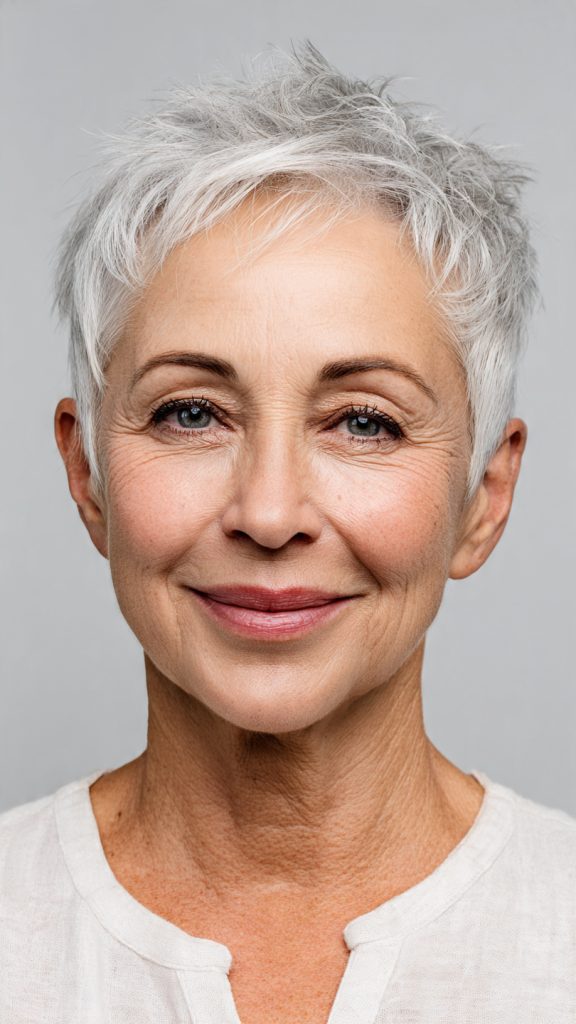
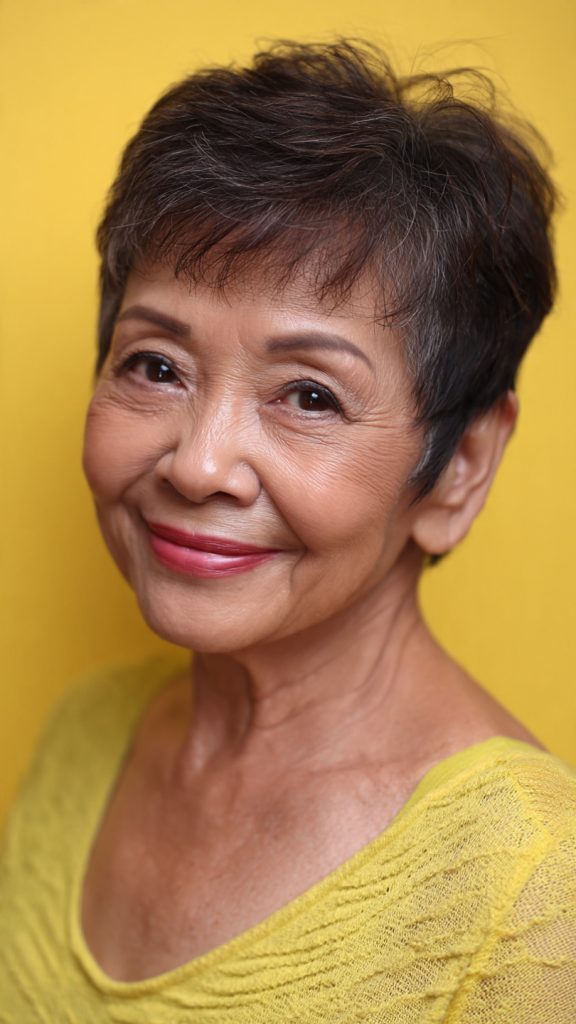
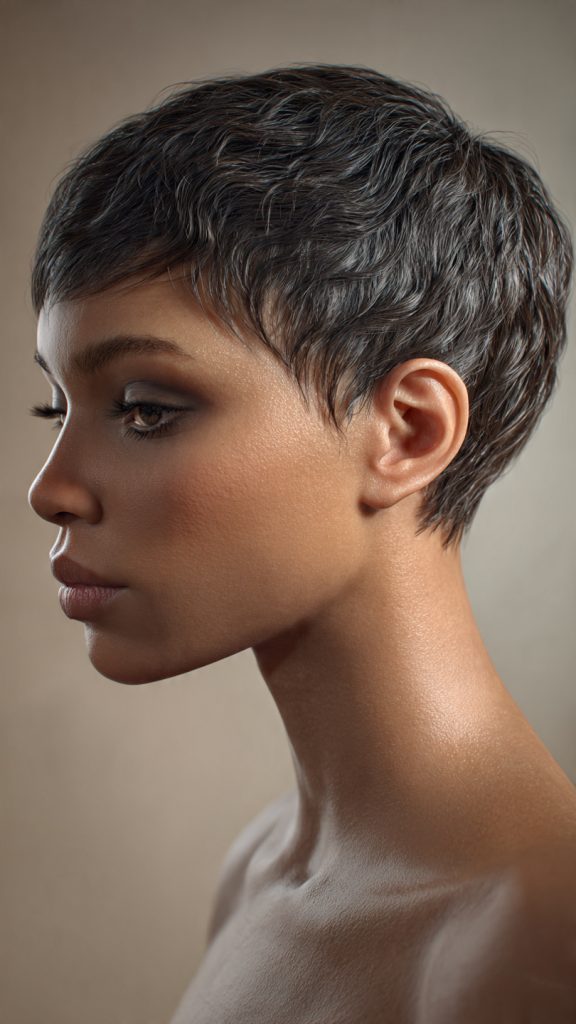
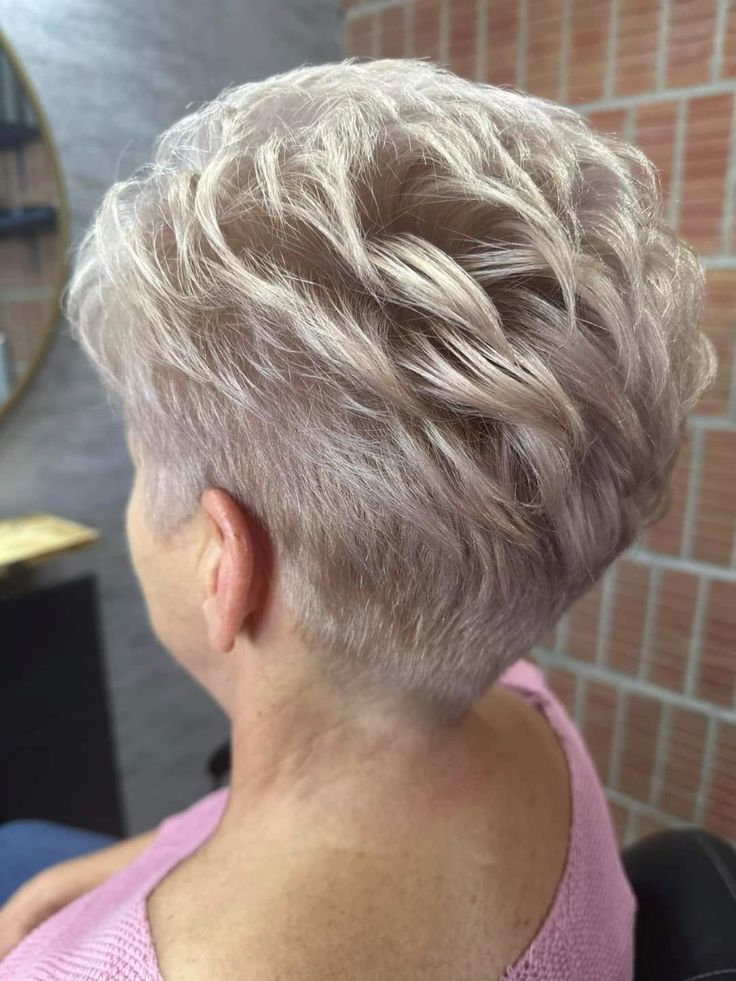
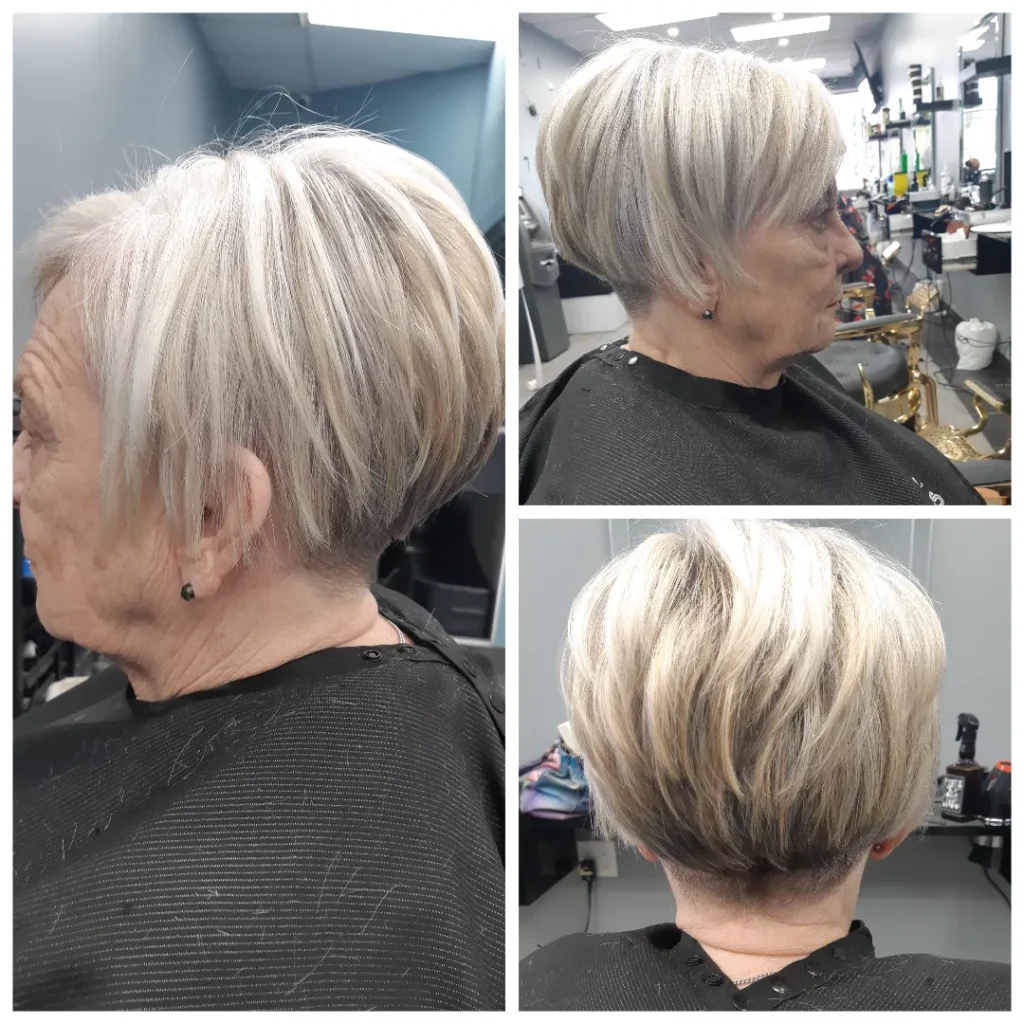
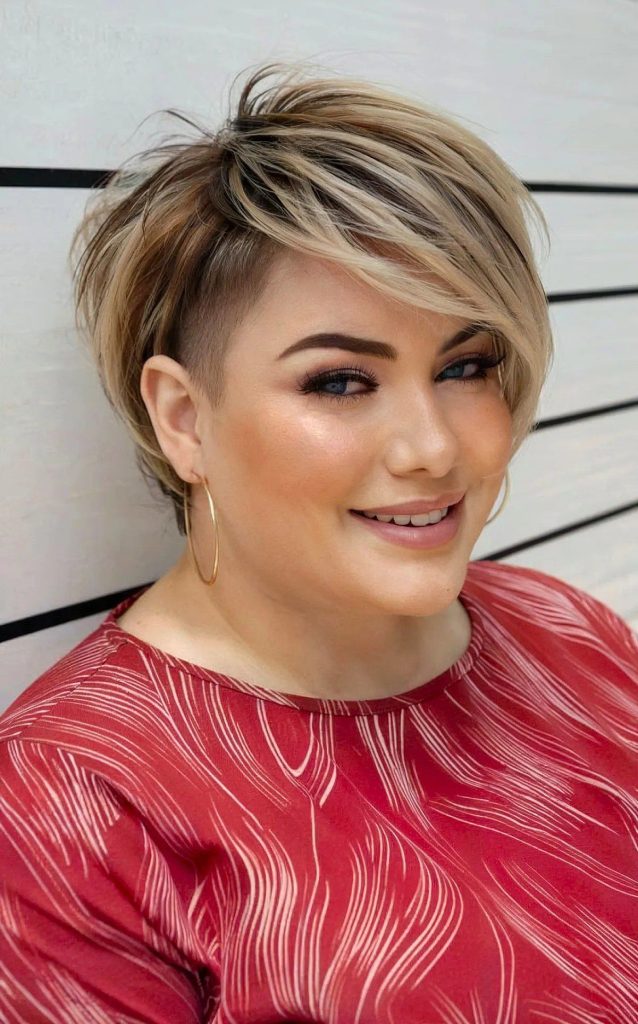
1. The Classic Undercut Pixie


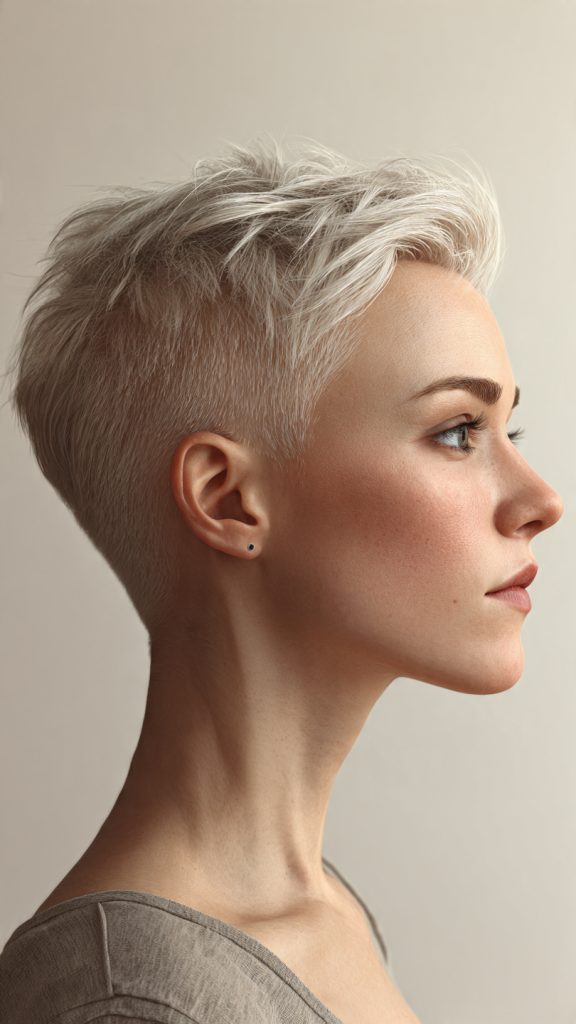
Shave both sides from the temple down to the nape, leaving 2–3 inches of soft texture on top. Sweep the top to one side for a timeless, polished rebel look.

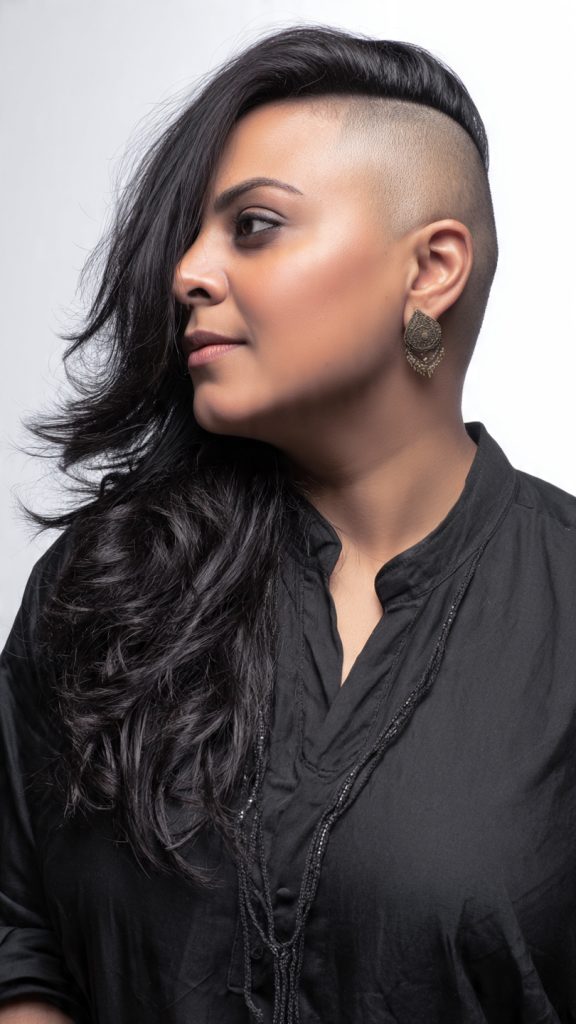
2. The Asymmetrical Shave


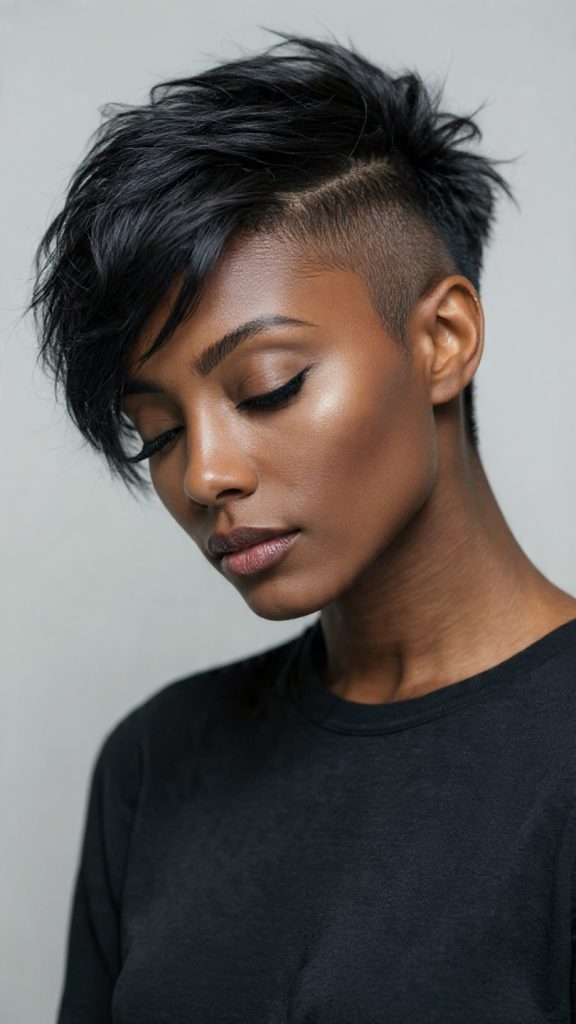
Shave only the left side (or right) and keep the opposite side longer. Part your top layers dramatically over the shaved side for a high-fashion, off-kilter effect.

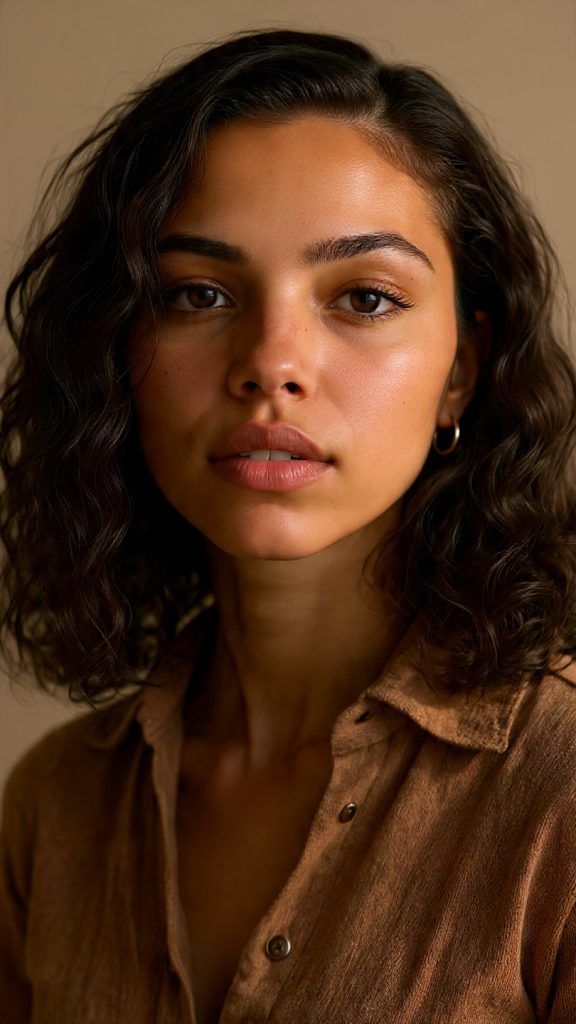
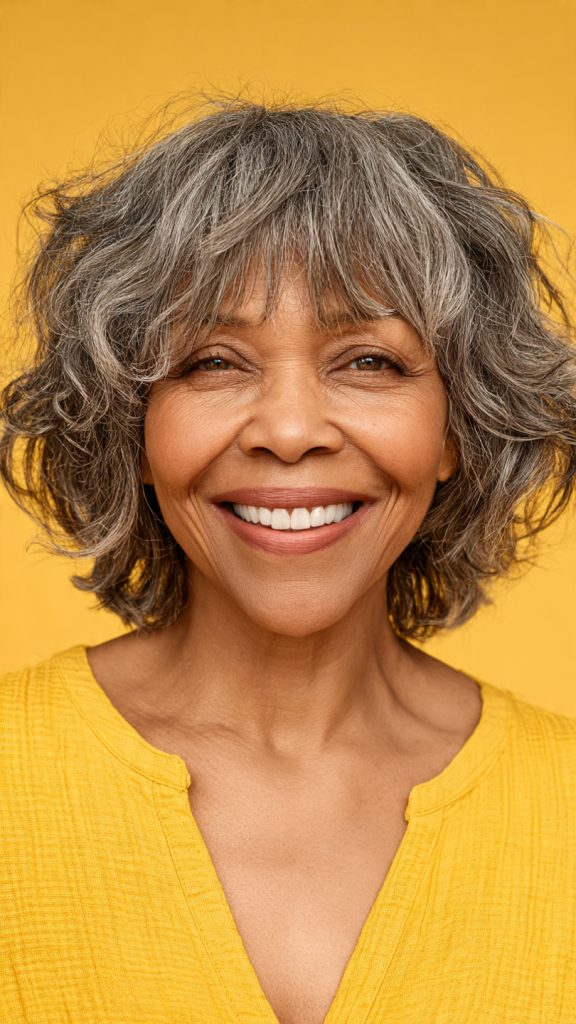
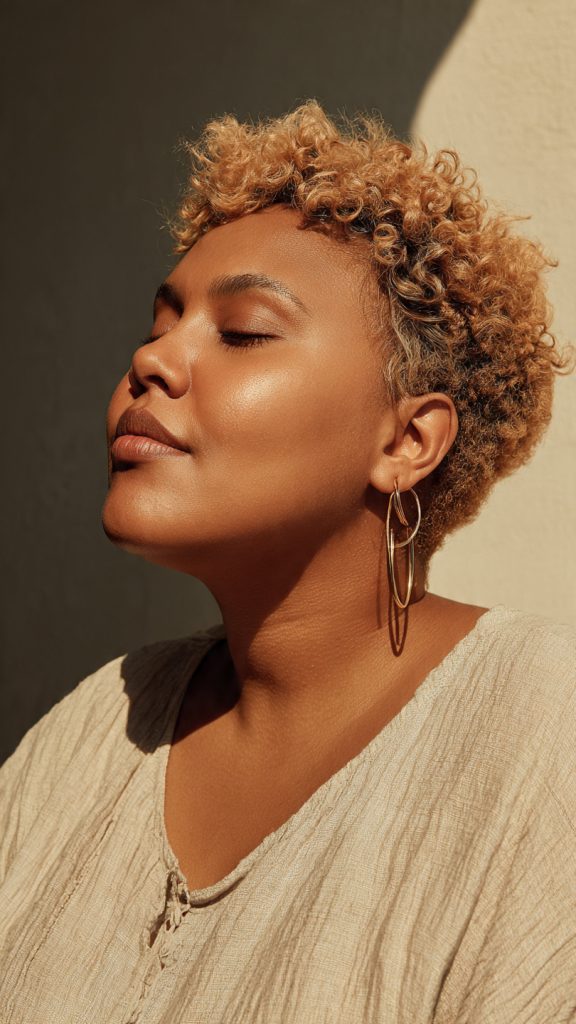
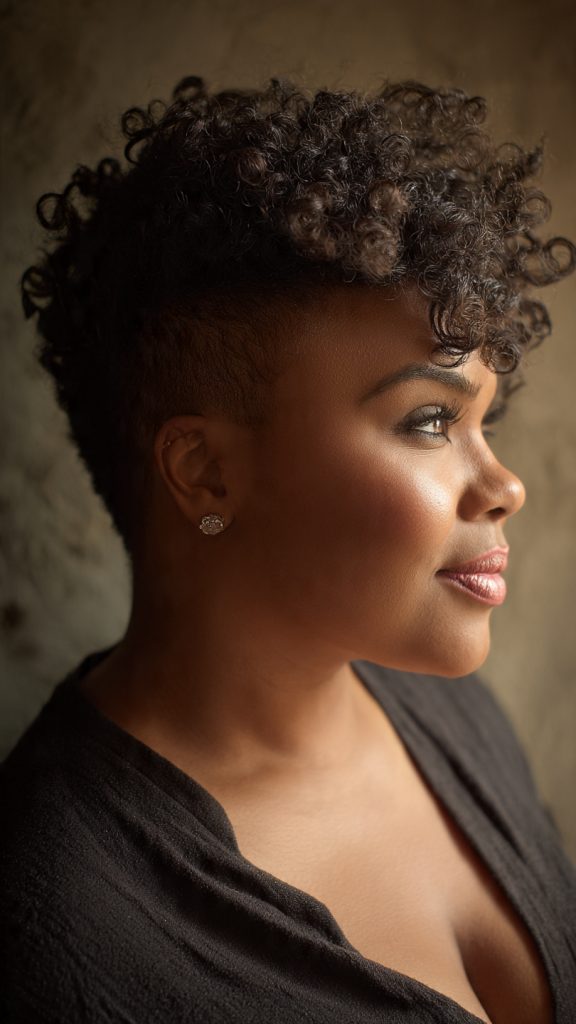
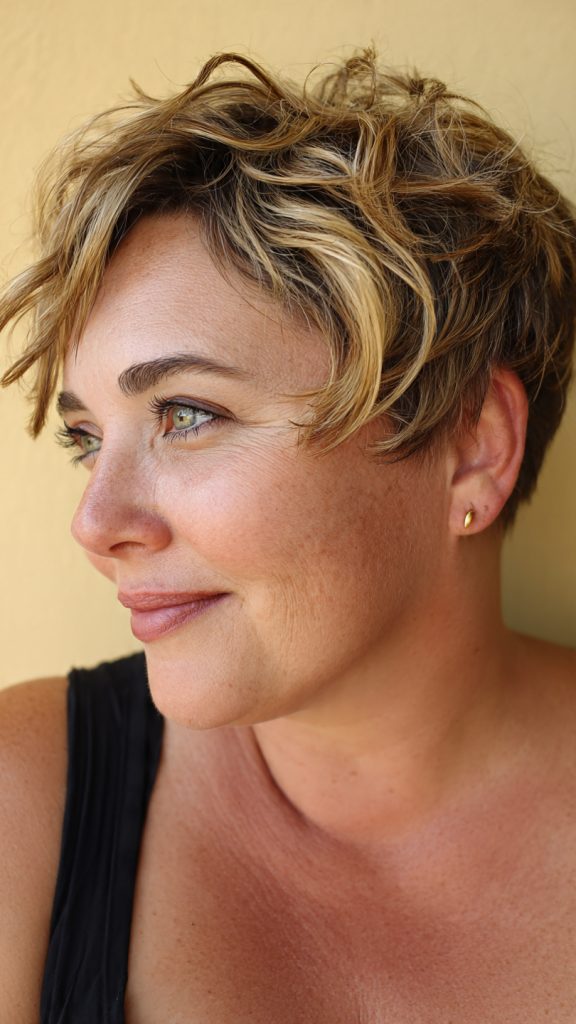
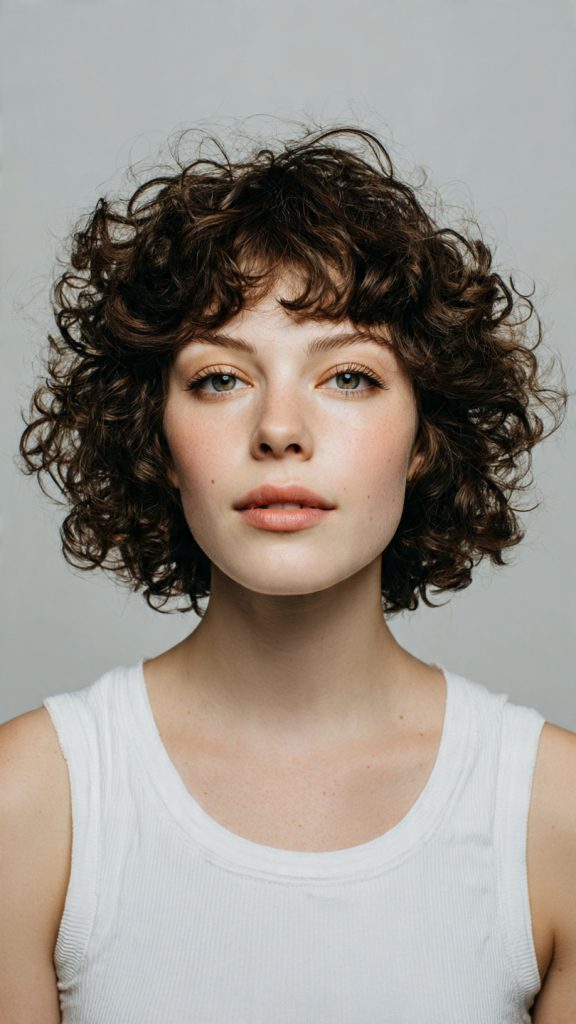
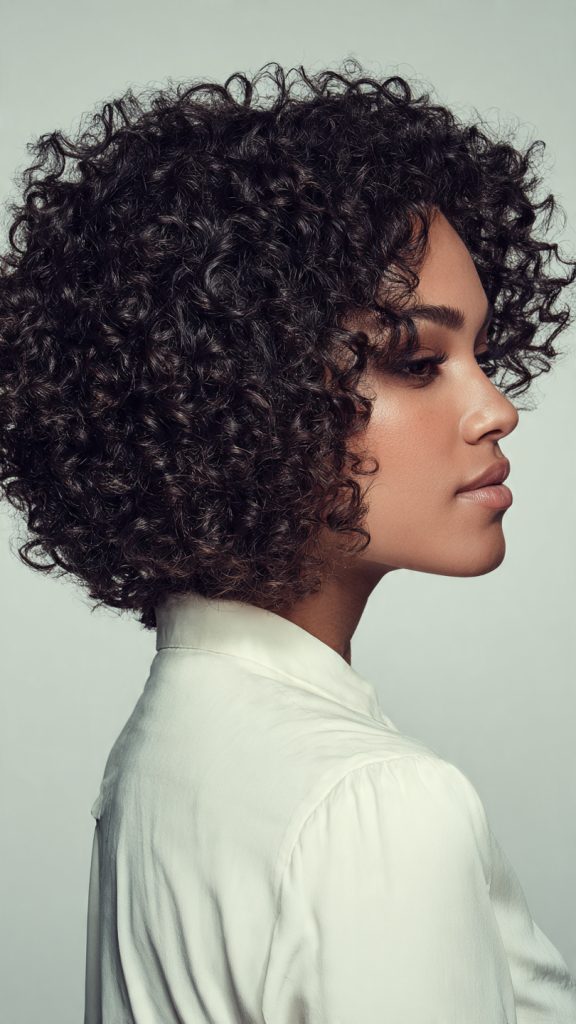
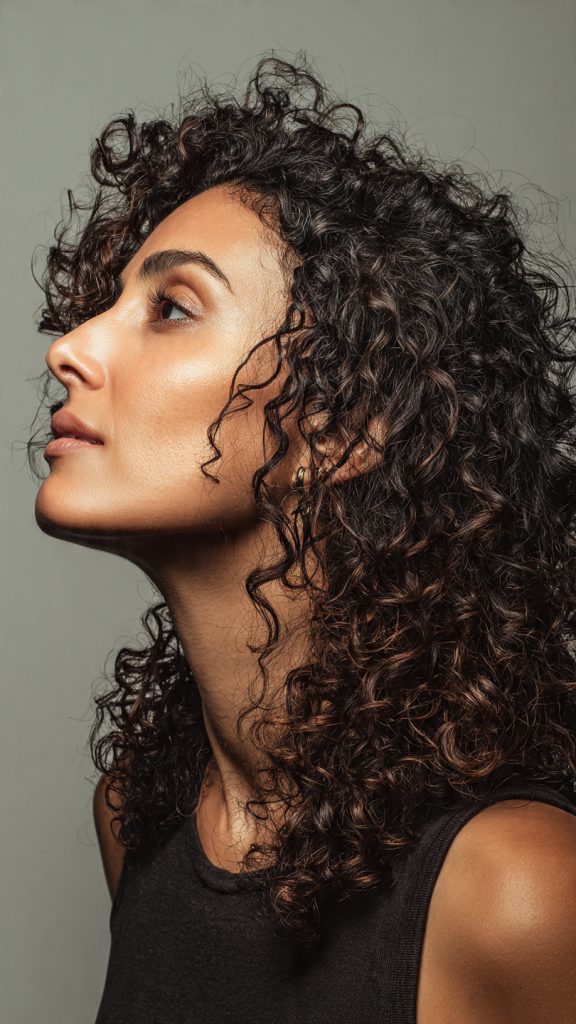
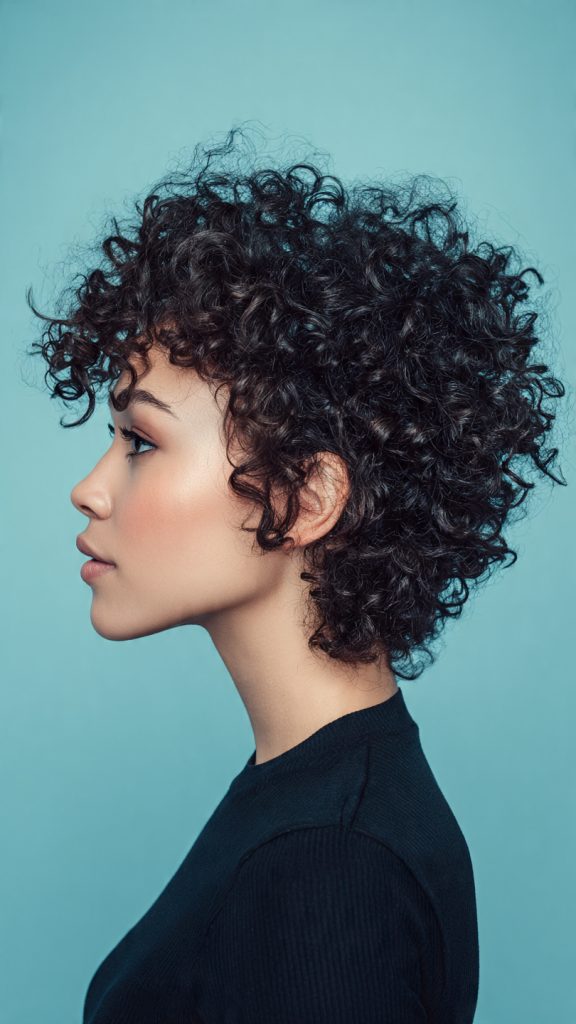
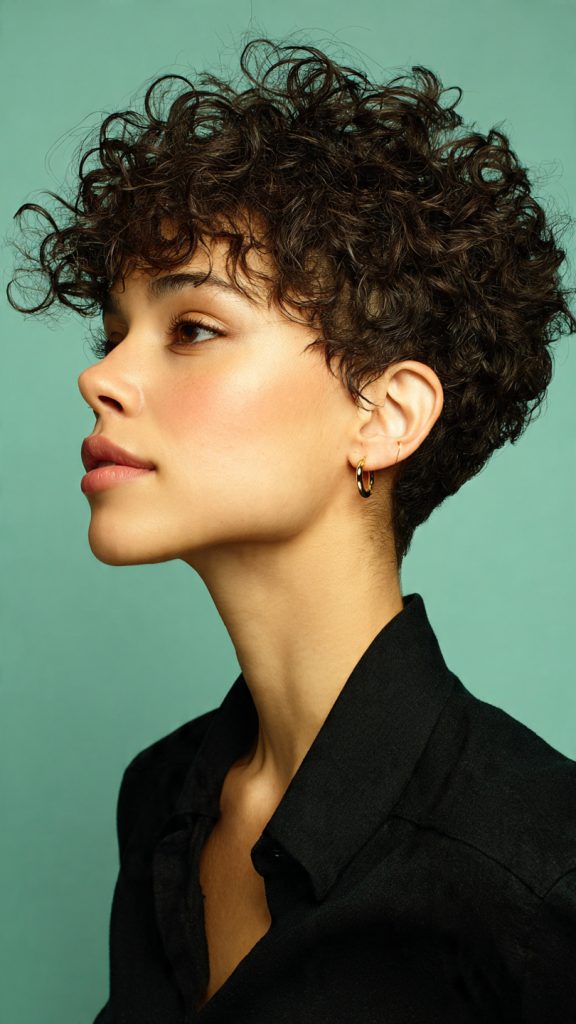
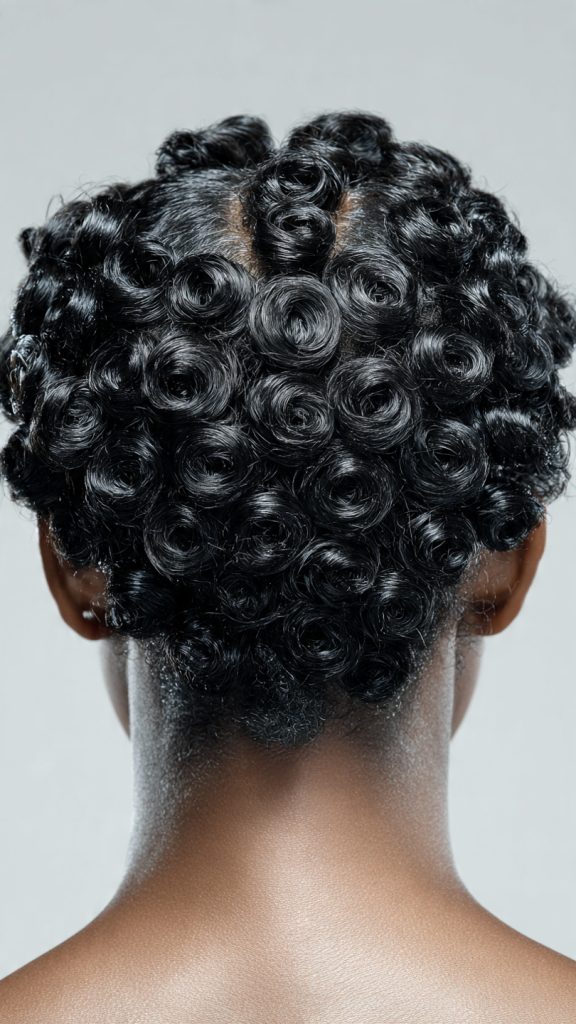
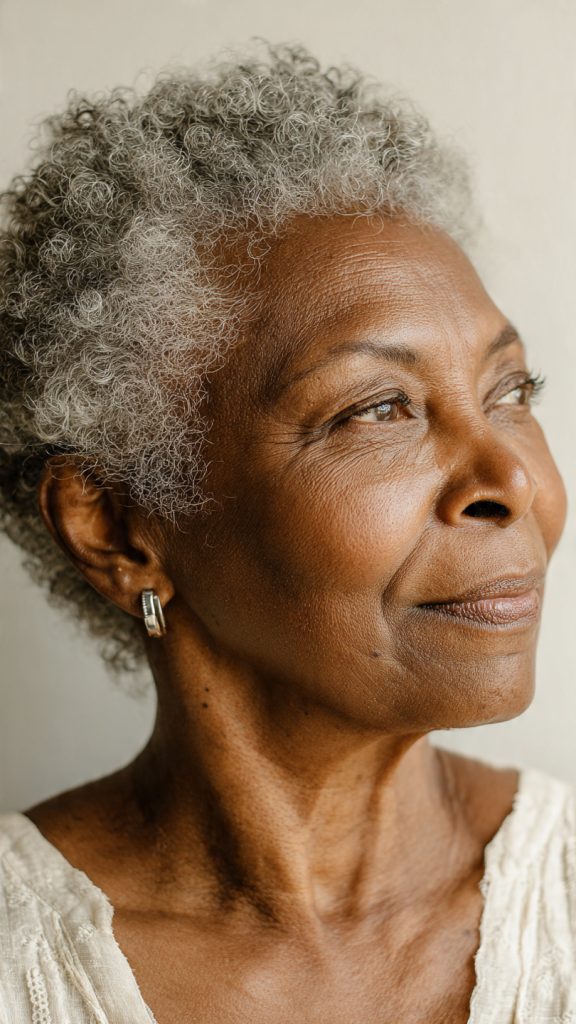
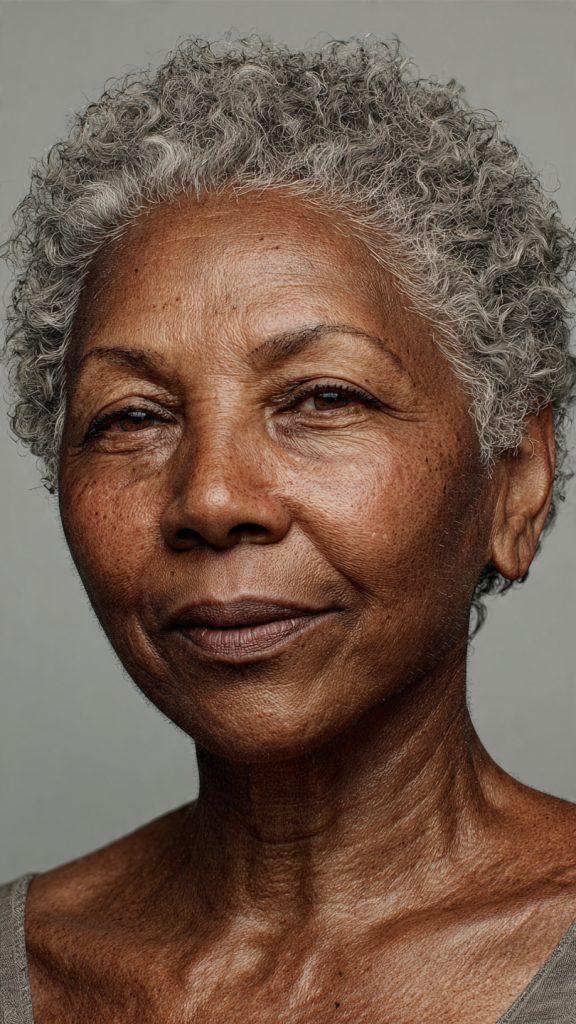
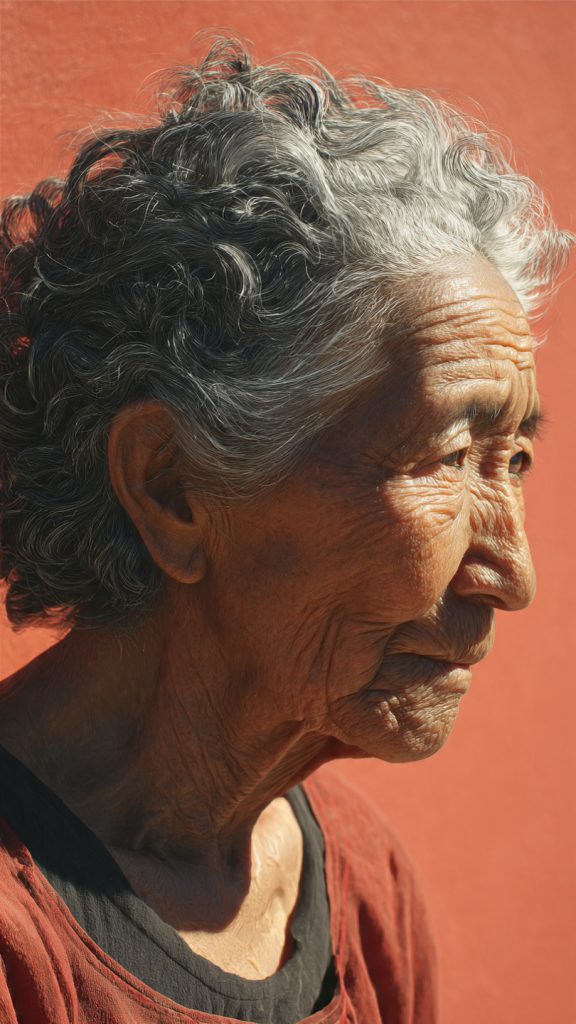
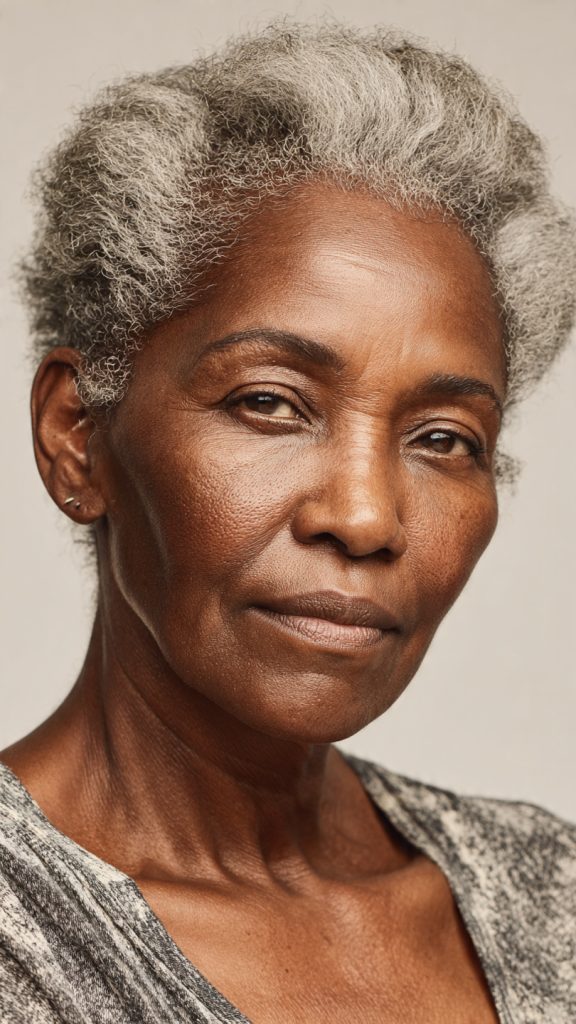
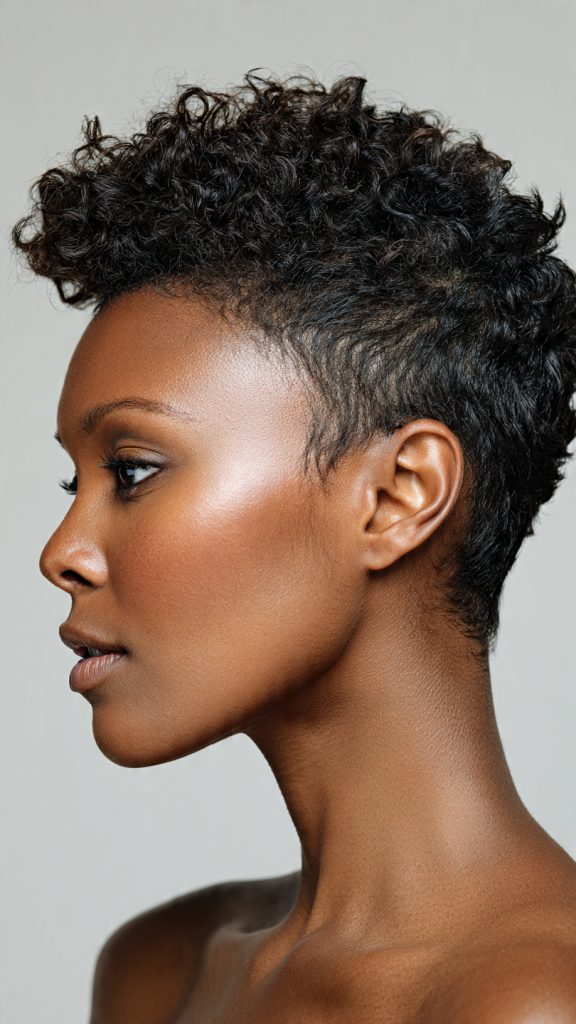
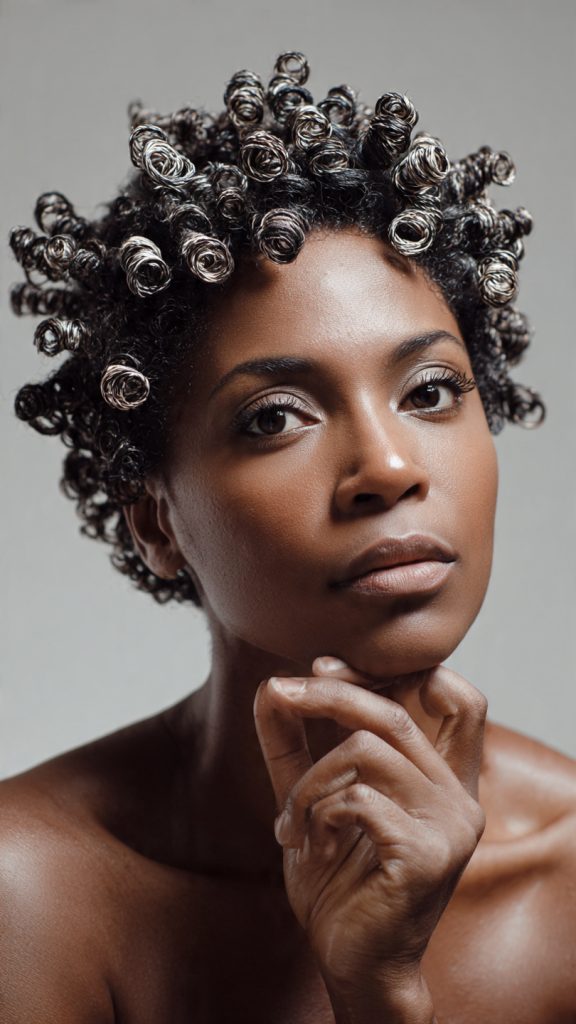
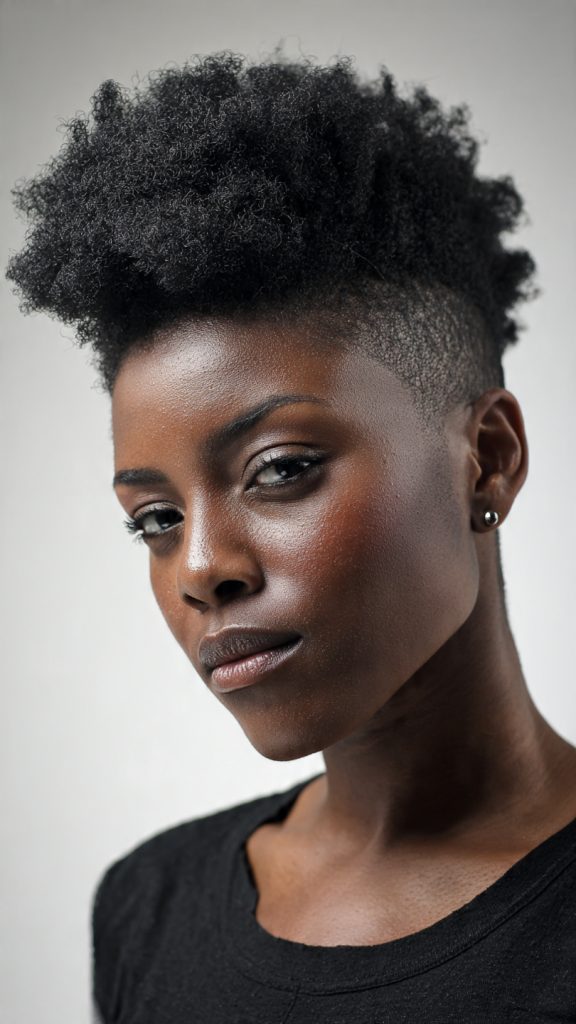
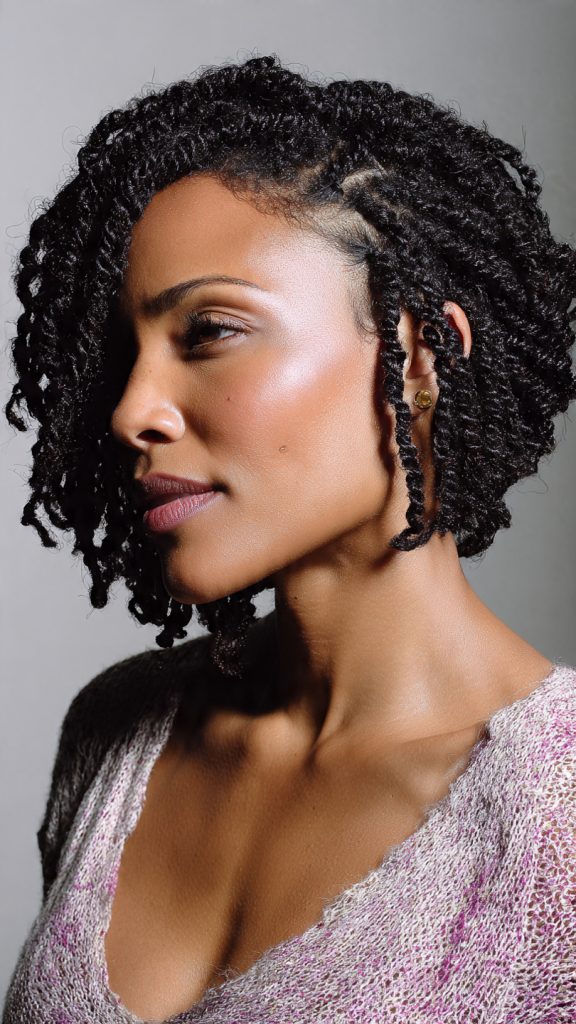
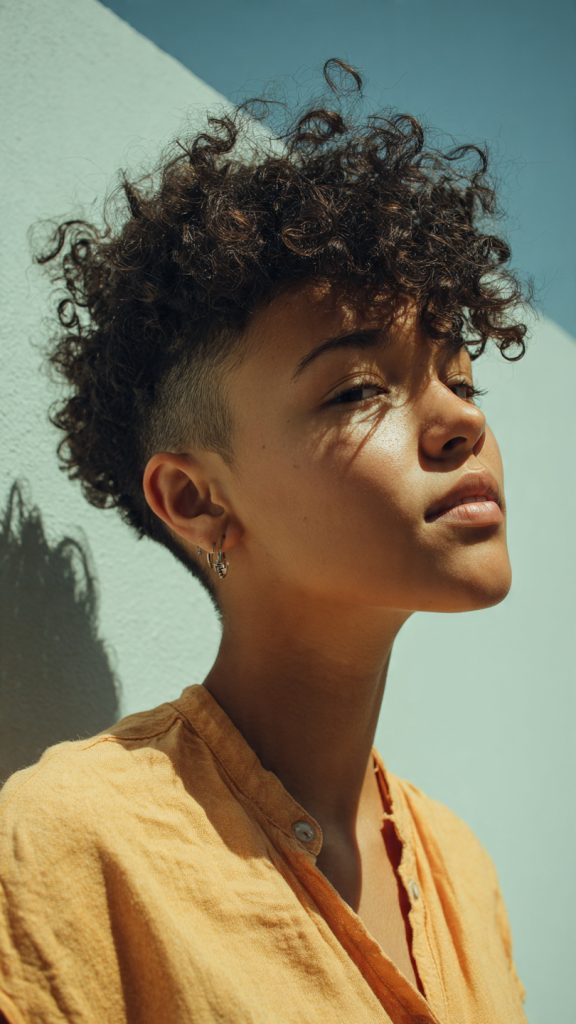
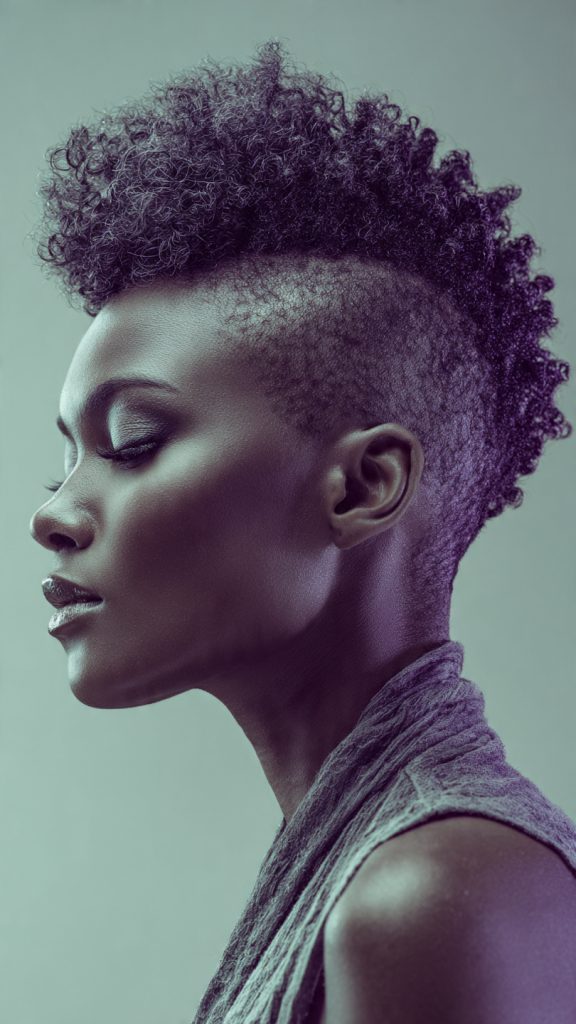
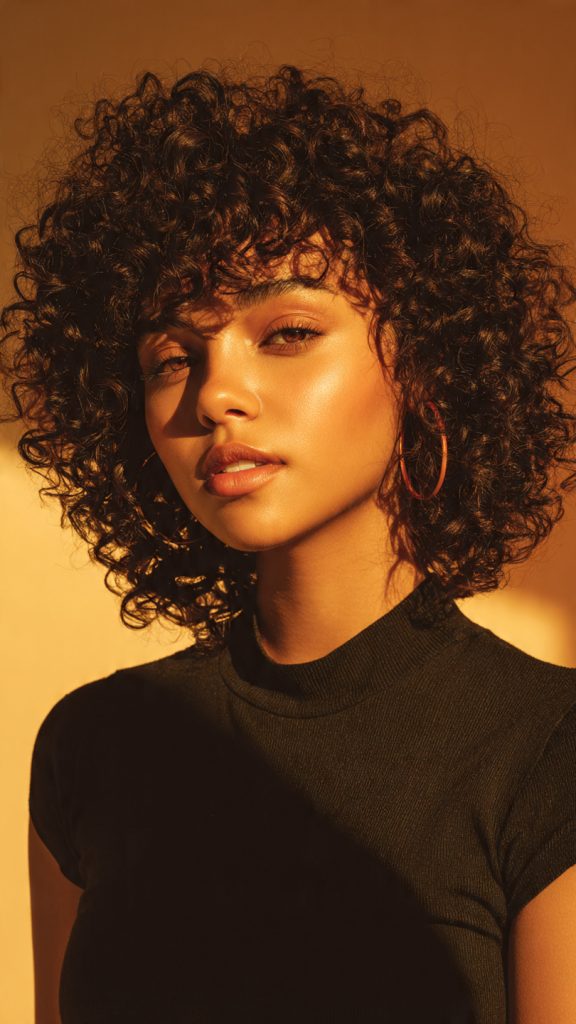
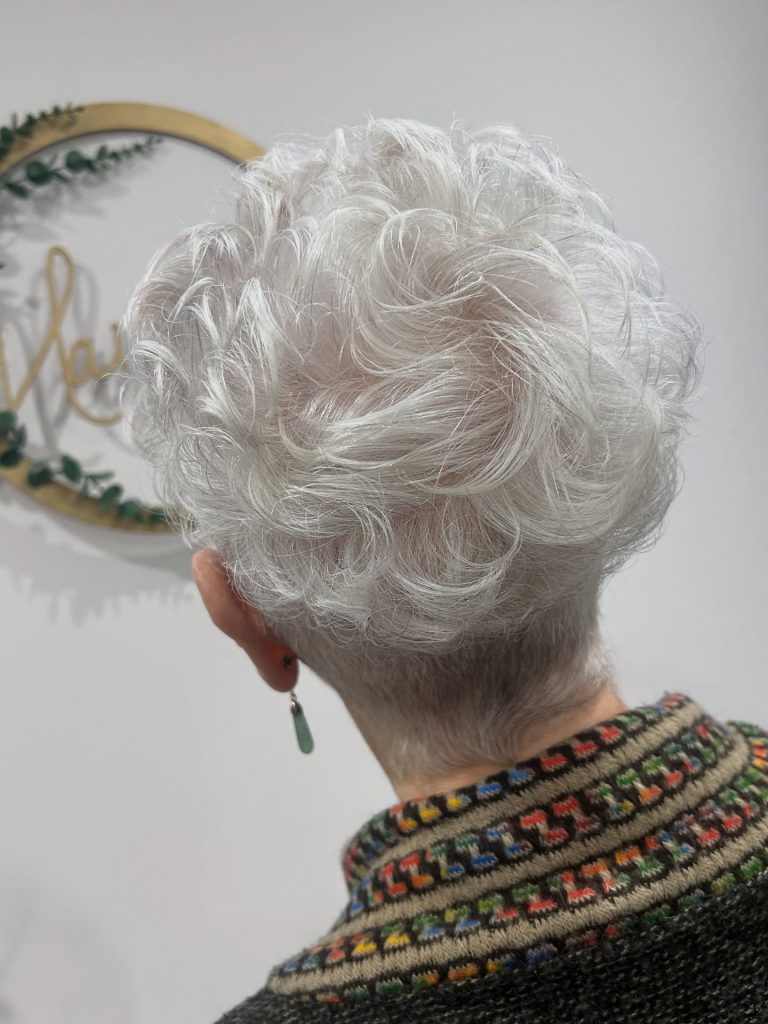
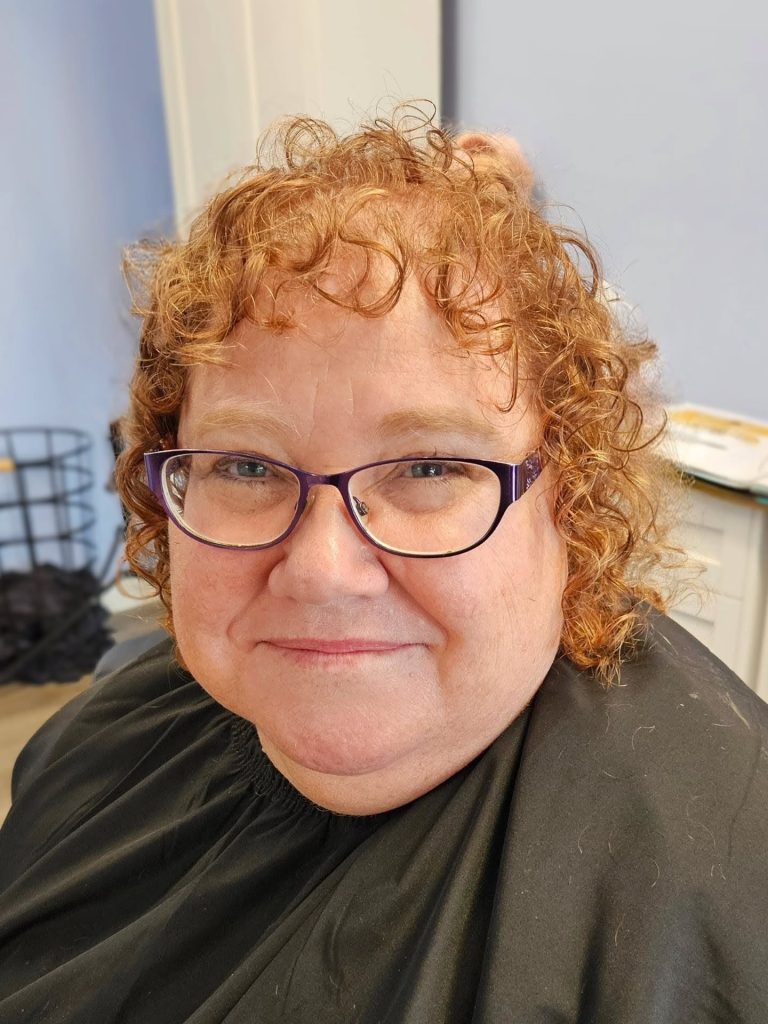
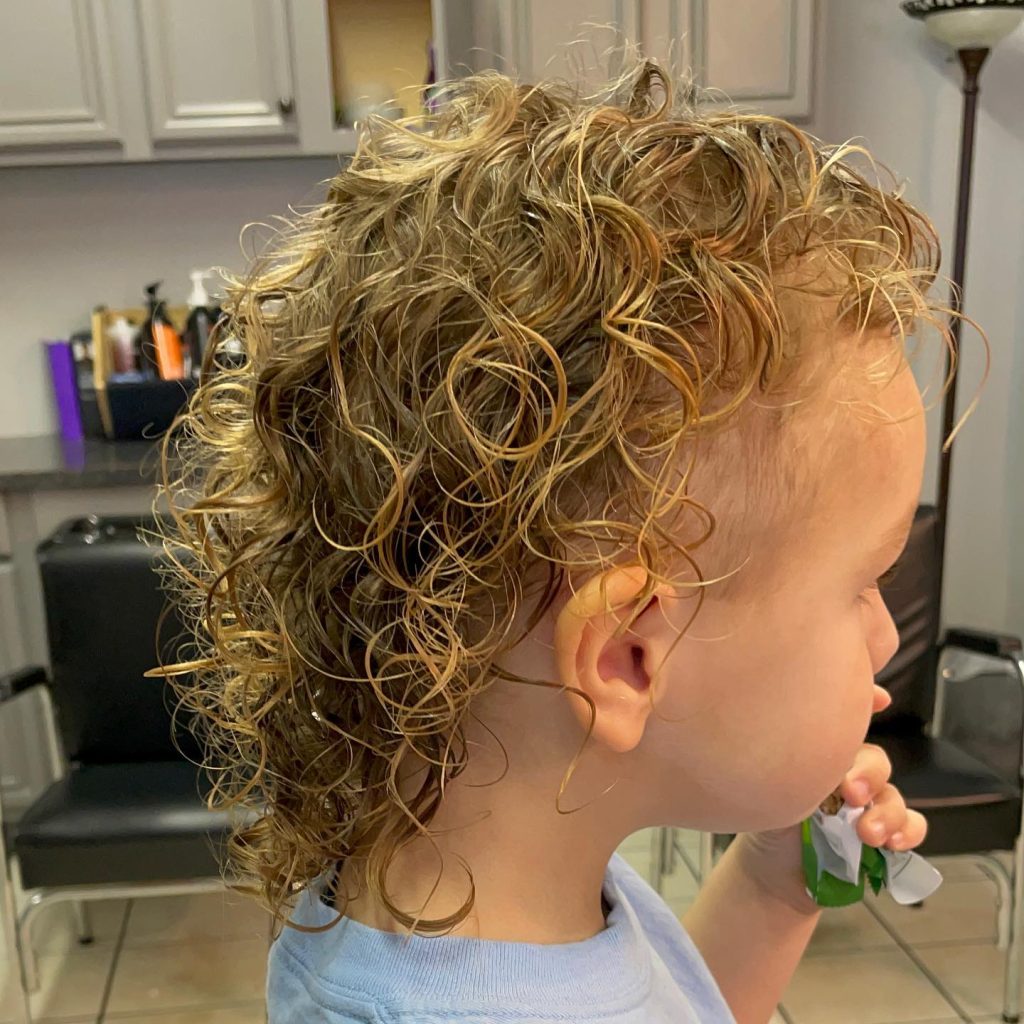
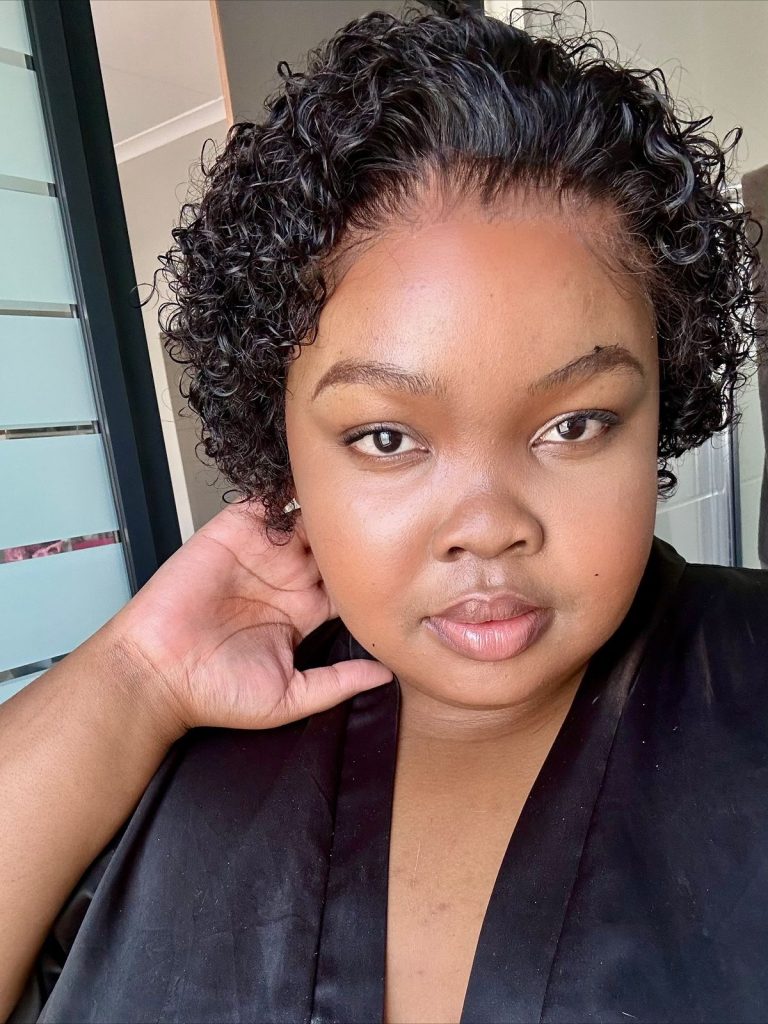
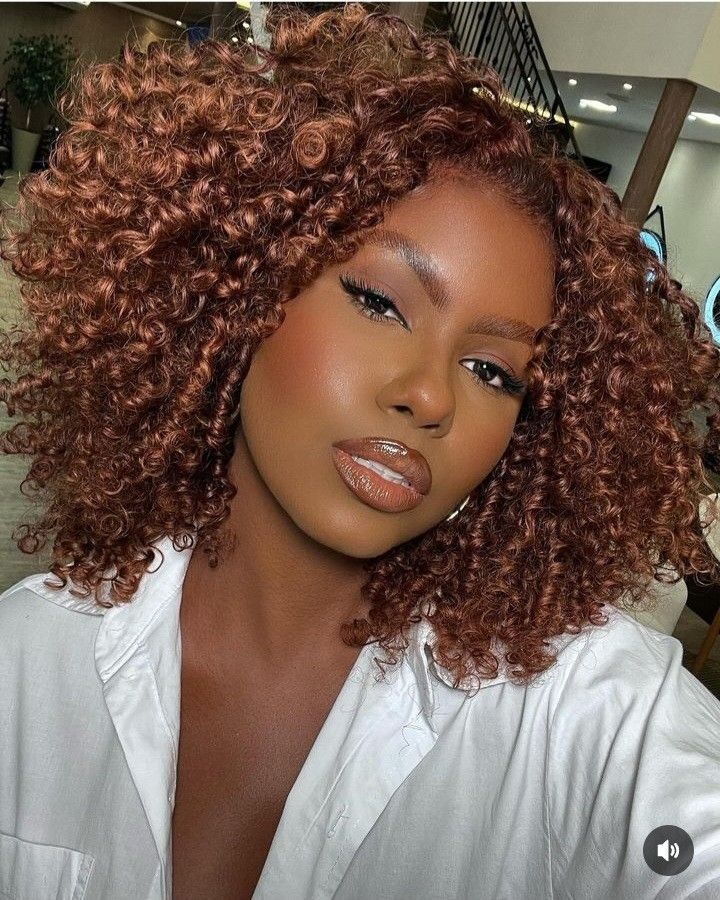
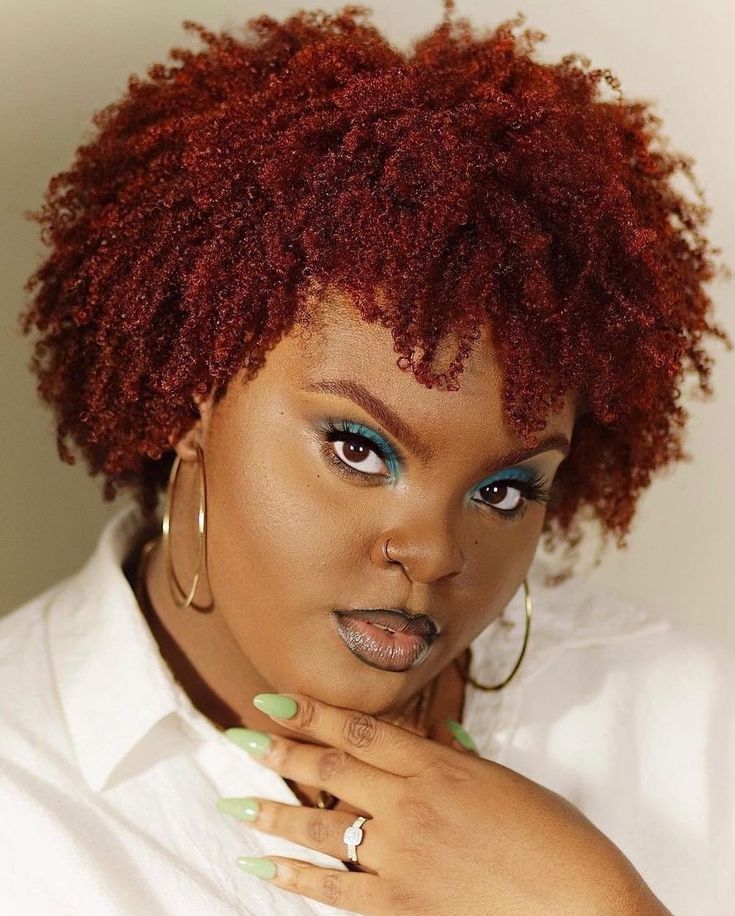
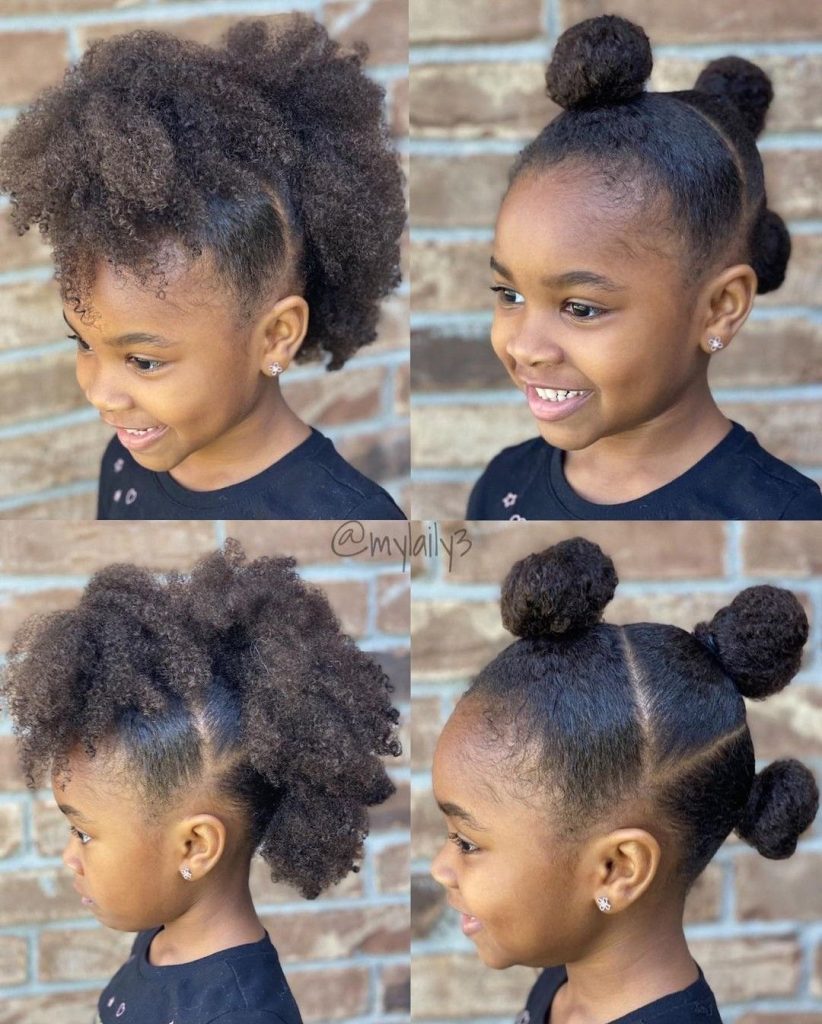
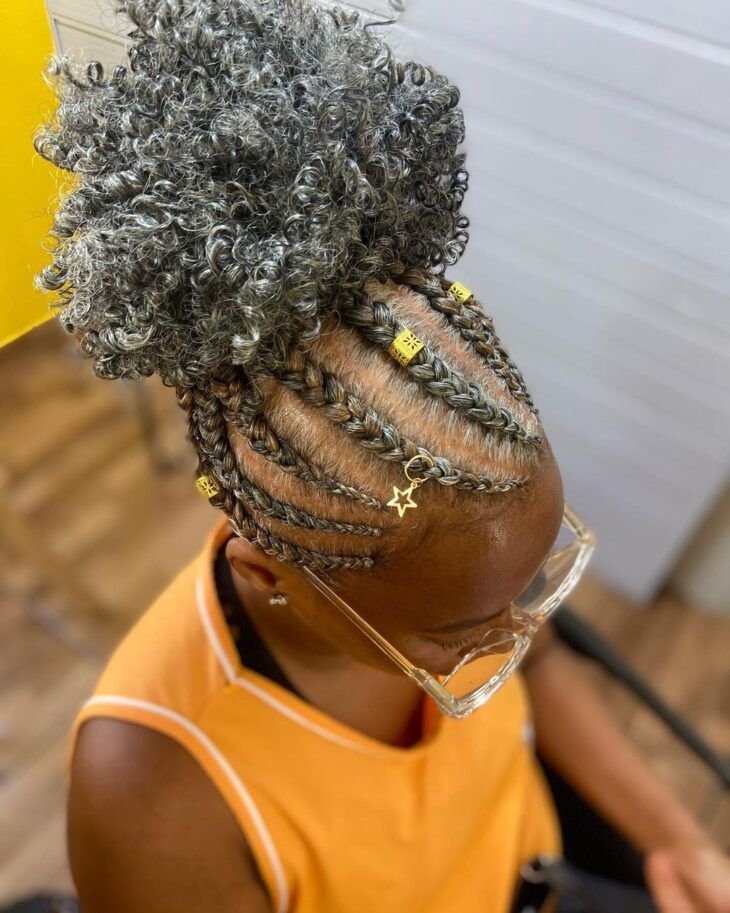
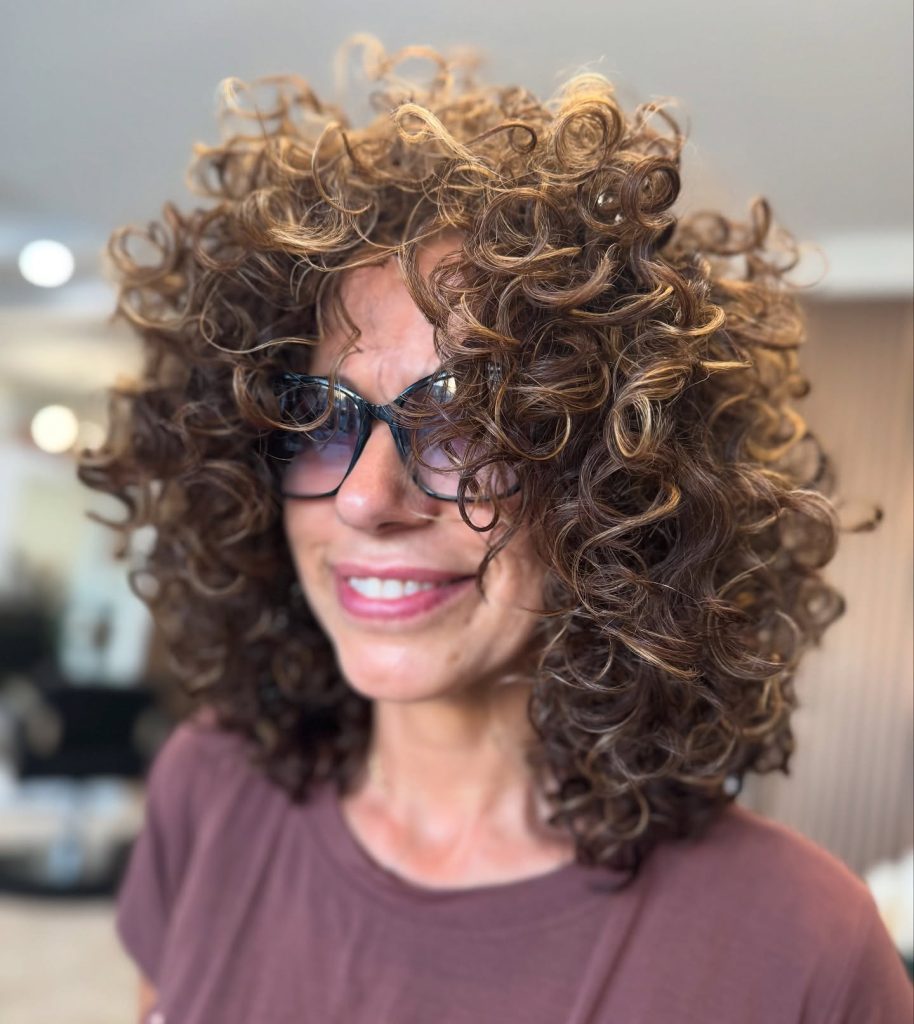
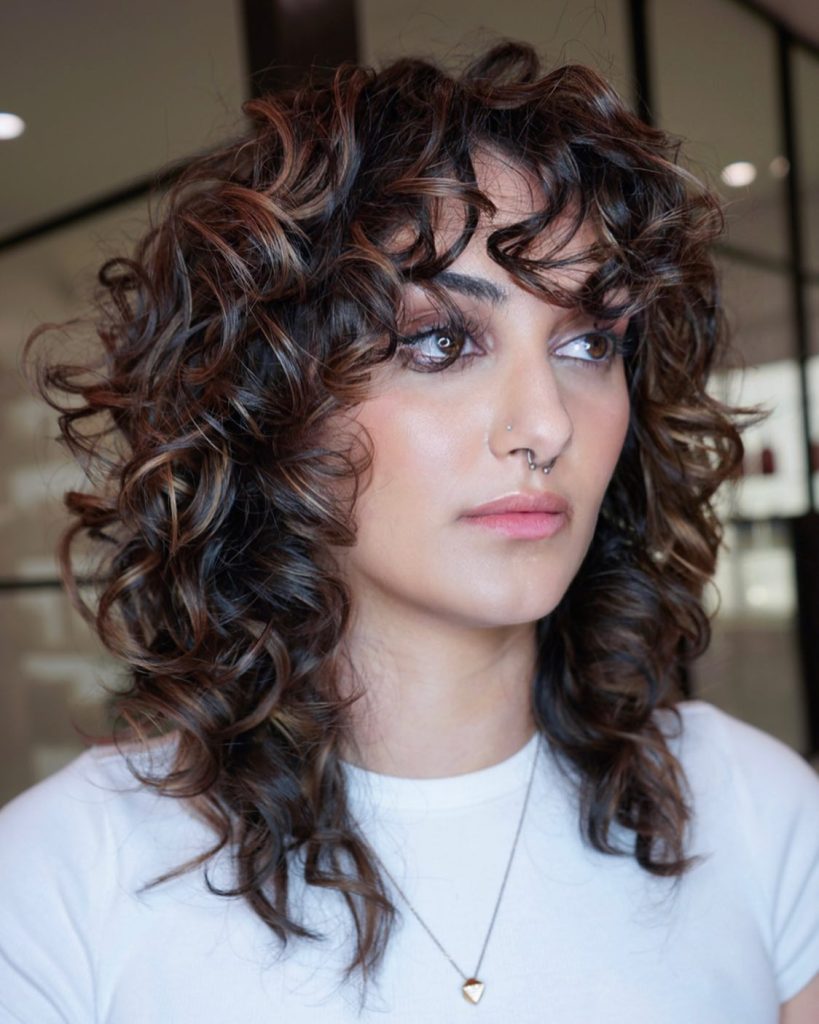
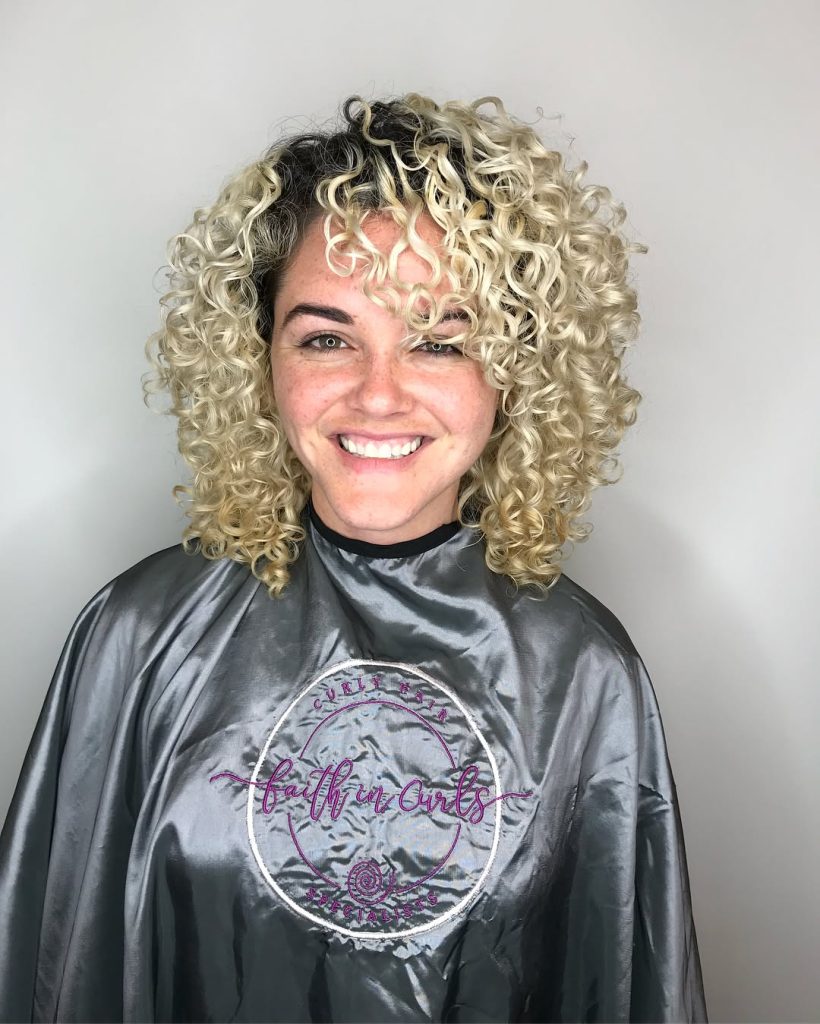
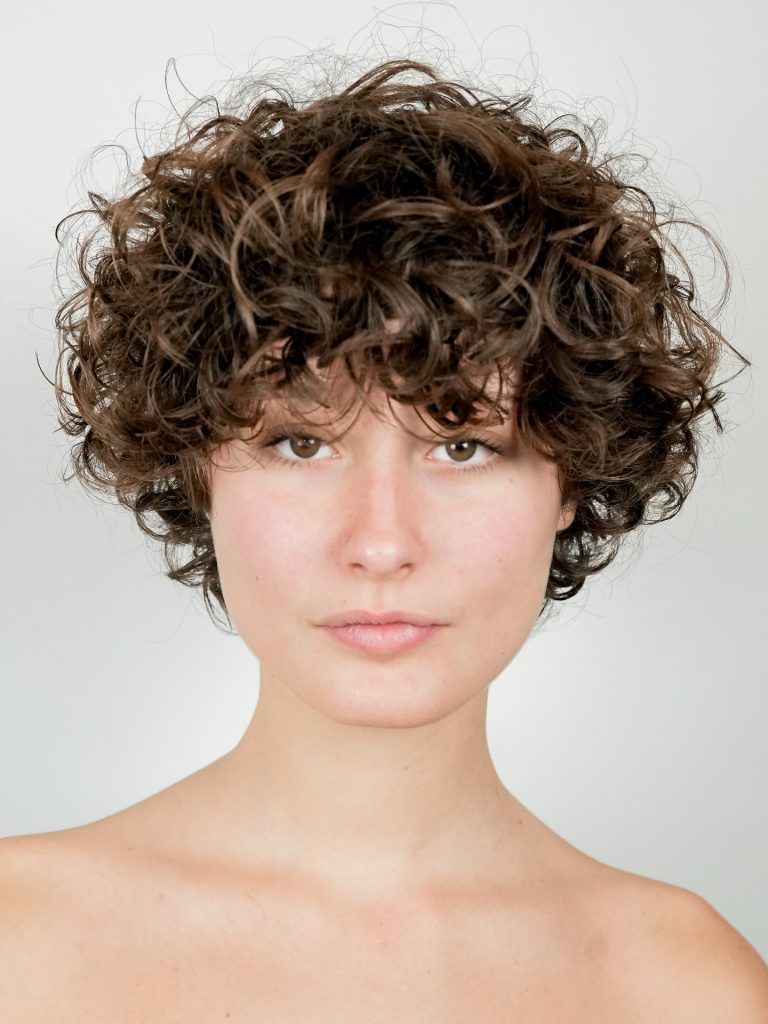
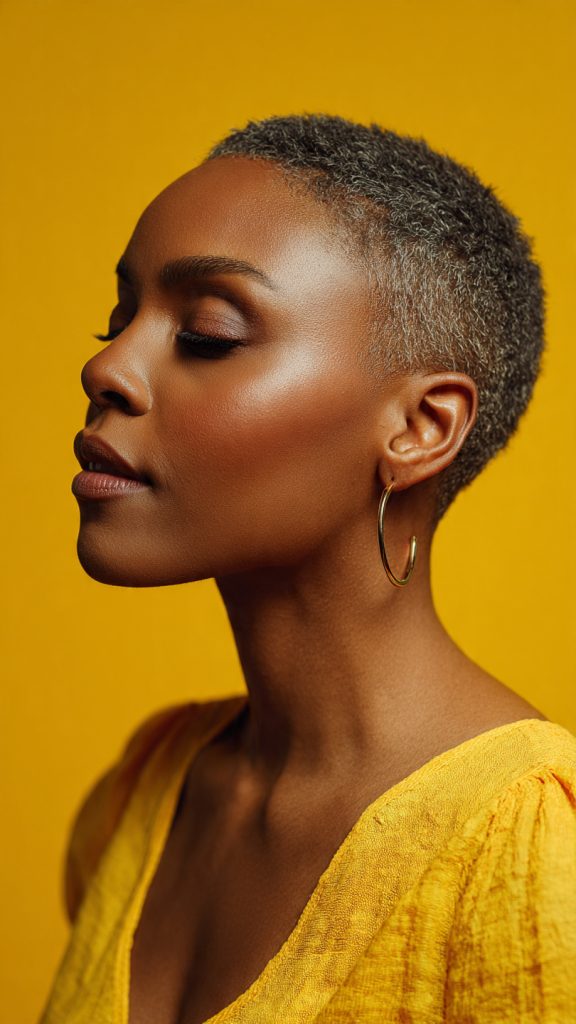
3. The Curly Top Fade


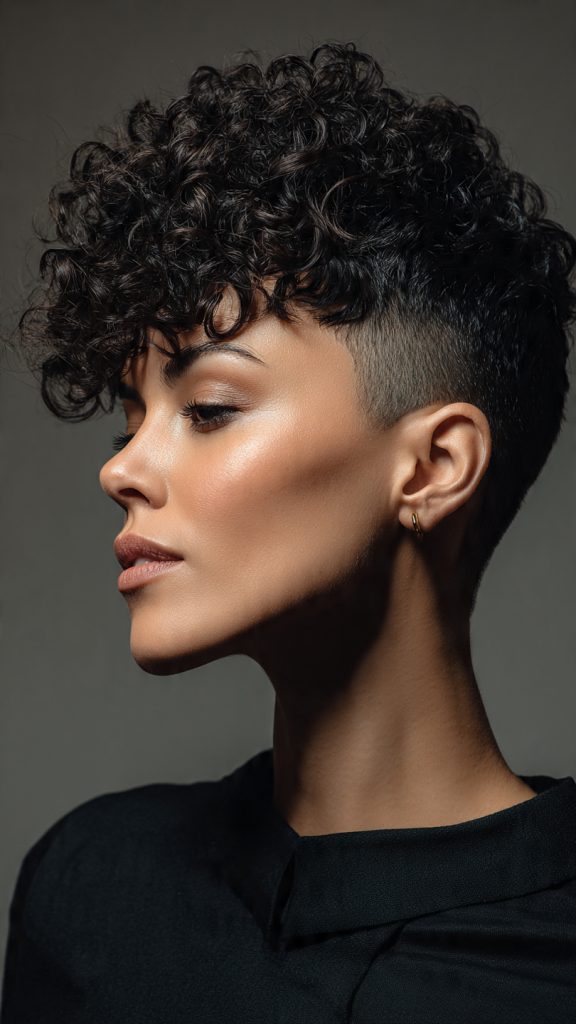
If you have natural curls, shave the sides into a skin fade and leave the crown curly and full. The contrast between tight coils and bare scalp is striking.

4. The Disconnected Pixie


Keep a very long, choppy top that dramatically overhangs completely shaved sides. This “floating” effect looks editorial and works well with bold hair colors.

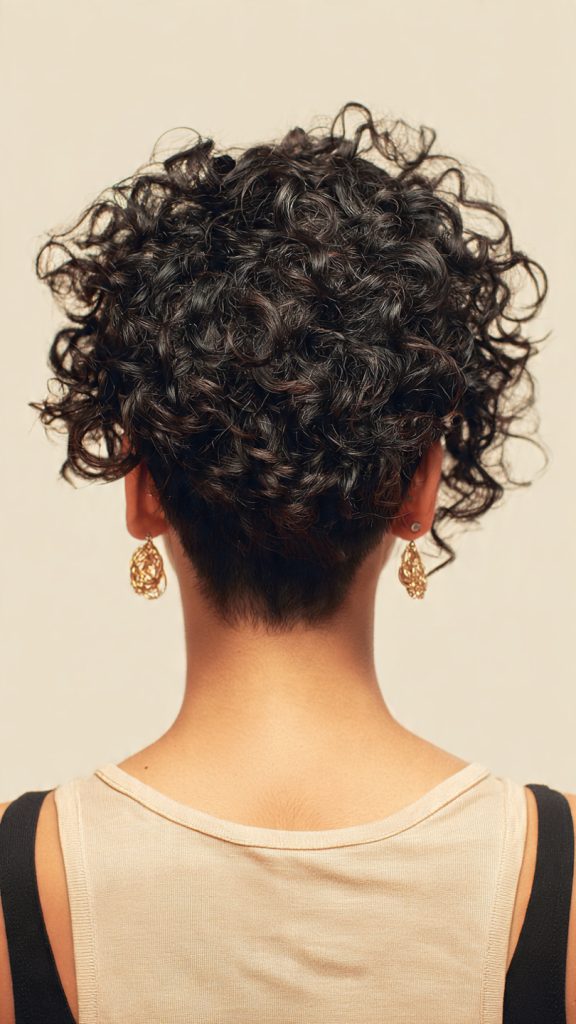
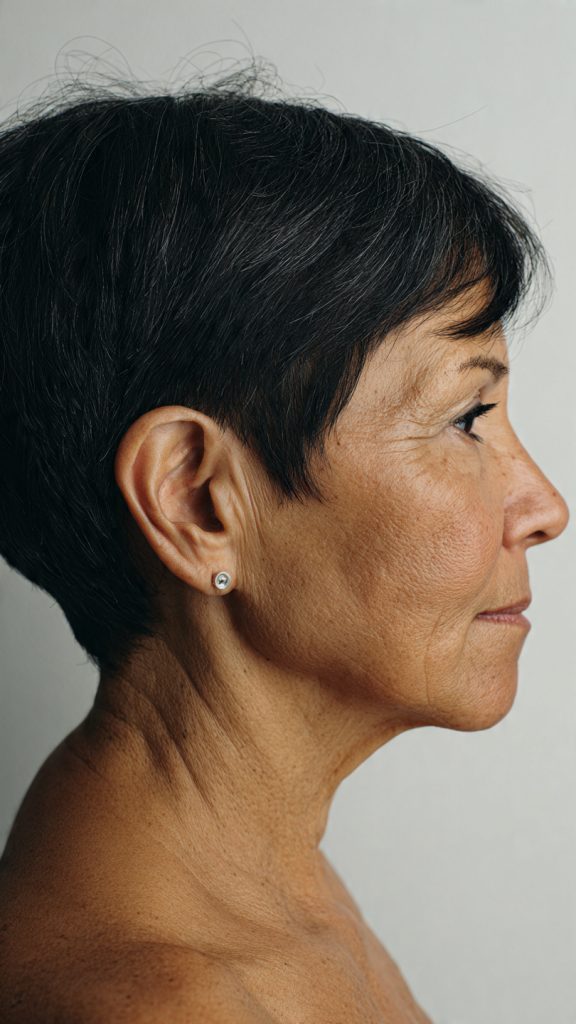
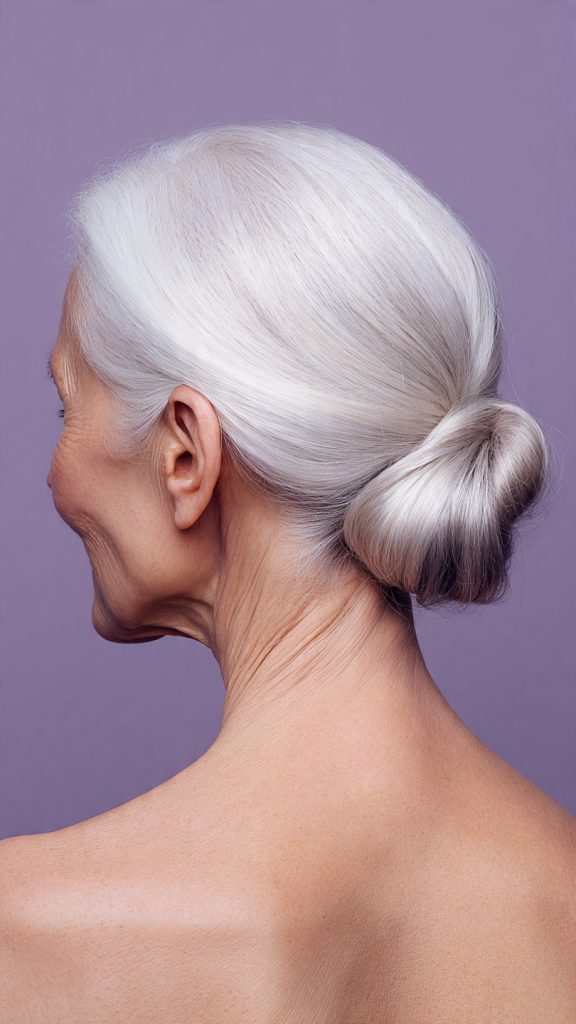
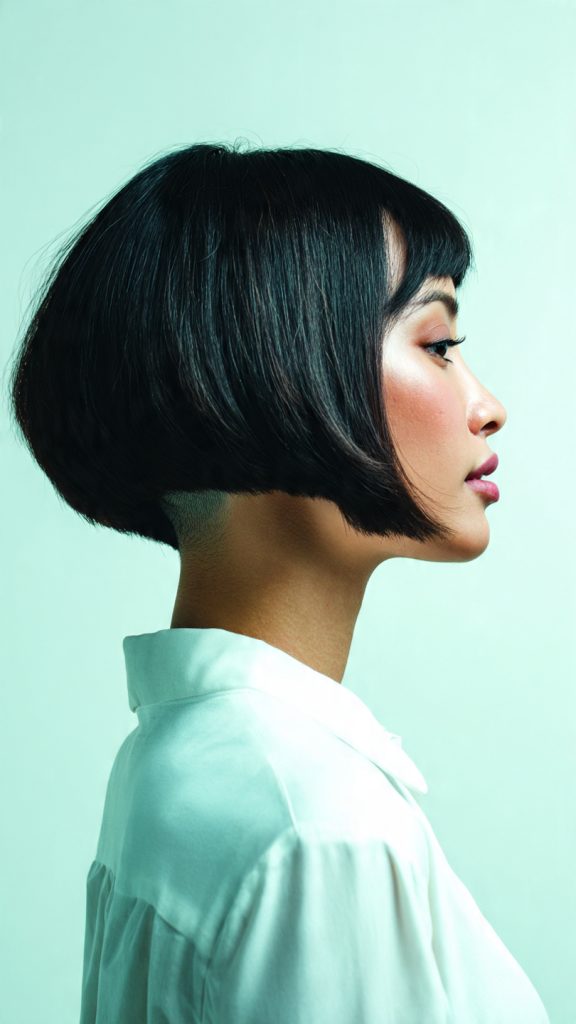
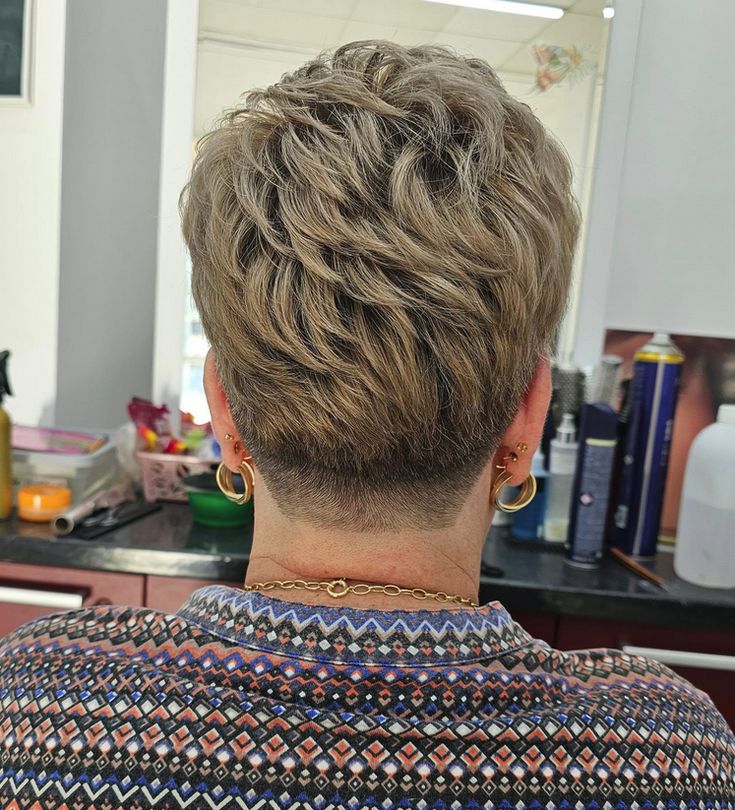
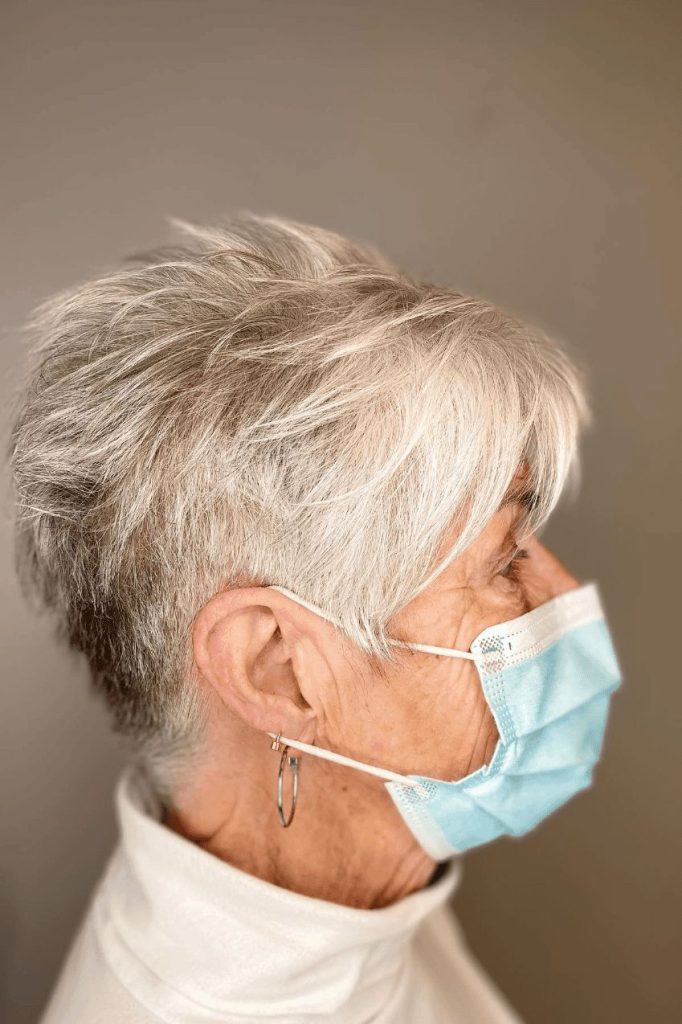
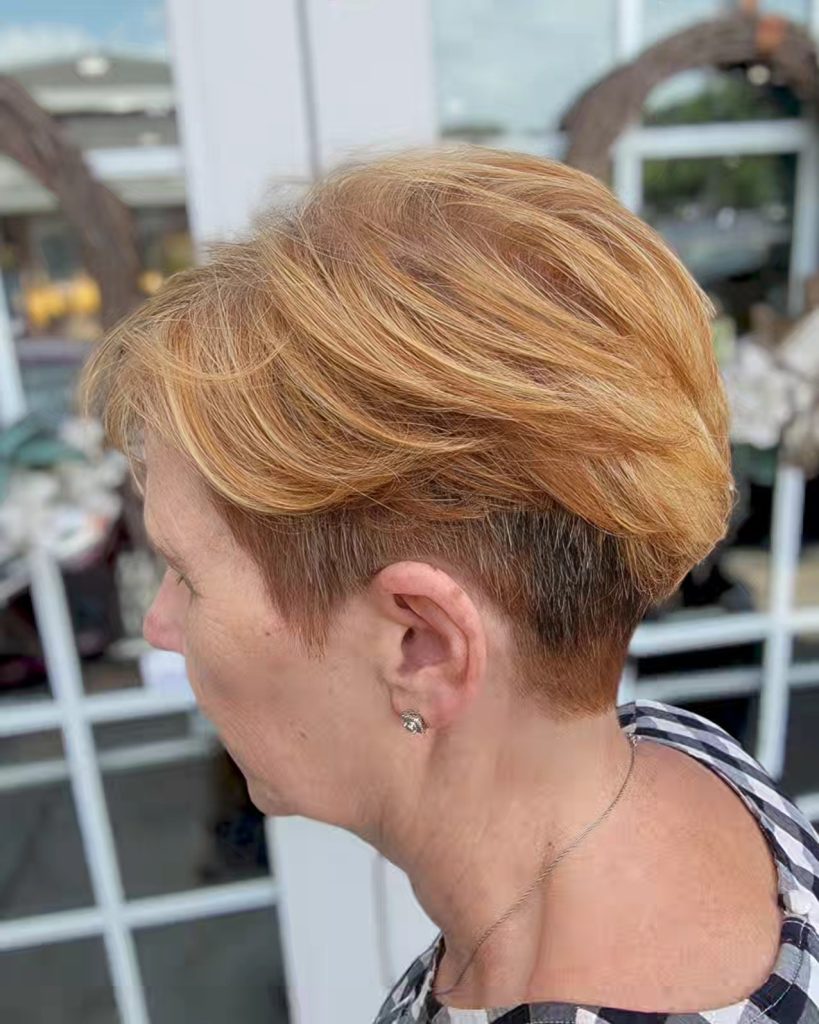
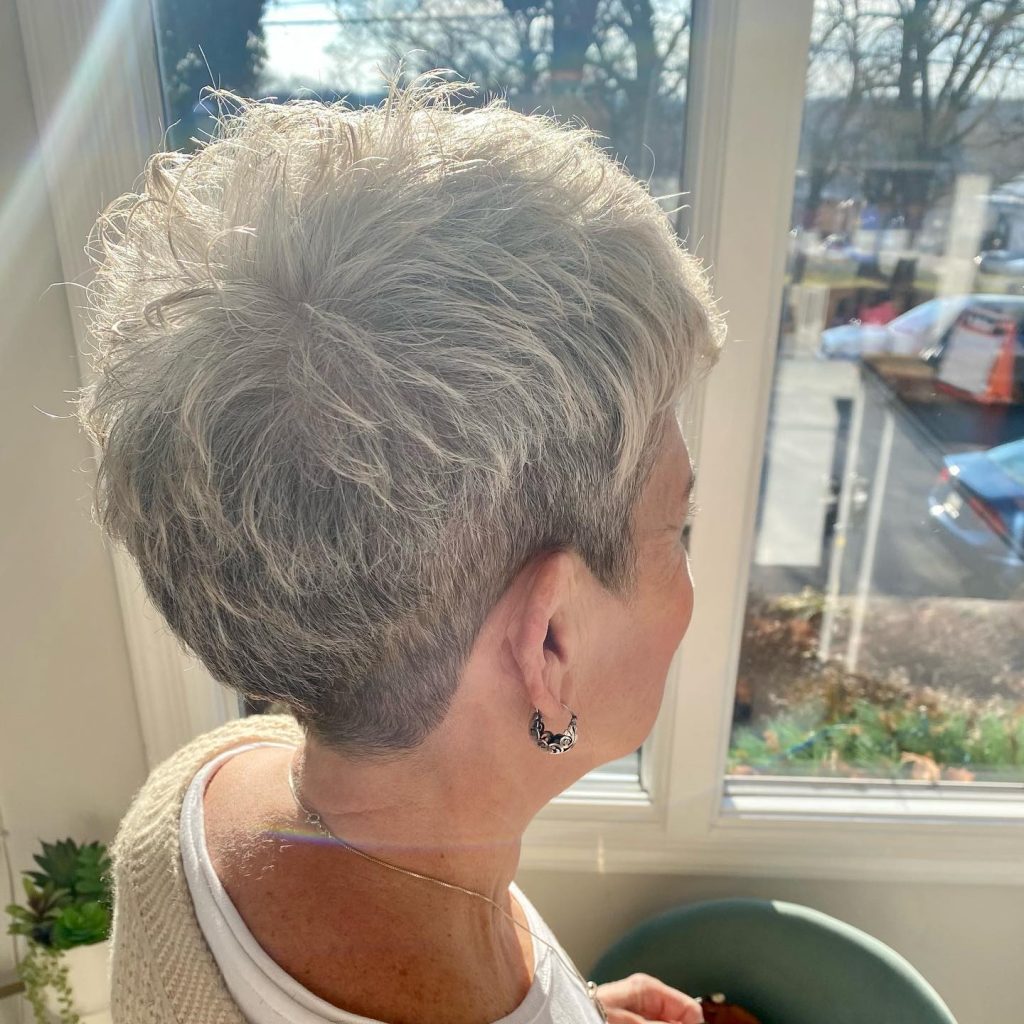
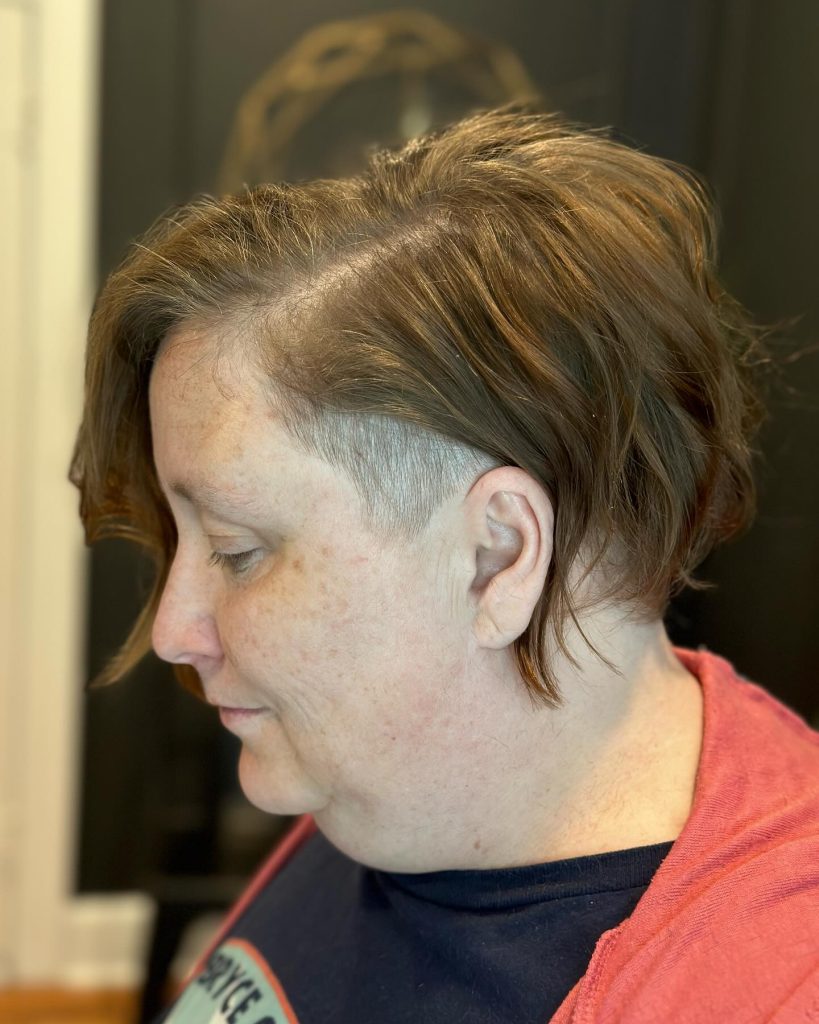
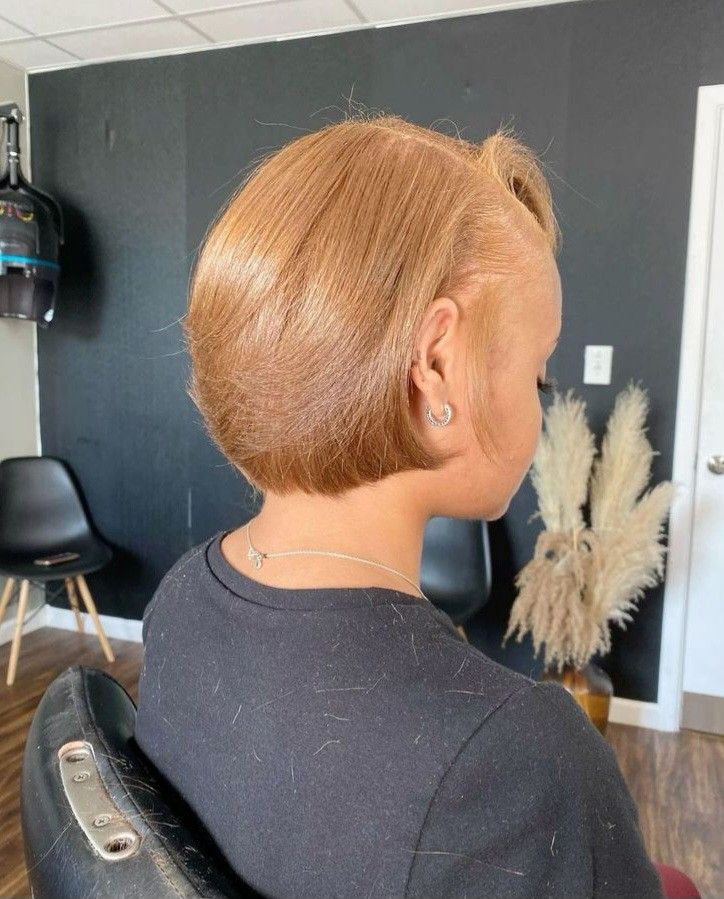
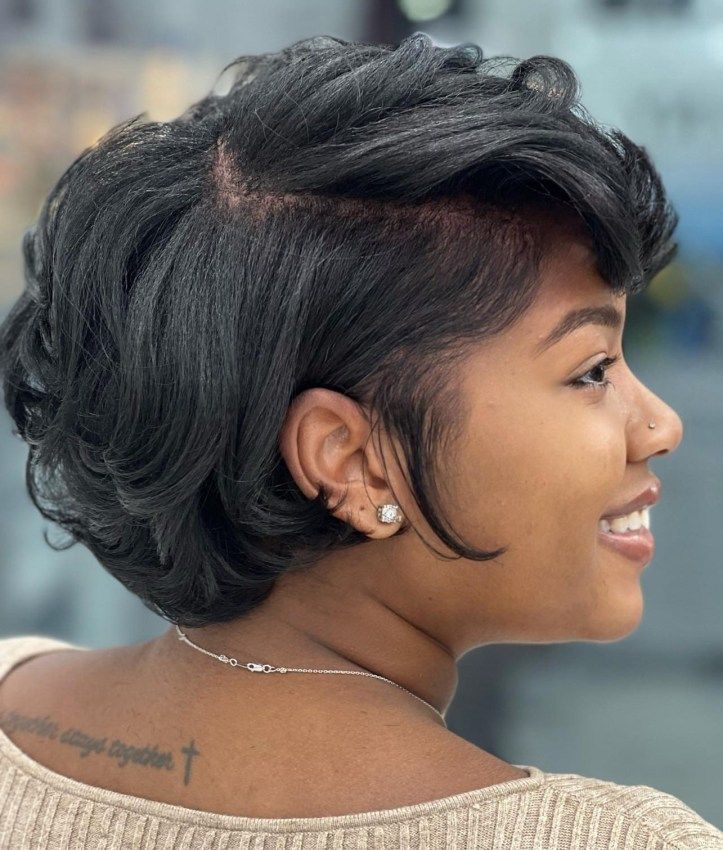
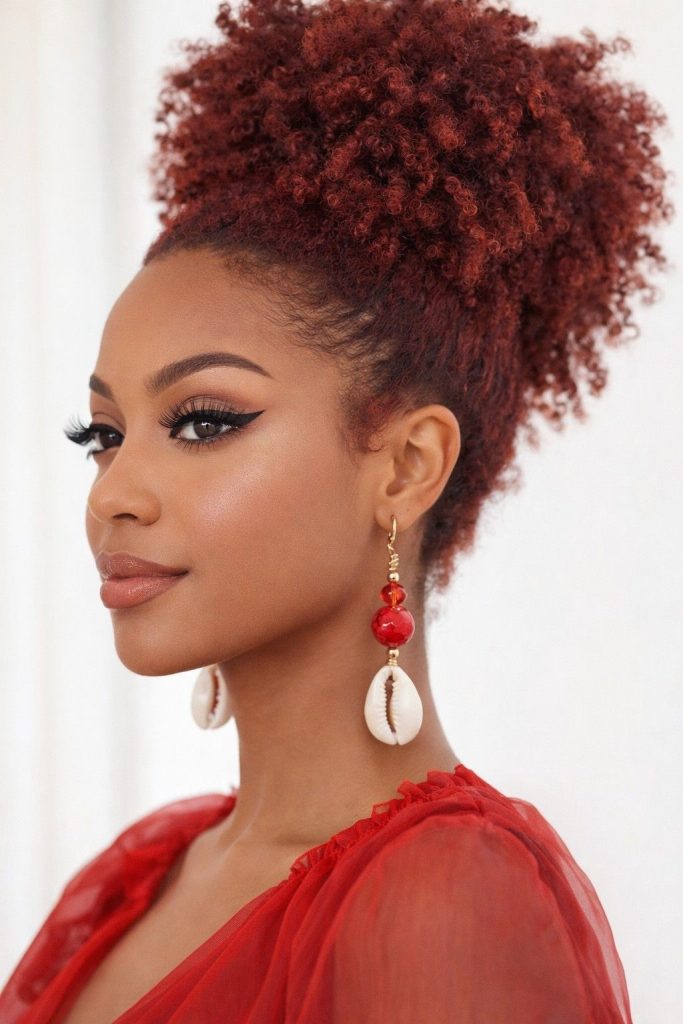
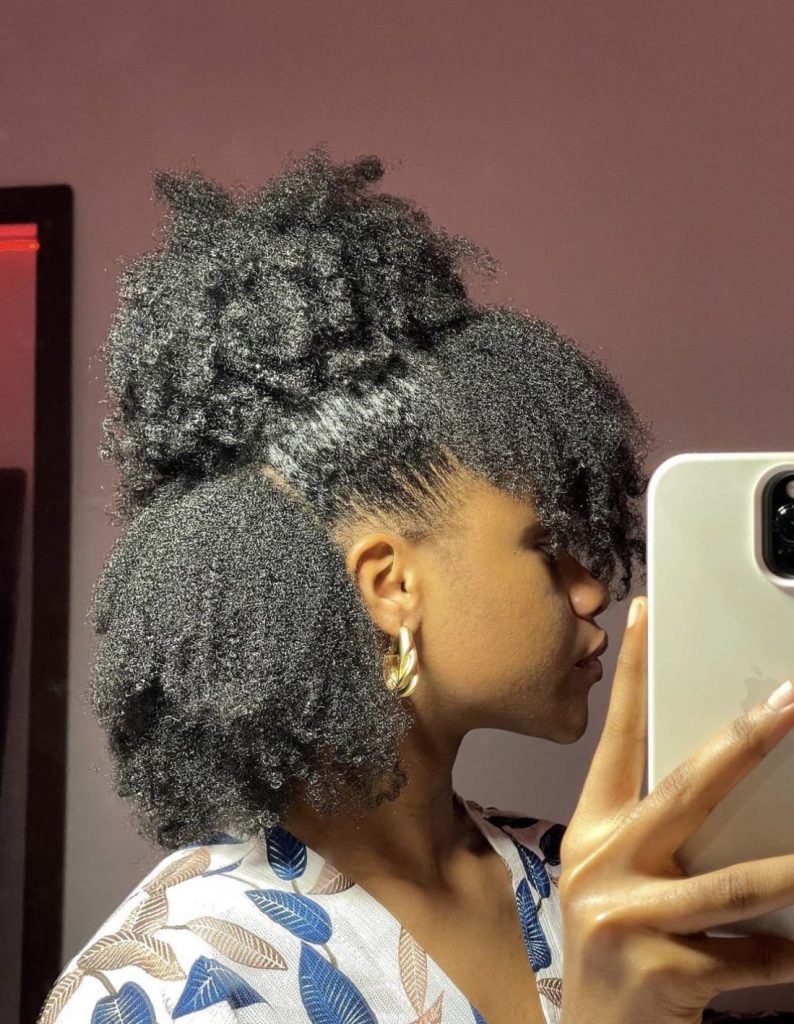
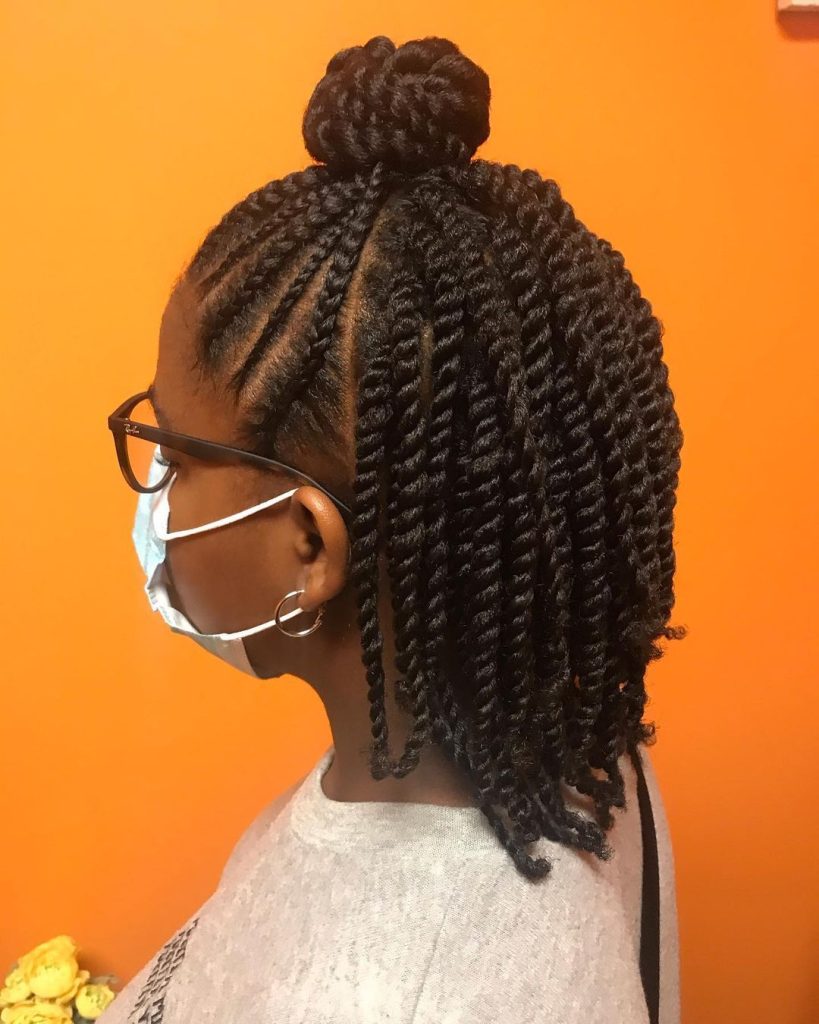
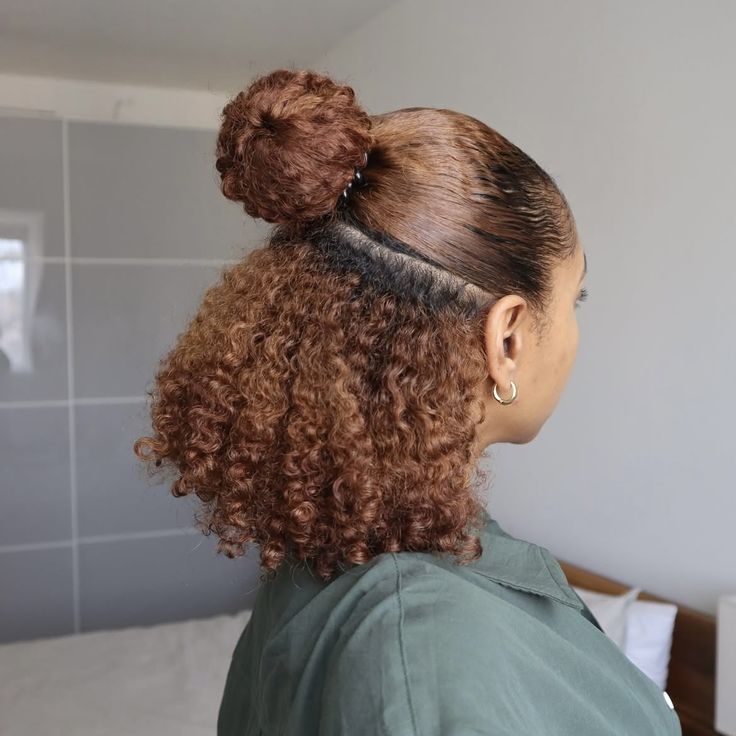
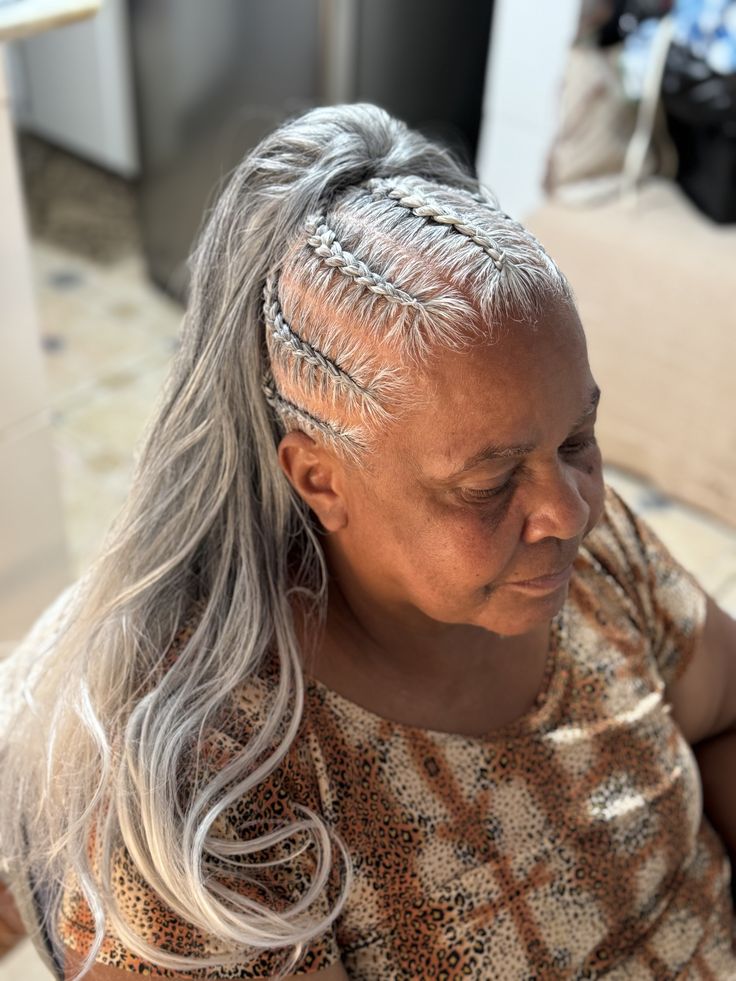
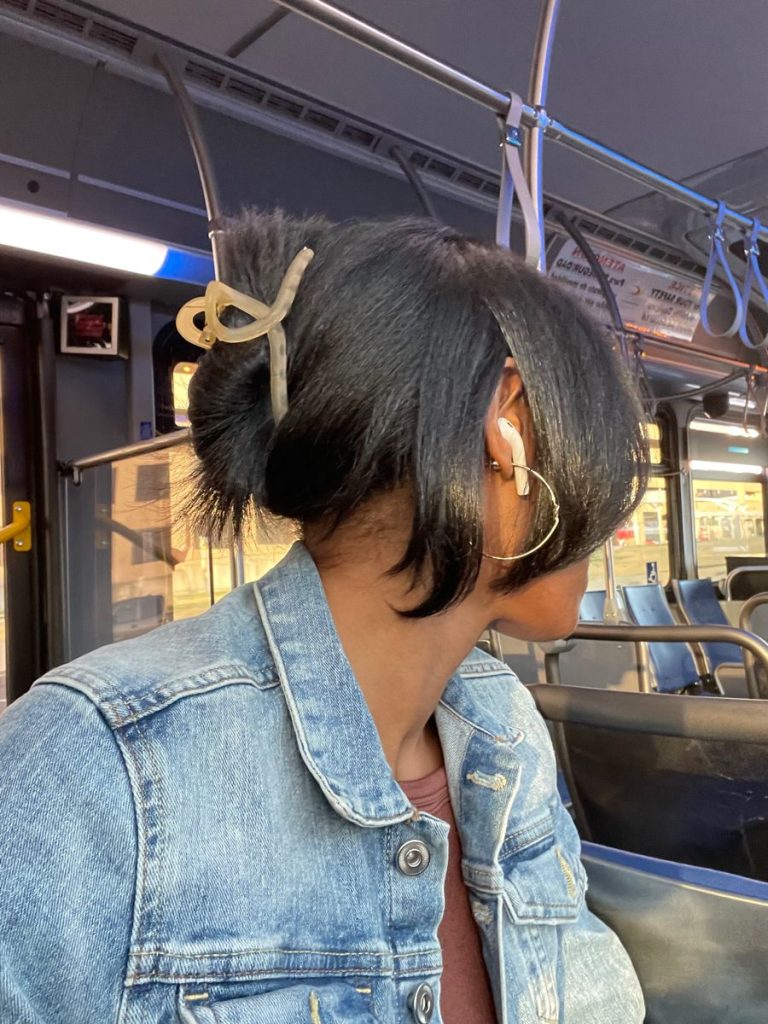
5. The Nape Undercut (Hidden Surprise)


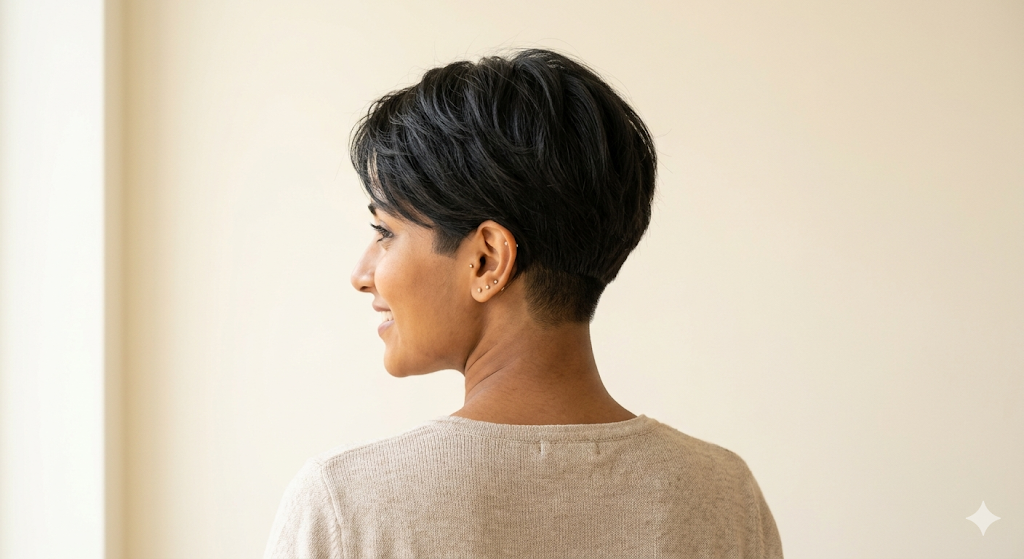
Shave only the back (nape area) while leaving side lengths intact. When your hair is down, it looks like a normal pixie; pull it up or turn your head to reveal the secret shave.
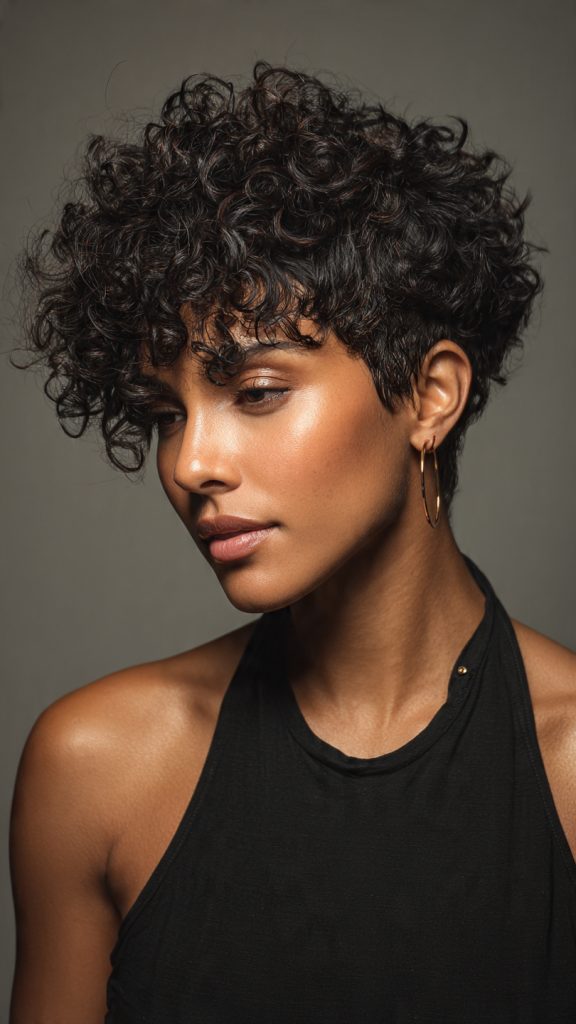
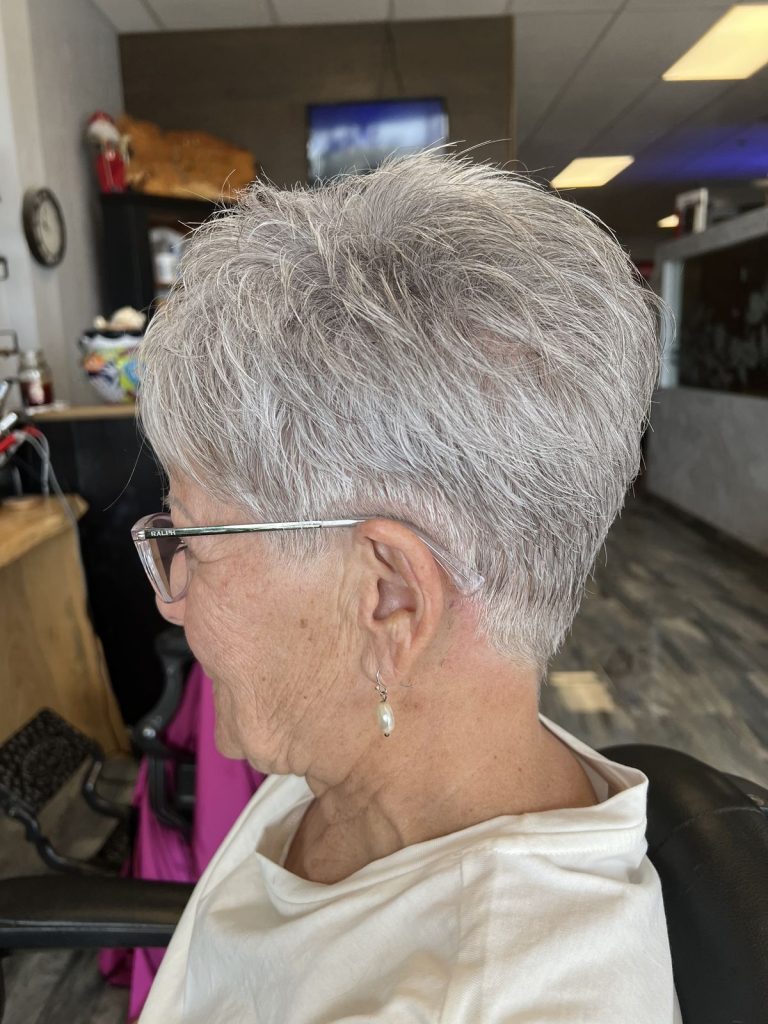
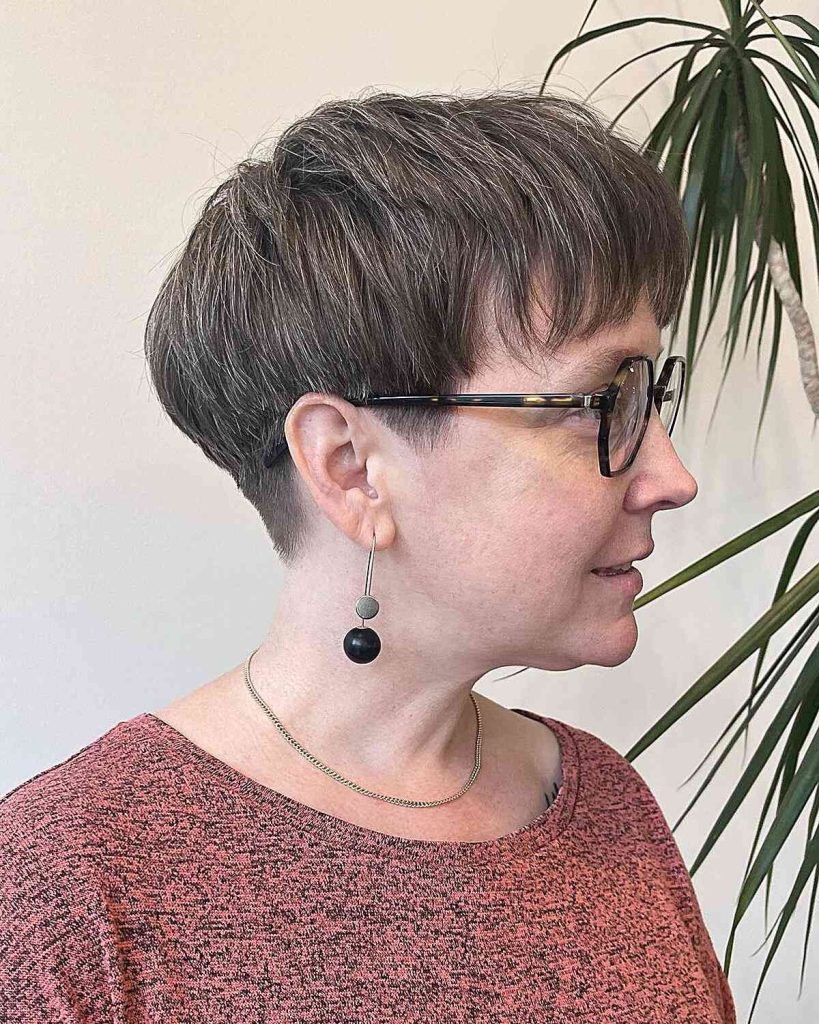
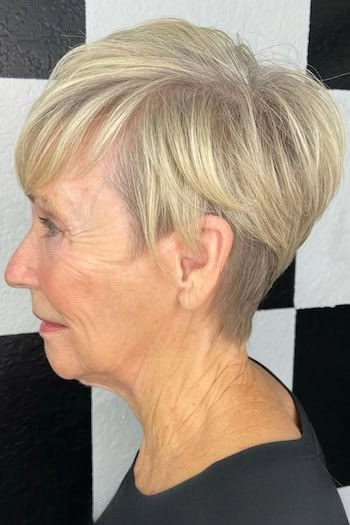
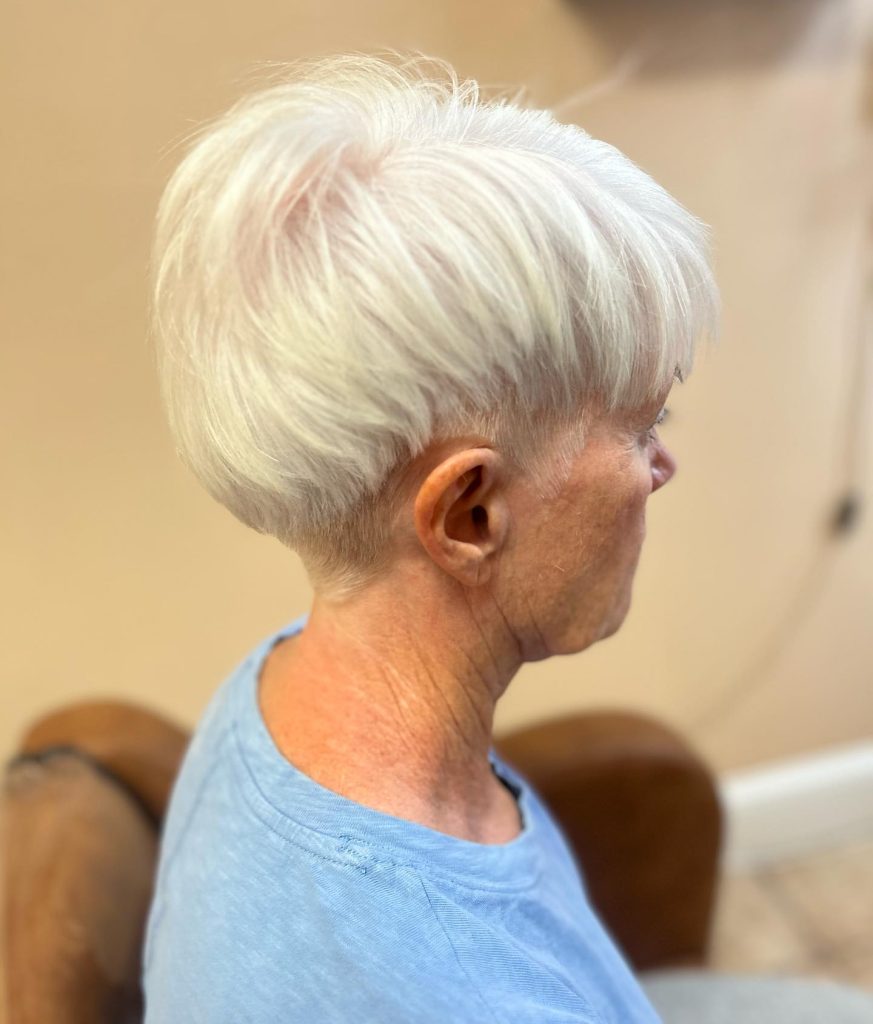
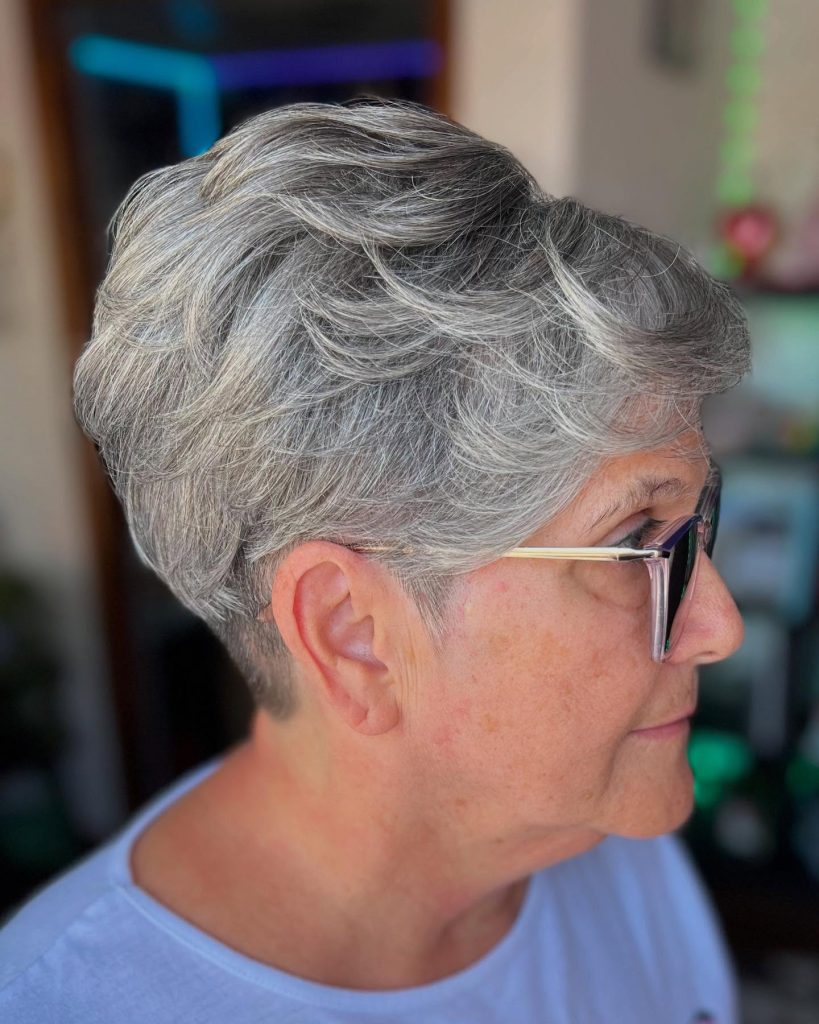
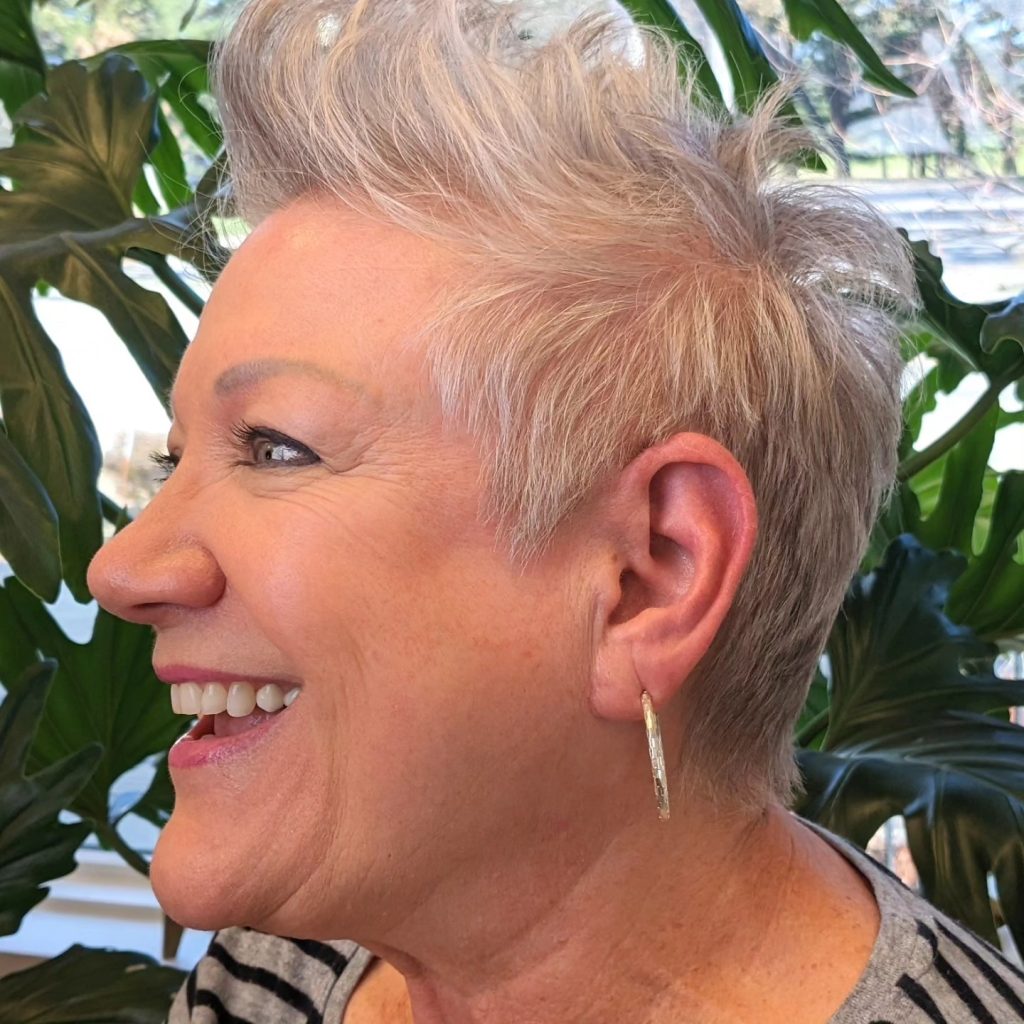
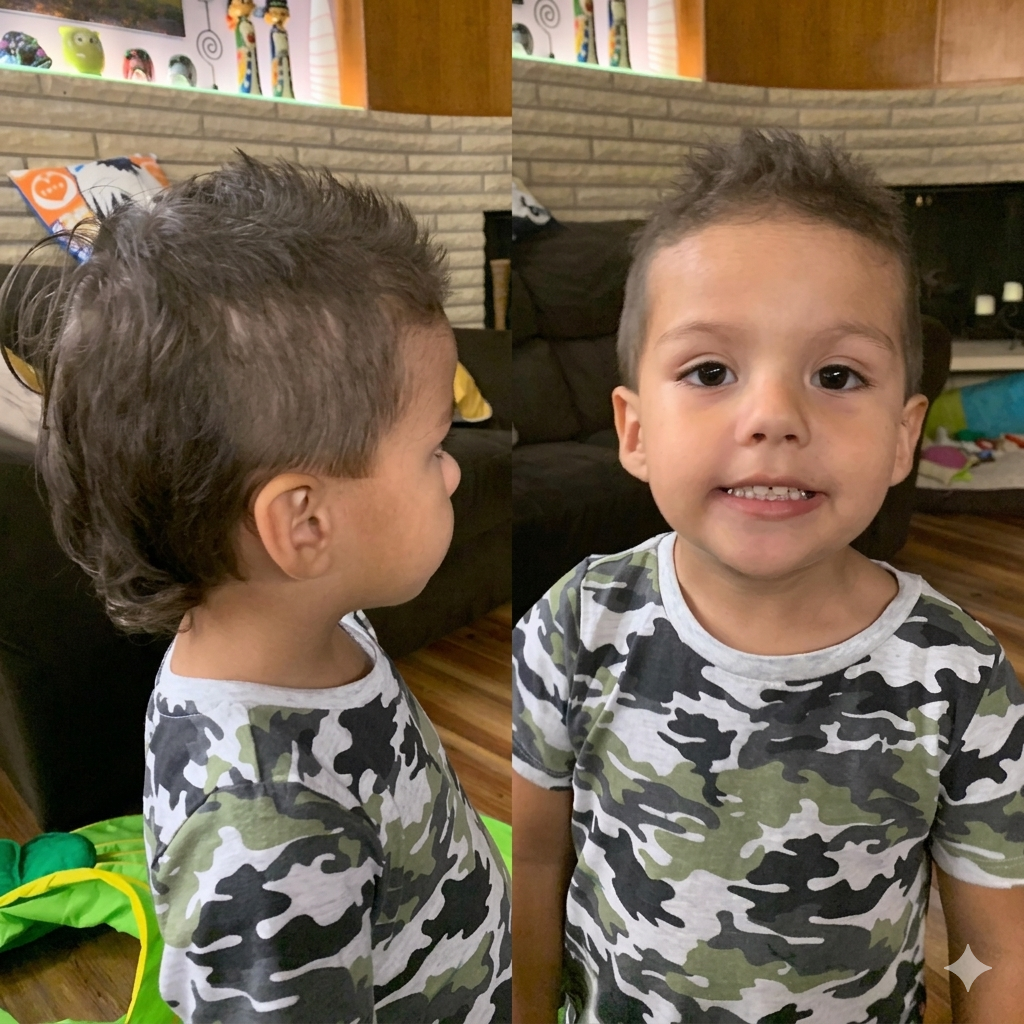
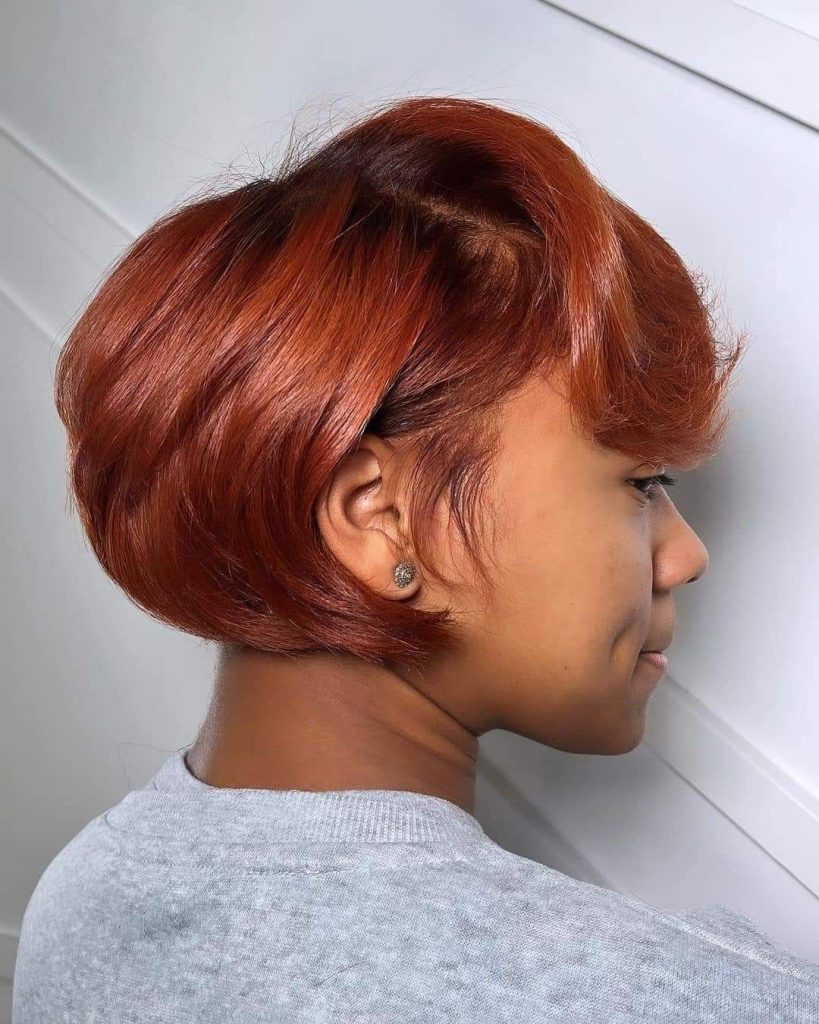
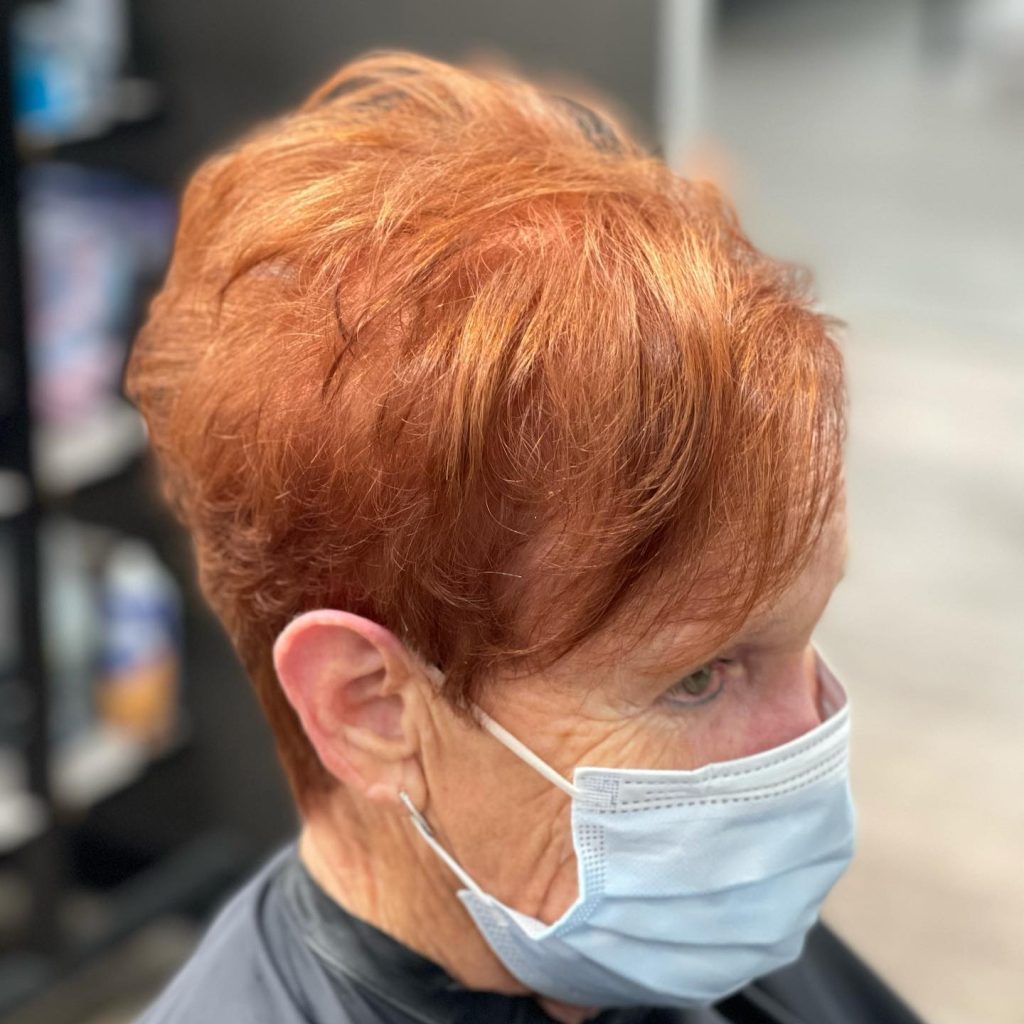
6. The Temple Taper


Instead of shaving full sides, ask for a high taper that goes from skin at the temples up into longer hair. It’s softer than a full undercut but still edgy.

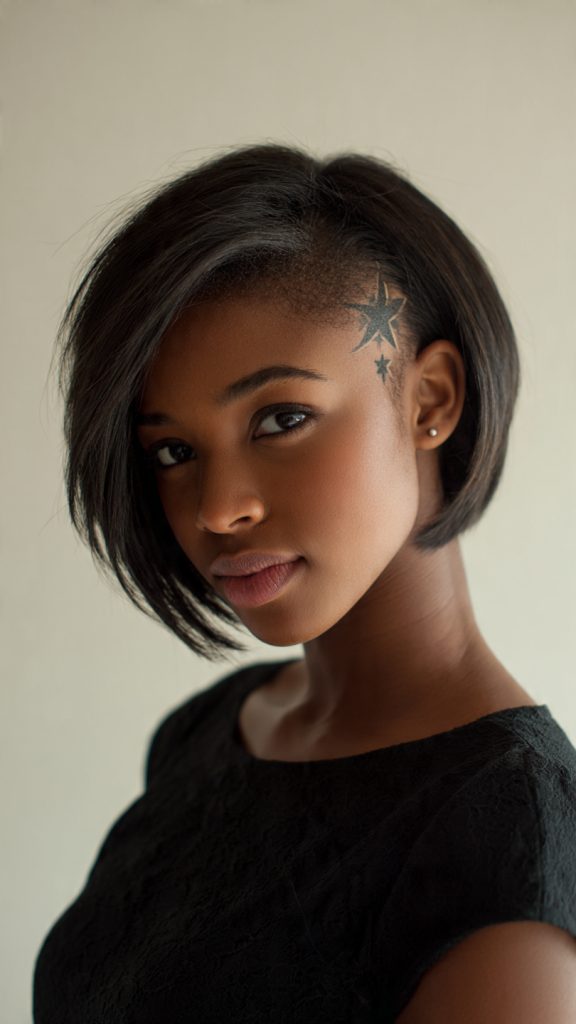
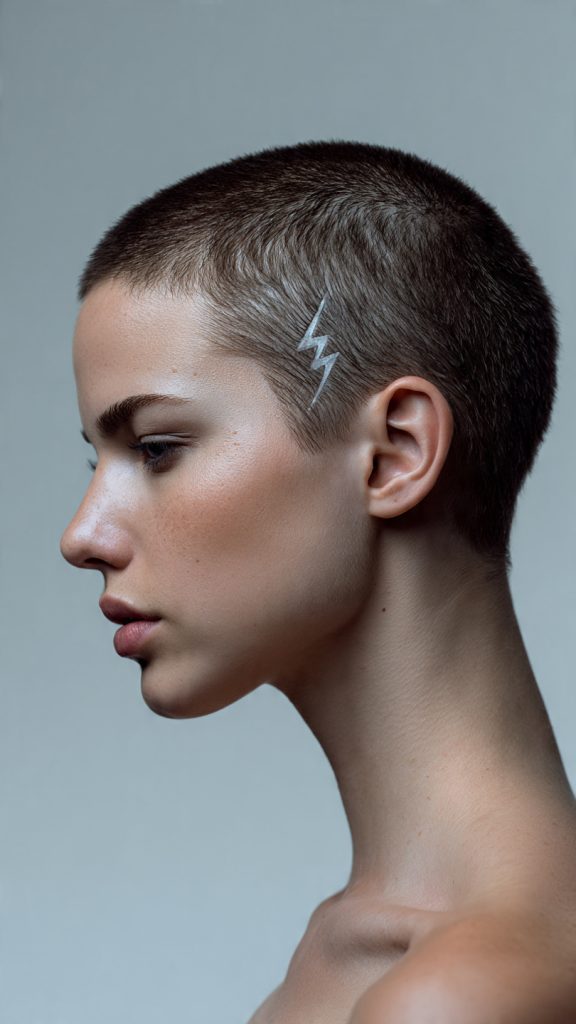
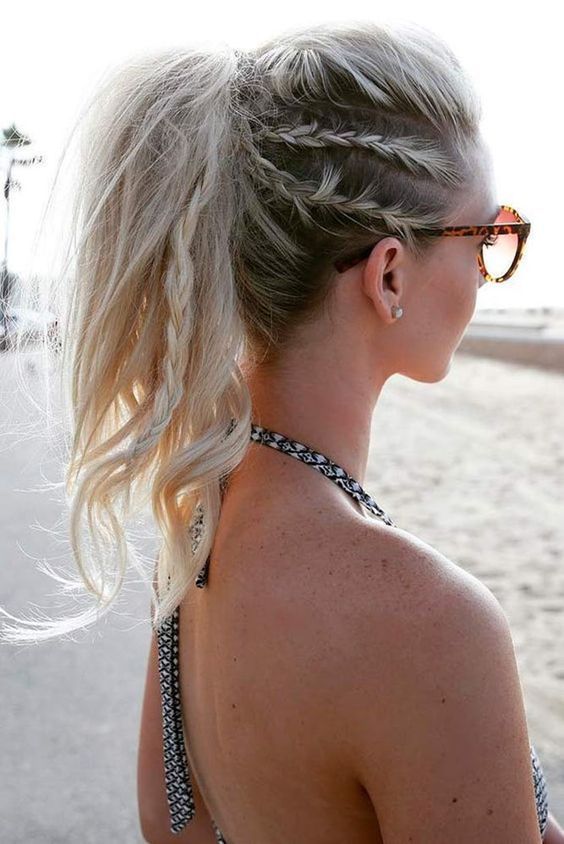
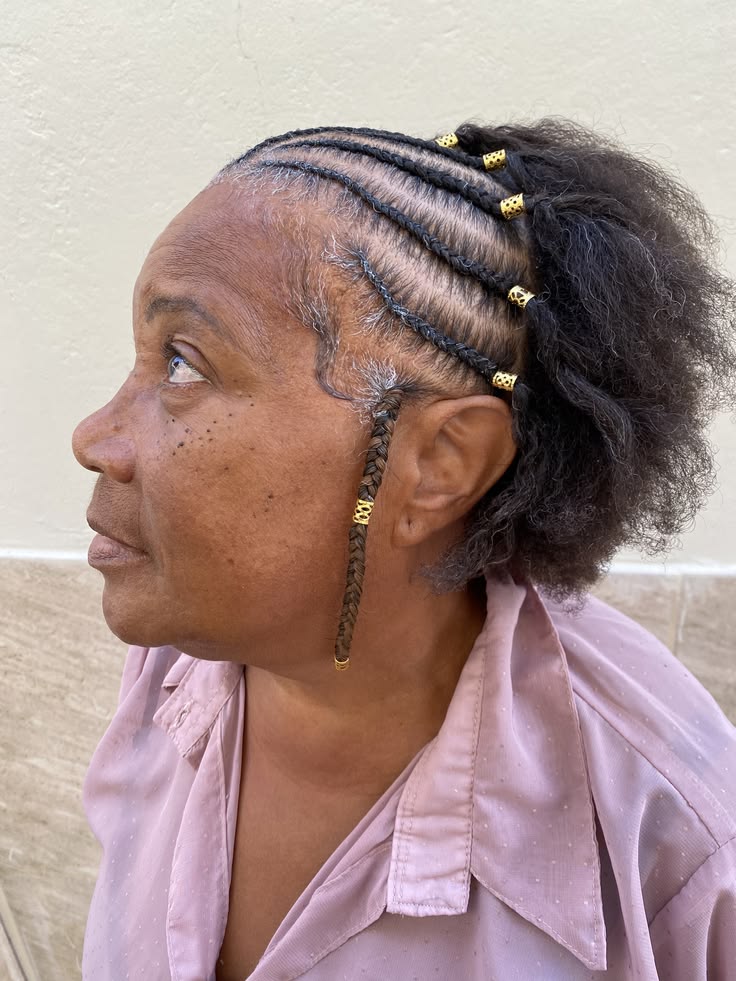
7. The Design Shave (Lines & Shapes)


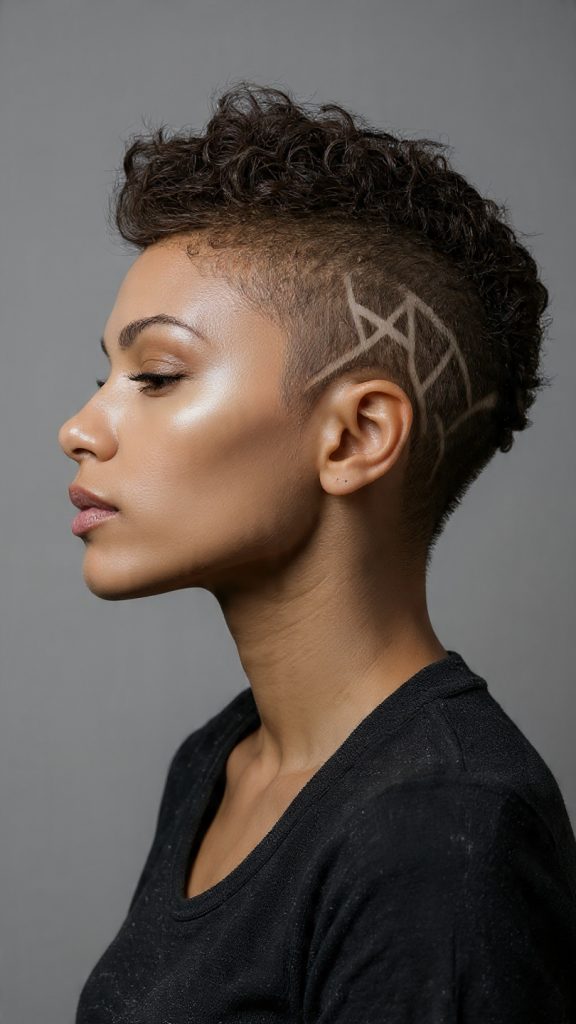
Once the sides are shaved, ask your barber to etch a design—lightning bolt, zigzag, dots, or a geometric line—into the buzzed area for personalized art.

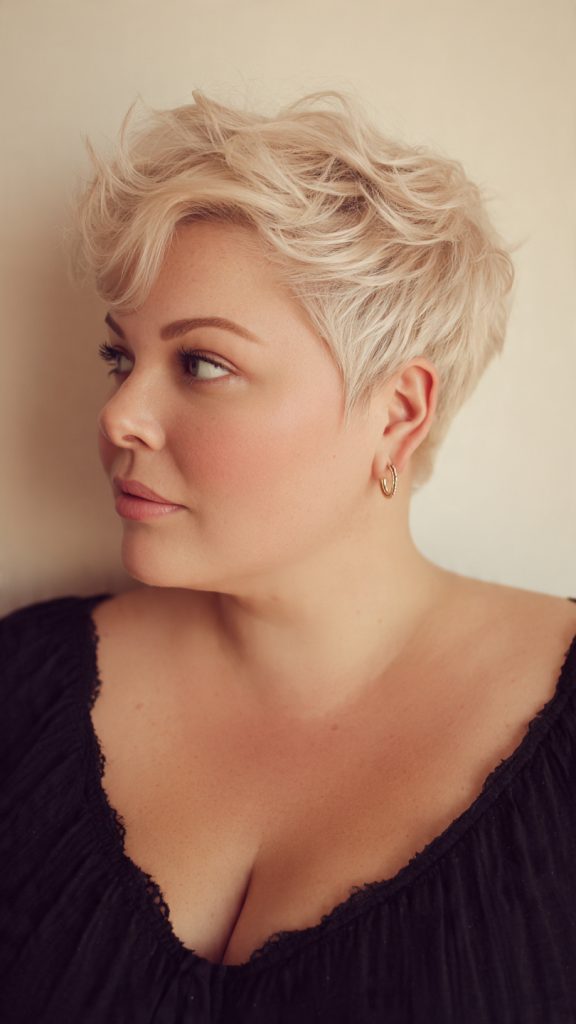
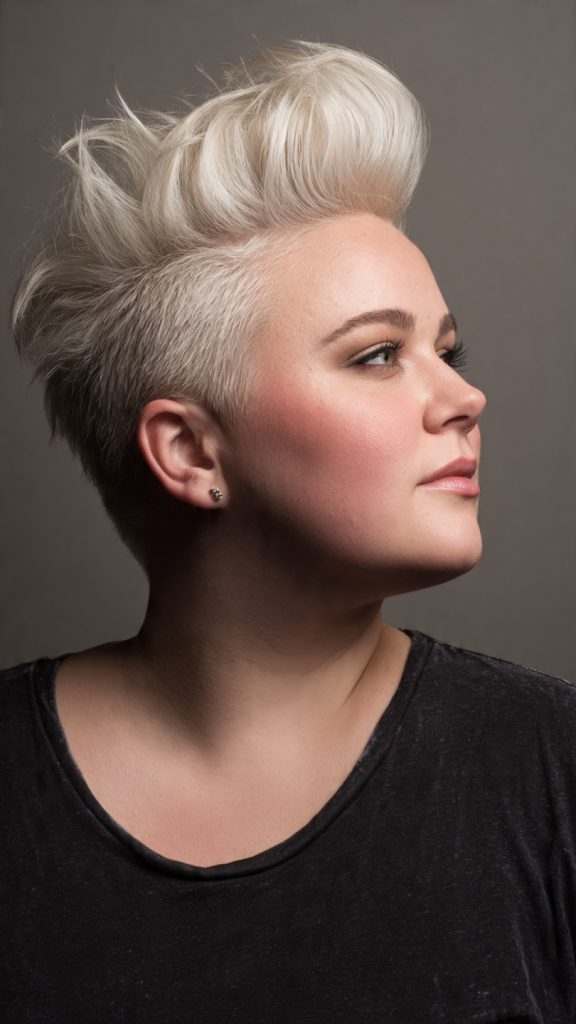
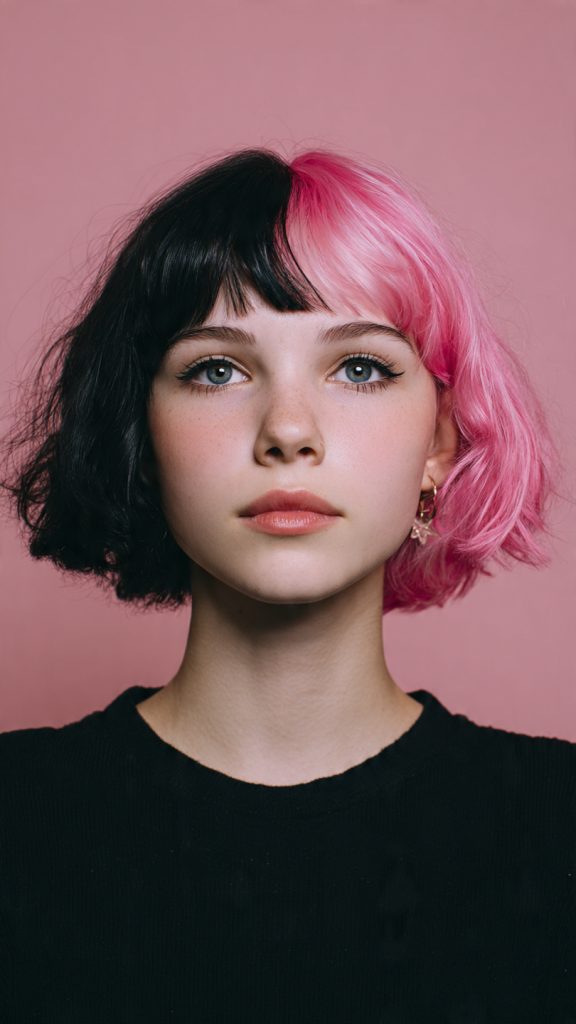
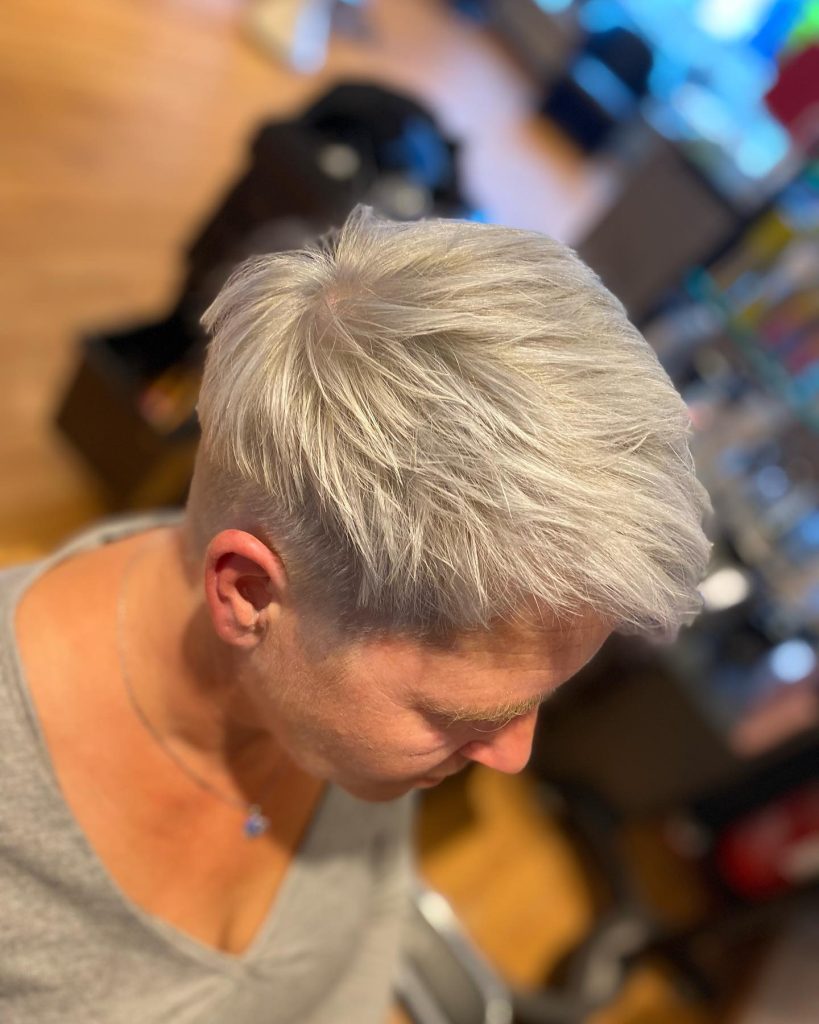
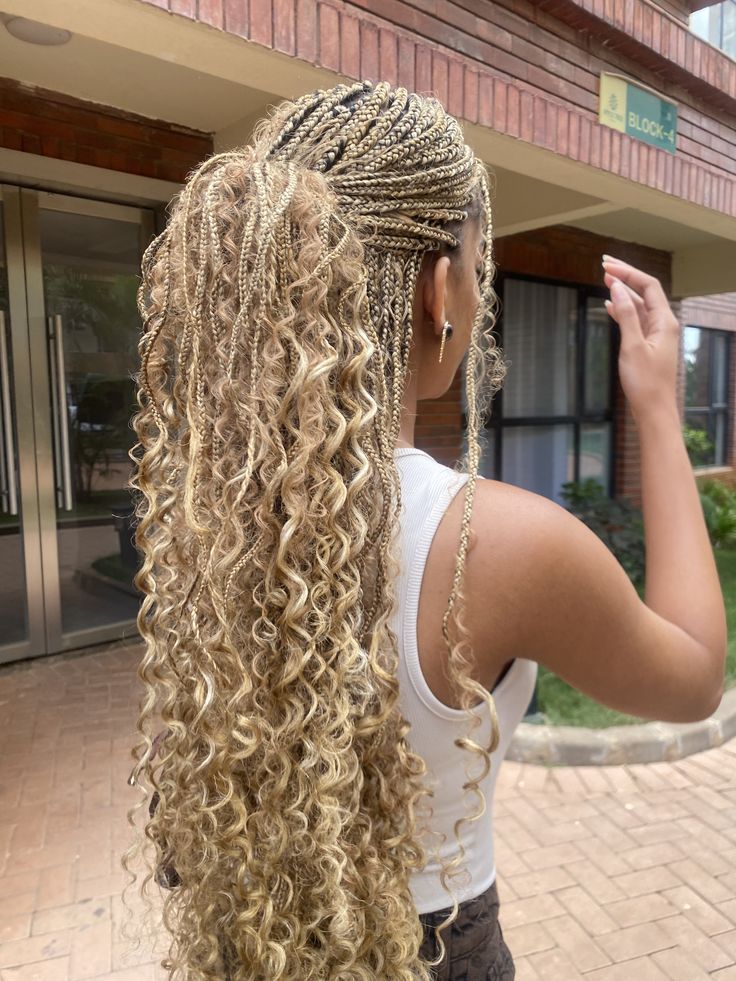
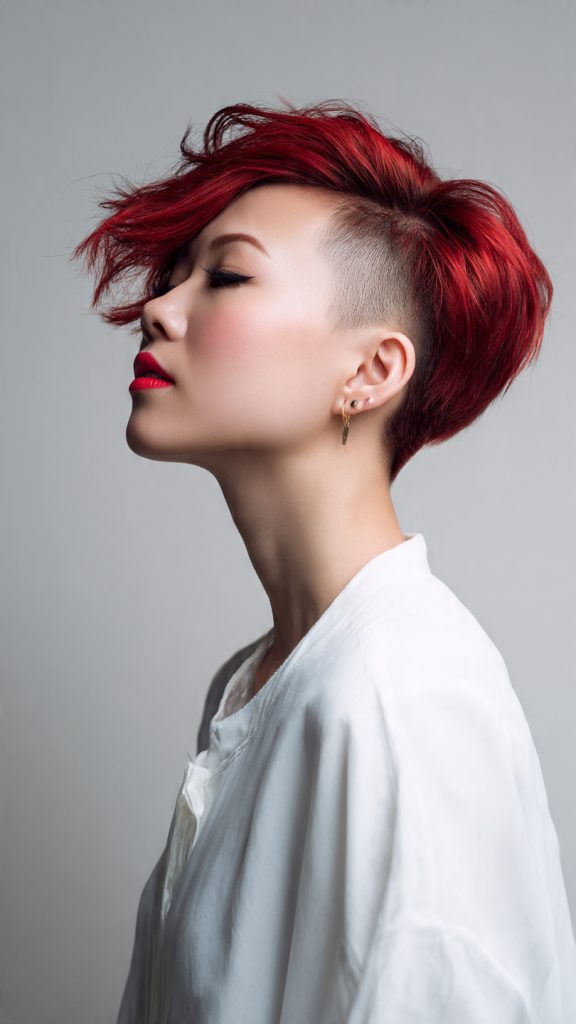
8. The Platinum Contrast


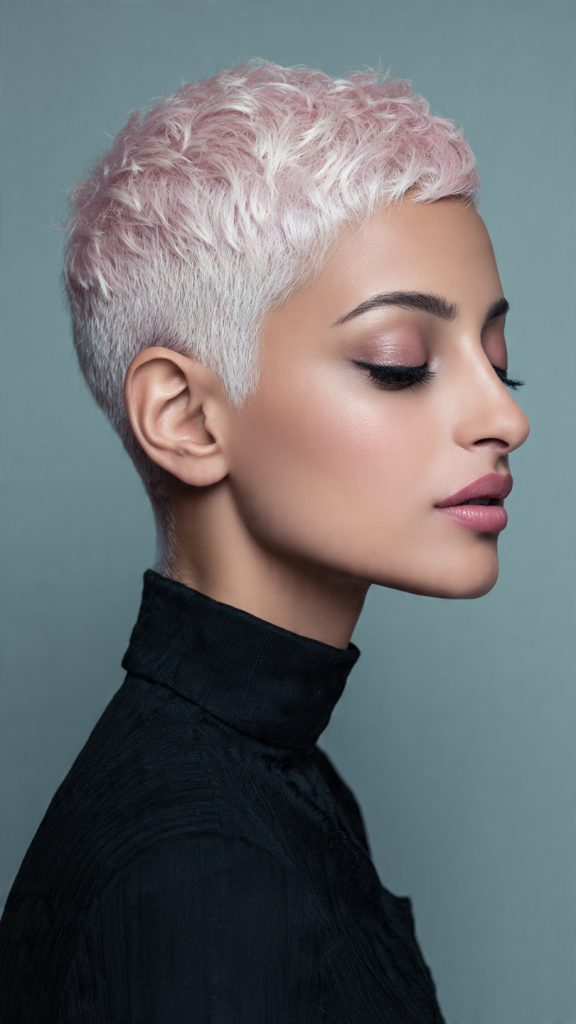
Dye the longer top platinum blonde (or pastel pink) and leave the shaved sides in your natural dark color. The high-contrast color emphasizes the cut’s structure.

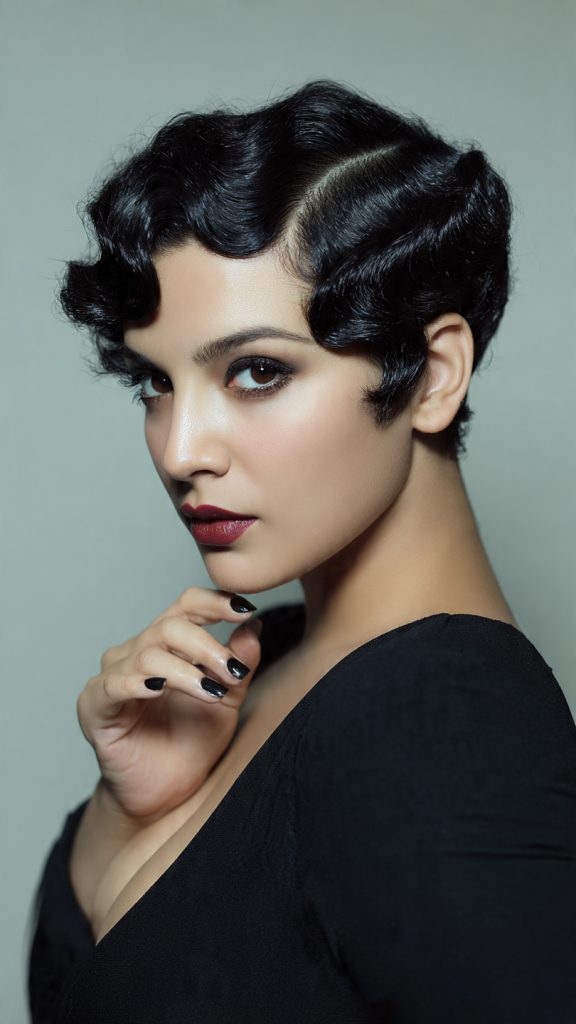
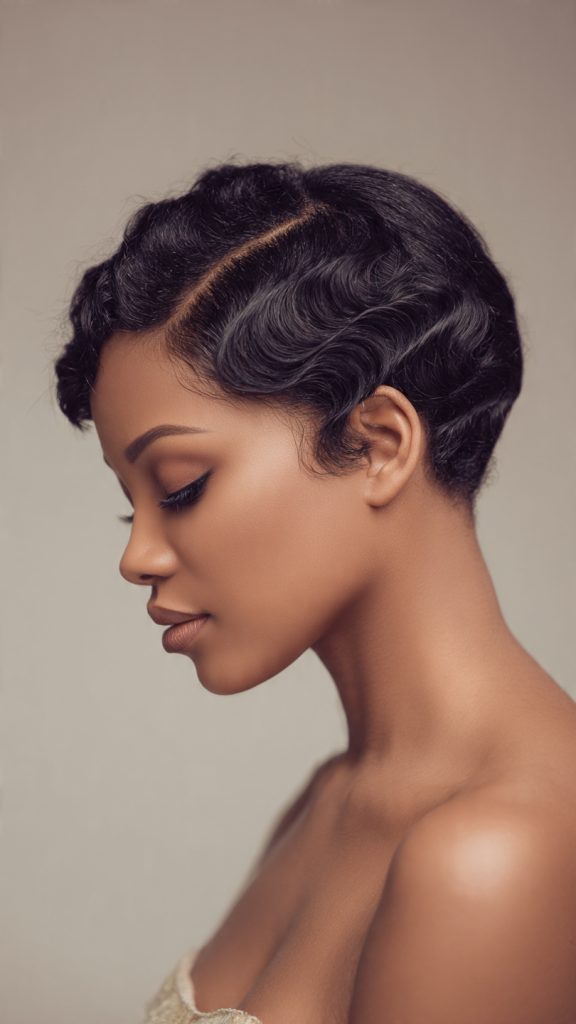
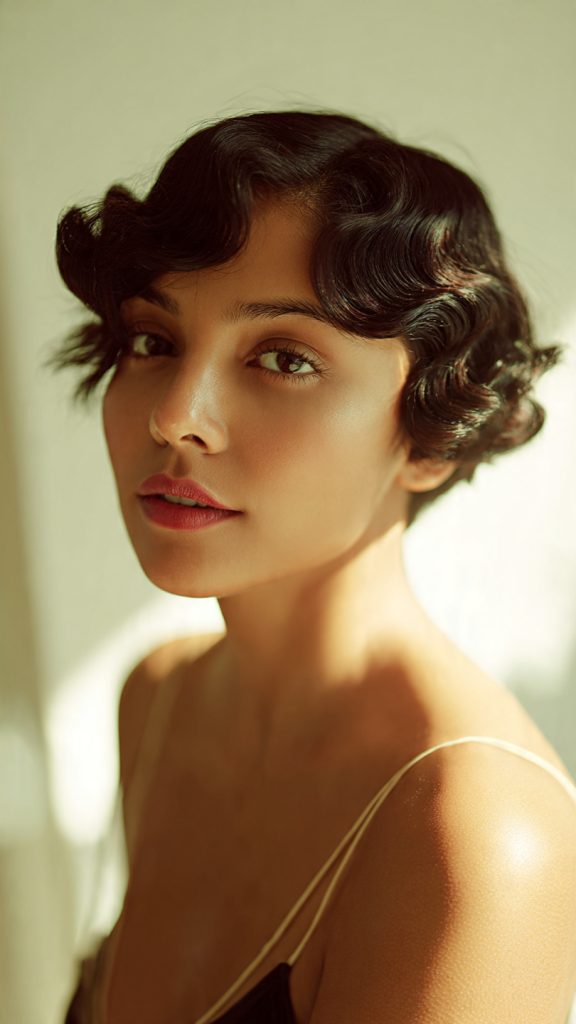
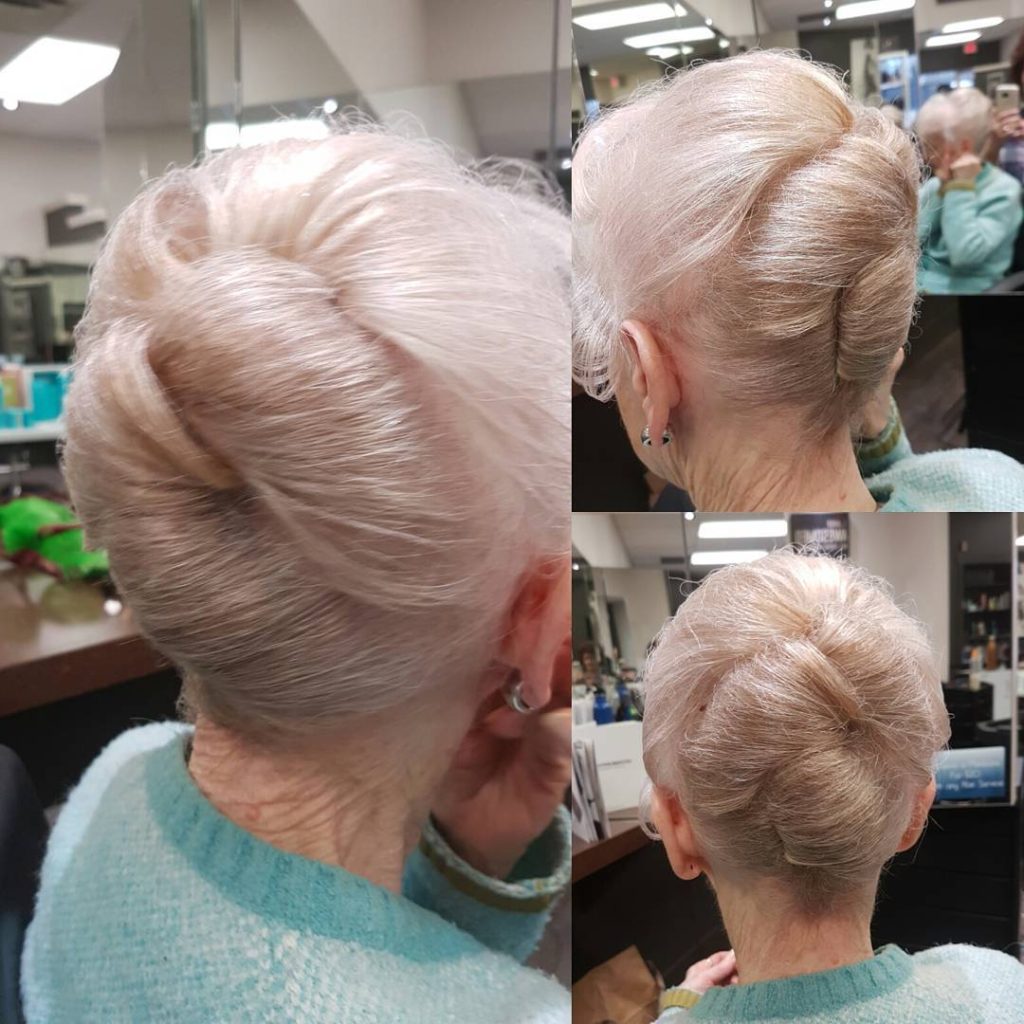
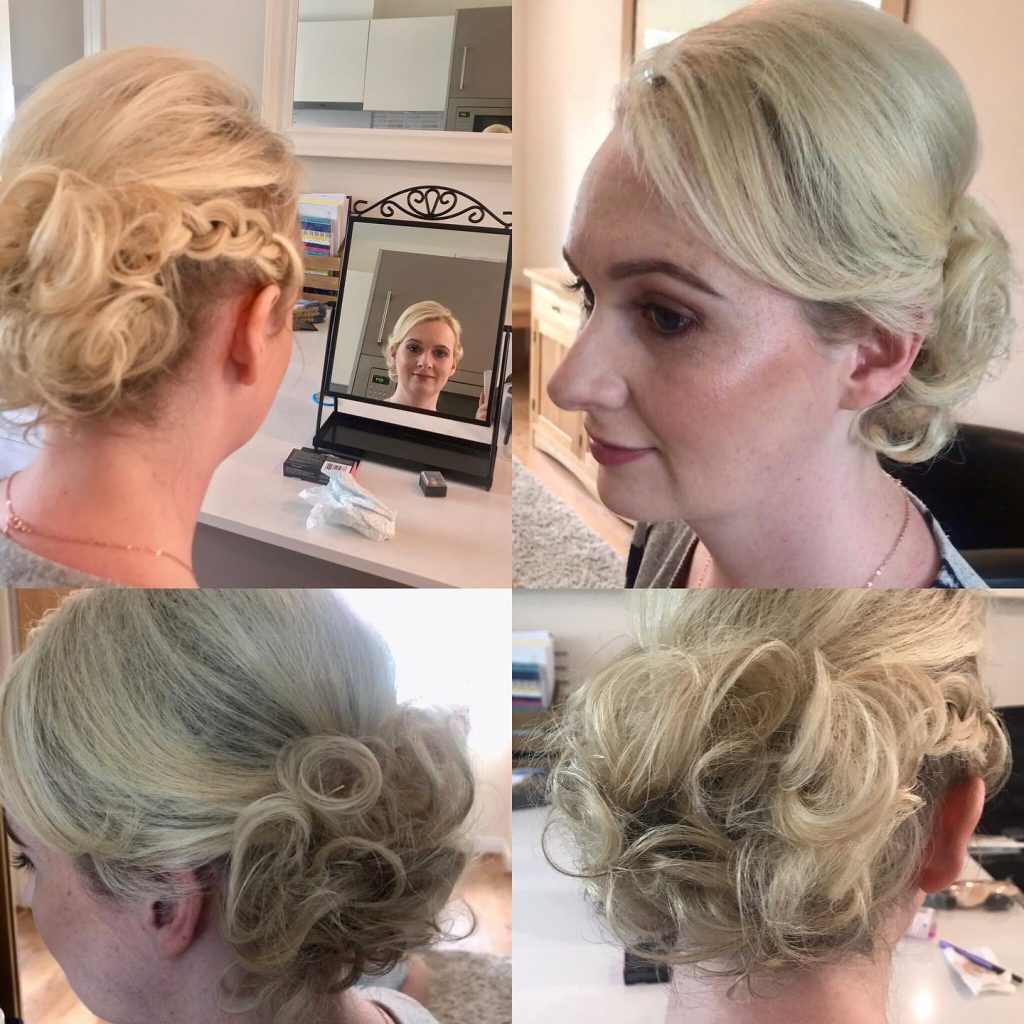
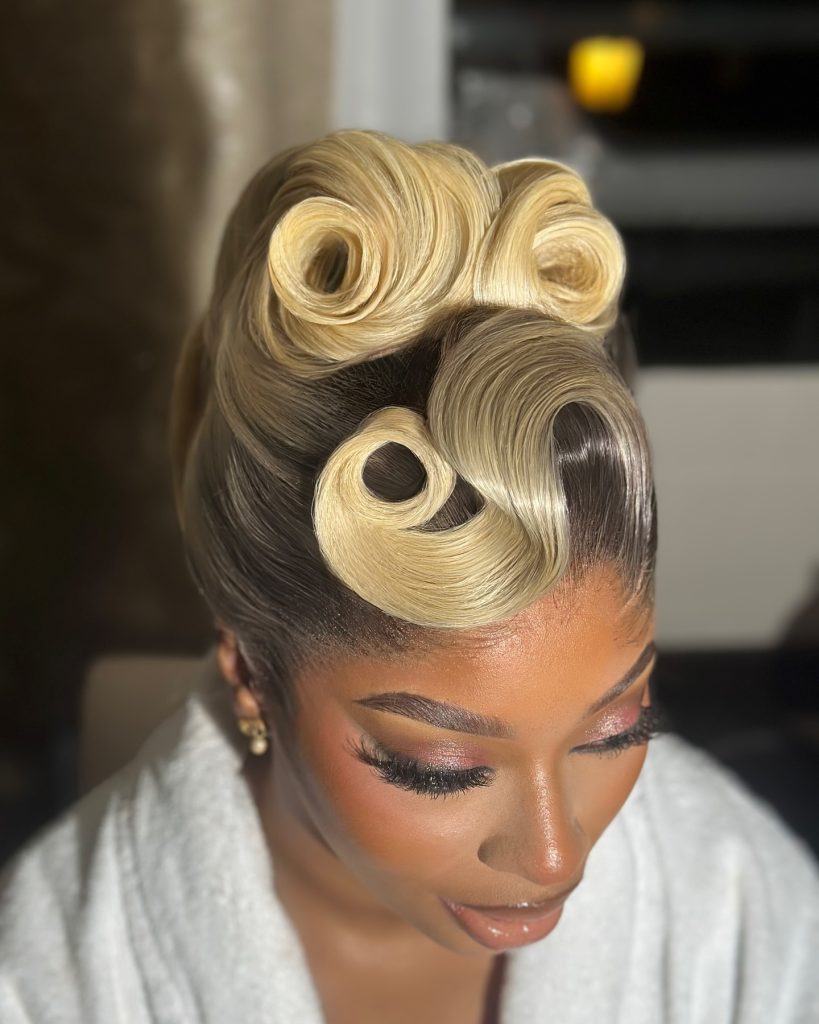
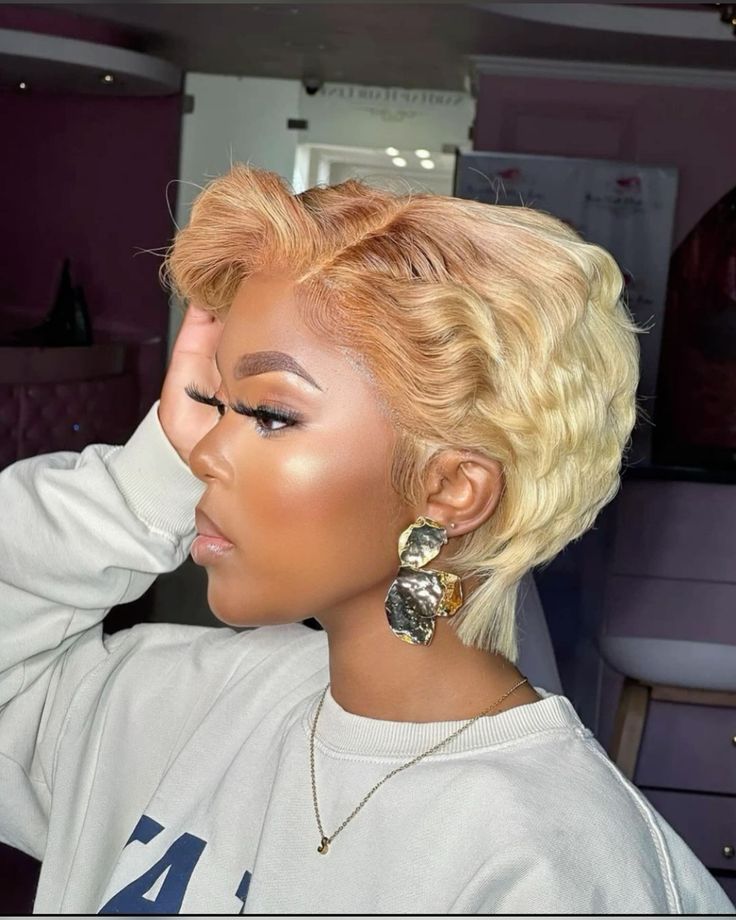
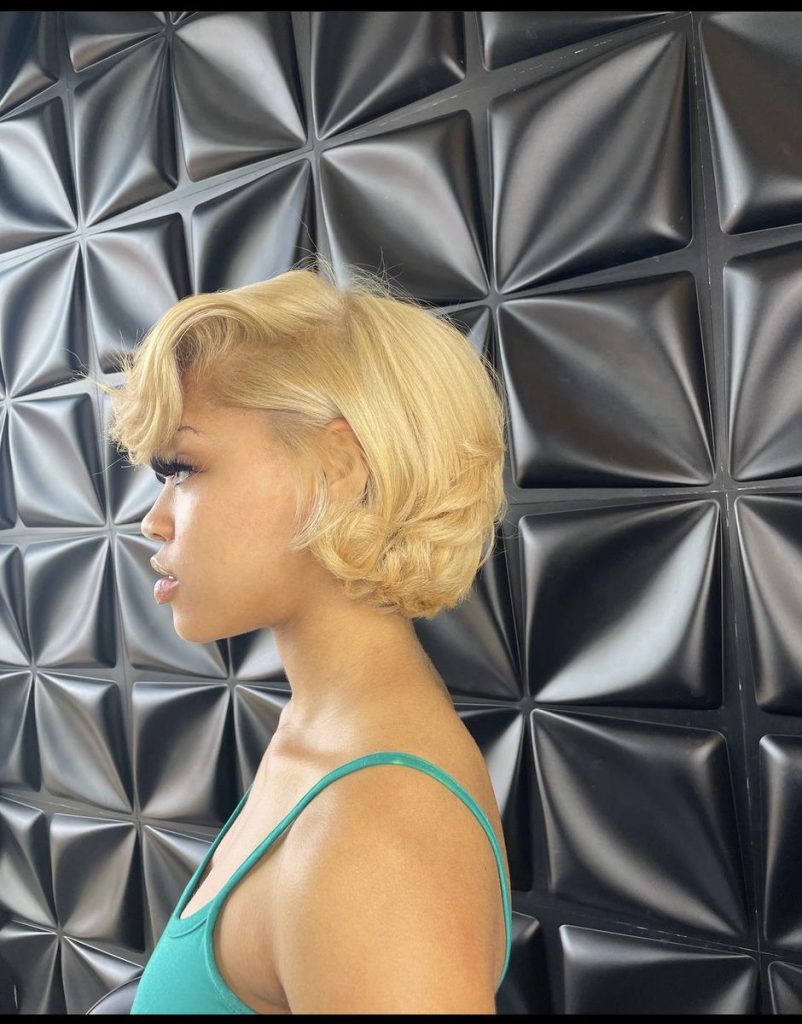
9. The Finger-Waved Top


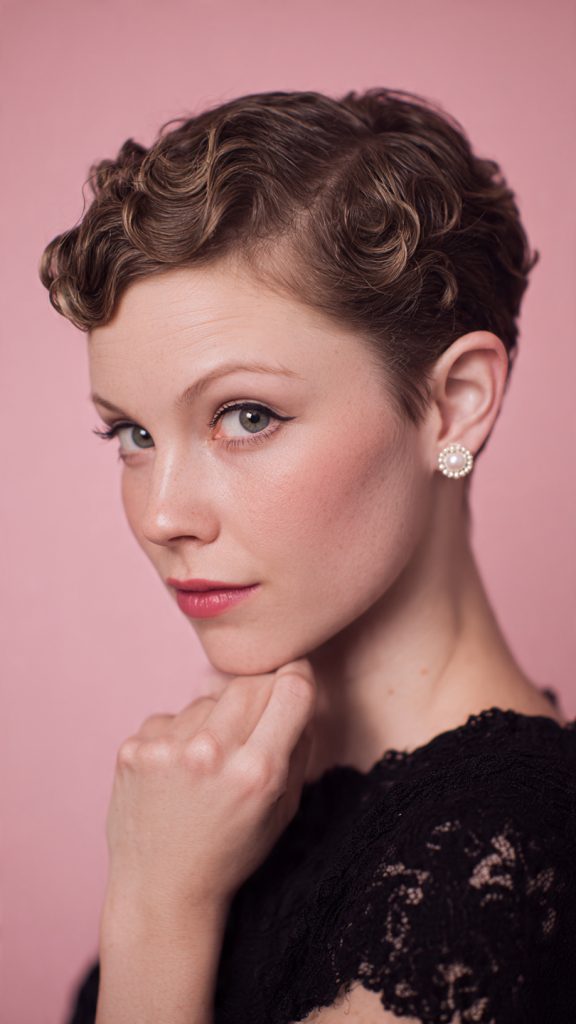
On the longer section, set your hair in vintage finger waves or pin curls. The juxtaposition of old Hollywood glamour with shaved sides is unforgettable.

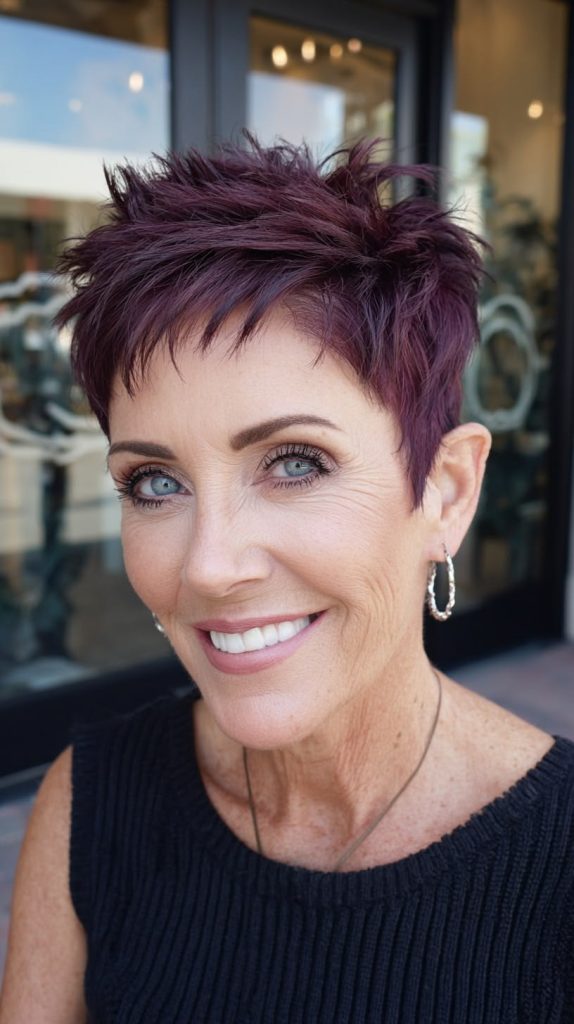
10. The Messy Spiked Pixie


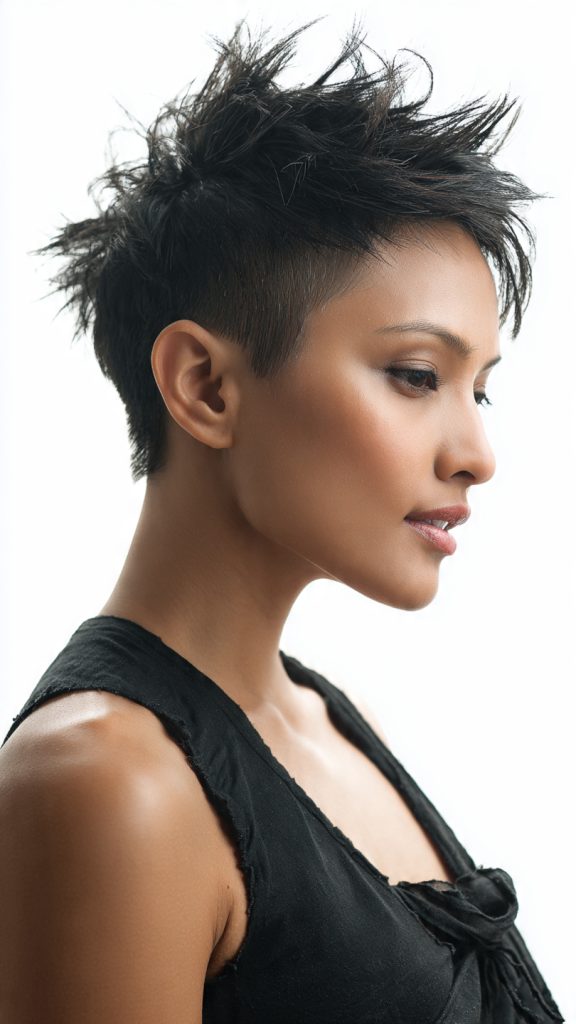
Apply a matte paste or wax to the top and messily spike it upward. Shaved sides make spikes look intentional and clean rather than juvenile.

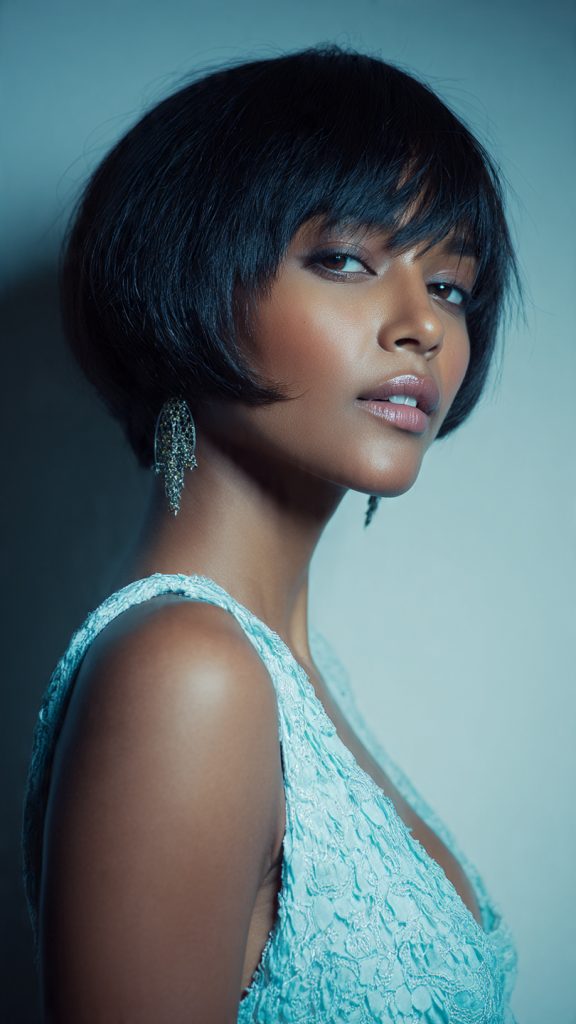
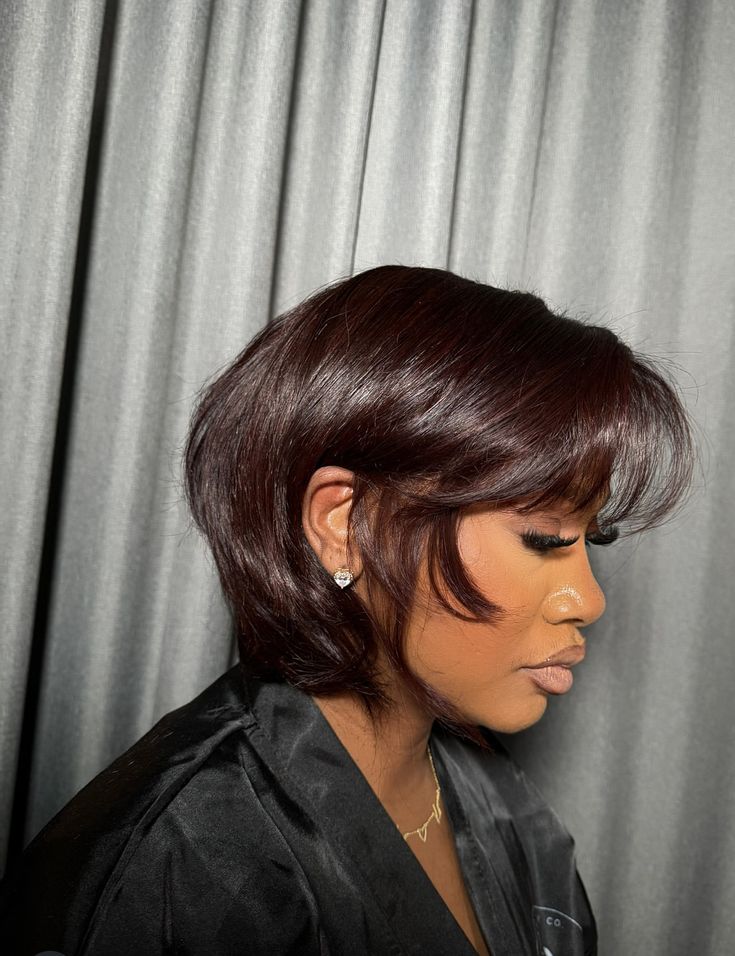
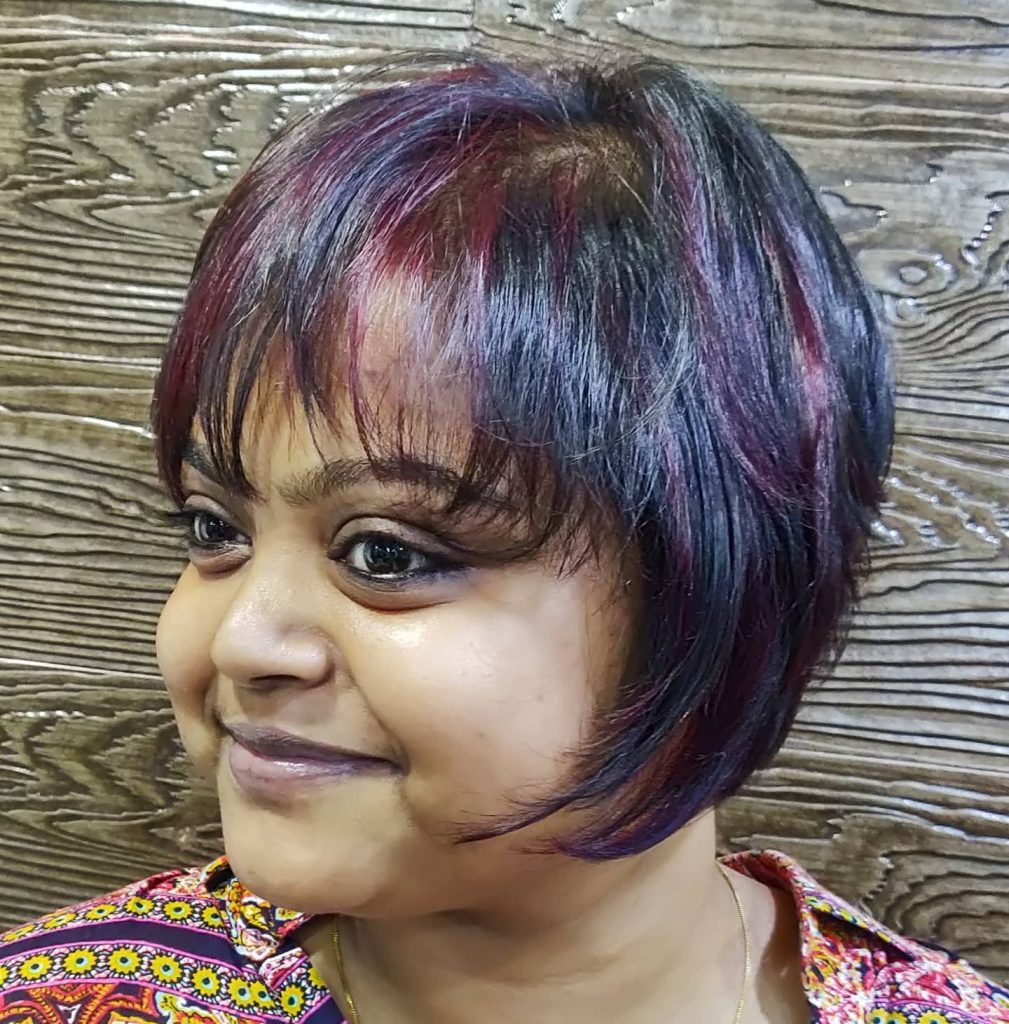
11. The Deep Side-Swept Bang


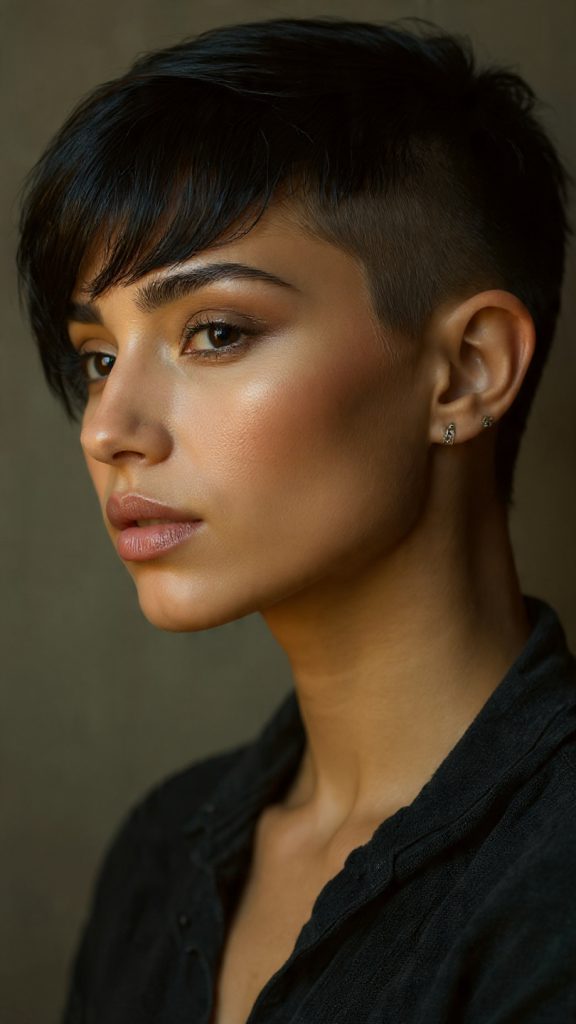
Keep the top long enough to form heavy, side-swept bangs that graze one eyebrow. Shave the opposite side completely—the asymmetry frames the face beautifully.

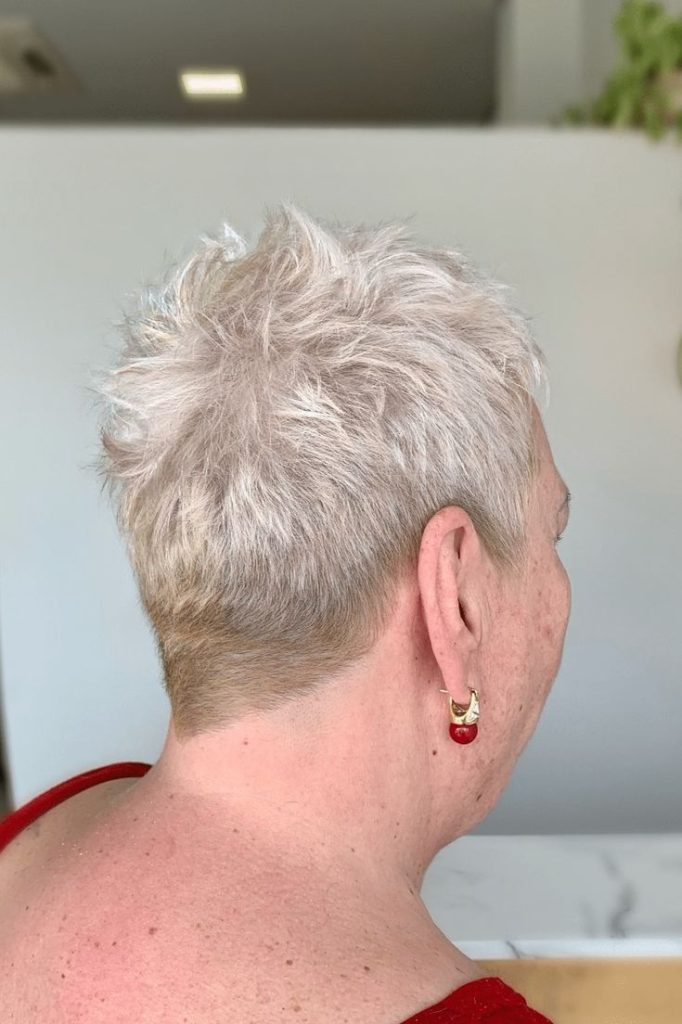
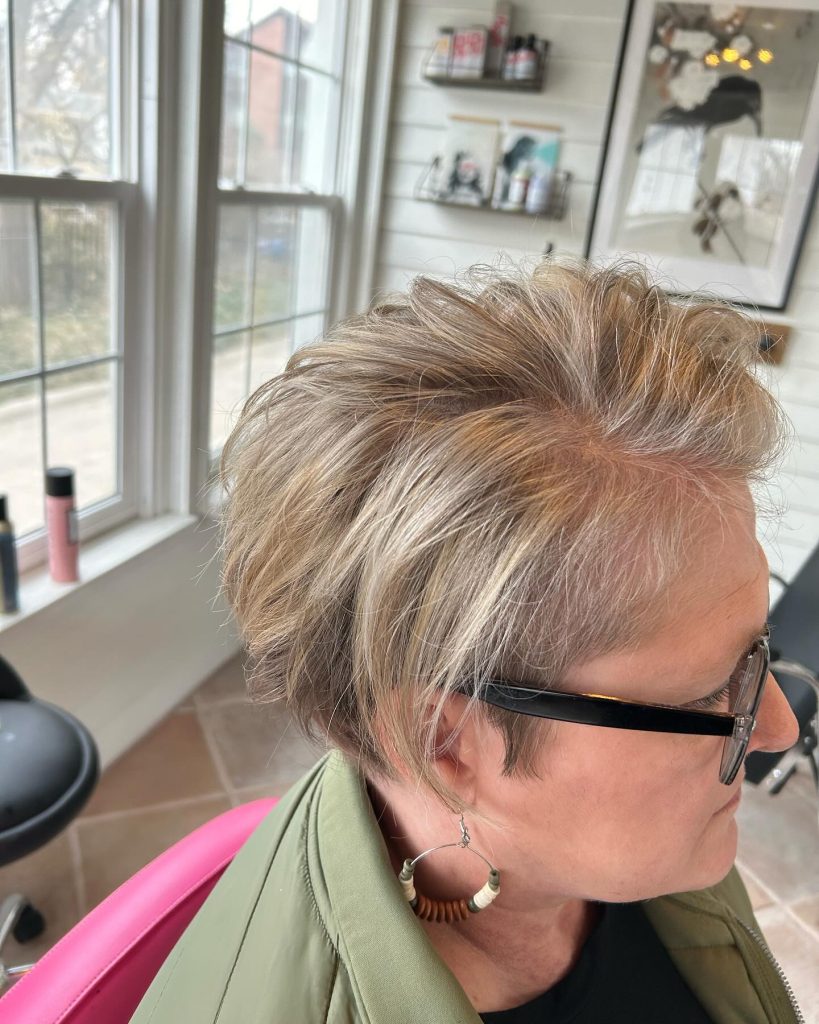
12. The Bleached Buzzed Sides


Shave the sides to a #1 or #2 guard, then bleach them platinum while keeping the top a natural brunette. It creates an optical illusion of more volume on top.
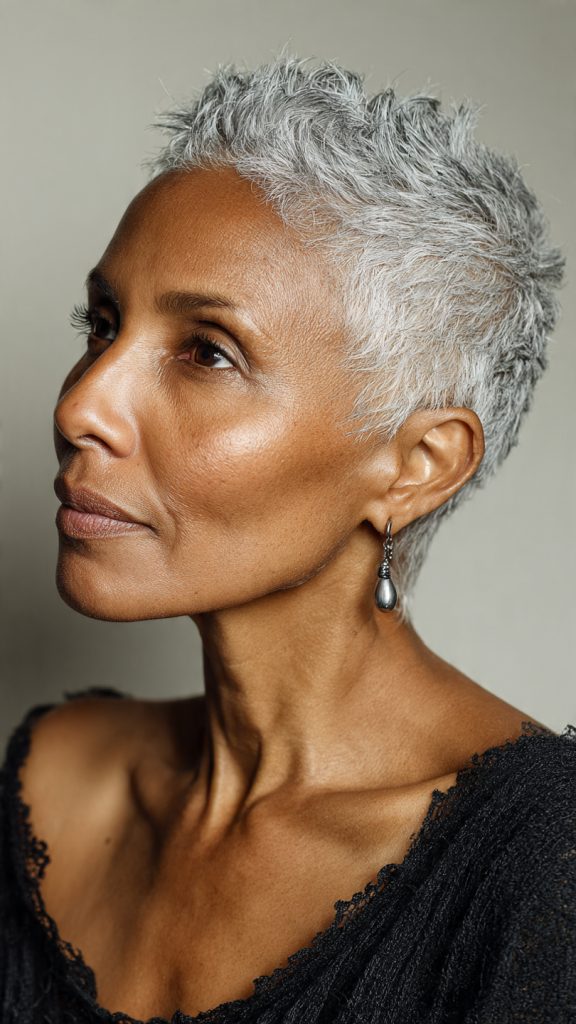
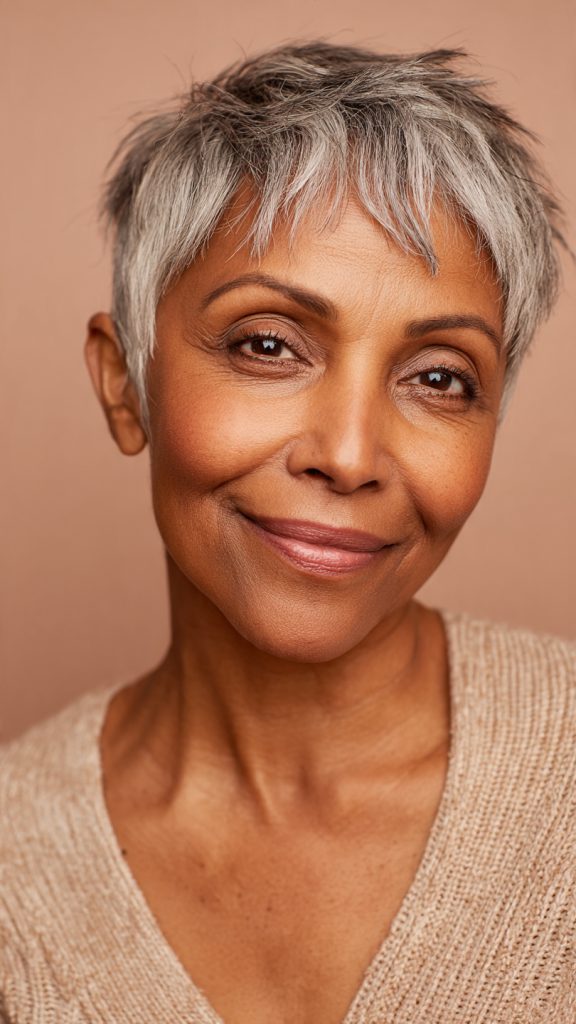
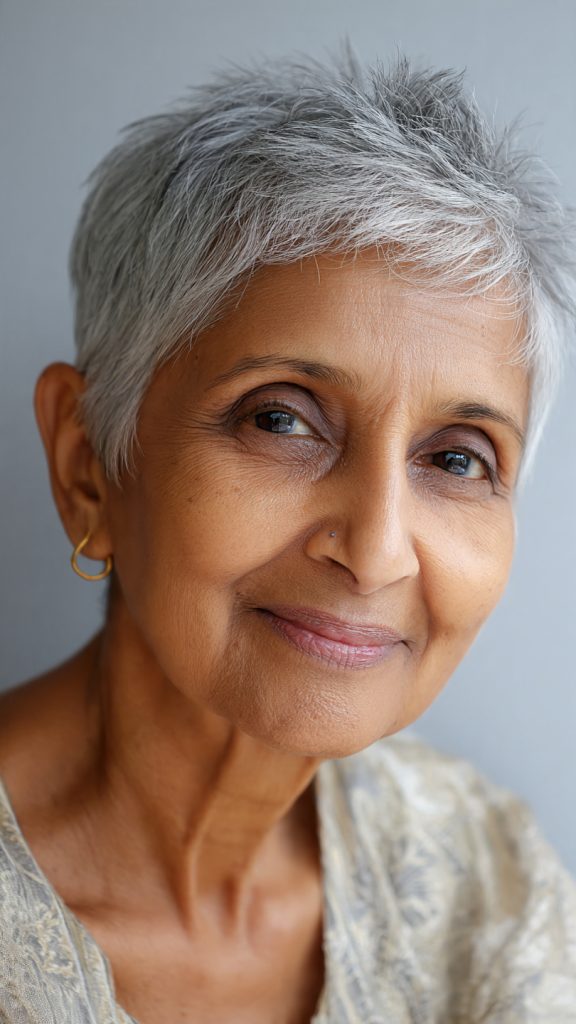
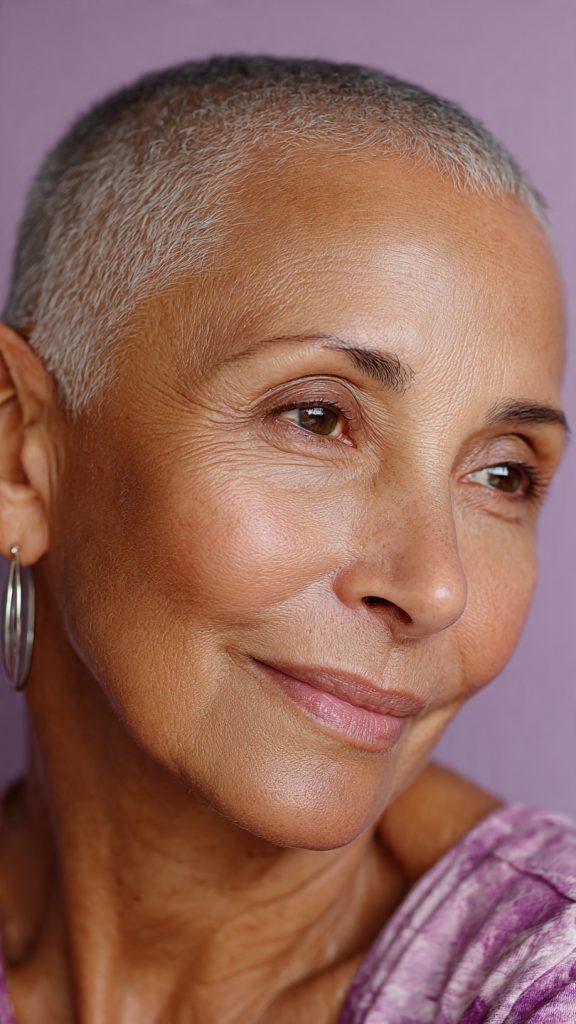
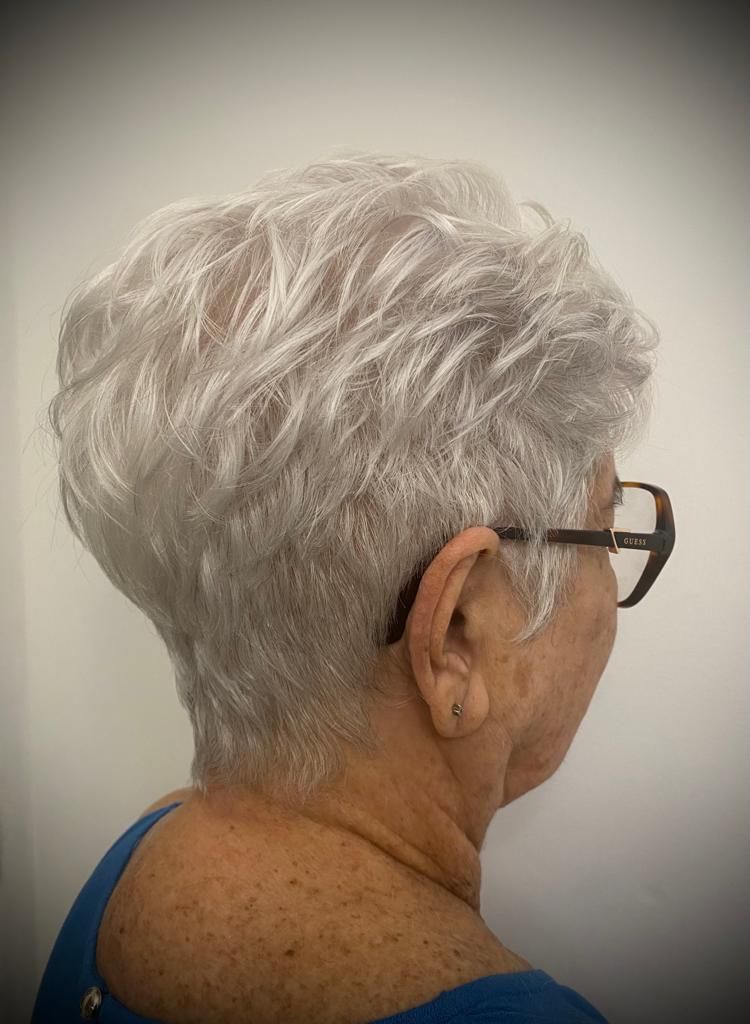
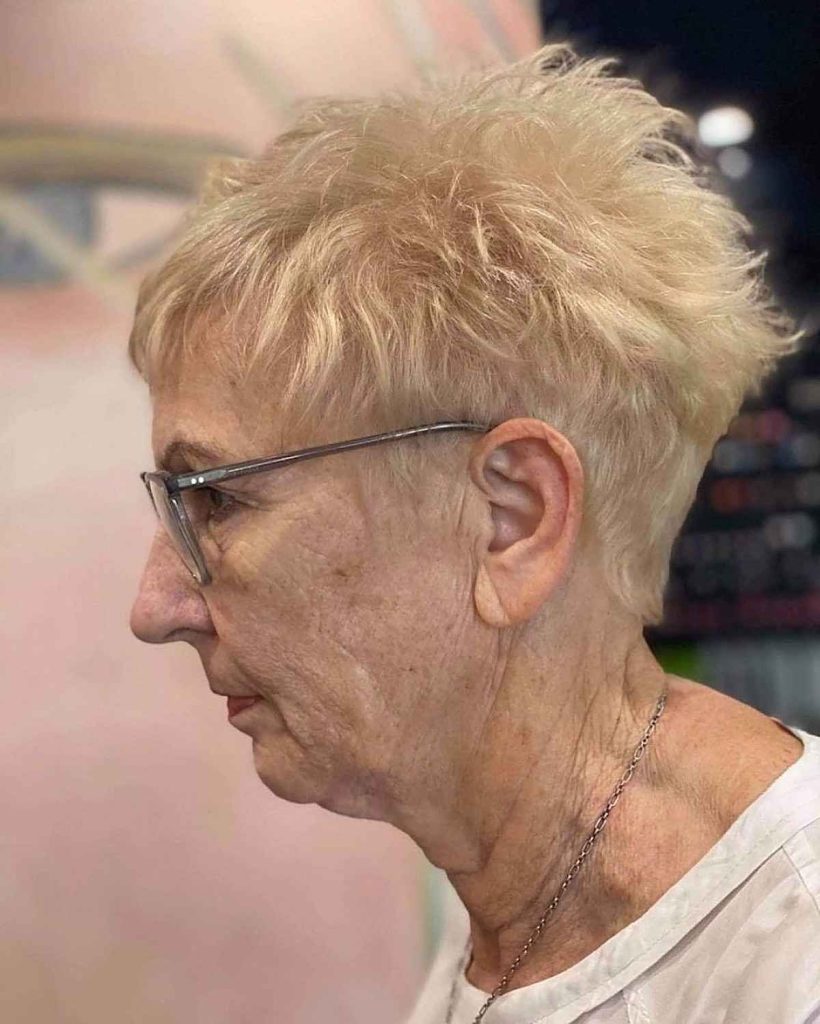
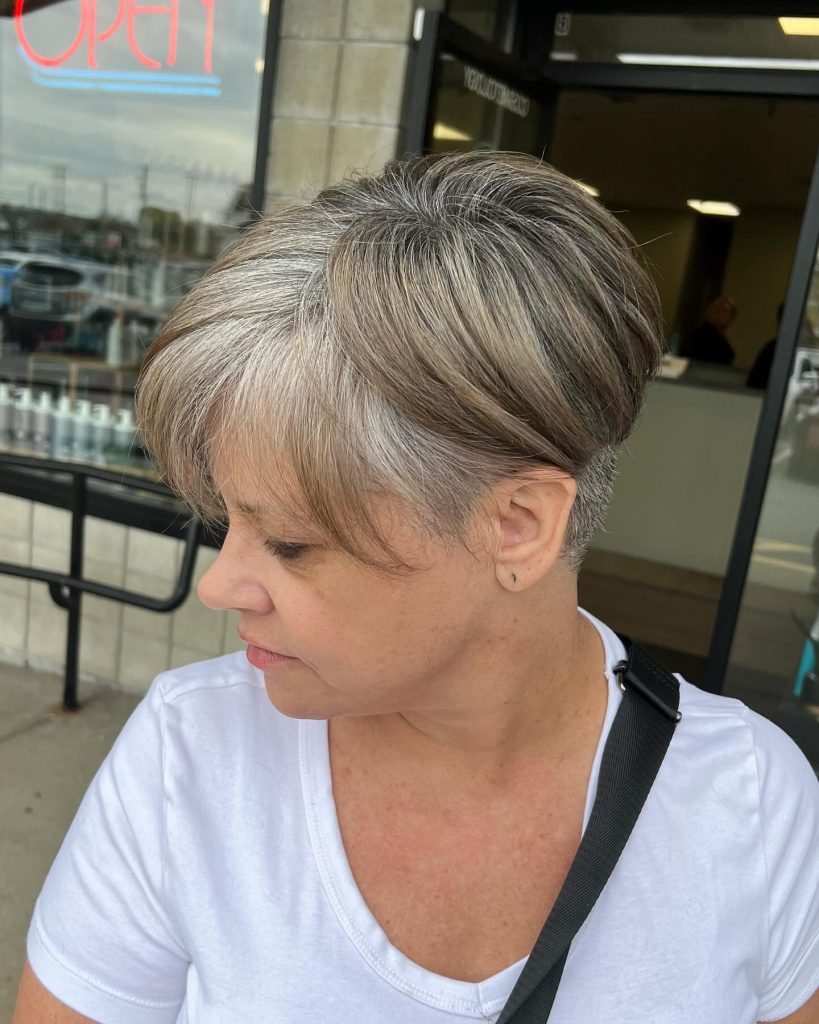
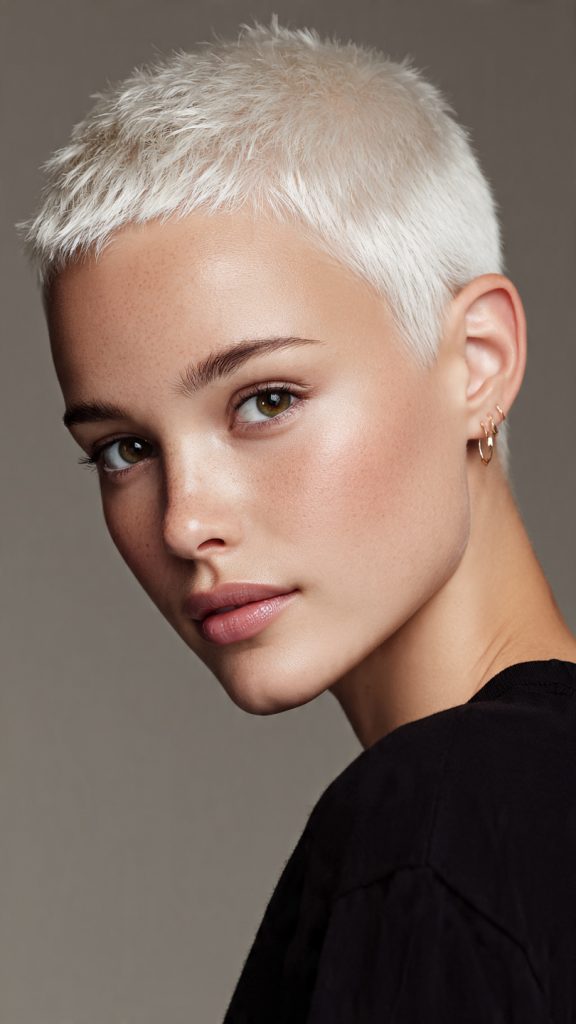
13. The Velvet Buzz


For a softer take, shave the sides but leave ½ inch of length (a “velvet” buzz cut length). The texture feels fuzzy and feminine while still bold.

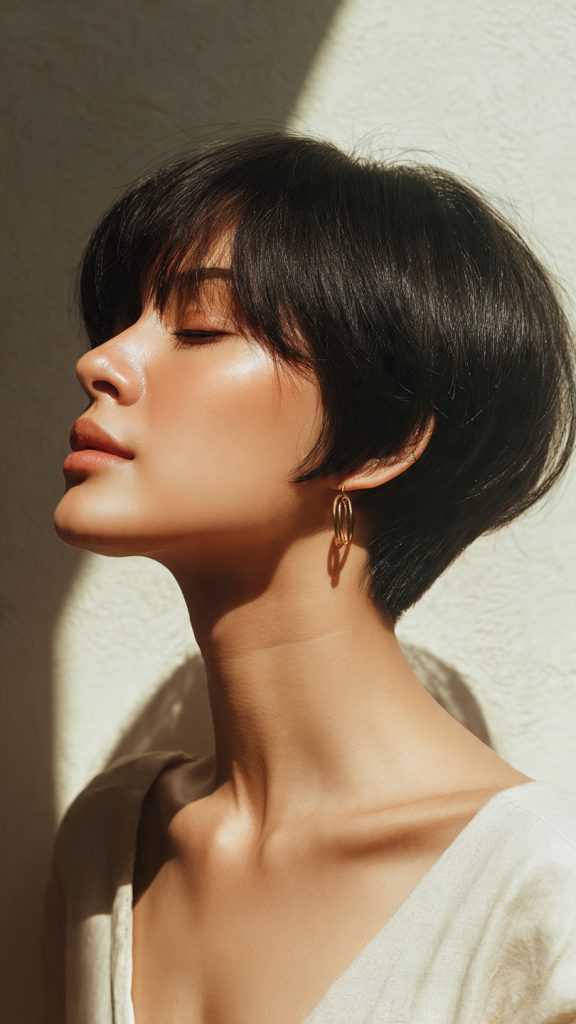
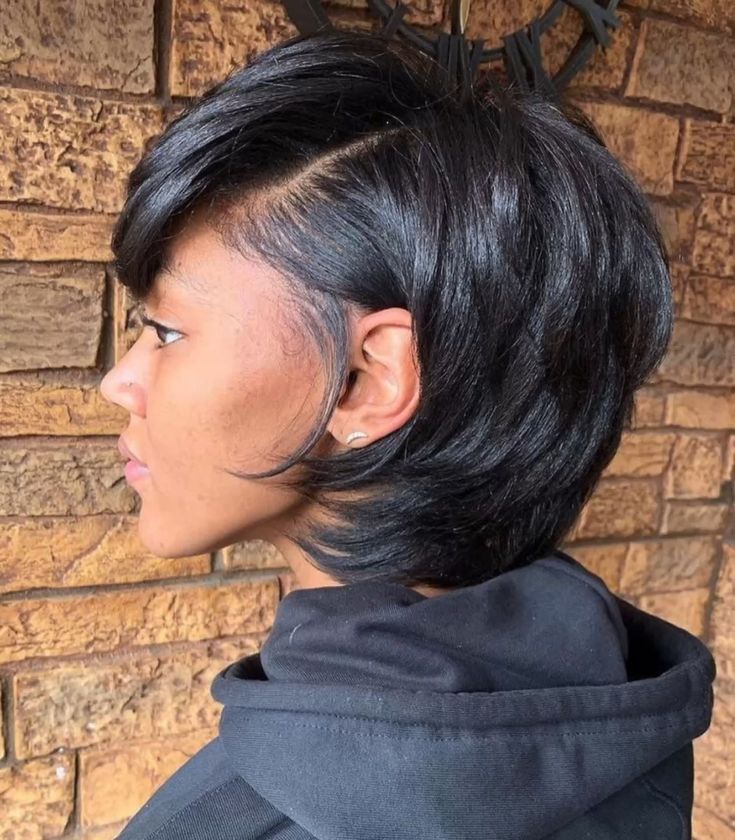
14. The Tucked-Behind-the-Ear Pixie


Shave only the area just above and behind one ear. Style the top so it naturally tucks behind that same ear, showing off the shaved patch as an accent.

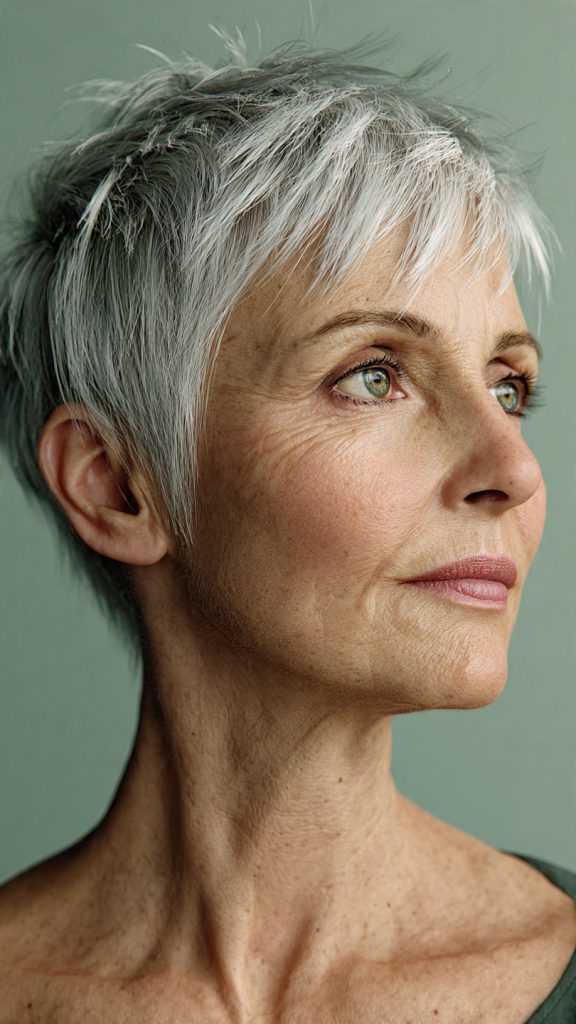
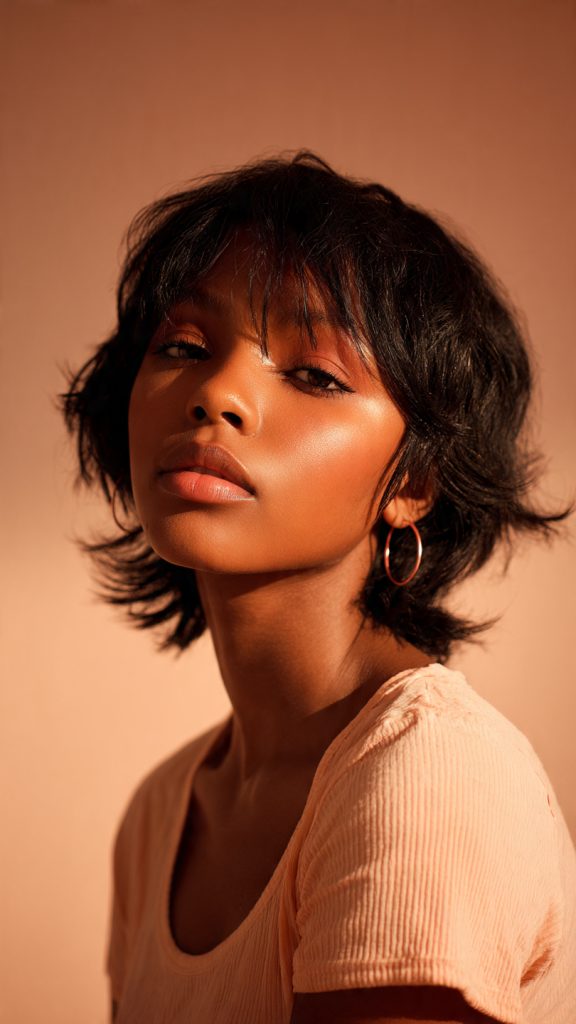
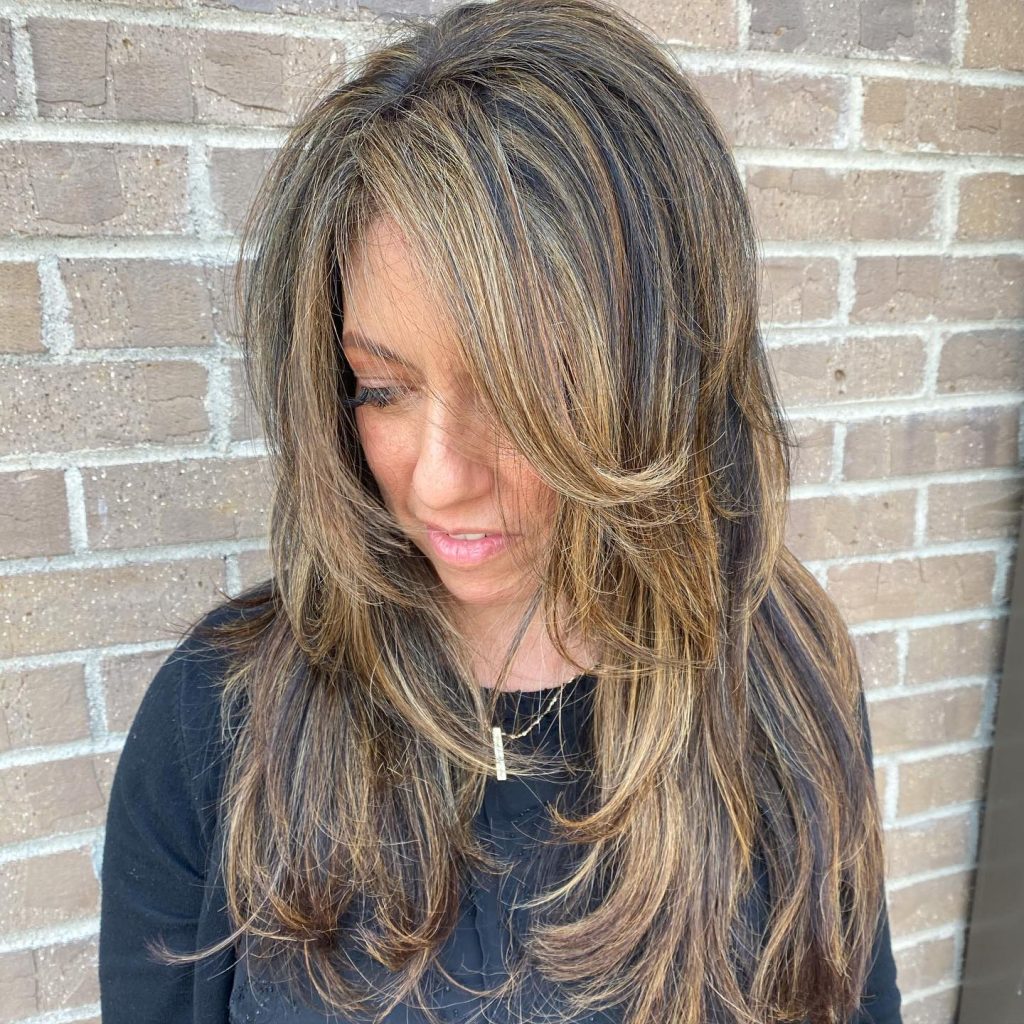
15. The Razored Layers on Top


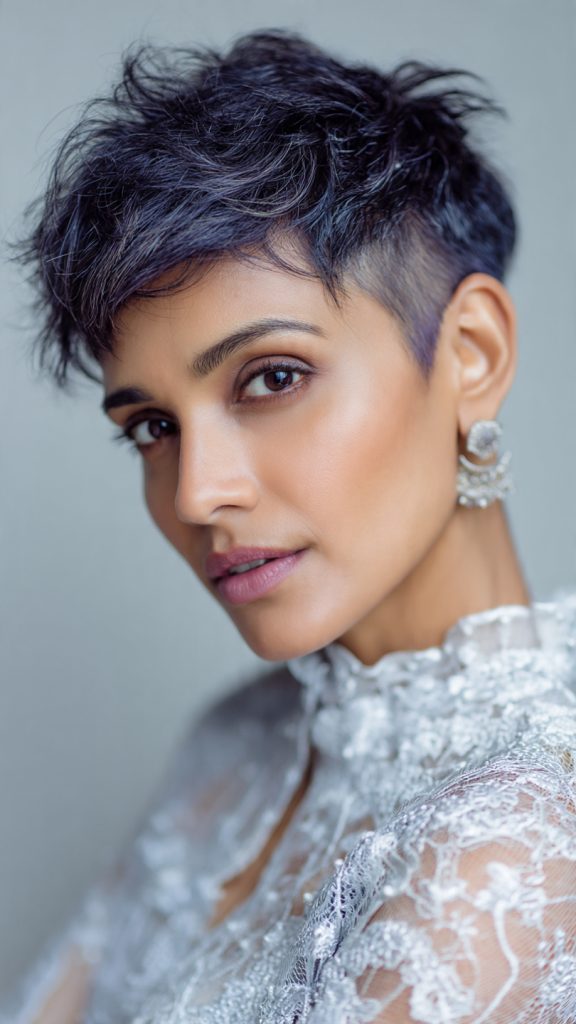
Have your stylist use a razor (not scissors) on the top section for wispy, piece-y texture. Shaved sides highlight every feathery layer.

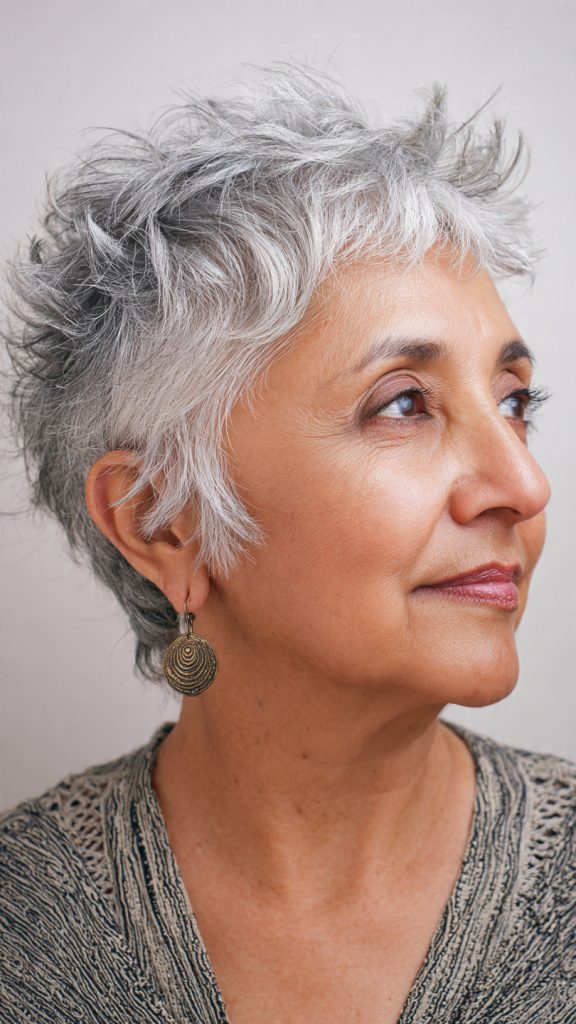
16. The Grown-Out Undercut


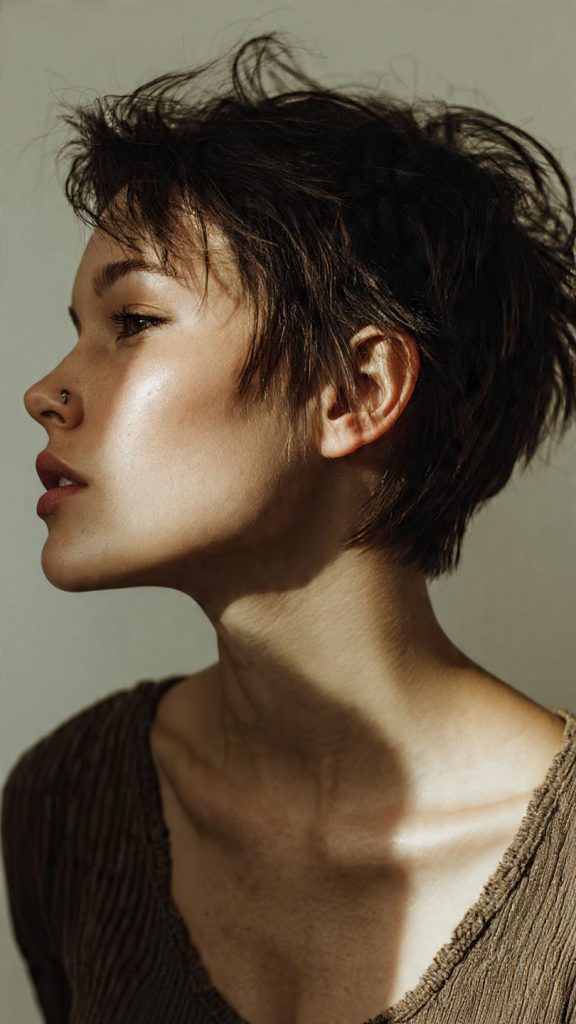
Start with a fully shaved side that has grown to 1 inch. Leave it longer and texturize it. This “messy grow-out” phase has its own cool, grunge appeal.

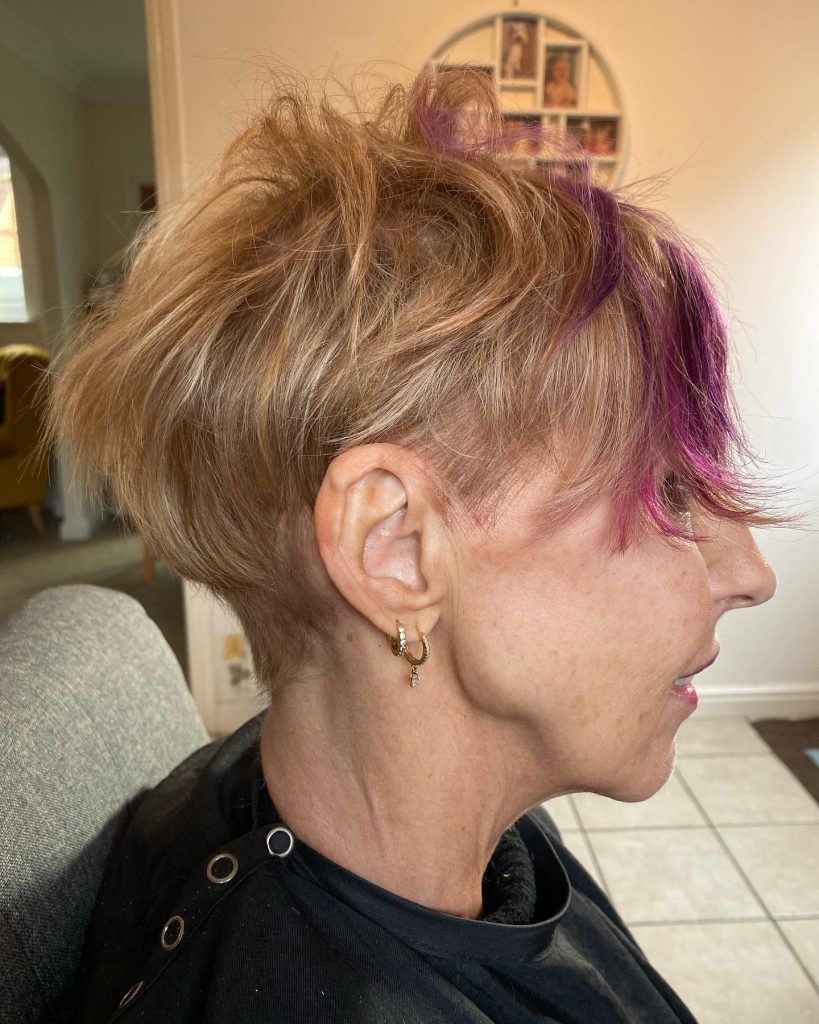
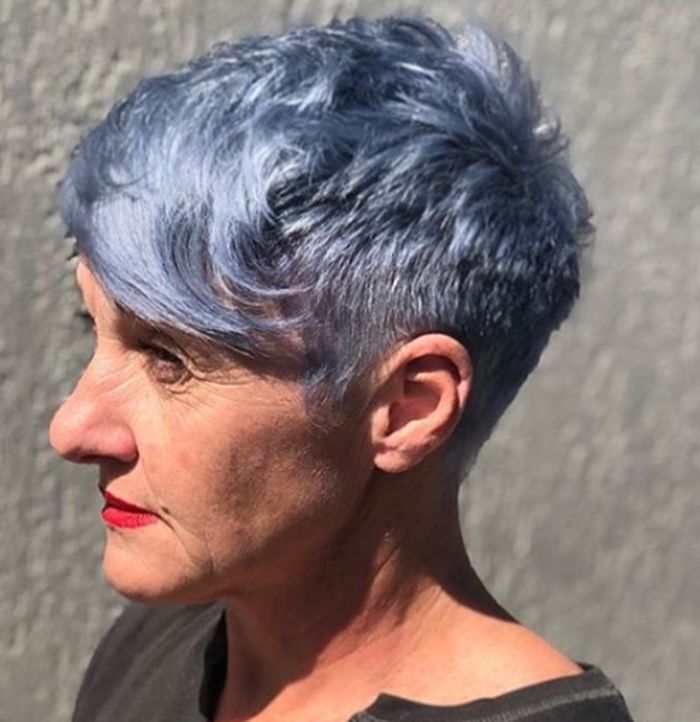
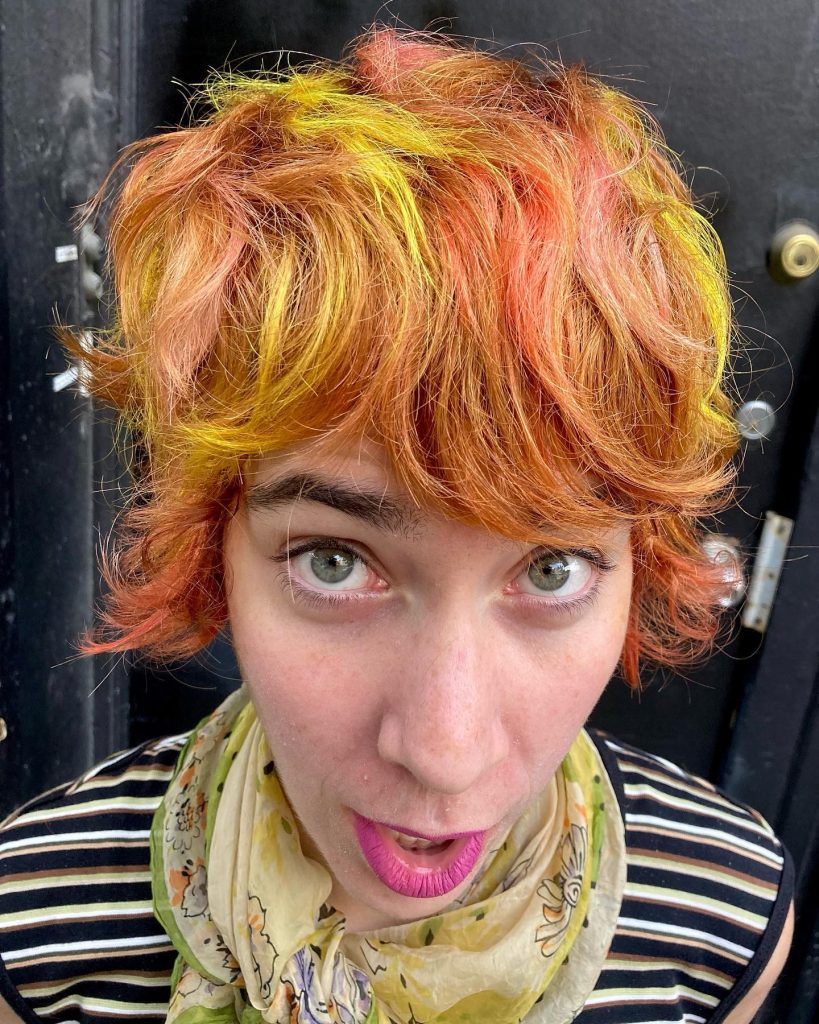
17. The Colored Root Smudge


Shave the sides and dye the longer top a vivid color (cobalt blue, emerald green). Then, smudge a darker shade into the roots of the top for a seamless blend into the shaved area.

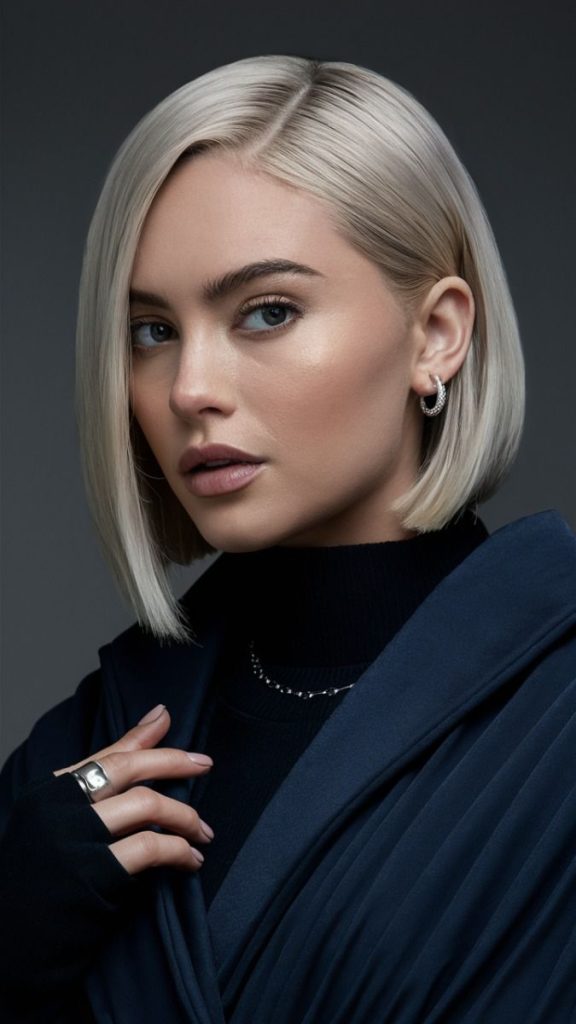
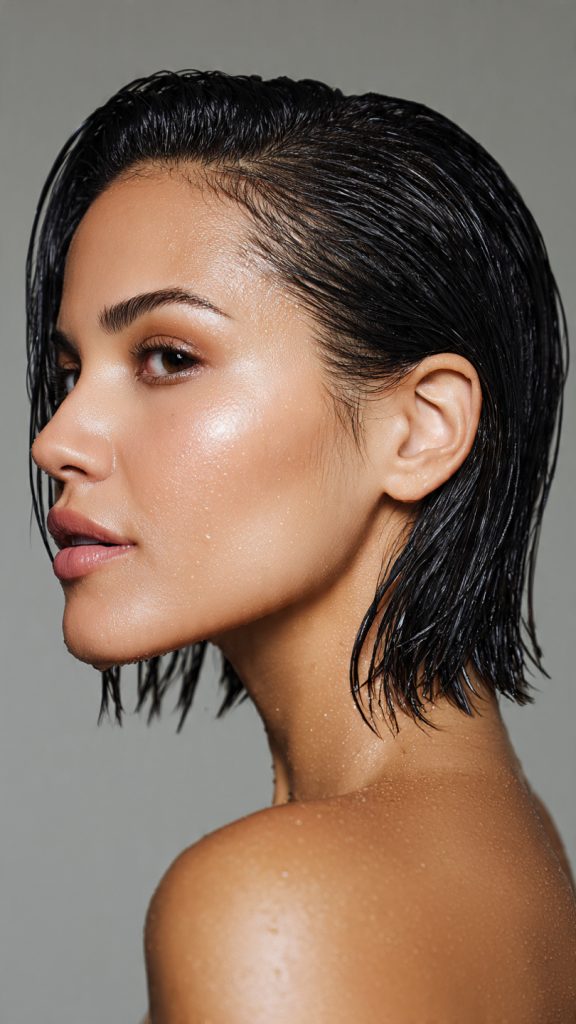
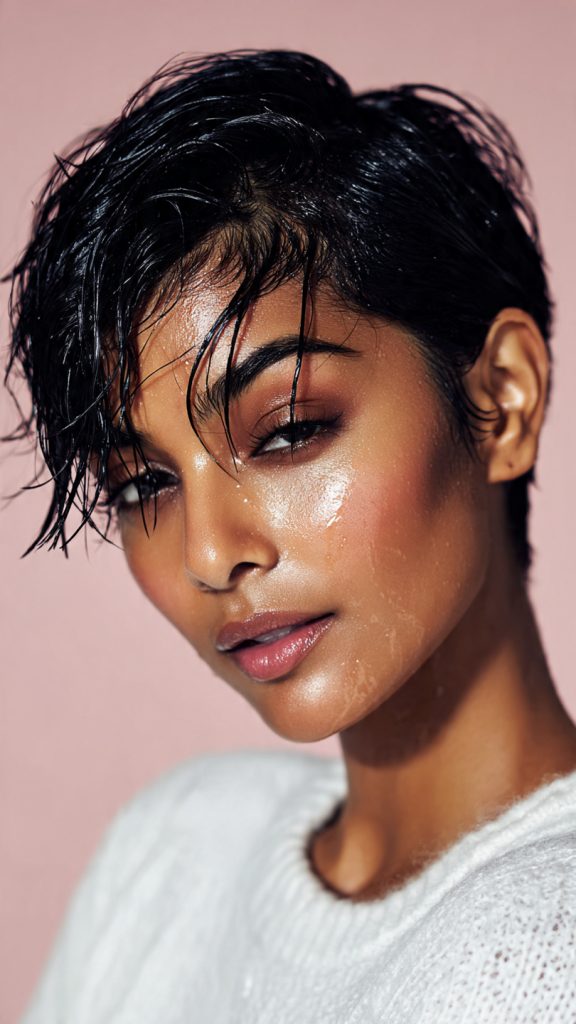
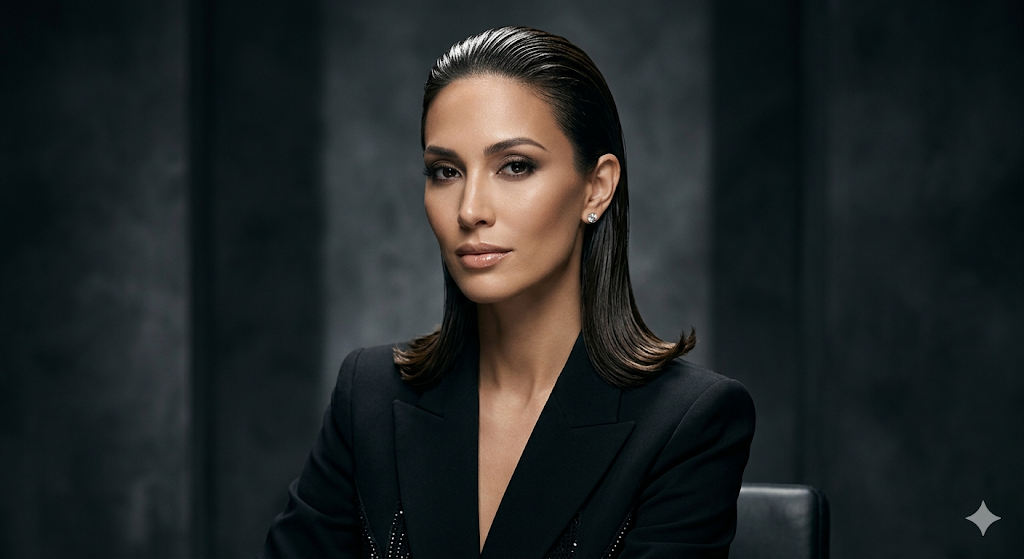
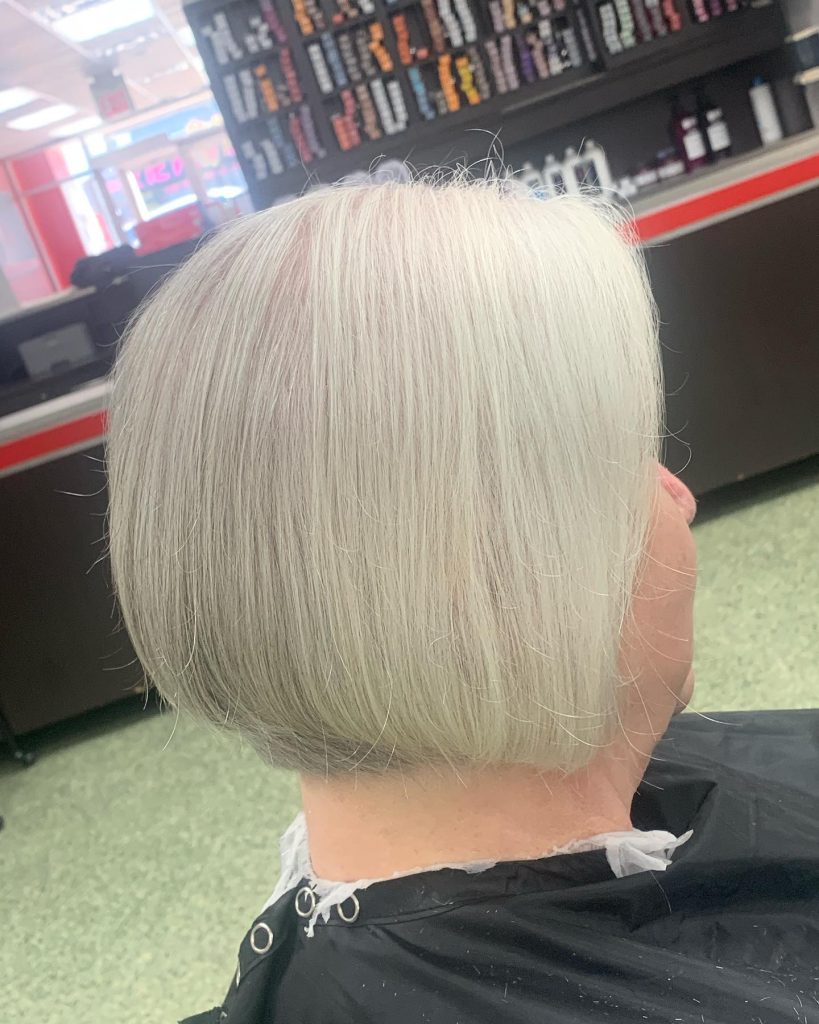
18. The Slicked-Back Wet Look


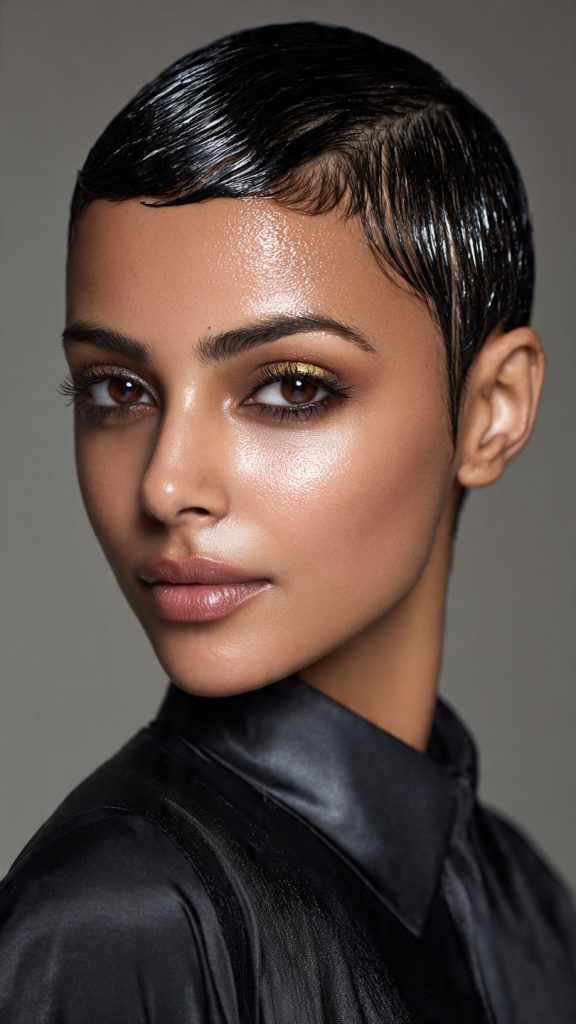
Use gel or pomade to comb the longer top flat and slick against your head. The shaved sides become sharp architectural lines—perfect for formal events.

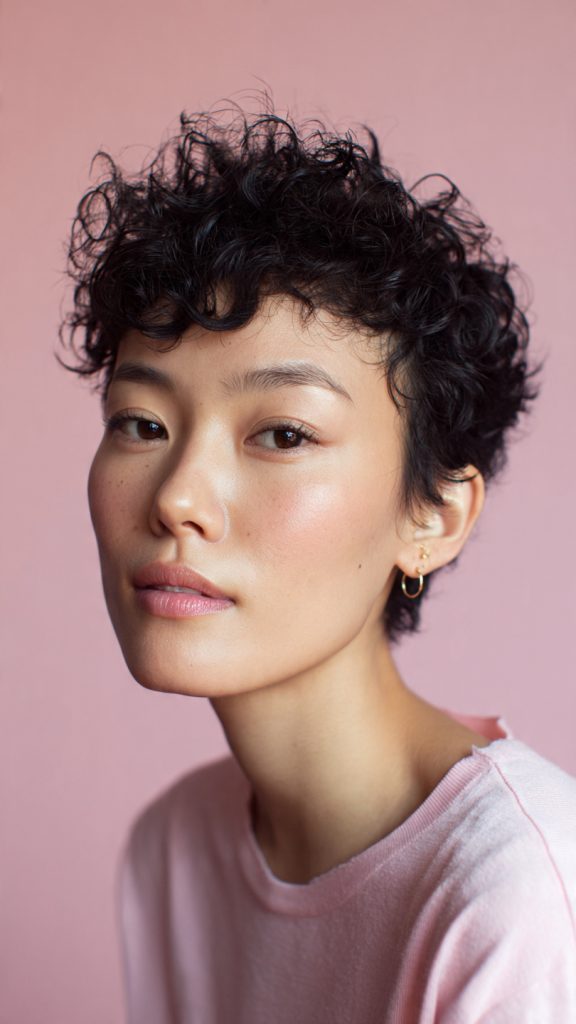
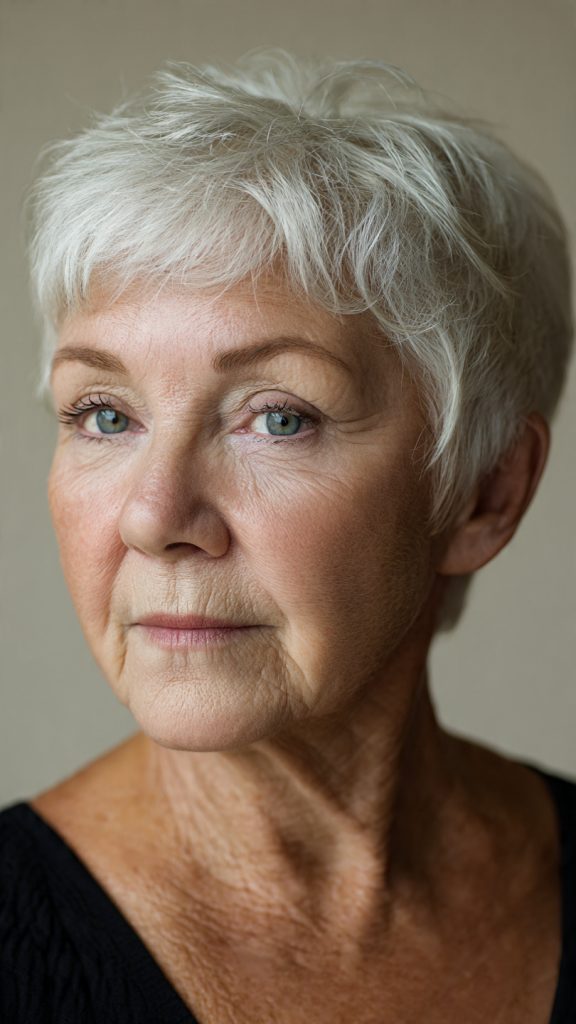
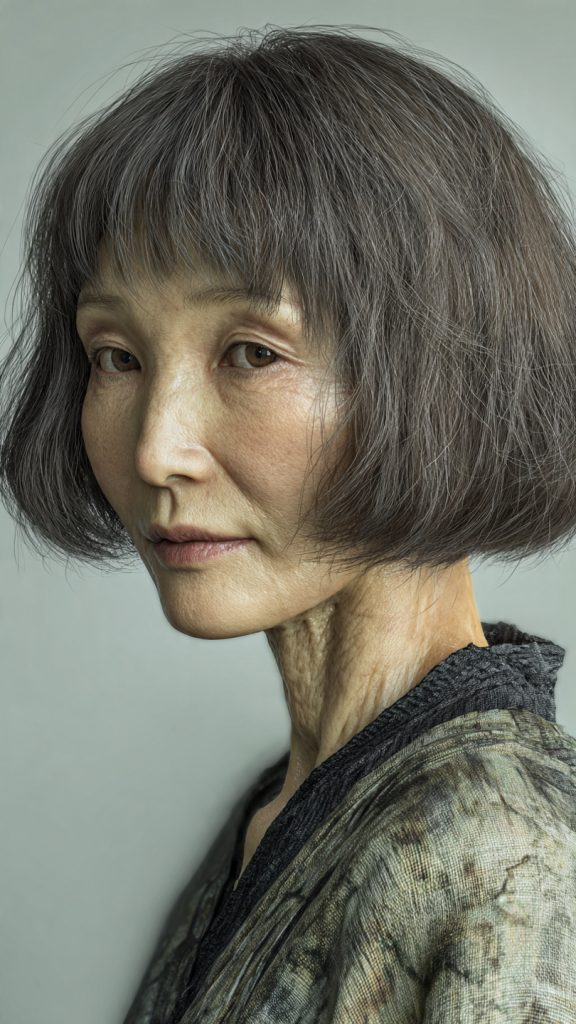
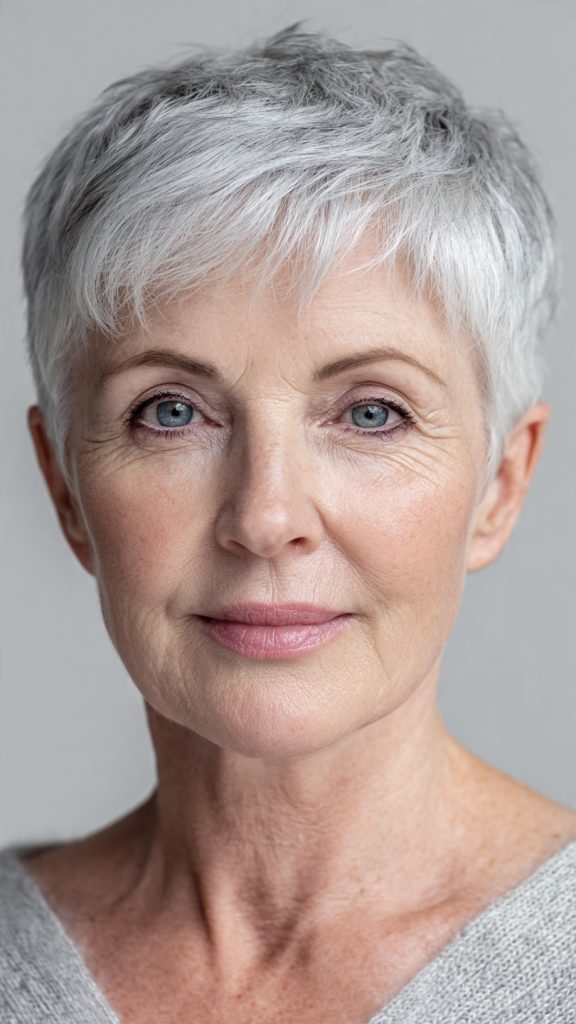
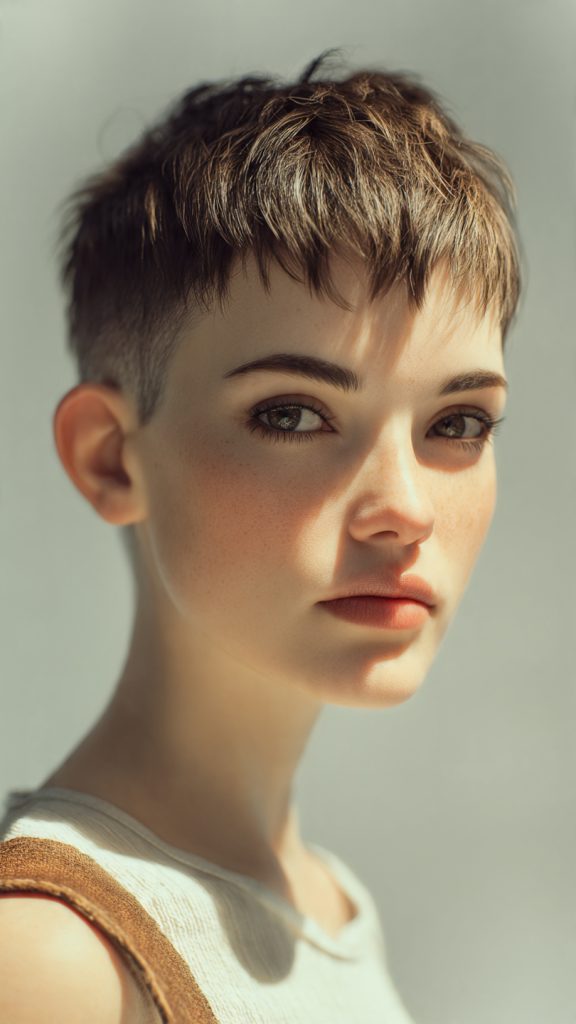
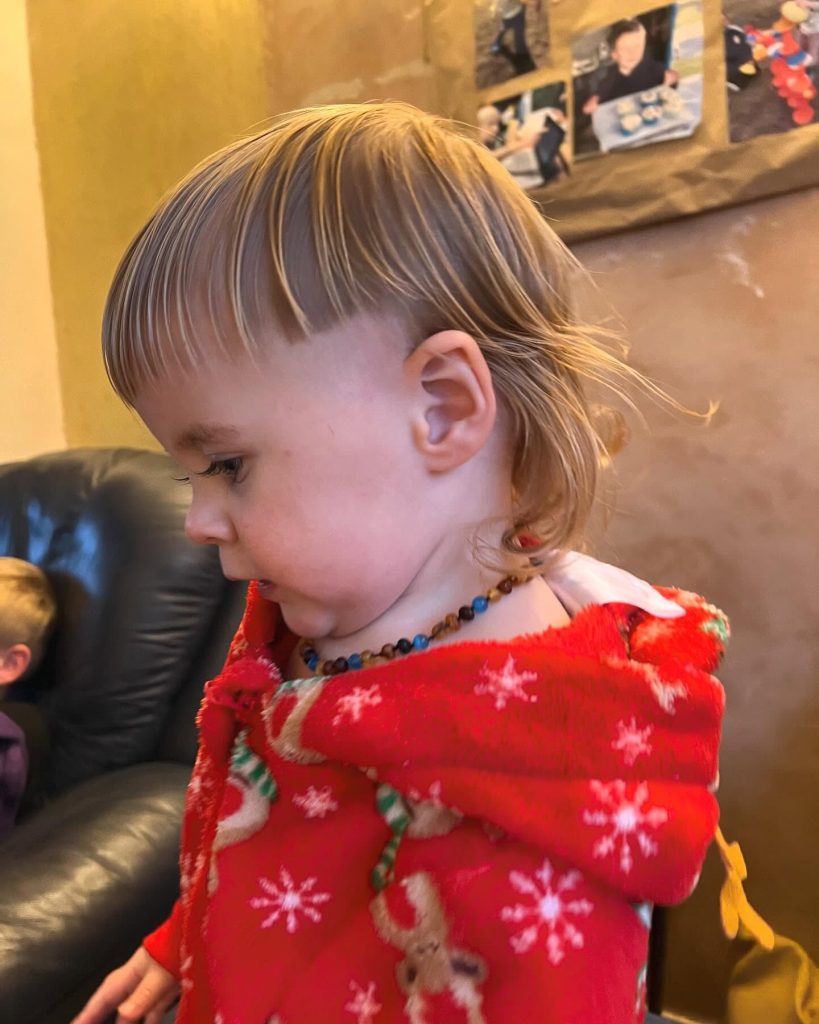
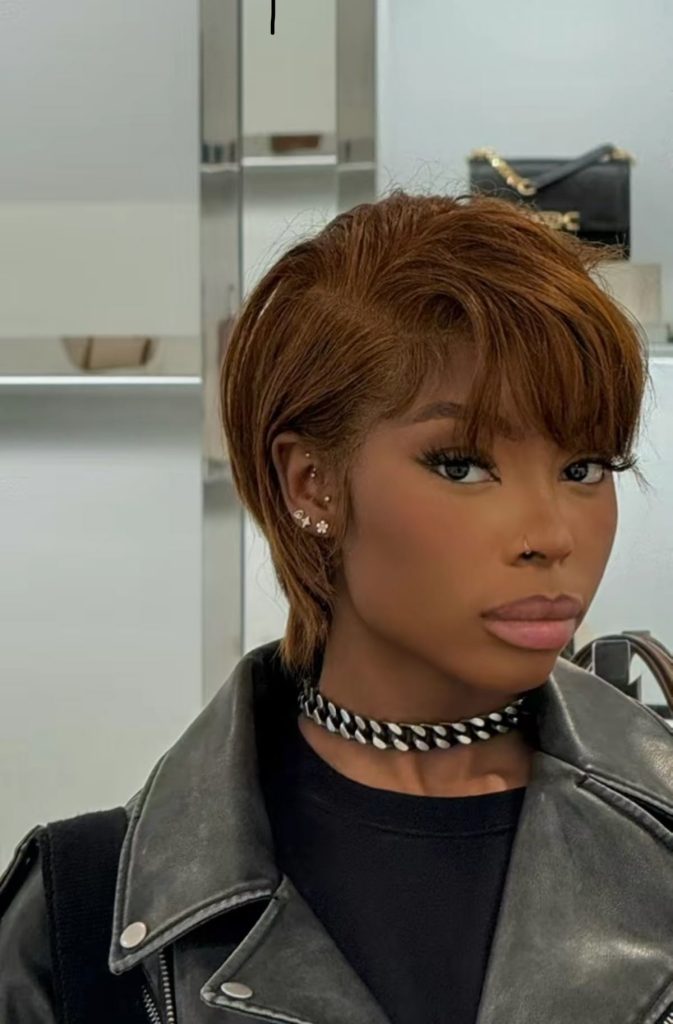
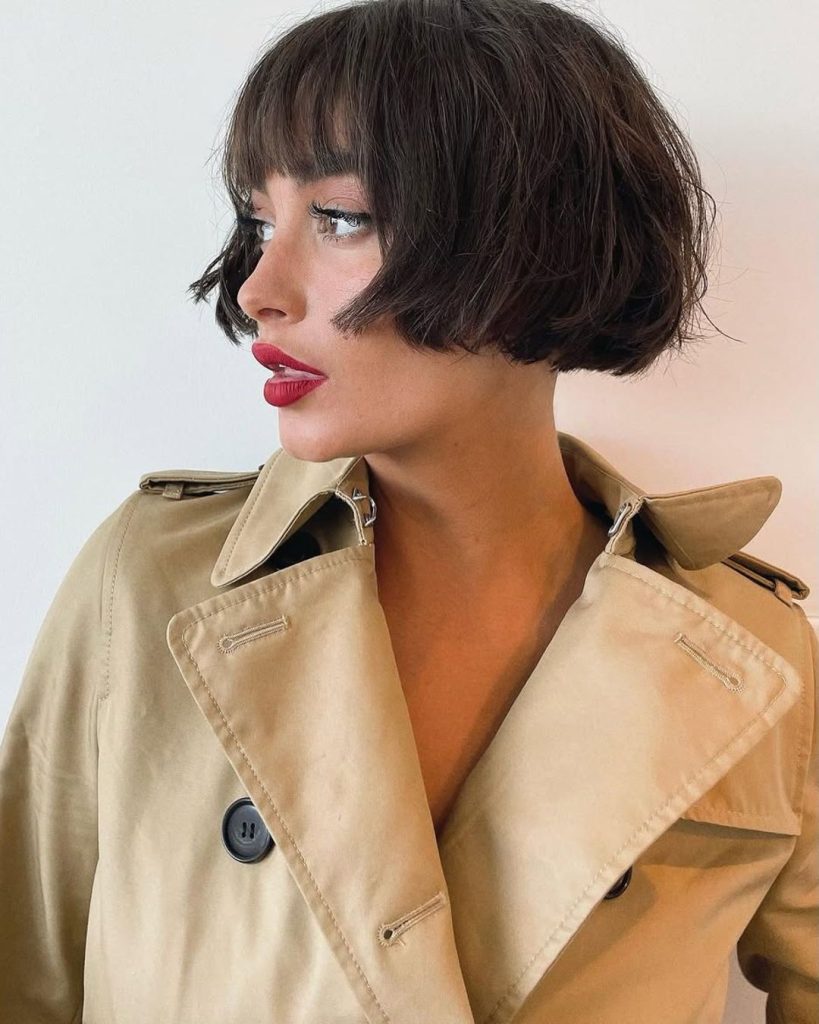
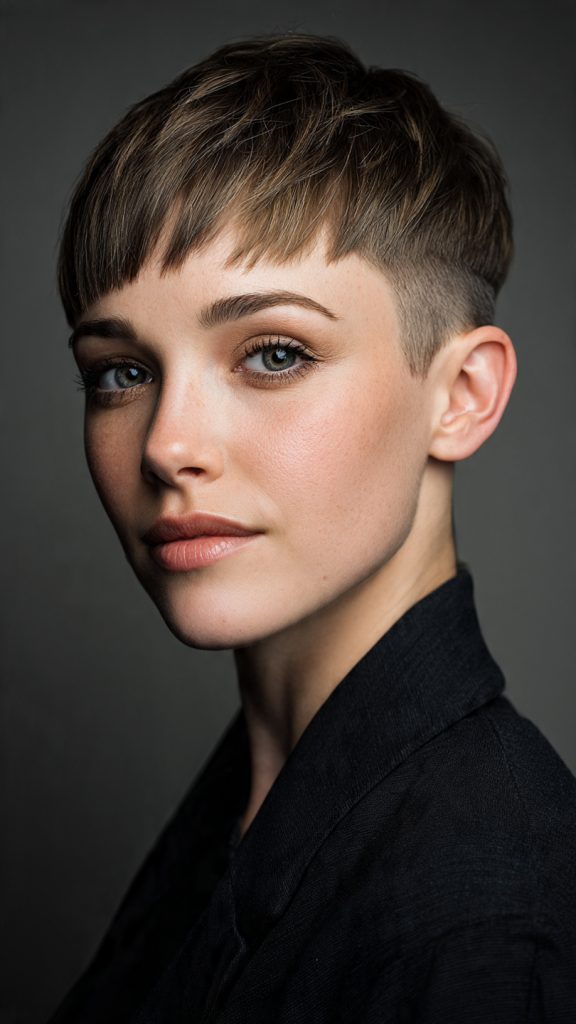
19. The Micro-Fringe Pixie


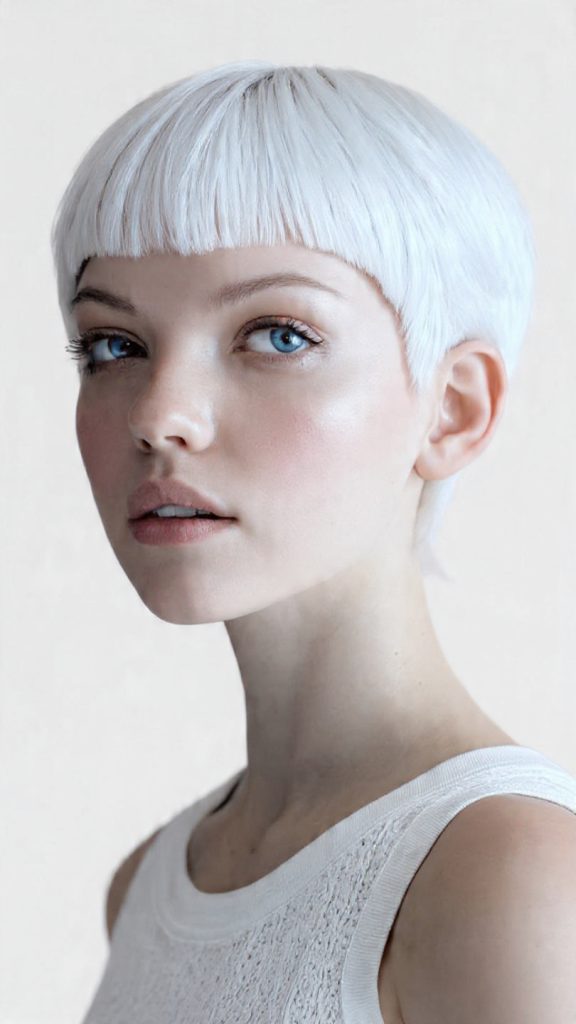
Cut the top into a short, blunt baby bang (micro-fringe) that sits 1 inch above your eyebrows. Shave both sides for a futuristic, mod-inspired silhouette.

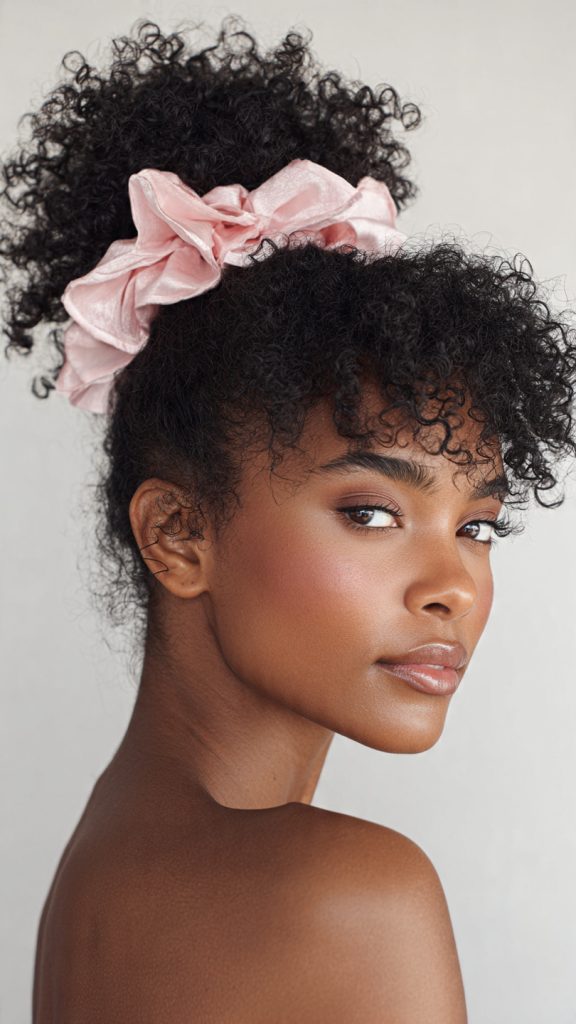
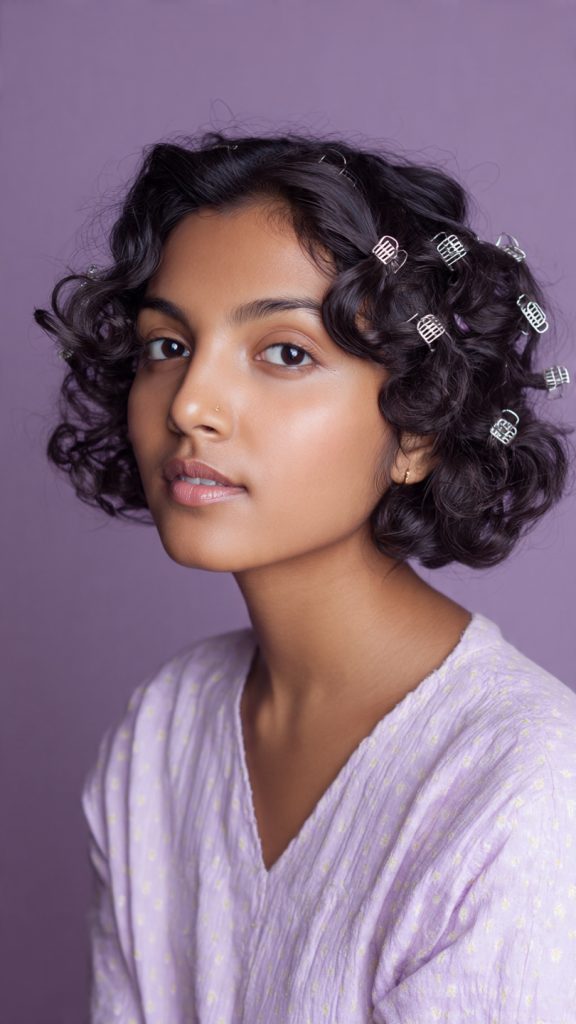
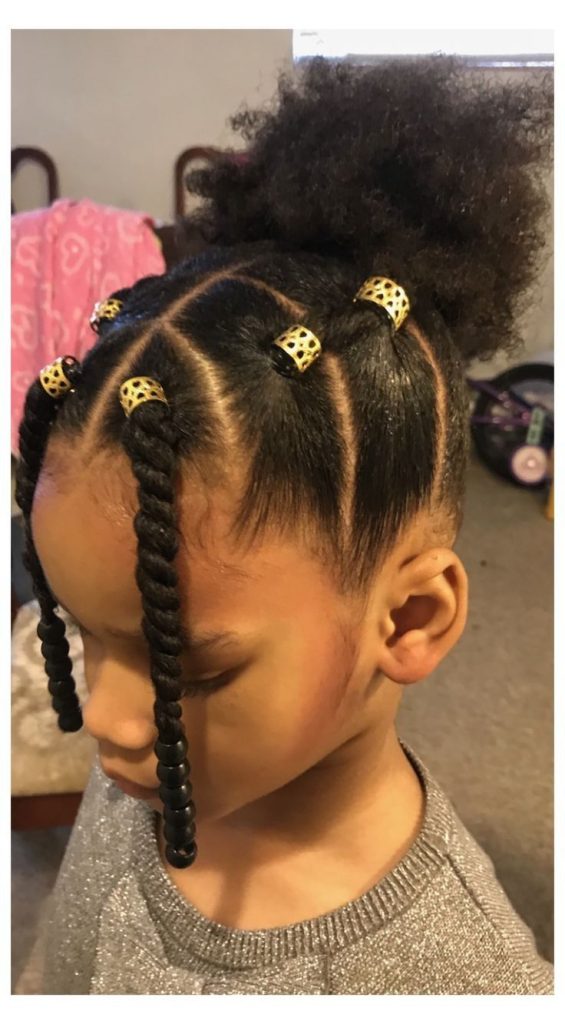
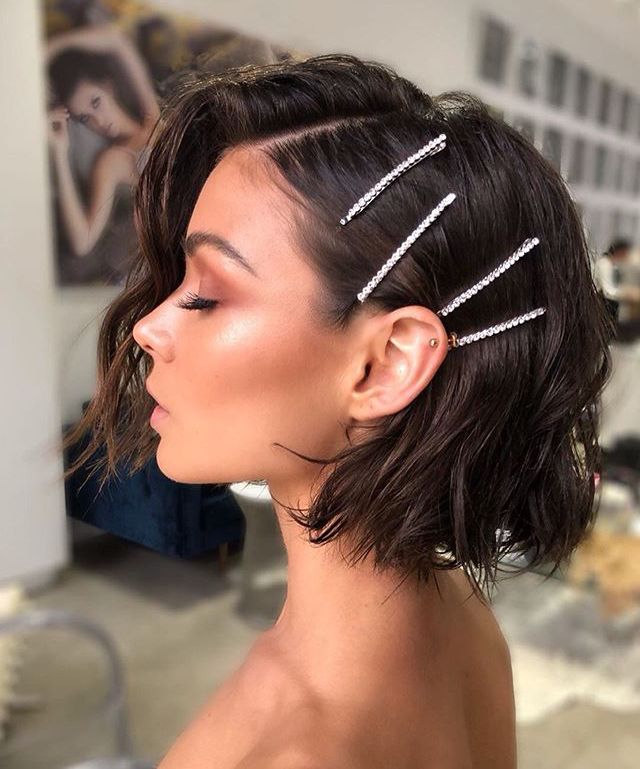
20. The Accessorized Shave


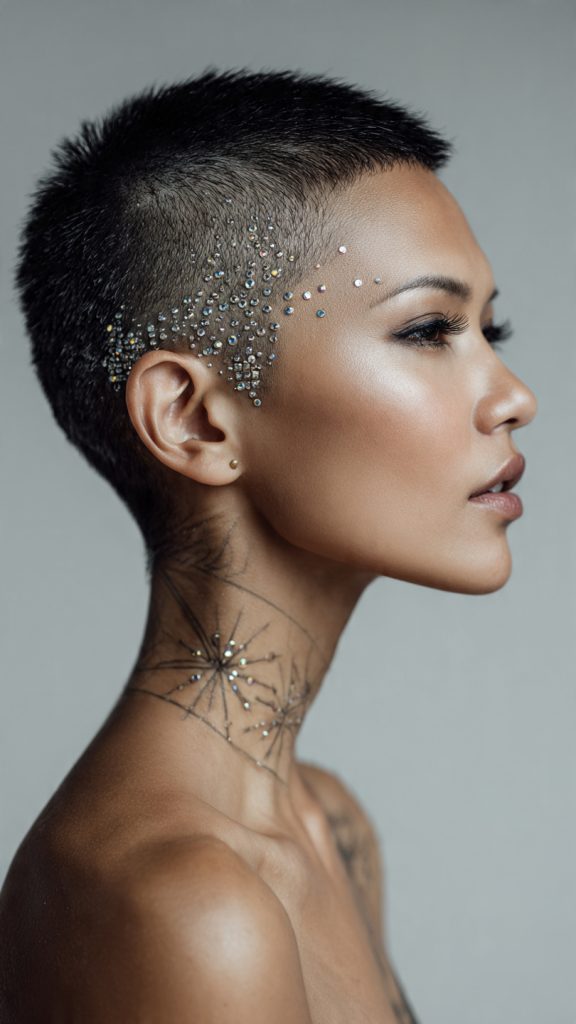
Once sides are shaved, decorate the buzzed area temporarily with metallic temporary tattoos, stick-on jewels, or colored hair powder. Change the design weekly for a new look.

What to Ask Your Stylist Before You Commit

Before you go under the clippers, book a consultation and bring these questions with you:

  • "What is my face shape, and how short should the sides go?" – Round faces often benefit from more height on top; oval faces can handle a full skin fade.
  • "How much length will you leave on top?" – Longer tops (3–4 inches) offer more styling versatility; shorter tops (1–2 inches) are lower maintenance.
  • "Will you use clippers, a razor, or scissors for the sides?" – Clippers give a clean, uniform shave; razors create softer, blurred transitions.
  • "How often will I need a touch-up?" – Shaved sides grow out visibly every 2–3 weeks. Budget for regular maintenance trims.
  • "Can you show me photos of your previous pixie undercuts?" – Always check a stylist's portfolio for evidence of clean, even clipper work.

Who This Haircut Works Best For

The pixie with shaved sides is surprisingly adaptable, but it shines brightest on:

  • Women with thick or coarse hair – Shaving the sides removes bulk and makes styling faster.
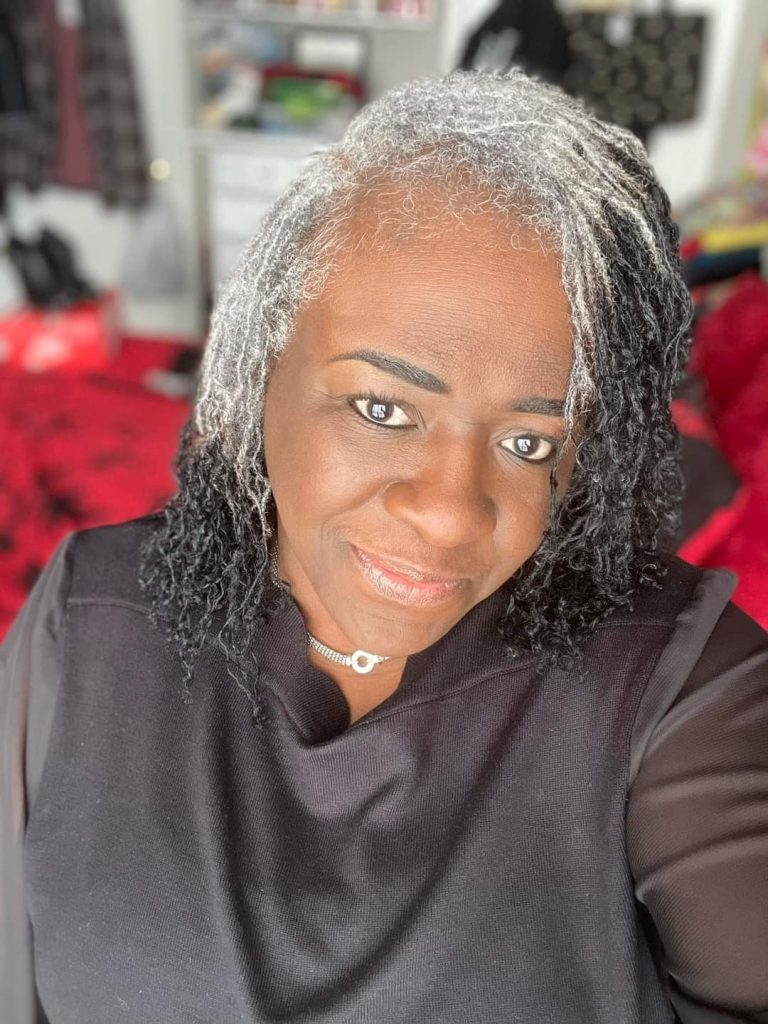
  • Women with fine, limp hair – The contrast of bare scalp against textured top creates instant volume illusion.
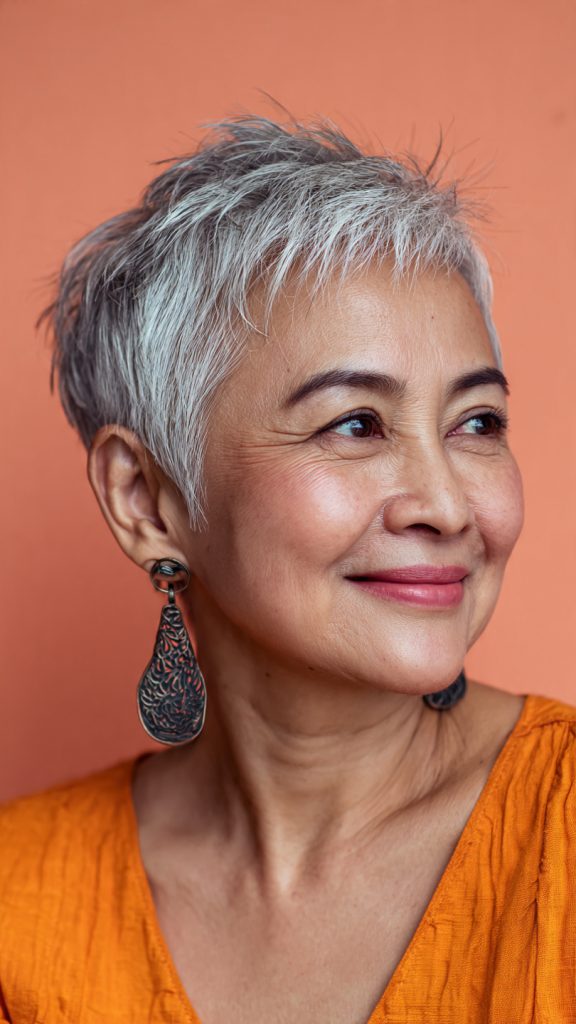
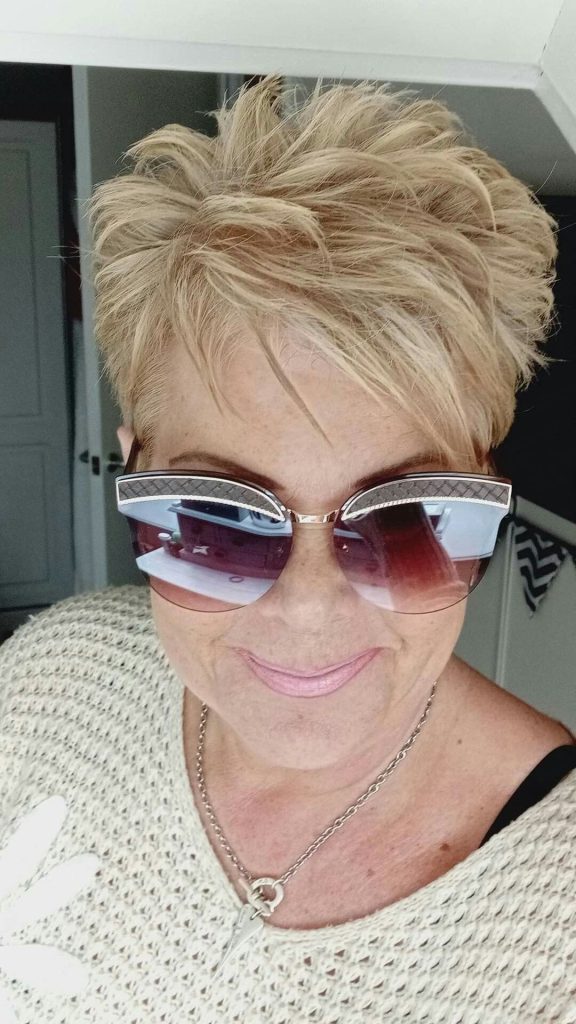
  • Women who wear glasses or bold earrings – Shaved sides frame accessories beautifully.
  • Women with active lifestyles – Less hair means less sweat, less drying time, and less product.
  • Women going through a style reinvention – This cut announces confidence and a fresh start.

That said, if you have very sparse hair on top or significant scalp sensitivity, talk to your stylist about a softer taper instead of a full shave.

Daily Styling & Maintenance Routine

Keeping your pixie with shaved sides looking sharp requires minimal effort but specific steps:

Morning routine (5 minutes):

  1. Spritz the longer top with water or a refresh spray.
  2. Apply a pea-sized amount of matte paste, wax, or lightweight pomade.
  3. Use your fingers to shape—sweep, spike, or tousle depending on your look.
  4. Optional: Run a trimmer over the shaved sides every 3–4 days to keep lines crisp.

Weekly maintenance:

  • Shampoo 2–3 times per week (less often for curly or dry hair).
  • Use a boar bristle brush on the shaved sides to exfoliate the scalp.
  • Re-shave designs or lines at home with a detail trimmer, or visit your barber.

Every 2–3 weeks:

  • Professional touch-up for the shaved areas ($15–$30 depending on your city).

Products to Keep on Hand

Product TypeRecommended ForExample
Matte paste or clayMessy, textured, spiked looksAmerican Crew Fiber, Hanz de Fuko Claymation
Pomade (medium hold)Slicked-back, polished stylesSuavecito, Layrite
Sea salt sprayAdding grit and volume to the topNot Your Mother's Beach Babe
Buzzer/trimmerAt-home side maintenanceWahl Lithium Ion or Philips Norelco
Dry shampooAbsorbing oil on the shaved sidesBatiste, Klorane

Common Concerns (And Honest Answers)

"Will it make me look too masculine?"
Not at all—the pixie with shaved sides reads as edgy and fashion-forward, not masculine. Keep the top longer and softer, or add earrings and makeup to balance as you prefer.

"How bad is the grow-out phase?"
Honestly, it can be awkward. The shaved sides will puff out like a mushroom for about 6–8 weeks. Plan for a "transition cut" (like a stacked bob) or use headbands and clips during that time.

"Can I still put my hair in a ponytail?"
Only if the top is at least 4–5 inches long. Most pixies with shaved sides won't pull back fully, but you can use bobby pins or small claw clips to lift the top.

"Will it damage my hair?"
No. Shaving doesn't damage hair; it only removes already-grown strands. In fact, giving your ends a break from heat and color can improve overall hair health.

Adapting for Different Hair Textures

  • Straight hair: Works beautifully but shows every line. Ask for a precise, clean fade.
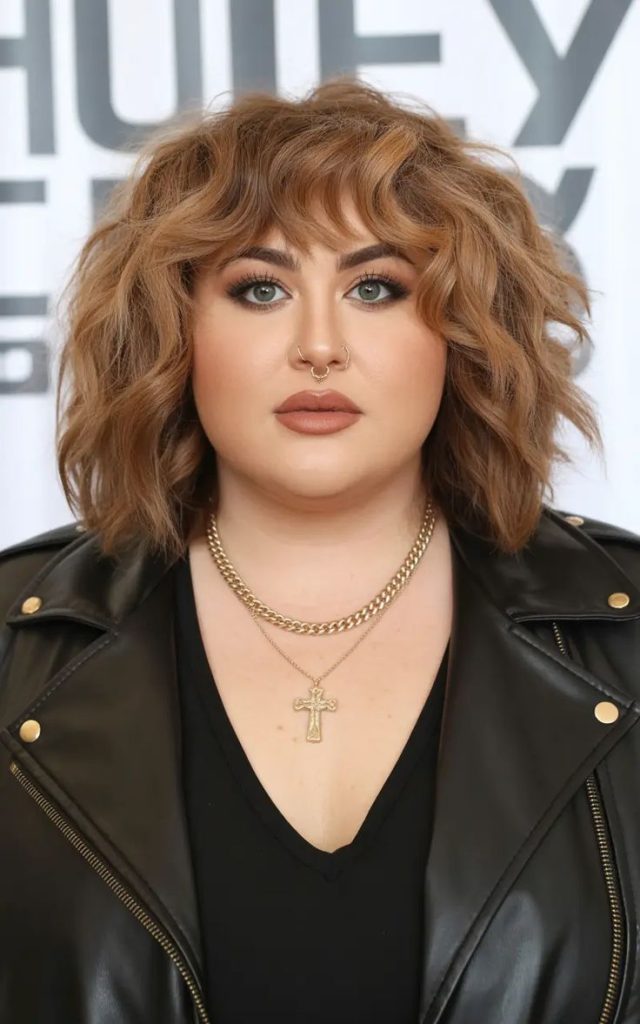
  • Wavy hair: Ideal. Waves add movement on top while sides stay sharp.
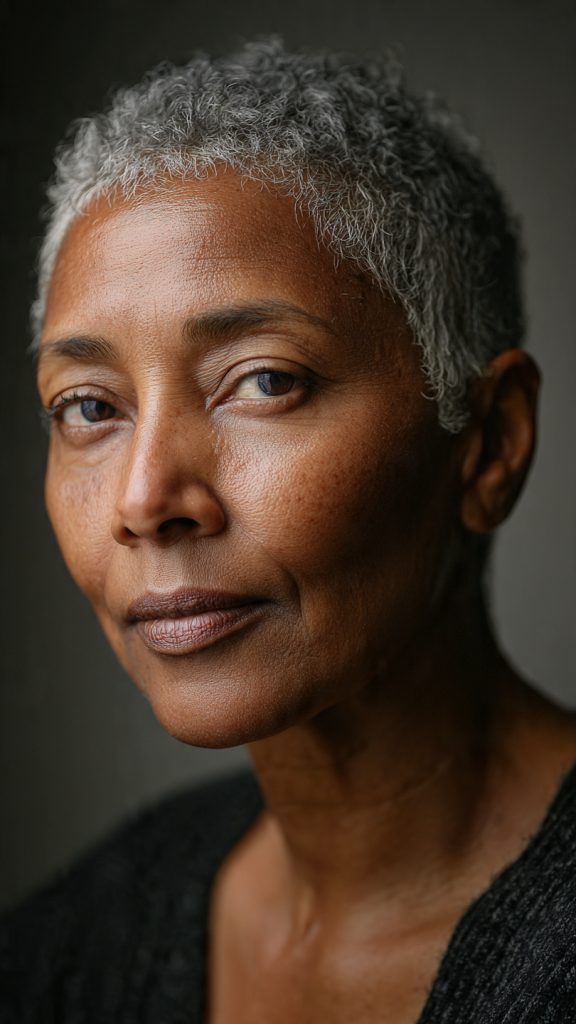
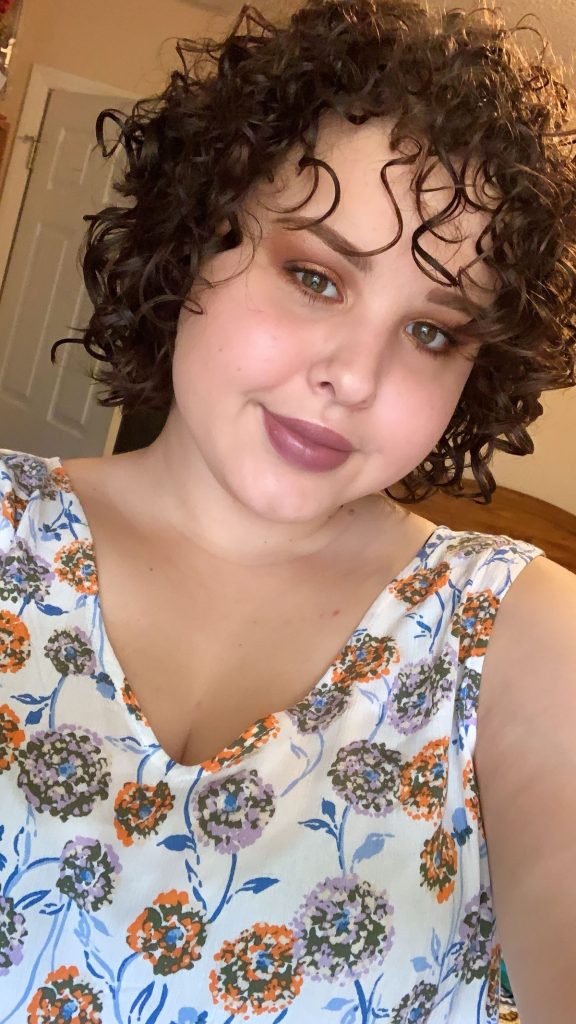
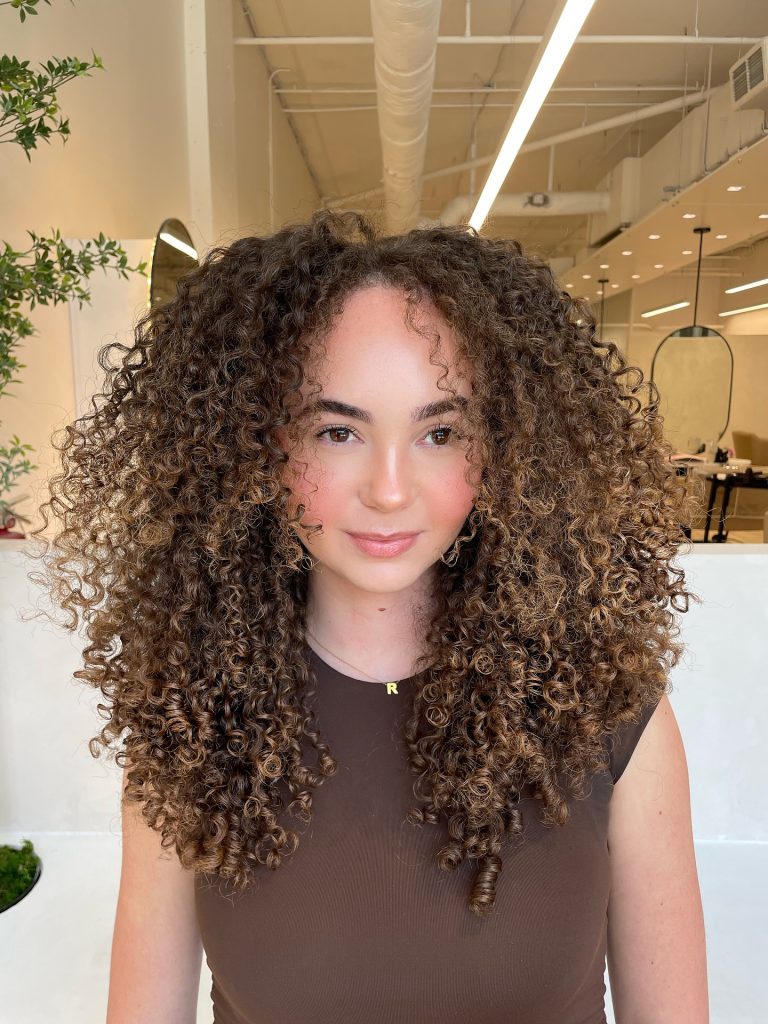
  • Curly hair (type 3a–4c): Stunning. Keep the top hydrated with leave-in conditioner. Curls will shrink, so ask for more length than you think you need.
  • Coily/kinky hair: A fade on the sides looks incredible. Use a sponge brush or curl definer on top.

Conclusion

The pixie cut with shaved sides is far more than a trend—it's a statement of personal freedom, practicality, and style. Whether you choose a dramatic undercut with platinum color, a soft velvet buzz with natural curls, or a hidden nape shave that only you know about, this haircut delivers on every front: low maintenance, high impact, and endlessly customizable.

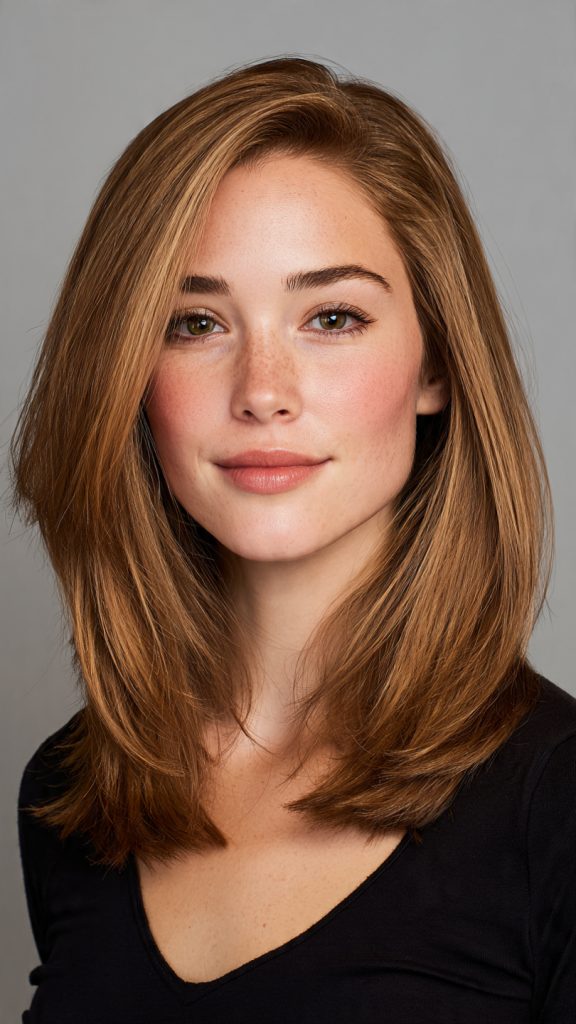
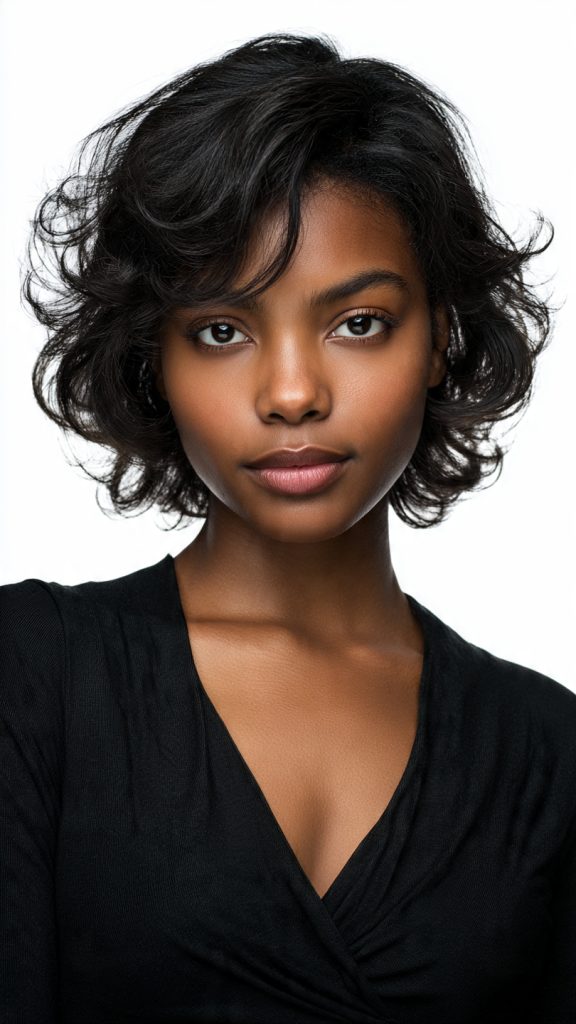
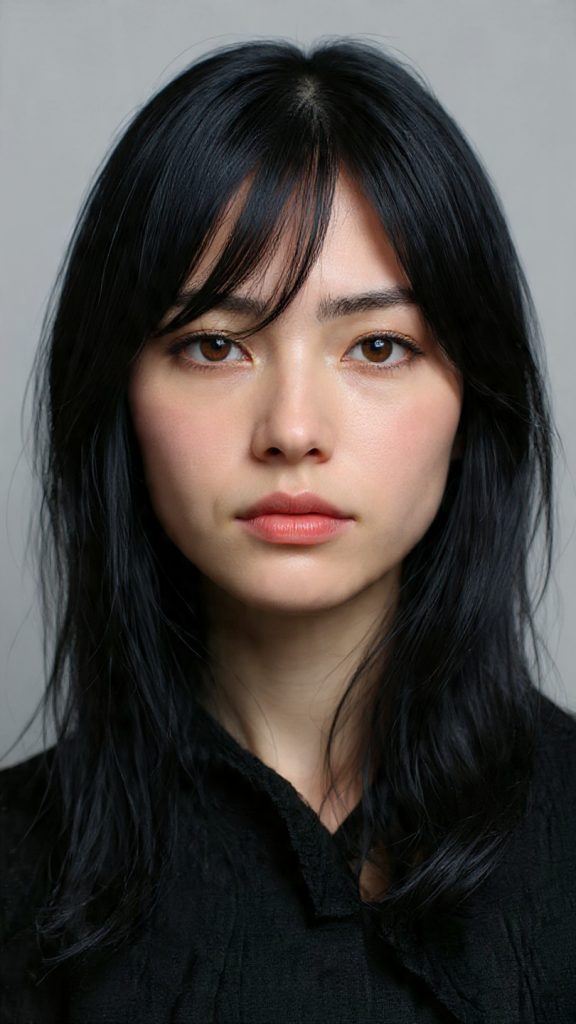
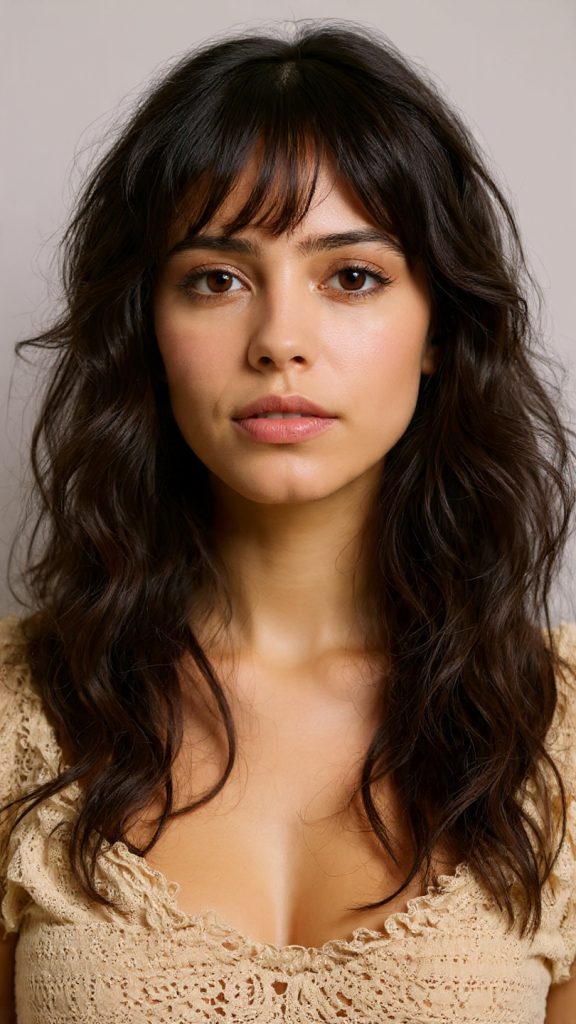
The 20 ideas above prove there's a version for every woman—White, Black, Latina, Asian, Middle Eastern, and every identity in between. With the right stylist, the right products, and a little daily finger-styling, you'll walk out of the salon feeling lighter, bolder, and undeniably yourself.

So go ahead. Book the appointment. Let the clippers buzz. And enjoy the most liberating haircut of your life.

Stunning Medium-Length Hairstyles with Layers to Transform Your Look

April 19, 2026 by Jessica Guevara Leave a Comment

If you’ve been stuck in a haircut rut—caught between growing out a short bob and avoiding the weight of very long hair—medium-length hairstyles with layers are your perfect solution. Falling anywhere from the collarbone to just above the bust, this versatile length offers the best of both worlds: enough length to tie up, but short enough to feel fresh and voluminous.

Layers are the secret weapon. They remove bulk, add movement, frame the face, and create the illusion of thicker, bouncier hair. Whether you have fine, straight strands or thick, curly manes, there is a layered cut waiting for you.

Below are 12 well-structured ideas to inspire your next salon visit:


1. The Classic Mid-Length Layered Cut

Best for: All hair types, especially straight to wavy.

This is the foundation of all layered looks. Hair is cut to sit between the shoulders and armpit, with long layers starting around the chin. The result is a soft, rounded shape that prevents the dreaded “triangle head” effect. It’s low-maintenance, air-dries beautifully, and looks just as good in a ponytail as it does down.

2. The “Butterfly” Cut

Best for: Fine to medium hair wanting dramatic volume.

Inspired by the trendy “wolf cut” but softer, the butterfly cut uses short, face-framing layers on top and longer layers underneath. When styled, the top layers “lift” away from the head like butterfly wings, creating incredible bounce. Ask your stylist for a “disconnected layer” at the crown to achieve this ethereal, ’70s-inspired look.

3. Curtain Bangs with Shoulder-Length Layers

Best for: Round or heart-shaped faces.

Curtain bangs (which part in the middle and sweep to the sides) naturally blend into face-framing layers. When paired with medium-length hair, this combination widens the eyes and slims the jawline. The key is keeping the bangs long enough to tuck behind your ears, giving you the flexibility to switch from boho to polished in seconds.

4. The Textured Shag (Modern Version)

Best for: Wavy, thick, or unruly hair.

Forget the heavy shags of the ’70s. The modern medium-length shag features choppy, piece-y layers throughout the ends, often paired with a micro-fringe or wispy bangs. The layers are cut at steeper angles to remove massive weight from thick hair, creating a cool, rock-and-roll vibe that looks intentionally messy.

5. Collarbone-Kissing Layers with Soft Ends

Best for: Fine or thinning hair.

If your hair is on the finer side, aggressive layering can make it look sparse. Instead, opt for “invisible” or “soft” layers that only texturize the last inch of the hair. Cut exactly at the collarbone, this style gives the illusion of thickness because the ends are slightly blunted but not heavy. A little dry shampoo at the roots amplifies the effect.

6. V-Cut Layers for Long Medium Hair

Best for: Straight hair that lacks movement.

When your medium-length hair is almost long (think armpit length), a V-cut changes the game. Instead of straight-across layers, the stylist cuts the back into a subtle “V” shape. This creates long, dramatic layers that flick outward when curled or swing side-to-side when you walk. It adds a sexy, mermaid-like movement without losing length in the front.

7. Blunt Ends with Hidden Under-Layers

Best for: Thick, heavy hair.

Paradoxically, you can have a blunt hemline and layers. This style keeps the bottom perimeter thick and solid while removing weight from the inside of the hair (using slide-cutting or under-cutting techniques). You get the chic, heavy look of a blunt bob but without the bulk. This is a favorite for professional settings where you want polish but not poof.

8. The Round-Layered “Italian” Cut

Best for: Curly and coily hair textures.

Inspired by classic Italian films, this cut focuses on shape rather than individual strands. The hair is cut dry, curl-by-curl, into a rounded globe shape. The layers are graduated heavily at the crown to encourage curls to spring up, not weigh down. The result is a perfectly circular, frizz-free silhouette that bounces with every step.

9. Asymmetrical Layers with a Deep Side Part

Best for: Oval and long face shapes.

By shifting your part dramatically to one side, you instantly create asymmetry. The layers follow suit: shorter and more textured on the heavier side, longer and sleeker on the lighter side. This optical illusion adds width to long, narrow faces and gives fine hair a volume boost at the roots where the part flips up.

10. Wispy Face-Framing Highlights + Layers

Best for: Adding brightness and softness.

While not a cut by itself, the placement of highlights can act as pseudo-layers. Ask for “baby lights” or thin ribbons of color woven through the face-framing layers and ends. The contrast between light and dark accentuates every cut, making the layers look more defined and three-dimensional. It’s the ultimate “expensive” look.

11. The Layered Midi with Bottleneck Bangs

Best for: Forehead balancing (large or small foreheads).

Bottleneck bangs are narrow at the center top (like a bottleneck) and widen over the brows. When blended into medium-length layers, this creates a seamless curtain of hair. The layering starts high—right at the occipital bone—to push volume backward, preventing the bangs from falling flat. It’s a retro, editorial look that feels fresh.

12. Air-Layer (Korean Feather Cut)

Best for: Straight, sleek hair.

Originating from Korean hair trends, the air-layer cut uses point-cutting to create “feathery” ends that move like air. Unlike Western layers which are distinct steps, these are millimetrically fine. The hair remains one length visually but moves incredibly softly. Pair this with a center part and light serum for that glossy, weightless K-pop idol finish.

Before You Book: How to Communicate Layers to Your Stylist

Walking into a salon saying "just add layers" is a recipe for disappointment. Layers vary dramatically in placement, angle, and intensity. Use this simple script to get exactly what you want.

Step 1: Identify your layer type using the chart above. Screenshot the idea that matches your hair texture and face shape.

Step 2: Use these three key phrases:

  • "Long layers starting at my chin" – safest for fine hair.
  • "Short, choppy layers throughout" – for volume and texture.
  • "Internal under-cutting only" – to remove bulk without changing the outer shape.

Step 3: Ask the "show me" question. Request that your stylist shows you the first cut section before proceeding. This prevents miscommunication about how short the shortest layer will be.

Step 4: Discuss your styling commitment. Layers that look stunning blown out can look messy air-dried. If you never use heat tools, ask for "round layers" or "invisible layers" specifically designed for wash-and-wear routines.


Maintenance & Styling: Keeping Your Layers Fresh

Layered haircuts require more frequent trims than blunt cuts. Without regular upkeep, the shortest layers can outgrow their shape, leaving you with an uneven, straggly appearance.

Trim schedule by layer type:

Layer StyleRecommended Trim Frequency
Soft, long layersEvery 10–12 weeks
Choppy shag or butterfly cutEvery 6–8 weeks
Blunt ends with hidden layersEvery 8–10 weeks
Curly round-layered cutEvery 12 weeks (dry cut only)

Quick styling hacks for each texture:

  • Fine/straight hair: Use a volumizing mousse at the roots before blow-drying upside down. Layers reveal flatness faster, so lift is essential.
  • Thick/wavy hair: Apply a lightweight curl cream to damp hair, then scrunch and air-dry. Layers prevent the dreaded "pyramid" shape.
  • Curly/coily hair: Never brush dry curls. Detangle in the shower with conditioner, then use a diffuser or hooded dryer to set the round shape.
  • Sleek/Asian hair texture: A drop of silicone-based serum on the ends only. Avoid roots entirely, or layers will look greasy rather than feathered.

The one product every layered haircut needs: A texturizing spray or powder. Unlike heavy oils or creams, texturizers grip the ends of each layer, making them visible and piece-y rather than melting into one blob.


Who Should Avoid Medium Layers? (Honest Advice)

Layers are not universal. While they solve many problems, they can create new ones for certain hair types and lifestyles.

Avoid medium layers if:

  1. Your hair is severely damaged or chemically processed. Layers remove length, and damaged ends become the new shortest layer. You'll need a "dusting" only until healthy hair grows in.
  2. You exclusively wear your hair in tight ponytails or buns. Short layers will poke out, requiring bobby pins or gel. A blunt one-length cut behaves better for slicked-back styles.
  3. You have very thin, fragile hair. Aggressive layering can make thin hair look even sparser. Stick to "invisible layers" or a blunt collarbone cut with face-framing pieces only.
  4. You are growing out a pixie or undercut. Let the hair reach shoulder length first. Layers applied too early will leave you stuck in an awkward mullet phase.
  5. You have naturally strong cowlicks at the crown. Layers can lift and exaggerate cowlicks, creating unintended volume in the wrong places. A stylist may recommend a different weight distribution.

When in doubt, ask for a "dry consultation." Your stylist will pin up sections to show you exactly where the layers will fall before any cutting begins.


Layering for Face Shapes: A Quick Guide

The same layered cut can elongate a round face or shorten an oval face. Use this cheat sheet to match layers to your bone structure.

Face ShapeBest Layer StrategyWhat to Avoid
RoundLong layers starting below the chin, center part, face-framing pieces that graze the jawlineShort layers at cheekbone level (widens face)
OvalAlmost anything works. Especially flattering: curtain bangs and chin-length face-framing layersExtremely short top layers (can look boxy)
SquareSoft, wispy layers around the jaw to soften angles. Side-swept bangs helpBlunt, heavy layers that end exactly at the jaw
HeartLayers that add volume at the chin and below. A deep side part helps balance a wider foreheadShort layers that stop at the temples (emphasizes width)
Long/OblongRounded layers with volume at the sides. Bottleneck or straight-across bangs shorten length visuallyLong, straight layers that drag the face down
DiamondLayers that widen the forehead and chin area while narrowing the cheekbones. Wispy bangs helpSevere center parts with flat, straight layers

A universal rule: The shortest layer should never fall at your widest point unless you want to emphasize that area. Adjust the starting point of your layers up or down by one inch to change the entire optical effect.


Conclusion

Medium-length hairstyles with layers are not a trend—they are a timeless solution to the most common hair frustrations: flatness, heaviness, lack of movement, and the dreaded in-between grow-out phase. Whether you choose the soft, rounded shape of the classic layered cut, the dramatic bounce of the butterfly cut, or the weightless precision of the Korean air-layer, there is a version designed specifically for your texture, face shape, and lifestyle.

The key is intentionality. Layers are a tool, not a default. By understanding where the shortest layer falls, how often you are willing to style your hair, and what you want to emphasize or minimize about your face, you transform a simple haircut into a personalized signature look.

Remember: bring a photo, learn the three key phrases for your stylist, and commit to the maintenance schedule that matches your chosen layer style. With these twelve ideas and practical guides in hand, you are ready to walk into any salon with confidence—and walk out with the best hair of your life.

Now go book that appointment. Your bounciest, most layered era awaits.

Layered Shoulder-Length Haircuts: 10 Fresh Ideas for Movement & Style

April 18, 2026 by Jessica Guevara Leave a Comment


The shoulder-length haircut is the “goldilocks” of hairstyles—not too long, not too short, but just right. When you add layers to this versatile length, something magical happens. Layers remove bulk, add dynamic movement, frame the face beautifully, and create volume where it’s needed most. Whether you have fine, straight hair craving body or thick, wavy hair needing shape, a layered shoulder-length cut offers endless styling possibilities.

Below are 10 well-structured ideas to inspire your next trip to the salon:


1. The Classic Long Layered Cut


This is the foundation of all layered shoulder-length styles. Long layers are cut throughout the hair, with the shortest layer falling just below the chin. This technique removes weight while keeping the overall shape intact. Best for: Fine to medium hair that needs volume without losing length. Styling tip: Blow-dry with a round brush for a bouncy, polished finish.

2. The “Butterfly” Cut


Inspired by the viral trend, this cut uses two distinct layers: a short, face-framing top layer (the “wings”) and a longer bottom layer. When styled, the shorter pieces curl away from the face, creating a winged, ethereal effect. Best for: Adding instant volume and a romantic feel. Styling tip: Use a small curling wand to curl pieces away from your face.

3. Invisible Layers (Micro-Layers)


These are ultra-subtle, barely-there layers cut into the interior of the hair. From the outside, the hair looks like a blunt one-length cut, but the hidden layers prevent the ends from flipping out awkwardly and add gentle internal movement. Best for: Fine, straight hair that needs a little lift without looking choppy. Styling tip: Air-dry with a light mousse for effortless, natural texture.

4. Choppy, Textured Layers


Think rock-and-roll. This style uses point-cutting techniques to create jagged, disconnected ends. The layers are more visible and dramatic, giving a piece-y, undone finish. Best for: Thick hair that needs weight removed, or anyone wanting an edgy, low-maintenance look. Styling tip: Work a texturizing paste or sea salt spray through dry hair to emphasize the separation.

5. Face-Framing Curtain Layers


The layers are concentrated heavily around the front, starting at the cheekbones or jawline and cascading down to blend with the shoulder-length back. This creates a soft, “curtain” effect that opens up the face. Best for: Round or heart-shaped faces, as it visually lengthens and slims. Styling tip: Blow-dry the front pieces away from your face using a large round brush.

6. The Shag (Modern Version)


A modern shoulder-length shag features shorter layers throughout the crown, wispy bangs (optional), and a slightly disconnected look. Unlike the 70s version, today’s shag keeps the ends less feathered and more blunt for a chic, cool-girl vibe. Best for: Wavy or curly hair; also great for adding volume to flat hair. Styling tip: Scrunch in curl cream and let it air-dry for that effortless, lived-in look.

7. Graduated Layers (Angled)


This cut is shorter in the back and slightly longer in the front, with layers that “graduate” in length. The stacking of layers in the back creates significant lift and volume at the crown, while the front remains soft. Best for: Fine hair that falls flat, and those who want a more structured, polished silhouette. Styling tip: Use a vented brush and blow-dry the back section upward to maximize volume.

8. Wispy Layers with Bottleneck Bangs


Combine shoulder-length layers with “bottleneck” bangs—bangs that are shorter in the center and blend into longer curtain pieces at the sides. The layers in the body of the hair are cut wispy (soft and airy) to match the lightness of the bangs. Best for: High foreheads or anyone wanting to soften strong features. Styling tip: A quick pass with a flat iron to bend the bangs outward creates the perfect bottleneck shape.

9. The Beveled Layered Bob (Lob)


A longer bob that hits just above or at the shoulders, with internal layers that are slightly heavier at the bottom. The ends are “beveled” (tucked under) while the internal layers add roundness. This is the polished, professional’s choice. Best for: Straight to slightly wavy hair; perfect for corporate or elegant settings. Styling tip: Use a paddle brush and a round brush to tuck the ends under smoothly.

10. Air-Layer Cut (Weightless Layers)


Popularized by Korean hair styling, this technique removes weight from the inside of the hair shaft rather than the ends. The hair is held vertically and sliced into, creating pockets of air. The result is a silky, weightless finish with no visible layer lines. Best for: All hair types, especially thick or heavy hair that feels dense. Styling tip: A simple air-dry with a lightweight oil will showcase the cut’s feathery movement.

What to Ask Your Stylist (Without Getting Lost in Jargon)

Before you sit in the salon chair, know these three key terms. They will help you communicate exactly what you want.

  • “Point-cutting” – Ask for this if you want soft, textured ends rather than a blunt line. It creates that airy, modern feel.
  • “Internal layers” – Say this when you want volume and weight removal inside the hair without changing the outer shape. Perfect for thick hair.
  • “Elevation” – The higher your stylist lifts your hair while cutting, the shorter and bouncier the layers. For subtle, shoulder-length layers, ask for low to medium elevation.

One golden rule: Always bring a reference photo. The prompts above can generate exactly that.


How to Choose the Right Layered Cut for Your Face Shape

Not every layered shoulder-length cut suits every face. Use this quick guide:

Face ShapeBest Layered Cut from the 10 Ideas
OvalAny style works. Try the Classic Long Layers (Idea 1) or the Butterfly Cut (Idea 2).
RoundFace-Framing Curtain Layers (Idea 5) or Graduated Layers (Idea 7) to lengthen the face.
SquareWispy Layers with Bottleneck Bangs (Idea 8) or the Modern Shag (Idea 6) to soften a strong jaw.
HeartThe Beveled Lob (Idea 9) or Invisible Layers (Idea 3) – both add width near the chin to balance a narrower jaw.
Long/OblongChoppy Textured Layers (Idea 4) or the Butterfly Cut (Idea 2) to add width and break up length.

Styling & Maintenance: Keep Your Layers Looking Fresh

Layered cuts are low-maintenance but not no-maintenance. Follow these rules.

Daily Styling (5 minutes or less)

  • For volume: Flip your head upside down and blow-dry the roots with a round brush. Focus on the crown where layers start.
  • For texture: Spray dry texture spray or sea salt spray into damp hair, then scrunch. Air-dry for that “undone” layered look.
  • For smoothness: Use a flat iron only on the ends of each layer. Ironing the whole strand flattens the dimension layers create.

The 8-Week Rule

Layers grow out faster than one-length cuts. After 8–10 weeks, your shortest layer will drop by about an inch, and the shape will start to feel heavy. Book a “dusting” (micro-trim) every 2 months – not a full cut.

Product Picks for Layered Shoulder-Length Hair

Hair TypeAvoidUse Instead
FineHeavy oils, creamy leave-insVolumizing mousse, lightweight sea salt spray
ThickSilicone-heavy serums (they weigh layers down)Lightweight curl cream, texturizing powder
Curly/WavyBrushing dry (it destroys the layer definition)Wide-tooth comb in the shower, diffuser attachment

Common Mistakes to Avoid with Layered Shoulder-Length Hair

Even a great cut can look wrong if you make these errors.

  1. Asking for “layers” without specifying length – The shortest layer matters. If you don’t give a reference point (e.g., “shortest layer at my chin”), you might end up with very short top layers that don’t blend.
  2. Cutting wet hair too uniformly – Wavy and curly hair shrinks when dry. Always get layered cuts on dry hair or ask for a “dry cut” after the initial wet cut.
  3. Using too much product near the roots – Layers are designed to create natural lift. Heavy root products (butters, thick creams) collapse that lift within an hour.
  4. Skipping the consultation photo – “Shoulder-length layers” means different things to different stylists. Never assume. Show a photo.
  5. Letting the back grow too long – Shoulder-length layers look unbalanced if the back reaches your bra strap while the front stays at your collarbone. Trim the back more often.

Adapting These Cuts for Different Hair Textures

The same layered cut behaves very differently on straight, wavy, curly, and coily hair. Here is how to adjust each idea for your texture.

Hair TextureModification to Make
Straight (fine or medium)Add invisible or micro-layers (Idea 3). Avoid choppy layers – they look stringy on stick-straight hair.
Wavy (type 2A–2C)The Shag (Idea 6) and Butterfly Cut (Idea 2) are your best friends. Waves catch beautifully on disconnected layers.
Curly (type 3A–3C)Ask for long layers only. Short layers on curly hair create a triangular “pyramid” shape. Stick with Classic Long Layers (Idea 1) or Air-Layer (Idea 10).
Coily (type 4A–4C)Graduated Layers (Idea 7) work beautifully because the stacked back adds height. Also try the Beveled Lob (Idea 9) for a structured shape.

Conclusion: Why This Cut Deserves a Spot on Your Inspiration Board

The layered shoulder-length haircut is not a trend – it is a timeless, adaptable solution for almost every hair type, face shape, and lifestyle. Unlike a pixie, it does not demand weekly trims. Unlike waist-length hair, it does not tangle or weigh you down. And unlike a blunt bob, it actually moves when you turn your head.

The 10 ideas in this article give you a roadmap. The prompts give you visuals. And the sections above give you the confidence to walk into any salon and leave with a cut that feels custom-made for you.

Whether you choose the romantic Butterfly Cut, the edgy Choppy Layers, or the polished Beveled Lob, one thing is certain: shoulder-length with layers is the haircut that keeps giving. It looks just as good air-dried on a Tuesday morning as it does blown out for a Friday night.

So save your favorite prompt. Book that appointment. And get ready to flip your hair with intention – because now, every layer has a purpose.

The Modern Short Shag: Fresh Reasons Older Women Are Loving This Effortless Cut

April 17, 2026 by Jessica Guevara Leave a Comment

For decades, older women were told to stick to safe, sensible "helmet" cuts or simple one-length bobs. But style has no expiration date. Enter the short shag: a choppy, textured, and surprisingly liberating haircut that breaks every boring rule. Unlike severe, rigid styles that can highlight thinning hair or a changing hairline, the short shag uses layers, movement, and volume to create a look that is youthful, edgy, and remarkably easy to maintain. Whether your hair is fine, curly, silver, or stubbornly straight, this rock-and-roll cut adapts to you—not the other way around.

Here are seven compelling reasons to book that appointment today:

1. Instant Volume and Lift at the Crown


As we age, hair naturally loses density. A short shag strategically removes weight from the bottom, pushing volume up to the crown. By using short, stacked layers on top, the cut creates natural lift that lasts all day without heavy products. This vertical height balances softening facial features and gives the illusion of thicker, fuller hair instantly.

2. Softens the Face with Wispy Fringes


Harsh, blunt cuts can accentuate fine lines and jowls. The shag’s signature wispy bangs—whether curtain-style, side-swept, or choppy—softens the forehead and draws attention upward to your eyes. The textured edges around the ears and nape create a blurred, gentle frame that makes the whole face look more relaxed and approachable.

3. Embraces and Enhances Natural Silver and Gray


The short shag is a dream for naturally gray or transitioning hair. Gray hair often has a coarser, wiry texture that resists smooth styles but loves layers. The choppy ends blend gray regrowth lines seamlessly, so you can grow out color gracefully or rock a full silver mane. The cut’s messy, lived-in vibe turns natural texture into an intentional, chic statement.

4. Low Maintenance for a Busy or Active Lifestyle


Forget blowouts and hot rollers. A short shag is designed to air-dry beautifully. Because the layers are deliberately uneven and textured, a little bedhead looks like "style," not neglect. Simply spray in some sea salt texturizer, scrunch with your fingers, and go. It’s the perfect wash-and-wear cut for women who want to look polished without the daily time commitment.

5. Hides Thinning or Receding Hairlines


A receding hairline or sparse temples can feel frustrating, but the short shag offers clever camouflage. Longer, piece-y layers around the hairline can be swept forward or to the side to conceal bare spots. Additionally, the overall choppiness creates optical density—the uneven ends reflect light differently, making every strand appear thicker than it actually is.

6. Works with Curly and Wavy Textures


Curly hair can become heavy and triangular as it grows. A short shag liberates curls by cutting internal layers that allow each ringlet to bounce individually. This removes the "pyramid" shape, giving you a rounded, airy silhouette. For older women with natural waves, the shag encourages your curl pattern to form soft, romantic shapes without frizz or excessive product.

7. Gives a Confident, Modern Edge


Perhaps the most important reason: the short shag says you don’t take yourself too seriously. It has a playful, slightly rebellious attitude that defies the notion that older women must blend into the background. Paired with bold glasses, silver hoops, or a swipe of lipstick, this cut becomes a signature of confidence. It tells the world, "I’m still here, and I’m still having fun with my look."

How to Know If a Short Shag Is Right for You

Before you book that salon appointment, consider these three quick checks:

  • Face shape: The short shag is incredibly forgiving. Oval, round, square, and heart-shaped faces all suit this cut—just adjust the bang length and side volume. For very long faces, keep more width at the sides; for very round faces, add height at the crown.
  • Hair type: Fine hair thrives on the shag's volume-boosting layers. Thick hair benefits from the weight removal. Curly hair loves the bounce. Even thinning hair works well with strategic piece-y layering.
  • Commitment level: If you prefer slick, perfectly smooth styles, the shag may frustrate you. This cut celebrates imperfection. Ask yourself honestly: do I have the patience to let my hair be a little messy?

What to Tell Your Hairstylist

Walk into the salon with confidence. Use these exact phrases:

  • "I want a short shag with lots of internal layers, not a stacked bob."
  • "Keep the perimeter soft and uneven—nothing blunt."
  • "Leave length for wispy bangs that I can sweep to the side."
  • "Take weight out of the ends so the crown lifts naturally."
  • "Show me how to style it with just my fingers and a texturizing spray."

Pro tip: Bring one reference photo (use any of the prompts above) and one "don't" photo—usually a smooth, helmet-like cut. Visuals prevent miscommunication.


Styling Tips for Every Morning

The short shag is low-maintenance, but not no-maintenance. Here's your 5-minute routine:

StepProductAction
1Leave-in conditionerApply to damp hair, focusing on ends
2Texturizing spray or sea salt sprayMist evenly, scrunch with fingers
3(Optional) Volumizing mousseWork into roots only for extra lift
4DryAir-dry or use a diffuser on low heat
5Finishing touchRub a drop of argan oil between palms and lightly skim over ends

Avoid: Heavy gels, waxes, or serums. They weigh down the layers and kill the shag's signature movement.


Maintenance Schedule

FrequencyAction
Every 4–6 weeksTrim to keep the shape. The shag grows out better than most cuts, but layers blur without regular trims.
Every 8–12 weeksProfessional reshaping if you have curly or very thick hair.
DailyLess than 5 minutes of styling (see above).
MonthlyDeep conditioning treatment, especially for gray or color-treated hair.

Common Concerns—And Why They Shouldn't Stop You

"I'm too old for layers."
False. Age has nothing to do with layers. In fact, older hair benefits more from movement and texture than any other age group.

"My hair is too thin."
The shag is actually recommended for fine hair. Short layers create the illusion of density. Just avoid over-texturizing (ask your stylist to use scissors, not a razor, on fine hair).

"I don't want to look like I'm trying too hard."
The shag's secret weapon is effortlessness. It doesn't scream "look at me"—it quietly says "I know what works." That's confidence, not trying.

"What if I hate it?"
Hair grows. But more importantly, a good shag can always be softened into a classic bob in one trim. Start with longer, softer layers, then go shorter if you love it.


Conclusion

The short shag haircut is more than a trend—it's a practical, beautiful solution for older women who refuse to sacrifice style for ease. It delivers volume where you need it, softness around your face, and a daily routine that takes less time than brewing coffee. Unlike rigid cuts that fight against natural texture and aging hair patterns, the shag works with what you have, celebrating silver strands, waves, fine hair, and everything in between.

From the Black woman embracing her natural silver crown to the White woman softening her features with wispy bangs, from the Latina rocking gray texture to the East Asian woman camouflaging a thinning hairline—this cut is genuinely universal. It asks for little and gives back confidence, edge, and hours of your week.

So call your stylist. Bring a photo. Say the words "short shag." Then wake up tomorrow, spray, scrunch, and walk out the door looking like you already have your life together—even if the laundry is still waiting.

You're not too old for this cut. You're exactly the right age.


The Best Haircuts for Round Faces Over 50 (That Actually Slim)

April 17, 2026 by Jessica Guevara Leave a Comment

Let’s clear something up right away.

When you have a round face over 50, most of the advice out there treats you like you want to hide your cheeks or fake an entirely different bone structure. That is not what we are doing here.

A round face is soft, balanced, and age-defying by nature—round faces tend to look younger, longer. The goal is not to fight your shape. The goal is to choose a haircut that adds just enough structure, height, and asymmetry to create that subtle "slimming" effect without looking like you tried too hard.

At 50+, your hair has likely changed texture. It might be finer. It might be drier. It might have less volume at the crown than it used to. That changes which haircuts actually work for you versus which ones look great on a 25-year-old with a round face.

We have tested these 12 cuts on real women over 50 with fine to medium density. These are the ones that deliver the three things you actually need: lift at the crown, length below the chin, and softness around the jawline.

Let’s get into it.


1. The Long Layered Lob (The Gold Standard)

The lob—long bob—hits that magic zone between the chin and collarbone. For a round face, this is the most forgiving length because it elongates without dragging your features down.

Why it slims: The length sits below the chin, which visually stretches the face. Layers remove weight from the sides (where round faces get width) and keep movement around the jaw.

For over 50: Ask your stylist for long layers that start at the cheekbone. This lifts the eye up and prevents the dreaded "triangle head" that happens when all the weight sits at the ends.


2. Face-Framing Layers with a Center Part

This is the single most underrated cut for round faces. A center part with layers that gently curve around the face creates a vertical line down the middle, which immediately slims.

Why it slims: The center part breaks the horizontal width of a round face. The face-framing pieces hit at the cheekbones and jaw, casting shadows that carve out dimension.

For over 50: Keep the layers soft—not choppy. Fine hair over 50 can look sparse if layers are too aggressive. Think "whisper layers" rather than dramatic steps.


3. The Curtain Bangs + Shoulder-Length Cut

Curtain bangs are the anti-aging bang nobody is talking about enough. Unlike blunt bangs that shorten a round face, curtain bangs part in the middle and sweep to the sides, creating a diagonal line.

Why it slims: The diagonal sweep pulls the eye outward and downward, breaking the circle. When paired with shoulder-length hair, you get elongation without losing softness.

For over 50: Curtain bangs hide forehead lines beautifully while still showing your eyebrows. Keep them wispy—thick curtain bangs can add width to the temples, which works against you.

Read next: Curtain Bangs for Women Over 40: The Anti-Aging Cut Nobody's Talking About


4. The Asymmetrical Bob

An asymmetrical bob—shorter in the back, longer in the front, with one side slightly longer than the other—creates deliberate unevenness. For a round face, asymmetry is your best friend.

Why it slims: A perfectly symmetrical cut mirrors the symmetry of a round face, making it look rounder. Asymmetry breaks that mirror effect. The eye follows the diagonal line, not the circle.

For over 50: Keep the asymmetry subtle. A one-inch difference between sides is plenty. Too dramatic reads as trendy (in a bad way) rather than polished.


5. The Textured Pixie with Height at the Crown

Yes, a pixie can work on a round face—but not a flat one. The key is height. A pixie that sits flat against the head makes a round face look wider. A pixie with volume at the crown elongates everything.

Why it slims: Height creates a vertical line. When the top of your head has lift, your face looks longer and leaner. Keep the sides close to the head to avoid adding width at the ears.

For over 50: This is the cut for women with fine, thinning hair. The texture hides sparse areas, and the height creates the illusion of density. Ask for a spiky pixie or undercut pixie if you want edge.

Read next: Short Hair, Big Personality: 20 Pixie Cuts That Aren't All the Same


6. The Blunt Bob with a Deep Side Part

Blunt bobs scare some women with round faces because they worry about "adding width." But a blunt cut (no layers) with a deep side part actually works beautifully.

Why it slims: The deep side part creates a dramatic diagonal line across the forehead. The blunt ends create a strong horizontal line at the jaw, which acts as a visual "stop" that defines the face. The combination of diagonal and horizontal breaks the circle.

For over 50: Only do this if your hair is medium to thick. Fine hair goes flat with a blunt cut. If you have fine hair, skip this and go back to the layered lob.


7. The French Bob (Chin-Length with Micro Bangs)

The French bob is shorter—chin-length or just above—with micro bangs that sit above the eyebrows. It is bold. It is not for everyone. But for the right round face, it is incredibly slimming and chic.

Why it slims: The micro bangs expose the upper half of your face, drawing the eye up. The chin-length ends hit at the narrowest part of your face (the chin), not the widest (the cheeks). This changes the perceived shape entirely.

For over 50: This works best on women with strong jawlines and good bone structure. If your jaw has softened with age, this cut can highlight that rather than hide it. Proceed with confidence or caution.


8. The Shag Cut (Soft, Not 70s Rockstar)

A modern shag is softer than the original. It has layers throughout, texture around the face, and usually some bangs. For round faces, the shag adds something most cuts don't: width at the crown while keeping the sides slim.

Why it slims: The shag puts volume at the top of your head (good) and keeps the sides relatively close (good). The messy, piece-y texture breaks up the smooth circle of a round face.

For over 50: Ask for a soft shag or modern shag. You do not want the aggressive, choppy 1970s version. You want movement without looking like you just rolled out of a tour bus.


9. The Bixie (Pixie + Bob Hybrid)

The bixie is exactly what it sounds like: a pixie cut in the back, a bob in the front. It is shorter than a bob but longer than a pixie. For round faces, this is a sweet spot because it gives you the lift of a pixie with the face-framing length of a bob.

Why it slims: The length in front hits at the jaw or below, elongating. The short back keeps the silhouette from getting too wide. The combination is naturally asymmetrical, which we already know works for round faces.

For over 50: This is ideal for women transitioning from long hair to short hair. You get the ease of a pixie without the shock. It also works beautifully on gray hair because the texture hides regrowth.


10. The Side-Parted Wavy Lob

If you wear your hair wavy or curly, the rules change slightly. Curl adds width naturally. That means you need to be more intentional about length and part.

Why it slims: A deep side part breaks the symmetry. Waves that start below the chin (not at the ears) keep the width lower on your face, which elongates. Loose, soft waves are better than tight curls for round faces.

For over 50: Keep the length at collarbone or longer. Any shorter and curly hair will spring up to chin level, which adds width exactly where you do not want it.


11. The Cloud Cut (Soft, Rounded Volume)

The cloud cut is the 2026 trend that actually works for round faces over 50. It is soft, rounded, and voluminous—but the volume is at the crown, not the sides.

Why it slims: Think of a cloud: fluffy on top, tapered at the bottom. That is the silhouette you want. The rounded top adds height. The tapered bottom keeps the face looking lean.

For over 50: This cut is magic for fine hair because the soft layering creates volume without teasing or products. Ask your stylist for "rounded layers with weight removed from the perimeter."


12. The Long Pixie with Wispy Side Bangs

Not ready for a full pixie? The long pixie keeps length at the top and front while the back and sides are short. Wispy side bangs finish the look.

Why it slims: The length at the front (hitting near the eye or cheekbone) creates a diagonal line across your face. The short sides keep width minimal. The wispy texture prevents harsh lines that can make a round face look severe.

For over 50: This is the "training wheels" pixie. If you have worn a bob for years and want to go shorter, try this first. It gives you the lift and ease of a pixie without the full commitment.

What to Tell Your Stylist (Exact Words)

You cannot assume a stylist knows what "slimming" means to you. Be specific. Here is exactly what to say when you sit in the chair.

Print this or save it on your phone:

*"I have a round face and I am over 50. My hair has gotten [finer / thinner / drier] than it used to be. I want a cut that adds height at the crown, keeps length at or below my chin, and removes bulk from the sides. I do not want anything that adds width at my cheeks or ears. Please show me where the layers will fall before you cut."*

Then, bring two photos:

  1. One photo of the haircut you want
  2. One photo of the same haircut on a woman with a round face (so they see the shape matters)

One more thing: If your stylist says "that won't work with your texture" — believe them. A great cut on thick hair looks flat on fine hair. A great cut on straight hair looks completely different on wavy hair. The goal is not the exact photo. The goal is the same effect on your actual hair.


The 3 Things That Ruin a Good Haircut on a Round Face (Over 50)

Avoid these. They are the fastest way to make your face look wider and your hair look thinner.

1. Blunt Bangs That Hit at the Eyebrows

Straight-across bangs shorten your forehead, which makes a round face look rounder. They also draw attention to forehead lines and crow's feet. There is almost no scenario where blunt bangs are the right choice for a round face over 50.

The fix: Curtain bangs, wispy side bangs, or no bangs at all.

2. One-Length Hair That Hits at the Chin

A blunt, one-length cut that ends exactly at your chin is the most widening cut possible for a round face. It creates a horizontal line at the widest part of your face. This is the opposite of what you want.

The fix: Add layers, add a side part, or take the length below the collarbone.

3. Flat Crown with Volume at the Sides

If your hair is flat on top but puffy at the ears and jaw, your face will look like a circle sitting on a triangle. This happens when layers are placed wrong or when you have natural volume at the perimeter but no lift at the root.

The fix: Ask for "volume at the crown" and "weight removed from the sides." Use a volumizing powder or dry shampoo at the roots. Do not let your stylist "round out" the shape — you want height, not a dome.


How to Style These Cuts at Home (In 5 Minutes or Less)

Your new haircut will do 80% of the work. But the right 20% of styling makes the difference between "good haircut" and "people ask where you got it done."

For Fine or Thinning Hair

StepWhat to DoTime
1Spray volumizing mist at the roots while hair is damp30 sec
2Flip head upside down and blow-dry on low heat2 min
3Use a small round brush at the crown only (not the sides)1 min
4Texturizing powder or dry shampoo at the roots for lift30 sec
5Light hairspray, lift with fingers, go30 sec

Total: 5 minutes

For Medium or Thick Hair

StepWhat to DoTime
1Apply heat protectant and a lightweight mousse30 sec
2Blow-dry with a paddle brush, focusing on lifting the crown2 min
3Flat iron or wand just the face-framing pieces (not the whole head)1.5 min
4Flip head and shake out with fingers30 sec
5Flexible hairspray, go30 sec

Total: 5 minutes

For Curly or Wavy Hair

StepWhat to DoTime
1Apply leave-in conditioner and curl cream to wet hair1 min
2Scrunch upward (do not rake fingers through)1 min
3Diffuse upside down on low heat for 2 minutes2 min
4Air dry for 5 minutes while you do something else—
5Flip head, shake roots, go30 sec

Total: 4.5 minutes active time

Read next: The 5-Minute Morning Makeup Routine: Dewy, Natural, Done


The Best Products for Volume Without Weight

You do not need expensive products. You need the right products. Here is what actually works for women over 50 with round faces and changing hair texture.

Product TypeWhat to BuyWhy It Works
Volumizing mousseLightweight, alcohol-freeAdds lift at the crown without drying out aging hair
Dry shampooTinted for dark or light hairCreates grit at the roots for instant height
Texturizing powderLoose powder, not sprayThe single best product for fine, flat hair
Light hairsprayFlexible hold, not hardKeeps crown volume without crunch
Root lift spraySpray directly at scalpHeat-activated volume that lasts all day

What to avoid: Heavy oils, butters, creams, or "smoothing" serums. These add weight. Weight is the enemy of volume. If your hair is dry, use a leave-in conditioner only on the ends, never the roots.


When to Go Shorter vs. When to Keep Length

Not every round face needs the same length. Here is how to decide.

Go Shorter (Pixie or Bixie) If:

  • Your hair has become noticeably thin or sparse
  • You want a 2-minute styling routine
  • You have good bone structure (cheekbones or jawline)
  • You are tired of finding hair everywhere
  • You live in a humid climate where longer hair frizzes

Keep Length (Lob or Longer) If:

  • Your hair is still medium to thick
  • You like having options (ponytail, bun, half-up)
  • Your neck and jaw have softened with age (length disguises this)
  • You feel more feminine with longer hair
  • You are not ready for the psychological shift of short hair

The honest truth: There is no wrong answer. But women who go short and hate it usually went too short too fast. Try a bixie first. Then a pixie. Then a cropped pixie. Give yourself off-ramps.


What No One Tells You About Haircuts After 50

Let me say the quiet part out loud.

Your hair is not the same hair you had at 35. It is finer. It is drier. It grows slower. It breaks easier. It does not hold a curl the way it used to. Pretending otherwise will only lead to frustration.

Here is what actually changed:

Age 35Age 55+
Hair held volume all dayVolume falls within hours
Blowout lasted 3-4 daysBlowout lasts 1-2 days
Could skip conditionerEnds are dry by afternoon
Curls stayed curledCurls fall straight by lunch
Hair grew fastHair grows slower, thinner

This is not a tragedy. This is just information. You work with the hair you have now, not the hair you wish you had. The 12 cuts above were chosen because they work with these changes, not against them.

One more thing: Gray hair has a different texture. It is often coarser, drier, and more resistant to styling. If you are growing out gray, add extra moisture (mask once a week) and expect that your cut may need to be adjusted. Gray hair does not behave like pigmented hair. That is normal.


Frequently Asked Questions (Round Faces Over 50)

Can I wear my hair very long with a round face?

Yes, but with conditions. Very long hair (below the bust) pulls the face down visually. For a round face, you want some structure around the jaw. Very long hair with no layers will make your face look wider by comparison. Add long layers and face-framing pieces. Do not wear it all one length.

Do I have to have bangs?

No. Bangs are optional. If you have a high forehead, curtain bangs help. If you have a small forehead, skip bangs entirely. A center part or deep side part with no bangs works beautifully on round faces.

Will a pixie make my face look fatter?

A flat pixie will. A textured pixie with height at the crown will not. The difference is volume. Show your stylist a photo of a pixie with lift, not a pixie that is slicked down.

How often do I need to cut these styles?

HaircutFrequency
PixieEvery 4-6 weeks
BixieEvery 6-8 weeks
BobEvery 8-10 weeks
LobEvery 10-12 weeks
Long layersEvery 12-16 weeks

Shorter cuts need more maintenance. Factor that into your decision.

What if I have a double chin?

Length is your friend. A lob that hits below the chin draws the eye past the jawline. Avoid chin-length cuts. Avoid blunt bangs. Add height at the crown to create a vertical line. And remember: every woman over 50 has something about her face she wishes were different. The haircut is not magic. It is just one tool.


Conclusion

Here is what you actually need to remember.

A round face is not a problem to fix. It is a shape to work with. The goal is not to look like you have a different face. The goal is to look like you — just with better hair.

The 12 cuts we walked through all do the same three things:

  1. They add height at the crown
  2. They keep length at or below the chin
  3. They remove bulk from the sides

That is it. That is the formula. Everything else is preference.

If you have fine or thinning hair, lean toward the pixie, the bixie, or the cloud cut. These create volume where you need it most.

If you have medium to thick hair, the lob, the asymmetrical bob, or the blunt bob with a deep side part will give you structure without heaviness.

If you are not sure, start with face-framing layers and curtain bangs. It is the lowest-risk change on this list and the one that makes the biggest difference for the smallest commitment.

One last thing: Do not let fear keep you in a haircut that is not working. You are over 50. You have earned the right to look exactly how you want to look. If you have worn the same bob for 15 years and you are bored, try the bixie. If you have never had short hair, try the long pixie. Hair grows back. Not instantly — but it grows.

Book the appointment. Bring the photo. Say the words we gave you.

And when someone asks where you got your hair done, send them to this article.


Read next: The Best Haircuts for Women with Fine Thin Hair After 50

Read next: Short Hairstyles for Women Over 70: Ageless Chic

Read next: What Haircut Suits Your Face Shape? A Plain English Guide


Short Hair Ideas for Plus Size Women: Flattering & Fierce

April 17, 2026 by Jessica Guevara Leave a Comment

There’s a persistent myth that plus size women need long hair to “hide” or “balance” their bodies. Let’s shatter that right now: some of the most stunning, confident, and head-turning looks sit proudly above the shoulders. Short hair doesn’t just work for curvy women—it often works better. It draws the eye up to your face, highlights your collarbone, showcases your jewelry, and can actually make you look more proportionate and radiant.

The key is choosing a cut that complements your face shape, hair texture, and personal style—not your dress size. Whether you have fine hair that needs volume, thick hair that needs weight removal, or natural curls that crave freedom, there’s a short ‘do for you.

Here are 16 short hair ideas designed to celebrate your fullness, not camouflage it:


1. The Textured Pixie with Height

A classic pixie is timeless, but add significant height at the crown and it becomes a game-changer for round or full faces. The vertical lift elongates your silhouette, creating a beautiful balancing effect. Ask your stylist for choppy layers on top and close-cropped sides.

2. The Asymmetrical Bob

An A-line bob that is shorter in the back and longer (chin-length) in the front creates sharp angles that cut across the roundness of the face. This geometric shape adds structure and edge, making it a sophisticated choice for professional settings.

3. Curly Tapered Cut

If you have natural curls or coils, a tapered cut (short on the sides and back, voluminous on top) is pure magic. It removes the “triangle” effect that long curls can create, lifting your face and showing off your neck. Use a curl cream to define each ringlet.

4. The Deep Side-Swept Undercut

Keep length on top to sweep dramatically across your forehead, but shave or closely clip one side. This look is bold, modern, and draws the eye diagonally across your face—a very flattering line for plus size features. It also reduces bulk in thick hair.

5. Chin-Length Blunt Bob with Bangs

Don’t fear the blunt cut. A precise, straight-across bob that ends right at your chin can define your jawline beautifully. Add full, blunt bangs to shift focus to your eyes. Keep the length exact—not shorter, not longer—for maximum jaw-framing effect.

6. The Voluminous French Bob

A French bob is shorter (above the chin, near the earlobes) with soft, undone texture. For plus size women, pair it with wispy curtain bangs that part in the middle. This look is romantic, face-framing, and works wonders for oval or heart-shaped faces.

7. Shaggy Pixie with Wispy Sideburns

A little length at the “sideburn” area (soft, wispy pieces in front of the ears) is surprisingly slimming. It breaks up the width of your cheeks. Add shaggy, piece-y texture throughout the top for a rock-and-roll vibe that’s low-maintenance.

8. The Stacked Lob (Long Bob)

A stacked lob is shorter in the back (stacked for volume) and graduated to hit just above the collarbone in front. This is perfect for plus size women transitioning from long hair. The back “stack” gives you lift at the crown, while the front length keeps you from feeling too bare.

9. Finger Wave Pixie

For formal events or a vintage flair, try a finger wave pixie. The structured “S” curves of the waves create lines and movement that add artistic shape to a fuller face. Use strong-hold gel and a hooded dryer to set the waves.

10. The Buzz Cut (Yes, Really!)

A super-short buzz cut (number 2 or 3 guard all over) is the ultimate power move. When you remove hair entirely, your features—your eyes, lips, cheekbones—become the star. Plus size women with strong bone structure or beautiful skin absolutely glow with a buzz cut. Pair with bold earrings.

11. The Disconnected Undercut Bob

This is two looks in one. Keep a smooth, chin-length bob on top, but shave the underlayer completely (the hair at your nape). When your hair is down, it looks like a normal bob. When you tuck it behind an ear or put it up, you reveal a sexy, edgy surprise that also keeps you cool.

12. Soft Curly Pixie

For women with loose curls or waves, a soft, rounded pixie is incredibly feminine. The key is keeping the sides full (not shaved) and the top softly rounded like a cloud. This mimics the curve of your face in a harmonious way, rather than clashing with it.

13. The Side-Parted Bowl Cut (Modernized)

Forget the scary childhood version. A modern bowl cut is a uniform, rounded shape that sits just above the ears. To make it work for plus size faces, add a deep side part and keep the ends soft and texturized. Worn with glam makeup, it’s avant-garde and stunning.

14. The Quiff

A quiff is like a pompadour’s cooler cousin—volume is pushed up and slightly forward at the front hairline. This upward direction literally lifts your face. Keep the back and sides tight. It works best on straight to wavy hair and adds at least an inch of vertical height.

15. Curly Bangs with a Rounded Afro

If you have tight coils, consider a short, rounded afro that sits just above your ears, paired with curly bangs that graze your eyebrows. This creates a perfect frame around your eyes and cheekbones. The symmetry is powerful and celebratory of your natural texture.

16. The Piece-y, Messy Crop

Finally, a low-stress option: a short, all-over messy crop (about 2-3 inches long everywhere). The trick is to use a texturizing powder or sea salt spray to create separation between strands. The “imperfect”, piece-y lines are more forgiving and dynamic than a smooth, round shape.

What to Consider Before Choosing Your Short Haircut

Before you book that salon appointment or hand an AI-generated image to your stylist, take a moment to think about these five factors. Short hair is liberating, but the right short hair for you depends on more than just a pretty picture.

1. Face Shape (Not Body Size)

Short hair interacts with your face shape directly. Here's a quick guide:

  • Round face: Look for height at the crown (pixie with volume, quiff) or sharp angles (asymmetrical bob).
  • Oval face: You can wear almost anything—blunt bobs, French bobs, even buzz cuts.
  • Heart-shaped face: Side-swept bangs and chin-length bobs work beautifully.
  • Square face: Soft, textured cuts with wispy edges soften a strong jawline.

2. Hair Texture & Density

  • Fine/thin hair: Stacked bobs and textured pixies create volume. Avoid heavy blunt cuts.
  • Thick/dense hair: Undercuts and tapered cuts remove weight and prevent the "pyramid" shape.
  • Curly/coily hair: Tapered cuts and rounded afros honor your natural pattern without fighting it.

3. Maintenance Level

  • Low maintenance: Buzz cut, messy crop, curly tapered cut (wash and go).
  • Medium maintenance: Pixie cuts, French bobs (need regular trims every 4–6 weeks).
  • High maintenance: Finger waves, asymmetrical bobs with blunt lines (need styling products and salon visits).

4. Your Lifestyle

  • Active / gym-goer: Go very short (buzz, pixie) or a curly crop that survives sweat.
  • Professional setting: Asymmetrical bob, stacked lob, or soft curly pixie reads polished.
  • Creative / edgy style: Undercuts, disconnected bobs, or shaved designs let you express personality.

5. The Seasons

  • Summer: Shorter cuts (buzz, tapered undercut) keep you cool.
  • Winter: Slightly longer pixies or French bobs allow for cozy hats without total flattening.

How to Communicate With Your Stylist (Using AI Images the Right Way)

You've generated the perfect AI prompt image. Now what? Here's exactly how to use it without confusing your hairstylist.

Do This:

✅ Save or screenshot ONE image from your AI generation.
✅ Show the image and say: "I love the overall shape and volume at the crown. But my hair is [thicker/finer/curlier] than this model's."
✅ Point to specific zones: "I want the back this short, but the front this long."
✅ Bring photos of your own hair (freshly washed, no product) to show texture.

Don't Do This:

❌ Don't say "Make me look exactly like the AI picture" — AI hair often defies gravity and physics.
❌ Don't bring 10 different images. Pick one.
❌ Don't ignore your hair's natural texture. AI can generate straight hair on a curly model; reality cannot.

A Script to Use at the Salon:

"I have a reference photo from an AI image. I know my hair won't look identical because my texture is different, but I want the same [length / volume / shape]. Can you show me where that cut would hit on my face?"


Styling Tips for Short Hair on Plus Size Women

Short hair isn't a "cut and forget" situation. These five styling tricks make the difference between "I just rolled out of bed" and "I woke up like this."

1. Use Volume at the Crown Strategically

  • Apply a small amount of volumizing mousse to damp roots.
  • Blow-dry upward using a round brush or your fingers.
  • Why it works: Vertical height balances horizontal width.

2. Define Your Edges (Especially for Curly/Coily Hair)

  • Use a soft edge brush or toothbrush with edge control gel.
  • Sweep edges away from your face, not straight down.
  • Why it works: Clean edges lift your eye upward and open your face.

3. Add Statement Earrings

  • Short hair exposes your ears and neck. Wear large hoops, colorful acrylics, or chunky studs.
  • Why it works: Earrings create a new horizontal line that draws attention away from areas you might feel self-conscious about.

4. Dry Shampoo Is Your Best Friend

  • Spray at the roots on non-wash days. Massage in with fingertips.
  • Why it works: Short hair shows oil faster than long hair. Dry shampoo adds texture and grip.

5. Don't Fear Product

  • Fine hair: Lightweight mousse or texture spray.
  • Thick hair: Cream or gel to control bulk.
  • Curly hair: Leave-in conditioner + curl cream + light hold gel (the "praying hands" method).

Common Fears About Going Short (And Why They're Wrong)

Let's address the three biggest worries plus size women have before cutting their hair short.

Fear #1: "It will make my face look wider."

The truth: The wrong long hair makes your face look wider. Long hair that hangs straight down creates two vertical lines that frame and emphasize the widest part of your face. A good short cut with height or asymmetry breaks that up.

Fear #2: "I don't have the right neck or jawline."

The truth: There is no "right" neck or jawline. Short hair highlights what you do have—your eyes, your cheekbones, your smile. It doesn't expose flaws; it reveals features.

Fear #3: "People will stare at my body more."

The truth: People stare at confidence. Short hair signals self-assurance. When you walk into a room owning a bold pixie or a buzzed cut, people see you, not your size.

Fear #4: "I can't hide behind my hair anymore."

The truth: Exactly. And that's the gift. Hiding never made anyone feel beautiful. Showing up as yourself does.


Maintenance Schedule by Haircut Type

HaircutSalon Visit FrequencyDaily TimeKey Products
Buzz cutEvery 2–3 weeks1 minuteNone needed
Pixie (textured)Every 4–5 weeks5 minutesMousse, texture spray
Pixie (smooth)Every 3–4 weeks10 minutesPomade, fine-tooth comb
Bob (chin-length)Every 6–8 weeks10–15 minutesHeat protectant, round brush
Stacked lobEvery 6–8 weeks10 minutesVolumizing spray
Curly taperedEvery 6–8 weeks5–10 minutesCurl cream, edge control
UndercutEvery 3–4 weeks (undercut refresh)5 minutesDry shampoo

Before & After: What to Expect Emotionally

Going from long to short hair is not just a haircut. It's an emotional experience. Here's what's normal.

Week 1: Shock

You might think, "What have I done?" This is normal. Give yourself 7 days before judging.

Week 2–3: Euphoria

You'll notice how fast showers are. How light your head feels. How earrings finally make sense. Strangers might compliment you.

Week 4–5: The Awkward Grow-Out Phase (if you don't maintain it)

Short hair grows fast. If you skip a trim, the back gets shaggy. Book your next appointment before you leave the salon.

Week 6 and beyond: Ownership

This is your hair now. You'll stop thinking about it. You'll just be the woman with the great short cut.


Conclusion

Short hair is not a punishment. It's not a "brave" choice you have to apologize for. And it is certainly not reserved for thin women with delicate bone structure.

The 16 ideas in this article—from the textured pixie to the buzz cut to the soft curly tapered cut—share one thing in common: they put you first. Not your insecurities. Not society's outdated rules about what plus size women "should" do with their hair. Just you, your face, your style, and your life.

If you take one thing away from this article, let it be this: Your body does not need to be balanced, hidden, or corrected by your hair. Your hair exists to express you. And if a short cut makes you feel powerful, beautiful, or simply lighter—then it is the right cut, regardless of your dress size.

So save the AI prompts. Book the consultation. Bring the image to your stylist. And then, for the first few days, run your hands through your new short hair and smile. You didn't lose length. You gained presence.

Your face has been waiting for this.

Curtain Bangs After 50: The Soft, Youthful Update You’ve Been Looking For

April 17, 2026 by Jessica Guevara Leave a Comment


If you’ve been wearing the same side-swept or no-bangs look for years, curtain bangs might just be the refresh you didn’t know you needed. Unlike heavy, blunt bangs that can feel high-maintenance or harsh, curtain bangs are soft, face-framing, and incredibly versatile. They gently part in the middle (like, well, a curtain), drawing attention to your eyes and cheekbones while softening fine lines around the forehead and brows. For women over 50, the right curtain bangs can add volume, movement, and a modern-yet-timeless feel—without requiring a full chop.

Below are 10 well-structured ideas to help you find your perfect version:


1. The Classic Long Curtain Bang

Best for: Medium to long hair, oval or heart-shaped faces
These bangs start at the crown and gradually taper to chin length. Sweep them to each side to create a soft “S” shape. The length keeps them low-maintenance and easy to tuck behind your ears when desired.

2. The Wispy Gray Blend

Best for: Naturally gray or silver hair
Thinner, wispy curtain bangs allow your gray roots to blend seamlessly. Ask your stylist for point-cutting to remove bulk. This style softs facial contrast and looks stunning with silver tones.

3. The Volumizing Lift (for Thinning Hair)

Best for: Fine or thinning hair
Curtain bangs cut with a slight “bend” at the root can visually add density. A light root lift product and a round brush blow-dry will create a gentle wave that lifts the mid-face area.

4. The Curly or Wavy Curtain Bang

Best for: Natural curls or permed hair
On curly hair, curtain bangs should be cut dry and longer than straight styles—curls will spring up. They frame the face without adding width at the cheeks, balancing rounder or square face shapes.

5. The Shag-Layered Combo

Best for: Shoulder-length or shorter cuts
Pair curtain bangs with a layered shag. The bangs connect into the shortest layers, creating texture and movement. This is ideal for women who want an edgy, low-styling-effort look.

6. The Side-Parted Curtain (a.k.a. the Hybrid)

Best for: Those nervous about a full middle part
Ask for curtain bangs but style them with a slightly deeper side part. You’ll still get the face-framing effect without feeling like you’ve changed your part completely. Great for transitioning gradually.

7. The Brow-Skimming Length

Best for: Deep-set or hooded eyes
Keep curtain bangs just below the brow bone—not in the eyes. This opens up the eye area and softens forehead wrinkles. Pair with a lightweight texturizing spray to avoid a heavy look.

8. The Glamorous Blowout Bang

Best for: Special occasions or weekly styling
Cut curtain bangs with extra length (nose-to-chin). Use a large round brush and blow-dry them away from your face. The result is a polished, voluminous style that mimics a salon blowout.

9. The Minimalist’s No-Style Style

Best for: Wash-and-go routines
Choose micro-curtain bangs: very short at the center (just above brows) and gently longer at the temples. They fall into place with just fingers and air-drying—no heat needed. Ideal for low-maintenance women.

10. The Face-Framing Fade (for Short Pixies or Bobs)

Best for: Short hair, strong jawlines
In a pixie or short bob, curtain bangs become elongated pieces at the temples that blend into the sides. This elongates the neck and highlights cheekbones. Ask your stylist for “soft curtain texture” rather than a blunt fringe.

What to Ask Your Stylist Before Getting Curtain Bangs Over 50

A good consultation prevents regret. Bring these exact questions to your appointment:

  1. "Can you cut them dry first?"
    Curtain bangs behave differently on dry hair, especially if you have any wave or curl. A dry cut shows you exactly where they'll fall.
  2. "How much forehead will you leave visible?"
    More visible forehead = softer, more open look. Less visible = more dramatic. Ask for a middle ground if unsure.
  3. "Will these work with my cowlick or widow's peak?"
    Curtain bangs are forgiving, but a skilled stylist will adjust the parting or length to work with—not against—your natural growth patterns.
  4. "Show me where they'll hit when my hair is air-dried vs. blown out."
    Curtain bangs shrink when air-dried and lengthen when blown straight. Know both lengths before they cut.
  5. "Can you point-cut instead of blunt-cut?"
    Point-cutting removes weight and adds softness. Blunt cuts on curtain bangs can look harsh on mature faces.

Daily Styling: 2 Minutes or Less

Curtain bangs should simplify your routine, not complicate it. Here are three no-fuss methods:

Method 1 – The Round Brush Blowout (1–2 minutes)
Dampen just the bangs. Use a small round brush (1.5 inches). Brush forward, then roll away from your face. Blow warm, then cool to set.

Method 2 – The Velcro Roller Hack (no heat)
Dampen bangs. Roll one large velcro roller away from your face. Do makeup or dress. Unroll after 5–10 minutes. Finger-comb apart.

Method 3 – The Pinch-and-Dry (30 seconds)
For straight or slightly wavy hair: wet bangs, pinch them between two fingers, and blow-dry downward while shaking gently. No brush needed.

Pro tip: Never pull curtain bangs straight down when wet. Always sweep them to the sides as they dry—that's what creates the "curtain" effect.


Maintenance Schedule: What to Expect

TaskFrequencyNotes
TrimEvery 4–6 weeksCurtain bangs grow out gracefully, but lose their shape after week 6
Full washAs usualYou don't need to wash bangs separately unless you have very oily skin
Dry shampooEvery other dayLight spritz on the roots of bangs only—keeps them from separating
Deep conditionWeeklyAvoid the bang roots; condition only the ends
Full recutEvery 3–4 monthsThe rest of your hair may need a refresh, but bangs need more frequent trims

Growing them out?
Curtain bangs are the easiest bangs to grow out. After 8 weeks without a trim, they become face-framing layers. After 12 weeks, they tuck behind your ears completely. No awkward phase.


Who Should Skip Curtain Bangs (Honestly)

Curtain bangs are versatile, but not universal. Consider skipping them if:

  • You have very strong cowlicks at both front corners – The bangs may split unnaturally.
  • You wear your hair in a tight ponytail 5+ days a week – The bangs will need restyling every time you take it down.
  • You have extremely oily skin – Bangs absorb oil and may look greasy by midday unless you're committed to dry shampoo.
  • You prefer zero hair on your forehead – That's fine! Try a deep side-swept long bang instead.

If any of these sound like you, consider long face-framing layers (no forehead coverage) or a soft curtain bang that starts past your eyebrows (minimal forehead contact).


The Best Hair Textures & Face Shapes for Curtain Bangs Over 50

Face shapes that shine with curtain bangs:

Face ShapeWhy It WorksWhat to Avoid
OvalAlmost any length worksNothing—you're lucky
RoundVertical lines from the center part elongate the faceVery short bangs that stop at the widest part of cheeks
HeartSoftens a pointed chinHeavy, thick bangs that widen the forehead further
SquareCurved bangs soften a strong jawBlunt, straight-across bangs
Long/oblongHorizontal movement breaks up lengthUltra-long bangs that pull the face down further

Hair textures that take curtain bangs beautifully:

  • Fine hair – Yes, with texturizing spray. Avoid heavy products.
  • Medium hair – Ideal. Holds shape without effort.
  • Thick hair – Yes, but ask for internal layering to remove bulk.
  • Curly hair – Yes, but cut dry and 1–2 inches longer than desired.
  • Wavy hair – Perfect. The wave adds natural volume.
  • Straight hair – Yes, but may need a tiny bit of texture powder for grip.

Texture that needs extra consideration:
Very coily/kinky hair – Curtain bangs are beautiful, but they require a curly specialist and regular hydration. Ask for "soft curly curtain fringe."


Products That Make Curtain Bangs Behave

You don't need a shelf of products. Start with these three:

  1. Tiny round brush (1–1.5 inches) – Anything larger won't create the curve. Olivia Garden or Denman make excellent small brushes.
  2. Dry shampoo (powder or spray) – Apply to bang roots only. Klorane or Batiste work well. Powder formulas last longer.
  3. Lightweight texture spray or sea salt spray (diluted) – Spray on hands, then finger-comb through bangs. Avoid spraying directly on the roots.

What to skip:
Heavy oils, serums, or pomades. Curtain bangs should look airy, not piecey or greasy.


Conclusion

Curtain bangs are not a "young woman's" hairstyle. In fact, they offer something that blunt bangs and severe side-swept styles cannot: softness, movement, and an effortless lift that draws the eye upward. For women over 50, that upward lift is everything. It brightens the eyes, softens forehead lines, and creates a gentle frame that no other cut quite achieves.

The ten ideas above give you a roadmap—whether you want wispy gray blends, volumizing lifts for thinning hair, or a wash-and-go minimalist fringe. The key is starting longer than you think you need, finding a stylist who listens, and embracing a few minutes of simple styling each morning.

And if you decide curtain bangs aren't for you? They grow out into beautiful face-framing layers in just a few weeks. No drama, no regret.

So go ahead. Book that trim. Bring a photo. And enjoy the most forgiving, flattering, and fun bang style you've ever had—at any age.

Glass Hair Is Beauty's New Status Symbol — Here's Exactly How to Get It at Home

April 17, 2026 by Jessica Guevara Leave a Comment

First it was glass skin — if you haven't mastered that yet, achieve that coveted glass skin glow with our complete guide — then came glass nails. Now? Glass hair is officially beauty's most-wanted look — and it's not hard to see why.

We're talking mirror-like shine, impossibly smooth strands, and hair that looks so healthy it practically glows. You've seen it on your feeds. You've seen it on the red carpet. And now stylists across the US are reporting that it's one of the most requested looks in the salon chair for summer 2026.

The good news? You don't need a salon appointment to get it. You just need to understand what actually creates that glassy effect — and have the right products in your bathroom cabinet.


What Actually Makes Hair Look Glassy?

Here's the thing most articles won't tell you: glass hair isn't really about a specific style. It's about cuticle health.

Each strand of your hair is covered in tiny overlapping scales, like roof tiles. When those scales lie flat and smooth, light bounces off evenly — and your hair looks shiny and glassy. When they're raised or damaged (from heat, color, dryness, or hard water), light scatters in every direction — and your hair looks dull and rough.

So the path to glass hair isn't just product-layering. It's about anything that smooths and seals the cuticle: hydration, bond repair, the right heat tools, and the right finishing products.

If your hair is also feeling thinner than it used to be, what causes thinning hair after 40 — and the fixes that reverse it covers the root causes — and many of those same fixes support the glass hair look by strengthening the hair shaft.

Every product recommendation below works because of this mechanism — not just because a brand says so.


How to Get Glass Hair: 3 Routes

Route 1: The 5-Minute Fix
If you want glass hair today, a gloss treatment or shine serum applied to dry hair is your fastest path. Takes five minutes, no special tools required.

Route 2: The Blowout Method
Blow-dry with downward airflow and tension to flatten the cuticle, then finish with a flat iron on medium heat. The key is direction — always pointing heat downward, tip to root. Finish with a lightweight oil through the ends only.

Route 3: The Treatment Route
Once a week, swap your conditioner for a bond-building gloss treatment. Over 2–3 weeks, you'll notice a cumulative improvement in shine that no styling product alone can match.

Glass hair pairs beautifully with a dewy, minimal makeup look. If you're after that complete fresh-faced aesthetic, dewy, natural-looking makeup in five minutes flat shows you how to achieve it in record time.


The Best Glass Hair Products Available on Amazon Right Now

Best Gloss Treatment: Kérastase Chroma Absolu High Shine Gloss

This is the one beauty editors keep coming back to. It works in just one to two minutes in the shower, uses lactic and amino acids to seal the cuticle, and works on all hair types including color-treated. If you only buy one product from this list, make it this one.

👉 Buy Kérastase Chroma Absolu Gloss on Amazon


Best for Frizz Control + Shine: Color Wow Pop + Lock Serum

A pea-sized drop applied to dry hair delivers both frizz control and a glossy, lacquered finish without weight or greasiness. Particularly good for medium to thick hair.

👉 Buy Color Wow Pop + Lock Serum on Amazon


Best Budget Gloss: IGK Expensive Clear Gloss Top Coat

The name says it all. It's literally marketed as a "glass hair" treatment and it's a bestseller in Amazon's hair gloss category. Clear formula, so it works on any hair color.

👉 Buy IGK Expensive Clear Gloss on Amazon


Best for Color-Treated Hair: dpHUE Gloss+

Available in five shades (including a clear version), this in-shower gloss uses ceramides and upcycled lemon zest to hydrate and add shine while gently refreshing your color.

👉 Buy dpHUE Gloss+ on Amazon


Best Heat Protectant for Glass Hair: Kérastase Gloss Absolu Glaze Milk

Apply to damp hair before blow-drying. It protects up to 450°F, detangles, and controls frizz and flyaways — all while setting you up for that high-shine blowout finish.

👉 Search for Kérastase Gloss Absolu Glaze Milk on Amazon 


Best Affordable Option: John Frieda Luminous Glaze

Under $10. Specifically formulated to boost shine, but the clear version works on any shade. A solid starter product if you want to try the glass hair routine without committing to a premium price point.

👉 Buy John Frieda Luminous Glaze on Amazon


Best for Curly and Natural Hair: Olaplex No. 7 Bonding Oil

Glass hair is not just for straight hair. The real key to glassy shine on curly and natural hair is hydration — and this concentrated bonding oil smooths the cuticle while adding high-shine finish without weighing curls down.

👉 Buy Olaplex No. 7 Bonding Oil on Amazon


Does Glass Hair Work on All Hair Types?

Yes — with one adjustment in approach.

For straight and wavy hair, the path is cuticle-smoothing: gloss treatments, heat with downward airflow, finishing oils.

For curly and natural hair, the path is hydration-first. Well-moisturized curls naturally reflect more light. Focus on a deeply hydrating gloss treatment, smoothed edges, and glossy ends. You're not trying to make curly hair straight — you're bringing out the natural reflectivity that lives in healthy, hydrated curls.

This same principle of working with your natural texture applies to haircuts too. Glass hair is particularly striking on a sharp, structured blunt bob — the shine amplifies those clean, precise lines and makes the whole look feel more expensive.


Frequently Asked Questions

Is glass hair the same as glazed hair?
Almost. A hair glaze is a specific treatment that coats the strand for shine and tone — it's one method for achieving glass hair. Glass hair is the aesthetic goal. Think of glazing as one of several routes to get there.

How long does glass hair last?
With the right products and no heat damage, you can maintain the look between washes easily. A weekly gloss treatment keeps the cumulative effect building over time.

Do I need a flat iron?
No. The blowout method with downward airflow gets you most of the way there. A flat iron amplifies the shine further, but the gloss treatments and finishing products do the heavy lifting.


Ready to try glass hair? The easiest place to start is a 5-minute in-shower gloss treatment once a week — your hair will tell you the difference after the first use.

Looking for that complete head-to-toe glass aesthetic? Start with luminous, mirror-finish skin from head to toe — because glowing skin and glossy hair were made for each other.

Genius Curly Haircuts for Thin Hair That Add Instant Volume and Bounce

April 16, 2026 by Jessica Guevara Leave a Comment

If you have thin hair and natural curls, you’ve likely faced a frustrating paradox: curls need density to hold their shape, but thin hair often falls flat or looks sparse. The good news? The right haircut can transform limp, see-through curls into a full, bouncy, and voluminous style.

Thin curly hair requires strategic layering, weight removal, and shape control. Cut it too blunt, and it lacks movement. Cut it too layered, and it looks even thinner. In this guide, I’ll walk you through 10 expertly designed haircuts that create the illusion of thickness, boost root volume, and make every curl count.


10 Curly Haircuts for Thin Hair:

1. The Curly Shag

Why it works: The shag is a thin-haired curly’s best friend. With short layers on top and longer pieces underneath, it builds a “triangle of volume” at the crown.
Key detail: Ask for wispy, not chunky, bangs to avoid weighing down fine curls.
Best for: 2B to 3B curls.

2. The Rounded Bob (No Longer Than Chin-Length)

Why it works: A blunt bob on straight hair looks dense, but on curly thin hair, it can become bottom-heavy. The solution? A rounded bob that stacks slightly at the back and keeps the perimeter soft.
Key detail: Length should end at your chin when curls are dry. Any longer, and gravity pulls the curls flat.
Best for: Type 3A–3C with fine strands.

3. The “Undercut” for Volume Illusion

Why it works: This sounds counterintuitive, but removing a small hidden triangle of hair from the nape allows the top curls to stack and appear much fuller.
Key detail: Keep the undercut hidden (no shaved designs) so it only serves as internal weight removal.
Best for: Dense-but-fine curly hair (lots of strands, each thin).

4. The Micro-Layered Pixie

Why it works: When hair is very thin, going short removes the weight that pulls curls straight. A pixie with micro-layers (cuts as small as ¼ inch) creates a fuzzy, cloud-like halo of curls.
Key detail: Leave length slightly longer on top to form ringlets, and keep the sides tapered but not shaved.
Best for: Type 3B–4A with low density.

5. The A-Line Curly Bob

Why it works: Shorter in the back, longer in the front, the A-line cut instantly boosts volume at the crown while preserving length in front for versatility.
Key detail: The back should be stacked internally (using point-cutting, not razors) so curls don’t collapse.
Best for: Type 2C–3B who want length in the front.

6. The DevaCut “Layering Without Losing Mass”

Why it works: Inspired by the DevaCurl method, this dry cut follows your curl pattern. For thin hair, stylists use “carve-and-slice” techniques to remove weight vertically, which preserves density while adding lift.
Key detail: Insist on dry cutting only. Wet cutting thin curls leads to shockingly short, flat results.
Best for: All curl types, especially fragile, low-density hair.

7. The Curly Mullet (Modern, Soft Version)

Why it works: Don’t fear the mullet. A soft curly mullet keeps short, stacked volume at the crown and sides, with wispy length in the back. The contrast creates fullness where it matters most.
Key detail: Avoid harsh lines; ask for “invisible graduation” between the short and long sections.
Best for: Adventurous types 3A–3C with medium to fine strands.

8. The One-Length (But Only If…)

Why it works: One-length curls work for thin hair only if your hair is already dense enough to form a solid curtain. For most thin-haired curlies, this is risky.
Key detail: If you try it, keep the hemline soft (not blunt) and add long, subtle internal layers no shorter than 2 inches from the ends.
Best for: Type 2A–2C wavy-thin hair with high density per square inch.

9. The Asymmetrical Curly Cut

Why it works: By making one side slightly shorter (by 1–2 inches), you create visual asymmetry that tricks the eye into seeing more movement and body. The shorter side lifts the roots on that entire half of your head.
Key detail: The difference should be minimal—too dramatic, and thin curls will look patchy.
Best for: 2B–3B who want a modern, edgy shape.

10. The Crown-Focused “Layered Bowl” (No, Not the 90s Bowl Cut)

Why it works: This is a disguised version of a bowl cut, but for thin curls, it’s genius. The hair is cut to the same short length all around the crown (like a halo), while the lower perimeter is texturized away. The result? A full, circular cloud of curls.
Key detail: The top must be cut to your shortest curl’s shrinkage length (test by pulling a curl straight, then letting it spring back).
Best for: Very tight curls (3C–4C) with thin, fragile strands.

Essential Pre-Cut Checklist for Thin Curly Hair

Before you sit in the stylist's chair, complete these four steps to ensure your new cut delivers maximum volume.

1. The Dry Pull Test

Gently stretch one curl from root to tip. If it stretches more than 40% of its length before springing back, your hair has high elasticity and needs more layering to avoid looking stringy. If it barely stretches, keep layers wider and softer.

2. The Density Assessment

Part your dry hair down the middle in bright light. Can you clearly see your scalp along the part line? Yes → You have low density. Avoid over-layering. No → You have medium to high density and can handle shag or mullet cuts.

3. The Product Compatibility Check

Heavy butters, creams, and oils collapse thin curls within hours. Before booking a cut, switch to a lightweight leave-in conditioner and a foam or mousse styler for one week. This reveals your true curl pattern without product weight, helping your stylist cut accurately.

4. The Reference Image Rule

Do not bring photos of thick, dense curly hair. Find three images of thin-haired curlies with a similar curl type to yours. Label each with what you love (volume at crown? soft perimeter? bang length?) and what you want to avoid.


What to Tell Your Stylist (Exact Script)

Use this word-for-word when communicating with your hairstylist:

"I have thin curly hair that falls flat easily. I want to keep my length at [chin / shoulder / collarbone] when dry. Please cut my hair dry, curl by curl. Do not use thinning shears or a razor. Use point-cutting or slide-cutting only. I want internal layers that remove weight vertically, not horizontally. Keep the perimeter soft but not wispy. And please show me the length after every second cut."

Red flags to watch for: If your stylist insists on washing and cutting wet, refuses to show you the back mid-cut, or reaches for thinning shears, stand up and leave.


The 3-Product System for Styling Thin Curls Post-Cut

Even the perfect haircut fails without the right products. Stick to this minimalist system:

StepProduct TypeWhat to Look ForWhat to Avoid
1Lightweight leave-inWater-first ingredient, spray or lotion consistencyCreams, butters, oils
2Volumizing foam or mousseLabel says "root lift" or "fullness"Gels with heavy polymers
3Flexible hold hairsprayLight mist, touchable finishHard-hold aerosol

Application order: On soaking wet hair, spray leave-in → scrunch in mousse → microplop with a microfiber towel → diffuse upside down → finish with one mist of hairspray at the roots.


How Often to Re-Cut Thin Curly Hair

Thin curls lose shape faster than thick curls because each strand has less internal support. Follow this schedule:

  • Every 6–8 weeks: Micro-trim (just ¼ inch off the perimeter and refreshing the lightest layers). This maintains volume without losing length.
  • Every 12–16 weeks: Full restructure cut. Return to your original cut shape (shag, bob, etc.) because thin curls relax and drop over time.
  • Every 24 weeks (6 months): Complete reset. Cut back to baseline length if you notice see-through ends or flat crown despite proper styling.

Sign you're overdue: When your dry curls hang straight for the first two inches before forming a curl, the weight has won. Book immediately.


Two Common Mistakes That Ruin Thin Curly Cuts

Avoid these at all costs:

Mistake #1: Asking for "More Layers" to Add Volume

More layers on thin hair remove density at the ends, making your hair look wispy and transparent. Instead, ask for "internal layering" or "weight removal from the inside only." This keeps the outer perimeter intact while lifting the roots.

Mistake #2: Growing Out Your Cut "Just to See"

Thin curly hair does not get better with length past a certain point. For most curl types, the maximum volume length is between chin and collarbone. Anything longer creates a "triangle head" or flat curtain effect. Commit to your length.


Conclusion

Thin curly hair is not a limitation—it is a specific texture that demands a specific strategy. The ten haircuts in this guide share one common philosophy: remove weight strategically, never density. Whether you choose the playful curly shag, the precise rounded bob, or the bold asymmetrical cut, the goal is always the same—lift at the roots, fullness through the mid-lengths, and a soft, opaque perimeter.

Remember that no haircut works alone. Pair your new shape with lightweight products, a diffuser, and a six-week trim schedule. And most importantly, stop comparing your thin curls to thick-haired influencers. Your hair has its own rhythm: less weight, more bounce. When you cut for your density, not for an ideal, you stop fighting your curls and start showing them off.

Now go book that appointment. Bring your reference photos. Say the script. And watch your thin curls do something you may have never seen before—stand up, hold their shape, and finally look as full as they feel.

 Breathtaking Curly Updos That Celebrate Texture & Volume

April 16, 2026 by Jessica Guevara Leave a Comment

For too long, curly hair was treated as a problem to be solved rather than a gift to be celebrated. When it comes to updos, many curlies fall back on the same tight, slicked-back bun out of fear that their texture might look “messy” or unruly. But the truth is exactly the opposite: curls provide the natural volume, grip, and intricate detail that straight hair can only achieve with pins, backcombing, and extensions.

Whether you have loose waves, tight coils, or something in between, a curly updo is your opportunity to turn your texture into architecture. From romantic date-night styles to powerful red-carpet statements, these 11 ideas will work with your curl pattern—not against it. No frizz-shaming, no flat-ironing, and no fighting your natural texture. Let’s dive in.


1. The Pineapple Puff (High & Loose)

Best for: Type 3A–4C, second or third-day curls

The pineapple puff is the ultimate lazy-girl updo that somehow looks intentional. Gather all your hair to the very top of your head—right around your hairline—and secure it with a silk or satin scrunchie. The key is not pulling the ends all the way through on the last loop, leaving a fat, rounded puff that spills out like a blooming flower.

Pro tip: Leave a few face-framing curls out and define them with a drop of oil. For extra height, use two scrunchies stacked together.

2. The Curly French Twist (Fake-Out Version)

Best for: Medium to long hair, Type 2B–3C

A true French twist is tricky on curls because they refuse to lie flat. Instead, create the illusion: Sweep all your hair to one side, twist it upward vertically along the back of your head, and tuck the ends under. Secure with two long spiral pins (U-shaped pins work better than bobby pins for curly texture). The natural spring of your curls will hold the shape without needing a single bobby pin grid.

Why it works: Curls lock into each other like Velcro, so the twist stays put without hairspray cement.

3. The Low, Knotted Chignon

Best for: Shoulder-length to long curls, formal events

This style looks complex but takes under three minutes. Pull your curls into a low ponytail at the nape of your neck. Divide the ponytail into two sections, tie them into a loose knot (like the first step of tying a shoelace), then tuck the ends over and under the knot. Pin any stray pieces flat against your head.

Variation: For a more organic look, don’t hide the ends—let a few curly tendrils poke out like ivy around the knot.

4. The Curly Space Buns (Double Buns)

Best for: Festivals, gym sessions, or any “fun” event

Part your hair down the middle. On each side, gather hair up toward your crown and twist it into a small bun. Because curls have volume, even a tiny bun will read as substantial. Leave the lower half of your hair (from ears down) loose or pin it up—both work.

Why it’s genius: Space buns hide uneven shrinkage. If one side of your head always curls tighter than the other, nobody will ever notice.

5. The Sleek Front, Voluminous Back Combo

Best for: Weddings, galas, or any updo that needs to last 8+ hours

Apply a strong-hold gel or mousse to your front edges and smooth them down with a boar-bristle brush into a side or middle part. Pin that smoothed section flat against your scalp. Then, completely ignore the back of your head—gather the remaining curls into a wild, oversized bun or pouf. The contrast between sleek discipline and curly freedom is incredibly editorial.

Pro tip: Use a satin scarf to tie your edges down for 10 minutes before pinning. That gives you glass-like sleekness without heat.

6. The Curly Crown Braid (Pull-Through Braid)

Best for: Type 2B–3C, when you want a braided look without actual braiding

Instead of a traditional three-strand braid (which often frays on curls), make a “fake” braid: Section your hair into three big clumps. Instead of crossing strands over each other, simply pull each clump up and through the middle. This creates a braided shape that showcases each curl clump individually. Once complete, wrap the whole thing around your head like a crown and pin.

Visual effect: It looks like a intricate Celtic braid but takes 60% less time.

7. The Pin-Curl Updo (Using Your Own Curls as Pins)

Best for: Type 3B–4C, shorter curly hair (chin to shoulder length)

This is an advanced move but a showstopper. Instead of using bobby pins, take individual curl clumps, coil them into a flat spiral against your scalp, and pin them with their own ends tucked underneath. Layer these pin curls all over your head, overlapping slightly. The result looks like a mosaic of rosettes.

Who this is for: People with naturally defined curl clumps that hold a spiral shape without product. If your curls fall out easily, skip this one.

8. The Half-Up Curly Waterfall

Best for: Long curls, romantic or bohemian vibes

Take the top half of your hair (from the temples up) and secure it loosely at the back of your crown with a claw clip or pins. But here’s the twist: before pinning, gently pull a few individual curls out of the gathered section so they cascade down over the secured part. The pinned section acts like a dam, and the fallen curls become the waterfall.

Styling note: This works best on wash-day curls with good slip. Day-old curls tend to grip too much and won’t fall naturally.

9. The Curly Gibson Tuck (Vintage-Inspired)

Best for: Type 2A–3A, medium length, vintage or officewear

Roll your curls inward from the bottom up, as if you were putting them into a very low ponytail but stopped halfway. Once the roll is tight against your nape, fold the whole thing upward and pin it flat against your head. The visible roll should look like a smooth, tucked pillow of curls. Edwardian vibes, zero heat.

Caution: This requires some length—at least armpit level when stretched. Shorter curlies will end up with a mini tuck, which is also adorable.

10. The Messy Bun (But Intentional)

Best for: Every curl type, every day

The universal favorite, but done right: Do not brush your curls. Do not smooth them. Simply gather everything into a high ponytail, twist loosely, and coil into a bun. Now—and this is critical—pull out at least 10–15 individual curls from the bun’s perimeter so it looks exploded. Then take two bobby pins and pin nothing—just weave them into the bun as decoration.

The rule: If your messy bun looks like you tried, it’s wrong. If it looks like you gave up halfway through, it’s perfect.

11. The Tucked-In Bob (For Shorter Curls)

Best for: Type 3B–4C, chin-length or shorter, growing out a curly cut

If your curls don’t reach a ponytail yet, use the “tuck and pin” method. Apply a little gel or curl cream, then use small duckbill clips to tuck the ends of your curls under themselves all around your head. The goal is to create a rounded, faux-bob shape that sits just above your shoulders. It’s not a traditional updo, but it lifts the hair off your neck and gives a completely new silhouette.

Why you’ll love it: This is the only “updo” for short curls that doesn’t require a single elastic or scrunchie. Just clips and creativity.

Before You Start: Essential Prep for Curly Updos

Curly updos fail for one reason 90% of the time: dry hair. Unlike straight hair, which can be pulled back at any texture, curls need specific preparation to hold shape without frizzing or collapsing.

The Night Before (Highly Recommended)

  • Sleep on a satin or silk pillowcase (or wear a satin bonnet). This preserves your curl clumps and reduces friction that leads to frizz.
  • If your curls are flattened, refresh with a water-and-conditioner spray bottle. Do not brush dry curls—ever.

On the Day (15 Minutes Before Styling)

  • Apply a lightweight mousse or curl cream to damp hair. Avoid heavy oils or butters—they make curls too slippery to pin.
  • For sleek edges (as in idea #5), use a gel with medium hold. For volume-focused styles, use nothing at all or a salt spray.
  • Detangle only with your fingers or a wide-tooth comb while hair is wet. Dry detangling destroys curl patterns.

The Tool Kit You Actually Need

  • Satin scrunchies (no elastic bands—they snap curls)
  • U-shaped hair pins (better than bobby pins for thick or curly hair)
  • Duckbill clips (for sectioning and the tucked-in bob)
  • A small spray bottle with water
  • A soft bristle brush (only for edges, never for the whole head)

What to Avoid

  • Hairspray with alcohol (dries curls out within an hour)
  • Fine-tooth combs (cause frizz and breakage)
  • Pulling hair too tight (curly hair is fragile; tension leads to traction alopecia)

How to Adapt Any Updo for Your Curl Type

Not all curls behave the same way. Here is a quick cheat sheet to modify any of the 11 ideas for your specific texture.

Curl TypeCharacteristicsAdaptation Strategy
Type 2A–2B (loose waves)Falls flat easily, low volumeUse mousse for grip. Add a texturizing spray before pinning. Curls may slip—use more pins than you think.
Type 2C–3A (defined S-curls)Medium volume, good holdMost versatile type. Almost all 11 ideas work as written. Focus on keeping ends hydrated.
Type 3B–3C (tight corkscrews)High volume, high shrinkageEmbrace shrinkage as volume. For buns, use two scrunchies. For braids, use the pull-through method only.
Type 4A–4B (coils and zigzags)Very high shrinkage, densePineapple and pin-curl styles work best. Avoid styles that require length (Gibson tuck is difficult). Use water generously.
Type 4C (tight zigzag without defined curl)Most shrinkage, most fragileFocus on protective styles. The pineapple puff and tucked-in bob are ideal. Always use satin accessories.

Shrinkage note: If your curls shrink by 50% or more, stretch them gently with your fingers before pinning. Never use heat for this—just water and tension.


Products That Work (And Ones That Don't)

Approved for Curly Updos

  • Eco Styler Gel (for edges and sleek fronts)
  • The Doux Mousse Def (for volume and hold without crunch)
  • Pattern Beauty Curl Gel (medium hold, no flakes)
  • Ouidad Advanced Climate Control (anti-humidity for outdoor events)
  • SheaMoisture Coconut & Hibiscus Curl Mousse (lightweight, good for fine curls)

Avoid for Updos

  • Heavy butters (Shea butter, cocoa butter) – too slippery, pins fall out
  • Coconut oil alone – no hold, just shine
  • Drugstore aerosol hairspray – contains drying alcohol
  • Cream-based leave-ins applied same-day – weigh curls down before pinning

The One Product You Don't Need
Hairspray. Seriously. Curly hair grips itself. If your updo won't stay, you need more pins or better preparation, not more spray.


How to Make Your Curly Updo Last All Day (Or Night)

Curly updos have a reputation for falling apart by hour three. That reputation is earned—but avoidable.

The 4-Hour Rule
Within four hours of styling, your curls will naturally relax and expand. Plan for this by building "give" into your updo. If you pin everything too tight at hour zero, you'll have escapees by hour four.

The Pin Placement Secret
Don't push pins straight into the bun. Instead, weave them in parallel to your scalp, catching a few hairs from the bun and a few from your head. This creates a hinge rather than a spear.

The Emergency Refresh Kit (Keep in Your Bag)

  • 3–4 extra bobby pins (U-shaped pins for thick curls)
  • A mini satin scrunchie (for mid-event pineapple conversion)
  • A drop of jojoba or argan oil on your fingertip (to smooth flyaways, not re-wet)

When to Give Up and Redo
If your updo starts looking more like a bird's nest than a style after five hours, don't fight it. Pull the pins out, finger-comb, and redo a simpler style (the pineapple puff or messy bun) in 90 seconds. No one will know.


Conclusion

Curly updos are not about forcing your hair into a shape it doesn't want to take. They are about revealing the shape that was already there—the natural architecture of your curls, the volume that straight-haired people spend hours trying to fake, the texture that tells the world you aren't afraid of a little spring in your step.

The 11 ideas in this article are not commandments. They are starting points. The pineapple puff might become your daily uniform. The pin-curl updo might stay pinned to your Pinterest board for years before you try it. That is fine. What matters is that you stop apologizing for your texture and start using it as the tool it was always meant to be.

Next time you have an event—a wedding, a work party, or just a Tuesday—resist the urge to straighten. Do not reach for the flat iron. Do not slick everything back into a tight, lifeless knot. Instead, flip your head over, gather those curls, and pin them with confidence. Let the frizz be frizz. Let the volume be loud. Let your hair do what it was born to do.

And if someone tells you curly updos look "unprofessional" or "messy"? That is their problem. Not yours.

Short Hairstyles for Women Over 70: Ageless & Chic

April 16, 2026 by Jessica Guevara Leave a Comment

Turning 70 is a milestone that deserves a hairstyle as vibrant and confident as you are. Gone are the days when “short hair for older women” meant a plain, one-length helmet cut. Today, the options are stylish, low-maintenance, and designed to celebrate your natural texture, face shape, and personality.

Whether you want volume to offset thinning hair, softness to frame your features, or a bold, modern edge, the right short cut can energize your entire look.

Below are 12 flattering, easy-to-style ideas that prioritize comfort without sacrificing elegance:


1. The Classic Silver Pixie

  • What it is: A very short, cropped cut with slightly longer layers on top.
  • Why it works: It highlights silver or white hair beautifully, reduces bulk, and requires only a fingertip of styling cream. The height on top elongates the face.
  • Best for: Fine or thinning hair; oval and heart-shaped faces.

2. The Soft Curly Crop

  • What it is: Natural curls or permed hair cut close to the head but with rounded, soft edges.
  • Why it works: Embraces natural texture without fighting it. It’s playful, adds instant volume, and hides sparse areas.
  • Best for: Women with naturally curly or wavy hair; round or square faces (softens angles).

3. The Textured Bob with Wispy Bangs

  • What it is: A chin-length bob with internal layers and feather-light, uneven bangs.
  • Why it works: The wispy bangs draw attention to your eyes and minimize forehead lines. The texture prevents the “helmet head” look.
  • Best for: Straight or slightly wavy hair; long or rectangular faces.

4. The Tapered Nape Cut

  • What it is: Hair is closely tapered (shorter) at the nape of the neck, leaving more length on top and at the crown.
  • Why it works: This gives a clean, lifted silhouette and keeps hair off the neck in warmer weather. It’s incredibly neat and professional-looking.
  • Best for: Thick hair (to remove weight); any face shape when paired with side-swept bangs.

5. The Feathered Pixie

  • What it is: A classic pixie with soft, feathery layers cut into the top and sides, often swept to one side.
  • Why it works: The layers create movement and a gentle, airy feel. It’s very forgiving for uneven growth or cowlicks.
  • Best for: Fine to medium hair; women who want a feminine, not severe, short cut.

6. The Side-Swept Shingle

  • What it is: A very short, close-to-the-head cut (like a shingle roof) with one dramatic, longer side swept across the forehead.
  • Why it works: The diagonal line created by the side sweep is extremely slimming and adds drama without effort.
  • Best for: Women who wear glasses (the sweep balances frames); round or full faces.

7. The Cropped Layered Bob (Stacked)

  • What it is: A bob that is shorter in the back (stacked layers) and gradually longer toward the front.
  • Why it works: The stacked back gives natural lift at the crown, combating flatness. The longer front pieces frame the jawline attractively.
  • Best for: Straight or lightly waved hair; women who want volume without backcombing.

8. The Wash-and-Wear Curly Pixie

  • What it is: A very short cut (1–2 inches) all over, designed specifically for natural curl or a tight perm.
  • Why it works: Air-dries perfectly. No blow-dryer, no round brush—just scrunch with leave-in conditioner. Arthritis-friendly.
  • Best for: Active lifestyles; women with limited hand mobility or dexterity issues.

9. The Asymmetrical Pixie

  • What it is: One side is cut slightly longer or shaped differently than the other.
  • Why it works: Adds modern interest and can visually correct facial asymmetry. It’s a subtle way to look fashion-forward.
  • Best for: Oval or diamond-shaped faces; those wanting a trendy update without drastic length.

10. The Ultra-Short Buzz or Induction Cut

  • What it is: Hair cut to a uniform ¼ to ½ inch all over using clippers.
  • Why it works: Utterly liberating. Zero daily maintenance, highlights beautiful scalp shape, and can be very empowering. Easy to wear wigs or scarves over.
  • Best for: Women experiencing significant thinning or medical hair loss; confident minimalists.

11. The Long Pixie with Choppy Ends

  • What it is: A pixie that keeps length (1–2 inches) throughout, but with blunt, uneven, “choppy” tips.
  • Why it works: The choppy ends create the illusion of thicker, denser hair. It’s edgy yet age-appropriate.
  • Best for: Medium to thick hair; adding texture to straight, flat hair.

12. The Curly Top with Clean Sides

  • What it is: Sides and nape are clipped very short or shaved, while the top is left in soft curls or waves.
  • Why it works: High contrast and very modern. It puts all the volume and attention on top, lifting the face instantly. Easy to maintain with trims.
  • Best for: Bold personalities; strong bone structure; women who want a dramatic, artistic cut.

How to Choose the Right Short Hairstyle for You

With so many options, narrowing it down can feel overwhelming. Ask yourself these three simple questions:

  1. How much daily styling time do you want?
    • 5 minutes or less → Try the Wash-and-Wear Curly Pixie (#8) or Ultra-Short Buzz Cut (#10).
    • 10–15 minutes → The Classic Silver Pixie (#1) or Feathered Pixie (#5) are ideal.
  2. What is your natural hair texture?
    • Curly or coily → Embrace it with the Soft Curly Crop (#2) or Curly Top with Clean Sides (#12).
    • Straight or fine → Add volume with the Stacked Bob (#7) or Long Pixie with Choppy Ends (#11).
  3. What do you want the haircut to accentuate?
    • Your eyes → Wispy bangs (#3) or a side-swept style (#6).
    • Your cheekbones → An asymmetrical cut (#9) or tapered nape (#4).

Essential Maintenance Tips for Short Hair Over 70

Short hair is lower maintenance, but not no maintenance. Follow these guidelines:

  • Trim every 4–6 weeks. Short cuts lose their shape faster than long hair. A small trim keeps the silhouette clean.
  • Use volumizing products sparingly. A pea-sized amount of mousse or lightweight cream is enough. Heavy products weigh down fine hair.
  • Protect your scalp. With shorter hair, your scalp gets more sun. Apply a light SPF spray or wear a stylish hat outdoors.
  • Switch to a satin pillowcase. It reduces friction, prevents breakage, and keeps your style intact overnight.
  • Work with your natural growth patterns. Cowlicks and waves become more visible when hair is short. A good stylist will cut with them, not against them.

What to Tell Your Stylist (Exact Phrases to Use)

Bring this list to your appointment:

  • “I want a dry cut at the end so I can see how it really falls.”
  • “Keep the nape tapered, not blocked.”
  • “Add texture to avoid a heavy, helmet-like look.”
  • “Leave a little length around the ears for softness.”
  • “Show me how to style it with just my fingers and a blow-dryer.”

Red flag phrases to avoid: “Make it easy” (too vague) or “Just take off the damage” (often leads to uneven results).


Adapting Hairstyles for Mobility or Health Issues

If you have arthritis, limited hand strength, or are undergoing medical treatment, these adjustments help:

  • Use styling tools with large, padded handles. Look for “universal design” brushes and combs.
  • Try a leave-in conditioner spray. No rubbing or massaging needed—just spray and go.
  • Ask for a “sleeper cut.” This is a short style that looks good even after sleeping on it (the Curly Pixie #8 and Buzz Cut #10 are excellent choices).
  • Consider a gentle perm. If your hair has thinned, a body wave can add volume without daily effort. Always do a patch test first.
  • Wigs and toppers as options. Many women over 70 keep a very short natural cut (#10) and wear a wig or hairpiece for special occasions—this gives you two looks in one.

Common Concerns Addressed

“Won’t short hair make me look older?”
No—a badly cut short style makes anyone look older. A well-cut, textured, modern short style is actually more youthful than long, limp, stringy hair that drags the face down.

“I have a double chin. Can I still go short?”
Absolutely. Choose styles with height on top (like the Classic Pixie #1 or Stacked Bob #7) and softness around the ears. The vertical lift balances fullness below.

“My hair is very thin. What should I avoid?”
Avoid blunt, one-length cuts and heavy bangs. Instead, choose choppy ends (#11), feathered layers (#5), or a curly crop (#2) for built-in volume.

“Will I regret cutting off my long hair?”
Start with a longer short style—like a textured bob (#3) or long pixie (#11). You can always go shorter later. Many women find the freedom liberating within a week.


Conclusion

Your 70s are not a time to hide or fade away. They are a decade of experience, confidence, and self-knowledge—and your hairstyle should reflect that. The right short cut will save you time in the morning, keep you cooler in summer, and frame your face in a way that highlights your best features.

Whether you choose a bold asymmetrical pixie, a wash-and-wear curly crop, or the timeless elegance of a silver classic, the goal is the same: to feel like yourself, only easier. Short hair doesn't mean boring hair. It means intentional hair. It means waking up and running your fingers through it—and being ready for whatever the day brings.

So save the photos, book the appointment, and take the leap. You might just wonder why you didn't do it years ago.

Flattering Hairstyles for Women Over 70:Timeless & Trendy

April 15, 2026 by Jessica Guevara Leave a Comment


Reaching your 70s is a milestone of grace, wisdom, and freedom—and your hair should reflect that. Gone are the days of feeling pressured to stick to outdated “rules” about cutting your hair short or hiding your natural texture. Today, the best hairstyles for women over 70 prioritize health, comfort, and personal style. Whether you’re dealing with thinning, finer strands, natural curls, or a desire for low-maintenance chic, the right cut can boost your confidence and frame your face beautifully.

Below are 11 well-structured ideas, ranging from wash-and-wear pixies to elegant updos, to inspire your next salon visit:


1. The Classic Silver Pixie

Why it works: A short, textured pixie cut is a timeless favorite for a reason. It removes weight from thinning hair, creates instant volume at the crown, and highlights your natural silver or white tones.
Styling tip: Use a tiny dab of volumizing mousse on damp hair and finger-fluff it forward as it air-dries. For a polished look, smooth the sides with a boar-bristle brush.

2. The Soft Chin-Length Bob

Why it works: A bob that ends right at the chin is universally flattering, especially for oval and heart-shaped faces. It offers more styling versatility than a pixie but remains easy to manage.
Styling tip: Add long, face-framing layers to prevent a “helmet” effect. Blow-dry with a round brush for a gentle curve inward, or let it air-dry for a relaxed, wavy finish.

3. The Tapered Nape Cut (Short Crop)

Why it works: This cut is very short at the nape of the neck (often faded or tapered) with slightly more length on top. It’s cooling, comfortable, and ideal for women who wear glasses or hearing aids.
Styling tip: Comb the top forward or to the side with a light styling cream. The clean nape requires no trimming between salon visits for weeks.

4. The Wispy Shag with Bangs

Why it works: A modern shag cut—featuring lots of layers and choppy ends—adds incredible movement and the illusion of density. The wispy bangs soften forehead lines and draw attention to your eyes.
Styling tip: Apply a salt spray to damp hair and scrunch. This enhances natural waves and gives the shag a youthful, effortless texture.

5. The Side-Swept Long Bob (Lob)

Why it works: The lob (shoulder-grazing length) is perfect if you’re not ready to go short. A deep side part adds height at the crown, and the longer length visually elongates the neck.
Styling tip: Keep the ends blunt or slightly textured—avoid heavy layers that can make thin hair look stringy. A large hot roller at the roots adds lasting lift.

6. The Curly or Wavy Wash-and-Go

Why it works: If you have natural curls or waves, your 70s are the time to embrace them. A uniformly layered cut allows curls to spring up, creating volume and a soft, romantic silhouette.
Styling tip: Never brush dry curls. Instead, detangle with a wide-tooth comb in the shower, then scrunch in a leave-in conditioner and gel. Diffuse on low heat or air-dry.

7. The Sleek Low Ponytail or Chignon

Why it works: For medium to long hair, a low ponytail or a simple twisted chignon looks elegant and takes two minutes. It’s ideal for dinners, events, or days when you want hair off your face.
Styling tip: Smooth hair back with a soft-hold hairspray and a boar-bristle brush. Wrap a small strand around the elastic to hide it. Add a velvet scrunchie for comfort and style.

8. The Voluminous Pushed-Back Crop

Why it works: Similar to a pixie but with extra length on top, this cut uses volume instead of length. Sweeping the top section back and to the side creates a bouffant-like lift that is very sophisticated.
Styling tip: Blow-dry the top forward, then use a small round brush to roll it back. Secure with a dab of pomade. This style works beautifully with all-gray or all-white hair.

9. The Textured Bowl Cut (Modern)

Why it works: Forget the harsh bowl cut of the past. A modern version has soft, uneven edges and internal layers that remove bulk. It sits just above the ears and frames the face like a soft cloud.
Styling tip: This cut looks best with a piece-y texture. Use a dry wax spray or texture powder on your fingertips to pull tiny sections apart for a soft, edgy finish.

10. The Asymmetrical Bob

Why it works: An asymmetrical bob—slightly longer in the front than the back—adds a contemporary, artsy edge. The diagonal line tricks the eye into seeing more length and less width.
Styling tip: Straighten the ends slightly with a flat iron (on low heat) to emphasize the angle. Keep the rest of the style soft and natural to avoid looking severe.

11. The Soft Finger Wave Set

Why it works: For a glamorous, special-occasion look, modern finger waves (or pin curls) add vintage Hollywood charm. They work best on shoulder-length or shorter hair and are surprisingly gentle on fragile strands.
Styling tip: Have your stylist show you how to set them with large rollers or wave clips. Once dry, brush through lightly for a soft, S-shaped wave pattern, not a stiff, hard set.

Before You Cut: Essential Tips for Choosing the Right Style

Before booking your salon appointment, consider these four key factors to ensure your new hairstyle enhances your daily life, not complicates it.

1. Face Shape Guide

  • Oval face: Almost any style works—pixies, bobs, and longer lengths all suit you.
  • Round face: Go for height at the crown (voluminous crop, side-swept lob) to elongate the face.
  • Square face: Soft, wispy layers and side-swept bangs soften a strong jawline.
  • Heart-shaped face: Chin-length bobs and styles with volume at the bottom balance a wider forehead.

2. Hair Texture & Density

  • Fine or thinning hair: Shorter cuts (pixie, tapered nape) remove weight and create the illusion of fullness. Avoid very long, heavy styles.
  • Medium density: Bobs, lobs, and shags work beautifully with added layers for movement.
  • Thick or coarse hair: Internal layering and texturizing are essential to remove bulk. A modern bowl cut or curly wash-and-go is ideal.
  • Curly or coily hair: Embrace your natural pattern with uniform layers. Never over-process with harsh chemicals.

3. Lifestyle & Maintenance Level

  • Low maintenance (wash-and-wear): Pixie, tapered nape, curly wash-and-go.
  • Medium maintenance (occasional styling): Chin-length bob, side-swept lob, textured shag.
  • Higher maintenance (regular salon visits every 4–6 weeks): Asymmetrical bob, soft finger waves, precise pixie cuts.
  • Special occasion only: Sleek chignon, finger wave set.

4. Scalp & Hair Health Considerations

  • Sensitive scalp: Avoid tight ponytails, heavy products, and frequent heat styling. Opt for loose, soft styles.
  • Chemically treated or colored hair: Use sulfate-free shampoos and deep condition weekly. Consider transitioning to your natural silver to reduce damage.
  • Hair loss or thinning patches: A shorter, textured cut camouflages sparse areas. Volumizing powders and lightweight mousses work wonders.

How to Communicate with Your Stylist (A Script)

Getting the cut you want starts with clear communication. Take these exact phrases to your next appointment.

Before you go:

  • Bring 2–3 reference photos (use the AI-generated images from this article).
  • Be honest about how much time you want to spend on your hair daily.

What to say:

  • "I want a cut that works with my natural texture, not against it."
  • "Please show me how to style this at home with just my fingers and a blow-dryer."
  • "I prefer a soft, natural finish—not stiff or helmet-like."
  • "My hair has thinned [or become more fragile]; can you add internal layers to create volume without removing too much length?"

What to avoid saying:

  • "Just do what you think is best." (Be specific!)
  • "Make me look younger." (Focus on feeling confident instead.)

Daily Care & Styling Toolkit for Women Over 70

You don't need 20 products. Here is a streamlined, affordable kit for healthy, beautiful hair.

ProductPurposeRecommended for
Volumizing mousseLifts roots, adds bodyFine or thinning hair
Leave-in conditionerDetangles, softensCurly, dry, or fragile hair
Lightweight styling creamSmooths frizz, defines shapeAll textures, especially short cuts
Dry texture spray or powderCreates piece-y, lived-in lookShags, pixies, bowl cuts
Boar-bristle brushDistributes natural oilsStraight to wavy hair
Wide-tooth combDetangles wet hair without breakageCurly, coily, or fragile hair
Silk or satin pillowcaseReduces friction, prevents breakageAll hair types
Heat protectant sprayShields from blow-dryers or flat ironsAnyone who uses heat

Weekly routine:

  • Shampoo: 2–3 times per week (less if hair is very dry or curly).
  • Condition: Every wash day. Deep condition once a week.
  • Scalp massage: 2 minutes daily with fingertips to stimulate circulation.

Adapting Styles for Different Hair Lengths & Needs

Not every style works for every length. Use this quick-reference table to find your best match.

Your current lengthBest styles from this listStyles to avoid
Very short (above ears)Classic pixie, tapered nape, voluminous cropSleek chignon, long bob
Short to ear-lengthWispy shag, modern bowl cut, soft finger wavesAsymmetrical bob
Chin to shoulderSoft bob, side-swept lob, asymmetrical bobTapered nape
Below shoulderSleek ponytail/chignon, curly wash-and-goPixie, tapered nape

For women using wigs or hairpieces:

  • All short styles work beautifully over a well-fitted wig cap.
  • Consider a cropped pixie or tapered nape wig for the most natural look.
  • Consult a wig specialist to match your scalp color and hairline.

For women with very fragile or medically thinning hair:

  • Prioritize the tapered nape cut or classic pixie—they require the least manipulation.
  • Avoid tight elastics, clips, or heavy product buildup.
  • Use a satin-lined cap at night.

Seasonal Styling: Adjusting Your Look Year-Round

Your hairstyle can adapt to the weather and your activities.

Spring/Summer (heat & humidity):

  • Go shorter: Tapered nape, pixie, or curly wash-and-go.
  • Use anti-humidity sprays and lightweight gels.
  • Pull longer hair into a low chignon or ponytail.

Fall/Winter (dryness & static):

  • Add a deep conditioning mask weekly.
  • Use a humidifier in your bedroom.
  • Embrace slightly longer lengths (lob, bob) for warmth around the neck.
  • Apply a drop of argan oil to ends to combat static.

Conclusion

Your 70s are not a time to hide your hair—they are a time to celebrate it. The silver, the grey, the white, the salt-and-pepper—these are earned stripes of a life fully lived. The 11 hairstyles in this article prove that you have options for every texture, face shape, lifestyle, and personality. From the wash-and-ease of a classic pixie to the vintage glamour of finger waves, there is a cut that will make you feel seen, confident, and beautiful.

Remember three things as you move forward:

  1. Health over length. A shorter, well-cut style on healthy hair will always look better than long, fragile, thinning strands.
  2. Communication is key. Bring photos, be honest with your stylist, and learn one simple at-home styling technique before you leave the salon.
  3. Confidence is the best accessory. The most flattering hairstyle in the world is the one that makes you forget about your hair—because you're too busy enjoying your life.

So go ahead. Book that appointment. Show your stylist the prompt image. And walk out feeling lighter, brighter, and more yourself than ever. You've earned it.

Angled Bob Hairstyles: 15 Chic & Flattering Looks for Women

April 15, 2026 by Jessica Guevara Leave a Comment

Introduction
The angled bob is the perfect marriage of edgy and elegant. Unlike a classic one-length bob, this cut is shorter in the back and gradually longer in the front, creating a slimming, jaw-framing effect that suits almost every face shape. Whether you have fine, thick, straight, or curly hair, the angled bob offers versatility, volume, and a modern twist on a timeless classic.

Below are 15 stunning angled bob ideas to inspire your next salon visit:


1. The Classic Sharp Angled Bob


This is the blueprint. Hair is cut to a close-cropped nape and graduates to a chin-length point in the front. The sharp, dramatic angle creates a powerful silhouette that looks exceptionally polished on straight, sleek hair.

2. The Stacked Angled Bob


Adding internal layers (stacking) at the back creates incredible volume and lift. The stacked back seamlessly transitions into longer front pieces, making it an ideal choice for women with fine or flat hair who want to fake thickness.

3. The Inverted Long Bob (Lob)


For those hesitant to go too short, the inverted lob keeps the back at the collarbone while the front dips just below the clavicle. This subtle angle offers the same slimming effect with a relaxed, beachy vibe.

4. The Asymmetrical Angled Bob


Take the angle to an extreme. One side of the front is cut significantly longer than the other (e.g., chin-length on the left, shoulder-length on the right). This bold, high-fashion look works best on straight hair to highlight the extreme line.

5. The Curly Angled Bob


Yes, curls love angles! Cutting curls with a steep angle prevents the dreaded “triangle head.” The shorter back removes bulk, while the longer front allows curls to spring into a face-framing shape. Dry-cutting is essential here.

6. The Textured Angled Bob


Using point-cutting or razor techniques, this style removes weight from the ends to create a piece-y, tousled finish. It softens the harshness of a traditional angle and is perfect for women with thick hair or those who prefer a messy, undone look.

7. The Blunt Angled Bob


Opposite of textured, this uses blunt, scissor-cut ends for a heavy, solid perimeter. The angle is subtle, but the weight line is strong. This looks incredibly chic on fine hair, making it appear denser and healthier.

8. The Angled Bob with Bangs


Pairing the cut with full, curtain, or side-swept bangs transforms the entire face. A side-swept bang complements the diagonal line of the bob, while blunt bangs add a modern, graphic contrast. Great for hiding forehead lines.

9. The Platinum or Bold Color Angled Bob


An angled bob is the perfect canvas for color. The sharp geometric cut highlights color transitions, making it ideal for platinum blonde, silver, or a vivid ombre where the darker back fades into a bright front point.

10. The Deep Side-Parted Angled Bob


By parting your hair deeply to one side, the longer section sweeps dramatically across the forehead. This creates an instant red-carpet look, adds height at the crown, and is especially flattering for round or square face shapes.

11. The Pixie-Bob Angle (Angled Pixie Cut)


A hybrid cut. The back and one side are cut into a short pixie, while the front top section elongates into an angled bob line. This ultra-modern cut is for the daring woman who wants the ease of a pixie but the length of a bob.

12. The Wavy Angled Bob


Soft, beachy waves add volume and movement to the angled shape. The waves soften the structural line of the cut, making it look romantic and effortless. Use a 1-inch wand and alternate curl directions for best results.

13. The Slicked-Back Angled Bob


Perfect for evening or the office. Apply gel or mousse to wet hair and comb every hair back off the face. The severity of the slicked-back style accentuates the sharp geometry of the cut, highlighting your cheekbones and jawline.

14. The Choppy Angled Bob


This edgy variation uses uneven, jagged ends throughout the angled shape. It creates a rock-and-roll, rebellious aesthetic that removes bulk and adds incredible movement. Best for women with naturally straight or slightly wavy hair.

15. The Layered Angled Bob for Thick Hair


Thick hair needs internal architecture. Long layers cut within the angled shape remove weight from the interior while keeping the angled perimeter intact. This prevents the “pyramid” effect and allows the thick hair to move and swing freely.

Before You Cut: 5 Things to Discuss with Your Stylist

  1. The Degree of Angle – Do you want a subtle slope (1-2 inches difference) or a dramatic drop (4+ inches)?
  2. Your Nape Hairline – Very fine or high nape hair may not hold a tight stacked cut well.
  3. Natural Texture – Curly and wavy hair will "shrink" more in the back; ask for a dry cut.
  4. Lifestyle – Slicked-back and blunt bobs require daily styling; textured versions are more forgiving.
  5. Neck Length – Women with shorter necks should avoid overly steep angles that bury the neck.

Maintenance & Styling Tips

AspectRecommendation
TrimsEvery 4-6 weeks to preserve the angle (the back grows out faster than the front)
ToolsRound brush + blow-dryer for volume; flat iron for sleekness; 1-inch wand for waves
ProductsVolumizing mousse (for stacking), texture spray (for piece-y looks), anti-frizz serum (for blunt cuts)
Night RoutinePineapple or loose top-knot to prevent bedhead from ruining the angle
Rainy DaysCurly/textured angled bobs fare better; sleek versions may need a quick flat-iron touch-up

Face Shape Guide: Which Angled Bob is For You?

Face ShapeBest Angled Bob ChoiceWhy
RoundDeep side-parted or stacked angled bobThe height and diagonal line elongate the face
SquareTextured or wavy angled bob with soft endsSoftens a strong jawline
HeartInverted lob with curtain bangsBalances a wider forehead and narrow chin
OvalAny style – asymmetrical or blunt angled bobOval faces can pull off the sharpest angles
Long/RectangleClassic chin-length angled bob with fullnessWidens the face visually and shortens length
DiamondCurly angled bob or style with side-swept bangsAdds width at the forehead and chin

Pros & Cons of the Angled Bob

ProsCons
Instantly slims and lifts the faceRequires frequent trims (every 4-6 weeks)
Creates volume at the crownThe angle can look uneven if grown out too long
Works on all hair texturesNot ideal for extremely thin or fragile ends
Removes bulk from thick hairSleek versions suffer in humidity
Versatile – sleek, wavy, or messySteep angles can feel too dramatic for conservative workplaces

Frequently Asked Questions (FAQ)

Q: Will an angled bob make my face look thinner?
A: Yes. The diagonal line draws the eye downward and inward, creating a natural slimming effect, especially on round or square faces.

Q: Can I wear an angled bob with curly hair?
A: Absolutely. Just ensure your stylist cuts it dry curl-by-curl to account for shrinkage. The shorter back prevents the dreaded triangle shape.

Q: How is an angled bob different from an A-line bob?
A: They are essentially the same. "Angled bob" and "A-line bob" are used interchangeably – both mean shorter in back, longer in front.

Q: Will the angle look weird if I put my hair in a ponytail?
A: Not at all. In fact, an angled bob creates a beautiful graduated ponytail where pieces naturally fall shorter to longer. Low ponytails work best.

Q: I have very fine hair. Can I still get an angled bob?
A: Yes, but ask for a blunt cut with subtle stacking at the crown. Avoid heavy texturizing, which can make fine hair look thinner.

Q: How do I prevent the back from flipping out?
A: Use a round brush while blow-drying, directing the airflow downward. A light dab of anti-humidity spray or smoothing cream also helps.


Conclusion

The angled bob remains one of the most enduring and flattering haircuts for women of all ages, hair types, and ethnicities. Its genius lies in its adaptability – whether you want a sharp, dramatic statement or a soft, everyday wash-and-go style, there is an angled bob variation for you. By understanding your face shape, discussing the degree of angle with your stylist, and committing to regular trims, you can enjoy a cut that lifts, slims, and modernizes your entire look. Use the 15 ideas and their accompanying AI prompts above to visualize your perfect style, then book that appointment with confidence. The perfect angle is waiting for you.


Short Hairstyles for Black Women: Chic, Bold, and Liberating

April 15, 2026 by Jessica Guevara Leave a Comment


There is something undeniably powerful about the decision to go short. For Black women, cutting off length is often less about losing hair and more about gaining time, confidence, and definition. Whether you are transitioning to natural texture, looking for a low-maintenance routine, or simply want to highlight your bone structure, short hairstyles offer a world of versatility. From tapered pixies to fluffy finger waves.

Here are 9 stunning short hairstyles that celebrate the beauty of Black hair:

1. The Classic Tapered Cut


The tapered cut is the gold standard of short natural hair. It features very short, faded sides and back (often down to the skin or a #2 guard), while leaving more length and volume on top. This style is incredibly versatile because you can wear the top stretched out in an afro, defined in curls, or even straightened for a pompadour look. It elongates the face and requires only a weekly shape-up to stay crisp.

2. Sleek Finger Waves


Channel old Hollywood glamour with modern finger waves. Using gel or setting lotion, the hair is molded into deep ‘S’ shapes that hug the scalp. While traditionally done on relaxed hair, finger waves are stunning on short, damp natural hair or a tapered cut. This style is perfect for formal events or adding a touch of vintage elegance to your everyday look, and it can last up to two weeks with a silk scarf at night.

3. The Teeny Weeny Afro (TWA)


The TWA is not just a haircut; it is a rite of passage. Defined as a natural afro that is 1 to 2 inches long, this style celebrates the beauty of shrinkage and texture. It requires very little manipulation—just a daily spritz of water, a leave-in conditioner, and some oil to seal in shine. The TWA frames the face softly and highlights your features, specifically the eyes and lips.

4. Curly Pixie Cut


The curly pixie is the softer, more romantic cousin of the tapered cut. Unlike the strict fade of the taper, the curly pixie keeps the hair relatively uniform in length (usually 1 to 3 inches) all over the head, with slightly longer, face-framing pieces at the forehead and ears. It works beautifully with Type 3 curls or stretched Type 4 hair. The result is a lightweight, fluffy halo of curls that looks effortless and feminine.

5. Short Caesar with Waves


Inspired by the Roman emperor and popularized by legends like Samuel L. Jackson (and many women in the 90s), the Caesar cut features a short, horizontally straight cut fringe. When combined with 360 waves (ripples created by brushing the hair down), this style looks incredibly polished and athletic. It is ideal for women who have a looser curl pattern or who are dedicated to brushing their hair daily to maintain the ripple effect.

6. The Short Box Bob (Bixie)


A hybrid between a bob and a pixie, the "bixie" is gaining popularity for its adaptability. It is longer than a traditional pixie (hitting just below the ears or at the jawline) but shorter than a bob. For Black women, this works beautifully on blown-out natural hair or straight relaxed hair. It is heavy enough to swing slightly but short enough to keep off the neck. Adding deep side-swept bangs gives this cut a dramatic, asymmetrical edge.

7. Sculpted Finger Coils


If you have the patience, finger coils are a show-stopping protective style. On short hair (2 to 4 inches), a stylist or you can take small sections of hair and twist them around your finger to create tight, rope-like spirals. The result resembles a head full of small corkscrews or a curly wool texture. This style can last for three weeks and is a great way to grow out a TWA while looking intentional and detailed.

8. The High Top Fade (The Mini Frohawk)


This edgy look leaves the hair longest along the center ridge of the head (from forehead to nape) while the sides are faded short. When fluffed out, this center strip stands up like a mohawk made of soft afro texture. It is a bold, gender-fluid style that exudes confidence. You can keep the top rounded or pick it out for maximum height. To maintain it, keep the sides faded every two weeks and moisturize the top daily.

9. Short Passion Twist or Marley Braids


Short hair doesn't always mean short natural hair. Using Marley hair or water wave hair, you can install mini passion twists or two-strand twists that are cut to chin length or shorter. This gives the illusion of a short, thick bob made of soft, wavy rope. It is a protective style that lasts 4 to 6 weeks, requires no daily heat, and allows you to experiment with blonde or red hues without damaging your real strands.

How to Choose the Right Short Hairstyle for Your Face Shape

Not every short haircut suits every face shape. Use this quick guide to find your perfect match:

  • Oval Face: You can wear almost any short style. Try a curly pixie, high top fade, or finger waves.
  • Round Face: Go for height and volume on top (tapered cut or frohawk) to elongate your face. Avoid round, bulbous shapes.
  • Heart-Shaped Face: Side-swept bangs and chin-length bixies balance a wider forehead and narrow chin.
  • Square Face: Soft, textured styles like finger coils or a curly pixie soften strong jawlines.
  • Long Face: Keep volume on the sides rather than the top. A short box bob or finger waves add width.

Maintenance & Daily Care for Short Natural Hair

Short hair is lower maintenance than long hair, but it still needs a routine:

TaskFrequencyWhy It Matters
MoisturizingDaily (spritz + leave-in)Short natural hair dries out fast
ShampooingWeekly or bi-weeklyRemoves product buildup
Deep ConditioningWeeklyPrevents breakage and keeps curls soft
Edge ControlAs neededLays down baby hairs for a polished look
Shape-Up / TrimEvery 2–4 weeksMaintains the silhouette and removes split ends
Night RoutineEvery night (satin scarf or bonnet)Preserves style and reduces friction

Pro Tip: Invest in a good satin pillowcase and a handheld mirror to check the back of your head after styling.

Products Recommended for Short Black Hairstyles

Keep your short style fresh with these product types:

  1. Leave-In Conditioner: Adds moisture without weight (e.g., Mielle, Camille Rose, or Aunt Jackie's)
  2. Edge Control: Strong hold for sleek edges (e.g., Edge Booster or Got2b Glued)
  3. Curl Defining Cream: For curly pixies and finger coils (e.g., Miss Jessie's or SheaMoisture)
  4. Lightweight Gel: For finger waves and sleek styles (e.g., Eco Styler or Wet Line)
  5. Hair Oil: Seals in moisture and adds shine (e.g., argan oil, jojoba oil, or castor oil)
  6. Satin Scarf or Bonnet: Non-negotiable for preserving your style overnight

Common Mistakes to Avoid with Short Hair

  • Skipping trims: Short hair shows every split end. Do not go longer than 4 weeks between trims.
  • Over-washing: Strips natural oils. Stick to once a week unless you have an oily scalp.
  • Using heavy butters: Thick products weigh down short curls and cause buildup.
  • Neglecting sunscreen on your part: Your scalp can burn. Use a spray SPF or wear a hat.
  • Cutting it yourself without training: A crooked fade or uneven line is hard to fix. Visit a barber or stylist who specializes in Black hair.

Transitioning from Long to Short Hair: What to Expect

Cutting your hair short is an emotional and practical shift. Here is what to prepare for:

  • The shock factor: You may not recognize yourself for the first few days. This is normal.
  • Less styling time: You will save 30–60 minutes daily. Use that time.
  • More frequent barber visits: Long hair can go months without a cut. Short hair needs constant shaping.
  • Different product usage: You will use less product overall but may need stronger hold gels.
  • The grow-out phase: If you decide to grow it back, expect an awkward in-between stage. Use headbands, scarves, or crochet braids to bridge the gap.

FAQs About Short Hairstyles for Black Women

Q: Will short hair make my face look fatter?
A: No. The right short cut actually slims the face by adding height or asymmetry. Avoid round, helmet-like shapes.

Q: Can I wear weaves or extensions with short hair?
A: Yes. Sew-ins, wigs, and crochet styles work perfectly over short hair. Many women use a short wig for versatility.

Q: How do I stop my short hair from looking like a helmet?
A: Add texture, part it differently, or pick it out for volume. A stylist can also add internal layers to break up the shape.

Q: Is short hair professional for work?
A: Absolutely. Tapered cuts, finger waves, and short bobs are worn by Black women in every industry, from law to medicine to finance.

Q: How do I find a good barber or stylist for short Black hair?
A: Look for portfolios on Instagram with Black women. Search hashtags like #blackgirlbarber or #naturalhairstylist in your city.


Conclusion

Short hair on Black women is never a compromise—it is a statement. Whether you choose the bold architecture of a high top fade, the vintage romance of finger waves, or the proud simplicity of a teeny weeny afro, you are embracing a look that is as practical as it is powerful. The nine styles in this guide prove that "short" does not mean limited. From wash-and-go TWAs to protective passion twists, there is a short hairstyle for every texture, face shape, and personality.

Remember that cutting your hair off is also a mental shift. It asks you to see your beauty without length as a crutch. It demands confidence, but it rewards you with time, ease, and a striking silhouette that long hair simply cannot replicate. Take the photos from this article to your barber, invest in the right products, and protect your style every night with a satin scarf. Then step out and let your short hair do what it does best: turn heads and free your morning routine.

Your crown is short, but your presence is tall. Wear it well.

Funky Short Haircuts Every Young Woman Should Try: Chop It & Drop It

April 15, 2026 by Jessica Guevara Leave a Comment


There’s something electric about the moment you decide to chop off your hair. It’s not just a haircut; it’s an attitude. For young women, short hair is the ultimate playground—edgy, low-maintenance, and endlessly versatile. Gone are the days when “short” meant boring or boyish. Today, it’s all about texture, asymmetry, and unexpected details that scream confidence. Whether you want a bold geometric shape, a soft fluffy crop, or something that shimmers with color.

These 13 funky short hairstyles will make you want to book a salon appointment immediately:


1. The Textured Pixie with an Undercut

This style keeps the classic pixie soft on top while shaving the sides and back into a hidden undercut. The contrast creates a secret edge—visible when you flip your head or tie a bandana. Ask your stylist for point-cutting on top to give it a messy, feathery finish that’s anything but prim.

2. The Asymmetrical Bob (with a Twist)

Forget the polite A-line bob. This version has one side grazing your earlobe while the other dips past your chin—but the funk comes from shaving a small, hidden design (like a zigzag or star) into the shorter side. It looks sleek from the front and reveals a party trick from the side.

3. The Bowl Cut 2.0

Yes, the bowl cut is back, but not as you remember it. This funky update features soft, rounded edges with choppy, uneven ends. Pair it with curtain bangs that hover just above the brows. The key is texture: think more “cool art student” and less “kindergarten craft project.”

4. The Finger Wave Crop

Retro meets rebellious. This style uses short, uniformly cut hair (about 2–3 inches long) set into deep, sculpted S-waves using gel or mousse. It looks polished but playful, especially when you add a bold hair accessory like a velvet scrunchie or a metal hair cuff.

5. The Buzz Cut with a Design

Take the ultimate low-maintenance cut—the buzz—and level it up with a shaved-in pattern. Popular designs include lightning bolts, hearts, or abstract lines on one side. Keep the rest of the hair uniform (e.g., a #3 guard) to make the design pop. It’s bold, brave, and undeniably funky.

6. The Shaggy Mullet

Modern mullets are for everyone. The funky version keeps the front and top long (past the eyes) and stacked with layers, while the back is cropped close to the neck. Add micro-bangs for extra weirdness. This cut thrives on second-day texture and a bit of salt spray.

7. The Wet-Look Pixie

Slicked, shiny, and almost severe, this style works best on a short pixie (1–2 inches on top, tapered sides). Apply a high-shine gel or pomade to comb the top forward or to the side. It’s futuristic and editorial—perfect for a night out or when you want to look like you just stepped off a runway.

8. The Curly Taper Fade

For natural curls, this cut is a game-changer. The sides and back are faded down to skin, while the top is left longer (3–4 inches of coiled curls). The funk factor comes from shaping the top into a rounded, cloud-like silhouette. Use a curl-defining cream to make each ringlet pop.

9. The Two-Tone Split Crop

Color is half the fun. This hairstyle features a blunt, chin-length cut (or shorter) with a dramatic vertical split: one side dyed jet black, the other platinum blonde, neon pink, or electric blue. The sharp color line adds visual mischief to an otherwise simple shape.

10. The Mini Mohawk (Fro-hawk)

Keep the sides buzzed to a #1 or #2 guard, but leave a 2–3 inch strip of longer hair running from the forehead to the nape. The funk is in the styling: twist the strip into tiny bantu knots, spike it up with gel, or let it flop into a messy fringe. It’s punk-lite with zero commitment.

11. The Pinwheel Curls Cut

Ideal for tight, coily textures. The hair is cut into a rounded, tapered shape (shorter at the nape, longer on top) and then styled into defined pinwheel curls using a curl sponge or finger-coiling. The result looks like a spiral galaxy on your head—whimsical and structural at once.

12. The Disconnected Undercut Bob

This style plays with length and absence. The top is a full, blunt bob (ear to chin length), while the entire underlayer—from the temples down—is buzzed off. When your top hair is down, it looks like a normal bob. Sweep it up into a half-pony, and suddenly you’ve got an edgy undercut reveal.

13. The Pinned-Up Pixie with Jewelry

Start with a choppy pixie (long enough to twist). Then, instead of styling it with product, pin sections flat against your head using bobby pins, creating a mosaic-like pattern. Finish by pressing tiny stick-on pearls or flat-back earrings into the pinned sections. It’s wearable art for your hair.

Why Funky Short Hair Works for Young Women

Short hair isn't just a trend—it's a lifestyle upgrade. Here's why young women are making the chop and never looking back:

  • Confidence booster: There's something undeniably empowering about breaking the "long hair = feminine" stereotype. Short hair announces that you define your own beauty standards.
  • Time saver: Most funky short cuts take 5–10 minutes to style. No more hour-long blowouts or endless ponytails.
  • Personality magnet: Short hair draws attention to your face, your earrings, your smile, and your energy. It's impossible to hide behind.
  • Seasonless style: Whether it's a humid summer or a windy winter, short hair stays put and looks intentional.
  • Growth journey: Short hair grows out into a new shape every few weeks, so you're never stuck. One month it's a pixie; the next, a bob.

How to Choose the Right Funky Cut for Your Face Shape

Not sure which style suits you? Use this quick guide:

Face ShapeBest Funky Cuts to Try
OvalAlmost anything—textured pixie, buzz cut with design, mini mohawk
RoundAsymmetrical bob, curly taper fade, pinned-up pixie (adds height and angles)
SquareShaggy mullet, finger wave crop, bowl cut 2.0 (softens strong jawlines)
HeartWet-look pixie, two-tone split crop, disconnected undercut bob (balances a wider forehead)
Long/OblongCurly taper fade, pinwheel curls cut, bowl cut 2.0 (adds width and volume)

Pro tip: Bring 2–3 reference photos to your stylist and ask, "Which of these works best with my texture and face shape?" A good stylist will be honest.


Maintenance & Styling Tips for Funky Short Hair

Short hair is low-maintenance compared to long hair, but it still needs love. Here's how to keep it funky, not frumpy:

Daily/Weekly Care

  • Wash less often: 2–3 times a week max. Short hair shows product buildup faster.
  • Dry shampoo is your best friend: Use it on non-wash days to add texture and absorb oil.
  • Get regular trims: Every 4–6 weeks. Short hair loses its shape faster than long hair. Budget for it.
  • Invest in a good texture spray: Sea salt spray or sugar spray gives grip and messiness to pixies and mullets.
  • Protect your undercut: If you have shaved sides, apply SPF or wear a hat in strong sun—scalps burn easily.

Styling Tools to Own

  • Mini flat iron (1 inch or smaller) for precision work
  • Finger brush or wide-tooth comb (avoid fine-tooth combs on textured cuts)
  • Matte pomade or clay for piece-y, messy looks
  • High-shine gel for wet-look styles
  • Bobby pins and snap clips (get them in colors that match or contrast your hair)

Common Myths About Short Hair (Busted)

MythTruth
"Short hair makes your face look rounder."Wrong—asymmetry and height actually slim and elongate.
"You can't put it up."You can! Half-up styles, mini buns, pin curls, and headbands all work.
"It's not feminine."Tell that to Zendaya, Halle Berry, or Zoë Kravitz. Short hair is powerfully feminine.
"You have to have straight hair."Curly and coily textures look incredible in tapered fades, pinwheel cuts, and shaggy mullets.
"Growing it out is awful."It's an adventure. Each stage—pixie to bob to lob—is a new look.

Color & Accessory Ideas to Amp Up the Funk

Your cut is the foundation; color and accessories are the fireworks.

Funky Color Pairings

  • Neon streak: A single strip of electric green, hot pink, or orange hidden underneath
  • Rooted shadow: Dark roots melting into a pastel or silver mid-length and tip
  • Contrast tips: Black hair with white or platinum tips (or vice versa)
  • Metallic sheen: Temporary spray-on gold, rose gold, or silver for nights out

Accessories That Pop on Short Hair

  • Oversized scrunchies (yes, even with short hair—wear them on a tiny ponytail or around your wrist)
  • Thick headbands (padded or knotted)
  • Claw clips (mini sizes work best)
  • Decorative bobby pins (stars, pearls, colored enamel)
  • Bandanas and silk scarves (tied like a headband or wrapped fully)

Real Talk: What to Expect When You Chop It Off

Before you book that appointment, know this:

  • You'll touch your head constantly. It feels that good.
  • People will have opinions. Some will love it; some will ask, "Why did you cut it?" You don't owe anyone an answer.
  • The first wash is weird. There's less hair, but it dries in minutes—you'll laugh with joy.
  • You might cry. Not from regret, but from the shock of seeing yourself differently. Give it three days before judging.
  • You'll save money on shampoo. And spend it on cool earrings instead. Worth it.

Conclusion

Funky short hair isn't a phase—it's a permission slip. Permission to stop hiding behind long strands, to stop spending hours on maintenance you don't enjoy, and to show the world exactly who you are. Whether you choose a buzzed design, a shaggy mullet, or a pinned-up pixie with pearls, the most important detail is your confidence.

The 13 ideas above are just starting points. Mix them, mash them, dye them neon, or keep them classic black. Short hair grows back, but the feeling of looking in the mirror and loving what you see? That stays forever.

So go ahead. Book the chop. Bring your wildest reference photo. And when your stylist asks, "Are you sure?"—smile and say, "I've never been more sure."

Your funky short hair is waiting. Go get it.

The 14 Bob: The Ultimate Face-Framing Cut for Long Faces

April 12, 2026 by Jessica Guevara Leave a Comment

If you have a long face shape, you know the struggle: you want a chic, modern cut, but you don’t want something that adds even more vertical length. Enter the 14 Bob—a specific, tailored version of the classic bob that’s going viral for all the right reasons.

But what exactly is the "14 Bob"? It’s not magic—it’s math. The "14" refers to the length in inches (or a proportional short-to-medium length) that hits perfectly between the chin and the collarbone. For long faces, this specific length is a game-changer because it interrupts the vertical line of the face, adding width and balance.

Here is everything you need to know about why the 14 bob works for long faces, plus 14 specific ways to wear it.

Why the 14 Bob Works for Long Faces

Before we dive into the styles, let’s talk geometry. A long face (often oblong or oval) is typically longer than it is wide. The goal of any haircut is to create the illusion of width.

  • The Magic Length: A bob that ends at 14 inches (roughly chin-to-shoulder length) widens the appearance of the jawline.
  • Breaking the Line: Unlike long, straight hair that drags the eye down, the 14 bob stops the eye mid-way, making the face appear shorter and more balanced.
  • Volume at the Sides: This length allows you to push volume to the sides of your head, creating horizontal width.

14 Bob Variations for Long Faces

Here are 14 specific ways to rock the 14 bob if you have a long face.

1. The Classic 14-Inch Blunt Bob

A straight, one-length cut hitting at 14 inches creates a solid horizontal line. This is ideal for very narrow, oblong faces because the blunt edge acts like a visual shelf, shortening the face instantly.

2. The Textured 14 Bob

Adding choppy, piece-y layers removes weight. For long faces, texture prevents the hair from lying too flat against the cheeks, which can make the face look longer.

3. The "Lob" (Long Bob) at 14 Inches

Technically, 14 inches is a lob for some, a bob for others. This length is perfect if you are scared of going short. It still ties up, but when down, it frames the jaw perfectly.

4. The Curtain Bang 14 Bob

Best for: Forehead-heavy long faces.
Curtain bangs that part in the middle and sweep to the sides add massive width across the forehead and cheekbones. Combined with a 14-inch bob, this is arguably the most flattering combination for a long face.

5. The Deep Side-Parted Bob

A center part elongates a long face. A deep side part creates asymmetry and volume on top, which shifts the focus horizontally. Tuck the smaller side behind your ear for added width.

6. The Wavy 14 Bob

Straight hair hangs vertically. Waves and bends create horizontal movement. Use a 1-inch curling iron to add S-waves. The wider the wave, the wider the face appears.

7. The A-Line 14 Bob

Shorter in the back, longer in the front (hitting exactly at the 14-inch mark in front). This gives a lifted effect at the crown while keeping that crucial face-framing length in the front to shorten the chin-to-collar bone distance.

8. The Italian 14 Bob

This is the polished, blow-dried version with inward flicking at the chin. The rounded shape of the Italian bob specifically pads the sides of the face, adding soft width to square-oval or rectangular long faces.

9. The Messy, Bed-Head Bob

Volume is your best friend. A slightly messy 14 bob with root lift expands the silhouette horizontally. Use a texturizing spray to push the hair out, not down.

10. The Stacked 14 Bob

A classic stacked bob has internal layers that create a rounded, voluminous back. When viewed from the front, this pushes the perimeter out to the sides, creating a bubble-like shape that balances a long chin.

11. The Modern Shag Bob (14 inches)

Combine the 14-inch length with shaggy layers and a micro-fringe (baby bangs). Note: Be careful with baby bangs—they work best if your long face is due to a high forehead. Otherwise, stick to a heavier, straight-across bang.

12. The Asymmetrical 14 Bob

One side hits at 13 inches, the other at 15 inches. Asymmetry confuses the eye and stops it from tracking the vertical line of your face. It adds edgy, immediate width.

13. The Slicked-Back Wet Bob

For formal occasions, a sleek, wet-look 14 bob actually works because the shine reflects light horizontally. However, ensure the ends are curled under at the jaw, not left straight, to avoid the "pencil head" effect.

14. The Flip-End Bob

'90s are back. A 14-inch bob with flipped-out ends at the chin creates a "V" shape that widens the lower half of the face, perfectly counterbalancing a long, narrow jaw.

Pro Styling Tips for Long Faces

To make your 14 bob work overtime, remember these three rules:

  1. Root Volume is King: Flat hair elongates. Use a volumizing mousse at the roots and blow-dry upside down.
  2. Avoid the "Long and Straight" Trap: If you straighten your 14 bob, add a slight bend at the ends using a flat iron. Poker-straight hair points down, making your face look longer.
  3. Accessorize Horizontally: Headbands worn across the crown (not over the forehead) and wide barrettes at the temples reinforce the width illusion.

Conclusion

Your long face is not a problem to be fixed — it's a canvas to be framed. The 14 bob doesn't hide your features; it celebrates them by adding exactly what nature left out: width, balance, and a whole lot of attitude.

Whether you choose curtain bangs, beachy waves, or a sharp asymmetrical edge, the magic is in the math. Fourteen inches — no shorter, no longer — is the sweet spot where geometry meets glamour. It stops the eye, widens the silhouette, and proves that the right haircut isn't just a style. It's an optical illusion that works in your favor every single day.

So go ahead. Screenshot your favorite variation, book that salon appointment, and watch your reflection finally say: "That's the one."

20 Cruise Outfits That Actually Look Cool

April 12, 2026 by Jessica Guevara Leave a Comment

Cruise style has evolved. Whether you’re onboard a 6,000-passenger mega-ship or a boutique Virgin Voyages adults-only escape, the dress code is now effortless, intentional, and Instagram-friendly. Gen Z and Millennials want outfits that move from pool deck to sushi bar to silent disco without a full costume change. Here are 20 cruise-ready looks that balance comfort, sun protection, and main-character energy — no bedazzled visors required.

20 Outfits That Work On and Off the Ship:

1. High-Waist Bikini + Crochet Mesh Cover-Up

A neutral or bright solid bikini paired with an oversized crochet vest or crochet shorts set. Add sporty sunglasses and slides.
Why it works: Crochet is back, it breathes, and it looks intentional — not like a towel you forgot to drop.

2. Retro Sporty One-Piece + Bucket Hat

A color-block one-piece (think 90s revival) that stays put on water slides. Top with a quick-dry bucket hat.
Why it works: Functional, sun-smart, and nostalgic without being costume-y.

3. Board Shorts + Bandeau Top + Mesh Long-Sleeve

UPF mesh rashguard layered over a bandeau, with 5-inch board shorts below.
Why it works: Sun protection that actually looks cool. Perfect for snorkeling or a high-activity pool day.

4. Terry Cloth Mini Skirt Over Swimsuit

A towel-texture mini skirt worn right over your bikini or one-piece.
Why it works: Dries fast, doubles as a cover-up, and gives throwback resort energy. Slides on/off in seconds.

5. Linen Button-Up (Unbuttoned) + Bike Shorts + Chunky Sandal

An oversized linen shirt worn open over solid bike shorts, finished with platform or chunky sandals.
Why it works: Covers shoulders for port temples/churches, prevents thigh chafe, and breathes in humidity.

6. Matching Woven Set (Skirt + Sleeveless Top)

A coordinated neutral set (beige, black, or olive) in a textured woven fabric. Leather slides or minimalist sneakers.
Why it works: Zero thinking required. Looks expensive, packs flat, and transitions from market to café.

7. Wide-Leg Linen Pants + Cropped Tank + Fisherman Sandal

High-waist, wide-leg linen pants with a ribbed cropped tank. Roll the pants once at the hem.
Why it works: Maximum airflow, no thigh sweat, and the fisherman sandal is Gen-Z-approved practical.

8. Tank Dress + Compression Shorts Underneath

A ribbed or cotton midi tank dress worn with seamless compression shorts underneath.
Why it works: One-and-done dressing. The shorts prevent wind disasters and add a hidden phone pocket.

9. Safari-Shirt Jumpsuit (Short Sleeve, Zip Front)

A loose cotton or linen-blend jumpsuit with flap pockets and a front zipper. Belt optional.
Why it works: One piece, no matching, doesn't wrinkle. Dress it down with sneakers or up with a heel.

10. Linen Blend Trouser + Sheer Mesh Top + Bralette

Tailored but breathable trousers with a sheer mesh long-sleeve or short-sleeve top over a simple bralette.
Why it works: Sheer is fine when anchored below. Looks edgy but still dining-room appropriate. Block-heel mule completes it.

11. Cropped Hoodie + Satin Midi Skirt

A boxy, cropped hoodie (no giant logos) with a high-split satin or silky midi skirt. Platform sneakers or low heels.
Why it works: Texture contrast. Casual on top, dressed on bottom. Extremely Gen Z core.

12. Square-Neck Bodysuit + Paperbag Waist Shorts

A fitted bodysuit (ribbed or smooth) tucked into tailored paperbag-waist shorts with a fabric belt.
Why it works: Looks polished but feels like shorts. Perfect for warm-evening deck dinners. Hoop earrings finish it.

13. Knit Polo Dress + White Sneakers

A ribbed knit polo dress (collared, sleeveless or short-sleeve) in olive, navy, or cream. Clean white leather sneakers.
Why it works: Stretchy, flattering, and weirdly elegant. Reads as "I look rich but didn't try."

14. High-Waist Flare + Halter Top + Platform (70s Disco)

Flared pants (black, metallic, or jewel tone) with a simple halter top. Platform sandals or boots.
Why it works: Flares move beautifully on a swaying ship. Perfect for the mandatory cruise disco or 70s night.

15. All-White Linen Ensemble (Tank + Wide-Leg Pants)

A white linen tank tucked into matching white wide-leg linen pants. Silver jewelry and nude slides.
Why it works: Every cruise has a white party. Linen doesn't cling or go see-through when sweaty.

16. Neon Bralette + Cargo Mini Skirt + Fishnets

A bright neon bralette, high-waist cargo mini skirt, and fishnet tights or knee-high sport socks. Chunky sneakers.
Why it works: Silent disco energy. Youthful, sweaty, fun. Swap fishnets for socks if that's more your speed.

17. Sequined Short-Sleeve Button-Up + Black Straight Jeans

A camp-collar shirt with all-over sequins (or subtle shimmer) worn open or buttoned over a tank. Black straight-leg jeans.
Why it works: Gender-neutral glam. Roll the sleeves twice. Works for formal night without a gown or suit.

18. Matching Sweatsuit (French, No Logos) + Clean Sneakers

A matching sweatshirt and sweatpant set in oatmeal, charcoal, or burgundy. No visible brand names. White sneakers.
Why it works: Travel day. Airport to ship terminal. Good sweats look intentional; bad sweats look like surrender.

19. Loose Cotton Utility Jumpsuit + Slides

A relaxed-fit cotton jumpsuit with 4+ pockets (chest, hips, thighs). Roll the legs up when you hit the pool deck.
Why it works: Hands-free luggage chaos. Passport, phone, AirPods, lip balm — all pocketed. Slides on/off for security.

20. Oversized Oxford Shirt + Biker Shorts + Birkenstocks

An oversized men’s-style Oxford shirt worn open or tied at the waist over black biker shorts. Birkenstocks (Arizona or EVA).
Why it works: The shirt becomes a swim cover-up later. The shorts are pajamas in disguise. Embarkation genius.

The Cruise Packing Math That Actually Works

Forget "one formal outfit per night." Here's the real formula Gen Z and Millennials actually use.

The 5-4-3-2-1 Method (per 5-day cruise):

  • 5 tops (mix of tanks, cropped tees, one mesh/sheer, one linen button-up)
  • 4 bottoms (bike shorts, wide-leg linen pants, tailored shorts, one midi skirt)
  • 3 layers (cropped hoodie, oversized Oxford shirt, mesh cover-up)
  • 2 swimsuits (one sporty one-piece, one high-waist bikini)
  • 1 shoe capsule (chunky sandal + white sneaker + slide)

Every single outfit from the list above can be built from this kit. No checked bag required.

Pro move: Roll everything. Then roll it again. Then use packing cubes labeled "pool," "port," "dinner." Your future self will thank you at 11pm when you're digging for that one specific tank top.


What Not to Pack (The Anti-Haul)

You'll see these in every "cruise fashion" video from 2018. Leave them at home.

Don't PackWhy
Matching family reunion t-shirtsYou're not a summer camp team.
Heeled stilettosThe ship moves. You will fall.
Denim shortsThey take 6 hours to dry and chafe in humidity.
A full suit or gownUnless you genuinely want to. Formal nights now accept dark jeans and a blazer.
Anything dry clean onlyThere is no dry cleaner 2,000 miles from shore.
Your 10-year-old "emergency" flip-flopsThey will break. They always break.

Instead: Pack one "nice enough" outfit — the knit polo dress (#13) or the linen trouser + sheer top (#10) — and call it formal night done.


How to Remix 5 Pieces Into 15 Outfits:

You don't need 20 separate outfits. You need 5 hero pieces. Here's the remix formula using items from this article.

The Core 5:

  1. Black bike shorts (#5)
  2. White linen button-up (unbuttoned, from #5)
  3. Black ribbed tank dress (#8)
  4. Cropped cream hoodie (#11)
  5. High-waist black wide-leg linen pants (#7)

15 outfits you can make right now:

OutfitPieces
Pool to lunchBike shorts + unbuttoned linen shirt over swimsuit
Port exploringLinen pants + cropped hoodie (tied at waist)
Casual dinnerTank dress + hoodie over shoulders
Evening drinksLinen pants + tank dress worn as top (tucked in)
Travel dayBike shorts + oversized linen shirt (buttoned once)

Mix, match, layer. Nobody on the ship knows you only brought half a suitcase. And honestly? They're too busy worrying about their own outfits to notice.

Beach Outfits for Black Women Over 50: Stylish, Confident, and Sun-Ready

April 12, 2026 by Jessica Guevara Leave a Comment

There’s a particular magic that happens when a Black woman over 50 steps onto the beach. She isn’t chasing trends or seeking validation. She’s arriving in her power—crowned with silver strands or a vibrant wrap, melanin glowing against turquoise water, every line on her face earned. Yet, for too long, beach fashion has catered to youth or ignored the unique needs of mature women of color. It’s time to change that.

This guide is not about “anti-aging” or “covering up” out of shame. It’s about choosing pieces that honor your body’s wisdom, protect your radiant skin, and let you walk the shoreline with unshakable ease.

1. The Classic Kaftan & Wide-Leg Linen Pants

A flowing kaftan in a vibrant print (think emerald green, royal blue, or orange) offers breezy coverage. Pair it with lightweight, wide-leg linen pants. Add leather slide sandals and oversized wooden earrings. Perfect for transitioning from beach to lunch.

2. High-Waisted Retro Bottoms + Rash Guard

High-waisted bikini bottoms provide tummy support and a vintage silhouette. Match them with a short-sleeved rash guard (UPF 50+) in a bold color like coral or turquoise. This look protects your shoulders and décolletage while keeping you playful.

3. One-Shoulder One-Piece Swimsuit

A one-shoulder cut adds elegance and draws the eye upward. Look for a suit with built-in shelf bra and power mesh tummy control. Jewel tones like amethyst or sapphire glow beautifully against deeper skin tones.

4. Sheer Crochet Cover-Up Over a Tankini

A long, crochet-knit cover-up (white or natural) over a solid tankini set creates texture and movement. Choose a tankini with a longer top to cover the midriff. Add a wide-brim straw hat and cognac leather sandals.

5. Matching Set: Shorts + Button-Up Shirt

For women who prefer less swimwear, a matching cotton or rayon set is chic. Think palm-print shorts and an oversized button-up worn open over a black one-piece. This works as both a cover-up and a casual outfit for beachside dining.

6. Sarong as a Halter Dress

A large square sarong can be tied into a halter dress in seconds. Choose a fabric with metallic thread or an abstract African-inspired print. Wear it over a modest scoop-neck swimsuit. Gold hoop earrings complete the look.

7. Sporty Swim Dress with Built-In Shorts

A swim dress (skirt attached to a one-piece) with built-in shorts underneath gives full coverage and freedom to move. Look for racerback styles in navy or deep teal. It’s great for beach walks or playing with grandkids.

8. Linen Button-Front Romper

Not a fan of swimwear as outerwear? A short linen romper in cream or khaki can be worn over a simple bikini top and boy shorts. Roll up the sleeves and add rope sandals. Lightweight, breathable, and effortlessly cool.

9. Off-the-Shoulder Maxi Cover-Up

An off-the-shoulder maxi dress in a lightweight jersey knit drapes beautifully. Choose a solid fuchsia or chartreuse to brighten your complexion. This cover-up works over any swimsuit and provides sun coverage for legs.

10. Two-Piece: Swim Leggings + Long-Sleeve Swim Top

For maximum sun protection, consider swim leggings (UPF 50) paired with a long-sleeve swim top. This isn’t frumpy—look for color-blocked or tie-dye designs. It’s ideal for early morning walks or snorkeling trips.

11. Tiered Ruffle Tankini Set

A tankini with tiered ruffles down the front adds movement and conceals the midsection. Pair it with high-waisted swim shorts in a contrasting color (e.g., navy top with white shorts). Cute, flirty, and age-appropriate.

12. Kimono Cover-Up + Solid Bikini

A long, printed kimono in rayon or silk blend turns a simple solid bikini (or tankini) into an ensemble. Look for kimono with tassel ties or embroidery. This adds drama without bulk. Wear with flat espadrilles.

13. Polo-Style One-Piece Swimsuit

A one-piece with a polo collar and ¼ zip front gives a sporty, polished look. It’s surprisingly slimming and supportive. Choose a bright white or pastel yellow. Add a visor and cat-eye sunglasses for a retro touch.

14. Wrap-Style Cover-Up Skirt

For a quick change from wet suit to dry, a wrap skirt (terry cloth or gauze) ties over your swimsuit. Pair with a simple cotton tank top worn loose. Add beaded flip-flops and a canvas tote. This is minimalist and smart.

15. Floppy Hat + Matching Pareo & Simple Maillot

Never underestimate accessories. A classic maillot (solid black or navy) becomes fresh with a large floppy sun hat and a pareo tied at the hips—both in the same bright print (like lemon-yellow leaves). This trick pulls the whole look together in seconds.

What to Look for When Shopping for Beach Outfits Over 50

Before you buy, keep these five things in mind. They’ll save you money and frustration.

1. Fabric & UPF Rating

Look for nylon/spandex blends (80/20 or 85/15) for swimwear—they hold shape and dry fast. For cover-ups, choose cotton, linen, rayon, or modal. If you burn easily, check for UPF 30+ labels on rash guards and swim leggings.

2. Support & Structure

After 50, bust support matters more. Look for:

  • Built-in shelf bras with soft cups or removable pads
  • Power mesh tummy panels (not too tight)
  • Wider straps (thin straps dig in)
  • Racerbacks for better shoulder mobility

3. Length & Coverage

Many women prefer:

  • Mid-thigh swim shorts instead of bikini bottoms
  • Tankini tops that hit below the belly button
  • Swim dresses with attached shorts
  • High-waisted bottoms (2–3 inches above navel)

4. Color for Your Skin Tone

Black women over 50 glow in:

  • Jewel tones: emerald, sapphire, amethyst, ruby
  • Brights: fuchsia, coral, turquoise, lemon yellow
  • Neutrals with impact: white, navy, charcoal, chocolate brown
  • Avoid: dusty pastels, muddy olive, beige (they wash you out)

5. Ease of Movement

Can you raise your arms? Bend over? Walk a quarter mile on sand? Try the "beach test" at home: squat, stretch, and twist in front of a mirror. If anything pinches or rides up, return it.


Section 2: 5 Accessories That Complete Any Beach Look

The right extras turn a basic swimsuit into a real outfit.

AccessoryWhy It WorksWhere to Find
Wide-brim straw hatProtects face, chest, and ears from sun; adds instant eleganceAmazon, Target, Etsy
Oversized wooden or resin earringsFrames the face; lightweight and waterproofLocal craft fairs, Shein, ASOS
Leather or rope slide sandalsEasy on/off; dries quickly; prevents burnt feetClarks, Skechers, Teva
Cotton or linen tote bagHolds sunscreen, book, water, and cover-upLL Bean, Land's End, thrift stores
Statement sunglassesReduces glare; hides tired eyes; protects from cataractsWarby Parker, Zenni, Foster Grant

Pro tip: Buy two of each small accessory (earrings, sunglasses) so you have a backup when one gets lost in the beach bag.


Conclusion: The Beach Is for Every Body, Every Age, Every Shade

Let me be clear: You do not need a "bikini body." You have a body. The beach is for you.

For Black women over 50, the water holds a special kind of healing. It asks nothing of you but your presence. The best beach outfit is not the one that hides you—it's the one that frees you. Whether you choose a sporty rash guard and swim leggings, a flowing kaftan, or a simple one-piece with a floppy hat, wear it like you belong there. Because you do.

You've earned every laugh line, every silver curl, every curve. The sun rises just as beautifully on your skin as it does on anyone else's.

Spiky Hairstyles for Older Women: Edgy, Elegant & Age-Defying

April 11, 2026 by Jessica Guevara Leave a Comment

For decades, older women have been told to "soften" their look, to smooth things down, and to stick with safe, shoulder-length cuts. But who made that rule? Not us.

Enter the spiky hairstyle—a bold, liberating, and surprisingly versatile look that can add instant volume, frame the face beautifully, and inject a serious dose of confidence. Whether you’re dealing with thinning hair, a desire for low-maintenance mornings, or just a craving for an edgy new identity, spikes are the answer.

From subtly textured pixies to full-on punk-rock crops, here are 15 spiky hairstyles that prove attitude has no age limit.

15 Spiky Hairstyles for Older Women:

The Asymmetrical undercut with Color Pop

This look prioritizes a bold, avant-garde silhouette by combining a precision undercut with a swept-over fringe. The closely buzzed sides provide a clean, structural foundation that allows the longer, textured layers on top to take center stage. Incorporating vibrant highlights or unconventional color slices adds a sense of artistic intentionality, making it an excellent choice for those who view their hair as a medium for self-expression.

The Frosted Sculpted Pixie

This style is defined by its extreme vertical texture and multi-tonal depth. The cut features closely tapered sides that transition into dense, spiked layers at the crown, creating significant height and a youthful profile. When paired with high-contrast lowlights and icy blonde or silver tones, the spikes gain a three-dimensional quality that looks architectural and polished from every angle.

The Sleek Side-Swept Spiky Bob

For a more refined take on the spiky trend, this cut blends the length of a short bob with the piecey texture of a pixie. The hair is styled with a deep side part, allowing the longer layers to sweep across the forehead while the crown remains intentionally tousled. This balance of smooth lines and sharp edges offers a sophisticated aesthetic that transitions seamlessly from casual daytime wear to formal events.

The Classic Tapered Silver Spike

This design focuses on clean lines and a feminine, face-framing shape. The hair is kept short and uniform through the back and sides, with the texture concentrated on the top to create soft, upward-facing points. It is a low-maintenance yet high-impact look that embraces natural silver tones, utilizing precision cutting to ensure the hair maintains its lift and shape without the need for heavy styling products.

The Tapered Nape with Soft Spikes

This variation features a clean, high taper at the neckline that gradually builds into soft, layered texture at the crown. By keeping the hair tight around the ears and base of the head, the focus shifts upward to the natural volume on top. It is a practical yet chic option for those who want a structured look that grows out beautifully while maintaining a feminine, rounded silhouette from the side.

The Wispy Silver Undercut

Embracing a more relaxed aesthetic, this style utilizes thin, feathered layers to create a "cloud-like" spiky effect. The back is closely cropped to provide a sturdy foundation, while the silver strands on top are cut at varying lengths to encourage natural movement. This approach is particularly effective for finer hair textures, as it relies on the layering technique rather than heavy product to achieve its airy, uplifted appearance.

The Architectural Chevron Taper

For a more defined look, the chevron taper focuses on a V-shaped or straight-edge finish at the nape. The hair above this line is styled in forward-leaning, sculpted spikes that create a sense of momentum. This cut is highly structural and emphasizes the geometry of the hairstyle, offering a polished, high-end feel that works exceptionally well with multi-tonal blonde or ash-gray highlights.

The Textured Wavy Spike

This style celebrates natural movement by blending wavy texture with short, spiky points. Instead of a uniform spike, the hair is layered to follow the natural growth pattern, resulting in a series of interlocking "waves" that peak at the crown. The back is neatly tapered to ensure the look remains tidy, providing a sophisticated balance between organic texture and professional grooming.

The Sun-Kissed Textured Crop

This style features a soft, feathered approach to spikes, focusing on piecey layers that move forward toward the face. The blonde highlights create natural dimension, making the hair look thicker and more vibrant. By keeping the bangs wispy and swept slightly to the side, this cut provides a frame for the eyes while maintaining the playful energy of a short, textured crop.

The Copper Shag-Spike

For a bold, high-warmth look, this copper-toned cut uses razor-cut layers to achieve a tousled, messy-chic aesthetic. The spikes are more organic and less structured, giving the hair a voluminous, lived-in feel. The long, jagged fringe adds a touch of mystery and softens the forehead, making it a fantastic choice for those who want an edgy style that still feels warm and approachable.

The Icy Frosted Mohawk-Pixie

This architectural cut pushes the boundaries of the traditional pixie with a high-contrast fade on the sides and a dramatic, frosted top. The icy white tone emphasizes the sharp, vertical texture of the spikes, creating a striking profile. It is a powerful, low-maintenance choice that highlights the bone structure of the face and neck, perfect for showcasing a confident, minimalist aesthetic.

The Deep Plum Jagged Pixie

This style combines a rich, jewel-toned color with short, aggressive texture. The hair is cut into sharp, needle-like points that radiate from the crown, giving the style a modern, punky flair. By keeping the sides and back tight and the top full of jagged movement, this look provides a high-fashion edge that stands out beautifully against cool-toned skin and light-colored eyes.

The Tapered Nape with Frosted Spikes

This design features a clean, low-maintenance taper at the back that blends smoothly into a short, textured crown. The light, frosted tones catch the light on the piecey layers, creating a sense of density and thickness for those with finer hair. It is a structured look that stays polished throughout the day, offering a sleek and modern alternative to the traditional bowl or pixie cut.

The Windswept Profile Pixie

Focusing on a dynamic side profile, this cut uses slightly longer layers at the crown to create forward-moving spikes. The back is closely cropped around the ears to provide a sharp contrast, while the length on top is styled to look airy and effortless. This "windswept" effect adds a youthful energy and movement to the hair, making it a great option for a casual yet intentional daily look.

The Voluminous Blonde Pompadour-Spike

This style leans into maximum height and volume, blending the structure of a pompadour with the texture of a spiky cut. The hair is swept upward and back from the forehead, creating a flattering lift that opens up the face. By using soft, buttery blonde tones and interlocking layers, the style achieves a high-fashion, high-impact silhouette that pairs perfectly with bold accessories and a confident presence.

How to Style & Maintain Spiky Hair (Without Looking Like a Porcupine)

The beauty of spiky hair isn't just the look—it's the ease. Once you know the right techniques, you can go from pillow to polished in under three minutes. Here's exactly how.

The Right Products (Skip the Wet-Look Gel)

Most women make one mistake: they reach for their husband's old gel. Don't. Gel goes crunchy, flaky, and shiny—three things spikes should never be. Instead, look for these:

  • Matte styling paste – Gives you hold and definition without any shine. It's the gold standard for soft, touchable spikes.
  • Fiber wax – Slightly thicker than paste. Ideal for fine or thinning hair because it adds gripping texture and lifts the roots.
  • Volumizing powder – A secret weapon. Sprinkle a tiny bit at the crown, rub it in, and watch flat hair stand up like magic.

The 2-Minute Styling Routine

Memorize these five steps. They work for every single cut on our list.

  1. Start with dry, day-old hair. Freshly washed hair is too slippery and soft. Spikes hold best on second-day hair. If you must wash daily, use a dry shampoo first to add grip.
  2. Rub a pea-sized amount between your palms. Less is always more. You can add more product. You cannot take it away without rewashing.
  3. Scrunch and lift from the roots. Work your fingers into the hair at the crown and squeeze upward. Don't pull. Don't comb. Just scrunch.
  4. Use your fingertips to define individual spikes. Twist small sections between your thumb and index finger. Point them in different directions—slightly forward, slightly sideways. Perfectly uniform spikes look artificial.
  5. Mist with flexible hairspray only if needed. Windy day? Long event? A light hold spray is fine. But skip the freeze spray. You want movement, not helmet hair.

What to Avoid

  • ❌ Heavy, wet-look gels – They flake, they shine, and they scream 1980s.
  • ❌ Over-washing – Spikes are happier on slightly oily hair.
  • ❌ Too much product – A dime-sized amount is plenty. More just weighs everything down.
  • ❌ Brushing or combing after styling – Fingers only. Combs destroy spikes.

One final tip: Keep your product in the shower. Apply it while your hair is still damp if you want softer, lower spikes. Apply it to completely dry hair if you want height and drama. Both work. Both are correct.

Conclusion

A spiky hairstyle isn't just a cut—it's a statement. It says you’re confident, you’re fun, and you refuse to disappear into the background. The best part? Spikes are incredibly forgiving. They hide thinning areas, they make fine hair look thick, and they take minutes to style with a bit of wax or paste.

So go ahead. Show your stylist one of these 15 looks, invest in a good texturizing product, and wake up every morning with hair that says, "I’ve lived, I’ve learned, and I’m still fierce."

The Undercut Pixie for the Modern Woman Over 50

April 11, 2026 by Jessica Guevara Leave a Comment

The undercut pixie has emerged as a definitive power move for women over 50 who are ready to shed the weight of traditional styling. Far from being a mere "rebellious" phase, this cut is a masterclass in precision and intentionality. By removing bulk at the nape and sides, the undercut creates a structural lift that naturally draws the eye upward, highlighting the cheekbones and jawline with an architectural sharpness that softer cuts often lack. It is a style that honors the texture and silver-toned depth of mature hair while offering a streamlined, low-maintenance daily routine.

For those looking to refresh their aesthetic with longevity in mind, the undercut pixie serves as a versatile canvas. It can be worn with a swept-back, polished finish for formal occasions or styled with piecey texture for a relaxed, daytime look. This transition isn't just about a shorter length; it’s about embracing a silhouette that feels contemporary, breathable, and undeniably sophisticated. By focusing on the contrast between the closely cropped underside and the voluminous top, this haircut proves that short hair can be both a practical choice and a bold fashion statement.

15 Undercut Pixie Hairstyles After 50:

The Tapered Silver Crop

A profile view showcases a striking silver-blonde pixie that utilizes a tight taper at the nape to create natural lift. The longer, piecey layers on top are styled forward into a soft fringe, providing a delicate contrast to the structured, shorter back. This silhouette is ideal for highlighting the jawline while maintaining a sense of effortless, wind-swept movement.

The Icy Blue Textured Undercut

This bold iteration features a vibrant, icy blue-lavender tone with a distinct disconnection between the crown and the sides. The undercut is clipped close to the scalp, allowing the textured, wavy layers above to pop with three-dimensional depth. It’s a masterclass in using color and unconventional structure to achieve a contemporary, high-fashion look.

The Architectural Bowl-Pixie

A precision-cut style that merges the classic bowl shape with a modern undercut. The dark, brunette layers are cut with a blunt, horizontal line that skims the top of the ear, revealing a clean-shaven section underneath. This structural approach manages hair density perfectly, resulting in a sleek, rounded silhouette that frames the face with geometric clarity.

The High-Contrast Blonde Taper

This look focuses on a sharp, vertical taper that starts at the mid-ear level. The pale blonde top is kept smooth and voluminous, tucked neatly behind the ear to display the technical precision of the shorter fade beneath. It is a sophisticated choice that balances the softness of a traditional pixie with the clean lines of a barber-inspired undercut.

The Dimensional Grey Swept-Back

A soft, sophisticated take on the undercut that works beautifully with natural grey transitions. The hair is styled with a subtle side-swept motion, using the undercut at the temples and nape to remove bulk and keep the profile slim. The mix of ash and silver tones provides a natural radiance, emphasizing the healthy, thick texture of the longer top sections.

The Polished Honey Taper

A rear three-quarter view highlights this sleek, warm blonde pixie. The style features a dramatic taper at the nape, creating a structured lift, while the rich honey hue transitions smoothly into a subtly darker under-section. The top is swept back with refined layers, demonstrating a polished, architectural shape that defines the profile.

The Multi-Angle Platinum Bob-Pixie

This panel of three images provides a 360-degree view of a bold platinum-blonde cut that bridges the gap between a bob and a pixie. From the profile, the stacked, voluminous back provides striking height. The rear shot reveals a precisely blended taper at the very bottom, illustrating how an undercut can manage density without losing the classic, flowing lines of a short style.

The High-Contrast Bowl Cut

A detailed side profile shows off a graphic, precision-oriented undercut pixie in an icy, white-platinum shade. The look features a sharply defined "bowl" shape that creates a hard horizontal line above the ear. Below this line, the hair is clipped very close to the scalp, providing a bold and modern contrast that defines the silhouette.

The Vibrant Textured Undercut

This look offers a masterclass in dimension. The style features a soft, peachy-honey top section that is full of texture and volume, revealing a hidden, very short under-shave beneath. The defining moment of this look is a striking pop of purple-magenta placed asymmetrically in the side-swept fringe, proving that boldness is timeless.

The Icy Spiked Undercut

A high-angle view reveals a contemporary take on the pixie featuring a stark contrast between a close-shaven side and a heavily textured, spiked top. The cool, icy-blonde tone is enhanced by the shadows of the undercut, creating a multidimensional look that prioritizes height and edge. It is a bold, low-maintenance choice for those who want to emphasize a strong facial structure with a modern, architectural silhouette.

The Softly Curled Taper

This back-view perspective showcases a refined, silver-white crop that balances structure with softness. The nape is neatly tapered into a clean, short finish, while the top remains longer with elegant, airy curls that provide volume and a touch of classic sophistication. The result is a silhouette that looks airy and light, proving that an undercut base can support incredibly soft and feminine textures.

The Sculpted Ash-Grey Pixie

A profile shot near a window highlights the precision of a high-tapered undercut that blends seamlessly into ash-grey layers. The crown is styled with forward-moving texture to add fullness, while the tight sides keep the overall profile slim and manageable. This look is particularly effective for those with thick hair who want to maintain a polished, effortless shape throughout the day.

The Asymmetrical Caramel Undercut

This profile view features a warm caramel-toned pixie with a high-impact asymmetrical element. One side is buzzed close to the scalp, creating a dramatic foundation for the longer, wavy layers on the opposite side to drape naturally. The contrast in length and the warm highlights throughout the top make this a vibrant, expressive choice that feels both artistic and intentional.

The Voluminous Salt-and-Pepper Sweep

A side view captures a sophisticated, salt-and-pepper undercut styled for maximum height and flow. The hair is swept back from the face in large, soft waves, supported by a discreetly buzzed section at the temples and nape. This strategic removal of bulk allows the natural silver highlights to catch the light, creating a high-volume look that feels contemporary and breathable.

The Sun-Kissed Textured Taper

This side profile highlights a dimensional, ash-blonde pixie that utilizes a soft taper around the ears to create a clean, intentional finish. The top is styled with breezy, piecey texture that adds natural volume and movement, allowing the varied blonde and grey tones to catch the light. It is a perfect example of a low-maintenance undercut that provides structural lift while maintaining a soft, approachable aesthetic.

Why It Works for the Over-50 Scalp and Hair Cycle

  • Thinning hair becomes more common after menopause; an undercut removes weight without removing length from the top, preserving the illusion of density.
  • The cropped nape reduces friction and tangling in the delicate baby hairs that often break easily with age.
  • Less product buildup on the shaved underside means less frequent washing and fewer scalp irritations.
  • Regrowth is subtle—unlike a traditional pixie that looks "overdue" within two weeks, the undercut grows into a soft, intentional disconnect.
  • For those experiencing hot flashes, the exposed nape offers instant thermal relief without sacrificing style.

The Architecture of Lift


Removing under-layer bulk eliminates the "triangle head" effect common in grown-out pixies. The resulting lift at the crown visually raises the face, softening jowls without filler or frizz. Clean nape lines elongate the neck—an instant, non-surgical refresh.


Silver and Texture as Assets, Not Problems


Undercuts reduce density where gray and white hair often frizzes, leaving only intentional volume on top. Silver tones gain dimension when paired with closely cropped shadow underneath. Natural wave or cowlicks become design features, not daily battles.


A Five-Minute Morning


Air-drying works: top length dries quickly; undercut stays neat without product. Styling ranges from one pass with a flat brush (sleek) to a dime-sized amount of paste (piecey). No more "just rolled out of bed" shame—the cut wants some texture.


Day-to-Night Without an Overhaul


Day: fingertip-ruffled top, clean edges, effortless. Evening: damp-slick the top back with gel, add a single earring—instant structure. The contrast between cropped sides and longer top reads as intentional, not unfinished.


Why It Works for the Over-50 Scalp and Hair Cycle


Thinning hair becomes more common after menopause; an undercut removes weight without removing length from the top, preserving the illusion of density. The cropped nape reduces friction and tangling in the delicate baby hairs that often break easily with age. Less product buildup on the shaved underside means less frequent washing and fewer scalp irritations. Regrowth is subtle—unlike a traditional pixie that looks "overdue" within two weeks, the undercut grows into a soft, intentional disconnect. For those experiencing hot flashes, the exposed nape offers instant thermal relief without sacrificing style.


The Power of Accessories


The undercut pixie is a natural showcase for bold accessories because there is no competing length or volume to hide them.

  • Earrings become the main event. With hair off the ears, a single sculptural hoop, a long chain, or a cluster of diamonds draws immediate attention to the jawline and neck. Try mismatched earrings for an artistic edge.
  • Headbands and scarves add instant polish. A wide velvet headband worn just behind the crown creates a retro, sophisticated silhouette. Silk scarves tied at the nape (where hair is cropped short) stay secure and add a pop of color or pattern.
  • Hair jewelry for the undercut. Think tiny gold or silver cuffs clipped along the shaved side, or a delicate chain that drapes from the top length down to the nape. These subtle accents signal intentionality.
  • Barrette or claw clip on top length only. Because the underside is short, you can twist the longer top section and secure it with a decorative clip for an unexpected updo variation.
  • Glasses become framing devices. Cat-eye frames, bold acetates, or wire rims sit cleanly against the exposed temples and ears. The undercut lets your eyewear read as a deliberate style choice, not an afterthought.
  • Hoop earrings in the cropped zone. A medium-sized hoop draws the eye along the line of the undercut, emphasizing the contrast between bare skin and textured top.

Seasonal Adaptability


Unlike longer cuts that demand different products and drying times for each season, the undercut pixie adapts with minimal effort.

  • Summer: The exposed nape keeps you cool. Sweat dries quickly. A spritz of salt spray on the top length gives beachy texture in seconds.
  • Winter: The voluminous top traps natural warmth near the scalp while the cropped sides fit easily under beanies, berets, or cashmere cloches without creating hat-hair chaos.
  • Spring: Rain or humidity won't flatten the undercut because there's no bulk to swell. The top length can be finger-combed and left to air-dry into soft waves.
  • Fall: This is the season for deeper side-sweeping. Let the top length fall across the forehead for a softer, romantic look that still shows off the clean nape.

The Confidence Shift


A haircut cannot change your life. But it can change how you hold your head.

With no heavy hair pulling at the crown, women naturally lift their chins. The result: better posture, less neck strain, and a more open chest and shoulder line. The clean, sharp lines of the undercut tend to invite compliments from other women—often younger ones—which creates unexpected moments of connection and visibility. Many women report that the undercut ends "bad hair days" entirely. Not because every day is perfect, but because the cut is designed to look intentional even when messy. That predictability reduces morning anxiety. There is a quiet thrill in running a hand over the shaved nape. It is a private, tactile reminder of agency—a small rebellion you feel every time you wash, brush, or simply touch your own hair.


How to Transition Without Panic


Worried about going from a classic pixie to an undercut? Here is the step-by-step.

  • Start with a "hidden undercut." Ask your stylist to shave only the lower third of the nape, leaving the rest of the pixie intact. You will feel the difference without anyone seeing it.
  • Gradually raise the undercut line every six to eight weeks. By the third appointment, you will know whether you want to go higher.
  • Keep the top length longer than you think. The magic of the undercut pixie is contrast. If the top is too short, you lose the architectural lift. Aim for at least two to three inches on top.
  • Invest in one good texture paste. It will be your only product. Rub a pea-sized amount between palms, then rake through dry top length. That is the entire routine.

CONCLUSION


The undercut pixie for women over fifty is not about rebellion—it is about refinement. It rejects the old assumption that shorter hair must be softer, rounder, or more forgiving. In fact, the most forgiving haircut you can wear at fifty is the one that stops pretending. The undercut pixie delivers sharpness where it flatters (jawline, cheekbone, neck) and removes bulk where it ages (nape, sides, crown). It asks for five minutes in the morning and gives back twenty in the evening. And with the right accessories—a sculptural earring, a silk scarf, a single hair cuff—it transforms from everyday ease into evening architecture. More than a cut, it is a reset. If short hair is freedom, then the undercut pixie is the key.

7 Concert Outfits Ideas for 2026 – From the Pit to the VIP Lounge

April 11, 2026 by Jessica Guevara Leave a Comment

Concerts in 2026 are no longer just about listening to music; they are about making a visual statement that blends nostalgia with futuristic edge. As touring fashion evolves, the best looks balance comfort for three-hour sets with bold, personal style—think cyber-silhouettes, reworked vintage band tees, and accessories that double as light shows. Whether you are heading to a massive stadium rock tour, an underground electronic warehouse, or a country-pop crossover show, these 17 ideas will ensure you look as unforgettable as the performance itself. Each look below comes with a single description followed by a practical explanation.

17 Concert Outfits That Will Steal the Show in 2026:

1. Holographic Mesh Layering Set

Look: A sheer holographic mesh long-sleeve over a black matte bralette, paired with high-waisted liquid leather shorts and translucent platform mules.

Explanation: In 2026, iridescent fabrics are everywhere. The mesh allows breathability in crowded venues while the holographic finish catches every stage light, making you visible from the balcony to the barricade.

2. Deconstructed Blazer & Bike Shorts

Look: An oversized, cut-out blazer (worn open) over a cropped band logo tank, with matte black bike shorts and chunky combat boots.

Explanation: This bridges office-core and rave culture. The blazer adds structure for outdoor evening shows, while bike shorts prevent chafing during high-energy dancing.

3. Metallic Fringe Jumpsuit

Look: A one-piece silver fringe jumpsuit with a plunging neckline, worn with clear vinyl heeled boots and a single chain belt.

Explanation: Fringe moves with you. For pop or disco revival tours, this creates motion blur in photos and feels cooler than sequins (literally—more airflow).

4. Upcycled Denim Corset & Cargo Maxi Skirt

Look: A patchwork denim corset top over a loose white poplin button-up, with a slate-gray cargo maxi skirt and platform sneakers.

Explanation: Sustainability is key in 2026. The corset gives shape, the cargo skirt hides a small crossbody bag or water bottle, and sneakers keep you safe on sticky floors.

5. LED Dot Bodysuit & Parachute Pants

Look: A black long-sleeve bodysuit with programmable micro-LED dots, paired with silver nylon parachute pants and chunky foam runners.

Explanation: For EDM or hyperpop shows, you become part of the light show. The LED dots sync to bass frequencies via a phone app; pants are lightweight and don't trap sweat.

6. Sheer Tulle Overlay & Leather Leggings

Look: A puff-sleeve black tulle mini dress worn over faux leather leggings, with lace-up ankle boots and spiked ear cuffs.

Explanation: Romantic goth is huge in 2026. The tulle looks dramatic but the leggings prevent wardrobe malfunctions when climbing stairs or crowd surfing.

7. Neon Utility Vest & Micro Shorts

Look: A high-vis neon orange utility vest (worn as a top) with black micro shorts, fishnet tights, and green-tinted sport sunglasses.

Explanation: Practical meets cyberpunk. The vest has zip pockets for your phone and earplugs; the neon ensures friends never lose you in a dark crowd.

8. Velour Tracksuit Set – Cropped

Look: A cropped zip-up velour hoodie with matching wide-leg velour pants, worn over a lace-trim cami and retro white sneakers.

Explanation: 2000s revival continues but smarter. Velour is comfortable for long waits in line, and the cropped cut keeps it from looking like loungewear.

9. Asymmetrical Chainmail Tank & Raw Hem Jeans

Look: A stainless steel chainmail tank top (lightweight aluminum links) with destroyed raw-hem barrel jeans and leather slides.

Explanation: Chainmail is surprisingly cool and breathable. It reflects lasers and phone flash beautifully, and the jeans balance the metallic weight.

10. Convertible Cape Top & Stirrup Tights

Look: A black stretch-cape top that drapes off one shoulder, with opaque stirrup tights, high-waisted briefs worn outside, and lug-sole loafers.

Explanation: Stirrup tights don't ride down. The cape can be pulled over your head for sudden rain or temperature drops, then tied at the waist.

11. Acid-Washed Muscle Tee & Tripp Pants

Look: An oversized acid-washed muscle tee tucked loosely into black-and-neon green Tripp NYC-style strapped pants, with platform creepers.

Explanation: A direct nod to 2000s mall goth and nu-metal. Those extra straps and buckles look aggressive but actually give you places to clip a fan or hand sanitizer.

12. Cow Print Co-Ord – Mesh & Suede

Look: A cow-print mesh halter top with matching high-waisted suede-effect mini skirt, plus brown leather cowboy boots with a block heel.

Explanation: Country-tinged pop tours demand this. The mesh keeps you cool outdoors; the suede skirt is softer than leather for sitting on grass. Block heels won't sink into mud.

13. Clear PVC Raincoat & Bodycon Dress

Look: A fully transparent PVC cropped raincoat over a bright red bodycon dress, with white go-go boots and a metallic belt bag worn crossbody.

Explanation: For stadium shows with unpredictable weather or indoor AC blasting. The PVC shows off your dress while protecting from spills or rain. Wipes clean instantly.

14. Graffiti Art Hoodie & Pleated Skirt

Look: An oversized white hoodie hand-painted with neon graffiti (or a custom print), over a black tennis pleated skirt, with knee-high rainbow striped socks and chunky dad sneakers.

Explanation: Artistic and youthful. The hoodie can be tied around the waist when hot; the pleated skirt allows maximum movement. Socks add a pop without blisters.

15. Sequin Bra Top & Low-Rise Cargo Jeans

Look: A silver sequin triangle bra top (with pasties for coverage) under an unbuttoned flannel shirt, with low-rise cargo jeans and platform Converse.

Explanation: The flannel gives you an "off-duty rockstar" layer for the walk to the venue. Cargo jeans hold your power bank and merch money; sequins scream main character.

16. Knotted Rugby Shirt & Vinyl Leggings

Look: An oversized vintage rugby shirt (knotted at the side) with glossy black vinyl leggings, white ankle socks, and Birkenstock Bostons with shearling.

Explanation: Unexpectedly cool for indie or alternative rock shows. The cotton rugby absorbs sweat; vinyl leggings wipe clean and repel beer spills. Shearling clogs are shockingly comfortable for hours of standing.

17. Scarf Top & Patchwork Wide-Leg Pants

Look: A silk scarf tied as a halter top (using two large scarves for full coverage) with patchwork wide-leg pants made from recycled denim and canvas, plus woven espadrille wedges.

Explanation: Perfect for daytime festival-style concerts. The scarf top is packable and adjustable; patchwork pants are breathable and have deep pockets. Wedges add height without stabbing the person behind you.

5 Essential Accessories to Upgrade Any Concert Look in 2026

1. LED Earrings
Small, battery-operated earrings that pulse to bass frequencies. They work with any outfit and make you visible in dark crowds.

2. Clear Crossbody Bag
Stadiums are strict in 2026. A transparent PVC bag (smaller than 6"x8") holds your phone, power bank, and earplugs without getting turned away at security.

3. Reusable Cooling Neck Gaiter
For outdoor summer shows, a dampened cooling gaiter lowers body temperature instantly. Many now come in neon or holographic fabrics.

4. Spike Phone Grip Ring
A phone grip with metal spikes doubles as a selfie stand and a subtle self-defense tool. Attaches to any phone case.

5. Insole Inserts with Arch Support
Platform boots look cool but destroy your feet. Swap the factory insole for a gel arch support insert.

4 Common Concert Outfit Mistakes to Avoid in 2026

1. Brand new shoes
Never break in shoes at a show. Blisters by song three will ruin your night. Always wear shoes you have worn for at least two full days.

2. Heavy denim jackets
They feel nostalgic but weigh you down, trap sweat, and have nowhere to go when you get hot. Choose lightweight nylon or mesh instead.

3. Tiny clutch bags with no strap
You will drop it, set it down, or lose it. Always wear a crossbody or belt bag so your hands are free to clap, hold a drink, or crowd surf.

4. Over-layering without a tie-off
If you wear a flannel or hoodie, make sure it can be tied around your waist. Draping over one shoulder falls off within minutes. Tie it properly.

Conclusion

Concert fashion in 2026 is no longer a choice between looking good and feeling comfortable. With the right fabrics—mesh, vinyl, chainmail, tulle, and recycled denim—you can have both. The 17 outfits above cover every genre, venue size, and weather condition, from rainy stadiums to sweaty underground clubs. Remember to accessorize wisely, avoid the four common mistakes, and always prioritize footwear that lets you dance until the last encore. Whether you choose holographic mesh or a knotted rugby shirt, the real goal is simple: walk into that venue feeling like you belong on stage. Now go find your tickets, charge your LED earrings, and dress like the headliner you are.

The Bob Pixie For The Modern Older Woman: A Sophisticated Fusion of Modern Edge and Classic Elegance

April 10, 2026 by Jessica Guevara Leave a Comment

The beauty of a bob pixie—often affectionately called the "bixie"—lies in its ability to bridge the gap between bold short hair and soft, face-framing length. For women who want to reclaim their time without sacrificing their style, this cut offers a refreshing blend of sophistication and ease. It takes the effortless edge of a traditional pixie and marries it with the versatile silhouette of a bob, resulting in a look that feels intentional, modern, and incredibly flattering.

As we move through different stages of life, our hair often calls for a shift in strategy. Whether you are looking to add volume to fine textures, embrace your natural silver, or simply simplify your morning routine, the bob pixie delivers. It provides enough length to play with texture and tuck behind the ear, while remaining short enough to highlight the jawline and cheekbones. This article explores how to tailor this trending hybrid cut to your unique features, ensuring a look that feels less like a "safe" choice and more like a signature statement.

15 Stunning Bob Pixie Looks for Mature Beauty:

1. The Sleek Platinum Sweep

This version features a sophisticated, icy-white take on the hybrid cut. It focuses on soft, elongated layers that originate from a deep side part. The hair is tucked delicately behind one ear, while the other side showcases a sharp, forward-tapered point that grazes the jawline. This silhouette is perfect for creating a lifting effect on the face, using smooth, sweeping movement to highlight the cheekbones and provide a polished, airy finish.

2. The Textured Copper Shag

In this interpretation, the cut is transformed into a high-volume, "lived-in" style with a vibrant copper tone. It leans heavily into the pixie’s edgy roots, using piecey, feathered layers throughout the crown to create height and dimension. The fringe is cut with a wispy, eyelash-skimming length that adds a playful, modern energy. It’s an ideal choice for adding the appearance of thickness to hair through strategic texture and bold color.

3. The Sculpted Stacked Nape

This view highlights the structural foundation and the classic "stacked" technique. The hair at the nape of the neck is cut short and graduated to support the longer layers above, creating a natural lift and a rounded, voluminous shape at the back of the head. The honey-blonde tones are blended through smooth, overlapping layers that offer a clean, architectural profile that remains easy to maintain as it grows out.

4. The Feathered Silver Sweep

This profile view showcases a bob pixie that emphasizes movement and directional flow. The hair is cut into long, feathery layers that are swept back from the face, creating a sense of volume and texture throughout the crown. The silver-toned strands are tapered precisely toward the nape, while a soft, wispy side piece remains forward-facing to frame the cheekbones. It is a sophisticated choice for those who want a short cut that still feels fluid and full of life.

5. The Classic Straight Bixie

This style offers a clean, understated approach to the hybrid cut, perfect for straight hair textures. The length falls just below the ears, featuring a subtle curve that hugs the jawline for a softening effect. With integrated grey and white tones, the look is natural and low-maintenance. The light, airy fringe across the forehead provides a gentle frame for the face, making this an elegant, everyday option that balances simplicity with a modern silhouette.

6. The Wavy Sculpted Crop

In this version, the bob pixie embraces natural waves to create a soft, romantic profile. The back is expertly tapered to sit close to the neck, while the top layers are kept long enough to allow for deep, undulating texture. These waves provide natural "lift" and a rounded shape that adds fullness to the back of the head. It is a brilliant example of how a shorter cut can still feel feminine and soft by working with the hair’s natural movement rather than against it.

7. The Tapered Ash-Grey Bob

This variation leans closer to a traditional bob but incorporates the lightweight layering of a pixie at the back and sides. The hair features a multi-tonal ash-grey blend, styled with a soft, side-swept fringe that blends seamlessly into the longer side sections. By keeping the length slightly longer toward the front and tapering it gently at the nape, this cut provides a balanced look that offers the coverage of a bob with the manageable weight of a shorter crop.

8. The Midnight Salt-and-Pepper Crop

This sleek, dark variation emphasizes high contrast and sharp lines. The hair is kept close to the head with minimal bulk, while the sideburns are tapered into a clean, geometric point that frames the jawline. A soft, full fringe rests just above the eyewear, blending seamlessly into the sides. It is a fantastic choice for those with naturally straight hair who want a look that feels modern, intellectual, and incredibly easy to style.

9. The Stacked Steel Bixie

This profile showcases a masterfully layered back that provides incredible lift and volume. The "stacked" effect at the nape of the neck creates a structural foundation, while the longer, ash-grey layers on top cascade down to a sharp, forward-swept point. This silhouette is ideal for adding body to finer hair textures, offering a profile that looks architectural and voluminous from every angle.

10. The Soft Platinum Bob-Pixie Hybrid

This version leans more toward the bob side of the spectrum, offering a softer and more rounded silhouette. The platinum-white strands are cut to a uniform length that skims the ears, with internal layering that prevents the look from feeling heavy. A delicate, curled-under tip at the jawline adds a touch of classic elegance, making this an excellent "transition" cut for those who want the ease of a pixie but prefer the face-framing benefits of a bob.

11. The Honey-Blonde Shaggy Mullet-Mix

This style brings a contemporary, slightly edgy twist to the bob pixie by incorporating elements of a shag. The hair features warm honey-blonde tones with distinct, piecey layers that flip out slightly at the nape. The crown is kept full and voluminous, while the sides are tucked back to reveal the ear, creating a multi-dimensional look that feels effortless and youthful.

12. The Radiant Ruby Shag

In this bold interpretation, the bob pixie is elevated by a deep, monochromatic wine-red hue. The cut features longer, face-framing layers and a "bottleneck" fringe that opens up the face. The texture is piecey and undone, with the back layers left long enough to graze the collarbone, offering a more bohemian and spirited take on the traditional short crop.

13. The Velvety Pearl Stack

This back-profile view showcases a bob pixie with an exceptionally smooth, silk-like finish. The platinum-pearl hair is cut into long, sweeping layers that overlap seamlessly, creating a dense and healthy appearance. The nape is neatly tapered to follow the natural hairline, providing a sturdy foundation for the voluminous crown. This style is perfect for those who want a structured, architectural look that prioritizes shine and a refined, touchable texture.

14. The Airy Silver Wing

This profile highlights a lighter, more ethereal take on the bixie cut. The silver-grey hair is styled with a soft, outward-flipping layer at the cheekbone, mimicking the delicate shape of a wing. The back and sides are kept quite short and close to the head, which emphasizes the length and movement of the top sections. It is a graceful and modern choice that opens up the face and works beautifully with eyewear, offering a look that feels both weightless and intentional.

15. The Deep Espresso Precision Cut

This style demonstrates the power of a rich, monochromatic tone paired with a sleek silhouette. The hair is cut with smooth, internal layers that provide a rounded, voluminous shape at the back while maintaining a flat, polished finish on the surface. A distinct, elongated side-piece is left in front of the ear to add a touch of modern asymmetry and frame the jawline. This version is an excellent choice for those with thicker hair who want to eliminate weight while keeping a look that feels substantial and high-fashion.

The Anatomy of the Bob Pixie

The Bob Pixie is not simply a shorter bob or a longer pixie—it’s a deliberate architectural choice. Typically, the cut features:

  • Length variation: Longer top layers (2–4 inches) for movement, with the back and sides cropped closer to the nape, similar to a classic pixie.
  • Weight line: Unlike a traditional bob, the Bob Pixie often removes weight from the perimeter, keeping fullness on top and texture around the ears.
  • Versatile fringe: Blunt, side-swept, or micro-bangs work equally well, allowing the cut to shift from soft and romantic to sharp and androgynous.

This balance gives the cut its “sophisticated fusion”—edgy enough for fashion-forward clients, elegant enough for professional settings.


Styling & Maintenance

One reason the Bob Pixie has gained popularity is its surprisingly low-maintenance nature—when cut correctly. Daily styling often takes less than 10 minutes:

  • For a sleek, elegant finish: Apply a smoothing cream and blow-dry with a flat brush, tucking sides behind the ears.
  • For modern edge: Use a texturizing paste or sea-salt spray on damp hair, then scrunch and air-dry or diffuse for piece-y, undone volume.
  • Growth phase: The Bob Pixie grows out more gracefully than a traditional pixie because the longer top blends into a bob shape, reducing awkward “mullet” stages.

Maintenance trims every 4–6 weeks keep the neckline clean and the shape intentional.


Who Does the Bob Pixie Suit Best?

This cut is surprisingly adaptable:

  • Face shapes: Oval, heart, and square faces wear it especially well. For round faces, keep height on top and avoid excessive volume at the sides.
  • Hair textures: Straight to wavy hair shows off the cut’s graphic lines. Curly hair can work beautifully with a dry cut and longer layers to prevent shrinkage from ruining the shape.
  • Lifestyle: Ideal for someone who wants a wash-and-go option that still looks intentional, or for clients transitioning from long hair to short but who aren’t ready for a full pixie.

Conclusion

The Bob Pixie is more than just a haircut—it's a statement. By masterfully blending the structured sophistication of a bob with the fearless, low-maintenance appeal of a pixie, it offers something genuinely rare: a style that feels both timeless and trend-forward.

Whether worn sleek and polished for the boardroom, tousled and textured for a weekend brunch, or accessorized with bold hoops and silk scarves for a night out, the Bob Pixie adapts effortlessly to the woman who wears it. It flatters a range of face shapes, suits multiple hair textures, and grows out with grace—all while demanding minimal daily effort.

For anyone standing at the crossroads of "chop it all off" or "keep some length," the Bob Pixie delivers the best of both worlds. It is confident without being severe, elegant without being fussy, and edgy without trying too hard.

In short: the Bob Pixie doesn't just frame the face—it empowers it.


Modern Medium Length Hairstyles for a Fresh, Radiant Look For Women With Over 60.

April 10, 2026 by Jessica Guevara Leave a Comment

For decades, there was an unwritten rule that women reached a certain age and immediately traded their tresses for a sensible, short crop. But in 2026, the "rules" of aging have been officially rewritten. Today, the most coveted length for women over 60 isn't short or long—it’s the versatile, vibrant middle.

Medium-length hairstyles offer the best of both worlds: they are long enough to provide a flattering frame for the face, yet short enough to maintain the bounce and health that can sometimes be lost with age. Whether you are embracing your natural silver, experimenting with soft layers, or looking for a "wash-and-go" style that still feels polished, the mid-length cut is a masterclass in effortless chic.

In this article, we’ll explore how to work with your hair’s changing texture, the best cuts for different face shapes, and why the "shoulder-grazing" look is the secret to a timeless, modern aesthetic.

Why Medium Length Is the Sweet Spot After 60

Long hair can sometimes drag down the face, emphasizing fine lines and thinning areas, while very short crops may feel too severe or require frequent trims. Medium length—generally from the collarbone to just above the shoulders—offers the best of both worlds. It provides enough weight to keep hair from looking wispy, but it’s light enough to add volume, movement, and bounce. For women over 60, medium length is also forgiving, versatile, and surprisingly easy to style.

15 Timeless Cuts to Elevate Your Look This Year;

1. The Modern Straight Lob

A stunning example of how a straight, precise cut can add definition and a contemporary edge. This shoulder-length long bob features a blunt, clean hemline that emphasizes hair health and shine. The look is personalized with a delicate, full-fringe that rests just at the eyebrows, offering a soft face-framing effect and a playful touch of youthfulness. It's a sophisticated "power cut" that requires minimal daily styling.

2. The Elegant Caramel Cascade

Demonstrating that medium-length can still exude luxurious texture, this style features rich, dimensional caramel-brown hair with soft, internal layering. The length is kept versatile, reaching well below the collarbone, allowing for cascading, flowing waves that add a deep sense of movement and volume. Paired with a soft, piecy fringe, this look is the epitome of effortless, polished glamour.

3. The Bright Platinum Shag

This cut showcases the vibrancy of a high-lift platinum hue applied to a heavily textured medium length. The style is defined by extensive, choppy layers that create an asymmetrical, piece-y look with significant lift and volume, particularly around the sides. The graduated layers are swept back slightly, giving it an airy, dynamic feel that feels modern and fresh

4. The Textural Curled Shag

A masterclass in adding texture, this shoulder-length shag uses internal layers to create significant volume and texture throughout the crown and back. The hair is cut to fall just at the collarbone, with the ends of the layers styled into a soft, multi-directional curl that encourages height and fullness. This silhouette is ideal for anyone seeking a "wash-and-wear" look that maintains dynamic shape and body.

5. The Golden Feathered Lob

A beautiful demonstration of how face-framing layers can add lift and movement. This honey-blonde long bob features soft, feathered layers that sweep away from the face, creating a breezy and youthful silhouette. The length rests perfectly on the shoulders, providing enough weight for a sleek finish while the internal thinning ensures the style feels light and effortless.

6. The Classic Silver Volume Bob

This image showcases the stunning potential of natural silver hair when paired with a structured, voluminous cut. The hair is shaped into a rounded bob with stacked layers at the back to encourage maximum height and body. The sides are styled with a soft, inward curve that grazes the jawline, creating an elegant frame that emphasizes bone structure and a polished, timeless aesthetic.

7. The Warm Copper Butterfly Cut

A vibrant example of how long, cascading layers can revitalize hair color and texture. This warm copper style features a modern "butterfly" cut, characterized by shorter, voluminous layers around the crown and chin that transition into long, flowing waves. The wispy, full fringe adds a soft touch to the forehead, while the layered ends create a sense of fullness and romantic movement.

8. The Platinum Icy Waves

This mid-length style focuses on high-contrast texture and cool-toned brilliance. The bright platinum hair is cut with subtle layers and styled into defined, beachy waves that break up the solid color and catch the light from every angle. It’s a bold, fresh take on the medium-length trend, offering a look that is both edgy and sophisticated for those wanting to embrace a high-shine, modern finish.

9. The Soft Scandi-Blonde Waves

This mid-length style emphasizes a natural, effortless flow with long, sweeping layers that fall just past the shoulders. The hair is styled with large, soft curls at the ends to create a sense of romantic movement and fullness. With a gentle off-center part, this look allows the hair to frame the face naturally, showcasing a bright, ash-blonde tone that feels both fresh and sophisticated.

10. The Dimensional Swept-Back Lob

A masterclass in volume and structure, this long bob uses strategic layering to create height at the crown and width through the sides. The front sections are swept back and away from the face, blending seamlessly into the rest of the hair. The soft, honey-toned highlights add depth to the cut, making it a perfect choice for those looking to add the appearance of thickness to their natural hair texture.

11. The Polished Layered Face-Frame

This elegant look features long, face-framing layers that start at the jawline and cascade down to the collarbone. The ends are styled with a subtle inward curve, creating a neat, polished finish that feels incredibly intentional. Paired with a soft side-swept fringe, this style is ideal for balancing facial features and providing a modern, "quiet luxury" aesthetic that is easy to style for daily wear.

12. The Sleek Ash-Silver Lob

A refined take on the long bob, this style features a smooth, straight texture that showcases a beautiful blend of natural grey and ash-silver tones. The length is cut precisely to graze the collarbone, with a subtle outward flick at the ends to provide a touch of modern flair. The off-center part allows the hair to fall gracefully away from the face, offering a clean and polished look that embodies a "quiet luxury" aesthetic.

13. The Voluminous Silver Shag

This dynamic cut celebrates natural grey hair with high-impact volume and movement. By incorporating heavy layering throughout the crown and sides, the style achieves a wind-swept, effortless feel. The face-framing sections are cut to different lengths, creating a soft, textured fringe that adds dimension and a youthful, edgy energy to the overall silhouette. It is an ideal choice for those looking to embrace their natural color with a bold, contemporary shape.

14. The Multi-Tonal Sun-Kissed Lob

A classic medium-length style that highlights the depth of multi-tonal blonde highlights. This shoulder-length cut features internal layers that add subtle body and prevent the ends from feeling too heavy. The back is styled with a soft inward curve, providing a neat and finished appearance from every angle. It’s a versatile, low-maintenance option that bridges the gap between a traditional bob and a longer, more layered cut.

15. The High-Contrast Salt and Pepper Lob

This collarbone-length cut is a masterclass in showcasing multi-dimensional color. Featuring a deep charcoal base woven with bright silver-white streaks, the style uses a long bob silhouette to provide a structured yet flowing appearance. The hair is styled with a subtle inward curve at the ends, while long, invisible layers throughout the mid-lengths add weightless volume and movement. By opting for a soft side part, the silver strands naturally highlight the face, proving that "grown-out" color can be an intentional and incredibly chic fashion statement.

What to Consider Before Your Next Haircut

Before choosing a style, take a moment to think about your hair’s current texture, your daily routine, and your face shape.

  • Hair texture: Fine hair benefits from blunt ends or subtle layers to create fullness. Thick hair can be shaped with internal layers to remove bulk. Curly or wavy hair shines with longer layers that encourage natural movement.
  • Face shape: Soft, side-swept bangs or face-framing pieces can soften a long face. Rounded faces look beautiful with height at the crown and length below the chin. Angular faces are complemented by gentle waves and textured ends.
  • Lifestyle: If you prefer wash-and-go styles, look for cuts that dry naturally into a flattering shape. If you enjoy a little styling time, a blowout-friendly lob with layers is a great choice.

Modern Medium Length Hairstyles to Try

Here are some of the most flattering, on-trend cuts for women over 60:

  1. The Textured Lob (Long Bob)
    Falling just above or below the collarbone, the lob is timeless. Adding soft, piece-y texture prevents it from looking stiff and gives a modern, airy feel.
  2. Soft Shag with Face-Framing Layers
    A modern shag is not just for your 20s. With gentle layers around the face and light fringe, it adds instant volume and a playful, youthful energy.
  3. Shoulder-Length with Loose Waves
    Ideal for naturally wavy hair or for using a large-barrel curling iron. Waves soften facial features and reflect light beautifully, giving a radiant, luminous look.
  4. Blunt Cut with a Subtle Bend
    For fine hair, a blunt hemline creates the illusion of thickness. Add a slight inward bend at the ends for polish without effort.
  5. Side-Parted Curls or Beachy Texture
    Whether your hair is naturally curly or you add soft bends, a deep side part opens up the face and adds asymmetry—one of the most flattering tricks for a fresh, modern look.

Styling Tips for Volume, Shine, and Effortless Radiance

A great cut is only half the story. These simple styling habits will keep your medium-length hair looking fresh every day:

  • Lift at the roots: Use a lightweight volumizing mousse on damp hair, then blow-dry with a round brush or a root-lifting clip.
  • Add texture: A dry texture spray or light sea salt spray gives fine hair grip and movement without heaviness.
  • Go easy on the heat: Use a heat protectant and consider air-drying a few times a week. Medium-length hair often dries into beautiful natural shapes.
  • Refresh second-day hair: A spritz of dry shampoo at the roots and a quick curl with a flat iron can make day-old hair look brand new.
  • Embrace gray or silver: If you’ve gone natural or are considering it, ask your stylist for a cut that enhances your silver tones—often cool-toned layers or a gloss treatment for extra shine.

Conclusion

(Use the conclusion I provided earlier, or feel free to adapt it slightly to match the added sections above.)

Turning 60 isn’t about stepping back from style—it’s about stepping into a version of yourself that’s more confident, self-assured, and radiant than ever. A modern medium-length hairstyle offers the perfect balance: soft enough to frame your face beautifully, short enough to be low-maintenance, and versatile enough to move with your life. Whether you choose soft layers, a textured lob, or gentle waves, the right cut can brighten your features, boost your energy, and make you feel effortlessly polished every day. Remember, confidence is the most beautiful thing you can wear—and a fresh, modern haircut is simply the ribbon that ties it all together. Here’s to looking and feeling radiant at 60 and beyond.

The Best Shoulder-Length Hairstyles for Fine Hair in 2026

April 10, 2026 by Jessica Guevara Leave a Comment

The challenge of styling fine hair has rarely been about a lack of options, but rather a search for intentionality. When hair lacks natural density, every inch of length is a gamble between elegant movement and unwanted weight. This is why the shoulder-length cut has solidified its place as the definitive choice for those seeking a sophisticated, low-maintenance silhouette. By hitting right at the collarbone or skimming the shoulders, these styles preserve the hair’s integrity, preventing the "stringy" look that often plagues longer, finer strands.

In 2026, we are seeing a shift away from over-processed layers toward precision-based techniques that create the illusion of thickness. Whether it is a blunt-cut lob that offers a sharp, healthy edge or subtle internal layers designed to catch the light, the goal remains the same: aesthetic longevity. A well-executed shoulder-length cut does more than just sit there; it provides a structural foundation that allows fine hair to look fuller, move naturally, and hold its shape from morning until evening.

15 Best Shoulder-Length Hairstyles for Fine Hair:

1. The Blunt Lob with Wispy Fringe

A side profile highlights a precise, shoulder-skimming blunt lob in a natural ash-blonde tone. The cut features a soft, wispy fringe that adds structure to the face, while the sharp, horizontal baseline at the ends creates a much-needed illusion of density for fine hair. This style demonstrates how a straight finish without heavy external layers can prevent the ends from appearing sparse or stringy.

2. Natural Texture and Crown Density

An overhead perspective offers a realistic look at the crown and parting area of fine, light-blonde hair. This angle provides a clear view of the hair's natural transparency and texture, serving as a technical reference for how fine strands behave at the root. It emphasizes the importance of strategic parting and volumizing products to create a sense of fullness and coverage at the scalp.

3. The Voluminous Platinum Layered Cut

A vibrant platinum blonde style is captured in profile, showcasing the transformative power of internal layers and a face-framing fringe. The hair is styled with a soft, sweeping motion that encourages lift and movement, preventing the fine texture from falling flat against the head. The high-contrast color and airy styling work together to maximize the hair’s visual volume and provide a modern, high-fashion aesthetic.

4. Polished Gold with Full-Bodied Bangs

A polished, golden blonde cut extends just past the shoulders, featuring a full, straight-across fringe that blends into subtle face-framing layers. The hair is styled with a smooth, rounded finish that emphasizes a healthy shine and a dense, cohesive shape. This look illustrates how maintaining a consistent length while incorporating a bold bang can give fine hair a sophisticated and intentional silhouette that looks effortlessly thick.

5. The Textured Dark Bob with Tapered Layers

A profile view showcases a sophisticated, chin-length bob in a deep espresso shade. This cut utilizes subtle, tapered layering at the back to create a rounded silhouette, providing natural lift to fine hair without sacrificing the overall shape. The inclusion of soft, piecey bangs helps to frame the face and add a sense of effortless movement to the darker, uniform color.

6. Voluminous Beach Waves with Golden Highlights

This front-facing style demonstrates how texture can completely transform fine hair. The shoulder-length cut is styled into loose, airy beach waves that expand the hair's width, creating maximum volume. A honey-blonde palette with sun-kissed highlights adds multi-dimensional depth, while wispy bangs break up the forehead line for a soft, approachable look that feels full and energized.

7. Classic Layered Blowout in Ash Blonde

A view from the back highlights a masterfully layered shoulder-length cut in a pale ash blonde. The hair is styled with a rounded blowout, where the ends are curved inward to create a "C-shape" silhouette. These soft, overlapping layers stack onto one another, building structural body and a thick, healthy appearance that is perfect for those looking for a polished, professional aesthetic.

8. High-Contrast Root Melt and Fine Texture

An overhead perspective captures a high-contrast color technique, featuring deep natural roots that melt into a bright, buttery blonde. This shot provides an honest look at fine hair texture from above, illustrating how a dark root can provide a visual "anchor" at the scalp, making the hair appear more grounded and dense before transitioning into the lighter, airier ends.

9. The Sleek Blunt Lob with a Modern Side Part

This profile image features a classic, straight-edged lob that hits right at the collarbone. The hair is a neutral sandy blonde with subtle dimension, styled with a clean side part to create a sweeping, architectural look. By keeping the ends blunt and the surface smooth, this style emphasizes the hair's natural shine and ensures the perimeter looks thick and intentional rather than sparse.

10. Polished Platinum Shag with Internal Layering

This rear-facing perspective showcases how strategic layering can breathe life into bright, icy tones. The mid-length cut is designed with significant internal texture, allowing the hair to stack naturally for maximum movement and a lightweight feel. A crisp, platinum-white palette offers a high-impact aesthetic, while the feathered ends prevent the density of the hair from appearing heavy, resulting in a look that feels both effortless and intentionally curated.

11. Sleek Mushroom Blonde Lob

A focused view of the back and sides highlights a precision-cut long bob in a sophisticated mushroom blonde. The color features a cool, muted ash base that transitions seamlessly into brighter, silvery tips, perfect for those seeking a modern, low-warmth finish. The hair is styled straight to emphasize the clean, blunt perimeter, creating a sharp silhouette that conveys health and structural clarity for a refined, professional presence.

12. Multi-Dimensional Honey Balayage

This perspective captures a classic, sun-kissed color technique featuring a warm honey-blonde base with golden highlights. The style utilizes a "lived-in" root approach, where the natural base melts into brighter mid-lengths and ends to create visual depth and a soft, approachable glow. With a straight, uniform finish and a clean horizontal baseline, this look emphasizes the rich color transitions and provides a dense, full-bodied appearance.

13. Bright Ash Highlights and Soft Tapering

This full-length view demonstrates a high-clarity blonde achieved through fine, vertical highlighting techniques. The blend of cool ash and neutral beige tones creates a multidimensional shimmer that catches the light from every angle. The cut features subtle tapering toward the ends to reduce bulk, allowing the long lengths to flow with a soft, airy quality that maintains a balance between a high-fashion color statement and functional, everyday wearability.

14. Sculpted French Twist in Pearlescent White

This multi-angle view illustrates a classic, elegant French twist tailored for short to mid-length hair. The style is meticulously tucked and pinned to create a vertical roll that adds height and a sense of formality. The pearlescent white tone enhances the visible texture of the sweep, while the clean finish at the nape of the neck ensures a polished, sophisticated silhouette that remains secure and stylish for special occasions.

15. Voluminous Golden Shag with Wispy Bangs

A front-facing perspective demonstrates how a layered shag cut can transform fine hair into a full-bodied, energetic style. The shoulder-length hair is styled with loose, airy waves that expand the width of the look, while a honey-blonde palette with sun-kissed highlights adds multi-dimensional depth. The inclusion of soft, wispy bangs helps to frame the face and break up the forehead line, resulting in a modern aesthetic that feels both approachable and vibrant.

Why Shoulder-Length Works Wonders for Fine Hair

Fine hair often struggles with two extremes: too long, and it falls flat; too short, and it lacks styling versatility. Shoulder-length hits the sweet spot. It removes enough weight to encourage natural lift at the roots while retaining enough length to create movement, softness, and shape. In 2026, this length is being redefined with precision cutting techniques that make fine hair look denser, bouncier, and effortlessly chic.


Top Shoulder-Length Trends for Fine Hair in 2026

This year, fine hair is getting a volume-first makeover. The most popular shoulder-length styles include:

  • The Airy Lob (Long Bob): Cut just above the shoulders with invisible internal layers that add lift without sacrificing fullness.
  • The Soft Shag: Featuring wispy, face-framing layers and light texture through the ends—perfect for creating the illusion of thicker hair.
  • The Blunt One-Length Cut: A sharp, clean line at the shoulders that reflects light and makes fine strands appear denser.
  • The Curtain-Bang Bob: Soft, parted bangs that blend into shoulder-length layers, adding width and framing the face beautifully.

Cutting Techniques That Boost Volume

The secret isn’t just the length—it’s how the hair is cut. In 2026, stylists are moving away from heavy layering and toward:

  • Point cutting to soften ends without removing bulk.
  • Under-graduation to create hidden support underneath.
  • Surface texturing on mid-lengths only, keeping the perimeter strong.
    These techniques give fine hair structured volume that lasts all day.

Styling Tips for Maximum Body and Hold

Even the best cut needs the right routine. For shoulder-length fine hair in 2026:

  • Use a volumizing mousse at the roots before blow-drying.
  • Blow-dry upside down or with a round brush to lift roots away from the scalp.
  • Avoid heavy oils or butters near the crown—save them for the ends only.
  • Try texture sprays (not dry shampoo) to create grip and separation.
  • Sleep with a loose topknot or silk scrunchie to preserve volume overnight.

Product Picks for Fine, Shoulder-Length Hair

Lightweight formulas are non-negotiable. Look for:

  • Root-lifting sprays (e.g., Bumble and Bumble Thickening Spray)
  • Foam or mousse over creams or gels
  • Dry texture spray for second-day body
  • Lightweight heat protectant that won’t weigh hair down

Avoid anything labeled “smoothing,” “nourishing,” or “repair” unless you have damage—those often contain heavy silicones.


Maintenance and Growth Between Cuts

Fine hair shows every uneven end. To keep shoulder-length styles looking fresh:

  • Trim every 6–8 weeks to prevent thinning ends.
  • Avoid over-layering as hair grows out—stick to one length with subtle texture.
  • Use a gentle, sulfate-free shampoo and focus conditioner on mid-lengths to ends only.

A well-maintained shoulder-length cut can easily transition into a longer style later without losing its shape.


Who This Length Suits Best (And Who Should Reconsider)

Shoulder-length fine hair works for most face shapes—especially oval, heart, and round. It’s ideal if you want volume, softness, and easy styling. However, if your hair is extremely sparse or you prefer a wash-and-go pixie, this length may still require a bit of daily effort. For very straight, ultra-fine hair, a blunt shoulder-length cut with no layers often performs best.


Conclusion

Fine hair no longer means settling for limp, lifeless styles. As we move through 2026, shoulder-length cuts have proven to be the perfect middle ground—long enough to feel feminine and versatile, yet short enough to preserve volume and movement. Whether you choose a soft textured lob, a classic blunt cut with hidden layers, or a modern shag with curtain bangs, the key lies in strategic shaping, lightweight products, and embracing your hair’s natural texture.

Remember: the right cut doesn't fight your fine hair—it works with it. So step away from the overgrown lengths and overly heavy layers. A shoulder-length style in 2026 isn’t just a trend; it’s a smart, stylish solution that gives fine hair the body, bounce, and confidence it deserves.

The Best Haircuts for Women With Fine, Thin Hair After 50

April 9, 2026 by Jessica Guevara Leave a Comment

The transition into your 50s often brings a shift in hair texture, with strands becoming finer and density naturally decreasing. While thinning hair can feel like a challenge, it is actually an invitation to embrace precision cutting and strategic styling that prioritizes health and movement. The goal isn't just to add volume, but to choose a silhouette that complements your facial structure and fits a lifestyle centered on intentionality and ease.

Finding the right look is about moving away from heavy, weighed-down lengths and toward styles that create the illusion of thickness. From architectural bobs to textured pixies, modern techniques can breathe new life into fine hair, proving that sophisticated, high-impact style doesn't require a high-maintenance routine. Whether you prefer a polished, "quiet luxury" aesthetic or a soft, lived-in feel, these curated cuts are designed to celebrate your natural texture while providing the longevity and lift you need.

20 Masterful Haircuts for Fine, Thin Hair To Try In 2026:

The Dimensional Midi-Cut

For those who aren't ready to commit to a short crop, a mid-length cut with internal layering is an excellent choice. By incorporating soft, graduated layers throughout the back and sides, the hair gains a sense of movement that prevents fine strands from laying flat against the scalp. This style works particularly well for women with natural silver or platinum tones, as the layers catch the light and create a multi-dimensional effect that mimics the appearance of thicker hair.

The Precision Stacked Bob

A classic stacked bob is perhaps the most effective silhouette for creating immediate density. By concentrating the weight at the nape of the neck and tapering the hair inward, the style naturally pushes the remaining hair upward and outward. This architectural approach provides a "built-in" lift at the crown, offering a sophisticated and polished look that requires very little daily styling to maintain its shape.

The Swept-Back Voluminous Lob

Length can often weigh down fine hair, but a long bob (or "lob") that is styled away from the face can counteract this. Utilizing a deep side part or sweeping the hair back from the hairline creates height right where thinning is often most noticeable. This technique keeps the ends blunt to maintain a strong perimeter line—making the hair look fuller from root to tip—while the face-framing flow adds an air of effortless elegance.

Protective Styling and Scalp Care

Addressing thinning hair also involves protective techniques that prioritize scalp health and minimize tension on fragile follicles. For women experiencing more significant thinning, strategic sectioning and soft, protective styles can provide a clean and intentional look. These methods allow for the use of scalp treatments and provide a rest period for the hair, ensuring that the focus remains on long-term hair health and comfort without sacrificing personal style.

The Textured Tapered Pixie

For women experiencing thinning at the crown, a tapered pixie with piecey texture is a game-changer. By keeping the hair shorter on the sides and back, the eye is naturally drawn upward toward the fuller sections on top. Using a lightweight texturizing paste allows you to "lift and separate" the strands, which hides the scalp more effectively than a flat, uniform cut. This style is the epitome of effortless chic, offering a youthful energy that is incredibly easy to manage.

The Sculpted Wedge

The sculpted wedge is a masterclass in using geometry to create the illusion of thickness. By creating a sharp, clean line at the nape and allowing for soft, wispy layers through the mid-section, this cut provides a structural foundation that fine hair often lacks. The result is a silhouette that looks intentional and dense from every angle, making it an ideal choice for those who want a sophisticated, "quiet luxury" finish to their look.

The Soft-Feathered Crop

If your hair is fine but still has a bit of natural bend, a soft-feathered crop is a beautiful way to embrace that movement. This cut relies on light, feathery layers that can be brushed forward or swept to the side to provide coverage where needed. The multidimensional tones of blonde or silver further enhance this effect, as the highlights and lowlights create depth, making the hair appear much more voluminous than a single-toned, blunt cut would.

Intentional Styling for Hair Health

When working with delicate or sparse strands, the focus shifts to low-tension techniques that protect the hair you have. Incorporating soft twists or sectioned styles can offer a unique aesthetic while keeping the hair organized and reducing the need for harsh heat or heavy product buildup. This approach prioritizes the longevity of the hair and the health of the scalp, ensuring that your style remains as resilient as it is beautiful.

The Blunt-Edge Midi

While layering is a common go-to for fine hair, a blunt-cut midi style offers a different kind of power. By maintaining a crisp, straight line at the ends, you create a visual "weight" that makes thin hair appear much denser than it actually is. This look is perfect for those who prefer a minimalist, clean aesthetic. Keeping the length just past the shoulders provides enough versatility for an elegant low bun or a sleek, polished down-look, embodying a timeless sense of "aesthetic longevity."

The Faux-Hawk Pixie

For a bold, high-energy transition, the faux-hawk pixie uses verticality to solve the problem of flat hair. By keeping the sides tightly tapered and the top section longer and swept upward, you create instant height and volume. This architectural style draws focus to the eyes and cheekbones, offering a spirited and modern alternative to more traditional short cuts. It is an ideal solution for those who want to turn thinning into a deliberate, edgy style statement.

The Voluminous Shag with Bangs

Embracing natural waves and curls is one of the most effective ways to mask thinning. A modern shag utilizes shorter layers around the crown and soft, wispy bangs to create a halo of volume. The "organized chaos" of the curls adds surface area to the hair, making the overall silhouette look much fuller. Adding fringe is particularly helpful for concealing a receding hairline or thinning at the temples, providing a soft, face-framing effect that feels both nostalgic and fresh.

The Soft Ringlet Crop

Natural curls don't have to be long to be high-impact. A short, rounded crop that follows the natural curl pattern allows fine hair to "stack" upon itself, creating organic lift without the need for heavy styling products. By keeping the length concentrated around the face and forehead, this cut provides excellent coverage while highlighting a playful, effortless vibe. It’s a low-maintenance choice that relies on the hair's natural bounce to provide all the necessary volume.

The Angled Micro-Bob

A sharp, angled bob that hits just below the earlobe is a masterclass in creating density through structure. By keeping the length slightly shorter in the back and allowing it to graze the jawline in front, you create a dramatic silhouette that feels thick and intentional. This architectural cut works beautifully for those who want a polished, high-fashion look that remains manageable. The clean, straight lines minimize the appearance of "wispy" ends, providing a solid frame that enhances the facial structure.

The Sculpted French Twist

Formal styling for fine hair is all about strategic placement and volume-building techniques. A soft, sculpted French twist is an excellent choice for special occasions, as the folding process allows you to tuck ends away and create a sense of fullness at the back of the head. By gently loosening a few strands around the crown, you can create a soft, airy height that masks thinning areas while maintaining a sleek, secure hold.

The Platinum Pageboy

The classic pageboy cut is reimagined for modern elegance with a soft, rounded perimeter and smooth finish. For fine hair, this style is particularly effective because it relies on a uniform length to create a "curtain" of hair that looks exceptionally healthy and dense. When paired with bright platinum or silver tones, the light reflects off the smooth surface, giving the hair a luminous, vibrant quality that feels both youthful and incredibly refined.

The Intricate Low Chignon

Creating a low chignon with fine hair often involves using texture and pinning techniques to maximize every strand. By incorporating soft rolls, loops, or light braiding, you can expand the surface area of the hair, making a small amount of hair look like an intricate, voluminous masterpiece. This style is perfect for formal events where you want a secure, "set" look that radiates grace and intentionality without putting excessive tension on the hairline.

The Wispy Graduated Midi

When fine hair begins to lose its density, a graduated midi-cut with wispy ends can provide a much-needed sense of lightness. By thinning the very ends of a medium-length cut, the hair gains a feather-like quality that moves beautifully. This approach avoids the "heavy" look that can often make thin hair appear limp, instead creating a soft, ethereal silhouette. It is an ideal middle ground for those who prefer some length but need a style that doesn't drag down the facial features.

The Razor-Cut Bob with Fringe

Incorporating a razor-cutting technique into a classic bob adds an immediate edge and "lived-in" texture that is perfect for disguising sparse areas. The addition of a light, wispy fringe helps to frame the eyes and soften the forehead, while the shattered layers throughout the sides create a sense of volume and grit. This style is particularly effective for darker hair tones, as the shadows between the textured layers create a visual depth that makes the hair appear thicker and more vibrant.

The Feathered Shixie

The "shixie"—a hybrid between a shag and a pixie—is a masterclass in utilizing short, feathered layers to create maximum lift. By concentrating volume at the crown and keeping the ears softly covered, this cut provides a balanced, feminine shape that feels incredibly modern. The multi-directional layers catch the light and add a textured "halo" effect, making it a go-to choice for women who want a high-impact, low-maintenance style that radiates confidence and intentionality.

The Ear-Length Minimalist Bob

For a look that prioritizes "quiet luxury" and ease, a minimalist bob tucked behind the ear offers a clean and timeless aesthetic. By cutting the hair to a uniform, ear-grazing length, you reinforce the perimeter of the hair, making it look as healthy and dense as possible. This "no-fuss" approach is perfect for showcasing natural color transitions and works seamlessly for those with a busy lifestyle who still want to look curated and polished.

The "Crown Lift" Rule – Why Hair Changes After 50

After menopause, declining estrogen levels often lead to finer strands, a more visible scalp, and reduced volume—especially at the crown and hairline. The solution isn't more length. It's smarter architecture.

Key principles of the Crown Lift Rule:

  • Prioritize lift at the roots – Volume at the crown creates the illusion of fuller hair overall.
  • Preserve density at the ends – Avoid over-layering that makes fine hair look wispy or see-through.
  • Ask for internal layering – Short layers hidden beneath longer ones prop hair up from within.
  • Ditch the middle part – A deep side part instantly creates height and disguises a thinning crown better than any product.
  • Keep the perimeter strong – A blunt or softly rounded edge looks thicker than a feathered, wispy one.

3 Products That Actually Work for Fine, Thin Hair (No Grease Allowed)

A great haircut fails without the right products. Fine hair needs grip and lift—not moisture and oil.

Product #1: Volumizing Mousse

  • Apply only to damp roots (skip the lengths)
  • Use a golf-ball-sized amount
  • Look for words like "fullness" or "thickening"
  • Avoid any mousse labeled "smoothing"

Product #2: Dry Texture Spray

  • Not the same as dry shampoo
  • Adds weightless grip so your cut holds its shape
  • Helps fine hair hold style for 2–3 days
  • Spray on dry roots and scrunch lightly

Product #3: Root Lifting Powder

  • A tiny shake at the crown is all you need
  • Rub in with fingertips for instant height
  • Lasts all day without residue
  • Use sparingly—a little goes a long way

What to avoid completely:

  • Heavy conditioners applied to roots
  • Argan oil, coconut oil, or any hair oil
  • "Repair" or "restorative" masks
  • Leave-in creams or butters

Exactly What to Say to Your Stylist (A Script That Works)

Avoid miscommunication by using these exact phrases.

Say this (do's):

  • "I want to keep the perimeter strong but add internal texture so it doesn't look see-through."
  • "Please use point-cutting, not thinning shears."
  • "I need lift at the crown—can you add short, hidden layers there?"
  • "Keep the ends blunt or softly rounded, not wispy."

Never say this (don'ts):

  • "Just take off the dead ends" (leads to a blunt, heavy cut with no volume)
  • "Thin it out a little" (invites thinning shears, which cause frizz)
  • "I want to keep my length" (long hair on fine, thin strands looks stringy)

Red flag to watch for:

  • If your stylist reaches for thinning shears, politely say: "Could we use point-cutting instead? Thinning shears make my fine hair frizzy."

The 3-Minute Blow-Dry That Doubles Your Volume

No haircut looks its best air-dried on fine, thin hair. Follow these steps in order.

Step-by-step method:

  1. Flip your head upside down – This immediately separates roots from the scalp.
  2. Apply mousse only to your roots – Avoid the lengths entirely.
  3. Dry roots first – Use medium heat and focus only on the crown area.
  4. Ignore the ends until roots are dry – They will dry naturally as you work.
  5. Switch to the cool shot button – Once roots are lifted, blast them with cool air for 10 seconds to lock the volume in.
  6. Backcomb just the crown – Gently tease a small section, then smooth the top layer over it.
  7. Finish with a deep side part – This adds even more height instantly.

What not to do:

  • Don't use a round brush on soaking wet hair (causes breakage)
  • Don't apply conditioner to roots before blow-drying
  • Don't skip the cool shot (volume will fall within an hour)

Conclusion: Fine Hair After 50 Deserves Strategy, Not Length

Let go of the old rule that long hair equals youthful hair. For women with fine, thin hair after 50, the most flattering cuts follow these truths:

  • Shorter is often better – Chin-length bobs, textured pixies, and soft shags look healthier than wispy, shoulder-length strands.
  • Architecture matters more than inches – The right cut removes weight from the inside while keeping the perimeter strong.
  • Products must be weightless – Mousse, texture spray, and lifting powder add grip without grease.
  • Technique is everything – A 3-minute blow-dry with cool air locks in volume that lasts all day.
  • Communication with your stylist saves results – Say "point-cutting" and "internal layers," not "thin it out."

If you've been hiding your fine hair under a ponytail or letting it air-dry flat, consider this your invitation to try something new. Book a consultation. Ask for internal layers. Avoid thinning shears. Embrace a shorter cut with confidence.

The goal isn't to fake thickness. It's to work with the texture you have and style it with intention.

Your hair after 50 shouldn't whisper. It should have lift, light, and life.

Elegant Prom Hairstyles for Black Women: A Guide to Timeless Beauty

April 9, 2026 by Jessica Guevara Leave a Comment

The magic of prom night often begins long before the first dance, starting with the careful selection of a hairstyle that feels like a crowning achievement. For Black women, the options are as diverse as they are stunning, offering a unique opportunity to celebrate texture, versatility, and personal style. Whether you are envisioning the intricate patterns of ornate braids, the soft romanticism of a voluminous blowout, or the structural elegance of a sleek updo, the right hairstyle does more than just complement a dress—it anchors the entire look.

This season, the trends lean toward a sophisticated blend of classic glamour and contemporary edge. From sculptural buns that highlight the neck and shoulders to flowing, embellished curls that capture the light, there is a silhouette for every aesthetic. Choosing a prom hairstyle is a deeply personal decision that balances the formality of the event with the natural beauty of your hair. As you prepare for this milestone evening, exploring these curated styles will help you find a look that feels both effortless and unforgettable, ensuring you step into the room with unparalleled confidence.

17 Breathtaking Prom Hairstyles for Black Women to Covet in 2026:

High-Volume Half-Up with Sweeping Fringe

This style masterfully combines the playfulness of a high ponytail with the classic glamour of long, cascading waves. The top section is pulled into a voluminous crown, allowing large, barrel-curled lengths to frame the face and shoulders with soft, intentional movement. A defining feature of this look is the deep-parted, sleek side fringe that swoops across the forehead, providing a polished contrast to the buoyant texture of the curls. It is a versatile choice that offers both height and length, perfect for a high-impact entrance.

Sculptural Burgundy French Twist Updo

Deep jewel tones bring a rich, multidimensional quality to this sophisticated updo. The hair is expertly molded into a vertical French twist at the back, creating a smooth and elongated silhouette that transitions into a fountain of soft, layered curls at the crown. A single, stylized curl is left to fall delicately by the ear, adding an element of soft asymmetry. The high-shine finish accentuates the deep red hues, making it a striking option for those looking to pair a bold color with a structured, formal aesthetic.

Vibrant Crimson Pin-Up Curls

This look is a celebration of vivid color and vintage-inspired architectural styling. The hair is swept upward into a series of intricate, defined pin curls that create a mohawk-like crown of texture and volume. The front is styled with a sharp, sleek side-swept bang that lays perfectly flat, highlighting the precision of the hairline and the intensity of the crimson shade. With its blend of retro charm and modern hair artistry, this style is ideal for a bold, fashion-forward prom look that demands attention.

Honey-Bronde Curly Top Knot

Warm, golden-brown tones add a sun-kissed glow to this elegant and practical updo. The hair is slicked back into a high, secure base, erupting into a cluster of tight, springy curls that form a textured top knot. To soften the look, delicate tendrils are curled and left to hang near the ears and nape, creating a romantic, effortless vibe. This hairstyle is particularly effective for showcasing intricate jewelry and high necklines, offering a clean yet spirited silhouette that remains comfortable throughout a long night of celebration.

Honey-Blonde Sculptural Updo with Face-Framing Waves

This look is a masterclass in dimension, utilizing a warm honey-blonde palette to highlight the intricate layering of a high updo. The hair is gathered into a series of soft, voluminous loops at the crown, while a thick, side-swept bang adds a modern, polished edge. To soften the overall silhouette, long, loose curls are left to cascade around the face, creating a romantic and ethereal frame. It is a sophisticated choice for prom that balances the height of a formal updo with the movement of a down style.

The Coquettish Hair Bow Half-Up Silhouette

Channeling a sense of playful elegance, this style features a stunning hair bow sculpted entirely from the wearer's own tresses. The top half of the hair is pulled back into this structural centerpiece, while the remaining lengths fall in glossy, perfectly defined ringlets down the back. This "half-up" approach offers the best of both worlds—keeping the hair away from the face to showcase makeup and jewelry while maintaining the dramatic length of a full-down look. It is a whimsical yet polished aesthetic that feels both youthful and high-fashion.

Two-Tone Avant-Garde Pin Curls

For the trendsetter seeking a truly unique prom look, this sculptural updo uses high-contrast blonde and brunette tones to define its architectural shape. The hair is molded into large, seamless pin curls that sit prominently at the front and crown, creating a "wave" effect that is both vintage and futuristic. The precision of the bicolor transition accentuates the curves of the style, making it a standout choice for those who view their hairstyle as a piece of wearable art.

Sleek High Ponytail with Classic Side Sweep

This hairstyle offers a refined take on the high ponytail by incorporating a heavy, swooping side bang that lays flat across the forehead. The base of the ponytail is wrapped for a seamless finish, while the lengths are styled into large, bouncy curls that rest over one shoulder. The combination of a slicked-back crown and voluminous, textured ends creates a dynamic silhouette that is both secure for a night of dancing and undeniably glamorous for the red carpet.

Honey-Blonde Goddess Braids and Waves

This look is a striking fusion of protective styling and mermaid-length texture, featuring a warm honey-blonde palette that adds a sun-kissed radiance. The top section is intricately braided into neat goddess plaits that transition seamlessly into a waterfall of long, deep-wave curls cascading down the back. This style offers incredible movement and volume, making it a perfect choice for those who want a dramatic, high-impact aesthetic that balances the precision of braids with the softness of flowing texture.

Burgundy Side-Swept Updo with Sculpted Edges

Deep jewel tones bring a sophisticated, moody elegance to this high-contrast look. The hair is pulled back into a voluminous, textured ponytail at the crown, while a sleek side bang is swept across the forehead in a vibrant burgundy hue. The attention to detail is evident in the expertly laid edges, which are styled into delicate swirls to frame the face. The result is a polished, modern updo that feels both intentional and fashion-forward, ideal for making a statement under the ballroom lights.

Romantic Low Chignon with Crystal Accents

For a timeless and understated aesthetic, this low-slung chignon focuses on soft, voluminous texture and effortless grace. The hair is loosely gathered at the nape of the neck, with layered waves throughout the crown adding depth and a lived-in feel. A minimalist crystal hairpiece is tucked into the side, providing a subtle touch of sparkle that catches the light without overwhelming the look. It is a refined, classic choice that pairs beautifully with open-back gowns and delicate jewelry.

Half-Up Curls with Floral Silver Barrette

This style celebrates the beauty of defined, spiral curls, accented by warm caramel highlights that provide a multidimensional finish. The top half is pinned back securely to create a clean silhouette at the front, anchored by a prominent silver floral barrette that adds a regal, vintage-inspired touch. The remaining curls fall in uniform, springy ringlets over the shoulders, offering a look that is both structured and romantic. It is a quintessential prom style that provides a secure, polished feel throughout the evening.

Braided Crown with Fresh Floral Embellishments

The braided crown offers a regal and organic aesthetic, incorporating thick, neat plaits that wrap around the head to create a natural tiara. This look is elevated with the addition of fresh baby’s breath and soft pink floral sprigs, which are woven into the hair for a delicate, whimsical finish. The remaining hair is gathered into a soft, textured bun at the back, striking a perfect balance between artisanal craftsmanship and ethereal beauty. This style is particularly effective for outdoor or garden-themed prom events.

Deep-Wave Glamour with Stylized Edge Artistry

This look centers on the luxurious texture of deep, uniform waves that cascade past the shoulders, offering a high-shine finish that radiates sophistication. The focal point is the intricate hairline work, where edges are expertly swooped into delicate, circular patterns that transition seamlessly into a sharp side part. Small, golden hair charms are tucked into the parting, adding a subtle glimmer that elevates the style for a formal evening. It is a powerful choice for those who want to balance the romanticism of long hair with modern, intentional detailing.

Tribal-Inspired Braids with Cowrie Shell Accents

Blending cultural heritage with contemporary prom fashion, this style features neat, curved cornrows that sweep back into a voluminous half-up silhouette. The defining characteristic is the addition of polished cowrie shells and silver rings woven into the accent braids, creating a regal and rhythmic aesthetic. Large, soft waves fall over one shoulder to provide a sense of softness and movement. This look is an ideal choice for a celebratory milestone, offering a secure and artistic silhouette that remains flawless from the first photo to the last dance.

Scarlet Heart-Parted Silk Press with Flicked Ends

For a sleek and vibrant aesthetic, this deep scarlet silk press utilizes color and precision to make a bold statement. The hair is styled with a unique, heart-shaped parting that adds a layer of whimsical artistry to the smooth, glass-like finish. The ends are tightly flicked upward into uniform curls, providing a playful, vintage-inspired bounce that frames the collarbone beautifully. With perfectly laid edges and a deep side-swept fringe, this look is the epitome of "aesthetic longevity"—a timeless silhouette reimagined with a modern, vivid edge.

Voluminous Half-Up Curls with Velvet Bow

This hairstyle captures a soft, romantic spirit, utilizing tight, springy curls to create immense volume and texture. The top section is pulled into a high ponytail at the crown, fastened with a bold magenta velvet bow that provides a striking pop of color against the dark tresses. This coquettish detail adds a sense of youthful elegance, while the immense length of the curls provides a dramatic backdrop. It is a secure and spirited style that showcases facial features beautifully, making it a standout option for a night defined by celebration and style.

Choosing the Right Style for Your Face Shape & Dress Silhouette

A truly timeless prom look harmonizes your hairstyle with your natural features and your gown. Here’s a quick guide:

  • For Oval Faces: Almost any style works. Try a sleek high ponytail or a deep side-part with voluminous curls to accentuate your balance.
  • For Round Faces: Elongate your silhouette with height on top (a teased pompadour or high bun) or sleek, asymmetric braids that fall past the shoulder.
  • For Heart-Shaped Faces: Soft, low-side buns or loose, face-framing curls soften a wider forehead and draw attention to your cheekbones.
  • For Square Faces: Romantic, wispy edges (baby hairs laid delicately) and voluminous, rounded styles (like a curly afro puff or a halo braid) soften a strong jawline.

Pairing with your dress:

  • High neck / illusion neckline: An updo (bun, chignon, or twisted crown) keeps the focus on the dress’s detail.
  • Strapless / sweetheart neckline: Let your hair down with a blowout, loose waves, or a side-swept style to frame your shoulders.
  • Backless or low-back dress: A low ponytail, braided cascade, or a bun placed at the nape draws the eye down your spine.

Protective & Prep: How to Maintain Healthy Hair Before Prom Night

Elegance starts with healthy hair. Prom styles often require heat, tension, or extended wear, so prep is essential—especially for natural hair.

  • Two Weeks Out: Deep condition with a moisturizing mask. Trim any split ends. If you plan to straighten or blow out your hair, do a test run to see how your texture responds.
  • One Week Out: Avoid heavy manipulation. Sleep on satin or silk pillowcases. If wearing braids or twists, consider installing them 3–4 days early to let your scalp relax.
  • The Night Before: Wash, condition, and apply a heat protectant (if using hot tools). For curly styles, set flexi-rods or perm rods on slightly damp hair with a light hold mousse.
  • Morning Of: Moisturize your edges with a natural oil (jojoba or argan) and a light edge control. Do not overload with heavy products—they can weigh down braids or cause an updo to slip.
  • Emergency Kit: Pack bobby pins matching your hair color, edge gel, a small satin scarf (for transportation), and a few decorative hair pins in case of flyaways.

Embellishments & Accessories: Taking Your Look from Beautiful to Breathtaking

The right accessory transforms a classic style into a signature statement.

  • Pearls & Crystals: Dot a sleek bun or braided crown with small pearl pins. For curly updos, a crystal vine or hair comb tucked near the temple adds old-Hollywood glamour.
  • Florals & Greenery: Fresh baby’s breath or silk flowers woven into a side braid or puff creates an ethereal, garden-party feel. Match the flower to your dress’s accent color.
  • Metallic Cuffs & Rings: Slide a gold or silver hair cuff onto a single chunky braid or a low ponytail. Minimalist yet striking.
  • Hair Chains & Drapes: A delicate chain that falls across a middle part (secured with tiny pins) looks stunning on a slicked-back bun or a wash-and-go fro.
  • Scarves & Wraps: For a vintage or Afrocentric touch, tie a silk scarf around a high puff or a pineapple updo, letting the ends cascade down.

Pro tip: Choose one focal accessory. If your dress is heavily beaded, keep hair accessories minimal. If your dress is simple, a bold hair piece becomes the star.


Conclusion

Prom night is a constellation of moments—the flash of a camera, the swell of your favorite song, the reflection in a friend’s laughing eyes. Your hairstyle should not be a source of stress, but rather a source of joy and self-expression. Whether you choose the precision of a braided geometric updo, the freedom of a curly wash-and-go, or the timeless sophistication of a sleek French twist, the most elegant detail you can wear is confidence.

Remember that beauty is not about perfection, but about feeling wholly yourself—celebrated, seen, and radiant. Let your hair move with you when you dance. Let your edges frame your smile. And when you look back at prom photos years from now, may you see not just a hairstyle, but a young woman who honored her texture, her heritage, and her unique spark. That is the true definition of timeless beauty.

Glass Hair & Beyond: The Most Coveted Sleek and Straight Trends for 2026

April 9, 2026 by Jessica Guevara Leave a Comment

The appeal of pin-straight hair has evolved into a high-tech, high-gloss aesthetic that prioritizes both health and precision. For 2026, the focus shifts away from "flat" hair toward "liquid" textures that move with a weightless, reflective quality. Whether you are leaning into the sharp geometry of a blunt bob or the ethereal length of a tapered "U-cut," these contemporary takes on straight strands offer a fresh perspective on timeless sophistication. From lived-in shadow roots that add depth to vibrant, high-contrast ombrés, discover the modern techniques and silhouettes defining the sleek hair movement this year.

15 Sleek and Straight Hairstyles to Master the "Liquid Hair" Trend in 2026:

High-Volume Sleek Ponytail

A striking example of how straight hair can achieve dramatic height and length. This look features a ultra-high ponytail with a polished wrap-around base that conceals the hair tie. The face is framed by delicate, face-framing strands and a soft side fringe, balancing the sharp, pin-straight length that cascades down the back. It’s a sophisticated take on a classic silhouette, perfect for showcasing the hair's natural luster and density.

Braided Crown with Straight Lengths

This style blends intricate texture with a smooth finish by incorporating a thick, Dutch-style braid that acts as a natural headband. The warm honey-brown hair is pulled back off the face to highlight the eyes and makeup, while the rest of the hair remains sleek and straight. The contrast between the structural braid and the fluid, straight ends creates a romantic yet modern look that is ideal for formal events or intentional everyday wear.

The Precision Blonde Blunt Cut

Focusing on the technical beauty of straight hair, this look features a bright, buttery blonde hue with a dark, lived-in root for depth. The cut is a masterclass in precision, featuring perfectly horizontal, blunt-cut ends that rest just below the shoulders. This style emphasizes the healthy, thick appearance of Type 1 hair and provides a clean, geometric silhouette that feels both bold and timeless.

Soft Caramel Layers with Face-Framing Fringe

A more layered and dimensional approach to straight hair, this style utilizes soft, caramel-toned highlights to add movement. The hair is cut with long, invisible layers and a prominent, jaw-length face-framing fringe that adds volume around the cheekbones. The finish is smooth but airy, proving that straight hair can maintain incredible body and a soft, "expensive" bounce without the need for curls.

Sunkissed Dimensional Brunette

This look demonstrates how subtle balayage can add depth and movement to naturally straight, long hair. The base is a rich espresso, woven with warm honey and caramel highlights that concentrate toward the face and ends. The hair is styled with a center part and tucked behind the ear, showcasing the healthy, light-reflective quality of the strands and a clean, healthy silhouette.

Warm Honey Mid-Length Cut

A beautiful example of a classic mid-length style, this cut features soft, blunt ends that rest just below the collarbone. The multidimensional color features ribbons of amber and gold that emphasize the hair's smooth texture and natural shine. This versatile length offers a polished appearance that is both professional and effortless, proving that straight hair doesn’t need excessive length to make a statement.

Vivid Neon Green Ombré

For those looking to make a bold statement, this style utilizes the sleekness of straight hair to showcase a dramatic color transition. The jet-black roots melt seamlessly into a vibrant, neon lime green. The sharp contrast is enhanced by the hair’s smooth finish, which allows the vivid pigment to take center stage. Gentle face-framing layers add a touch of softness to the edgy, high-contrast palette.

The Modern Smoky Lob

This ultra-chic, shoulder-length long bob (lob) features a unique smoky, ash-toned brunette shade that borders on lavender-grey. The center part and impeccable "glass hair" finish create a highly symmetrical and architectural look. With its sharp, blunt-cut ends and cool-toned palette, this style is a perfect representation of modern, "quiet luxury" aesthetics, offering a sophisticated and slightly moody vibe.

Icy Platinum with Subtle Dimensions

This long, straight hairstyle features a stunning platinum blonde base with delicate, sandy-toned lowlights that add natural depth. The hair is cut with soft, face-framing layers that begin at the jawline, giving the straight texture a sense of light movement. The finish is sleek and healthy, highlighting how a bright, cool-toned palette can make fine-to-medium hair appear exceptionally vibrant and luminous.

Radiant Fuchsia Blunt Cut

A bold and high-impact style, this mid-length cut showcases a vibrant, monochromatic fuchsia hue. The hair is styled in a perfectly straight, blunt-cut silhouette that emphasizes the density and uniform texture of the strands. Against the backdrop of a neutral setting, the vivid pink-red tone takes center stage, demonstrating how a smooth "glass hair" finish can elevate even the most adventurous of color choices.

The High-Gloss Auburn Contour

This sophisticated look features a deep auburn shade that glows with a mirror-like shine. The hair is styled with a subtle inward curve at the ends, creating a soft, rounded shape that avoids looking flat. The color is exceptionally rich, with warm mahogany undertones that catch the light at every angle. It is a perfect example of "liquid hair," where the health and moisture of the strands are the primary focus of the aesthetic.

Honey Blonde with Classic Full Bangs

A timeless and youthful approach to straight hair, this style features a warm honey-blonde shade paired with a thick, eye-skimming fringe. The bangs are cut straight across to frame the face and draw attention to the eyes, while the rest of the hair cascades down in a smooth, long silhouette. This look balances the structural element of the bangs with the soft fluidity of the lengths, making it a versatile choice for a polished, everyday look.

Seamless Platinum Shadow Root

This back-view shot showcases a flawless execution of the "lived-in" platinum trend. The hair transitions beautifully from a cool, smoky shadow root into a bright, icy blonde that radiates with a healthy sheen. The cut features a soft "V" or "U" shape at the ends, which provides a more tapered and fluid movement compared to a traditional blunt cut. By maintaining the natural root color, the style offers a modern, low-maintenance approach to high-contrast blonde, ensuring the hair looks sophisticated even as it grows out. The ultra-smooth texture highlights the precision of the color melt and the overall integrity of the long, straight strands.

Midnight Sapphire Long Layers

This striking look features deep, denim-blue tones that saturate long, straight strands from root to tip. The color possesses a subtle metallic sheen, which is beautifully highlighted by the hair's sleek, pin-straight finish. The cut includes soft, wispy ends that add a touch of lightness to the dense, cool-toned palette. It’s a bold, artistic choice that demonstrates how dark, unconventional colors can still feel sophisticated when paired with a polished "glass hair" texture.

High-Intensity Copper Silk

A vibrant example of the "expensive copper" trend, this style features a brilliant, warm ginger hue with incredible saturation. The hair is styled in a middle part with long, unbroken lengths that act as a mirror for the light, showcasing a healthy and vibrant glow. The uniform color and impeccable smoothness create a high-fashion aesthetic that feels both energetic and refined. This look is perfect for highlighting the natural luster that straight hair can achieve through professional color and intentional hydration.

The Structural Advantage—Why Straight Hair Behaves Differently

  • Straight hair grows from round follicles, resulting in a strand without natural bends or twists.
  • The cuticle layers lie flatter and more uniformly, creating a smooth surface that reflects light like still water.
  • Sebum travels easily from root to tip, making roots prone to greasiness while ends remain vulnerable to dryness.
  • The same flat cuticle that enables shine also makes straight hair highly susceptible to buildup from silicones, dust, and hard water.
  • Even thin residues disrupt light reflection, turning potential brilliance into a dull, filmy finish.

The Right Brushes and Combs—Tools That Respect the Cuticle

  • Boar-bristle brushes are ideal for straight hair: they distribute sebum from root to tip, smoothing the cuticle while adding natural shine. Use them only on dry, detangled hair.
  • Mixed-bristle brushes (boar + nylon) work well for fine to medium straight hair, offering gentle detangling without static.
  • Avoid pure nylon or plastic-bristle brushes—they generate static electricity, which lifts the cuticle and attracts dust and flyaways.
  • Wide-tooth combs should be used exclusively on wet, conditioned hair to prevent breakage. Opt for seamless, polished materials like acetate or horn.
  • Never use metal combs or brushes with metal prongs. They create friction heat and can scratch the cuticle permanently.
  • Detangling brushes with flexible, staggered bristles (such as wet brushes) are acceptable for gentle use, but limit them to damp hair only.
  • Clean your brushes weekly: accumulated oil, dead skin, and product residue transfer back to clean hair, dulling shine immediately.

Hair Accessories That Protect—And Those That Destroy

Silk and Satin Accessories (Highly Recommended)

  • Silk scrunchies are the gold standard for straight hair. Their smooth surface prevents creasing, friction, and breakage at the tie point.
  • Silk or satin headbands keep hair off the face without snagging cuticles or leaving dents.
  • Silk claw clips offer secure hold without tension or crimping. Look for smooth-edged, seamless designs.
  • Silk bonnets or wrap scarves are essential for preserving a sleek style overnight, especially for longer straight hair.

Accessories to Avoid or Use With Extreme Caution

  • Elastic hair ties with exposed rubber bands shred the cuticle on contact. If you must use them, choose seamless elastic or spiral telephone-cord ties.
  • Metal claw clips often have rough seams or exposed springs that catch and tear strands. Inspect every clip before use.
  • Velvet or fabric-covered bands with rough backing create micro-friction every time hair shifts. The damage accumulates invisibly over weeks.
  • Heavy barrettes or metal slides weigh down straight hair, creating a visible dent and potentially stressing the follicle at the root.
  • Plastic headbands with jagged inner edges snag hair during application and removal. Always smooth your hand between the band and your hair when taking them off.

Styling-Specific Accessories

  • Heat-protectant gloves (sold with professional flat irons) allow tension-smoothing during straightening without burning fingers or transferring skin oils to clean hair.
  • Sectioning clips with smooth, rounded edges (avoid alligator clips with metal teeth) keep styled portions separate without crimping.
  • Silk-lined baseball caps and hats protect straight hair from both UV damage and cotton friction during outdoor activities.

The Hidden Cost of Everyday Accessories

  • Glasses and sunglasses create friction points at the temples and behind the ears. Wipe the arms of your glasses daily to remove oil and debris, and consider lightweight frames that don't press firmly against the hair.
  • Necklaces and bag straps continuously rub against the underside of straight hair, causing mysterious mid-length fraying. Wear crossbody bags on the opposite shoulder of your hair's natural parting, and opt for smooth leather straps over chain or woven fabric.
  • Headphone headbands compress and friction-bend straight hair along a visible line. Use earbuds or behind-the-neck styles when preserving a sleek finish matters.
  • Face masks with elastic ear loops create tension and friction at the temples and behind the ears. Use mask extenders (satin-covered, if possible) or choose fabric ties that loop behind the head instead.
  • Winter scarves and turtleneck collars generate static electricity and physical abrasion. Wear a silk scarf underneath wool or cashmere, or tuck hair completely inside your outer layer during cold weather commutes.

Styling Ideas for Straight Hair

  1. The Polished Low Ponytail
  2. The Side-Swept Minimalist
  3. The Half-Back Tuck
  4. The Sleek Low Bun
  5. The Pinpoint Root Lift
  6. The Reversed Part
  7. The Bent-End Blowout
  8. The Overnight Pin-Straight Method
  9. The Damp Bun Unravel
  10. The Saran Wrap Set (Professional Technique at Home)
  11. The Low Chignon With a Modern Edge
  12. The Slicked-Back Wet Look
  13. The Pin-Straight Center Part
  14. The Silk Scarf Wrap
  15. The Minimalist Barrettes Cluster
  16. The Ribbon Tie

The Product Layering Strategy—Less Is Always More

  • Straight hair requires no more than two to three products per styling session.
  • Begin with a leave-in conditioner that is spray-based or water-thin in consistency.
  • Follow with a single occlusive product—either a lightweight serum or a single drop of argan or jojoba oil—to seal the cuticle without greasiness.
  • Avoid multi-step routines designed for curly or coily textures; layering creams, custards, and butters will collapse straight hair within hours.
  • When in doubt, perform the "slip test": after applying product, your fingers should glide down a strand without resistance or stickiness.
  • If product feels tacky or heavy, rinse and start over with half the amount.

The Modern Toddler Mullet: 2026’s Boldest Mini-Trend

April 8, 2026 by Jessica Guevara Leave a Comment

The toddler mullet has officially transcended its vintage roots, emerging as a definitive statement of "cool" for a new generation of parents. Far from the unrefined cuts of decades past, the modern iteration focuses on intentional texture, soft fades, and a silhouette that celebrates a child’s natural hair growth. It is a style that balances the practicality of keeping hair out of little eyes with a spirited, rebellious length at the nape. Whether styled with a natural wave or a clean taper, the toddler mullet offers an effortless longevity that grows out beautifully, making it a favorite for those seeking an aesthetic that is both timelessly bold and undeniably sweet.

11 Essential Toddler Mullet Styles for 2026:

1. The Spiky Burst Fade Mullet

This high-energy look combines the sharp edges of a burst fade with a heavily textured, spiky crown. The contrast between the skin-tapered sides and the voluminous, jagged length through the back creates a dynamic silhouette perfect for active toddlers. It’s a modern, edgy take that brings a contemporary street-style vibe to the classic mullet shape, ensuring the hair stays manageable while making a bold statement.

2. The Clean Tapered Bowl Mullet

A sophisticated blend of precision and play, this style features a blunt-cut fringe that transitions into a clean taper around the ears. The top is kept smooth and uniform, flowing into a moderate length at the nape for a polished finish. This cut is ideal for straight hair textures, offering a structured look that feels intentional and high-end while maintaining the "business in the front" practicality.

3. The Undercut Mullet with Wispy Length

This variation utilizes a sharp undercut to eliminate bulk around the temples, highlighting the natural flow of the hair from the crown to the neck. The fringe is swept to the side for an effortless, soft appearance, while the back is left wispy and light. It’s a versatile option that works well for finer hair types, providing a cool, asymmetrical aesthetic that grows out gracefully without losing its shape.

4. The Retro-Inspired Textured Mullet

Capturing a vintage aesthetic with a modern twist, this cut focuses on a short, piecey fringe and a soft, graduated length at the back. The sides are subtly faded to keep the look clean, while the overall texture is kept natural and slightly lived-in. This style is perfect for an "effortless" vibe, offering a timeless silhouette that celebrates volume and movement for a spirited, stylish look.

5. The Blonde Tapered Mohawk-Mullet

This ultra-modern cut features a sharp, skin-tight taper around the ears that transitions into a spiked, mohawk-style crown. The back maintains a soft, wispy length that keeps the "mullet" silhouette visible but refined. It is a high-contrast look that works exceptionally well for lighter hair tones, emphasizing the texture and the intentional disconnect between the shaved sides and the voluminous top

6. The Fade with Hard-Line Detail

A sleek, professional-leaning variation that incorporates a clean fade and a shaved "hard line" or racing stripe for added personality. The hair is groomed smoothly across the top, flowing into a dense, healthy length at the nape. This style is perfect for parents who want a structured, salon-finished look that combines traditional barbering techniques with the edgy profile of a modern mullet.

7. The Soft-Wave Shaggy Mullet

Embracing a more relaxed and "quiet luxury" aesthetic, this style relies on natural texture and subtle layering. The hair is kept medium-length throughout, with a gentle taper around the ears to prevent the style from looking overgrown. It’s an ideal choice for toddlers with natural waves or curls, providing a soft, face-framing effect that looks effortless and stays stylish through all-day play.

8. The Full-Curl Burst Fade

This style is a masterclass in managing natural coils with a trendy silhouette. A deep burst fade around the temples allows the curls to pop, while the back and crown are left long and voluminous to showcase the child's natural texture. The result is a balanced, breathable cut that celebrates curly hair without letting it become unmanageable, maintaining a sharp and clean profile.

9. The Spiky Micro-Mullet

For toddlers with fine to medium hair, this short and textured version provides a spirited look. The crown is styled upward for a spiky, energetic finish, while the back is kept in a modest, tapered tail. It is a practical, low-maintenance cut that gives off a bold "big kid" energy while remaining easy to style with just a touch of light-hold product.

10. The Wavy Tapered Mullet

This style artfully manages thick, wavy hair by using a clean taper around the ears to reduce bulk and highlight the facial profile. The natural waves are left long and voluminous from the crown down through the nape, creating a soft, textured finish that feels both modern and manageable. It is an ideal choice for parents wanting to embrace their toddler’s natural hair pattern while maintaining a sharp, intentional silhouette.

11. The Blunt Micro-Fringe Mullet

A bold, avant-garde take on the trend, this cut features a precision-cut blunt micro-fringe that sits high on the forehead. The contrast is amplified by closely cropped sides that give way to long, wispy layers at the back, offering a graphic and high-fashion aesthetic. This look is perfect for straight hair textures, providing a distinctive, editorial "cool" that stands out with effortless longevity.

Why Parents Are Saying Yes to the Mullet

  • Low maintenance, high reward – Less frequent trims mean more time playing and less time in the salon chair.
  • Grows out gracefully – Unlike blunt cuts that look awkward after two weeks, the mullet’s layered shape matures naturally.
  • Keeps eyes clear – The shorter front and sides prevent hair from falling into a toddler’s face during meals, art projects, or playground tumbles.
  • Celebrates cowlicks and curls – Rather than fighting unpredictable hair patterns, the mullet leans into them as built-in texture.
  • Gender-neutral appeal – The style works beautifully on any child, making it a favorite among parents who prefer clothing and grooming choices free from rigid labels.

How to Describe the Look to Your Barber or Stylist

  • "Short on top, longer in back" – This is the non-negotiable foundation of any mullet.
  • "Soft fade or taper on the sides" – Avoid harsh lines; request a blended transition that keeps the look sweet, not severe.
  • "Textured, not choppy" – Ask for point-cutting or slice-cutting to create movement without looking like a DIY accident.
  • "Leave the nape natural" – The back should follow the child’s hair growth pattern, not be forced into a blunt line.
  • "Above the ears, below the collar" – A helpful shorthand for balancing the proportions on a small head.

Styling Tips for Real Life (No Heat Required)

  • Air-dry with a scrunch – For wavy or curly hair, a gentle upward scrunch while damp defines the mullet’s signature shape.
  • A dab of leave-in conditioner – Keeps the longer back piece soft and tangle-free without weighing down the top.
  • Morning spritz and finger-comb – Most toddler mullets reset in under 60 seconds with plain water and your hands.
  • Slick sticks for fancy days – A touch of natural, kid-safe styling balm can tame the front for photos or family gatherings.
  • When in doubt, let it ride – The mullet’s superpower is that it looks intentionally mussed. Over-styling defeats the point.

A Quick Checklist Before You Commit

  • ✅ Your child has at least 2–3 inches of length at the nape to work with.
  • ✅ You’re okay with strangers calling it “adorably rock-and-roll.”
  • ✅ Your daycare or preschool has no written rule against creative cuts (most don’t).
  • ✅ You’ve accepted that grandparents may have thoughts (they’ll come around).
  • ✅ You want a haircut that buys you 8–12 weeks between trims instead of

Conclusion

In the end, the modern toddler mullet isn’t just a haircut—it’s a small act of creative confidence. It says that parenting style can be playful without being precious, and that “age-appropriate” doesn’t have to mean boring. As more parents in 2026 embrace the blend of softness and edge, the mullet is shedding its ironic past to become something genuinely fresh: a look that honors childhood’s wild energy while still showing up neatly for school pictures. Whether your little one wears it curly, straight, or somewhere in between, this mini-trend proves that the best fashion statements are the ones that grow—literally and figuratively—right alongside your child. So go ahead, let the back grow long and the front stay sharp. The toddler mullet isn’t going anywhere—except maybe into the playground, windblown and wonderful.

The Bixie: A Bold Fusion of Texture and Edge for the Modern Black Woman

April 8, 2026 by Jessica Guevara Leave a Comment

The bixie haircut has emerged as a transformative trend for Black women seeking a look that marries the effortless spirit of a pixie with the structural versatility of a bob. This hybrid cut is particularly striking on natural textures, as it allows coils and curls to take center stage while offering a defined shape that frames the face with precision. By keeping the length concentrated at the crown and tapering the back, the bixie provides a sophisticated silhouette that reduces daily maintenance without sacrificing the ability to experiment with volume. Whether styled with a sleek, tapered finish or left to celebrate its natural movement, this cut serves as a powerful statement of intentionality and quiet luxury. For those ready to move away from high-maintenance styles, the bixie offers a timeless yet contemporary alternative that highlights bone structure and celebrates hair health.

10 Stunning Bixie Haircuts for Black Women:

1. Two-Tone Platinum and Burgundy Bixie

This striking bixie cut utilizes a bold high-contrast color palette to emphasize its layered structure. The front section features a bright platinum blonde sweeping fringe that beautifully frames the eyes, while the remainder of the hair is a rich, deep burgundy that adds depth and dimension. The length hits just at the nape of the neck with textured ends that flip slightly outward, providing that signature hybrid silhouette between a bob and a pixie. Sideburns are kept soft and curved around the ear, allowing for a clean look that showcases jewelry and bone structure. This style is an ideal choice for those who want to use color to define their cut's shaggy, effortless layers while maintaining a sharp, professional edge.

2. Chocolate Brown Voluminous Silk Press Bixie

A masterclass in sophisticated volume, this chocolate brown bixie is styled with a sleek silk press finish that highlights the hair's natural shine. The cut features heavy, face-framing layers and a deep side part that creates a dramatic, sweeping fringe across the forehead. The back is expertly tapered to provide a lifted effect at the crown, giving the hair a rounded, bob-like appearance from the side while keeping the neck clear and elongated. The ends are curled inward toward the jawline, softening the face and adding a touch of classic elegance. This version of the bixie is perfect for a polished, everyday look that transitions seamlessly from the office to an evening out, offering maximum movement and a soft, touchable texture.

3. Copper Auburn Bixie with Deep Side Sweep

This vibrant copper bixie showcases how a warm, monochromatic color can make a layered cut pop. The hair is styled with a deep side sweep that creates significant height and volume at the top, transitioning into a smooth, curved shape that hugs the ears. The warm auburn tones complement the skin's glow, while the feathered layers throughout the crown add a sense of airy lightness to the style. Unlike more shaggy versions, this bixie leans toward a structured bob at the sides, providing a fuller look for those with finer hair textures. It is a refined and intentional style that balances a bold color choice with a classic, face-skimming shape that is both youthful and timeless.

4. Honey Blonde Sculpted Wave Bixie

This honey blonde bixie stands out with its meticulously sculpted waves and warm, sun-kissed hue. The hair is cut with longer layers at the top to allow for soft, finger-wave-inspired texture that adds a vintage flair to a modern silhouette. A dark root smudge provides a natural transition and adds visual weight to the crown, while the sides and back are tapered closely to maintain a sleek profile. The front is styled into a soft, voluminous quiff that opens up the face, making it a brilliant option for highlighting bold makeup or statement earrings. This look perfectly captures the essence of a modern bixie by combining the short, manageable length of a pixie with the glamorous, wavy possibilities of a longer bob.

5. Strawberry Blonde Sleek Beveled Bixie

This strawberry blonde bixie features a flawless silk press finish with a focus on geometric precision and shine. The cut is characterized by a deep, sharp bevel at the nape of the neck, creating a rounded, voluminous back that mirrors the classic structure of a stacked bob. The sides are tucked neatly behind the ears to emphasize the clean lines and smooth texture, while the top maintains enough length for a subtle, lifted fringe. This monochromatic warm tone adds a luminous quality to the hair, making it a standout choice for a professional yet bold aesthetic. It is a perfect example of a high-gloss, low-fringe bixie that prioritizes a neat silhouette and healthy, shimmering hair.

6. Pale Gold Romantic Curls Bixie

Defined by soft, touchable volume and a romantic flair, this pale gold bixie utilizes larger barrel curls to create a sense of movement and bounce. The cut keeps the length around the mid-ear level, allowing the curls to stack and create a full-bodied shape that tapers beautifully toward the neck. A soft, wavy fringe sweeps across the forehead, adding a youthful and feminine touch that softens the profile. The creamy blonde hue enhances the visibility of every curl and wave, providing a multidimensional look that feels airy and light. This style is an excellent option for those who want to maintain a sense of classic glamour while embracing the shorter, more manageable length of a hybrid cut.

7. Caramel Brown Edgy Textured Bixie

This caramel brown bixie leans into the "edgy" side of the trend with visible texture and a slightly shaggy finish. The hair is styled with a piecey, forward-sweeping fringe that grazes the eyebrows, while the sides are expertly feathered to hug the cheekbones. The rich, warm brown tone is highlighted by the way the light hits the individual layers, giving the style a dynamic and lived-in feel. Paired with a leather jacket or bold accessories, this cut emphasizes a cool, effortless confidence. It works exceptionally well for someone looking for a bixie that maintains a bit of grit and movement, offering a modern take on the traditional pixie through its increased length and layered depth.

8. Jet Black Classic Feathered Bixie

A timeless interpretation of the trend, this jet black bixie showcases the power of expert layering and classic styling. The cut features voluminous, feathered curls that are swept back from the face, creating a sophisticated and open look that highlights the eyes and jawline. A delicate, curled sideburn adds a playful, vintage-inspired detail that grounds the modern silhouette. The deep black color provides a high-contrast backdrop for the hair's texture, ensuring that the stacked layers at the back and the side-swept volume at the top are clearly defined. This style is a versatile staple, offering a polished and intentional finish that celebrates the natural density and bounce of the hair.

9. Radiant Ginger Beveled Bixie

This vibrant ginger bixie features a high-shine finish that emphasizes its rounded, beveled structure. The cut is expertly graduated at the back to create a full, stacked effect that mimics a traditional bob, while the shorter length around the neck keeps the silhouette modern and fresh. A thick, side-swept fringe adds a touch of classic glamour, blending seamlessly into the longer side sections that frame the jawline. The rich, warm copper tones provide a luminous glow, making this an ideal choice for those who want a bold yet sophisticated look that prioritizes volume and healthy, silk-pressed texture.

10. Midnight Black Layered Shag Bixie

Defined by its sharp, piecey layers, this jet-black bixie leans into a more textured and edgy aesthetic. The cut features a deep side part that directs hair into a sweeping, face-framing fringe, while the back and sides are heavily layered to create a feathered, wind-swept appearance. The ends are flicked slightly outward to add movement and dimension, highlighting the precision of the tapered neck. This style offers a perfect balance of height at the crown and sleekness at the base, making it a versatile option for achieving an effortless, "quiet luxury" look with a bit of a rebellious spirit.

Why the Bixie Works for Natural Textures

  • Built-in volume: The concentrated length at the crown allows coils and kinks to rise naturally, creating height without teasing or product stacking.
  • Shape retention: Unlike longer styles that can flatten or lose definition, the bixie’s tapered back and shorter sides hold their silhouette even as shrinkage occurs.
  • Less tangling, more breathing: With fewer inches to manipulate, strands are less likely to knot, reducing breakage and making wash days noticeably shorter.
  • Heat-free styling potential: Finger-coiling, rod sets, and twist-outs pop beautifully on a bixie, often requiring no heat to achieve a finished look.

Styling Options for Every Mood

  • Sleek & tapered: Smooth edges with a gel or mousse, define the hairline, and tuck sides behind the ears for a sharp, architectural finish.
  • Big & unapologetic: Fluff the crown with a pick, allow the back to shrink naturally, and let your full texture extend past the cut’s perimeter.
  • Accessorized: A bold earring, silk scarf, or gold headband instantly elevates the bixie from casual to editorial.
  • Wet-set defined: Use a leave-in and curl cream, then define individual coils with a styling brush for a juicy, elongated look that lasts several days.

Who the Bixie Is For

  • The Black woman tired of spending hours on twist-outs that fall flat by midday
  • Anyone transitioning from heat damage or a big chop who wants shape without waiting for length
  • Professional creatives who need a style that works from Zoom calls to dinner dates
  • Low-maintenance lovers who refuse to sacrifice high-impact beauty
  • Curly girls ready to stop hiding their texture under wigs, weaves, or constant tension styles

Maintenance & Longevity Tips

  • Refresh with water and a lightweight leave-in – The bixie revives quickly; no need for full wash days between wears.
  • Trim every 4–6 weeks – Because the shape is the statement, regular trims keep the bixie intentional rather than overgrown.
  • Protect at night – A satin scarf or mini pineapple method (gathering just the crown) preserves volume and definition.
  • Watch the nape – The tapered back grows out faster than the rest; a quick edge-up or shape-up extends the cut’s life.

Conclusion

The bixie is more than just a haircut—it’s a reclamation of ease, identity, and edge for the modern Black woman. In a world that often demands exhaustive maintenance or rigid beauty standards, this hybrid style offers a refreshing middle ground: bold enough to turn heads, yet practical enough to honor the natural rhythm of textured hair. It doesn’t ask you to choose between structure and softness, precision and play, or polish and personality. Instead, the bixie invites you to own all of it at once. Whether you're navigating a busy professional life, embracing a season of intentional minimalism, or simply ready to let your coils lead the way, the bixie stands as a confident, quiet-luxury staple. It’s not just a cut—it’s a crown you can wake up to.

Flattering Haircuts for Chubby Faces: Elevating Your Look with Intentional Style

April 8, 2026 by Jessica Guevara Leave a Comment

Finding the perfect silhouette for a chubby face is about embracing cuts that offer structure, movement, and a sense of effortless balance. Rather than hiding your features, the most flattering styles use strategic layers and volume to elongate the face and highlight your natural bone structure. From the soft, airy volume of a "cloud cut" to the textured layers of a modern "bixie," these styles move away from harsh, blunt lines in favor of verticality and face-framing softness. By incorporating elements like wispy curtain bangs or deep side parts, you can create a sophisticated look that feels both modern and timeless. Choosing a style that complements a rounder face shape is a powerful way to lead with subtle confidence, ensuring your haircut serves as a beautiful, intentional frame for your personality.

15 Modern Cuts for Chubby Faces:

1. Voluminous Pixie with Side-Swept Bangs

This voluminous pixie cut is a masterclass in adding height and structure to a chubby face. By keeping the sides closely tapered and focusing the density at the crown, the style creates a vertical lift that naturally elongates the facial silhouette. The deep, side-swept bangs act as a dramatic diagonal across the forehead, breaking up the roundness and drawing attention toward the eyes and cheekbones. This look is perfect for those seeking a bold, low-maintenance style that feels sophisticated and intentionally sculpted.

2. Textured Blonde Crop with Lateral Movement

For a soft yet structured approach, this textured crop utilizes multi-tonal blonde highlights to create depth and dimension. The hair is styled with significant lateral movement, sweeping across the forehead to soften the jawline while maintaining a crisp, clean edge around the ears. This intentional layering prevents the hair from looking flat, ensuring that the volume remains at the top to balance out fuller cheeks. It is a refined, modern choice that offers a bright, energetic frame for rounder facial features.

3. Long Butterfly Layers with Wispy Fringe

This long-layered style, often called the butterfly cut, uses cascading tiers to create a slimming, contoured effect around the face. The wispy, see-through fringe and face-framing "bottleneck" layers start at the cheekbones, drawing the eye inward and narrowing the appearance of the face. By maintaining length and volume through the ends, this cut provides vertical lines that balance a chubby face shape perfectly. It is an ideal look for achieving an airy, romantic aesthetic that feels both effortless and high-fashion.

4. Edgy Undercut with Sweeping Layers

Combining edge with elegance, this asymmetrical style features a hidden undercut on one side to significantly reduce bulk and widen the neck area. The remaining hair is styled into long, sweeping layers that fall gracefully over the opposite side, creating a sharp, diagonal focal point that distracts from facial roundness. The contrast between the buzzed section and the voluminous, highlighted top adds a modern, "quiet luxury" grit to the look. This haircut is designed for the woman who wants a transformative style that highlights her bone structure with a crisp, punchy finish.

5. Sleek Blunt Bob with Money Piece Highlights

This sophisticated bob features a crisp, chin-length cut that provides a structured frame for a chubby face. The addition of high-contrast "money piece" highlights around the face creates vertical interest, drawing the eye toward the center and elongating the overall look. By styling the hair with a slight inward curve, the jawline is softened while the volume at the roots ensures the style doesn't lay flat. It is a timeless, intentional choice that perfectly embodies the "quiet luxury" aesthetic through clean lines and strategic color.

6. Voluminous Golden Curls with Airy Fringe

Embracing natural texture is a powerful way to balance fuller features, as seen in this voluminous curly style. The golden-blonde hue adds warmth and dimension, while the rounded silhouette provides height at the crown to elongate a rounder face shape. Soft, curly bangs break up the forehead line, shifting the focal point toward the eyes and creating an effortless, youthful energy. This look prioritizes movement and health, offering a balanced frame that feels both vibrant and high-fashion.

7. Short Tapered Curls with Defined Texture

This short, cropped style is ideal for highlighting natural bone structure while maintaining a manageable, punchy look. By tapering the hair closely at the sides and back, the volume is concentrated at the top, which adds much-needed verticality to a chubby face. The defined, glossy curls provide a rich texture that feels sophisticated and intentional. This cut is a masterclass in using short hair to sculpt the face, creating a clean and modern silhouette that leads with confidence.

8. Shoulder-Length Ringlets with Curly Bangs

For a soft and romantic approach, these shoulder-length ringlets provide beautiful vertical lines that naturally slim the facial appearance. The inclusion of curly bangs adds a layer of face-framing softness that helps to contour the forehead and temples without adding bulk to the cheeks. The curls are layered to encourage lift and bounce, ensuring the hair moves with the wearer and maintains a sense of airy lightness. This style is perfect for those who value a natural, textured look that feels both curated and effortless.

9. Polished Hollywood Waves with Side-Swept Fringe

This look is the epitome of "quiet luxury," featuring soft, polished waves that cascade below the shoulders to provide an elongating vertical effect. The long, side-swept fringe creates a beautiful diagonal line across the forehead, which helps to minimize facial width and draw focus to the eyes. By keeping the volume concentrated toward the mid-lengths and ends rather than the cheeks, this style offers a balanced, sophisticated frame. It is a refined choice for anyone looking to combine classic elegance with a slimming silhouette for a chubby face.

10. Dimensional Long Layers with Face-Framing Highlights

Strategic color and layering work together in this style to contour and sculpt fuller features. The high-contrast, face-framing highlights act as a spotlight, drawing the eye inward and creating the illusion of a narrower face shape. Deep, voluminous layers prevent the hair from looking heavy, adding movement that softens the jawline and neck area. This cut is perfect for maintaining length while achieving a crisp, intentional look that feels both modern and professional.

11. Textured Copper Shag with Airy Bangs

This vibrant copper shag is a bold way to embrace volume while flattering a rounder face shape. The choppy, internal layers create height at the crown, which provides a vertical lift that naturally balances a chubby face. A full, airy fringe breaks up the circularity of the forehead, while the shaggy ends add a punchy, edgy texture that feels effortless. This style is an ideal blend of vintage inspiration and modern aesthetic, offering a dynamic frame that leads with personality and subtle confidence.

12. Straight Lob with Airy Wispy Fringe

This shoulder-grazing lob is a perfect example of how clean, vertical lines can beautifully elongate a chubby face. The straight texture provides a slimming effect by hugging the jawline, while the light, wispy fringe breaks up the forehead without adding excessive bulk. This style is incredibly versatile and sophisticated, offering a "quiet luxury" appeal that feels intentional and effortless. It is a go-to choice for anyone wanting a polished look that balances fuller facial features with a crisp, modern finish.

13. Fiery Sunset Curls with Side-Swept Volume

Embracing dynamic volume and a bold color palette can completely transform the silhouette of a rounder face. These copper and amber ringlets are styled with a deep side part to create height at the crown, which provides a necessary vertical lift to balance out chubby cheeks. The layers are cut to allow the curls to bounce away from the face, drawing the eye upward and toward the cheekbones. This high-impact style leads with confidence and artistic flair, turning natural texture into a powerful framing tool.

14. Sharp Jet-Black Bob with Micro Bangs

For a high-fashion, editorial look, this structured jet-black bob uses precise geometry to sculpt the face. The ends are tapered inward to hug the chin, while the short micro bangs create a horizontal line high on the forehead, effectively elongating the rest of the face. The sleek, glossy finish adds a level of sophistication that feels both punchy and curated. This is a bold choice that uses sharp lines to contrast against softer facial features, resulting in a look that is both striking and intentional.

15. Classic Blonde Bob with Soft Face-Framing

This timeless blonde bob is cut just below the jawline to provide a slimming frame for rounder features. The soft, feathered ends and light fringe create a gentle transition that highlights the eyes while softening the jawline. By keeping the volume at the roots rather than the sides, the style avoids adding width to the face. This cut is the ultimate "quiet luxury" staple—simple, elegant, and perfectly balanced to enhance a chubby face with subtle, lasting confidence.

Understanding Your Face's Unique Architecture

  • A "chubby face" is often round, soft, or heart-shaped with fuller cheeks and a gently curved jawline.
  • The width and height are usually similar, which can make the face appear shorter.
  • The goal is not to create harsh angles but to introduce subtle verticality and elongation.
  • Strategic layers, off-center partings, and height at the crown draw the eye upward and downward instead of outward.
  • When you understand this principle, you stop searching for "hiding" techniques and start curating shapes that complement what you already have.

The Power of Height and Crown Volume

  • Volume at the crown is one of the most effective tools for balancing a rounder face.
  • A layered lob, tousled pixie, or softly rounded bob can instantly create the illusion of length.
  • Keep the lift soft and natural—avoid stiff or teased styles.
  • Ask your stylist for interior layering that removes weight while preserving movement.
  • This approach lifts hair away from the cheekbones without creating harsh, boxy lines.
  • The result: your face appears longer, leaner, and more sculpted without losing its natural softness.

Strategic Length: Where the Hair Falls Matters

  • A blunt cut that ends directly at chin level can widen the face.
  • Cuts that fall just below the jawline or above the ears create more lift.
  • For medium lengths, aim for collarbone-grazing layers that skim past the chin.
  • For shorter styles, keep the sides slightly cropped while leaving length on top.
  • The guiding principle: avoid stopping at the widest part of your face.
  • Instead, let your haircut guide the eye past that point—by dropping lower or lifting higher.

Bangs Done Right: Softness Over Severity

  • Wispy, curtain-style bangs that part in the middle and graze the cheekbones are the safest option.
  • These create a diagonal line that breaks up the face's roundness while keeping the look airy and modern.
  • Avoid blunt, heavy bangs that cut straight across the forehead—they shorten the face and emphasize width.
  • Side-swept bangs are another excellent option, especially when blended into longer layers.
  • The takeaway: bangs should invite the eye inward and downward, not create a hard horizontal line.

Texture as Your Secret Weapon

  • Blunt, one-length cuts often work against chubby faces by emphasizing roundness.
  • Texture is your ally: soft layers, point-cutting, choppy ends, and slight disconnection all help.
  • These techniques break up the hair's outline, making the overall shape feel more dynamic and less circular.
  • A textured "bixie" (bob-pixie hybrid) or a shaggy lob with feathered ends adds movement.
  • Even subtle internal layering can transform a basic cut into something light, modern, and intentionally imperfect.

The Role of Styling and Daily Habits

  • A great haircut is only half the story—how you style it each morning matters just as much.
  • A deep side part instantly adds asymmetry, which counterbalances roundness.
  • Blow-drying the roots upward with a round brush enhances crown volume.
  • Small choices can shift the entire proportion of your face:
    • Tucking one side behind an ear
    • Adding loose waves
    • Spritzing dry shampoo at the roots for lift
  • Think of your haircut as the foundation; your styling routine is where the magic becomes daily reality.

Conclusion

At its heart, choosing a flattering haircut for a chubby face isn't about following rigid rules or trying to minimize who you are. It's about making intentional, confident choices that work with your natural shape rather than against it. Remember the key principles: add height at the crown, avoid blunt lines that stop at the widest part of your face, embrace soft texture over harsh precision, and style with small daily habits like a deep side part or loose waves. Whether you gravitate toward a cloud cut, a bixie, or a textured lob, the right silhouette should feel effortless—lifting your features, framing your smile, and moving with you throughout the day. So let go of the idea that a rounder face needs "fixing." Instead, step into a haircut that celebrates your bone structure, softens your edges, and leaves you looking—and feeling—undeniably yourself. That's the power of intentional style.

The Melanin Glow-Up: Why Auburn is the Most Soulful Hue for Black Women

April 7, 2026 by Jessica Guevara Leave a Comment

There is a specific, sun-drenched alchemy that occurs when auburn pigment meets melanin. It is the rare "bridge" color—bold enough to turn heads in a crowded room, yet organic enough to look like it was kissed into existence by the sun. For Black women, choosing auburn isn't just a hair change; it’s a lighting shift. By pulling warmth from the skin and reflecting it back through rich, reddish-brown tresses, auburn acts as a permanent "golden hour" filter that adds instant dimension to every coil, curl, and sleek install.

10 Radiant Auburn Shades Every Black Woman Should Try in 2026:

1. Ginger Copper Tapered Cut

A vibrant, monochromatic ginger auburn transformation on a short tapered natural cut. This shade leans heavily into warm copper territory, providing a high-contrast brightness that illuminates the face and adds a modern, edgy feel to a classic TWA. It is the perfect choice for those with golden or warm undertones looking for a bold but cohesive color story.

2. Deep Mahogany Ringlets

This look features a sophisticated, wine-infused auburn with deep mahogany undertones. The rich, dark red base provides incredible depth to the tight curl pattern, creating a soulful and classic aesthetic. The intensity of the color adds weight and definition to the hair, making it a stunning option for a more dramatic, moody take on the red spectrum.

3. Chestnut Auburn Silk Press

A luxurious example of a "quiet luxury" auburn, this chestnut-leaning shade is applied to a voluminous silk press. The multi-tonal brown-red reflects light beautifully across the large, soft waves, giving the hair a healthy, high-shine finish. It is an ideal middle-ground shade for those who want a natural-looking transition that still offers plenty of warmth and dimension

4. Spiced Cinnamon Afro Curls

A radiant spiced cinnamon hue that perfectly defines a voluminous afro-textured style. The color features a blend of burnt orange and medium brown tones, which helps to separate and highlight each individual curl. This particular shade of auburn creates a sun-kissed, ethereal glow that feels both vibrant and approachable for everyday wear.

5. Burnt Orange Long Curls

A striking example of burnt orange auburn applied to extra-long, defined curls. This high-saturation shade features a perfect balance of red and orange pigments, creating a fiery and commanding look that pop beautifully against deep skin tones. The uniform color from root to tip provides a bold, editorial vibe that emphasizes the hair's length and texture.

6. Soft Cinnamon Balayage

A subtle and sophisticated cinnamon-brown auburn that incorporates a gentle balayage effect. This look blends chocolatey roots with warm, spicy mid-lengths and ends, making it an excellent choice for a low-maintenance, natural-looking transformation. The muted reddish-brown tones add a soft, "quiet luxury" glow that complements neutral and warm undertones alike.

7. Crimson Wine Short Afro

A deep, cool-toned crimson auburn that adds incredible intensity to a short, textured afro. This wine-inspired shade leans into the purple-red spectrum, making it a standout choice for those with cool or ebony skin tones. The rich pigment provides high-definition clarity to the natural coil pattern, resulting in a look that is both edgy and elegant.

8. Sunset Auburn Pineapple Updo

This vibrant sunset-inspired auburn is styled in a classic pineapple updo, highlighting the contrast between sleek edges and voluminous curls. The color features a mix of copper and warm red tones that catch the light from every angle. It is a versatile shade that works exceptionally well for active, everyday styling while providing a bright, refreshed aesthetic.

9. Spiced Ginger Bombshell Waves

This look showcases a luminous ginger-auburn hue with strong copper undertones, styled into voluminous, sweeping waves. The warmth of the color creates a striking glow against deep complexions, acting as a natural brightener for the skin. By blending a reddish-brown base with lighter cinnamon highlights, the hair achieves a multi-dimensional finish that looks both high-end and vibrant, making it an ideal choice for those wanting an "expensive" editorial aesthetic.

10. Black Cherry Silk Blowout

A deep, sultry take on the auburn spectrum, this shade leans into cool burgundy and mahogany tones. The wine-inspired pigment is perfectly suited for a voluminous silk blowout, where the large, high-shine curls reflect light to reveal the purple-red depth hidden within the dark chocolate base. This sophisticated color choice offers a more dramatic and moody alternative to traditional copper, providing a seamless and elegant look for those with cool or neutral undertones.

Choosing the Right Shade for Your Undertone

The secret to a flawless auburn transition lies in the science of skin undertones. For those with cool undertones—often characterized by blue or purple veins—deep, berry-infused auburns or "black cherry" shades provide a striking, high-contrast look that brightens the face. Conversely, if you have warm or golden undertones, leaning into the copper, ginger, and cinnamon side of the spectrum will create a harmonious, sun-kissed effect. Neutral undertones have the luxury of playing in both worlds, allowing for a custom "cowboy copper" blend that utilizes both red and brown dimensions to create a rich, multi-tonal finish.


Tailoring Auburn to Your Hair Texture

Auburn is a chameleon that adapts beautifully to the diverse landscape of Black hair textures. On tight coils and 4C curls, a gradient or "root melt" approach allows for low-maintenance growth while the red tones highlight the shape and bounce of each individual ringlet. For those rocking protective styles like knotless braids or twists, mixing different shades of auburn hair extensions can create a dimensional, "highlighted" effect without the need for chemical processing. Even on a bone-straight silk press, auburn reveals its depth, shifting from a subtle mahogany in low light to a fiery crimson when hit by the sun.


Maintenance: Keeping the Flame Alive

While auburn is undeniably stunning, red pigments are notoriously large and tend to escape the hair cuticle faster than other colors. To preserve the vibrancy and prevent your rich copper from fading into a dull orange, a specialized care routine is essential. This begins with sulfate-free, color-safe cleansers and the use of cool water during rinse cycles to keep the cuticle sealed. Incorporating a color-depositing conditioner once a week can help replenish lost pigment between salon visits, ensuring that your glow remains consistent and your strands stay hydrated and healthy.

Conclusion: More Than a Color, a Homecoming

So, what is auburn, really? It's not just a shade swatched from a box or mixed in a bowl. It's an attitude—a quiet declaration that softness and boldness can live in the same strand. For Black women, wearing auburn is an act of reclamation. It says: I don't need the sun to validate my glow; I brought my own warmth. It honors the way our skin changes with the seasons, the way light dances across our cheekbones, the way our ancestors' earth tones still hum in our DNA. Whether it's woven through knotless braids, painted on a silk press, or peeking out from a puff of bantu knots, auburn doesn't compete with melanin—it harmonizes with it. It reminds us that the most soulful beauty choices aren't about becoming someone else. They're about remembering who we've always been: radiant, dimensional, and unapologetically warm. So go ahead. Turn on your own golden hour. Auburn isn't just a color. It's a homecoming.

Effortless Updos for Medium-Length Hair: Chic Styles for Every Occasion

April 7, 2026 by Jessica Guevara Leave a Comment

Medium-length hair occupies the ultimate sweet spot in styling—it offers enough volume for intricate looks without the heavy lifting required for long tresses. While it can sometimes feel like your hair is in an "in-between" phase, it is actually the ideal canvas for updos that look sophisticated but take less than ten minutes to master. From sleek, low-slung buns that exude polished professionalism to textured, airy twists perfect for a weekend brunch, mastering a few key techniques can transform your daily routine. This guide explores versatile styles that prioritize ease and aesthetic longevity, ensuring you look intentional and put-together with minimal effort.

8 Intentional Updos That Take Less Than Ten Minutes:

High-Volume Twisted Updo

This high-placed updo focuses on architectural volume, making it an ideal choice for medium-length hair that benefits from added texture. The style is created by gathering the hair at the crown and organizing it into large, soft twists that are pinned to create a cascading effect. By leaving out a singular, wavy tendril at the temple, the look gains a touch of romantic softness that balances the structured height of the main arrangement. It is a sophisticated option for formal events or weddings where a dramatic silhouette is desired. This style maximizes the hair's natural highlights and lowlights, ensuring every twist and turn catches the light for a multi-dimensional finish.

Sleek Polished Topknot

The polished topknot is a masterclass in clean lines and "quiet luxury" aesthetics. This look pulls the hair back tightly into a high, secure bun with a flawless finish that emphasizes the wearer's facial features and jewelry. For medium hair, this style is easily achievable by using a smoothing balm to eliminate flyaways and create a mirror-like shine. The compact nature of the bun ensures it remains secure throughout the day, making it as functional as it is fashionable. It is a powerful choice for professional settings or high-fashion moments where a sharp, intentional appearance is the goal.

Textured French Twist Hybrid

A modern evolution of the classic French twist, this hybrid style incorporates loose, airy textures and soft layering. The hair is swept upward and tucked, but instead of a rigid roll, it features visible sections that add depth and a sense of movement. This technique is particularly flattering for medium lengths as it creates the illusion of more hair while remaining lightweight. The addition of delicate, wispy strands around the ears and nape of the neck provides a lived-in feel that keeps the look contemporary. It perfectly suits a refined yet relaxed wardrobe, offering aesthetic longevity that never feels over-engineered.

Sculpted High Bun with Face-Framing Waves

This style combines a tightly sculpted high bun with deliberate, high-contrast face-framing curls. The sleekness of the base provides a clean canvas, while the two defined, spiral-curled tendrils add a playful, vintage-inspired element to the overall look. This updo is excellent for medium-length hair because it utilizes the density of the hair at the crown to create a full, rounded bun without overwhelming the proportions of the face. It strikes a unique balance between traditional formal hair and modern trend-driven styling. Finishing the look with a high-shine serum ensures the curls remain defined and the bun stays perfectly in place.

Sculpted Braided Bun with Side-Swept Fringe

This sophisticated updo combines a high, braided bun with a dramatic side-swept fringe that frames the face beautifully. The hair is pulled into a high ponytail and woven into a thick, structured braid before being coiled into a secure bun, creating a look that is both architectural and secure for medium-length hair. The sleek finish on the sides is complemented by a deep side part and a soft, wavy tendril, adding a romantic touch to an otherwise structured silhouette. This style is perfect for formal occasions where you want a balance of modern precision and classic glamour, ensuring every angle looks intentional and polished.

Half-Up Bow Accent with Soft Waves

For a playful yet refined aesthetic, this half-up style utilizes a large silk bow to elevate classic medium-length waves. The top section of the hair is gathered smoothly at the crown, providing a subtle lift that elongates the profile while leaving the rest of the hair to fall in lush, voluminous curls. This look is particularly effective for showcasing dimensional highlights and soft texture. The bow serves as a focal point, bringing a "coquette" charm to the outfit that feels feminine and fresh. It is an ideal choice for daytime events or spring gatherings where ease and effortless style are the primary goals.

Vertical Claw Clip Twist

This vertical twist offers a chic, modern update to the standard claw clip look, making it a staple for functional daily styling. The hair is gathered at the nape and twisted upward against the back of the head, secured with a tortoiseshell clip to create a sleek, elongated shape. The ends are tucked neatly to maintain a clean line, emphasizing the natural gradient of the hair color. This updo is perfect for medium lengths as it provides a secure hold that lasts all day without the need for multiple pins. It reflects a minimal, "quiet luxury" vibe that pairs effortlessly with a capsule wardrobe and refined basics.

Braided Half-Up Style with Cascading Curls

This intricate half-updo utilizes symmetrical Dutch braids to pull the hair away from the face, meeting at the crown to create a textured, voluminous top section. For medium-length hair, this technique is excellent for adding height and visual interest without the complexity of a full updo. The remaining lengths are styled into soft, romantic barrel curls that fall elegantly over the shoulders, showcasing the hair's natural depth and shine. It is a versatile choice for brides or formal event guests, offering a secure, intentional look that maintains the femininity of loose hair. The combination of structured braiding and fluid waves ensures the style remains balanced and photogenic from every angle.

Why Medium-Length Hair Is a Hidden Superpower

Many assume longer hair is required for elegant updos, but medium-length strands offer distinct advantages. They hold curls and twists more naturally without excessive weight pulling them down. Pins and clips grip better, and styles tend to stay intact longer because there’s less mass to shift. Plus, medium-length hair dries faster, textures more easily, and never overwhelms your facial features—making every updo look balanced and intentional rather than heavy or overdone.


The Essential Toolkit for 10-Minute Updos

Before diving into specific styles, equip yourself with a few key tools:

  • Bobby pins (textured or matte): These grip better than smooth ones.
  • Small clear elastics: Ideal for securing sections invisibly.
  • Spiral hair pins: A game-changer for holding buns with fewer pins.
  • Dry texture spray or volumizing powder: Adds grip and body to otherwise slippery clean hair.
  • Flexible-hold hairspray: Keeps flyaways in check without stiffness.
  • A soft-bristle brush and a rat-tail comb: For smoothing and sectioning.

With these on hand, any updo becomes faster, more secure, and more forgiving.


Three Go-To Updos for Everyday Wear

1. The Twisted Low Bun
Pull hair into a low ponytail, split into two sections, twist each, then wrap them around each other and pin. Takes 3 minutes. Looks elegant with a middle part or side-swept front pieces.

2. The Messy French Twist (for Medium Hair)
Gather hair to one side at the back, twist upward, tuck the ends under, and secure vertically with spiral pins. Leave a few face-framing strands loose. Perfect for rushed mornings.

3. The Half-Up Knot
Take two small sections from above each ear, tie them into a loose knot at the crown, and pin the tail underneath. Effortlessly chic for second-day hair.


Dressing It Up – Evening and Event-Ready Styles

When the occasion calls for something more polished, small tweaks elevate everyday updos:

  • The Sleek Low Ponytail Wrap: After making a low pony, take a thin strand from underneath, wrap it around the elastic, and pin. Instantly refined.
  • The Braided Accent Bun: French or Dutch braid one side of your head from the temple, then gather all hair into a low side bun. The braid adds texture without complexity.
  • Pearl or Gold Pin Embellishment: Even a basic twist bun becomes party-ready with two decorative pins crossed at the center.

The key is restraint—one intentional detail beats five scattered elements.


Common Mistakes (And How to Avoid Them)

  • Starting with hair that’s too clean: Freshly washed hair often slips. Use dry shampoo or texture spray for grip.
  • Over-pinning: More pins don’t always mean more security. Two well-placed spiral pins often outperform eight bobby pins.
  • Pulling too tight: This causes tension headaches and makes updos look severe. Leave slight softness at the crown.
  • Forgetting the nape: Loose hairs at the neck can make a style look undone. A quick mirror check and two extra pins solve this.

Longevity – Keeping Your Updo Fresh All Day

To ensure your effortless updo lasts from morning coffee to evening plans:

  • Spray texture product before styling, not after.
  • Pin in a crisscross pattern (X-shape) for maximum hold.
  • Carry two extra pins and a mini hairspray for touch-ups.
  • If pieces fall, don’t fight them—re-pin loosely or intentionally pull out a few face-framing strands to reset the style.

Conclusion

Medium-length hair doesn’t demand perfection—it rewards intention. As these styles and techniques show, you don’t need length, hours, or professional training to create updos that feel polished, personal, and perfectly suited to your day. Whether you’re twisting a quick bun before a meeting, pinning a textured knot for brunch, or adding a single pearl pin for a wedding, the power lies in simplicity. Master a few foundational moves, trust your tools, and remember: the most effortless look isn’t the one without flaws—it’s the one that lets you stop fussing and start living. So go ahead, pin it up, and step out with confidence. Your hair is already in its sweet spot.

Quick and Easy Hairstyles: Stress-Free Looks for Kids

April 7, 2026 by Jessica Guevara Leave a Comment

Efficiency is the secret to a successful morning, especially when it comes to grooming and getting out the door on time. Finding hairstyles that are both fast to execute and sturdy enough to survive a busy day of school and activity allows for a much smoother daily transition. These simple styling solutions focus on minimizing effort while maximizing hold, ensuring that hair remains tidy and out of the way without requiring a massive time investment. Whether you are dealing with a tight schedule or a restless toddler, these practical approaches prove that looking put-together doesn't have to be complicated.

18 Quick and Easy Hairstyles for Kids: Simple Solutions for Every Morning

1. Quick and Easy Geometric Parted Buns

Creating a high-impact look often starts with the foundation of the style, as seen in this geometric parting technique that organizes hair into clean, triangular sections. By using a rattail comb to create precise lines, you can gather hair into small individual ponytails secured with colorful elastic bands or star-shaped clips before feeding them into two larger buns. This structured approach not only looks professional but also serves a functional purpose by keeping flyaways flat and ensuring the style remains intact during physical activities. Adding soft pink bows at the base of each bun provides a charming finish to a look that balances technical precision with a playful, youthful energy.

2. Quick and Easy Side-Twist Accents with Bows

This style offers a sophisticated take on traditional pigtails by incorporating flat twists that sit close to the scalp, feeding into neat, secured ends. The hair is parted to the side, with thick sections twisted firmly to provide a textured, dimensional appearance that stays secure throughout the day. By placing oversized coordinating bows at the start of the twists, you add a layer of intentionality to the routine without adding significant time. This is an excellent solution for managing thicker hair textures, as the twists help to compress volume and keep the style looking crisp and organized from morning until evening.

3. Quick and Easy Half-Up Bubble Rows

Combining the elegance of soft waves with the practicality of a secured front, these half-up bubble rows are ideal for keeping hair out of the face while showcasing natural length. Two parallel rows of hair are sectioned from the hairline to the crown and divided into small "bubbles" using gold metallic bands. This creates a repetitive, eye-catching pattern that adds a modern flair to the overall look. Because the rest of the hair is left loose, it maintains a sense of movement and comfort, making it a versatile choice for school pictures or weekend events where both durability and aesthetic appeal are priorities.

4. Quick and Easy Sculptural Bubble Ponytail

For a bold and protective style that prioritizes maximum security, the sculptural bubble ponytail stands out as a top-tier choice. The hair is gathered into a single, sleek high ponytail and then segmented into large, rounded sections using gold bands placed every few inches. This creates a dramatic, tiered effect that prevents tangling and keeps the hair unified regardless of how active the day becomes. It is a highly efficient way to style long hair, as it eliminates the need for constant brushing and repositioning, providing a polished and confident look that holds its shape beautifully until the day is done.

5. Quick and Easy Braided Crown Accents

This style offers a creative way to keep hair secure and out of the face by using small, manageable braids that act as a natural headband. By sectioning off three small portions of hair at the front and crown and securing them with vibrant blue elastics, you create a sturdy base for simple three-strand braids that drape elegantly over loose hair. This look is particularly effective for active days because the initial elastic anchors prevent the braids from slipping or loosening. It is a time-efficient method to add visual interest and a touch of athletic flair to a classic down-style without requiring complex braiding expertise.

6. Quick and Easy Butterfly Puff Buns

Transforming a standard double-bun look into something whimsical is easily achieved with the right accessories, as seen in this asymmetrical puff style. The hair is divided with a clean, curved part and gathered into two voluminous puffs positioned at different heights to create a modern, playful silhouette. To finish the look, small butterfly clips in varying shades of purple are scattered throughout the puffs, adding a layer of texture and charm. This approach is perfect for textured hair, as it celebrates natural volume while keeping the morning routine short and the results securely in place for a full day of school or play.

7. Quick and Easy Butterfly-Shaped Half-Up

For a style that feels special yet remains grounded in simplicity, this heart-shaped sectioning adds a delightful focal point to a half-up hairstyle. By dividing the top section of the hair into three small, triangular segments and securing them with colorful bands, you can create a central "clover" or heart motif that feeds into the back. The inclusion of subtle glitter or small decorative beads within these sections adds a celebratory touch that is perfect for birthdays or school events. This technique ensures the hair stays flat against the head and out of the eyes, allowing the rest of the hair to flow naturally in soft, manageable waves.

8. Quick and Easy Embellished Updo

When a more formal appearance is needed on short notice, a sleek updo accented with simple gems provides a sophisticated solution with very little effort. The hair is gathered into a high, textured bun, while the front sections are smoothed down with a center part for a clean, editorial finish. The look is instantly elevated by the strategic placement of small, stick-on rhinestones along the hairline, mimicking a tiara or a starry night. This style is highly durable and keeps hair completely out of the way, making it a functional choice for performances or family gatherings where you want a look that stays pristine for hours.

9. Quick and Easy High Voluminous Puff

Celebrating natural texture is effortless with a high voluminous puff that keeps hair gathered neatly while allowing its natural shape to shine. This style begins by smoothing the hair upward toward the crown of the head and securing it with a single, soft elastic band to maintain maximum volume. By focusing on a sleek perimeter and a full, rounded top, you create a look that is both balanced and functional for school or playground activities. It is a highly efficient choice for mornings where time is limited, providing a polished and confident appearance that holds up beautifully throughout a busy day without the need for constant adjustments.

10. Quick and Easy Braided Ponytail Accent

Integrating a simple side braid into a standard ponytail is a fantastic way to add texture and security to finer hair textures. The style features a Dutch or French braid that travels along the side of the head, acting as a sturdy anchor for shorter layers before being pulled into a mid-height ponytail. Adding a soft floral or bow accessory at the base of the tie provides a bright, personalized finish that makes the routine feel intentional. This approach is excellent for active kids because the braid prevents flyaways from slipping out during movement, ensuring the style remains neat and organized from the morning commute until the end of the day.

11. Quick and Easy Sunburst Braided Updo

For a more structured look that offers exceptional durability, this sunburst braiding pattern organizes the hair into clean, curved sections that feed into a central top knot. By using precise parting to create a radiating effect, you can braid small sections toward the crown, keeping the hair flat and secure against the scalp. To finish the look, a large fabric bow or pom-pom is placed at the top to hide the gathering point and add a pop of color. This style is particularly effective for managing thicker textures and providing a protective hold that lasts through several days of wear with minimal maintenance.

12. Quick and Easy Multi-Puff Sectioning

This variation on double buns uses distinct triangular parts to create a series of voluminous puffs that gather hair securely at different points. By sectioning the hair into three or four manageable quadrants and securing each with a gold claw clip or decorative band, you can distribute volume evenly and prevent the hair from becoming tangled. This technique is remarkably fast and provides a modern, trendy silhouette that works well for both casual and formal settings. It is a practical solution for busy mornings, as the claw clips allow for quick adjustments while the sectioning ensures the hair stays tidy and out of the way.

13. Quick and Easy Horizontal Braided Band

Creating a "braided headband" effect across the crown is a simple way to manage loose hair while maintaining a playful, half-up aesthetic. This look involves taking a horizontal section of hair and weaving it into three parallel braids that rest across the top of the head, secured at the ends with colorful elastics and star-shaped clips. This structured "band" keeps hair out of the eyes without the need for plastic headbands that can slip or cause discomfort. It is a versatile choice that pairs well with loose waves or a side ponytail, offering a secure and stylish solution for school days that require both focus and a touch of flair.

14. Quick and Easy Quad-Section Puffs

For a balanced look that evenly distributes volume, dividing the hair into four equal quadrants creates a sturdy and playful silhouette. Using a clean "X" part at the crown, each section is gathered into a small puff and secured with snag-free elastics. This style is particularly effective for active kids as it keeps weight distributed and prevents the hair from pulling or becoming loose during play. Scattering small, colorful star-shaped clips throughout the puffs adds a bright, decorative finish that takes only seconds to apply but makes the overall look feel personalized and intentional for school or weekend outings.

15. Quick and Easy Face-Framing Braids with Scrunchies

Combining soft, natural volume with secure face-framing accents is a great way to manage hair while letting its texture take center stage. This style features two thin braids at the front hairline that drop down to the shoulders, accented with lime green beads for a touch of fun. The rest of the hair is pulled back into high pigtail puffs and secured with oversized, colorful scrunchies in contrasting yellow and blue. The scrunchies provide a soft, comfortable hold that won't damage the hair, while the front braids ensure that shorter layers stay out of the eyes throughout the day.

16. Quick and Easy Rainbow Bead Accents

Adding a pop of color to straight or smoothed hair can be achieved quickly through small, repetitive sectioning along the hairline. By gathering tiny segments of hair and securing them with neon-colored elastic bands in a row, you create a structured "headband" effect that keeps hair flat and organized. This technique is ideal for mornings when you want a look that feels more intricate than it actually is, as it requires no complex braiding or twisting skills. The result is a vibrant, durable style that keeps the face clear and holds its shape regardless of gym class or recess activities.

17. Quick and Easy Triple Bun Mohawk

This variation on the classic bun offers a more architectural and modern look by lining up three distinct puffs from the forehead to the nape of the neck. By sectioning the hair horizontally, you create a "mohawk" silhouette that is exceptionally secure and keeps hair completely off the neck and face. This is an excellent protective style for textured hair, as it minimizes tangling and keeps the ends tucked away safely. Whether you choose to leave the puffs natural and voluminous or wrap them into tighter buns, this three-tier approach provides a polished, confident look that remains pristine from morning until evening.

18. Quick and Easy Beaded Front Twists

This style combines the practicality of a gathered high puff with the decorative detail of face-framing twists, creating a look that is both durable and visually striking. The hair is sectioned at the front into tidy squares and secured with metallic gold cuffs, which provide a sturdy anchor for the two-strand twists that drape toward the face. By finishing the ends with small black beads, you ensure the twists stay weighted and in place throughout the day, while the remaining hair is swept into a voluminous puff at the crown for maximum comfort. This approach is highly efficient for busy mornings, as it keeps the hair organized and managed while adding a layer of intentional, coordinated detail with very little extra effort.

19. Quick and Easy Soft Bow Headband

For infants and toddlers with shorter or finer hair, a wide fabric headband is the ultimate time-saving accessory that provides an instant polished look. This soft, elasticated band features a large, coordinated bow that sits comfortably at the crown, helping to keep wispy curls away from the face while adding a charming focal point to any outfit. Choosing headbands made from breathable materials ensures all-day comfort without causing tension or irritation to the scalp. This approach is ideal for busy mornings as it requires zero styling tools or complex sectioning, offering a reliable way to ensure your little one looks put-together and ready for the day in just seconds.

Quick Wins for Busy Mornings

  • Low ponytail – Smooth hair back, secure with one elastic. Done in seconds.
  • Top knot – Gather hair at the crown, twist, and wrap into a bun.
  • Single braid – A basic three-strand braid keeps hair neat all day.
  • Half-up clip – Pin back just the top section to keep hair off the face.
  • Headband style – Slip on a stretchy headband — instant polish with zero effort.

Why Speed Matters

  • Reduces morning stress for both parent and child
  • Leaves extra time for breakfast, packing bags, or shoes
  • Prevents tears over tangles or "bad hair days"
  • Builds independence — kids can learn a few simple styles themselves

Essential Tools to Keep on Hand

  • Soft hair elastics (no metal parts)
  • A wide-tooth detangling brush
  • Snap clips or small jaw clips
  • Stretchy, seamless headbands
  • A spray bottle with water (to tame flyaways)

Fastest Hairstyles by Hair Type

For straight or fine hair:

  • Low ponytail
  • Half-up clip
  • Headband only

For wavy or curly hair:

  • Messy top knot
  • Loose single braid (to prevent frizz)
  • Pineapple ponytail (high and loose)

For thick or long hair:

  • Bubble ponytail (adds control without tight pulling)
  • Twist bun
  • Two braids (split the work in half)

30-Second Emergency Styles

  • The "no-brush" low bun – finger-comb and twist
  • The backwards cap – hide messy hair instantly
  • The side sweep – push everything to one side and clip
  • The double ponytail – two small pigtails at the nape

Pro Tips for Longer Hold

  • Dampen hair slightly before styling
  • Avoid elastics with metal — they slip and snag
  • Twist sections before clipping for extra grip
  • Use a tiny dab of gel or mousse for slippery hair
  • Let sleep styles do the work (braid at bedtime)

Conclusion

A hectic morning doesn't have to mean a hair emergency. By keeping a few go-to styles in your routine — like the classic ponytail, a simple braid, or a quick bun — you can turn grooming from a daily struggle into a seamless part of your family's rhythm. The real goal isn't perfection; it's consistency and calm. When kids feel comfortable and look neat with minimal fuss, everyone wins. With these stress-free, efficient hairstyles, you're not just saving time — you're starting the day with confidence, creativity, and a lot less chaos. After all, the best hairstyle is the one that lets you walk out the door smiling.

The Art of the Aquatic Mane: Essential Hairstyles for the Modern Swimmer

April 6, 2026 by Jessica Guevara Leave a Comment

The transition from the poolside to the water should be seamless, yet for many women, the looming threat of tangled knots and chlorine damage causes a moment of hesitation. Hair is porous, and without a strategic approach, it acts like a sponge for salt and chemicals, leading to brittle ends and faded color. However, functionality doesn't have to come at the cost of aesthetics. By choosing styles that prioritize structural integrity and minimize friction, you can protect your hair’s health while maintaining an elevated, intentional look. This guide explores curated styling solutions that keep your hair secure, manageable, and resilient against the elements.

12 Tangle-Free Hairstyles for Your Next Swim:

1. Braided High Ponytail with Side Detail

A textured, high-volume ponytail is elevated by tight side braids that sit flat against the scalp. This technique is ideal for keeping shorter face-framing layers secure, preventing them from slipping out if you choose to wear a swim cap or face the wind on a boat deck. The braided accents add a touch of intentional edge to a classic silhouette, making it a versatile choice for a beach-to-boardwalk transition.

2. Sculpted Dutch Braid Low Bun

For maximum security and structural integrity, these thick Dutch braids offer a symmetrical, organized look that keeps every strand in place. By feeding the braids into a compact low bun at the nape, the weight of the hair is evenly distributed, reducing tension on the scalp. This style is particularly effective for those with thick or textured hair, providing a flat base that fits comfortably under silicone caps.

3. Sun-Kissed Braided Low Chignon

This style blends effortless summer vibes with functional design. Diagonal braids lead into a soft, coiled low bun, creating a look that feels elevated yet practical for a day by the pool. By keeping the hair gathered low, you minimize the risk of tangling caused by water movement, while the intricate braided detail ensures the style remains secure even as it dries.

4. Precision Braided High Bun

A masterclass in protective styling, these fine, uniform braids are gathered into a sleek, high-profile bun. This look offers total control and minimizes the hair's overall porosity by keeping it tightly wound and off the shoulders. It is a highly durable option for active swimmers, providing a clean, "quiet luxury" aesthetic that highlights the facial features while offering the ultimate defense against salt and chlorine.

5. The Dual Bubble Ponytail

A playful twist on the traditional functional ponytail, this segmented style is perfect for very long hair. By using soft elastics to create "bubbles" down the length of two separate ponytails, the hair is segmented, drastically reducing the risk of mid-length tangling or "matting" when wet. This method keeps the hair aerodynamic and organized, offering a modern aesthetic that transitions effortlessly from the pool to poolside lounging.

6. Quad Dutch Braid Low Buns

For maximum control and the ultimate "cap-ready" profile, this style utilizes four tight, parallel Dutch braids that lead into compact buns at the nape. This symmetrical design offers superior grip, ensuring that no stray layers escape during vigorous activity. The low bun placement is essential for a proper, snag-free swim cap fit, while the intricate, structured look maintains a high-end, powerful athletic vibe when worn without a cap.

7. The "X" Crossover Dutch Braids

A geometric, high-security option that leverages the structural integrity of intersecting braids. Two Dutch braids cross over each other and merge into secure pigtails, creating a robust, low-tension hairstyle that distributes weight evenly across the scalp. This technique is highly effective at anchoring hair against drag in the water, providing a durable, friction-resistant solution for active swimmers.

8. The Sleek Dual-Merging Braid

A sophisticated combination of security and minimalism. Two clean Dutch braids follow the contour of the head, merging into a single, polished braid at the nape. This sleek design reduces drag while offering comprehensive coverage, keeping hair flat and secure against the head. It is an ideal style for those requiring maximum hydrodynamic performance without sacrificing an elegant, composed presentation.

9. Twisted Halo with Segmented Tail

This elegant style combines the security of a crown twist with the modern utility of a bubble ponytail. By twisting the side sections away from the face and securing them at the nape, you manage shorter layers that often fly loose. The addition of segmented elastics down the remaining length prevents the mid-shaft and ends from knotting in the water, offering a romantic yet highly functional aquatic look.

10. The Effortless High Space Buns

A playful and youth-focused classic, these high-set space buns are a go-to for keeping hair completely out of the water while wading or lounging. By dividing the hair into two symmetrical top-knots, you distribute the weight away from the nape, allowing for comfort during movement. This style is particularly effective for those who want to avoid getting their ends wet while maintaining a vibrant, photogenic aesthetic.

11. Braided Accent Space Buns

For a more structured take on the space bun trend, these tight micro-braids lead directly into coiled buns. The braiding adds a layer of scalp security, ensuring that fine hair or baby hairs stay flat and organized. This is an ideal transition style for those who move from a morning workout to a social afternoon, as the braids keep the foundation of the style crisp and sleek even in humid, poolside conditions.

12. The Ultra-Secure Twisted Braid

A masterclass in streamlining, this high-tension twisted ponytail offers a singular, dense braid that significantly reduces the hair's surface area. By tightly winding the strands, you create a rope-like effect that is less prone to absorbing excess chlorine and much easier to detangle post-swim. This style provides a clean, athletic profile that is both incredibly durable and aesthetically minimal.

The Pre-Swim Ritual – Sealing Out the Elements

  • Saturate with fresh water first. Dry hair absorbs up to 35% of its weight in pool water. Rinsing thoroughly with clean water before entering fills the hair shaft, leaving little room for chlorine or salt to penetrate.
  • Apply a protective sealant. Use a lightweight, water-resistant leave-in conditioner or a few drops of vitamin E, argan, or coconut oil. This creates a temporary barrier along the cuticle, repelling chemicals while locking in moisture.
  • Avoid soaking dry hair in chlorinated water. Think of the pre-swim routine as a raincoat for your strands—invisible, fast, and highly effective at preventing brittleness and color fade.
  • Time investment: under 60 seconds. This small habit saves minutes of post-swim detangling and extends the life of your hair color and elasticity significantly.

Strategic Styling – Three High-Performance Looks

Option 1: The High-Tension Bubble Pony (Best for long, straight or wavy hair)

  • Segment the ponytail into small sections using snag-free elastics every two inches to create "bubbles."
  • Position the ponytail high on the head to keep hair out of the water during backstroke and reduce drag.
  • Finish with a silicone swim cap—the textured surface grips the bubbles better than a smooth ponytail.

Option 2: The Low-Profile Dutch Braid Crown (Best for thick, curly, or textured hair)

  • Create an inverted Dutch braid starting at the nape and working upward, wrapping around the head like a halo.
  • Pin the end discreetly behind an ear; this distributes tension evenly and eliminates pressure points.
  • Fits comfortably under Lycra or silicone caps without leaving crimp marks or causing breakage along the hairline.

Option 3: The Four-Strand Flat Braid (Best for medium, fine, or color-treated hair)

  • Use four strands instead of three to create a flatter braid that lies closer to the scalp, reducing water exposure.
  • Apply minimal tension to protect fragile follicles from traction alopecia.
  • Alternate between left-leaning and right-leaning versions on consecutive swim days to prevent repetitive stress.

Post-Swim Recovery – Restoring What the Water Took

  • Rinse within 15 minutes. Use cool or lukewarm fresh water immediately after leaving the pool. Hot water opens the cuticle, locking in chemical residue instead of releasing it.
  • Use the right shampoo. Once a week, apply a chelating shampoo to remove minerals like copper and iron (the culprits behind green discoloration in blonde and gray hair). On daily swim days, stick to a gentle sulfate-free cleanser.
  • Condition and detangle carefully. Apply a pH-balancing conditioner, then a leave-in detangler while hair is still damp. Use a wide-tooth comb starting from the ends and working upward.
  • Never brush wet hair aggressively. Wet strands are at their lowest elasticity; aggressive brushing guarantees breakage.
  • Air-dry whenever possible. Heat styling immediately after chlorine exposure produces straw-like texture. If you must use heat, apply a thermal protectant and use the lowest effective setting.
  • Consistency is key. With daily recovery habits, your hair can withstand years of regular swimming without visible compromise.

Conclusion

The modern swimmer no longer has to choose between peak performance and personal style. By embracing techniques that prioritize protection—reducing friction, limiting chemical absorption, and securing strands against the pull of the water—you transform hair care from an afterthought into an intentional part of your routine. Whether you opt for a sleek, low-tension bun, a series of durable braids, or a silicone-lined cap paired with a pre-swim sealant, the principle remains the same: preparation prevents damage. Ultimately, the art of the aquatic mane isn't about fighting the water; it's about working with it. With the right style in place, that moment of hesitation before diving in becomes a quiet confidence—knowing your hair is as resilient as you are.

The Art of the Half-Up: Effortless Versatility for the Modern Woman

April 6, 2026 by Jessica Guevara Leave a Comment

The half-up, half-down hairstyle remains a perennial favorite for its unique ability to marry the polished structure of an updo with the soft, romantic flow of loose locks. It is the ultimate stylistic compromise—functional enough to keep hair away from the face, yet effortless enough to maintain a sense of movement and ease. Whether executed with razor-sharp precision for a formal event or tossed together with a silk scrunchie for a weekend morning, this silhouette offers a canvas for personal expression that transcends seasonal trends. In this guide, we explore the nuances of the half-up aesthetic, focusing on intentionality, texture, and the subtle details that elevate a simple tuck into a curated look.

10 Elevated Half-Up, Half-Down Hairstyles for a Timeless Look:

1. The Sculptural Honey-Blond Twist

This look centers on a sophisticated interplay of architectural twists and cascading silkiness, creating a silhouette that is both structured and fluid. The foundation consists of voluminous, high-gloss waves in a dimensional honey-blond palette, where the deeper base tones provide a shadow that makes the brighter highlights pop. At the crown, the hair is meticulously sectioned and swept back into a series of overlapping horizontal twists. This technique hides all visible fastenings, creating a seamless transition from the smoothed, tucked top to the expansive curls below. The intentionality behind the hair's movement ensures that even as the loose lengths flow, the crown remains polished and secure. It is a masterclass in using hair as its own accessory, relying on the natural luster and weight of the strands to build a shape that feels both timeless and deeply curated.

2. The Sleek Crown and Natural Coils

This style is a striking study in contrast, juxtaposing a high-shine, ultra-smooth crown with the dense, organic texture of natural curls. The hair is parted with razor-sharp precision and swept back with a firm, sleek finish that minimizes flyaways and emphasizes the scalp’s clean lines. This controlled foundation serves as a launchpad for the main event: a breathtaking explosion of tight, springy coils that tumble from the mid-section down the back. The transition is marked by a deep burgundy satin bow, which provides a weighted focal point without overshadowing the hair's natural volume. By keeping the front section strictly flat and the back section expansive and wild, the look celebrates the versatility of coily hair, proving it can be both strictly formal and effortlessly expressive in a single silhouette.

3. The Dimensional High-Volume Cascade

Focused on maximum impact and red-carpet elegance, this variation utilizes heavy, structured curls to create a sense of dramatic movement. The top portion of the hair is pulled back into a high-set anchor point, but rather than a simple tie, the hair is layered and crossed to create a wider, more cushioned base at the crown. This adds significant height and a "lifted" effect to the profile. From this elevated position, the hair falls in thick, glossy spirals that have been brushed out just enough to merge into a singular, cohesive wave pattern. Two delicate, face-framing tendrils are left out at the temples, providing a soft, intentional border that breaks the sleekness of the pulled-back section. The result is a highly contoured look that uses the hair’s own density to create a sense of luxury and aesthetic longevity.

4. The Elevated Tropical High-Pony

This silhouette reimagines the high-ponytail hybrid by focusing on extreme verticality and the raw beauty of long, defined curls. The hair is gathered at the highest point of the crown, pulling the sides and front into a sleek, tension-filled base that highlights the wearer’s bone structure. Once secured, the ponytail acts as a fountain, allowing the curls to spill forward and down in a dense, textured waterfall that reaches well past the shoulders. The inclusion of a singular, vibrant pink floral clip at the base of the pony serves to ground the height and add a pop of organic color that mimics the softness of the hair. With a single, thin curl left loose to trail along the jawline, the style balances the severity of a tight pull with the romanticism of loose, wandering texture.

5. The Ash-Blonde Minimalist Tuck

This look demonstrates how the half-up silhouette can be adapted for shorter, shoulder-grazing lengths with a focus on understated elegance. The hair features a cool, ash-blonde tone with subtle dimensional lowlights that add depth to the straight, blunt-cut base. Instead of a high-tension pull, the top section is gathered loosely and tucked with a soft, airy volume that suggests a relaxed, "lived-in" aesthetic. A small, circular metallic clip serves as a focal point at the back, providing a functional anchor that feels like a piece of quiet jewelry. The addition of a sweeping, chin-length side fringe softens the profile, allowing the hair to frame the face while maintaining the clean, functional benefits of a pinned-back style. It is an ideal example of how minimalist intentionality can transform a simple bob into a curated, polished statement.

6. The Sculptural Cloud with Textured Bangs

Embracing the architectural power of natural texture, this style utilizes a high-set gathering to create a dramatic, cloud-like silhouette. The hair is worked into a voluminous half-up puff at the crown, which provides striking verticality and highlights the dense, springy nature of the coils. A key feature of this look is the inclusion of a textured "fringe"—a thick section of curls that has been brought forward to graze the brow, adding a modern, edgy contour to the face. The sides are sleekly handled to emphasize the transition from the smooth temples to the expansive, airy volume above and behind. By allowing the natural texture to dictate the shape, the style achieves a sense of effortless confidence and artistic longevity, proving that the half-up silhouette can be a bold celebration of natural hair's inherent movement and height.

7. The Double-Rosette Honey-Gold Wave

This variation leans into a romantic, ornate aesthetic by incorporating sculptural rosettes into a classic half-up foundation. The hair is a vibrant, warm honey-gold, styled into long, uniform "S" waves that provide a rhythmic, high-shine backdrop. At the crown, the hair is divided and manipulated into two soft, rose-like buns that sit stacked vertically, adding a unique three-dimensional element to the profile. This intricate detail elevates the style from a standard tuck to a curated piece of hair art. The hair at the temples is pulled back firmly to maintain a sleek front, while the cascading waves below offer a soft, feminine contrast. It is a masterful interpretation of the half-up look that prioritizes texture and ornate detail, making it a perfect choice for those seeking a style that feels both intentional and deeply artistic.

8. The Twisted Crown with Polished Top-Knot

This style showcases the beauty of protective styling within a half-up framework, using precisely executed twists to build a structured, high-fashion look. The hair is sectioned into neat, uniform twists that begin at the hairline, leading the eye upward toward a tightly coiled top-knot at the apex of the head. This elevated bun provides a clean, architectural finish that contrasts beautifully with the remaining twists that fall freely around the shoulders. The intentionality of the parting creates a rhythmic pattern across the scalp, emphasizing the craftsmanship behind the style. By gathering the top half into a secure knot, the look maintains a functional, face-baring silhouette while allowing the movement and texture of the twists to shine through in the back. It is a sophisticated, high-impact aesthetic that balances the durability of twists with the timeless appeal of a top-knot.

9. The Copper-Glazed Bun and Coil Hybrid

This style masterfully explores the intersection of sleek precision and expansive natural volume, unified by a vibrant copper-toned palette. The hair is divided horizontally with clinical accuracy, creating a high-contrast transition between the two halves of the silhouette. The upper section is pulled into an ultra-smooth, high-tension base that leads into a tightly coiled, spherical bun at the crown. This high-gloss, reflective finish highlights the rich metallic undertones of the copper glaze. Below the parting, the hair erupts into a dense, pillowy cloud of defined curls that provide a soft, tactile counterpoint to the structured bun above. By keeping the front section strictly flat and the back section horizontally wide, the look celebrates the architectural potential of coily hair while maintaining a curated, modern edge that feels both functional and high-fashion.

10. The Bohemian Goddess Braid and Curl Fusion

A breathtaking display of texture and dimension, this look utilizes a half-up silhouette to organize a voluminous sea of ash-blonde micro-braids and loose ringlets. The hair at the scalp is intricately woven into fine, uniform braids that alternate between dark roots and luminous blonde lengths, creating a rhythmic, striped effect across the crown. These braids are then gathered into a high, overflowing ponytail that spills down the back in a dense waterfall of curls. What makes this variation particularly striking is the integration of loose, spiraled strands that escape the braids, adding an airy, ethereal quality to the overall texture. A single, delicate braided tendril is left to trail over the shoulder, providing a soft frame for the face. This style is a definitive example of aesthetic longevity, blending the durability of protective braids with the romantic, free-flowing energy of a classic half-up cascade.

The Architecture of Placement: Where Detail Meets Intention

  • Crown placement creates instant lift and the illusion of length, ideal for round or heart-shaped faces.
  • Temple-to-temple gathering softens the jawline and reads as more romantic than utilitarian.
  • Lower placement (at the back of the head) evokes Old World romance and works beautifully with longer lengths.
  • The width of your section changes everything: narrow reads as delicate, wide as dramatic.
  • Face-framing strands left out intentionally can shift the look from polished to bohemian in seconds.
  • The angle of the pull—straight back versus diagonally upward—determines whether the final silhouette feels relaxed or lifted.

Texture as the True Foundation

  • Second-day hair is the ideal canvas, offering natural grip that freshly washed hair lacks.
  • Salt spray or texture mist adds beachy grit and helps the style hold without pins or elastics.
  • Dry shampoo at the roots provides invisible scaffolding, especially for finer hair types.
  • A dab of pomade tames flyaways and creates a sleek, editorial finish when paired with a fine-tooth comb.
  • The memory of yesterday's curl pattern gives the half-up softness and volume that heat styling often cannot replicate.
  • Never fight your natural texture—the half-up looks best when working with, not against, what your hair wants to do.

The Accessory as Signature

  • A velvet ribbon threaded through the gathered section whispers quiet luxury.
  • Pearl pins placed asymmetrically suggest whimsy without tipping into costume.
  • A single sleek barrette at the crown transforms the ordinary into the intentional.
  • Silk or cashmere scrunchies elevate a weekend morning look without overthinking it.
  • Minimalism wins—one thoughtful accent is almost always more powerful than several.
  • The hairstyle becomes a frame; the accessory becomes the art.

From Coffee Run to Cocktail Hour: The Chameleon Quality

  • Sunday morning with leggings calls for a low, loose gather and a fabric scrunchie.
  • The office favors a slightly higher placement with flyaways smoothed back.
  • A dinner date shines with face-framing tendrils and a discreet clip rather than an elastic.
  • Black-tie asks for sleek tension, a taut pull, and pearl or metal accessories.
  • The gym works with a textured, grip-heavy half-up using a no-slip elastic.
  • Transitioning from day to night requires just two tweaks: go higher and swap fabric for metal.
  • The same hairstyle that holds your coffee can hold a champagne flute—no full redo required.

Conclusion

In a beauty landscape often divided between rigidly structured updos and unapologetically loose waves, the half-up hairstyle occupies a rare and valuable middle ground. It asks for neither full commitment nor total surrender—instead, it invites the modern woman to have it both ways: polish with softness, intention with ease. What makes the half-up enduringly relevant is not a single technique or trend, but its quiet adaptability. It can be sleek or undone, accessorized or stark, romantic or architectural—all while honoring the natural movement of the hair. As we continue to seek versatility in our daily routines, the half-up remains a quiet testament to the power of balance. It proves that you don't have to choose between effort and effortlessness. Sometimes, the most intentional statement is the one that looks like you barely tried at all.

Braided Hairstyles for Black Women Over 50

April 6, 2026 by Jessica Guevara Leave a Comment

The conversation around hair and aging is shifting from maintenance to effortless expression. For women over 50, braided styles offer a perfect intersection of practical protection and modern elegance. Far from being just a convenient choice, braids serve as a canvas for showcasing natural silver transitions, highlighting facial features, and embracing a refined sense of personal style. Whether you are leaning into the ease of a low-manipulation routine or looking for a sculptural look for a special event, modern braiding techniques provide an elevated aesthetic that honors both your time and your crown.

12 Sophisticated Braided Styles for Women Over 50:

1. Sculptural Cornrows with Gold Accents

This style features precisely sectioned cornrows that sweep back from the forehead, creating an elegant and architectural frame for the face. The braids transition into a soft, natural puff at the crown, offering a beautiful contrast between the structured base and the organic texture of the hair. Small gold beads are strategically placed at the termination of each braid, adding a touch of sophisticated hardware that elevates the look from a simple protective style to a curated accessory. This approach is particularly flattering for women over 50 as it highlights the brow and cheekbones while keeping the hair's natural volume intact. It is a perfect choice for those who value a clean, artistic silhouette that feels both grounded and intentionally styled.

2. Silver-Infused High Ponytail with Braided Base

This striking look showcases how high-contrast silver and charcoal tones can be used to create a modern, high-fashion statement. Neat, scalp-skimming braids lead into a dramatic high ponytail that flows freely over the shoulder, offering an instant "lift" to the facial features. The blend of icy silver extensions with natural salt-and-pepper hair creates a multidimensional finish that feels incredibly high-end. The long, soft waves of the ponytail add a romantic movement to the overall structured design, proving that braids for mature women can be both bold and soft. This style is ideal for the woman who wants a sophisticated, red-carpet-ready aesthetic that celebrates her natural color transition with absolute confidence.

3. Intricate Micro-Braids with Cascading Waves

For a look that balances meticulous detail with effortless flow, these micro-braids offer a stunning solution. The hair is braided into fine, uniform strands that transition into lush, cascading waves toward the ends, creating a soft and voluminous silhouette. The deep grey and silver palette provides a seamless and polished appearance that honors the natural aging process while maintaining a youthful energy. By keeping the braids small and lightweight, this style ensures comfort and flexibility, allowing the hair to move naturally with the body. It is an exceptionally graceful choice for formal occasions or daily wear, providing a textured, "quiet luxury" appeal that remains timeless and easy to manage.

4. Side-Swept Salt and Pepper Twists

This style embraces a relaxed yet refined aesthetic through the use of soft, side-swept twists that beautifully highlight a natural silver hairline. The hair is parted deeply to one side, allowing the silver-toned strands to frame the face like a halo, while the darker charcoal tones provide depth and contrast throughout the length. These twists offer a lower-tension alternative to traditional tight braids, making them an excellent choice for maintaining scalp health and hair elasticity. The shoulder-length finish is manageable and chic, perfect for the woman who prefers a style that feels personal and approachable. It is a testament to how simple, intentional styling can turn natural color transitions into a powerful fashion statement.

5. Classic Center-Parted Silver Box Braids

This look features long, sleek box braids with a defined center part that creates a balanced and symmetrical frame for the face. The striking blend of silver and charcoal tones offers a sophisticated "salt and pepper" finish, allowing natural grey hair to transition seamlessly into the extensions. The clean parting highlights the forehead and eyes, providing an open and bright appearance that is both timeless and modern. For women over 50, this style is an excellent choice for its low-maintenance nature and its ability to provide protective length without sacrificing elegance. The uniform size of the braids ensures a neat, curated look that works effortlessly for daily wear or special occasions, embodying a sense of graceful confidence.

6. High Braided Bun with Star Accents

This creative style combines traditional cornrowing with a playful, high-volume bun at the crown. The hair is braided upward in precise sections, merging into a beautifully textured top-knot that showcases the natural curl and silver highlights of the hair. Small gold charms, including a delicate star, are woven into the braids to add a touch of personality and artistic flair. This "lifted" silhouette is particularly flattering as it draws the eye upward, highlighting the bone structure and providing a youthful energy to the overall aesthetic. It is a perfect example of how mature styling can remain experimental and fun while maintaining a high level of sophistication and intentionality.

7. Shoulder-Length Box Braids with Gold Cuffs

For a classic and manageable silhouette, these shoulder-length box braids offer a chic solution that is both practical and stylish. The hair is braided into medium-sized sections, falling gently around the collarbone to provide a soft frame for the face. Each braid is accented with metallic gold cuffs, which act as subtle jewelry for the hair, adding a refined, "quiet luxury" element to the protective style. This length is ideal for women who prefer a lightweight feel that doesn't overwhelm the scalp or neck. The dark, rich color of the braids provides a striking contrast against the skin, creating a polished and grounded look that transitions perfectly from professional settings to relaxed weekend outings.

8. Layered Salt and Pepper Twists

This side-swept look features soft, textured twists that are cut into a layered, chin-length bob. The multidimensional color story—blending deep blacks with bright silver strands—mimics the natural graying pattern for an authentic and sophisticated finish. By opting for twists rather than tight braids, this style offers a gentler touch on the scalp, which is essential for maintaining hair density and health in mature years. The layered cut adds movement and volume, preventing the style from feeling heavy or static. It is a refined, artistic choice that feels deeply personal and effortless, proving that short, textured styles can be incredibly high-fashion while remaining easy to maintain day-to-day.

9. Low Braided Chignon in Silver

This sophisticated look features precise cornrows that sweep back into a neat, woven chignon at the nape of the neck. The monochromatic silver palette is strikingly modern, offering a uniform and polished finish that celebrates the beauty of grey hair. By keeping the volume concentrated at the back, this style provides a sleek, "face-lifting" effect that highlights the profile and jawline. It is an ideal choice for the woman over 50 who desires a professional and secure protective style that transitions seamlessly from a structured workday to an elegant evening out.

10. High Voluminous Braided Bun

This style emphasizes height and sculptural beauty, featuring thick, textured braids that are gathered into a bold bun at the crown. The rich contrast between the dark charcoal roots and the icy silver extensions adds a multidimensional depth that feels both intentional and high-fashion. The upward direction of the braids provides a natural lift to the facial features, while the substantial bun creates a powerful, regal silhouette. This is an excellent option for women who want to make a statement with their hair while keeping it entirely off the neck for maximum comfort and ease.

11. Spiral Curls with Braided Crown

For a softer, more romantic aesthetic, this style combines structured cornrows with a waterfall of tight, silver spiral curls. The braids at the front provide a neat and manageable base, while the loose curls add a playful, youthful volume that moves beautifully. This hybrid look is particularly flattering for mature women as the curls add a softness to the face, breaking up rigid lines. The bright silver tone throughout creates a radiant, halo-like effect that feels fresh and elevated, making it a standout choice for those who love a mix of texture and definition.

12. Shoulder-Length Goddess Braids

This classic shoulder-length style utilizes the "Goddess" technique, where the braids transition into soft, bouncy curls at the ends. The side part allows for a natural drape that frames the face elegantly, while the salt-and-pepper color blend keeps the look grounded and sophisticated. The medium length is incredibly versatile and lightweight, offering a chic bob-like silhouette that is easy to style daily. It represents a perfect balance of protection and femininity, providing a textured look that feels effortless and timeless for any occasion.

Why Braids Are a Game-Changer for Women Over 50

As hair naturally becomes finer, drier, or more fragile with age, braids offer a protective solution that minimizes breakage and reduces daily stress on the scalp. Unlike heat styling or chemical treatments, braids allow your natural hair to rest while still looking polished. They also eliminate the need for daily combing, blow-drying, or heavy products—making them a low-maintenance yet high-impact choice. For women embracing gray or silver transitions, braids can be styled to highlight those new hues, turning what some once saw as "aging" into a luminous feature.


Choosing the Right Braid for Your Hair Texture and Length

Not all braids are created equal, especially when working with mature hair. Here’s a quick guide:

  • Knotless Braids: Gentle on the scalp and edges, these start with your natural hair before extensions are added, reducing tension.
  • Crochet Braids: Ideal for women with thinner hair or sensitive scalps. Pre-braided or pre-twisted hair is looped through your natural hair with a crochet needle—quick, lightweight, and versatile.
  • Feed-in Cornrows: Great for showcasing silver roots or blending colors. They lie flat against the head and can be styled into buns, ponytails, or geometric patterns.
  • Senegalese Twists & Rope Twists: Softer and more flexible than traditional box braids, these work beautifully on medium to fine hair.

If your hair is shorter, don't worry—extensions can add length, or you can rock short, chic braided bobs that sit just above the shoulders.


Protecting Your Edges and Scalp Health

One of the biggest concerns for women over 50 is hairline thinning or receding edges. The good news: braids done correctly can actually protect your edges. Look for a stylist who understands tension control and avoids rubber bands at the roots. Styles like knotless braids, loose cornrows, or jumbo braids put far less stress on the hairline. Between installations, give your scalp a break—two to three weeks of rest before re-braiding is ideal. Keep your scalp moisturized with lightweight oils (like jojoba or argan) and avoid heavy buildup by washing your braids gently every 10–14 days.


Embracing the Gray: Color and Blending Techniques

Silver, white, and salt-and-pepper hair are no longer "transition" colors—they're statement shades. Many women over 50 are choosing to enhance their natural gray by braiding with extensions that match or complement their silver tones. Think cool ash blondes, platinum, or even soft lavender for a playful touch. Alternatively, you can braid only your natural gray hair without extensions for an airy, ethereal look. If you're not fully gray yet, lowlights in silver or champagne can blend new growth seamlessly into your braided style.


Styling Ideas for Every Occasion

Braids are surprisingly versatile. Here are a few ways to wear them:

  • Everyday Elegance: A low ponytail or loose side-swept braids with a silk scarf tied at the nape.
  • Work & Professional Settings: Sleek cornrows pinned into a low bun or a crochet bob in a natural black or dark brown.
  • Special Events: Add gold or pearl cuffs, beads, or ribbon-wrapped sections. A braided updo or halo braid looks stunning with evening wear.
  • Vacation & Active Days: High ponytail braids or pigtail twists keep hair off the neck and require zero daily styling.

Maintenance Made Simple

One of the greatest gifts of braids is the time they return to you. To keep them fresh:

  • Wrap your hair with a silk or satin scarf every night.
  • Spritz a leave-in conditioner or braid spray on your scalp weekly.
  • Cleanse with a diluted shampoo or witch hazel on a cotton pad between washes.
  • Re-braid any loose strands at the root to extend the life of your style (usually 4–6 weeks).

Avoid keeping braids in for more than eight weeks, as mature hair can begin to matte or lock at the roots.


Finding a Stylist Who Understands Mature Hair

Not every braider understands the unique needs of women over 50. Look for a stylist who:

  • Asks about scalp sensitivity, thinning areas, and past hair loss.
  • Uses lightweight extensions (heavy hair can pull on fragile roots).
  • Avoids tight braiding and glue.
  • Has experience with gray or silver hair textures, which can be coarser or more wiry.

Don't be afraid to do a consultation first. A great stylist will celebrate your vision while protecting your hair's health.

The Elevated Cute Hair Bun: A Masterclass in Effortless Versatility

April 6, 2026 by Jessica Guevara Leave a Comment

The hair bun is perhaps the most enduring silhouette in beauty, moving seamlessly from the quiet focus of a morning routine to the intentional elegance of an evening gala. No longer just a convenience for a busy day, the modern bun is a curated statement of personal style. It balances the intersection of quiet luxury and functional art, offering a way to frame the face and highlight the neckline with ease.

Whether you are leaning into the soft, romantic textures of a lived-in "cloud" knot or the sharp, architectural lines of a sleek mid-bun, the key lies in the intentionality of the finish. This guide explores the most coveted bun styles, designed for those who value aesthetic longevity and a sophisticated, polished edge.

12 Curated Hair Buns for Timeless Appeal :

1. The "Cloud" Texture High Updo

This style is the quintessence of the "Art of the Undone Bun," prioritizing airy volume and intentional imperfections. The bun is strategically placed high on the crown, creating an elegant lift to the entire facial silhouette. The hair is gathered loosely, with individual sections looped and pinned to build a cloud-like, multi-dimensional texture. This texture provides structural intrigue without feeling rigid. Crucially, the "cute" and lived-in factor is amplified by the soft, face-framing tendrils and the nape wisps, which are lightly curled to add a romantic, effortless finish. It is a perfect example of a style that feels simultaneously grand and approachable.

2. The Architectural, Sleek Chignon

Focusing on the "Polished Sophistication" section of the article, this look is a masterclass in precision and quiet luxury. The bun is a perfect, sculpted loop sitting precisely at the mid-level point on the back of the head. It is achieved with highly reflective, smoothed hair, minimizing any flyaways. A key distinguishing feature is the intentional wrap of hair concealing the base, creating a seamless, architectural silhouette. This mid-level placement balances the profile perfectly. The sleekness of the main bun is contrasted by a few deliberate, soft tendrils framing the jawline, demonstrating that even a highly structured, "cute" bun retains its soft appeal.

3. The Intricate, Wrapped Low-Bun

This style exemplifies the "Occasion-Ready" adaptations, showcasing how a bun can mimic intricate, organic forms like a floral arrangement. Situated low at the nape of the neck, this style utilizes hair volume to create deep, twisted layers that wrap and tuck around each other. The texture is softer than the sleek chignon, yet more intentional than the messy bun, resulting in a complex, multi-layered tuck. The placement draws the eye downward, enhancing the neckline. The intricate wrapping technique ensures that the bun itself acts as the primary accessory, radiating a sense of classic, "quiet luxury" sophistication perfect for a formal event.

4. The Sculpted High-Knot with Edge Detail

This style seamlessly blends the structural integrity of the "Polished Sophistication" bun with the playful, modern artistry of "Nostalgic Accents." The core of the look is a flawlessly smooth, donut-style bun placed firmly at the apex of the head. This high placement creates an instant "facelift" effect and maximizes shine. Its perfect, spherical symmetry is contrasted by the highly detailed, sculpted "baby hair" edges framing the forehead and temples. This deliberate contrast—the severe smoothness of the high knot paired with the delicate, artistic swirls of the hairline—creates an editorial, curated look that feels both timeless and high-energy.

5. The Botanical Low Chignon

This style serves as a beautiful representation of how botanical elements can elevate a classic silhouette into something deeply romantic. The bun is tucked low at the nape of the neck, featuring a soft, horizontal orientation that emphasizes the width and health of the hair. The texture is smooth but not severe, allowing the natural luster of the hair to shine under ambient lighting. Adorned with a delicate arrangement of fresh florals and greenery nestled into the side of the tuck, this look transitions from a simple updo to a curated, artistic statement. The floral accent adds a pop of natural color and a sense of "quiet luxury" that is perfect for outdoor events or editorial bridal spreads, proving that the right accessory can redefine the intentionality of a classic bun.

6. The Ribbon-Accented Ribbon Space Buns

Drawing inspiration from the "Nostalgic Accents" of the Y2K era, this style is a playful and artistic interpretation of symmetry. The hair is divided by a sharp, "S-curved" center part that adds a modern, graphic element to the look. Twin buns are set at a mid-level height, featuring a soft, voluminous tuck that allows the ends to remain hidden for a clean, spherical finish. The addition of long, slender silk ribbons tied into delicate bows at the crown of each bun provides a romantic, vintage touch. These cascading ribbons add movement and a sense of "aesthetic longevity" to a high-energy style, making it feel curated and thoughtfully designed rather than purely casual.

7. The Braided Crown Top Knot

A masterful execution of "Texture Transitions," this style utilizes the structural beauty of intricate braiding to build a powerful, high-volume bun. The hair is gathered into sleek, uniform cornrows that sweep upward toward the apex of the head, creating a clean and architectural foundation. The bun itself is composed of many smaller braids coiled together to form a large, textured top knot. This placement creates a striking vertical line that elongates the neck and draws attention to the facial structure. The interplay between the scalp’s geometric patterns and the dense, braided texture of the bun reflects a high level of intentionality and craftsmanship, making it a standout choice for those seeking a bold yet sophisticated silhouette.

8. The Sculpted French Twist Fusion

This look offers a sophisticated blend of a traditional French twist and a modern, high-set bun, focusing on verticality and "quiet luxury." The back of the hair is swept upward in a smooth, seamless motion, creating a polished surface that leads into a voluminous, lopped bun at the crown. The hair is tucked and pinned with hidden precision to create a series of soft, rolling folds that add depth and dimension. This elevated placement provides a refined profile that feels both professional and artistic. The lack of visible hardware or elastics gives the style an "effortless" yet highly calculated aesthetic, embodying the grace of a ballet-core classic with a more contemporary, textured twist.

9. The Jeweled Braid-Wrapped Chignon

This style is a sophisticated exploration of "Curated Accents," where the hair itself becomes a canvas for high-end hardware. A thick, textured braid sweeps across the back of the head, leading into a low-set chignon at the nape. The bun is tucked with a soft, rounded finish that highlights the multi-tonal, ash-grey palette of the hair. What elevates this look into the realm of "quiet luxury" is the delicate string of pearls and crystals woven through the braid. This subtle glimmer adds a touch of ethereal elegance, transforming a classic braided updo into a curated, artistic masterpiece. It is an ideal silhouette for events that demand a balance of traditional craftsmanship and modern, high-fashion intentionality.

10. The Sleek High-Gloss Knot

Embodying the "Polished Sophistication" of a modern classic, this high-set bun is defined by its impeccable smoothness and high-shine finish. The hair is pulled back into a tight, secure placement at the crown, creating an architectural silhouette that emphasizes the profile and jawline. The bun itself is a full, spherical knot with a seamless wrap around the base, hiding any evidence of styling tools. This look is further refined by the expertly sculpted "baby hair" edges, which add a sharp, editorial edge to the soft roundness of the knot. It is a powerful, intentional style that radiates confidence and aesthetic longevity, making it a staple for a high-impact, curated wardrobe.

11. The Geometric Braided Top Knot

A striking example of "The Anatomy of Placement," this style uses bold verticality and geometric precision to create a commanding presence. The back of the head features clean, crisp sectioning that leads into uniform braids, sweeping upward to the highest point of the head. The bun is a dense, voluminous coil of braids, stacked to create a textured crown that adds significant height and poise. This high-crown placement serves as an instant "facelift," drawing all focus to the face and neck. The contrast between the intricate scalp patterns and the massive, braided silhouette of the knot demonstrates a high level of technical intentionality and a commitment to a bold, artistic aesthetic.

12. The Floral-Crowned Braided Tuck

This style celebrates the "Occasion-Ready" silhouette through a romantic fusion of texture and nature. The bun is a voluminous, low-set arrangement of thick braids coiled into a wide, horizontal chignon at the nape. Its intricate, woven texture is crowned by a lush, semi-circular arrangement of fresh white blossoms that bridge the gap between the hair and the head. This floral halo adds a sense of organic beauty and softness, making the bun feel deeply personal and artistic. The richness of the dark hair serves as the perfect backdrop for the bright petals, creating a high-contrast, "cute" look that feels timeless, intentional, and rooted in a classic, romantic tradition.

Strategic Styling: Techniques for Every Hair Type

Practical insights to ensure these styles translate from the screen to real life.

  • Building Volume: Utilizing texture sprays and light teasing to create fullness in finer hair.
  • Weight Management: Techniques for securing thick hair without sacrificing the delicate proportions of the bun.
  • The Second-Day Secret: Why natural oils provide the perfect grip for a long-lasting, secure hold.

Occasion-Ready: Adapting the Silhouette

Choosing the right bun based on the energy of the room and the demands of your schedule.

  • The Power Meeting: A low, sleek chignon that radiates authority and subtle confidence.
  • The Sunday Gallery Stroll: A loose, messy bun paired with a wide headband for a relaxed, artistic vibe.
  • The Evening Gala: An intricate, multi-twisted bun that mimics the complexity of a floral arrangement.

The Anatomy of Placement: Choosing Your Angle

Understanding how the height and position of a bun can completely shift your facial aesthetic.

  • High Crown: Creates an instant "lift" effect, drawing the eyes upward and lengthening the neck.
  • Mid-Level: The most versatile placement, offering a balanced profile that works with any outfit.
  • Low Nape: Evokes a sense of classic romance and softness, perfect for framing statement jewelry.

Texture Transitions: Working with Natural DNA

How to create a bun that feels authentic to your hair’s natural movement.

  • The Coiled Pineapple: Celebrating natural curls by gathering them high and loose to maintain ringlet integrity.
  • The Waveset Bun: Incorporating pre-styled waves into a low tuck to add romantic ripples and depth.
  • The Braided Foundation: Using Dutch or French braids that lead into the bun for a multi-textured finish.

Nighttime Preservation: The "Sleep-In" Bun

Utilizing the bun as a functional tool for maintaining hair health and morning efficiency.

  • The Silk Wrap Technique: Securing a loose bun with a silk scrunchie to prevent breakage and frizz overnight.
  • Heatless Waves: Using a high bun as a foundation for waking up with natural, voluminous curls.
  • Tension Management: Ensuring a loose enough hold to avoid scalp strain while resting.

Seasonal Adaptations: Weather-Proofing Your Style

Adjusting your technique to ensure aesthetic longevity regardless of the environment.

  • The Humidity-Resistant Twist: Using smoothing balms and high-tension placements to combat frizz.
  • Winter Accessories: Styling a low bun that accommodates beanies and scarves without losing its shape.
  • The Summer Escape: A secure, salt-spray-infused knot designed for effortless seaside transitions.

The Minimalist’s Toolkit: Essential Hardware

A look at the functional tools that act as the invisible architects of a perfect bun.

  • Seamless U-Pins: For securing heavy hair with a "floating" look that hides all mechanics.
  • Texturizing Dry Shampoos: Providing the necessary "grip" for fine hair to hold a voluminous shape.
  • Hand-Carved Hair Forks: A timeless, artistic choice for securing hair without the need for elastics.

Conclusion: The Beauty of the Boundless Bun

The true magic of the hair bun lies in its ability to be whatever you need it to be—a practical solution for a busy afternoon or a refined masterpiece for a milestone event. It is a style that transcends fleeting trends, relying instead on the harmony of texture, placement, and intentionality. By mastering these variations, you aren't just tying your hair back; you are choosing a silhouette that reflects your mood and enhances your natural beauty with effortless grace. In a world of fast-paced changes, the bun remains a timeless anchor, proving that aesthetic longevity is always in style.

12 Balayage Hair Colour Ideas For Effortless Dimension.

April 5, 2026 by Jessica Guevara Leave a Comment

Balayage remains the gold standard for achieving that coveted, sun-kissed glow without the harsh lines of traditional highlights. Unlike uniform coloring techniques, this hand-painted method focuses on seamless transitions and soft, natural growth, making it the ultimate choice for those seeking a high-end look with low-maintenance upkeep. Whether you are looking to brighten your natural brunette base or experiment with cool-toned platinum ribbons, these twelve balayage inspirations offer a sophisticated way to add depth and movement to your hair.

12 Balayage Perspectives for Dimensional Depth:

1. The Honey-Gold Sombré Melt

This first look is a quintessential example of soft ombré, showcasing an ultra-smooth transition from a natural chestnut brown root into flowing, voluminous waves of golden honey. The blending is flawless, with the lighter tones saturated heavily through the mid-lengths and ends for a truly sun-bleached effect. The dimension is enhanced by the light catching the distinct, defined curls, which create a soft gradient that feels intentional and effortless.

2. Deep Mocha and Walnut Dimension

This portrait highlights the power of balayage on dark hair. While maintaining a deep, espresso-mocha base, fine ribbons of warm walnut and milk chocolate are strategically hand-painted throughout. These highlights are subtle but give the long, tumbling waves a rich, dimensional structure. The color placement is concentrated just below the eye level, which lifts the face, while the depth at the roots keeps the style grounded and low-maintenance.

3. The Textured Bronde Bob

This style is an excellent example of a high-contrast ‘bronde’ (brown-blonde) applied to a shorter, layered cut. The base remains a deep, smoky brown, but bold strokes of neutral beige and light ash-blonde are painted in thick sections, mimicking natural light reflection. This placement emphasizes the texture and layering of the bob, making the individual curls pop. The heavy concentration of highlights at the very ends against the dark interior provides substantial visual depth.

4. Vivid Ultraviolet Ribboning

Proving that balayage is not just for neutrals, this technique uses a bold, ultraviolet tone. A deep violet base provides the shadow root, while vibrant, cool-toned purple ribbons are painted through the mid-lengths and concentrated heavily into defined, structural barrel curls. This approach ensures that as the color shifts and catches the light, the dimensional contrast between the darker base and the brilliant purple is maximizing the hair's perceived shine and movement.

5. Seamless Cinnamon Copper Melt

This look is an example of an immaculate gradient applied to warm, coppery hair. The transition begins with a soft, natural chestnut root that blends entirely seamlessly into mid-lengths saturated with bright cinnamon and soft auburn tones. The hand-painted technique is so precise that the distinct barrel curls, which fall into structured waves, showcase a continuous shift of light rather than harsh lines of demarcation. The heavy saturation on the ends maximizes the dimensional warmth and perceived health of the hair.

6. The Iced Champagne Frame

This portrait features a high-impact, high-contrast balayage tailored specifically for a face-framing effect. The base remains a deep, smoky brown, but bold strokes of exceptionally pale, cool, champagne blonde are applied starting near the root to frame the face. The back and mid-lengths use heavy ribboning that emphasizes the definition of the large, glamorous waves. The blend is sophisticated, ensuring that while the blonde is dramatic and bright, the transition into the darker interior layers is soft and curated.

7. Smoky Ash-Silver Diffusion

This technique is a striking display of dimensional gray. It utilizes a very dark, smoky brown base, transitioning dramatically into cool, diffused ribbons of light ash and bright silver. The application here is incredibly fine, creating a 'veil' of cool tone that shifts with movement. The layering of the cut highlights the multi-tonal silver accents, making the hair appear textured and voluminous. This look is perfect for those seeking an editorial, sophisticated take on a gray or silver palette.

8. Creamy Platinum and Pearl Contrast

This image showcases the intersection of creamy warmth and a bright platinum finish. It features a deep shadow root, providing strong contrast to the heavy application of very pale, creamy pearl blonde highlights that dominate the mid-lengths and ends. This placement emphasizes texture, creating the illusion of significant visual volume through the large, rolling waves. The blend is meticulous near the crown, ensuring a soft grow-out despite the powerful brightness of the platinum ribbons.

9. Radiant Auburn and Copper Sweep

This look celebrates the vibrancy of red tones through a sophisticated, high-shine melt. Starting with a deep, earthy auburn at the roots, the color gradually shifts into a bright, reflective copper through the mid-lengths. The application is exceptionally smooth, emphasizing the hair's natural luster and the fluid movement of the soft, voluminous waves. This tonal balayage provides a monochromatic depth that feels rich, artistic, and perfectly curated for a bold yet polished aesthetic.

10. The Luminous Champagne Lob

Designed for a textured, shoulder-length cut, this balayage features a high-contrast blend of deep brunette and bright champagne blonde. Bold, chunky ribbons of cool-toned blonde are painted throughout to catch the light from every angle, significantly increasing the visual volume of the lob. The placement is strategic, ensuring the brightest pieces pop against the darker interior layers, creating a multidimensional "glow" that looks fresh and modern.

11. Toasted Toffee and Hazelnut Curls

This portrait showcases an elegant, warm-toned dimension on a deep chocolate base. Hand-painted ribbons of toasted toffee and hazelnut are woven through the hair, concentrating on the lower half to accentuate a series of tight, structured curls. The result is a luxurious, "expensive brunette" finish where the highlights provide just enough contrast to define the hair’s texture without losing the richness of the natural dark base.

12. Midnight Cobalt Dip-Dye Melt

A striking example of creative color, this balayage transitions from a sleek midnight black root into a vivid cobalt blue. Rather than a harsh line, the blue is "melted" into the dark base using a subtle ribboning technique, ensuring the transition feels intentional and artistic. The cool, oceanic tones are concentrated at the ends of the tousled waves, providing a high-impact, edgy finish that maintains a sophisticated editorial feel.

The Timeless Appeal of Balayage

Balayage has cemented its place as more than just a hair color trend; it is a lasting technique prized for its natural, sun-kissed results. Unlike traditional foil highlights that often create stark, uniform lines, balayage—a French word meaning "to sweep"—involves hand-painting color onto the surface of the hair. This allows for a seamless, graduated effect that grows out beautifully without harsh regrowth lines. It is the ultimate low-maintenance option for those who want to look effortlessly polished.

Why Dimension Matters More Than Color

When considering a hair transformation, many clients focus solely on the color—blonde, brunette, or red. However, the true secret to luxurious-looking hair lies in dimension. Flat, single-process color can often look one-dimensional and lack movement. Balayage excels at creating visual depth by weaving together multiple tones. By playing with light and shadow, skilled colorists can mimic the way natural light hits the hair, making it look thicker, healthier, and more dynamic. This section explores the 12 best ways to achieve that coveted dimensional look.

How to Choose the Right Balayage for Your Skin Tone

Choosing the right balayage is about more than just liking a picture; it’s about harmony. For fair skin tones, cool tones like ash, champagne, and platinum often look striking, while warm honey tones can add a healthy flush. For medium/olive skin, gold, caramel, and bronze tones enhance the natural warmth of the skin. For dark skin tones, rich mahogany, deep mocha, and bold copper create stunning contrast and brightness. Consulting with a professional colorist ensures that the tones chosen will complement your undertones and bring out your best features.

Maintenance and Aftercare

One of the greatest benefits of balayage is its low-maintenance nature. Because the technique avoids the root area, you can typically go 3 to 4 months between touch-ups. However, to keep the dimension looking fresh and the hair healthy, a proper aftercare routine is essential.

  • Use Purple Shampoo Sparingly: If you have blonde or cool-toned balayage, a purple shampoo once a week will prevent brassiness. Overuse can leave hair looking dull or ashy.
  • Hydrate, Hydrate, Hydrate: Lightened hair requires moisture. Invest in a high-quality hydrating mask to keep the ends soft and the color glossy.
  • Heat Protection: Always use a heat protectant before styling. Heat damage can cause color to fade faster and disrupt the seamless blend of the painted sections.

Conclusion: Embracing Effortless Beauty

In a world where beauty routines often demand hours of upkeep, balayage stands out as a celebration of effortless style. It is more than just a coloring technique; it is an investment in confidence and convenience. By moving away from rigid, high-maintenance color lines and embracing the soft, natural dimension of hand-painted highlights, you allow your hair to look its best every single day—whether styled in a sleek blowout, natural waves, or a messy bun.

The 12 ideas explored above prove that there is a perfect balayage for everyone, regardless of hair length, texture, or base color. Whether you are drawn to the subtle warmth of caramel ribbons, the cool sophistication of ash brown melts, or the bold contrast of platinum pieces, the key lies in the dimension. This dimension mimics the organic way light interacts with hair, creating movement, depth, and a luminous glow that cannot be achieved with flat, single-process color.

Ultimately, balayage offers freedom—the freedom to let your hair grow out gracefully, the freedom to style it without worrying about visible roots, and the freedom to enjoy a look that is polished yet inherently natural. When you choose balayage, you aren’t just choosing a hair color; you are choosing a lifestyle of low-maintenance luxury. So, take the leap, consult with a trusted colorist, and get ready to fall in love with the most dimensional, radiant version of your hair yet.

How to Grow Out a Bob Gracefully — Without a Single Awkward Phase

April 5, 2026 by Jessica Guevara Leave a Comment

Growing out a bob doesn't have to feel like serving a sentence.

The awkward phase of growing out a bob is one of beauty's most reliable frustrations. There's the stage where it sits on the shoulder and does nothing. Then the stage where it's long enough to be inconvenient but too short to tie back properly. Then the stage where it develops a strange interior layer that curls outward at the nape. Most people give up somewhere in the middle and cut it back to a bob.

But each of these stages is solvable with the right trim strategy — and the difference between a graceful grow-out and an agonising one is usually just a 20-minute appointment every eight weeks where you know what to ask for. This guide maps out the exact stages of growing a bob to shoulder-length or beyond: which shapes to cut at each stage, what to ask your stylist for at each appointment, and how to use accessories, styling, and the butterfly cut's layering philosophy to make every stage feel intentional rather than in-between.

→ The most important grow-out rule: keep trimming. The instinct when growing hair is to avoid scissors entirely — but regular small trims during a grow-out remove the damaged, uneven sections that make the awkward phases look worst. Every eight weeks, a small trim maintains a shape rather than undermining the growth.

14 Seamless Grow-Out to Transitioning Your Bob Gracefully:

1. The Sophisticated Silver Micro-Trim

This classic jaw-length bob exemplifies the first phase of a graceful grow-out, where the focus is on maintaining a sharp, clean perimeter while allowing the natural silver tones to provide dimension. The cut features subtle internal weight removal to ensure the ends don't become overly boxy as they transition toward the neck, keeping the silhouette light and mobile. By prioritizing a precise trim at this stage, the look remains intentional and polished, effectively bypassing the "triangle head" effect that often plagues early growth.

2. The Floral Half-Up Transition

As the bob moves into the nape transition phase, utilizing intentional hardware like a matte floral claw clip becomes a strategic way to manage mid-length layers. This half-up style pulls back the top sections that are finally long enough to pin, effectively taming the "interior layer" while allowing the bottom length to graze the shoulders. It is a perfect example of using accessories to bridge the gap between a short bob and a lob, creating a curated aesthetic that feels like a deliberate style choice rather than a temporary in-between phase.

3. The Polished Butterfly Lob

Representing the "Butterfly Evolution" of the grow-out process, this long bob incorporates deep, sweeping face-framing layers that blend older lengths with new growth. The side-swept volume at the roots and the soft, inward-curling ends draw the eye upward, highlighting the face and distracting from the hair’s transition over the shoulders. This stage is all about "The Face-Frame Bridge," where the silhouette is softened with disconnected layers to ensure the hair moves with a sense of "quiet luxury" and intentionality as it approaches chest-length.

4. The Voluminous Sculpted Shag

Embracing maximum texture and height, this look demonstrates how to use the "Internal Architecture" of thick, coily hair to create a high-fashion focal point during a grow-out. By leaning into dramatic volume at the crown and sculpted face-framing pieces, the awkwardness of the length is completely neutralized by the boldness of the shape. This style utilizes a "Butterfly Cut" philosophy by layering the hair to move outward rather than just downward, turning a transitional length into a powerful, editorial statement that celebrates movement and natural density.

5. The Face-Framing Flip

This look beautifully illustrates the power of the "Face-Frame Bridge" by incorporating sweeping layers that curve away from the eyes, creating an intentional silhouette even as the length hits the jawline. By styling the front sections with outward volume, the haircut avoids looking like a heavy, growing-out mass and instead adopts a sophisticated, retro-inspired shape. This technique effectively manages the "Micro-Trim" phase by focusing on movement and lift around the face, ensuring the grow-out feels curated and high-end rather than a waiting game for more length.

6. The Strategic Claw Clip Twist

When the nape of the neck becomes a frustration during the middle months of growth, a large claw clip serves as the ultimate "Survival Toolkit" essential for a sleek, on-the-go aesthetic. This styling choice tucks away the awkward interior layers that tend to flip at the shoulder, while allowing the face-framing pieces to remain loose for a soft, intentional feel. It is a perfect example of how to handle the "Nape Transition" with a functional yet chic accessory that keeps the hair off the collar and maintains a polished, "quiet luxury" appearance.

7. The Textured Golden Wave

Transitioning a blonde bob becomes much more manageable when embracing heavy texture and "S-waves," which act as a strategic camouflage for uneven lengths during a grow-out. The internal weight removal throughout the mid-lengths prevents the "triangle head" effect, allowing the curls to sit softly rather than stacking outward in a boxy shape. This style is ideal for those moving toward a "Butterfly Cut" evolution, as the multi-dimensional layers and tousled finish create a cohesive, intentional style that masks the exact stage of the hair's growth journey.

8. The Side-Swept Root Lift

A dramatic side part is a highly effective way to shift the focal point of a bob during the early stages of growth, providing instant volume and a modern, asymmetrical edge. By lifting the hair at the root and sweeping it over, you can hide any "flatness" that often occurs when the hair starts to feel heavy and transition-weary. This approach works as a "Strategic Maintenance" hack, using a simple change in direction to refresh the haircut’s personality and give the illusion of a deliberate, edgy style while the back and sides gain the necessary length.

9. The Polished Espresso Lob

This voluminous long bob marks the successful transition through the "Nape Transition" phase, where the hair has finally cleared the shoulders with a smooth, inward-curving finish. By maintaining a deep side part and subtle face-framing layers, the style avoids a heavy or weighted look, instead embracing a sophisticated "quiet luxury" aesthetic that feels entirely intentional. This length is the perfect canvas for "The Face-Frame Bridge" philosophy, using a slight bend in the front sections to provide structure and elegance while the back layers catch up in length.

10. The Mid-Length Transition to Long-Layered Integration

This side-by-side comparison perfectly captures the journey from a texturized "lob" to a fully integrated, long-layered silhouette, emphasizing the importance of "Strategic Maintenance" over time. In the first phase, beachy waves are used as a clever styling hack to camouflage the unevenness that often occurs as hair hits the shoulder, effectively neutralizing the "triangle head" effect with soft, internal weight removal. The subsequent transformation shows the result of consistent "dusting" and shape-shifting; the hair has successfully transitioned into a sleek, V-shaped perimeter that eliminates the memory of the bob. This final length demonstrates a "Butterfly Evolution" where the previous short layers have been blended seamlessly into a cohesive, flowing look that moves with intentionality and "quiet luxury."

11. The Voluminous Butterfly Evolution

As a bob transitions into the "Butterfly" phase, long, disconnected layers become essential for maintaining lift and movement. This style focuses on heavy face-framing pieces that bridge the gap between the original shorter lengths and the new growth reaching toward the shoulders. By utilizing a voluminous blowout that flicks the ends outward, the "in-between" length is transformed into a glamorous, intentional silhouette that effectively disguises the transition. It’s a prime example of how strategic layering can turn the most difficult grow-out stage into a high-fashion focal point.

12. The Polished Headband Survival Strategy

When a growing bob reaches the stage where it sits flat or develops an awkward interior layer at the nape, a structured headband becomes an indispensable tool for maintaining a curated aesthetic. By pulling the hair back and away from the face, this accessory instantly adds height and volume at the crown while neatly managing the length hitting the collarbone. This look demonstrates how to use "quiet luxury" hardware to bypass the frustration of daily styling, ensuring the grow-out feels like a sophisticated fashion choice rather than a temporary lapse in maintenance.

13. The Half-Up Space Bun Bridge

Embracing playful, high-positioned hardware like space buns is a genius way to manage top layers that have gained significant length but aren't yet ready for a full ponytail. Combined with a soft, wispy fringe, this style utilizes "The Face-Frame Bridge" philosophy to keep the focus on the eyes and forehead rather than the shifting perimeter at the neck. The textured, pastel waves add a soft grit that masks any uneven ends, turning the mid-neck transition into a creative opportunity for bold, modern styling that feels entirely intentional.

14. The Embellished Side-Tucked Wave

Utilizing strategic hardware is a masterclass in navigating the early stages of a bob grow-out, especially when layers start to feel heavy or uncooperative. By pulling one side back with a series of jeweled pins, you instantly create a sleek, asymmetrical focal point that bypasses the "triangle head" effect often seen at this length. This styling hack not only manages the bulk near the ear but also allows the natural texture of the hair to shine on the opposite side, proving that the transition toward a lob can be an opportunity for high-glamour, intentional accessorizing rather than a beauty frustration.

Strategic Maintenance: The "Internal Architecture"

  • Managing Density: How to address the "middle layer" that thickens as the hair grows, causing the bob to look dated.
  • The Science of the Split: Why a $⅛$-inch "dusting" every 8 weeks actually accelerates visible growth by preventing breakage.
  • The Nape Undercut (Optional): A secret trick for those with thick hair to remove the "shelf" effect during the mid-neck phase.

The Face-Frame Bridge: Diverting the Eye

  • The Power of the Perimeter: How bangs or face-framing "bits" make an awkward length look like a "Shag" or a "Wolf Cut."
  • Creating a Focal Point: Using bottleneck bangs to frame the eyes, drawing attention away from the length hitting the shoulders.
  • The "Tuck & Pin" Method: How to use face-framing layers to create the illusion of a finished style while the back continues to grow.

The Survival Toolkit: Accessories & Products

  • The Power of the Silk Scarf: Using headwraps to disguise "flat" roots during growth spurts.
  • Product Swapping: Moving from heavy waxes to lightweight texturizing mists and serums for flow.
  • Strategic Hardware: Using decorative bobby pins to "fake" a shorter, pinned-back look on days when the length feels unmanageable.

Conclusion: Consistency is King

  • Summary of the 8-Week Rule.
  • Final encouragement: The awkward phase is only awkward if it looks accidental; shape makes it style.

Technical Note for Content:

Remind readers that the average growth rate is 0.5 inches per month. By trimming only 0.25 inches every eight weeks, they are still netting a total of 0.75 inches of growth every two months, but with a silhouette that looks like a high-end haircut rather than a neglected one.

Does this addition of the "Face-Frame Bridge" help bridge the gap between the different growth phases for your readers?

The Best Haircuts for Curly Hair — Work With It, Not Against It.

April 5, 2026 by Jessica Guevara Leave a Comment

Curly hair doesn't need to be tamed. It needs a cut that understands what it's doing.

The history of curly hair and haircuts is largely a history of stylists trained on straight hair attempting to apply the same techniques to a completely different structural reality. Dry cutting — cutting curly hair in its natural state rather than wet and straight — changed everything when it became mainstream, and the curly haircut is now one of the most specialised and considered techniques in a modern salon.

This guide covers the best cuts for curly hair in 2026: the DevaCut philosophy and what it means in practice, how the butterfly cut translates to natural curl patterns (dramatically), what the wolf cut and shag look like on curly hair, and why the lob and micro bob behave completely differently on curls than on straight hair. It also covers the most important conversation to have with your stylist before any curly cut: shrinkage, and how much length to account for.

→ Before any curly haircut: ask your stylist if they cut curly hair dry or wet. A stylist who cuts curly hair wet and then straightens it to check the shape has not cut your curly hair — they've cut your straight hair. The two are different cuts.

11 Sophisticated Curly Haircuts To Try In 2026:

The Sculpted Curly Bob with Full Fringe

This modern take on the curly bob avoids the dreaded triangle shape by utilizing strategic internal layering to create a soft, rounded silhouette that frames the face perfectly. By incorporating a full, curly fringe, the cut draws immediate attention to the eyes while maintaining a sophisticated balance of volume throughout the crown. It is an ideal choice for those seeking a manageable yet high-fashion look that celebrates the natural spring of tighter curl patterns without the weight of excess bulk.

Mid-Length Voluminous Layers for Defined Curls

For curls that crave movement and height, this mid-length layered cut provides the ultimate structural foundation to prevent the hair from looking flat at the roots. The shorter layers surrounding the face create a beautiful cascading effect, allowing each ringlet to bounce independently and showcase its unique coil definition. This style is the epitome of "quiet luxury" for curly hair, offering a polished and intentional look that transitions seamlessly from casual days to high-end events.

The Maximum Volume Curly Shag

Embracing a more bohemian and effortless aesthetic, this highly textured shag uses short, choppy layers to amplify volume and create a bold, expansive shape. The highlights throughout the curls add a dimension of light and shadow, making the texture pop and giving the hair a sun-kissed, lived-in feel. It’s a powerful statement cut that works with the hair's natural inclination toward frizz and fullness, turning what many fight against into a deliberate and stylish asset.

Dramatic Butterfly Layers on Cascading Curls

The butterfly cut remains a top trend for 2026 because of its ability to offer the illusion of short hair's volume while maintaining long-hair length. These dramatic, face-framing "wings" are cut into the curls to provide incredible lift around the cheekbones and jawline, while the longer back sections provide a beautiful flow of ringlets down the shoulders. This sophisticated silhouette is perfect for the minimalist who wants a high-impact transformation that enhances natural texture through expert-level engineering.

The Tapered Long Cut for 3b Curls

This elongated silhouette demonstrates the importance of weight distribution in tighter 3b curl patterns, ensuring the hair maintains height at the crown without losing its vertical flow. By incorporating subtle, face-framing "bits" and a centered part, the cut allows the curls to frame the features with intentionality rather than overwhelming them. It is a sophisticated choice for those who want to keep their length while benefiting from the structural integrity that a professional dry-cut provides.

The Rounded Copper Coily Cut

Specifically engineered for high-density coily textures, this rounded cut focuses on architectural shape to celebrate the hair’s natural volume and "fro" potential. The vibrant copper hue enhances the depth of the layers, while the tapered sides prevent the style from feeling too heavy around the jawline. This look is a testament to the "curl-by-curl" philosophy, as it ensures a perfectly symmetrical and balanced halo that remains consistent as it dries and shrinks.

Deep Side-Parted Layered Curls

For a glamorous and high-contrast aesthetic, the deep side-parted cut utilizes extreme layering to create a dramatic sweeping effect that adds immediate volume to the top of the head. This technique allows the curls to cascade elegantly over one shoulder, highlighting the defined ringlets and providing a soft, romantic frame for the face. It’s an ideal "quiet luxury" style that feels curated and polished, perfect for showcasing healthy, hydrated 3a-3c curls with maximum bounce.

The Bright Blonde Curly Shag with Bangs

This high-impact blonde shag combines a bold color choice with a heavy, textured fringe to create a youthful and energetic silhouette. The short layers throughout the crown are designed to prevent the hair from pulling flat, while the bright highlights accentuate each individual coil's movement and shape. This cut is perfect for the minimalist who wants their hair to be their primary accessory, offering a balanced blend of "90s cool" and modern styling intentionality.

Raven Side-Swept Cascading Curls

This high-contrast, jet-black style utilizes long layers to manage the weight of high-density 3a-3b curls, preventing the hair from pulling flat at the roots. By maintaining a deep side part, the cut encourages a dramatic sweep of volume that creates an elegant, asymmetric frame for the face. It is a perfect example of "quiet luxury" for the minimalist woman who wants a look that feels naturally effortless yet remains structurally sound through intentional layer placement.

The Platinum Curly Halo with Soft Fringe

This expertly shaped mid-length cut showcases the power of the "dry cut" technique, ensuring a perfectly rounded perimeter that respects the natural bounce-back of 3c curls. The introduction of a soft, eyebrow-skimming fringe breaks up the forehead and draws immediate focus to the eyes, while the platinum blonde color adds a modern, high-fashion edge to the texture. This silhouette is specifically designed to eliminate the "triangle" effect, providing a balanced and airy volume that feels fresh and curated.

The Effortless Curly Pixie Shag

Short, cropped, and undeniably chic, this curly pixie shag is the ultimate beginner-friendly style for those transitioning to a more manageable length. By keeping the density focused at the crown and incorporating a tousled, piecey fringe, the cut highlights the cheekbones and creates a playful yet sophisticated profile. This style works with the hair’s natural movement to provide a "wake-up-and-go" aesthetic that perfectly aligns with the intentionality of a modern, minimal beauty routine.

Curl Pattern Guide — Tailoring the Cut to Your Type

Wavy (2a–2c):
Wavy hair exists in a delicate balance—it craves volume but is easily flattened by excess weight. The primary goal for this texture is strategic weight removal. Without it, waves can form a triangle shape, looking heavy at the ends while lacking lift at the root. Techniques like point-cutting and long internal layers are essential. These methods remove bulk from the interior of the hair without disturbing the wavy perimeter, allowing the natural "S" shape to spring up. Asking your stylist to "ghost layer" (creating very subtle, weightless layers) can encourage lift at the crown without sacrificing the length that gives waves their characteristic movement.

Curly (3a–3c):
Curly hair requires a mathematical approach to cutting. Because curls contract as they dry, a cut that looks perfect when wet can shrink into a shapeless mass when dry. The focus here is strategic layer placement and calculating the "bounce back" factor—the percentage of shrinkage unique to your curl density. A skilled stylist will typically cut curly hair dry (or use the curl-by-curl method) to see exactly how each curl cluster sits. The goal is to distribute volume evenly, preventing the dreaded "pyramid" shape (narrow at the top, wide at the bottom) by using layering that supports the curl pattern from the root to the tip, ensuring the shape remains consistent as the hair dries and contracts.

Coily (4a–4c):
For coily textures, the cut is less about managing individual strands and more about sculpting a silhouette. Because coily hair experiences the highest degree of shrinkage (often 50-75%), traditional layering can sometimes lead to unintended bulk. The most effective approach is shape-first cutting, often referred to as tapering or fro-shaping. This involves cutting the hair in its naturally shrunken, dry state to define the overall outline—whether a rounded Afro, a high-top, or a tapered nape. This method celebrates the hair's structural integrity, ensuring that the shape looks intentional and polished whether the hair is in a stretched state or its full, glorious coily volume.


V. Styling Foundation: Post-Cut Maintenance

A great haircut is a blueprint, but how you style it determines the final structure. Establishing a consistent post-wash routine is the key to making your cut last between salon visits.

The LOC Method:
This three-step method is the gold standard for sealing in moisture, which is critical for preventing breakage and maintaining the integrity of your cut.

  • Leave-in (L): Start with a water-based leave-in conditioner on soaking wet hair. This is the hydration base.
  • Oil (O): Apply a sealing oil (like jojoba, argan, or castor oil) over the leave-in. Oil penetrates the hair shaft and locks in the water and conditioner.
  • Cream (C): Finish with a thick curl cream or butter to define the curl clumps and smooth the cuticle. This creates a barrier against humidity and seals the shape you just paid for.

The Art of the Finish:

  • Diffusing: Using a diffuser attachment on low heat with a "hover" method (not touching the hair until a cast forms) encourages root lift and faster drying. This method is ideal for adding volume and setting a structured shape.
  • Air-Drying: The gentlest option, air-drying allows the curl pattern to form entirely naturally. For thick hair, this requires patience. To prevent the weight of water from elongating the curls and ruining the shape, use a microfiber towel to gently scrunch out excess water first.

Preserving the Shape:
To protect your cut while you sleep:

  • The "Pineapple": Gather your hair into a very loose, high ponytail right at the very top of your forehead. This prevents friction on the ends and preserves the curl clumps.
  • Silk Protection: Sleep on a silk or satin pillowcase or wear a satin bonnet. This eliminates friction that causes frizz and breakage, ensuring the shape lasts for 3-4 days post-wash.
  • [Inline Link #2] Recommended styling tools: PATTERN Beauty Curl Mousse for lightweight hold without crunch, or the Tangle Teezer for Curls to detangle wet hair without disrupting the curl pattern.

VI. The "In-Between" Phase: Managing Growth and Health

As your hair grows, the weight and density change. Managing this phase is crucial to maintaining the shape and health of your hair until your next cut.

Trimming for Growth:
There is a significant difference between maintenance trims and shaping cuts. A "dusting" involves trimming only the very tips (¼ inch or less) to eliminate split ends while preserving every millimeter of length. This is ideal if you are actively trying to grow your hair longer. A structural cut, on the other hand, is required every 8–12 weeks to maintain the shape of a specific style (like a shag or a layered cut) and prevent the hair from looking bottom-heavy.

The Density Factor:
As hair gains length, gravity changes the game. A product cocktail that worked for shoulder-length thick hair may be too heavy for waist-length hair, or not moisturizing enough for a new pixie cut. You will need to adjust the amount of product you use based on the weight distribution. As hair grows, the "weight" moves lower, often requiring lighter products (like swapping a heavy cream for a mousse) to prevent the roots from looking flat.

The Scalp Connection:
A healthy cut starts at the scalp. Buildup of dead skin cells and product can clog follicles, hindering new growth and causing inflammation.

  • Exfoliation: Use a scalp scrub or a brush with soft silicone bristles to physically exfoliate the scalp once a week.
  • Stimulation: Regular scalp massages (using oils like rosemary or peppermint) increase blood flow to the follicles, promoting a healthy environment for strong, resilient hair to grow into your new cut.

VII. The Salon Brief: Managing Your Appointment

The outcome of your cut hinges on communication. Because curl patterns vary so widely, you must act as the expert on your own hair during the consultation.

The Script:
Be specific to avoid misinterpretation. Instead of saying "just a trim," use phrases like:

  • "I want to maintain my length, but I need the density reduced from the underneath sections to remove the bulk."
  • "Please account for shrinkage. I want the dry shape to hit my collarbone, even if it looks shorter when wet."
  • "I prefer a dry cut so you can see my true curl pattern before taking off length."

Visual Communication:
Bring reference photos, but use them as a guide for vibe and shape, not as a carbon copy. Acknowledge the limitations of your specific curl type. A photo of a loose, wavy butterfly cut (2b) is not a realistic expectation for tight coils (4c), but it is a great reference for layering placement. Point to the specific elements you like in the photo—"I love the volume at the crown and the face-framing pieces in this picture"—to give your stylist actionable goals.


VIII. Conclusion & Expert Resources

The Final Word:
Thick, curly hair is not a problem to be solved; it is a unique texture to be engineered. The frustration of heavy, shapeless hair is rarely a flaw in the hair itself, but rather a mismatch between the cut technique and the hair’s density and curl pattern. By understanding the principles of weight removal, strategic layering, and proper styling maintenance, you transform your thick hair from a burden into a manageable, expressive asset. A well-engineered cut offers freedom—the freedom to wash-and-go, to wear your hair with confidence, and to spend less time fighting your texture and more time enjoying it.

Product Recommendations:

  • Curlsmith Kit: Ideal for experimenting with protein and moisture balance to find what makes your specific cut look its best.
  • PATTERN Mousse: Excellent for providing hold on thick hair without the crunch, preserving the shape of layers.
  • Universal Diffuser Attachment: Essential for drying thick hair efficiently while encouraging curl clumping and root volume.
  • Silk/Satin Pillowcase: A non-negotiable investment to preserve the shape of your cut and prevent overnight frizz.
  • Tangle Teezer for Curls: The best tool for detangling thick, curly hair in the shower while conditioner is in, preventing mechanical damage.

Related Reading:

  • The Butterfly Cut: A deep dive into the layered technique ideal for removing weight from thick, long hair while keeping perimeter length.
  • The Wolf Cut: How this hybrid shag-mullet style works specifically for thick, curly textures to create a rock-and-roll silhouette.
  • Air-Drying Techniques: A guide to refreshing and drying thick, curly hair without heat to maintain the integrity of your cut.

The Best Haircuts for Thick Hair — How to Lose the Weight Without Losing the Length

April 4, 2026 by Jessica Guevara Leave a Comment

Thick hair is a gift that most thick-haired women spend years trying to manage. The right cut is the answer.

Thick hair's biggest problem isn't volume — it's weight. Dense, heavy hair pulls layers flat, resists movement, and makes some of the most popular cuts (the lob, the blunt bob) look solid and blocky rather than sharp and graphic. The solution isn't more product or more time with heat tools. It's a cut that removes the right weight from the right places.

This guide covers the techniques that transform thick hair: point-cutting, internal layering, thinning shears used strategically, and the specific cuts that wear the best on dense hair — the butterfly cut, the wolf cut, the long shag, and the specific bob variations that work when the perimeter isn't undermined by bulk. It also covers what not to do, because a bad cut on thick hair is genuinely more difficult to live with than a bad cut on any other texture.

→ When asking for weight removal on thick hair, be specific about where: 'I want the bulk removed from the underneath sections and the mid-lengths, but I want to keep the perimeter clean.' This tells your stylist exactly where to thin without disrupting the shape.

14 Professional Techniques for Dense Hair:

1. The French Girl Bob with Sliced Ends

This chin-length bob is the ultimate solution for thick-haired women who fear the "mushroom" effect. By utilizing a "slicing" technique through the mid-lengths and ends, the stylist removes the internal bulk that usually causes short cuts to flare out. The result is a sharp, graphic silhouette that hugs the jawline beautifully. The addition of a soft, wispy fringe further breaks up the density of the hair, ensuring the style feels airy and Parisian-chic rather than heavy and solid.

2. The Internal Layered Butterfly Cut

For those who want to maintain maximum length, this butterfly cut is a masterclass in strategic weight removal. The face-framing layers provide instant lift and volume at the crown, while the longer, internal layers ensure the hair flows without feeling like a heavy curtain. By point-cutting the ends, the stylist creates a "shattered" look that allows the thick texture to move with fluidity. This cut is perfect for transforming dense, flat hair into a bouncy, multi-dimensional style that feels significantly lighter.

3. The Textured Modern Wolf Cut

The wolf cut is a game-changer for naturally thick hair because it leans into the hair’s volume rather than fighting it. This style features heavy layering throughout the crown and mid-lengths, which effectively "debulks" the hair while creating a cool, edgy texture. The choppy, shaggy ends prevent the hair from looking blocky at the shoulders, making it an ideal choice for someone looking to reduce daily styling time while maintaining a deliberate, high-fashion shape.

4. The Sleek Sliced Lob

This sophisticated long bob (lob) demonstrates how thick hair can look sleek and streamlined when the perimeter isn't undermined by bulk. By removing significant weight from the underneath sections at the nape of the neck, the hair is able to lay flat and follow the curve of the shoulders. The subtle, invisible layering throughout the lengths ensures the hair remains manageable and smooth, proving that you don't need a massive amount of volume to make a statement with thick hair.

5. The Stacked Graduation Bob

A stacked bob is the ultimate architecture for thick hair, using graduated layers at the nape to build a structured, lifted shape. By cutting the hair shorter at the back and leaving more length toward the front, the weight is shifted upward and away from the neck. This creates a sharp, angled profile that feels incredibly lightweight while still showcasing the natural density of the hair in a controlled, sophisticated way.

6. The Textured Shaggy Lob

This medium-length cut is all about removing bulk through choppy, disconnected layers. For thick hair that tends to feel like a "curtain," this shaggy approach introduces "windows" of airiness, allowing for natural waves and movement. The feathered ends prevent the style from looking too bottom-heavy, making it an effortless option for someone who wants a wash-and-go look that doesn't sacrifice style for manageability.

7. The Face-Framing Internal Layer Cut

When keeping length is the priority, internal layering is the secret weapon. This cut features long, sweeping layers that start around the collarbone to frame the face without thinning out the perimeter too much. It addresses the "heavy" feeling by thinning the mid-lengths, ensuring the hair has plenty of swing and bounce. This is a perfect example of a "stealth" cut—it looks like one solid length at first glance, but it's engineered to feel much lighter.

8. The Precise A-Line Lob

For those who love a sleek, polished aesthetic, the A-line lob provides a clean perimeter without the blockiness. The hair is slightly shorter in the back to help the front sections lay flat and forward, preventing the "bell shape" often associated with thick, blunt cuts. By utilizing point-cutting on the ends, the stylist ensures the bottom edge remains sharp and graphic rather than chunky, resulting in a streamlined look that radiates intentionality.

9. The Feathered Shag with Internal Layering

This shaggy cut is a perfect example of how internal layering can reduce weight without losing substantial length. By integrating hidden layers throughout the mid-shaft, the stylist removes the bulk that typically makes thick hair feel heavy. The face-framing layers are highly textured and point-cut to create a soft, feathery silhouette that looks effortless and cool. This technique allows for beautiful movement, preventing the hair from collapsing into a dense, flat curtain.

10. The Internal Volume Butterfly Cut

For maximalists who want both volume and length, this voluminous butterfly cut is the ultimate choice. It utilizes deep, invisible internal layers starting near the collarbone to significantly reduce the bulk while still supporting a grand, bouncy look. The perimeter is point-cut rather than blunt, ensuring a "shattered" end texture that gives the multi-dimensional structure a light, flowing finish. It proves that weight removal can be used to engineer more movement and swing.

11. The Texturized Long A-Line Lob

This long A-line lob is a masterclass in weight distribution for a short-to-medium length. The cut is subtly shorter in the back, shifting the weight forward for a streamlined profile. Heavy point-cutting and texturizing throughout the ends prevent the "blocky" effect, creating a shattered, airy look that allows the natural wave of thick hair to define the style. The internal bulk has been removed, making the collarbone-length perimeter sharp and graphic rather than chunky.

12. The Ultra-Long Face-Framing Sweep

This striking cut is designed for women who refuse to lose any length. The "weight" problem is solved by point-cutting extensive, long face-framing sections that start near the chin and cascade dramatically. This removes a significant amount of bulk around the face and shoulders. For the extremely long perimeter, the stylist uses invisible, internal thinning at the mid-lengths to ensure the hair doesn't feel like an immovable mass, resulting in a dramatic sweep of lightened-up texture.

13. The Textured Short Shag

For thick-haired women who want a dramatic change, this short shag is a brilliant example of intentional texture over sheer volume. By utilizing heavy point-cutting and slicing throughout the top and sides, the stylist removes the bulk that typically makes short cuts on dense hair look round or "helmet-like." The result is a piecey, edgy silhouette where the hair moves independently. This cut turns density into an advantage, providing a built-in structure that holds its shape with minimal styling effort.

14. The Multi-Dimensional Internal Layer Cut

This long-layered look is engineered for maximum swing. The stylist has implemented deep internal layering and mid-length thinning to "debulk" the hair without compromising the lush, thick appearance. Strategic face-framing layers beginning at the cheekbone add a sense of lightness and lift, preventing the weight of the hair from pulling the crown flat. By point-cutting the perimeter, the ends remain soft and fluid, allowing the multi-toned texture to catch the light and create a sense of depth and airiness.

What to Avoid: The "Red Flags" for Dense Hair

  • The "Triangle" Effect: Why blunt perimeters with no internal movement result in hair that flares out at the bottom.
  • Over-Layering the Crown: How too-short top layers can result in a "pouf" that is difficult to tame.
  • The "Mushroom" Bob: Why thick hair requires a graduated or undercut approach to avoid looking overly round.
  • Extreme Razoring: Why a razor on certain thick, coarse, or wavy textures can lead to frayed ends and flyaways.

The Stylist Script: How to Talk the Talk

  • Be Specific on Location: "I want the bulk removed from the underneath sections and the mid-lengths, but I want to keep the perimeter clean."
  • Ask for "Slicing": Requesting a slicing technique rather than just thinning shears for a more tailored finish.
  • Visual Aids: Bringing photos that match your specific hair texture (wavy vs. straight) so the stylist understands how your hair responds to weight removal.

Styling the "New" Texture: Maintaining the Airiness

  • The "Rough Dry" Technique: Why thick-haired individuals should blow-dry the roots and under-sections first to prevent the hair from settling into a heavy shape while damp.
  • Choosing Weightless Finishers: * Switching from heavy waxes to dry texture sprays to highlight the new layers.
    • Using lightweight hair oils only on the ends to prevent the "bulk" from returning via frizz.
  • The Role of Tension: How using a large round brush can help "stretch" the density, making the weight removal even more apparent and sleek.
  • Managing Regrowth: Why thick hair needs a "dusting" or a "weight-refresh" every 6–8 weeks to prevent the internal layers from becoming bottom-heavy again.

Conclusion: Embracing the Lightness

  • Confidence in Density: Reiterate that thick hair is a luxury once the "weight" is managed correctly.
  • The Stylist Partnership: Remind the reader that a great cut is a collaboration—be vocal about your hair's history and how it behaves in humidity.
  • The Final Result: You don't have to choose between length and manageability; with the right architectural approach, you can have both.

Sidebar/Tip Box: A quick guide to "The Nape Secret"—Ask your stylist to undercut or heavily thin the bottom two inches of hair at the base of the skull. This allows the rest of your hair to lay closer to your head, instantly reducing the "volume" without losing any visible length.

The Best Haircuts for Fine Hair — Volume Without the Drama

April 4, 2026 by Jessica Guevara Leave a Comment

Fine hair doesn't need more product. It needs a better cut.

Fine hair is consistently one of the top hair concerns for women — not because fine hair is difficult to style, but because most women with fine hair have been given the wrong cut for it and compensated with an exhausting product routine ever since. The right cut for fine hair creates the illusion of volume structurally, without relying on mousse, dry shampoo, and constant backcombing to hold a shape that collapses by lunchtime.

This guide covers the cuts that work hardest for fine hair in 2026: the lob with invisible layering, the blunt bob, the bixie, the butterfly at medium length with conservative layering, and the specific pixie variations that add visual density. But more importantly, it covers the cuts that actively hurt fine hair — the very short layers and dramatic layering techniques that make fine hair look thinner, not fuller. The difference is specific and actionable.

→ The single most damaging thing you can do to fine hair: over-layer it. Too many layers on fine hair leave the ends wispy and the overall style looking thin. Ask your stylist for 'minimal layering — just enough for movement' rather than 'lots of layers for volume.'

The Fine Hair Edit: 15 Structural Cuts for Effortless Density:

1. Two-Tone Pixie Undercut

Structural Support for Fine Hair: This style utilizes two key 2026 principles to maximize volume. Structurally, the very short undercut on the sides eliminates weight that often drags fine hair flat. Visually, the contrast between the darker base color and the light grey top creates a shadow effect at the root, simulating greater hair density at the scalp.

2. Beveled Bob with Full Fringe

The Blunt Perimeter and Hairline Architecture: This cut achieves visual thickness by employing a strict, blunt weight line at the chin. By keeping the ends heavy, it prevents the classic "wispy" look fine hair can acquire at shoulder length. The addition of a full, structured fringe provides immediate volume at the forehead, effectively framing the face and adding overall presence to the haircut.

3. Copper Tapered Short Cut

Nape Management and Crown Density: The volume in this cut is entirely architected by the structure of the taper. By meticulously removing length at the nape and sides, all the natural weight of the hair is effectively pushed upward. This concentration of hair at the crown, combined with subtle texture, provides a permanent, gravity-defying lift that lasts all day without relying on sticky products.

4. Classic Grey Volume Crop

Soft Structure and Integrated Layering: This haircut focuses on building fullness through a softly rounded silhouette. Integrated internal layering is used strategically to create pockets of air and lift among the fine strands, preventing them from compacting together and laying flat. This style emphasizes softness and shape rather than sharp lines, making it an excellent option for natural texture.

5. Conservative Butterfly for Curly Fine Hair

Modified Layering for Long-Length Density: This is an ideal visual for adapting the popular "Butterfly Cut" for fine texture. The key modification is the concentration of volume: the shortest, face-framing layers provide lift and shape near the crown and eyes, but the underlying structure and perimeter at the shoulders remain blunt and dense. This careful balance prevents the ends of the hair from looking sparse or see-through.

6. The Mid-Length Lob with Soft Face-Framing

Strategic Weight Distribution for Fine Strands: This cut illustrates the "safe zone" for fine-haired clients who want length. By maintaining a blunt perimeter at the base, the hair retains its maximum visual density. The internal weight is kept intact, while subtle face-framing pieces add movement and lift around the eyes without thinning out the overall silhouette.

7. The Textured Bixie with Micro-Fringe

Internal Texture and Crown Volume: A masterclass in "short but structured," this cut uses internal texture to create height and separation. By keeping the nape and sides closely tailored, the fine hair on top is forced to stand up and create volume rather than lying flat. The micro-fringe adds an edgy, intentional feel that draws focus to the structure of the cut rather than the thickness of individual strands.

8. The Platinum Graduated Bob

Structural Stacking and Perimeter Strength: This is the ultimate "density" cut. The graduated stack at the back creates a solid foundation that literally props up the crown layers, providing volume that won't collapse. The crisp, razor-straight lines at the jawline create a clear horizontal weight line, making the hair appear significantly thicker and more voluminous from every angle.

9. Long Fine Hair with Sun-Kissed Ribboning

Visual Dimension Through Color and Blunt Ends: For those who refuse to go short, this style demonstrates how to manage long, fine hair in 2026. The ends are cut in a solid, blunt line to avoid a wispy finish, while "ribboned" highlights add visual dimension. This color technique creates an optical illusion of depth, making the hair look multi-layered and full without the need for actual, thinning layers.

10. The Ultra-Blunt Midi-Lob

Maximum Density Through Weight Lines: This cut is the definitive answer to "wispy" ends. By maintaining a sharp, horizontal line just above the chest, the hair appears uniformly thick from roots to tips. The absence of traditional layering keeps the bulk of the hair intact, allowing the natural weight to create a sleek, expensive-looking finish that doesn't collapse by midday.

11. The Texturized Bob with Wispy Fringe

Strategic Movement and Airiness: For fine-haired individuals who prefer a "lived-in" look, this bob uses internal texturizing rather than heavy external layers. The soft, piecey fringe adds immediate interest and volume at the crown, while the slightly shattered ends provide movement. This structure allows for a "messy" style that still feels full and intentional.

12. The Dimensional Wavy Lob

Volume Through Wave and Color Architecture: This style demonstrates how a great cut and color work in tandem. The blunt mid-length provides the necessary foundation, while soft, internal "invisible" layers allow for the hair to hold a wave. The multi-tonal blonde highlights act as a "visual plumper," adding depth and the illusion of a much thicker hair fiber.

13. The A-Line Sleek Bob

Structural Forward Weighting: By subtly angling the cut so the hair is slightly longer toward the front, this style creates a "swing" that adds natural volume. This geometric approach directs the visual weight toward the face, ensuring the hair looks dense and healthy. It’s an ideal "zero-drama" cut that looks polished with minimal styling effort.

14. The Classic Shoulder-Length Blunt Cut

The "Gold Standard" for Fine Hair: This image perfectly captures the power of a solid perimeter. By keeping the length consistent all the way around, the hair achieves a "curtain of silk" effect. The lack of thinning ensures that every strand contributes to the overall silhouette, providing a structural fullness that layering simply cannot replicate for fine textures.

15. The Modern Soft Shag with Bottleneck Fringe

Structural Movement without the Sparse Ends: This 2026 adaptation of the shag proves that fine hair can handle layers when executed with precision. By utilizing "bottleneck" fringe and face-framing "petals," the cut creates significant volume at the crown and cheekbones where it matters most. To avoid the common pitfall of wispy ends, the perimeter is kept relatively blunt, ensuring the hair maintains its structural density while offering a breezy, effortless movement.

Beyond the Chair: The "Fine Hair" Protocol

  • The "Root-Only" Rule: Guidelines for applying products only where they are needed to avoid collapsing the structure.
    The fastest way to sabotage a great cut is to weigh it down with product. Volumizers, mousses, and even conditioners should be applied primarily to the mid-lengths and roots (for lift), while keeping the ends as light as possible. A heavy, product-laden end will drag the entire style down. Less is always more; start with a pea-sized amount and add only if necessary.
  • Thermal Protection without the Weight: Prioritizing lightweight mists over heavy oils/creams for 2026’s "clean" aesthetic.
    The modern “clean” look prioritizes movement and airy texture, which is perfect for fine hair. Swap heavy serums and oils for ultra-fine thermal protection mists or sprays. These provide necessary heat protection without the slick, heavy coating that causes fine hair to stick together and look greasy or stringy.
  • Strategic Drying: Using a "rough dry" technique to 80% completion to encourage natural lift before introducing a brush.
    How you dry is as important as how you cut. Begin by “rough drying”—using your fingers to lift and agitate the hair at the roots while directing the hairdryer’s nozzle up and around the head. This sets the foundation for volume. Only when the hair is 80% dry should you bring in a brush to smooth and refine the ends. This technique locks in structural lift that can last for days.
  • The Micro-Trim Schedule: Why a 6–8 week "dusting" is essential to keep the blunt edges looking sharp and thick.
    The precision of a blunt edge is what creates the illusion of density for fine hair. As soon as those ends become uneven or begin to split, the solid line is lost, and the hair looks thinner. A “dusting” (a micro-trim of just a quarter inch) every 6–8 weeks is non-negotiable. It keeps the perimeter sharp, prevents splits from traveling up the shaft, and preserves the integrity of the cut.

Conclusion: Confidence in the Cut

  • Structure Over Substance: Reiterate that the "drama" of styling ends when the physics of the haircut begins.
    The goal is to stop fighting your hair. When the cut is engineered correctly—whether it’s the solid line of a blunt bob or the internal architecture of a lob—the structure does the work for you. The endless cycle of “dramatic” styling—the backcombing, the dry shampoo buildup, the midday collapse—simply becomes unnecessary. A great cut is a foundation, not just a style.
  • The Freedom of Less: A final note on the time and money saved when you stop over-purchasing products.
    Fine hair is often the biggest spender in the beauty aisle, buying every “volumizing” product in hopes of a fix. The right cut flips that equation. By investing in precision haircuts instead of a cabinet full of band-aids, you reclaim both time and money. The daily routine becomes streamlined, effective, and intentional.
  • Final Thought: Fine hair isn't a problem to be solved; it's a texture to be mastered.
    Fine hair has a unique set of properties—it’s often silky, malleable, and responsive. When approached as a texture to be understood and enhanced with precise cuts and strategic styling, it becomes an asset. The goal is not to force it to be something it’s not, but to master its natural qualities to create looks that are chic, confident, and effortlessly full of life.
  • « Previous Page
  • 1
  • 2
  • 3
  • 4
  • 5
  • Next Page »

Welcome!

We are all about looking polished without spending hours on it. Here you'll find quick hairstyles, beauty tips, and style ideas that actually fit into a busy schedule.

More about me

Popular

  • Women's Haircuts: Medium Layers & Trending Long Bobs - 10 Stylish Ideas
  • Short Bob Hairstyles for Thick Hair Older Women: 10 Popular & Flattering Ideas
  • Short French Curls Braids Bob Layered: 10 Stunning Ideas
  • Short Stacked Angled Bob Hairstyles: 12 Modern & Voluminous Ideas

Seasonal

  • Wash-and-Wear Hairstyles for Women Over 50
  • The 15 Most Trending Kinky & Coily Hairstyles of 2026
  • Updo Hairstyles for Women Over 50 for Any Occasion
  • Trending Summer Hairstyles for Black Women

Footer

↑ back to top

About

  • Privacy Policy
  • Disclaimer
  • Terms & Conditions

Newsletter

  • Sign Up! for emails and updates

Contact

  • Contact

As an Amazon Associate I earn from qualifying purchases.