Blog

  • 25 Polka Dot Nail Ideas That Are Cute, Trendy, and Easy to Copy

    25 Polka Dot Nail Ideas That Are Cute, Trendy, and Easy to Copy

    Polka dots are having a moment—again. From celebrity manicurists’ Instagram feeds to spring runways, these playful spots are proving they’re more than just a childhood classic. The best part? They’re surprisingly easy to recreate, even if you’ve never picked up a nail art tool.

    Whether you love soft minimalist manicures or bold statement nails, polka dots can instantly add personality to your look. With just a dotting tool (or even a bobby pin from your bathroom drawer), you can transform a simple manicure into something eye-catching and stylish.

    We’ve rounded up 25 polka dot nail ideas ranging from classic black and white designs to colorful patterns trending right now. Save your favorites and show your nail tech at your next appointment—or grab your polishes and try them at home tonight.


    Classic Polka Dot Nails That Never Go Out of Style

    1. Classic Black and White Polka Dot Nails

    Some combinations are iconic for a reason. A glossy white base dotted with perfectly spaced black spots creates a manicure that works for the office, a wedding, or Sunday brunch. It’s elegant without trying too hard—like the little black dress of nail art.

    2. Retro 1950s Polka Dot Nails

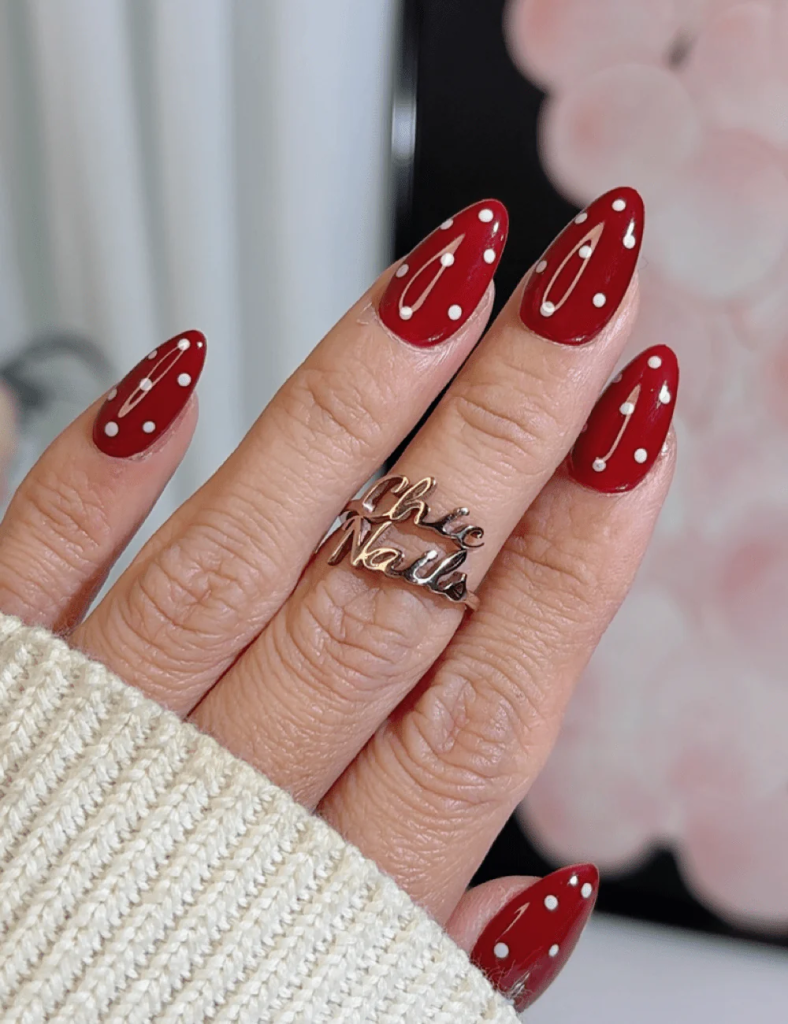
    Channel vintage Hollywood glamour with this pin-up inspired design. Bold cherry red nails provide the backdrop for crisp white dots that pop against the deep color. Pair it with red lipstick and cat-eye liner for the full retro vibe. Perfect for date night or when you’re feeling nostalgic.

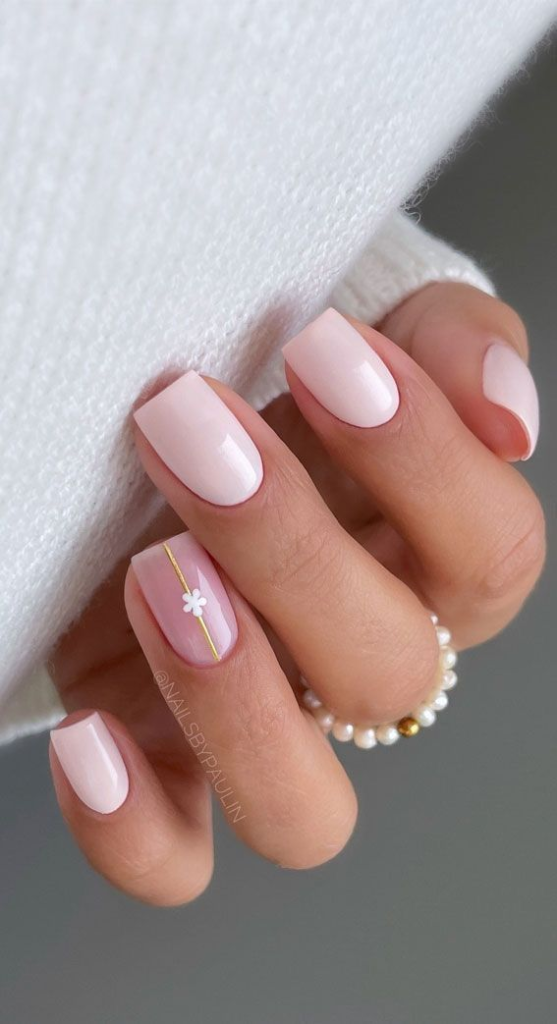
    3. Minimalist Single Dot Nails

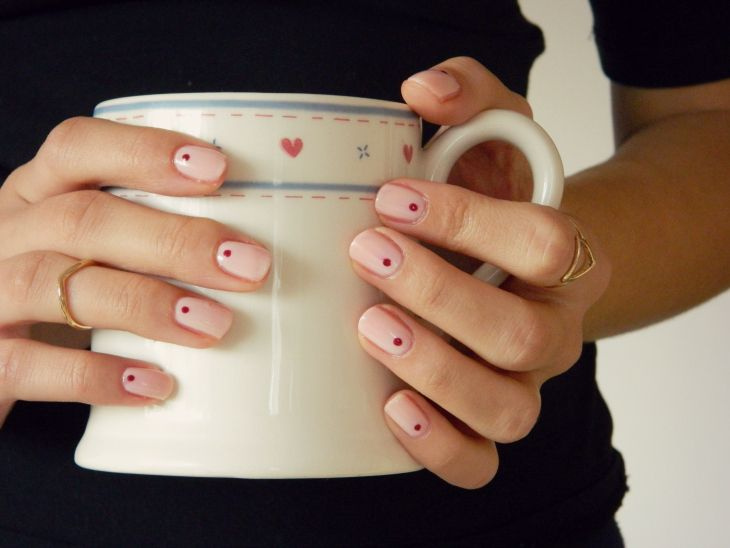
    Proving that less is truly more, this design features a sheer nude base with just one tiny dot placed near the cuticle. It’s subtle enough for conservative workplaces but interesting enough to spark compliments. Think of it as the jewelry your nails wear every day.

    4. Matte Polka Dot Nails

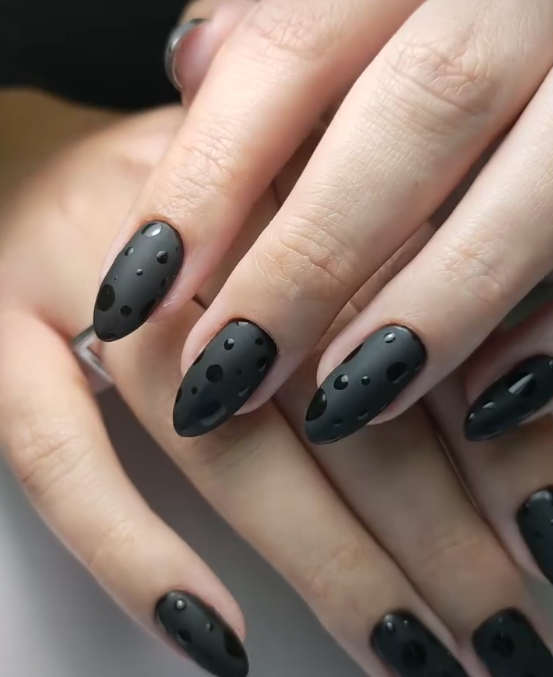
    Texture makes everything more interesting. Start with a velvety matte base in your favorite pastel—think lavender, peach, or powder blue. Then add glossy dots that catch the light and create a subtle contrast. It’s a small detail that makes a big impact.

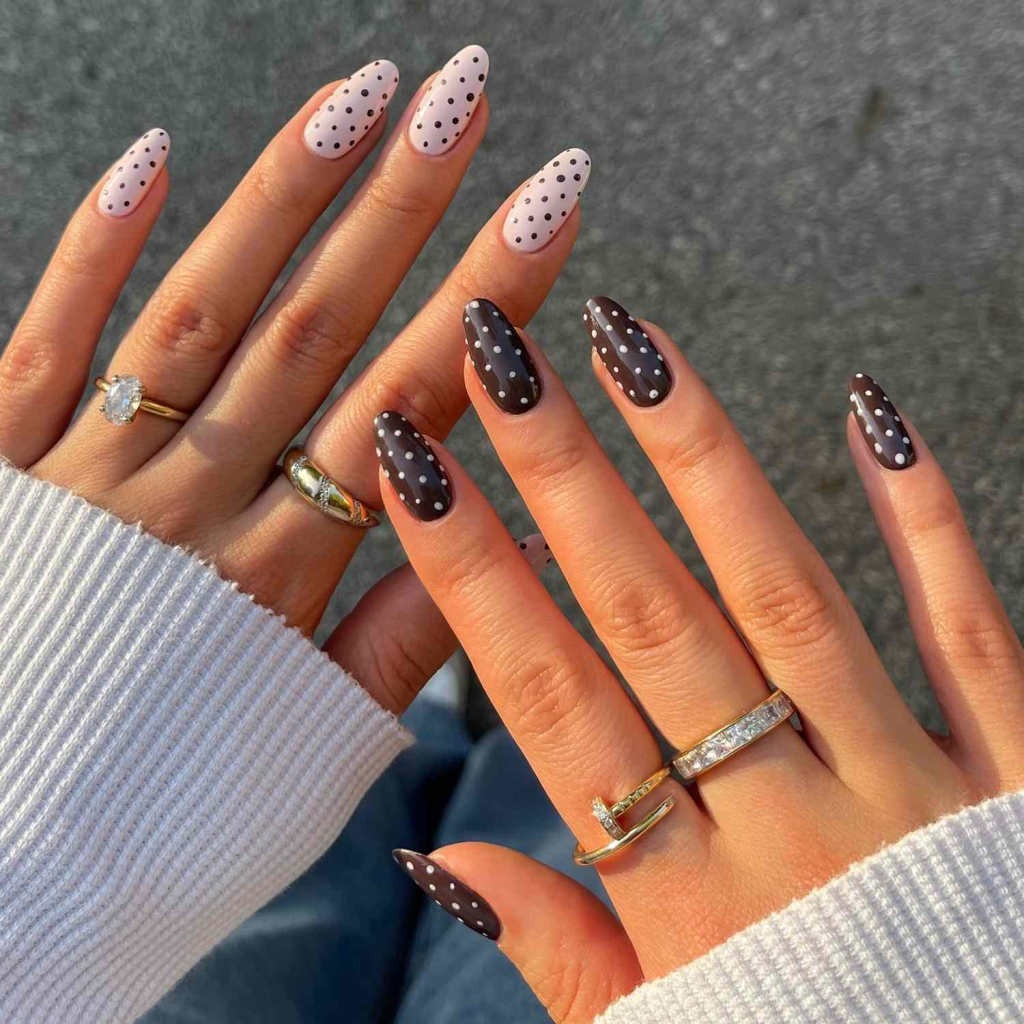
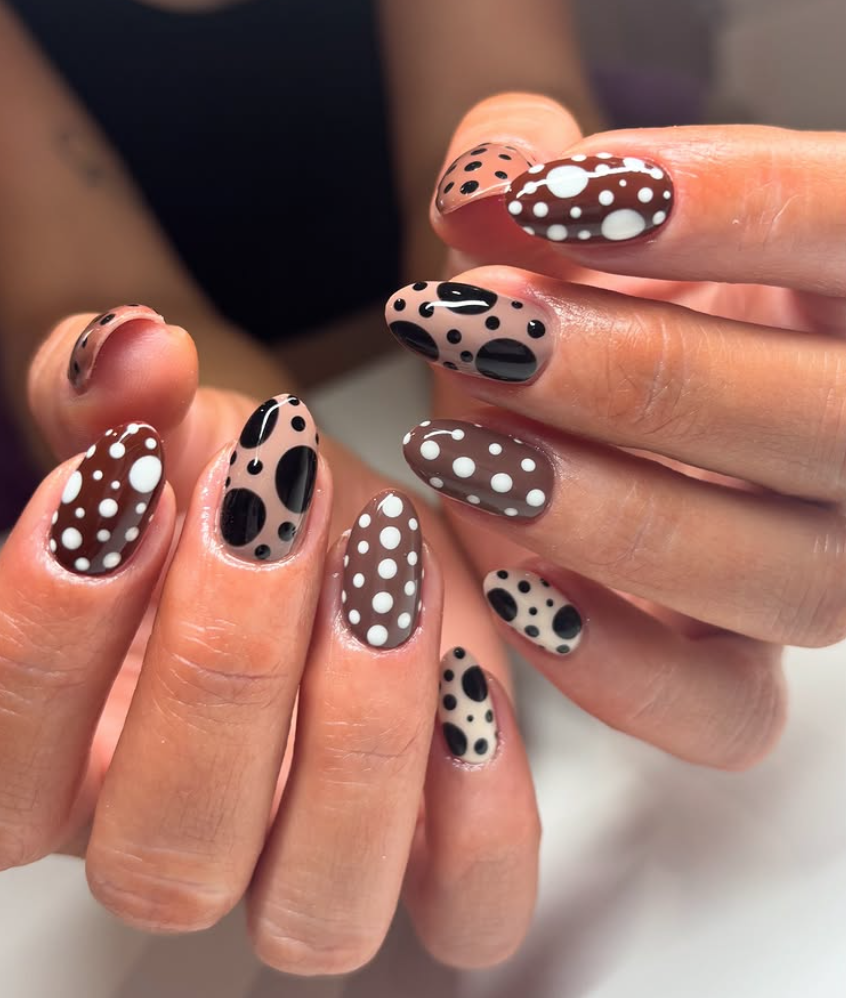
    5. Chocolate Brown Polka Dot Nails

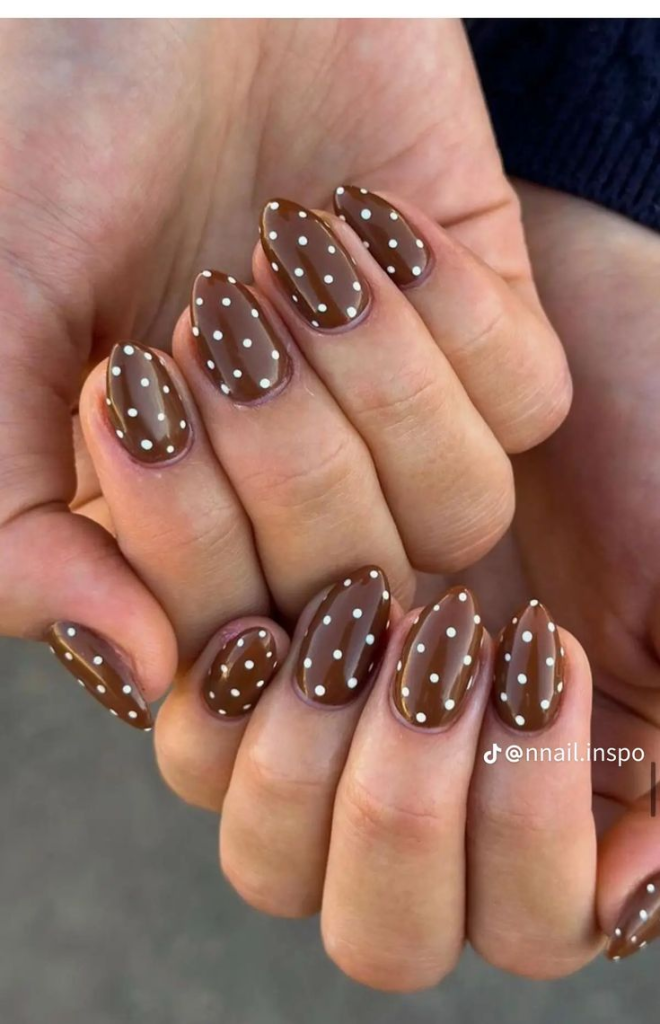
    Deep espresso brown is having a major moment. Paint your nails a rich chocolate shade, then add ivory or cream-colored dots for a sophisticated twist on the classic combo. It feels modern, warm, and unexpectedly luxurious—especially with a high-shine top coat.


    Cute Polka Dot Nail Ideas That Feel Fresh and Playful

    6. Pastel Easter Egg Dots

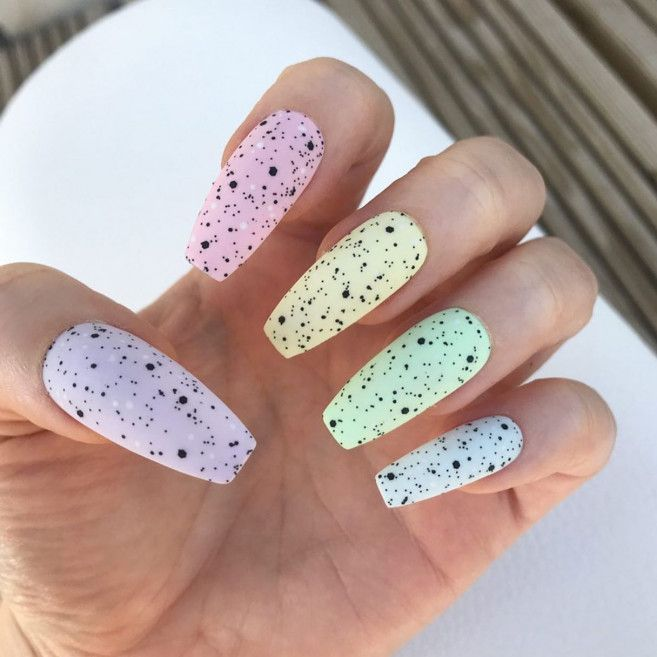
    Spring calls for colors that feel soft and sweet. Layer tiny white dots over lavender, mint, and baby pink bases for a manicure that looks like a box of marshmallow treats. It’s delicate, feminine, and absolutely perfect for Easter brunch or spring break.

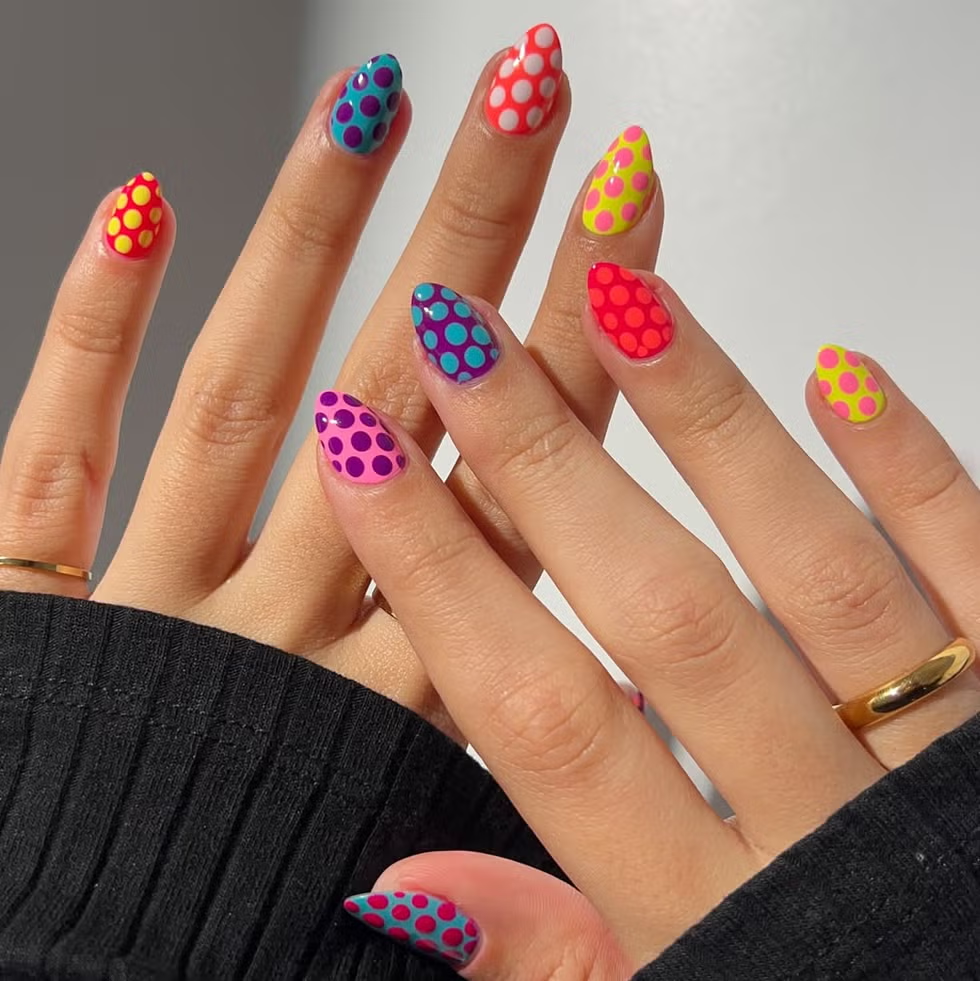
    7. Rainbow Bright Polka Dot Nails

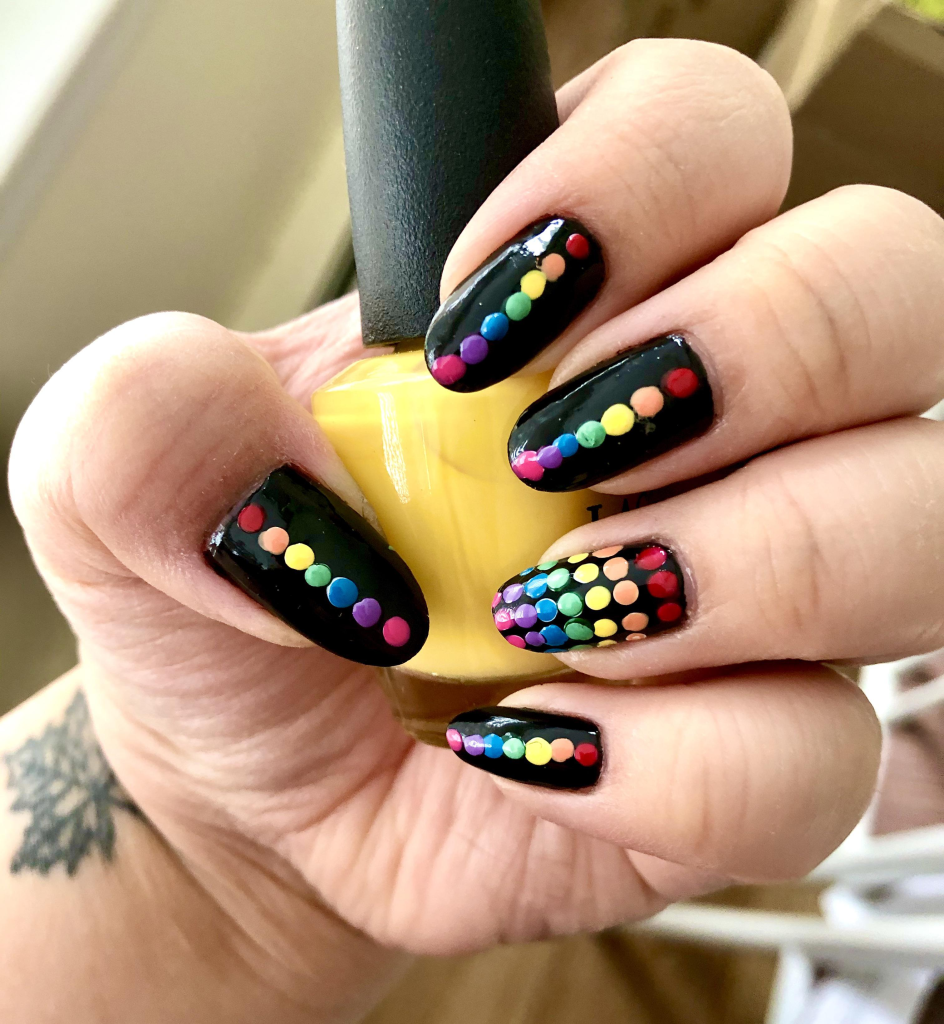
    Can’t choose just one color? Don’t. Paint each nail a different bright shade—coral, turquoise, sunny yellow, hot pink—then add contrasting dots in white or black. It’s a celebration on your fingertips that screams summer vacation and festival season.

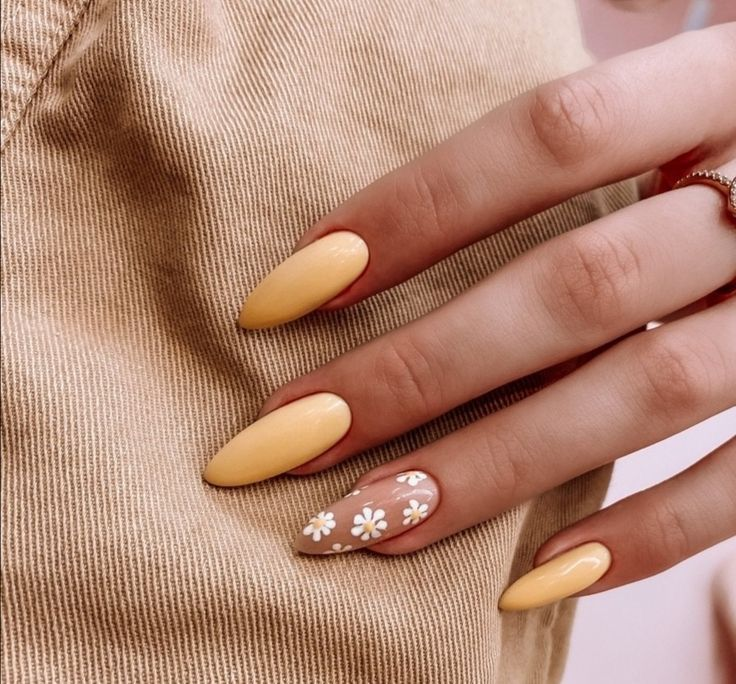
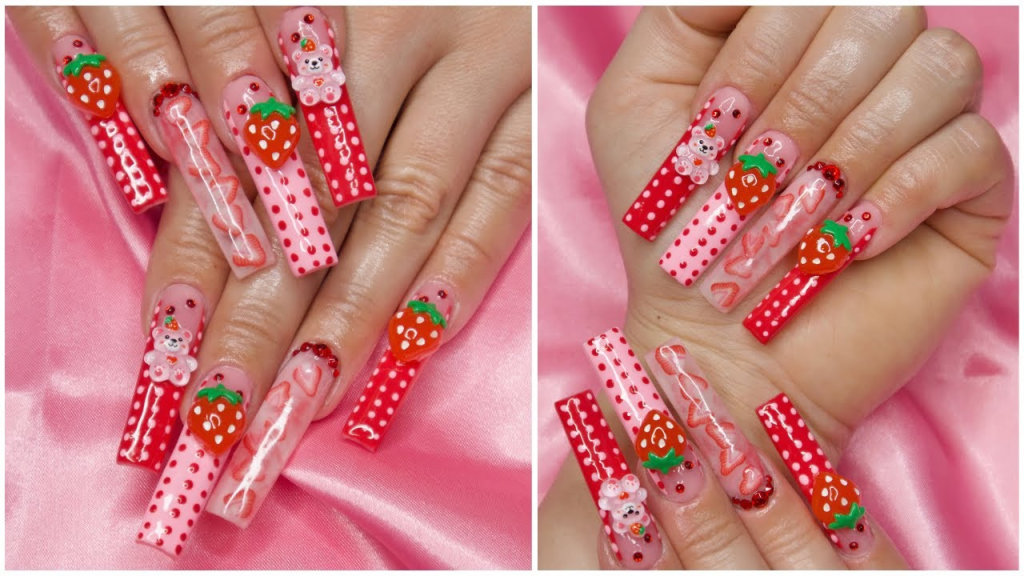
    8. Strawberry Milk Polka Dot Nails

    This design is basically dessert for your hands. A milky pink base gets scattered with tiny darker pink or red dots that look exactly like strawberry seeds. It’s sweet without being childish and has been trending all over TikTok for good reason.

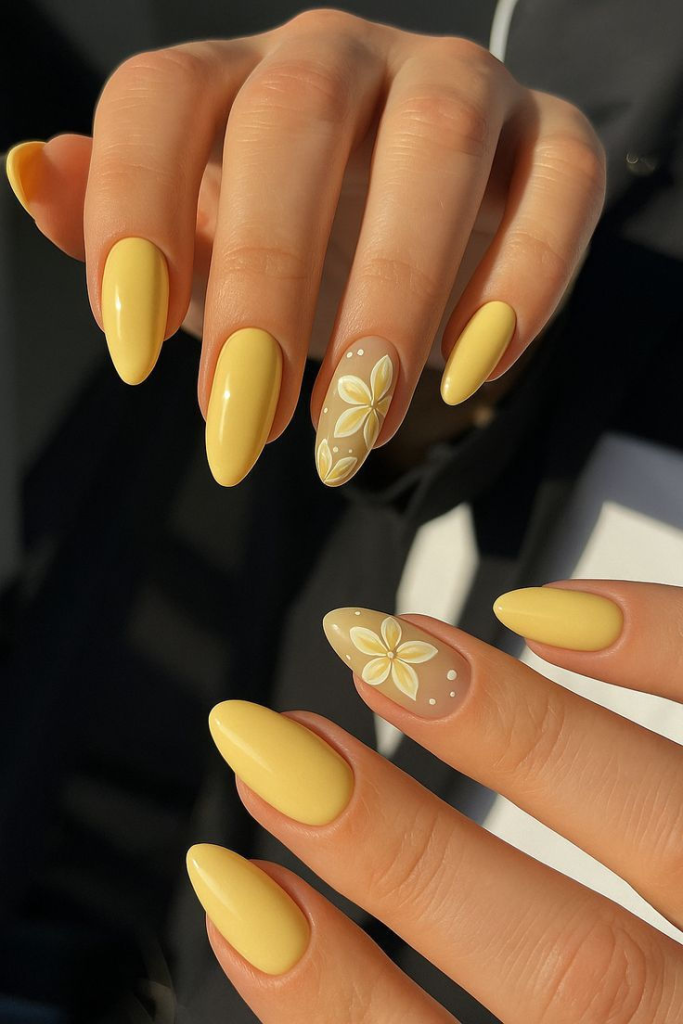
    9. Baby Blue Cloud Dots

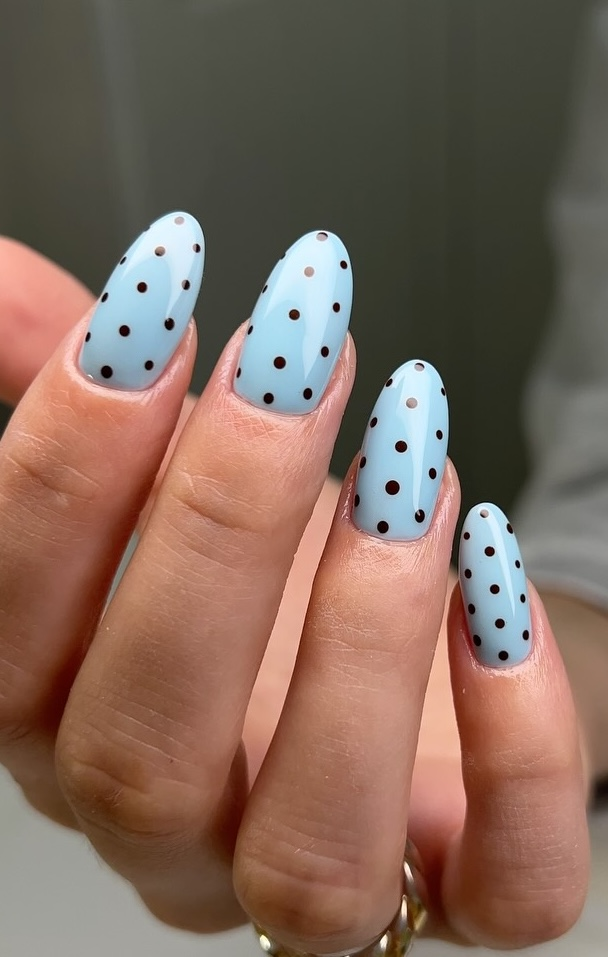
    Soft powder blue nails decorated with fluffy white dots create a sky-inspired manicure that feels calm and dreamy. Add an extra tiny dot next to each main dot to create a cloud-like effect. Perfect for beach vacations or days when you need a little serenity.

    10. Checkerboard Mix-Up

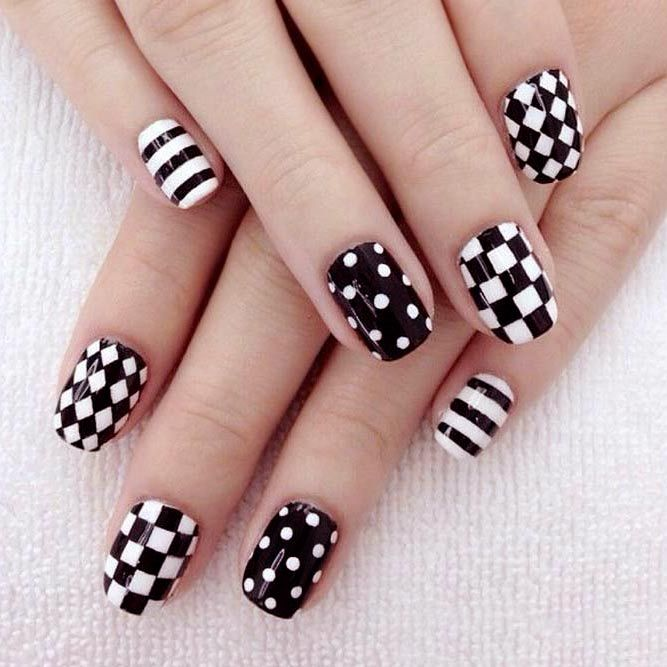
    Put a trendy spin on polka dots by alternating them with checkerboard patterns. Paint some nails with classic black and white checkerboard, others with scattered dots, and leave a few in solid color. It’s artsy, unexpected, and feels very now.


    Trendy Polka Dot Designs You’ll See Everywhere This Year

    11. Negative Space Polka Dot Nails

    This modern design leaves parts of the nail completely bare. Paint clear or pale pink polish, then strategically place colored dots so the natural nail shows through. It’s edgy, artistic, and perfect for anyone who loves minimalist fashion.

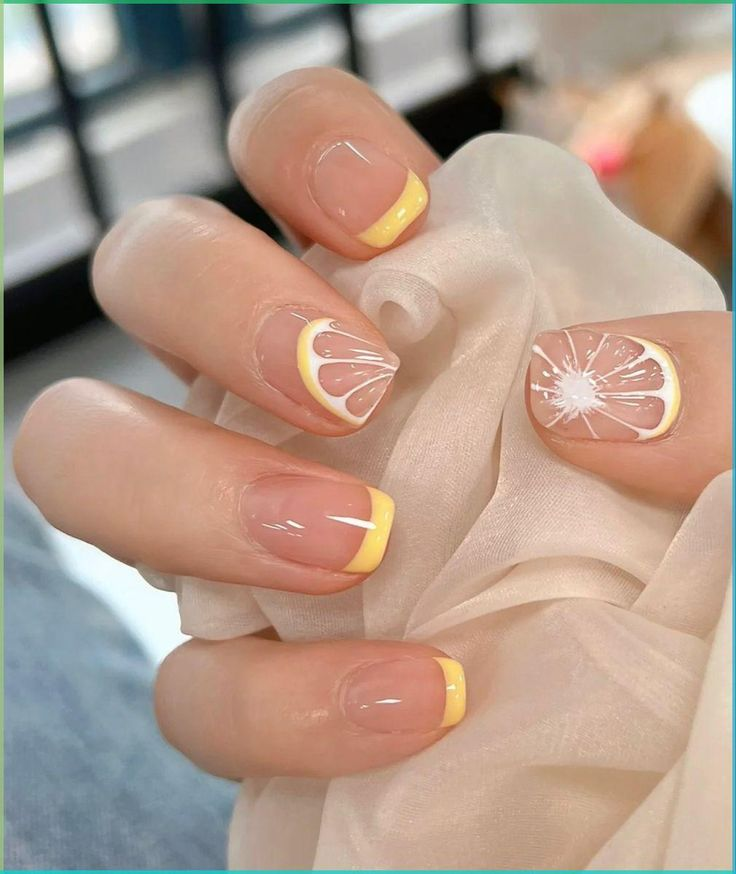
    12. Polka Dot French Tips

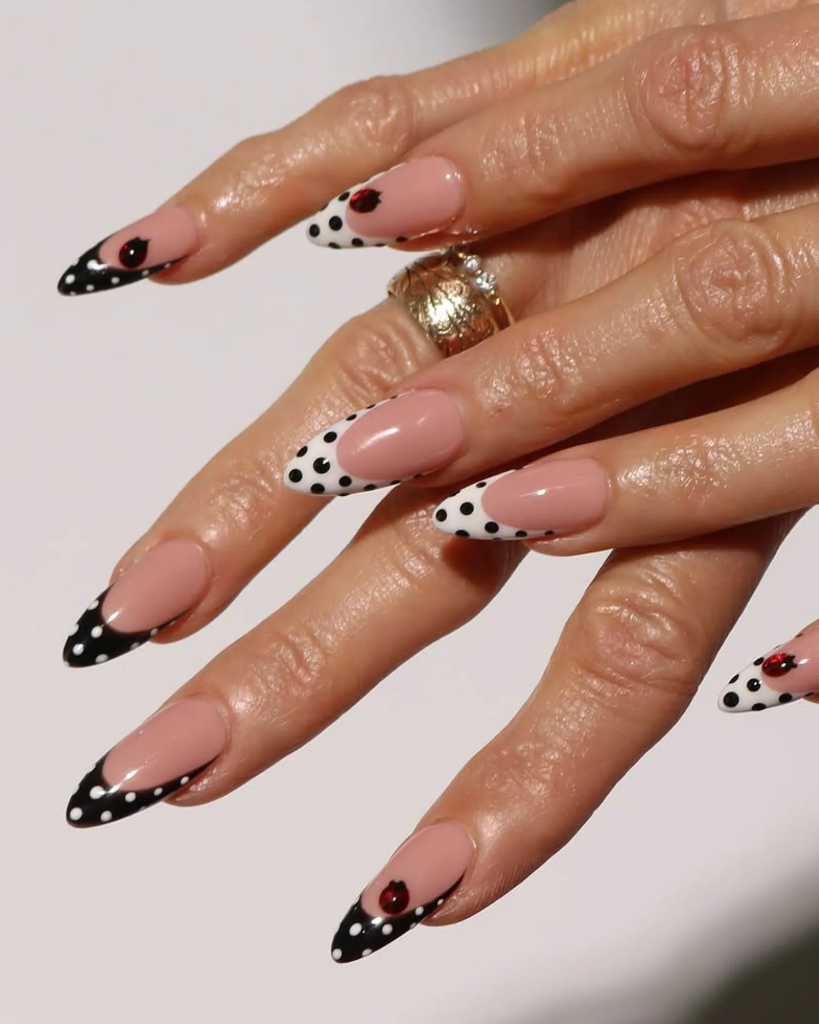
    The classic French manicure gets a playful refresh. Instead of a solid white tip, paint tiny dots along the free edge of your nail. You can keep them white for a subtle update or go bold with neon or metallic dots that really stand out.

    13. Mixed Size Polka Dot Nails

    Who says all dots have to match? Combine tiny micro dots with larger spots on the same nail for a dynamic pattern that catches the eye. Start with your largest dots, then fill in the gaps with smaller ones. It feels creative and slightly chaotic in the best way.

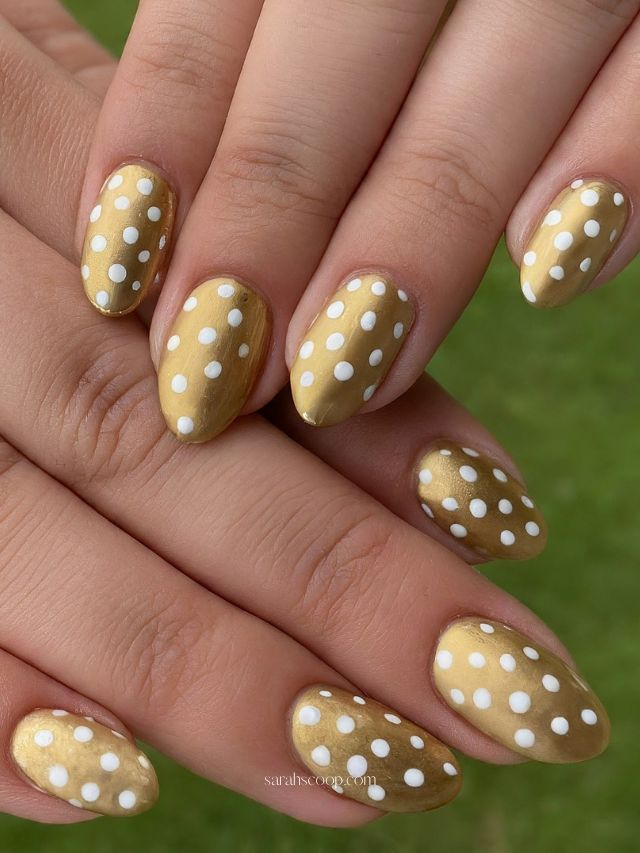
    14. Metallic Gold Dots on Nude

    Instant elegance, zero effort. A soft nude base becomes instantly glamorous with delicate gold dots scattered across the nail. This design catches the light beautifully and transitions seamlessly from day to night. Wedding guest? Bridal shower? Date night? Covered.

    15. Mismatched Polka Dot Nails

    Break the rules on purpose. Give each finger its own personality—one nail gets tiny black dots on white, another gets white dots on red, another gets metallic gold on nude. The lack of uniformity is exactly what makes it work.


    Bold Polka Dot Nails for When You Want to Stand Out

    16. Neon Explosion Dots

    Summer calls for colors that practically glow. Start with a bright neon base—think electric pink, highlighter yellow, or blazing orange—and add contrasting dots in white or black. These nails demand attention and deliver.

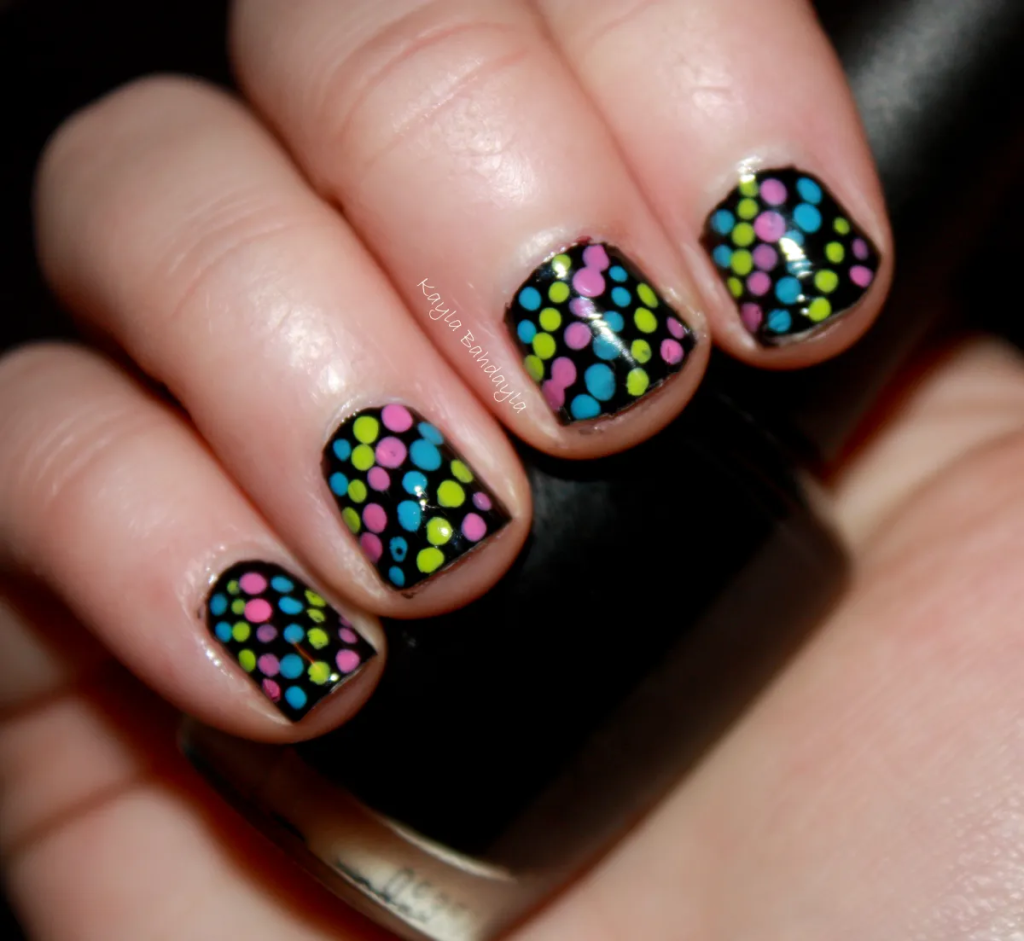
    17. Black Base with Neon Dots

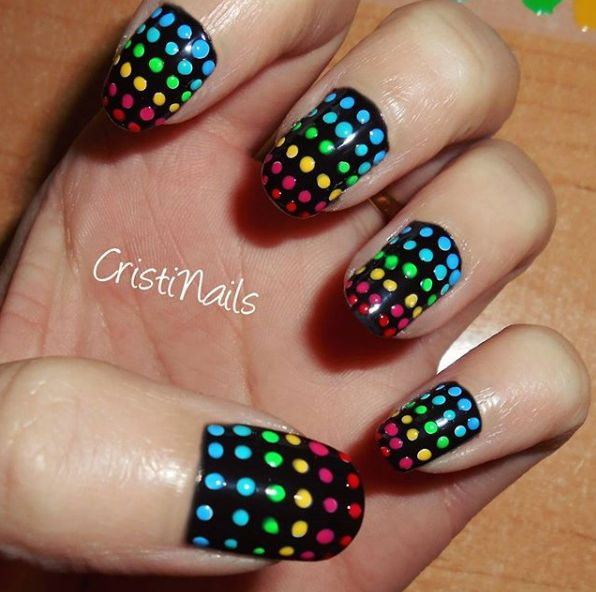
    A glossy black background makes every color pop louder. Paint your nails deep black, then scatter bright pink, green, and orange dots across the surface. It’s dramatic, edgy, and surprisingly wearable for night outs and concerts.

    18. Glitter Bomb Dots

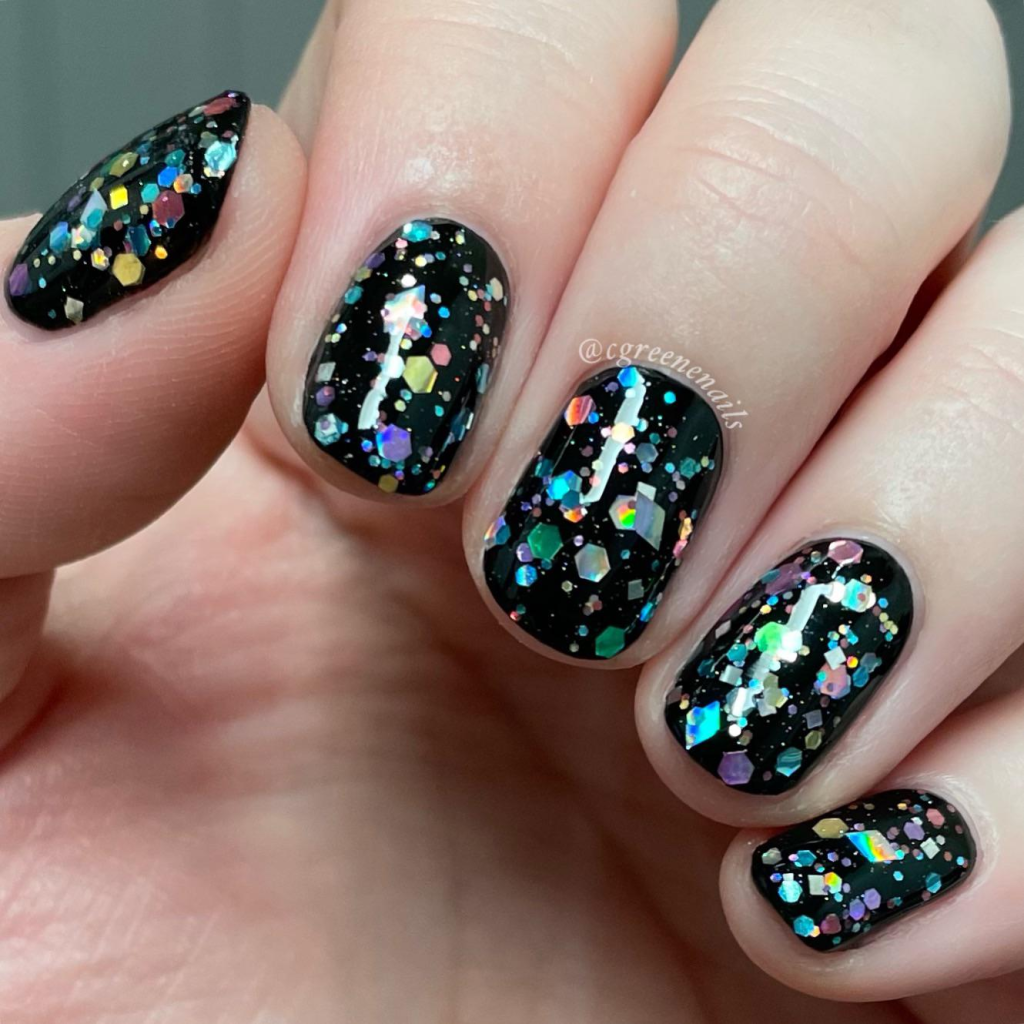
    Instead of regular polish, use glitter polish for your dots. A sheer pink base dotted with sparkly silver or gold spots catches every ray of light. It’s festive without being over-the-top and works beautifully for New Year’s Eve or birthday celebrations.

    19. Cow Print Accent Nails

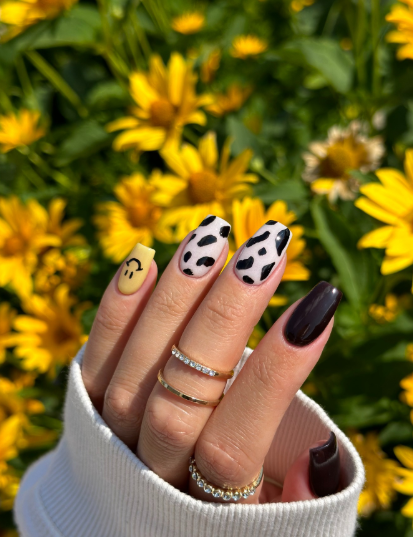
    Cow print is basically polka dots’ wild cousin. Paint most nails in a solid neutral, then turn one or two accent nails into cow print with irregular black spots on white. It’s trendy, playful, and surprisingly chic.

    20. Confetti Celebration Nails

    Scatter multicolored dots across a clear or white base for a manicure that looks like a party. Use every color in your collection—pink, blue, yellow, green, purple—and let them fall randomly. It’s impossible to look at these nails without smiling.


    Elegant Polka Dot Nails for Special Occasions

    21. Pearl Embellished Dots

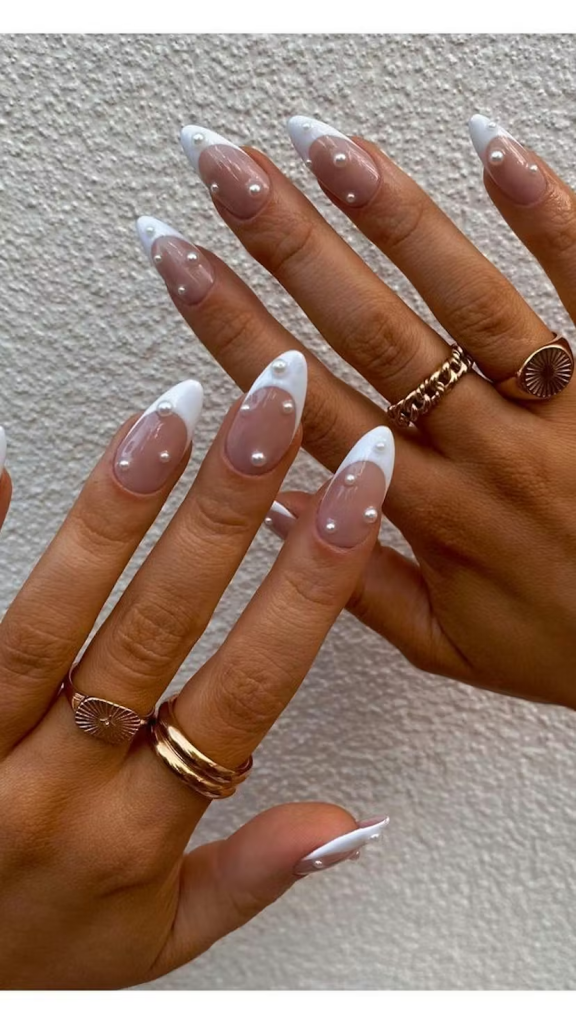
    Take polka dots into three dimensions. Instead of painted dots, apply tiny pearl beads to your nails in a dotted pattern. The texture adds luxury, and the pearls catch light from every angle. Perfect for weddings, galas, or anytime you want to feel extra.

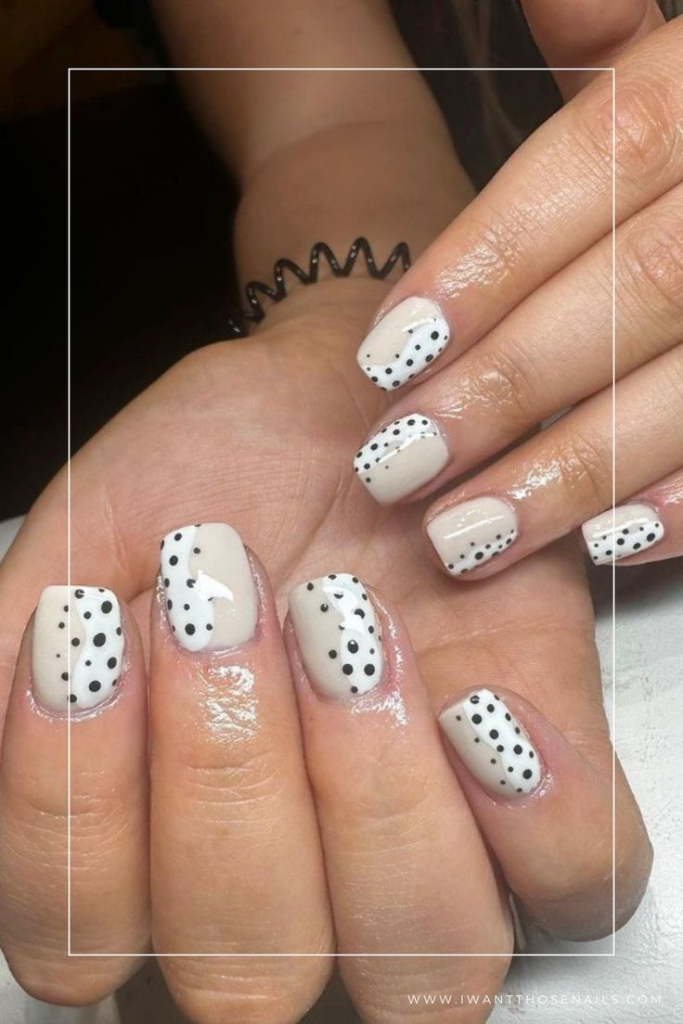
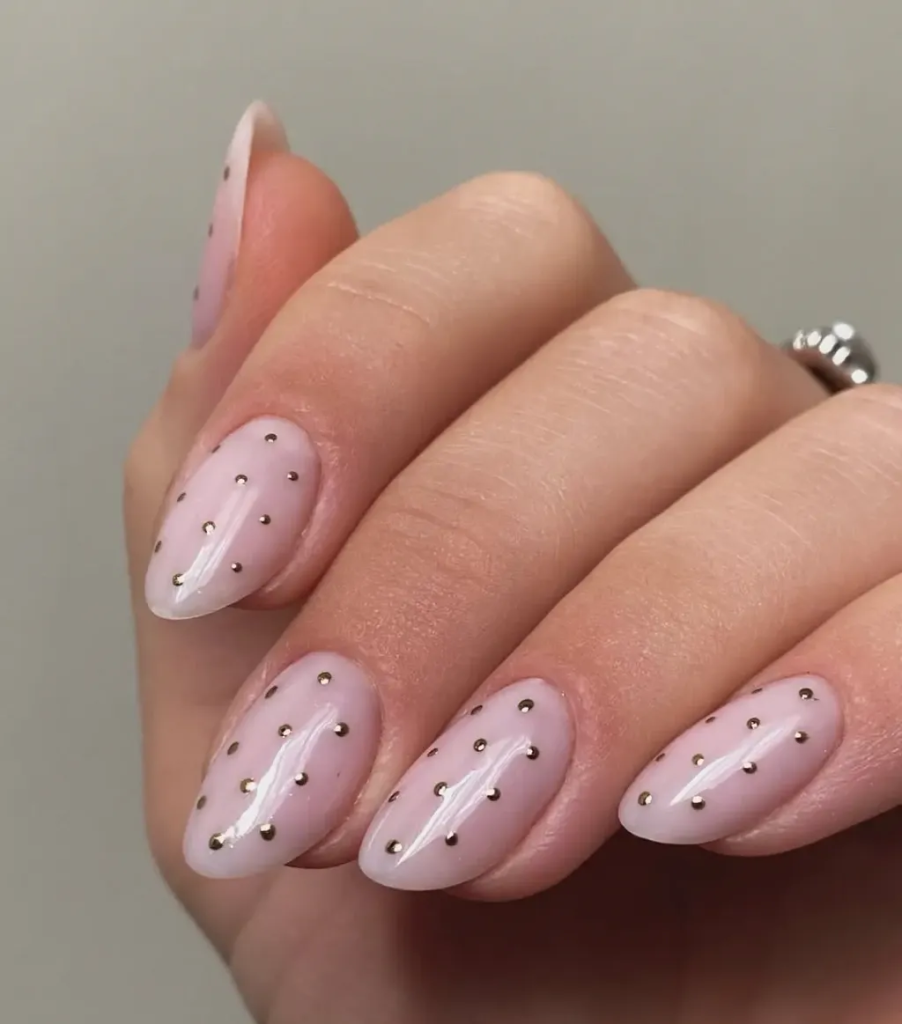
    22. Sheer Pink with Micro Dots

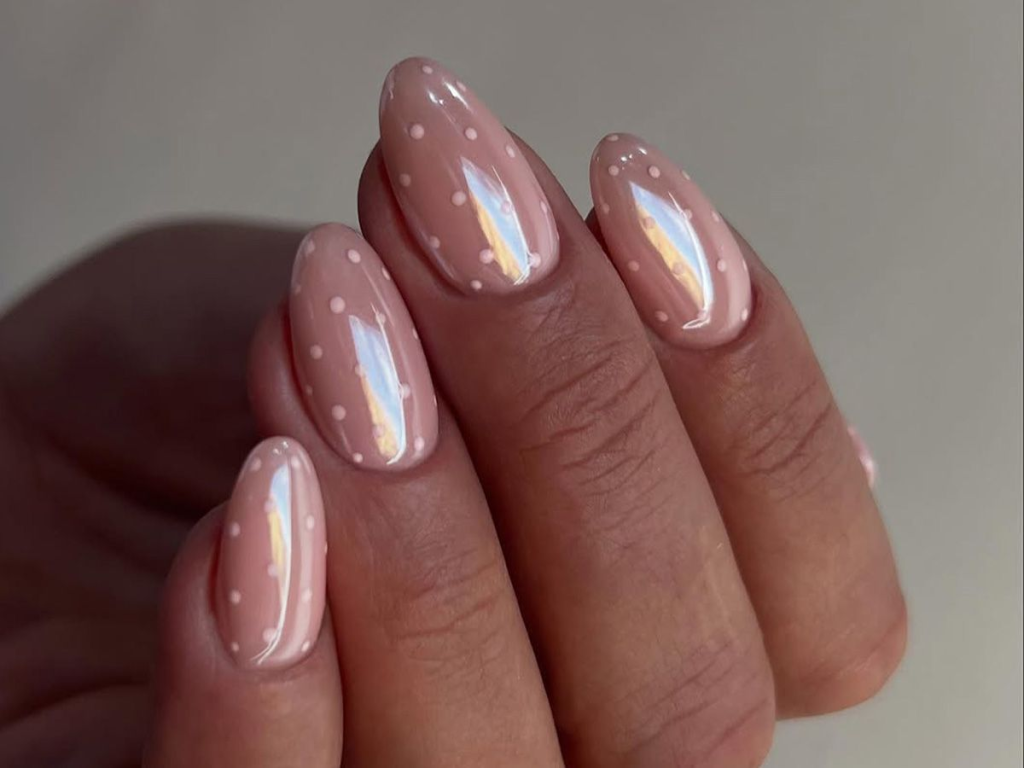
    This is what elegance looks like. A barely-there sheer pink base gets dotted with impossibly tiny white spots that are almost invisible from a distance. Up close, they reveal themselves as a delicate detail. It’s sophisticated, subtle, and completely timeless.

    23. Gold Foil Polka Dots

    Crumbled gold foil applied in dotted patterns creates texture and luxury that painted dots can’t match. Apply a clear base, place tiny pieces of gold foil in a scattered pattern, and seal with a thick top coat. It looks like jewelry for your nails.

    24. Half-Moon Dot Design

    Paint the bottom half of your nail (the half-moon area) in a contrasting color, then add dots along the border. It’s a vintage-inspired look that feels fresh again, especially in sophisticated color combos like navy and silver or burgundy and gold.

    25. Ombre Gradient Dots

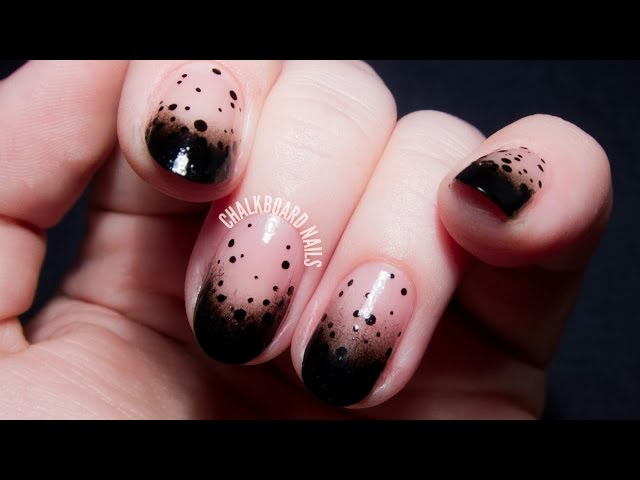
    Start with a gradient base that fades from light to dark—think pale pink to deep rose. Then add dots that follow the same color progression, with lighter dots at the top and darker dots near the tips. It’s artistic, unique, and looks way harder than it actually is.


    How to Create Polka Dot Nails at Home

    Creating polka dot nails is easier than you think. Here’s your simple step-by-step guide:

    What You’ll Need:

    • Base coat
    • Two or more nail polishes (one base color, one dot color)
    • Dotting tool (or substitute with a bobby pin, toothpick, or the back of a pen)
    • Top coat

    Steps:

    1. Prep your nails. Apply a base coat to protect your natural nails and help your polish last longer.
    2. Paint your base color. Apply two thin coats of your chosen base color and let them dry completely. This step requires patience—smudged dots are the worst.
    3. Prep your dotting tool. Dip the tip of your dotting tool into your second polish. You want a small, even drop, not a glob.
    4. Create your dots. Gently press the tool onto your nail. Start with larger dots and add smaller ones in between. Practice on paper first if you’re nervous.
    5. Let dots dry. Give the dots a few minutes to set before moving to the next step.
    6. Seal it all in. Apply a glossy top coat to protect your design and add shine. This also smooths everything out for a professional finish.

    Pro Tip: Clean your dotting tool between each dot with polish remover to prevent strings and uneven shapes.


    Final Thoughts

    Polka dots prove that sometimes the simplest designs are the most satisfying. Whether you’re a minimalist who loves a single dotted accent, a romantic drawn to pastels and pearls, or a maximalist ready for confetti-covered nails, there’s a polka dot design waiting for you.

    The only hard part? Choosing which one to try first.

    Save your favorites, tag your nail tech, and get ready for compliments. Spring is calling—and it’s covered in dots.

  • 30 Cute Spring Nails You’ll Want to Screenshot for Your Next Manicure

    30 Cute Spring Nails You’ll Want to Screenshot for Your Next Manicure

    Spring is officially in the air, and you know what that means: it’s time to put away the dark, moody winter polishes and embrace a fresh manicure.

    But with so many trends popping up, deciding what to put on your nails can be overwhelming. That’s why we are cutting through the noise. For this article, we are sharing the best spring nail ideas, grouped by the shades that are dominating the season.

    Whether you are a fan of earthy neutrals or vibrant pops of color, we’ve got you covered. Here is your go-to guide for slaying this spring, one color family at a time.

    Shades of Brown: Earthy & Sophisticated

    Brown isn’t just for fall anymore. This spring, brown is taking on a lighter, milkier texture that feels fresh and modern.

    • The Vibe: Understated luxury and warmth.
    • Ideas to Try: Mocha Mousse (the color of the year!), chocolate glaze nails, or pairing creamy latte browns with a single swirl of white for a cappuccino effect. They are the perfect neutral that goes with everything.

    Shades of Green: Nature’s Revival

    Green represents the growth and renewal happening outside. This spring’s palette ranges from soft herbs to deep jewels.

    Ideas to Try: Matcha latte greens are huge for a soothing look. For something edgier, try a deep hunter green with a high-shine gel finish. You can also play with sage green combined with simple daisy decals for a nature-inspired set.

    The Vibe: Fresh, calming, and trendy.

    Shades of Purple: Lavender Dreams

    Purple softens up significantly for spring, moving away from deep eggplants into the realm of florals.

    • The Vibe: Romantic and whimsical.
    • Ideas to Try: Lavender is the undisputed queen of the season. Wear it alone in a chrome finish, or use it as a base for 3D butterfly appliqués. For a trendier take, try a milky lilac with a subtle cat-eye effect.

    Shades of Yellow: Sunshine & Citrus

    Nothing says spring like the color of the sun. This season, yellow is all about happiness and energy.

    • The Vibe: Optimistic and bright.
    • Ideas to Try: Go for a soft butter yellow for a subtle pop, or dive into lemon-inspired designs. Think glossy lemon-shaped tips, checkerboard patterns with white, or even a vibrant neon chartreuse if you want to make a bold statement.

    Shades of Blue: Serene & Dreamy

    Blue offers a cool counterpoint to the warmer weather, providing a sense of calm and clarity.

    • The Vibe: Soothing and crisp.
    • Ideas to Try: Powder blue is a must-try for a classic spring look. If you want texture, the “denim” nail trend (a matte, textured blue that looks like jeans) is making a comeback. You can also try sky blue french tips for a modern twist on a classic.

    Pinke [sic] & Nude: The Everyday Essentials

    This category is the bread and butter of spring—polished, clean, and endlessly versatile.

    Ideas to Try: Think glazed donut nails in soft pink, ballet slipper nudes, or the ever-popular strawberry milk pink. For the nudes, choose shades that match your skin tone for a “your nails but better” look, or add a sheer micro-shimmer to catch the light.

    The Vibe: Clean girl aesthetic.

    The Flower Power Collection

    Of course, we couldn’t talk about spring nails without featuring the motif that defines the season: flowers. This isn’t just one color; it’s a celebration of them all.

    • The Vibe: Artistic and cheerful.
    • Ideas to Try:
      • Daisy Nails: White petals on a soft pink or blue base.
      • 3D Florals: Sculpted gel flowers that sit on the nail bed for a tactile experience.
      • Pressed Flowers: Real dried flowers encapsulated in clear or milky acrylic.
      • Abstract Florals: Watercolor-style blooms in oranges, pinks, and yellows for an artsy feel.

    The Verdict:
    Whether you gravitate toward the warmth of brown, the serenity of blue, or the timeless charm of flowers, the key to slaying this spring is to choose a shade that makes you feel fresh and confident. So, save your favorite photos and get ready to show your manicurist exactly what you want this season

  • How to Fade Dark Spots & Hyperpigmentation

    How to Fade Dark Spots & Hyperpigmentation

    You look in the mirror and notice them: those stubborn dark spots scattered across your cheeks, forehead, or upper lip. Maybe they appeared after a pregnancy, surfaced from sun exposure years ago, or lingered long after a blemish finally healed.

    Whatever their origin, hyperpigmentation is one of the most frustrating skin concerns—and one of the most common. The good news? You don’t need expensive laser treatments or a cabinet full of harsh products to fade those spots. With consistency and the right ingredients, you can see real results.

    Here is a simple, mom-friendly routine to fade dark spots and even out your skin tone.


    First, Understand Your Enemy

    Hyperpigmentation is simply an overproduction of melanin—the pigment that gives your skin its color. It shows up in a few common forms:

    • Post-inflammatory hyperpigmentation (PIH): Dark marks left behind after a pimple, scratch, or rash. Common for moms dealing with hormonal breakouts or “maskne.”
    • Melasma: Sometimes called “the mask of pregnancy,” these larger patches are triggered by hormones and sun exposure.
    • Sun spots: Also called age spots or liver spots, these appear after years of cumulative sun damage.

    The treatment approach is similar for all three: prevent further darkening and encourage cell turnover to fade existing spots.

    If you are just starting your skincare journey, first build a foundation with our beginner-friendly 5-step night routine . Once you have that down, layer in these targeted steps.


    The Golden Rule: Sunscreen Is Non-Negotiable

    Here is the truth that no one likes to hear: if you don’t wear sunscreen every single day, nothing else you do will matter.

    Sun exposure triggers melanin production. If you are using brightening ingredients without protecting your skin, you are essentially fighting a battle with one hand tied behind your back. The sun will undo all your hard work.

    Your sunscreen needs to be:

    • Broad spectrum (protects against UVA and UVB rays)
    • SPF 30 or higher
    • Worn every day—even when it’s cloudy, even if you’re mostly indoors

    For a dermatologist-approved morning routine that includes sunscreen, check out our 4-step morning skincare guide .


    The Fading Formula: Key Ingredients That Work

    Not all brightening ingredients are created equal. Here are the ones dermatologists and skincare experts recommend for fading dark spots.

    Vitamin C (Morning)

    Vitamin C is a powerful antioxidant that brightens skin and protects it from environmental damage. It inhibits melanin production, which helps prevent new spots from forming while fading existing ones.

    How to use: Apply a vitamin C serum in the morning after cleansing and before moisturizer. Look for stable formulations like ascorbic acid combined with vitamin E and ferulic acid for maximum effectiveness.

    Niacinamide (Morning or Night)

    Also known as vitamin B3, niacinamide is a multitasking ingredient that brightens dark spots, calms redness, and strengthens the skin barrier. It plays well with most other ingredients, making it easy to add to your routine.

    How to use: You can use niacinamide morning or night, in serum or moisturizer form.

    Retinoids/Retinol (Night)

    Retinoids speed up cell turnover, pushing fresh, evenly pigmented cells to the surface faster. They are the gold standard for treating hyperpigmentation—but they require patience and proper use.

    How to use: Start slowly—once or twice a week at night. Always follow with moisturizer, and never use retinoids without sunscreen the next morning. If you are pregnant or nursing, avoid prescription retinoids and check with your doctor about over-the-counter options.

    Azelaic Acid (Morning or Night)

    Azelaic acid is a gentle but effective ingredient for fading dark spots, especially for those with sensitive skin or melasma. It also has anti-inflammatory properties, making it great for acne-prone skin.

    How to use: Can be used morning or night, often in serum or cream form.

    Alpha Hydroxy Acids (AHAs) (Night, 2-3x weekly)

    AHAs like glycolic acid and lactic acid exfoliate the skin’s surface, helping to shed the top layer of pigmented cells. They work well alongside other treatments but should not be used on the same night as retinoids.

    How to use: Use an AHA toner or serum 2-3 times per week at night, on nights you aren’t using retinol.


    Your Simple Fading Routine

    Here is how to layer these ingredients into a routine that fits a busy mom’s schedule.

    Morning

    1. Cleanse with a gentle cleanser (or just rinse with water)
    2. Vitamin C serum (apply to dry skin, wait a minute)
    3. Niacinamide serum (optional, can be layered)
    4. Moisturizer
    5. Sunscreen (SPF 30+)

    Evening

    1. Double cleanse if wearing makeup or sunscreen (oil cleanser followed by gentle cleanser)
    2. Treatment—choose ONE per night:
      • Retinol (1-2 nights per week to start)
      • AHA exfoliant (1-2 nights per week)
      • Azelaic acid or niacinamide (on other nights)
    3. Moisturizer (look for barrier-repairing ingredients like ceramides)

    The Weekly Boost: Exfoliation + Masking

    In addition to your daily routine, these weekly steps can accelerate fading.

    Exfoliate 1-2 times weekly: Use a gentle scrub or an enzyme mask to physically remove dead skin cells. This helps your brightening products penetrate better.

    Use a brightening mask 1 time weekly: Look for masks containing vitamin C, kojic acid, or licorice root extract. Apply after cleansing and leave on for 10-15 minutes before continuing with your routine.

    Our 5-step night routine includes a full breakdown of weekly exfoliation and masking.


    Patience Is Everything

    Here is the honest truth: fading dark spots takes time.

    You will not see results overnight. With consistent use of the right ingredients, you may notice subtle changes in 4 to 6 weeks. More significant fading can take 3 to 6 months. Melasma, in particular, can be stubborn and may require ongoing maintenance.

    Think of it like getting in shape. You wouldn’t expect a flat stomach after one workout. Your skin works the same way.


    What to Avoid

    Just as important as what you add is what you avoid.

    Don’t pick at your skin. That pimple you squeeze today becomes a dark spot tomorrow. Hands off.

    Don’t skip sunscreen. Seriously. We cannot say this enough.

    Don’t use too many actives at once. Layering retinol, AHAs, and vitamin C in the same night is a recipe for irritation, which can actually worsen pigmentation. Rotate your treatments and listen to your skin.

    Don’t expect miracles from natural remedies. Lemon juice, toothpaste, and other DIY “treatments” often do more harm than good. Stick with proven ingredients.


    When to See a Professional

    If you have tried a consistent routine for 6 months with minimal results, or if your dark spots are changing in shape, size, or color, it is time to see a dermatologist.

    A professional can offer stronger treatments like prescription-strength hydroquinone, chemical peels, or laser therapy. They can also check any suspicious spots to rule out skin cancer—always a good idea, especially for sun-damaged skin.


    The Takeaway

    Fading dark spots doesn’t require a complicated routine or expensive products. It requires:

    • Daily sunscreen (non-negotiable)
    • Consistent use of proven ingredients (vitamin C, retinoids, niacinamide, AHAs)
    • Patience (results take time)
    • Protection (keep treating your skin gently)

    You have the power to improve your skin. Start with these steps, stay consistent, and give your skin the grace of time.

    Once your skin is glowing and even, learn exactly where to place your makeup to highlight your best features with our bronzer, blush, and contour placement guide . A smooth canvas deserves beautiful makeup application.

  • Makeup for Glasses: How to Make Your Eyes Pop Behind Lenses

    Makeup for Glasses: How to Make Your Eyes Pop Behind Lenses

    If you wear glasses, you have probably experienced this frustration: you spend time on your eye makeup, put on your frames, and suddenly… it disappears.

    Your beautiful eyeliner? Lost behind the frames. That perfect shadow? It looks like you did nothing at all. And those dark circles you thought you concealed? The lenses seem to magnify them十倍.

    Here is the good news: with a few simple adjustments, you can make your eyes stand out beautifully behind your glasses. In fact, many makeup artists—including Bobbi Brown herself—love wearing glasses because they offer an instant style statement. The trick is knowing how to work with your frames, not against them.

    Whether you wear reading glasses part-time or need them full-time, this guide will help you master makeup for glasses.


    Why Glasses Change Everything

    Before we dive into techniques, let’s understand what is happening.

    Your lenses do two things that affect your makeup:

    1. They magnify (if you are nearsighted) or minify (if you are farsighted) your eyes
    2. They cast shadows on your under-eye area
    3. They compete for attention with your eye makeup

    The result? Dark circles look darker. Delicate lines look more visible. And subtle eye makeup? It vanishes completely.

    But once you know how to adjust, your glasses become an accessory that enhances your look instead of hiding it.


    Step 1: The Non-Negotiable Base (Corrector + Concealer)

    This step matters for everyone, but for glasses wearers, it is absolutely essential.

    Your lenses—especially if you have a stronger prescription—draw attention to your under-eye area. Every bit of darkness, every shadow, every hint of fatigue becomes more noticeable.

    The fix: Layer corrector and concealer like a pro.

    Start with a peach or pink corrector (choose peach for warmer skin tones, pink for cooler or fair skin). Apply it to the darkest areas—usually the inner corner of the eye and any hollows. Tap it in gently with your ring finger.

    Next, layer a yellow-based concealer that is one shade lighter than your skin tone over the corrector. Use a small brush to get close to the lashes and into the inner corner. Then blend with your finger.

    Pro tip: Set everything with a light dusting of pale yellow or translucent powder. This prevents creasing and keeps your concealer in place all day. Glasses mean friction on your nose and under-eyes, so setting is non-negotiable.


    Step 2: Brows Matter More Than Ever

    When you wear glasses, your eyebrows become part of the frame.

    Think about it: the top of your frames either sits right below your brows or covers them partially. If your brows are unkempt or undefined, the whole look falls flat. If they are well-groomed, they work with your frames to create a polished, intentional appearance.

    The fix: Define your brows daily.

    Use a tinted brow gel for a fast, natural look. It takes ten seconds and instantly makes your brows look fuller and more polished.

    If you have sparse areas, fill them in with a brow pencil using short, hair-like strokes. Choose a shade that matches your natural brow color—for most people, that means a soft brown rather than a harsh black.

    The goal: Your brows should look clean and defined, not heavy or drawn-on.


    Step 3: Eyeliner Is Your Best Friend

    Here is the most common mistake glasses wearers make: skipping liner because it feels like too much.

    In reality, eyeliner is what brings your eyes forward so they don’t disappear behind your frames.

    The fix: Always line your upper lash line.

    For everyday wear, a thin line of gel or pencil liner close to the lashes makes a huge difference. It defines the eye without looking heavy.

    If you wear thick or dark frames, you can go bolder. A slightly thicker line, a winged tip, or even a deep navy or charcoal instead of black can look stunning.

    Pro tip: Make sure the line is visible when your eyes are open. This is especially important for those with hooded eyes or deep-set eyes—common concerns that glasses can exaggerate.

    For the lower lash line, proceed with caution. Lining the bottom can sometimes make eyes look smaller or emphasize dark circles. If you do line the bottom, keep it soft and smudged, and connect it to the top line at the outer corner.


    Step 4: Shadow Strategy

    The intensity of your eye shadow should match the boldness of your frames.

    If you have thin, wire-rim frames: You can wear softer, more subtle shadows. Think champagne, soft taupe, or light bronze. These colors enhance without competing.

    If you have thick, bold frames: You need more definition. Medium to deeper shades work well—think mushroom brown, charcoal, or even a soft plum. The color should be visible through the lenses.

    If your frames are colorful (red, blue, tortoiseshell): Choose shadow colors that complement rather than match. For example, warm browns look beautiful with tortoiseshell, while soft grays work with silver or black frames.

    The foolproof approach: Apply a light shadow all over the lid from lash line to brow bone. Then add a medium shade in the crease for definition. Finish with liner and mascara. This classic combination works with any frames.


    Step 5: Mascara That Won’t Betray You

    Nothing is more frustrating than spending time on your eye makeup only to have mascara smudge onto your lenses five minutes later.

    The fix: Waterproof mascara is your friend.

    Waterproof formulas stay put through humidity, tears, and the inevitable friction between your lashes and your lenses.

    If you hate removing waterproof mascara at night (fair enough), look for “tubing” mascaras. These form tiny tubes around each lash and remove easily with warm water—no tugging required.

    Application tip: Let your mascara dry completely before putting on your glasses. Give it a full minute. This small pause prevents those annoying little dots on your lenses.


    Step 6: Work With Your Frames, Not Against Them

    Different frame styles call for slightly different approaches.

    Thick, dark frames (Wayfarers, bold acetates): Your glasses make a statement, so your eye makeup should hold its own. Go for defined liner, visible shadow, and groomed brows. You can even play with a subtle wing.

    Thin, wire frames: These delicate frames call for a softer touch. Focus on perfect concealer, groomed brows, and defined lashes. Shadow can be sheer and natural.

    Cat-eye frames: Play up the retro vibe with a soft winged liner. Keep shadow neutral so the focus stays on the shape of the frames.

    Oversize frames: These can overwhelm your features if you aren’t careful. Define your eyes well and don’t skip the brows. A pop of color on the lips balances the look.

    Reading glasses (half-glasses): Since you look over them as much as through them, focus on your entire eye area. People see both your eyes and your frames.


    The Complete Glasses-Wearer’s Routine

    Here is your cheat sheet for mornings:

    1. Prep: Hydrating eye cream, then corrector + concealer under eyes
    2. Set: Light dusting of powder over concealer
    3. Brows: Tinted gel or pencil fill
    4. Liner: Upper lash line, visible when eyes open
    5. Shadow: Medium shade in crease, light shade on lid
    6. Mascara: Waterproof, let dry before putting on glasses
    7. Lips: Optional, but a soft color balances the face

    Real Women, Real Solutions

    For the nearsighted mom: Your lenses make your eyes look smaller. Emphasize them with liner and don’t skip the inner corner highlight. Curled lashes make a huge difference.

    For the farsighted mom: Your lenses magnify, so precision matters. Blend well, avoid harsh lines, and be extra careful with concealer application.

    For the progressive lens wearer: You look through different parts of your lenses throughout the day. Keep your makeup balanced and defined so it works from every angle.


    The Takeaway

    Glasses are not a barrier to beautiful makeup—they are an opportunity. With the right techniques, your frames become part of your overall look, enhancing your features and expressing your personal style.

    The key is adjusting for magnification, defining enough to be seen, and working with your frames instead of against them.

    You spent time choosing glasses that reflect who you are. Now let your makeup do the same.


    Master the basics first? Start with our beginner’s guide to bronzer, blush, and contour placement . And remember, great makeup starts with great skin—try our simple 5-step night routine .

  • The 5-Minute Face: A Mom’s Morning Routine

    The 5-Minute Face: A Mom’s Morning Routine

    Let’s be honest: most mornings are a race against the clock.

    Between getting kids dressed, packing lunches, finding missing shoes, and somehow getting everyone out the door, the idea of a full face of makeup is almost laughable. By the time you drop the kids at school, you are lucky if you remembered to brush your own hair.

    But here is the truth: taking five minutes for yourself in the morning is not vanity. It is sanity.

    That small window of time—just 300 seconds—where you focus on you can completely shift your mindset for the day. And no, you do not need a 12-step routine or a makeup artist’s kit. You just need the right products, the right tools, and a strategy that works with your life, not against it.

    Here is the 5-minute face every busy mom needs to know.


    The Philosophy: Less Is More

    Before we dive into the steps, let’s reset your expectations.

    The goal here is not perfection. It is not covering every single flaw or creating an Instagram-worthy beat. The goal is to look like yourself—only more rested, more refreshed, and more ready to take on the day.

    Professional makeup artists know a secret: the most beautiful makeup is the kind that looks like you aren’t wearing much at all. Bobbi Brown, the legendary makeup artist, built her entire career on this philosophy. She calls it “looking like yourself, only prettier and more confident.”

    For a busy mom, that means:

    • Brightening tired eyes
    • Evening out skin tone where needed
    • Adding a touch of color so you don’t look washed out
    • Getting out the door without stress

    The Tools You Actually Need

    You do not need a brush roll with 20 options. For a 5-minute face, keep it simple:

    • Your fingers (warmth helps products blend)
    • One good concealer brush (for precise application)
    • An eyelash curler (the secret weapon for tired eyes)
    • A fluffy powder brush (optional, but nice)

    Step 1: Start with Corrector + Concealer (60 seconds)

    If you only do one thing for your face every morning, let it be this.

    Bobbi Brown calls corrector and concealer “the secret of the universe.” Why? Because nothing transforms a tired face faster. The skin under your eyes is thin, so dark circles, blue tones, and shadows show up easily—especially after a night of broken sleep.

    The secret weapon: Peach or pink corrector.

    • If you have fair to medium skin, choose a pink or bisque corrector.
    • If you have medium to dark skin, go with a peach or deeper peach corrector.

    Apply a tiny amount with a brush to the inner corner of each eye and anywhere you see darkness. Then—and this is key—use your ring finger to gently tap it in. Your ring finger has the lightest touch, perfect for delicate under-eye skin.

    Next, layer a yellow-based concealer that is one shade lighter than your foundation (or your natural skin tone, if you skip foundation). Apply it over the corrector, close to the lashes, and blend again with your finger.

    Result: You instantly look like you slept eight hours. Magic.


    Step 2: Skip Foundation, Spot-Cover Only (60 seconds)

    Full-face foundation takes time, and frankly, most moms don’t need it. The trick is to only cover what needs covering.

    Take a quick look in the mirror:

    • Redness around the nose? Dab a little concealer there.
    • A blemish waking up on your chin? Spot-cover with a tiny bit of stick foundation.
    • Uneven skin tone on your forehead? A few dots blended out will do.

    Use your finger to pat and blend. The warmth of your skin helps the product melt in, so it looks like skin, not makeup.

    If your skin is looking dull but you don’t have specific spots to cover, skip the foundation altogether and move to step three.


    Step 3: Add Life Back to Your Face (60 seconds)

    After concealer, faces can look a little flat. You need to bring back dimension and life.

    Cream blush is your best friend here. It blends in seconds, looks natural, and you can even use it on your lips for a monochromatic moment.

    Smile to find the apples of your cheeks. Dab a small amount of cream blush onto the apples and blend upward toward your temples. If you accidentally use too much, just blend it out with a damp sponge or your fingers.

    Lip and cheek tints are even faster. These multitaskers can be swiped on cheeks and lips in seconds. Look for shades that give you a “just went for a walk” flush—soft pinks, peaches, or roses depending on your skin tone.


    Step 4: The 30-Second Eye Lift (60 seconds)

    You might think you don’t have time for eye makeup. But there is one tool that changes everything in seconds: the eyelash curler.

    Before you roll your eyes, try this: curl your lashes and look in the mirror. Notice how much more open and awake your eyes appear? It is like a caffeine shot for your face.

    Pro tip: Warm the curler for a second with your blow dryer (test it on your hand first!) for a curl that lasts all day.

    After curling, add one coat of mascara. Just one. Focus on the roots and wiggle the wand as you move upward to separate and define. If you have time for nothing else, do this.

    For moms who wear glasses, this step is non-negotiable. Your eyes can get lost behind lenses without definition. Curled lashes and mascara bring them forward.


    Step 5: Finish with Something for Lips (60 seconds)

    Your lip product should be easy and forgiving. This is not the time for a precise lip liner and careful application.

    Reach for:

    • A tinted lip balm (sheer color + moisture)
    • A gloss stick (easy to apply without a mirror)
    • The same cream blush you used on your cheeks (dabbed on lips)

    Swipe and go. If it wears off during the day, no big deal. The goal was to start your day with a little polish, not to maintain it through nap time and snack time.


    The Optional 60 Seconds: Brows

    If you have an extra minute, spend it on your eyebrows.

    Why? Because eyebrows frame your entire face. Even if you do nothing else, defined brows make you look more pulled together.

    Use a tinted brow gel. It takes ten seconds to brush through, adds a hint of color, and tames unruly hairs. If you have sparse spots, a quick fill with a brow pencil in short, hair-like strokes makes a huge difference.


    The 5-Minute Face: Recap

    Here is your cheat sheet for the bathroom mirror:

    • Minute 1: Corrector + concealer under eyes
    • Minute 2: Spot-cover redness or blemishes
    • Minute 3: Cream blush on cheeks (and lips, if you want)
    • Minute 4: Curl lashes + one coat mascara
    • Minute 5: Tinted balm + brows (if time)

    That is it. Five minutes. No stress. No complicated techniques.


    The Takeaway

    Moms, you are doing enough. You are showing up for everyone all day long. Taking five minutes for yourself in the morning is not selfish—it is a small act of self-care that reminds you that you matter, too.

    The goal is not to look like someone else. The goal is to look in the mirror and see a slightly more refreshed version of the person holding everything together.

    You deserve that.


    *Want to master the basics? Check out our beginner’s guide to bronzer, blush, and contour placement to take your 5-minute face to the next level. And if you are ready to build a full routine, start with our simple 5-step night routine —because great makeup starts with great skin.*

  • The Perfect Morning Skincare Routine: A Dermatologist’s 4-Step Guide

    The Perfect Morning Skincare Routine: A Dermatologist’s 4-Step Guide

    You already know that a consistent nighttime routine works wonders while you sleep. But what about the morning?

    Your skin’s needs change when the sun comes up. During the day, your focus shifts from repair to protection. The right morning routine sets you up for healthy, glowing skin that can handle whatever the day throws at it—pollution, blue light, stress, and yes, UV rays.

    I spoke with Dr. Marin Lock, board-certified dermatologist and founder of The Budget Dermatologist, to get her exact morning routine. The best part? It is simple, affordable, and backed by science.

    Here is her 4-step morning skincare routine for anti-aging and overall skin health.


    Why Morning Matters

    Before we dive into the steps, let’s talk about why your morning routine deserves attention.

    During the night, your skin is in repair mode—increasing cell turnover and absorbing treatments. But during the day, your skin switches to defense mode. It is constantly fighting environmental aggressors: UV rays, pollution, and free radicals that break down collagen and cause premature aging.

    A strategic morning routine does two things:

    1. Prepares your skin to absorb protective ingredients
    2. Shields your skin from daily damage

    If you are new to building a routine, start with our beginner-friendly 5-step night routine first. Once you have that down, layer in this morning protocol.

    Now, let’s get into it.


    Step 1: Glycolic Acid Cleanser (The Prep)

    Why: Most people reach for a basic cleanser in the morning. Dr. Lock recommends something smarter: a glycolic acid cleanser.

    Glycolic acid is an alpha-hydroxy acid (AHA) that gently exfoliates the top layer of dead skin cells. But in the morning, it serves a specific purpose: lowering the pH of your skin to help the next step absorb better.

    What it does:

    • Removes dead skin cells that accumulated overnight
    • Creates a smooth, even canvas
    • Lowers skin pH so vitamin C can penetrate effectively

    Dr. Lock’s picks:

    • Prequel Gleanser (5% glycolic acid)
    • L’Oreal Revitalift Brightening Cleanser (3.5% glycolic acid, under $15)

    Who can use it: This works for most skin types, including sensitive and rosacea-prone skin. If you are highly reactive, start with the lower concentration option.

    How to use: Wet your face, massage gently for 30-60 seconds, and rinse with lukewarm water. Pat dry.


    Step 2: Vitamin C Serum (The Protector + Brightener)

    Why: If you only add one serum to your morning routine, make it vitamin C. Dr. Lock calls it a “crucial ingredient in a well-rounded anti-aging routine” for two powerful reasons.

    Reason 1: It supercharges your sunscreen
    Vitamin C is a powerful antioxidant. When you apply it under sunscreen, it scavenges free radicals—those unstable molecules created by UV exposure that attack and break down collagen. Think of it as an extra layer of defense that keeps your collagen intact longer.

    Reason 2: It fights dark spots and fine lines
    Vitamin C inhibits melanin production, which helps fade hyperpigmentation over time. It also boosts collagen synthesis, smoothing fine lines and brightening your overall complexion.

    Dr. Lock’s pick:

    • Timeless 10% Vitamin C + E + Ferulic Acid Serum — This contains the same “trifecta” of ingredients as a popular $160+ serum, but costs around $13-20 depending on sales.

    How to use: Apply a few drops to clean, dry skin. Gently pat—don’t rub—to avoid irritation.

    Pro tip: Vitamin C absorbs best at a slightly lower pH, which is exactly why Dr. Lock pairs it with the glycolic acid cleanser. Smart, right?


    Step 3: Moisturizer (The Hydrator)

    Why: Hydrated skin is healthy skin. But Dr. Lock keeps this step simple.

    “You guys keep this step simple,” she says. “We don’t have to overthink it. We don’t have to overspend on this step. We just need moisture in our skin.”

    What to look for:

    • Lightweight, non-greasy formulas
    • Hydrating ingredients like hyaluronic acid
    • Barrier-supporting ingredients like ceramides

    Dr. Lock’s pick:

    • Vanicream Daily Facial Moisturizer — Under $15, contains hyaluronic acid and ceramides, lightweight enough for makeup, and has the National Eczema Association seal of approval.

    Who can use it: All skin types, including sensitive and eczema-prone.

    How to use: Apply a pea-sized amount to damp skin and gently massage until absorbed.


    Step 4: Sunscreen (The Non-Negotiable)

    Why: If you take one thing away from this article, let it be this: sunscreen is the most important anti-aging product you will ever use.

    Dr. Lock puts it plainly: “If you are not using your sunscreen every day, you are not going to be getting the results that you want from your anti-aging ingredients and your routine.”

    What it does:

    • Prevents UV damage that causes wrinkles, dark spots, and skin cancer
    • Protects all the work your other products are doing
    • Keeps collagen intact longer

    Dr. Lock’s pick:

    • Beauty of Joseon Relief Sun: Rice + Probiotic SPF 50+ — A tinted mineral sunscreen (zinc oxide based) that comes in multiple shades, feels lightweight like a serum, and costs around $10-12.

    How to use: Apply as the final step of your morning routine. Use enough to cover your entire face and neck (about a nickel-sized amount). Reapply throughout the day if you are outdoors.


    Step 5 (Optional): Eye Product

    Dr. Lock adds an optional fifth step: an eye product. She personally uses a vitamin C eye balm to target dark circles, fine lines, and aging around the delicate under-eye area.

    If you choose to add this: Apply after your vitamin C serum but before moisturizer. Gently pat—never rub—around the eye contour.


    The Shortcut: When to Skip Moisturizer

    Here is a pro tip from Dr. Lock: some days you might not need a separate moisturizer at all.

    “Some people don’t even need a moisturizer in the morning because so many sunscreens these days are super well-formulated and moisturizing in and of themselves.”

    If your sunscreen feels hydrating enough on its own, you can simplify your routine to three steps:

    1. Glycolic acid cleanser
    2. Vitamin C serum
    3. Sunscreen

    That is it. Simple, effective, and affordable.


    What About Nighttime?

    This morning routine pairs perfectly with a nighttime routine focused on repair. Dr. Lock recommends:

    • Retinoids (on nights your skin tolerates them)
    • Peptide serums (on alternate nights or even layered, since peptides play well with most ingredients)

    If you are not using a retinoid yet, start with our beginner night routine and work your way up.


    The Takeaway

    You do not need a 10-step routine or expensive products to have healthy, glowing skin. Dr. Lock’s morning routine proves that:

    • Step 1: Glycolic acid cleanser (preps for absorption)
    • Step 2: Vitamin C serum (protects + brightens)
    • Step 3: Moisturizer (hydrates)
    • Step 4: Sunscreen (the most important step)

    Keep it simple. Keep it consistent. And always wear your sunscreen.

    Once your skin is prepped and glowing, learn exactly where to place your makeup with our bronzer, blush, and contour placement guide . A smooth canvas deserves beautiful makeup application.

  • 6-Step Glass Skin Routine for Black Women: A Complete Guide

    6-Step Glass Skin Routine for Black Women: A Complete Guide

    You have seen the trend all over social media: “glass skin.” That impossibly smooth, bouncy, and luminous complexion that looks like a pane of pure crystal.

    Originating from Korean beauty trends, glass skin is about achieving extreme hydration and clarity through consistent, layered skincare. But if you have melanin-rich skin, you might wonder: can this trend work for me?

    The answer is a resounding yes. In fact, a well-structured glass skin routine can address many of the concerns Black women face—hyperpigmentation, ashiness, uneven texture, and dullness—while delivering that coveted glow.

    Here is your complete 6-step glass skin routine, tailored specifically for melanin-rich skin.


    Before You Begin: The Glass Skin Mindset

    Glass skin is not achieved overnight. It is the result of patience, consistency, and treating your skin with kindness. The goal is healthy, hydrated, luminous skin that reflects light like glass.

    Think of this routine as building a foundation. Just as you would prep a canvas before painting, you are prepping your skin to receive and hold moisture. And if you are new to structured skincare, you might want to start with our beginner-friendly 5-step night routine to build consistency first. Once you have those basics down, you can layer in the extra steps for that glass-like finish.


    Step 1: Double Cleanse (The Foundation)

    Glass skin starts with a perfectly clean canvas. If your skin is still carrying residue from the day, nothing you apply afterward will penetrate properly.

    The Method:

    • First cleanse (oil-based): Use an oil cleanser or cleansing balm to dissolve makeup, sunscreen, and excess sebum. Massage gently into dry skin, then emulsify with water.
    • Second cleanse (water-based): Follow with a gentle, hydrating foaming or cream cleanser to remove any remaining impurities.

    For Black women: Look for oil cleansers with non-comedogenic oils like grapeseed, jojoba, or sunflower oil. Avoid anything with harsh sulfates in the second cleanse—your skin barrier needs to stay intact.

    Pro tip: If you wear heavy makeup or water-resistant sunscreen, do not skip the double cleanse. It is non-negotiable for glass skin.


    Step 2: Exfoliate (The Smoother)

    Glass skin is smooth skin. Dead skin cells sitting on the surface create dullness and prevent light from reflecting evenly.

    The Method:

    • Use a gentle chemical exfoliant 2-3 times per week (not daily).
    • Lactic acid or mandelic acid are excellent choices for melanin-rich skin. They are larger molecules that exfoliate gently without causing irritation or post-inflammatory hyperpigmentation.
    • Avoid harsh physical scrubs that can cause micro-tears and lead to dark spots.

    For Black women: Be especially careful with exfoliation. Over-exfoliating can trigger excess melanin production, making dark spots worse. Start slow—once a week—and build up as your skin tolerates.


    Step 3: Hydrating Toner (The Layerer)

    This is where the “glass” magic begins. In K-beauty, toners are not astringent strips—they are hydration bombs.

    The Method:

    • After cleansing (and exfoliating on those nights), pat your skin until it is slightly damp.
    • Apply a hydrating toner using your hands, pressing it gently into the skin.
    • The 3-skin method: For extra glow, apply three thin layers of toner, allowing each to absorb before the next. This floods your skin with hydration and creates that plump, bouncy effect.

    For Black women: Look for toners with ingredients like:

    • Hyaluronic acid (attracts moisture)
    • Glycerin (humectant)
    • Niacinamide (brightens and supports barrier)
    • Beta-glucan (soothes and hydrates)

    Avoid toners with high concentrations of alcohol or witch hazel, which can strip your skin and leave it looking ashy.


    Step 4: Essence/Serum (The Treatment)

    This step targets your specific concerns while pushing hydration deeper.

    The Method:

    • After toner, apply an essence or serum while skin is still damp.
    • Essences are lighter and prep the skin; serums are more concentrated and treat specific issues.

    For Black women, key ingredients to look for:

    ConcernIngredient to Seek
    Hyperpigmentation/dark spotsVitamin C (morning), Niacinamide, Alpha-arbutin, Tranexamic acid
    DullnessLactic acid, Glycolic acid (low strength), Vitamin C
    DehydrationHyaluronic acid, Snail mucin, Glycerin
    Uneven textureGentle AHAs, Retinol (night, start slow)
    Loss of firmnessPeptides, Ceramides

    Pro tip: If you are using multiple serums, apply thinnest to thickest consistency. And remember—consistent use matters more than using everything at once.


    Step 5: Moisturizer (The Sealer)

    All that hydration needs to be locked in. A good moisturizer creates an occlusive barrier that prevents water loss.

    The Method:

    • Apply a generous layer of moisturizer to damp skin.
    • Look for a formula that balances hydration with nourishment—not too heavy, not too light.

    For Black women: This step is crucial for preventing that ashy look. Ingredients to love:

    • Shea butter (deeply nourishing)
    • Squalane (lightweight, mimics skin’s natural oils)
    • Ceramides (repair the barrier)
    • Jojoba oil (balances sebum)

    Texture tip: If you have oily skin, do not skip moisturizer—just choose a gel-cream or water-based formula. Dehydrated skin often overproduces oil to compensate.


    Step 6: SPF (The Protector)

    Here is the truth: you cannot achieve glass skin without sun protection. UV rays cause dark spots, break down collagen, and undo all your hard work.

    The Method:

    • Every single morning, finish with broad-spectrum SPF 30 or higher.
    • Apply as the last step of your morning routine, before makeup.

    For Black women: Sunscreen is not optional. While melanin provides some natural protection (about SPF 13), it is not enough to prevent hyperpigmentation or skin cancer. Look for sunscreens that:

    • Leave no white cast (mineral sunscreens with micronized zinc or chemical sunscreens)
    • Feel lightweight under makeup
    • Contain added skincare benefits (niacinamide, hyaluronic acid)

    Pro tip: Korean and Japanese sunscreens often excel at invisible finishes. Brands like Beauty of Joseon, Isntree, and Supergoop offer options that work beautifully on deeper skin tones.


    The Weekly Glass Skin Boosters

    In addition to your daily 6 steps, add these weekly treatments for extra glow:

    • Sheet mask (1-2x weekly): After toner, apply a hydrating sheet mask for 15-20 minutes. Pat in remaining essence.
    • Sleeping mask (as needed): On nights your skin feels extra thirsty, use an overnight mask in place of your regular moisturizer.
    • Facial massage (2-3x weekly): While applying products, use gentle upward motions to boost circulation and lymphatic drainage. This reduces puffiness and enhances glow.

    @beingcrystalnicolee

    Replying to @mahogani ♡ my morning GLASS skincare routine that’ll get the people staring😍 #glassskin #skincareroutine #koreanskincare #morningroutine #fyp #glowingskin

    ♬ original sound – CRYSTAL NICOLE

    Putting It All Together: Your Glass Skin Schedule

    TimeSteps
    MorningCleanse (water only or gentle cleanser) → Toner → Serum (Vitamin C) → Moisturizer → SPF
    EveningDouble Cleanse → (Exfoliate 2-3x/week) → Toner (layered) → Treatment Serum → Moisturizer → (Sleeping Mask occasionally)

    The Connection to Makeup

    Once your skin is prepped with this glass skin routine, your makeup application becomes infinitely easier. Products glide on smoothly, last longer, and look more natural. For tips on exactly where to place your base products for maximum effect, check out our beginner’s guide to bronzer, blush, and contour placement —it pairs perfectly with a glowing canvas.


    The Takeaway

    Glass skin for Black women is not about chasing an unrealistic ideal. It is about giving your skin what it needs to be its healthiest, most radiant self.

    Start with these 6 steps, listen to your skin, and adjust as you go. The glow will come—not from products alone, but from the consistency and care you bring to the routine.

    Your skin is beautiful. This routine just helps it shine.

  • Where to Put Bronzer, Blush & Contour: A Beginner’s Placement Guide

    Where to Put Bronzer, Blush & Contour: A Beginner’s Placement Guide

    If you have ever stared at a pile of cream products on your vanity and thought, “But where does this actually go?”—you are not alone.

    Makeup placement is the secret sauce between “I put stuff on my face” and “I look like I got a professional facial structure upgrade.” The good news? Once you learn the map of where each product belongs, applying makeup becomes muscle memory.

    Think of your face as a canvas. Bronzer, blush, and contour are not interchangeable. They each have a job, and they each have a specific neighborhood on your face where they do their best work.

    Here is your ultimate placement guide.


    The Golden Rule: Know Your Zones

    Before we dive into specific products, let’s establish a simple truth:

    • Contour lives in the shadows. It is cool-toned and meant to recede areas.
    • Bronzer lives where the sun hits. It is warm-toned and meant to bring warmth.
    • Blush lives on the apples and high points. It brings life and freshness.
    • Concealer lives where you need light. It lifts and brightens.

    If you mix these up, your makeup looks muddy. If you place them correctly, your face looks sculpted, fresh, and naturally lifted.


    Step 1: Concealer (The Brightener)

    Where it goes: Concealer is not just for hiding zits. When used strategically, it lifts your face instantly.

    The Placement Zones:

    • Under the eyes: An inverted triangle shape (not just half-moons). This brightens the entire mid-face.
    • The center of the forehead: A small dot helps fade any darkness and makes the forehead appear smoother.
    • Down the nose: A thin line on the bridge creates the illusion of a straighter, narrower nose.
    • The cupid’s bow: A tiny dab defines your upper lip.
    • The center of the chin: This counteracts any shadows or darkness around the mouth.

    The Goal: These are the high points of your face where light naturally hits. By adding concealer here, you are “painting with light” before you even start sculpting.


    Step 2: Contour (The Sculptor)

    Where it goes: Contour is cool-toned (think: taupe, grayish-brown) because it mimics natural shadows. You want it in the places that recede or sink in.

    The Placement Zones:

    • Hollows of the cheeks: Suck in your cheeks like a fish. That hollow? That’s your contour zone. Start at your ear and blend downward toward the corner of your mouth, but stop before you reach the smile lines.
    • Temples: A soft “C” shape along the hairline frames the face and shortens a longer forehead if needed.
    • Jawline: Run contour along the underside of your jawbone, not the top. This creates separation between your face and neck.
    • Sides of the nose: Two thin lines from the inner brow down to the nostrils (but blend well—no sharp lines).
    • Under the lip: A tiny dab in the center of your lower lip’s shadow adds fullness.

    The Goal: You are carving out dimension. These areas should recede slightly, making the high points (where you placed concealer) appear to pop forward.


    Step 3: Bronzer (The Warmer)

    Where it goes: Bronzer is warm, glowy, and mimics a tan. It should never go where contour goes, or you’ll end up with an orange, muddy mess.

    The Placement Zones:

    • The perimeter of the face: A “3” shape on each side. Start at the forehead (near the hairline), sweep down to the cheekbone (right above your contour), and finish along the jawline.
    • Across the nose: A light swipe where the sun naturally hits the bridge and the tip.
    • On the eyelids: A quick dusting in the crease warms up the eye area and ties the whole look together.
    • On the chin and cupid’s bow: A whisper of warmth here mimics sun-kissed skin.

    The Goal: Bronzer should look like you spent a weekend somewhere sunny. It brings your face forward and adds a healthy, warm dimension.


    Step 4: Blush (The Lifter)

    Where it goes: Blush is the fun one. It brings color back to your face after all that sculpting and warming.

    The Placement Zones:

    • The apples of the cheeks: Smile. See those round parts? That’s the traditional placement. It gives a youthful, lifted appearance.
    • Swept upward: For a more modern, lifted look, place blush slightly higher on the cheekbone, blending it back toward your temples (almost meeting your bronzer).
    • A touch on the nose: A tiny dab on the bridge and tip ties the whole look together and adds to that “fresh, just went for a walk” vibe.
    • On the chin (optional): A whisper of blush on the center of the chin balances the face if you have a longer face shape.

    The Goal: Blush should look like a natural flush. It sits on top of the cheekbones (not below them) and brings the face to life.


    The Layering Order (Cream Products)

    If you are using cream products (which blend beautifully and look like skin), order matters:

    1. Concealer (brighten first)
    2. Contour (sculpt second)
    3. Bronzer (warm third)
    4. Blush (flush fourth)

    Blend between each step with a damp sponge or a stippling brush. Then set with powder if needed.


    Face Shape Adjustments

    While the general map above works for most people, here are quick tweaks based on face shape:

    • Round face: Keep contour lower on the cheeks and bronzer closer to the hairline to create angles.
    • Oval face: You have balanced proportions—place blush on the apples and keep bronzer light on the forehead and chin.
    • Square face: Soften the jawline with contour placed directly on the angles, and keep blush on the apples to draw focus inward.
    • Heart face: Place blush slightly lower on the cheeks to balance a wider forehead, and keep contour light on the temples.

    The Takeaway

    Makeup placement is not about rules—it is about understanding your unique face and enhancing what you already have.

    Next time you sit down with your creams and brushes, remember the mantra:

    • Concealer = Light (center of the face)
    • Contour = Shadow (perimeter and hollows)
    • Bronzer = Warmth (where the sun hits)
    • Blush = Life (the high points)

    Save this guide, pin it for later, and practice. Within a few tries, placement will feel like second nature.

  • New to Skincare? This 5-Step Night Routine Fixes 90% of Skin Problems

    New to Skincare? This 5-Step Night Routine Fixes 90% of Skin Problems

    If you have ever stood in the skincare aisle feeling completely overwhelmed, you are not alone. With thousands of products promising everything from “glass skin” to “glass skin,” it is easy to fall into the trap of buying too much or doing too little.

    The good news? You do not need a ten-step routine to see real results. In fact, sticking to the basics consistently will fix the vast majority of common skin concerns.

    Whether you are battling dullness, persistent dryness, or clogged pores, this 5-step night routine is designed to reset your skin. Think of it as your “skin reset button”—a simple, science-backed sequence that works while you sleep.

    Here is how to do it right.


    Why Nighttime is the Ultimate Repair Hour

    Before we dive into the steps, it helps to understand why we focus on the evening.

    During the day, your skin is in “protection mode.” It is fighting off UV rays, pollution, and blue light. At night, however, your skin switches to “repair mode.” Cell turnover accelerates, blood flow increases, and your skin becomes more receptive to the ingredients you apply.

    Essentially, everything you put on your skin at night works harder and smarter. This makes your nighttime routine the most effective way to target your biggest skin frustrations.


    Step 1: The Canvas (Remove Makeup)

    The Problem: Leftover makeup mixed with the day’s oil and dirt creates a film over your skin. If you apply your expensive night cream over this film, nothing penetrates. This leads to clogged pores and a dull, congested complexion.

    The Solution: Double cleansing is the gold standard here. If you wear heavy makeup or sunscreen, start with an oil-based cleanser or micellar water to break down the grime. Follow up with a gentle water-based cleanser to wash away the residue.

    Beginner Tip: If you are exhausted, keep makeup wipes on your nightstand as a backup—but try to graduate to a proper cleanser. Your skin needs to be completely bare to absorb the next steps.


    Step 2: The Reset (Cleanser)

    The Problem: Even if you don’t wear makeup, your skin accumulates sweat, sebum, and environmental pollutants throughout the day. If these sit on your face overnight, they can oxidize and lead to breakouts or a loss of radiance.

    The Solution: A clean face is a happy face. Washing your skin preps it to receive nutrients. Look for a cleanser that removes impurities without stripping your skin of its natural moisture barrier.

    If your skin feels “squeaky” or tight after washing, your cleanser is too harsh. Switch to a hydrating, cream-based cleanser to avoid disrupting your skin barrier, which is essential for fixing dryness.


    Step 3: The Prescription (Treatment)

    The Problem: This is where most people get stuck. “Treatment” is a vague term, but in a beginner routine, it is simply the step where you target your specific concern. Are you dealing with dark spots? Fine lines? Acne? Ignoring this step means your skin stays the same.

    The Solution: You don’t need a different product for every concern. You need the right ingredient for your primary problem:

    • If your skin is dull or textured: Start with a gentle chemical exfoliant (like a low-percentage lactic acid or salicylic acid) 2-3 times a week. This dissolves the dead skin cells that cause that “tired” look.
    • If your skin is dry and flaky: Use a hydrating serum containing hyaluronic acid. It acts like a sponge, drawing moisture into your skin.
    • If you are worried about aging: A beginner-friendly retinol (look for encapsulated formulas) once or twice a week can boost collagen production.

    Warning: Do not use acids and retinol on the same night. Rotate them to avoid irritation.


    Step 4: The Seal (Night Cream)

    The Problem: Have you ever applied a serum only to wake up with dry skin again? That is because serums (treatments) are usually water-based and evaporate if they aren’t sealed in.

    The Solution: A night cream acts as a lock. It is typically richer than a day moisturizer and creates a physical barrier on the skin. This barrier keeps the active ingredients from step three pressed against your skin so they can absorb, and it prevents water loss while you sleep.

    Think of your treatment as the fuel and your night cream as the engine cover. You need both to get where you’re going.


    Step 5: The Detail (Lip Mask)

    The Problem: Chapped, peeling lips ruin an otherwise healthy complexion. The skin on your lips is incredibly thin and has no oil glands, meaning it cannot hydrate itself.

    The Solution: A lip mask or heavy lip balm is the ultimate overnight treatment. Unlike a standard lip balm that wears off in an hour, a mask is designed to sit thickly on the lips all night.

    In the morning, you can gently wipe away dead skin with a damp cloth, revealing soft, smooth lips underneath. This tiny detail makes a massive difference in how “polished” your skin looks overall.


    The Weekly Upgrade: Exfoliate, Mask, Massage

    To fix 90% of skin problems, consistency is key. However, adding these three weekly habits will accelerate your results:

    • Exfoliate (1-2x Weekly): This helps step three (Treatment) work better. By removing the layer of dead cells on the surface, your serums can penetrate deeper.
    • Face Mask (1x Weekly): Use this as a “spa night.” Depending on your skin’s needs that week, use a hydrating mask if you feel dry, or a clay mask if you feel congested.
    • Face Massage (1-3x Weekly): This doesn’t require a fancy tool. While applying your night cream, spend an extra minute massaging your jawline, cheeks, and forehead. This boosts circulation (which adds glow) and helps drain lymphatic fluid that can cause morning puffiness.

    The Takeaway

    You do not need a cabinet full of products to have great skin. You just need a routine that respects the biology of your skin.

    By following these five steps—Remove, Cleanse, Treat, Seal, and Detail—you are essentially giving your skin the ideal environment to repair itself overnight. Stick with it for 28 days (the time it takes for your skin cells to turn over), and you will likely find that your dullness fades, your dryness disappears, and your pores become less noticeable.

    Start simple. Stay consistent. Let your skin do the rest.