
Eye makeup can feel intimidating when you are just starting.
One tutorial uses five eyeshadow shades. Another adds winged liner, cut crease, false lashes, glitter, brow carving, and three brushes you do not even own. Before long, a simple eye look starts to feel impossible.
But beginner eye makeup does not have to be complicated.
You do not need a huge eyeshadow palette. You do not need perfect wings. You do not need to master dramatic smoky eyes on day one. You only need to understand the basics: where to place color, how to blend, how to define the lash line, and how to make your eyes look more awake.
This guide breaks eye makeup down step by step so you can build confidence without getting overwhelmed.
If you are still building your full makeup bag, start with Makeup for Beginners: What You Actually Need first. Then come back here for the eye makeup part.
What Beginners Actually Need for Eye Makeup
You do not need a drawer full of products.
For beginner eye makeup, these are enough:
- One neutral eyeshadow palette
- Mascara
- Brown or black pencil eyeliner
- Brow gel or brow pencil
- One small blending brush
- One flat eyeshadow brush
- An eyelash curler, optional
- Cotton swabs for cleanup
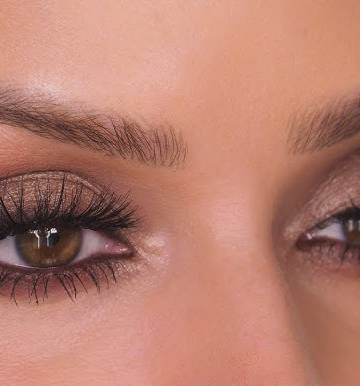
A neutral palette is the easiest place to start because browns, taupes, creams, soft golds, and warm beige shades are more forgiving than bright colors or heavy black shadow.
Once you can do a simple everyday eye, you can add shimmer, liner, smoky shades, or bolder colors later.
The Beginner Eye Makeup Rule
The most important rule is this:
Start soft, then build.
It is much easier to add more eyeshadow, liner, or mascara than it is to remove too much product after it gets messy.
Use light layers. Blend slowly. Keep the darkest colors close to the lash line or outer corner. Let the look grow gradually instead of applying too much at once.
Beginner eye makeup should make your eyes look more open, defined, and polished — not heavy or complicated.
Step-by-Step Eye Makeup for Beginners
Step 1: Prep the Eyelids
Before applying eyeshadow, make sure your lids are clean and not too oily.
If you apply eyeshadow on oily lids, it may crease or fade quickly. If your lids are dry, shadow may look patchy.
You can prep your eyelids with:
- A tiny bit of concealer
- Eyeshadow primer
- A light dusting of powder
- A skin-toned matte shadow
For beginners, concealer is usually enough. Apply a very thin layer over the eyelid, blend it out, then lightly set it with powder or a neutral shadow.
Do not use too much concealer. Thick layers can crease.
Step 2: Choose Three Simple Eyeshadow Shades
You do not need ten shades for a beginner eye look.
Start with three:
1. A light shade
This goes across the lid or under the brow bone. It can be cream, beige, soft peach, or light brown depending on your skin tone.
2. A medium shade
This goes into the crease. It creates soft depth and shape.
3. A deeper shade
This goes near the lash line or outer corner. It adds definition.
That is enough for most everyday eye makeup looks.
If you want a very simple look, you can even use one medium brown shade and mascara.
Step 3: Apply a Light Shade Across the Lid
Start with your lightest shade.
Apply it across the eyelid from the lash line up toward the crease. This creates a smooth base and makes blending easier.
Use a flat brush, fluffy brush, or even your finger if the shadow is soft.
The shade should not look too dramatic. It is just there to even out the lid and create a clean starting point.
Step 4: Add a Medium Shade to the Crease
The crease is the area where your eyelid naturally folds.
Apply a medium brown, taupe, peach-brown, or soft neutral shade into the crease using a fluffy blending brush.
Move the brush gently back and forth like a windshield wiper. Then use small circular motions to soften the edges.
This step creates shape.
Do not bring the color too high at first. Start lower, blend, then build if needed.
Beginner tip
Keep your eyes open while placing crease color. This helps you see where the shadow will actually show when your eyes are open.
Step 5: Deepen the Outer Corner
Now use your deeper shade.
Apply a small amount to the outer corner of the eye. This is the outer third of the lid, near the end of your lash line.
Blend it slightly into the crease, but do not drag it too far inward. Keeping the depth on the outer corner makes the eyes look lifted and defined.
Good beginner shades include:
- Soft brown
- Chocolate brown
- Deep taupe
- Espresso
- Warm plum
- Deep bronze
Avoid using black eyeshadow as a beginner unless you are doing a very specific smoky look. Black can get messy quickly.
Step 6: Blend Until There Are No Harsh Lines
Blending is what makes eye makeup look soft.
After placing your shadows, use a clean fluffy brush and gently blend around the edges. You do not need to blend forever, but you do want the colors to fade into each other.
A good beginner eye look should not have obvious stripes.
If the shadow looks patchy, add a tiny bit more medium shade and blend again. If it looks too dark, use a clean brush or a little skin-toned powder to soften it.
Step 7: Add Eyeliner Close to the Lash Line
Eyeliner can make the lashes look thicker and the eyes more defined.
For beginners, pencil liner is easier than liquid liner.
Start by applying a thin line as close to the upper lashes as possible. Do not worry about creating a perfect wing. The goal is soft definition.
You can use:
- Brown pencil for a natural look
- Black pencil for stronger definition
- Dark brown eyeshadow as liner
- Soft gray or plum for a gentler effect
After applying liner, smudge it lightly with a brush or cotton swab. This makes mistakes less obvious and gives a softer finish.
If eyeliner feels too hard, skip it and use dark eyeshadow along the lash line instead.
Step 8: Curl the Lashes, Optional
An eyelash curler can make a big difference, especially if your lashes grow straight or downward.
Use it before mascara, not after.
Place the curler near the base of your lashes, press gently for a few seconds, then release. Do not pull.
This step is optional, but it helps the eyes look more open.
Step 9: Apply Mascara
Mascara is the easiest way to finish beginner eye makeup.
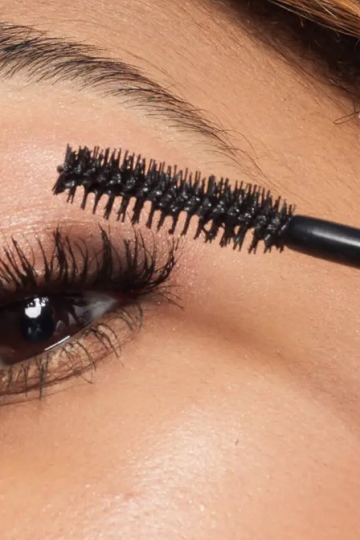
Start at the root of the lashes and wiggle the wand upward. This helps coat the lashes evenly and gives lift.
Use one coat for a natural look. Use two coats if you want more definition.
Avoid pumping the mascara wand in and out of the tube because that can dry it out faster.
Beginner mascara tip
If mascara gets on your eyelid, let it dry first. Then gently flick it away with a clean spoolie or cotton swab. Trying to wipe wet mascara usually makes a bigger mess.
Step 10: Do the Brows
Brows frame the eyes, so do not skip them completely.
You do not need dramatic brows. Just brush them into place and fill sparse areas lightly.
Use:
- Clear brow gel if your brows are already full
- Tinted brow gel for quick color and hold
- Brow pencil for gaps
- Brow powder for soft filling
Brush the brows upward and outward. If using pencil, make tiny hair-like strokes instead of drawing one solid line.
Soft brows make eye makeup look more polished.
The Easiest Beginner Eye Makeup Look
Here is the simplest version:
- Apply a light neutral shade over the lid
- Blend a medium brown shade into the crease
- Add a deeper brown shade to the outer corner
- Smudge brown liner along the upper lash line
- Apply mascara
- Brush brows into place
This works for everyday makeup, work, school, brunch, and casual plans.
It also pairs perfectly with The Simple Everyday Makeup Routine That Works in 5 Minutes.
The 2-Minute Eye Makeup Look
Some days, you will not have time for eyeshadow.
Do this instead:
- Brush brows up
- Curl lashes
- Apply mascara
- Add a tiny bit of shimmer or highlighter to the inner corners
That is enough to make the eyes look awake.
For more quick ideas, use 5-Minute Eye Makeup: Quick Easy Looks for Every Girl.
The One-Shadow Eye Look
A one-shadow look is perfect for beginners.
Choose one soft brown, taupe, bronze, peach, or rose shade. Apply it across the lid, then blend the edges upward into the crease.
That is it.
Add mascara and brow gel, and the look is finished.
This works best with shades that are not too light and not too dark. A medium tone gives the eye shape without needing multiple colors.
The Soft Brown Everyday Eye
A soft brown eye is one of the most useful beginner looks.
Use a light beige shade on the lid, a medium brown in the crease, and a deeper brown close to the lash line. Add mascara and keep everything blended.
This look works with almost any lip or cheek color.
It is also a good starting point if you want to move into soft glam makeup looks later.
The Clean Girl Eye Look
Clean girl eye makeup is minimal.
You can skip eyeshadow or use only a light brown shade in the crease. Curl the lashes, apply mascara, brush up the brows, and add a tiny highlight to the inner corner.
This look works beautifully with cream blush, glossy lips, and fresh skin.
For the full face version, follow the Clean Girl Makeup Routine for a Fresh Everyday Look.
Eye Makeup for Hooded Eyes
If you have hooded eyes, your eyelid may disappear or fold when your eyes are open.
The key is to place your crease shade slightly above your natural crease so it can be seen when your eyes are open.
Helpful tips:
- Blend crease color with your eyes open
- Keep shimmer on the mobile lid
- Place deeper color on the outer corner
- Use thin eyeliner
- Avoid very thick liner that hides the lid
- Focus mascara on the outer lashes
A soft lifted shape usually works better than a heavy rounded shape.
Eye Makeup for Small Eyes
If you want your eyes to look bigger, focus on brightness and lift.
Try:
- Light shimmer on the inner corner
- Medium shadow softly blended upward
- Thin liner close to the lashes
- Nude or beige liner on the lower waterline
- Mascara focused on the center and outer lashes
- Avoiding heavy black liner all around the eye
Dark liner all around the eye can make small eyes look smaller. Keep the lower lash line soft.
Eye Makeup for Glasses
Glasses can make eye makeup look softer or less visible, so definition matters.
Focus on:
- Brightening under the eyes
- Grooming the brows
- Curling the lashes
- Applying mascara carefully
- Adding liner close to the upper lash line
- Using slightly more definition than usual
Avoid very heavy lower-lash makeup if your frames already create shadows under the eyes.
For a full guide, read Makeup for Glasses: How to Make Your Eyes Pop Behind Lenses.
Eye Makeup for Mature Skin
For mature skin, softer eye makeup usually looks fresher than heavy layers.
Use satin, matte, or softly glowing shadows instead of chunky glitter. Keep dark colors close to the lash line and blend upward gently.
Helpful tips:
- Use thin layers
- Avoid heavy concealer on the lids
- Use soft brown liner instead of harsh black
- Blend shadow upward for lift
- Curl lashes before mascara
- Avoid thick powdery eyeshadow if lids are dry
The goal is soft definition, not heavy coverage.
Eyeshadow Finishes Explained
When choosing eyeshadow, the finish matters.
Matte
No shine. Great for crease shades and soft definition.
Satin
A gentle sheen. Very flattering and easy to wear.
Shimmer
Reflective but not glittery. Good for lids and inner corners.
Metallic
More intense shine. Better for evening or glam looks.
Glitter
Sparkly and bold. Fun, but harder for beginners because fallout can happen.
Beginners should start with matte, satin, and soft shimmer shades.
Where Each Eyeshadow Shade Goes
Here is a simple placement guide:
Light shade
Across the lid, inner corner, or brow bone.
Medium shade
Crease and slightly above the crease.
Deep shade
Outer corner and lash line.
Shimmer shade
Center of lid, inner corner, or lightly over the lid.
Once you understand placement, eyeshadow becomes much easier.
Common Beginner Eye Makeup Mistakes
Using too much dark shadow
Dark shadow is powerful. Start with a little and build slowly.
Not blending the edges
Blending makes eyeshadow look soft and intentional.
Applying eyeliner too thick
Thick liner can make the lid look smaller. Start thin.
Skipping mascara
Mascara finishes the look and opens the eyes.
Ignoring brows
Brows frame the eye area and make the makeup look complete.
Using too many colors
Beginners should start with two or three shades.
Choosing the wrong brush
A fluffy brush blends. A flat brush packs color. Using the wrong one can make shadow harder to control.
Closing your eyes the whole time
Check your makeup with your eyes open so you can see the real shape.
How to Fix Eye Makeup Mistakes
If your eyeshadow is too dark
Blend with a clean brush or add a little skin-toned powder around the edges.
If your eyeliner is messy
Smudge it into a soft smoky line instead of trying to make it perfect.
If mascara clumps
Use a clean spoolie to separate lashes before it fully dries.
If shimmer falls under your eyes
Use a clean fluffy brush or a bit of tape to lift away fallout.
If one eye looks different from the other
Do not panic. Eyes are naturally different. Adjust slowly instead of adding too much product.
Best Beginner Eyeshadow Colors
The easiest shades to start with are:
- Beige
- Taupe
- Soft brown
- Warm brown
- Chocolate brown
- Champagne
- Bronze
- Peach
- Rose
- Mauve
- Soft plum
These shades are wearable and forgiving.
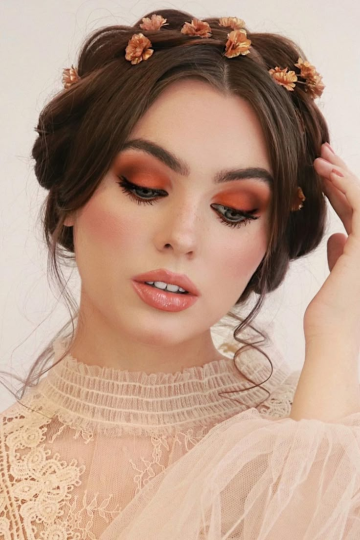
Bright colors can be fun, but neutrals are easier when you are learning placement and blending.
Do You Need Eyeliner as a Beginner?
No, eyeliner is optional.
Mascara alone can make the eyes look defined. If eyeliner feels stressful, skip it for now.
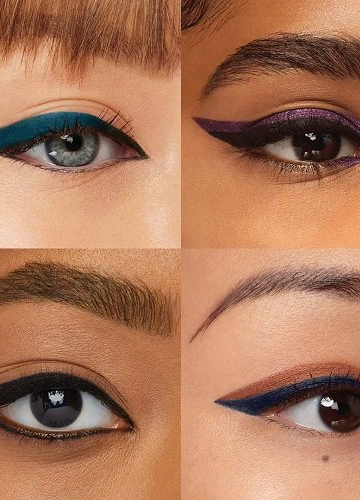
When you are ready, start with brown pencil liner or dark brown eyeshadow. Both are easier to blend than liquid liner.
Liquid liner can come later.
Do You Need Eyeshadow Primer?
Not always.
You may need eyeshadow primer if:
- Your eyelids are oily
- Shadow creases quickly
- Shadow fades during the day
- You want stronger color payoff
- You are wearing makeup for a long event
For everyday beginner makeup, a thin layer of concealer set with powder can work well.
The Bottom Line
Eye makeup for beginners does not need to be complicated.
Start with a few simple products, soft neutral shades, and light layers. Learn where to place color before worrying about advanced techniques.
The easiest beginner formula is:
Light shade on the lid.
Medium shade in the crease.
Deep shade near the lash line or outer corner.
Soft liner if you want definition.
Mascara to open the eyes.
Brows brushed into place.
Once that feels easy, you can try shimmer, smoky eyes, winged liner, colorful shadows, or soft glam.
Beginner eye makeup is not about perfection. It is about learning what makes your eyes look bright, lifted, and naturally defined.

Leave a Reply