
Makeup gets confusing fast when you are just starting.
One tutorial says you need primer, foundation, concealer, contour, bronzer, blush, powder, setting spray, brow gel, brow pencil, eyeshadow, eyeliner, mascara, lip liner, lipstick, gloss, highlighter, and three different brushes.
Another person says you only need skin tint and mascara.
So which one is true?
The honest answer is this: you do not need a huge makeup kit to look polished. You need a few products that match your skin, suit your lifestyle, and are easy enough to use every day.
Beginner makeup should not feel like a performance. It should help you look a little fresher, more awake, and more put together without making you feel like you need a professional beauty license.
If your goal is quick everyday makeup, you may also like this 5-minute face routine for busy mornings. But first, let’s build your beginner kit the smart way.
The Beginner Makeup Rule: Start With Less
When you are new to makeup, buying too much too soon is one of the easiest mistakes to make.
You do not need every trending product. You do not need a 20-step routine. You do not need every brush in a professional kit.
Start with the products that make the biggest difference:
- A good base product
- Concealer
- Blush or bronzer
- Mascara
- Brow product
- Lip product
- One simple setting product
- A few basic tools
That is enough to create a clean everyday look.
Once those feel easy, you can add eyeshadow, eyeliner, highlighter, contour, or more playful products.
The goal is not to own everything. The goal is to know what each product does.
Step 1: Skin Prep Comes Before Makeup
Before you buy makeup, pay attention to your skin prep.
Makeup sits better on skin that is clean, moisturized, and protected. If your foundation looks patchy, dry, greasy, or uneven, the problem may not be the foundation. It may be that your skin needs better prep underneath.
A simple morning prep can be:
- Cleanser or water rinse
- Moisturizer
- Sunscreen
That is enough.
If your skin is dry, use a richer moisturizer. If your skin is oily, choose a lightweight gel moisturizer. If your skin is sensitive, keep skincare gentle and fragrance-free.
If you are not sure what your skin type is, start with this beginner’s guide to knowing your skin type before buying products. Makeup becomes much easier when your skincare and skin type are working together.
Step 2: Choose a Base Product
Your base product is what helps even out your skin tone.
This can be:
- Skin tint
- Tinted moisturizer
- BB cream
- Light foundation
- Medium coverage foundation
Beginners usually do better with light to medium coverage instead of full coverage. Full coverage can look beautiful, but it is less forgiving. If the shade is slightly off or the blending is uneven, it shows quickly.
A skin tint or tinted moisturizer is easier because it lets your natural skin show through.
What to choose
If you want a natural everyday look, choose a skin tint or tinted moisturizer.
If you want more coverage for redness, uneven tone, or dark spots, choose a light or medium foundation.
If you do not like the feeling of makeup, use concealer only where needed and skip foundation.
Beginner tip
Test foundation along your jawline, not just on your hand. Your hand and face are usually not the same color.
The right shade should disappear into your skin without making your face look too orange, too gray, too pink, or too pale.
Step 3: Use Concealer Only Where You Need It
Concealer is one of the most useful beginner products because it lets you cover small areas without applying heavy makeup everywhere.
Use concealer for:
- Under-eye darkness
- Blemishes
- Dark spots
- Redness around the nose
- Uneven patches
- Discoloration around the mouth
You do not need to paint a giant triangle under your eyes. Start small. Add a little, blend, then add more only if needed.
For under eyes
Choose a concealer that is close to your skin tone or just slightly brighter.
For blemishes and dark spots
Choose a concealer that matches your skin tone. If it is too light, it will highlight the spot instead of hiding it.
Beginner tip
Let concealer sit for a few seconds before blending. This gives more coverage without needing more product.
Step 4: Pick Blush or Bronzer First, Not Both
Beginners often get confused by blush, bronzer, and contour.
You do not need all three right away.
Start with either blush or bronzer depending on what you want your face to look like.
Blush adds freshness and color.
Bronzer adds warmth.
Contour adds shadow and shape.
For beginners, blush is usually the easiest place to start because it instantly makes the face look more alive.
If you want a full breakdown, read this beginner’s guide to where to put bronzer, blush, and contour.
Step 5: Blush Makes the Biggest Difference
If you only buy one cheek product, make it blush.
Blush can make tired skin look fresher in seconds. It brings life back to the face, especially if your base product has evened everything out.
Best beginner blush types
Cream blush is great if you want a soft, natural finish.
Powder blush is great if your skin is oily or you want something easy to control.
Liquid blush can be beautiful, but use a tiny amount because it can be very pigmented.
Where to apply blush
For a lifted look, apply blush slightly higher on the cheeks and blend upward toward the temples.
For a softer youthful look, apply it to the apples of the cheeks and blend out.
Do not apply too much at once. Start light. You can always add more.
Step 6: Mascara Opens the Eyes
Mascara is one of the easiest beginner makeup products because it makes the eyes look more awake without needing eyeshadow or liner.
Choose a mascara based on your lashes:
- Short lashes: lengthening mascara
- Straight lashes: curling mascara
- Sparse lashes: volumizing mascara
- Sensitive eyes: gentle or washable mascara
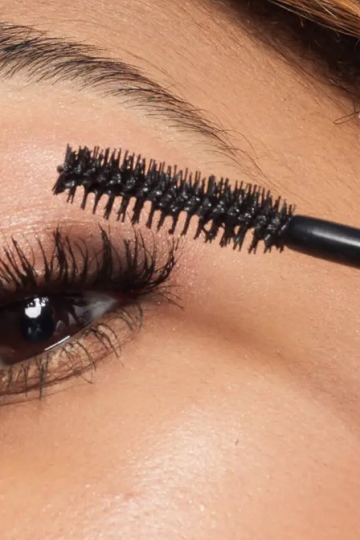
Apply one coat first. Wiggle the wand at the base of your lashes, then pull upward.
If you want a more open-eye effect, focus mascara on the outer lashes.
If eye makeup feels intimidating, try this 5-minute eye makeup guide for quick looks that do not require complicated blending.
Step 7: Brows Frame the Face
You do not need dramatic brows as a beginner.
You just need to lightly shape and fill sparse areas.
Good beginner brow products include:
- Tinted brow gel
- Clear brow gel
- Brow pencil
- Brow powder
If your brows are already full, use clear or tinted brow gel.
If you have sparse areas, use a pencil with light, hair-like strokes. Do not draw one solid block of color.
Beginner tip
Choose a brow shade slightly softer than your natural brow hair if you are unsure. Brows that are too dark can make the whole face look heavier.
Step 8: Lip Products Pull the Look Together
Lip products are the easiest way to finish a beginner makeup look.
You do not need complicated lip liner and lipstick combinations at first. Start with something comfortable and flattering.
Good beginner lip options include:
- Tinted lip balm
- Nude gloss
- Soft pink gloss
- Brown-pink lipstick
- Mauve lipstick
- Sheer berry balm
- Clear gloss
If you are not sure what color to choose, pick a shade close to your natural lip color but slightly warmer, pinker, or deeper.
A soft lip product makes beginner makeup look finished without feeling overdone.
Step 9: Powder Only Where You Need It
Powder helps control shine and set makeup, but too much powder can make beginner makeup look dry, heavy, or cakey.
You do not need to powder your whole face unless you are very oily.
Apply powder lightly to:
- Under the eyes
- Around the nose
- Center of forehead
- Chin
- Any area that creases or gets shiny
If your skin is dry, use very little powder or skip it completely.
If your skin is oily, powder can help your makeup last longer, but apply it in thin layers.
Step 10: Setting Spray Is Optional
Setting spray can help makeup look more blended and less powdery. It can also refresh the skin if your makeup looks too matte.
But it is not mandatory.
If your makeup is simple and you are not wearing it for a long event, you may not need setting spray at all.
Use setting spray if:
- Your makeup looks powdery
- You want a dewier finish
- You need makeup to last longer
- You wear more layers
Skip it if your routine is already working.
What Makeup Products Do Beginners Actually Need?
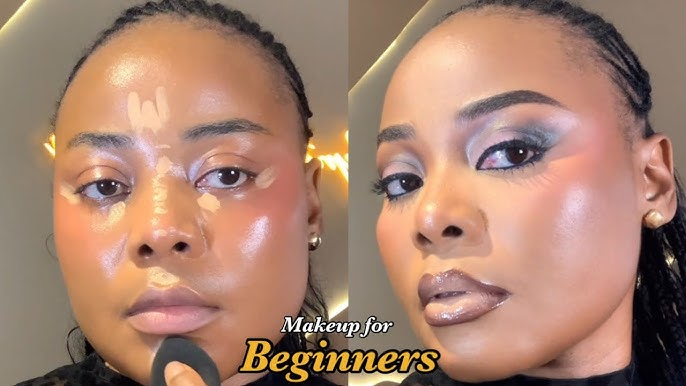
Here is the simple beginner makeup kit.
1. Skin tint or foundation
Choose light or medium coverage.
2. Concealer
Use it under the eyes, around the nose, and on spots.
3. Blush
Cream or powder blush works well.
4. Mascara
One good mascara is enough.
5. Brow gel or pencil
Choose gel for easy shaping or pencil for filling gaps.
6. Lip product
Tinted balm, gloss, or soft lipstick.
7. Powder
Use only where needed.
8. Basic tools
A sponge, one fluffy brush, and maybe one small eye brush.
That is it.
Everything else is optional.
Products Beginners Can Skip at First
You can always add these later, but you do not need them immediately.
Primer
Primer can help, but good moisturizer and sunscreen are enough for many people.
Contour
Contour is useful, but it takes practice. Start with blush or bronzer first.
Highlighter
Pretty, but optional. Many beginners already get enough glow from moisturizer or cream blush.
Full eyeshadow palette
You do not need 30 colors. One small neutral palette is enough.
Liquid eyeliner
Liquid liner can be tricky. Start with pencil or eyeshadow liner if you want definition.
Lip liner
Useful later, but not required for everyday beginner makeup.
False lashes
Beautiful for glam, but not necessary for a beginner routine.
Baking powder technique
This can look heavy if done wrong. Light powdering is easier.
The Easiest Beginner Makeup Routine
Here is a simple routine you can follow.
Step 1: Prep your skin
Cleanse or rinse, moisturize, and apply sunscreen.
Step 2: Apply skin tint or foundation
Use a small amount and blend outward.
Step 3: Add concealer
Apply only where needed.
Step 4: Add blush
Smile lightly, apply to the cheeks, then blend upward.
Step 5: Brush brows
Use clear or tinted brow gel.
Step 6: Apply mascara
One or two coats.
Step 7: Add lip color
Use gloss, balm, or lipstick.
Step 8: Powder if needed
Only on shiny or creasing areas.
This routine can take five to ten minutes once you get used to it.
For a faster version, follow The 5-Minute Morning Makeup Routine.
A Beginner Makeup Routine for Work or School
For work or school, keep everything soft and fresh.
Use:
- Skin tint
- Concealer
- Cream blush
- Brow gel
- Mascara
- Tinted lip balm
- Light powder
This gives you a clean look without feeling too glam.
Avoid heavy contour, dark smoky eyes, or sticky gloss if you need something low-maintenance.
A Beginner Makeup Routine for Date Night
Date night makeup can still be simple.
Use your everyday routine, then add one extra feature.
You could add:
- A slightly deeper lip
- Brown eyeshadow
- Soft eyeliner
- Extra mascara
- More blush
- A little glow on the cheekbones
Do not change everything at once. Soft glam works best when one feature stands out and the rest stays blended.
For more ideas, check out these soft glam makeup looks for 2026.
A Beginner Makeup Routine for Glasses
If you wear glasses, your makeup needs a few small adjustments.
Focus on:
- Brightening under the eyes
- Defining the lashes
- Keeping brows groomed
- Using liner close to the lash line
- Avoiding too much product where glasses sit
A little extra eye definition helps your features show behind the lenses.
For a full breakdown, read Makeup for Glasses: How to Make Your Eyes Pop Behind Lenses.
How to Pick the Right Shades
Shade choice matters more than product count.
Foundation
Match your face, neck, and chest as closely as possible.
Concealer
Use a skin-tone match for spots and a slightly brighter shade under the eyes if needed.
Blush
Fair skin often suits soft pink, peach, or rose.
Medium skin often suits coral, warm pink, mauve, or terracotta.
Deep skin often suits berry, brick, plum, orange, or deep rose.
Bronzer
Choose a shade that looks warm, not muddy or orange.
Lip color
Start with shades close to your natural lip color: pink-brown, nude rose, mauve, caramel, berry, or soft brown.
The best shades should make your face look fresher, not washed out.
Common Beginner Makeup Mistakes
Using too much product
Start with less than you think you need. Add more only where needed.
Choosing the wrong foundation shade
A bad shade match can make even good makeup look off.
Not blending down the jawline
Blend your base into the jaw and slightly down the neck.
Applying blush too low
Low blush can drag the face down. Blend upward for a lifted look.
Overfilling brows
Brows should frame the face, not dominate it.
Skipping skin prep
Dry or oily skin can make makeup harder to blend.
Powdering everything
Powder only where needed, especially if your skin is dry or mature.
Copying routines that do not fit your lifestyle
If you only have seven minutes in the morning, do not build a 30-minute routine.
Beginner Tools You Actually Need
You do not need a giant brush set.
Start with:
Makeup sponge
Good for foundation, concealer, and cream products.
Fluffy powder brush
Good for powder, bronzer, or soft blush.
Small blending brush
Good for simple eyeshadow.
Brow spoolie
Good for brushing brows before and after product.
Fingers
Your fingers work well for cream blush, tinted moisturizer, shimmer eyeshadow, and lip balm.
That is enough.
You can add more tools later once you know what products you actually use.
How to Build Your Makeup Bag Slowly
Start with the basics:
- Skin tint or foundation
- Concealer
- Blush
- Mascara
- Brow gel
- Lip product
- Powder
Use those for a few weeks.
Then ask yourself what is missing.
If your face needs warmth, add bronzer.
If your eyes need definition, add liner.
If your skin looks flat, add highlighter.
If you want more polish, add a small eyeshadow palette.
If your makeup fades, add setting spray.
Build based on your real routine, not someone else’s shopping list.
The Bottom Line
Beginner makeup does not have to be complicated.
You do not need every product you see online. You do not need a full glam kit. You do not need to master contour, cut creases, false lashes, and liquid liner on day one.
Start with what actually matters:
Fresh skin.
A little coverage.
Concealer where needed.
Blush for life.
Mascara for open eyes.
Brows that look groomed.
A lip product that makes you feel finished.
Once those basics feel easy, you can explore more.
Makeup should feel fun, not stressful. And the best beginner routine is the one you can actually do, repeat, and enjoy.

Leave a Reply