
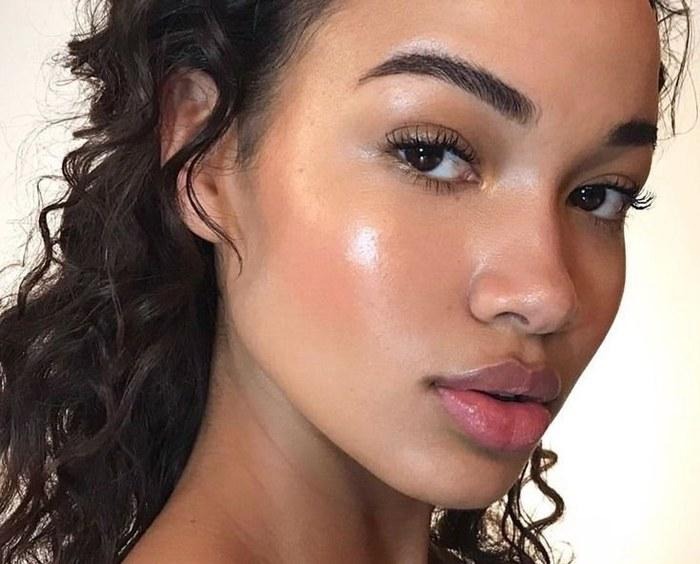
The goal: skin that looks alive, rested, and completely natural — in under 5 minutes
This isn't about doing less. It's about doing the right things in the right order — so your skin looks like itself, only better.
Bobbi Brown has spent 30 years teaching women that makeup should take five to ten minutes. Not because shortcuts are good — but because when you know exactly what to do and in what sequence, you don't need more time than that. The women who spend 45 minutes in front of the mirror are often doing too much, in the wrong order, with the wrong formulas.
This routine is built on Bobbi Brown's 10-step professional method, adapted for busy mornings and skin that needs hydration, not coverage. The emphasis is on a dewy finish — because heavy, matte makeup settles into lines and works against you. Every step has a reason. Nothing is filler.
Before you start: Wash your face, apply your moisturiser, and give it 60 seconds to absorb. Makeup applied over damp skin blends more evenly and stays fresher longer. This is the step most people rush — don't.
The Routine — 7 Steps, Under 5 Minutes
Pre Eye Cream — 20 seconds
Apply a small amount of eye cream with your ring finger — the weakest finger, which prevents tugging on this delicate skin — by pressing gently from the inner corner outward. Don't rub. This step is non-negotiable: without eye cream underneath, concealer will crease and cake regardless of what else you do. Give it 30 seconds to absorb while you squeeze out your foundation.
⏱ 0:20 Ring finger · press gently · inner corner outward
💡 For dry or mature skin, choose a richer balm formula at night and a lighter fast-absorbing gel for mornings so it layers easily under concealer.
Step 1 Concealer — 40 seconds
Start here, not with foundation. Concealer on the under-eye, inner corner, and anywhere you have redness gives you a fresh, bright base before foundation goes anywhere near your face. Choose a yellow-toned concealer one to two shades lighter than your skin. Apply with a small concealer brush, then blend by gently patting with your fingers. The warmth of your fingertips melts it seamlessly into the skin. If you have significant darkness, layer a pink or peach corrector underneath first.
⏱ 0:40 Brush to apply · fingers to blend · pat, don't rub
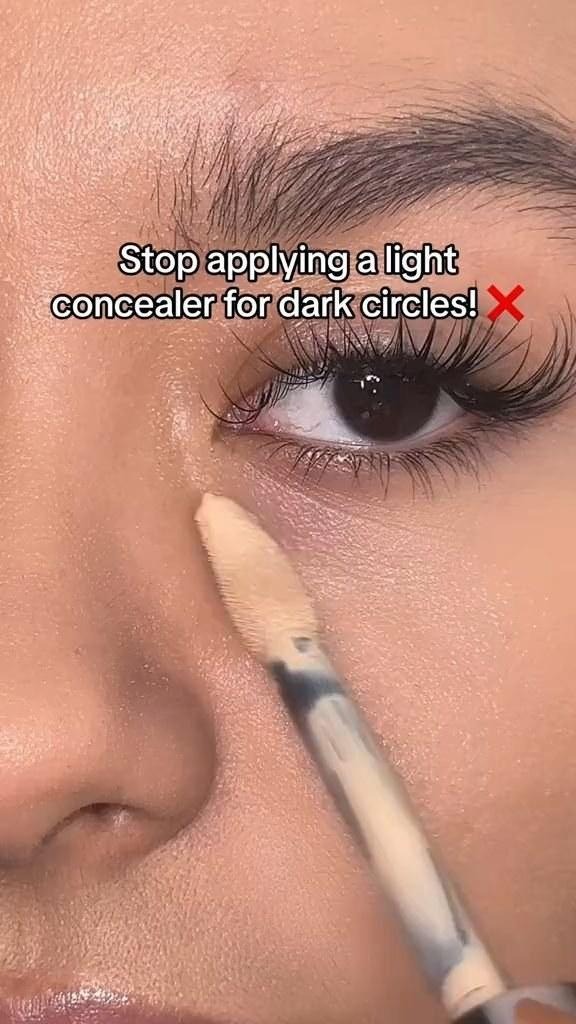
Concealer applied with a brush to the under-eye — the shade should be yellow-toned, not ashy
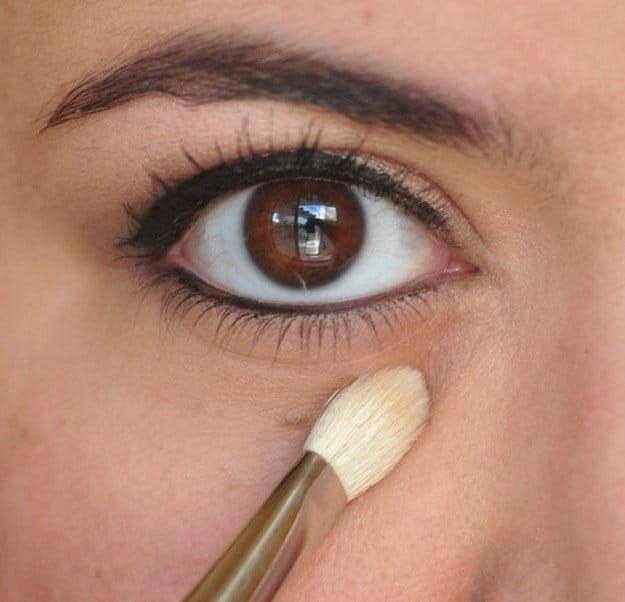
The inner corner — the single most brightening spot to apply concealer, and the most commonly missed
💡 A tiny dot of concealer at the very inner corner of each eye — where the lash line meets the bridge of the nose — opens the eyes more dramatically than almost anything else.
Step 2 Foundation or Tinted Moisturiser — 60 seconds
For most mornings, a tinted moisturiser or skin tint is the better choice over full foundation — it gives coverage where you need it while letting the skin breathe and look alive. Apply with fingers starting where skin needs the most evening out — usually around the nose and mouth where redness gathers — and blend outward. You don't need full-face coverage daily.
⏱ 1:00 Fingers for natural finish · sponge for more coverage
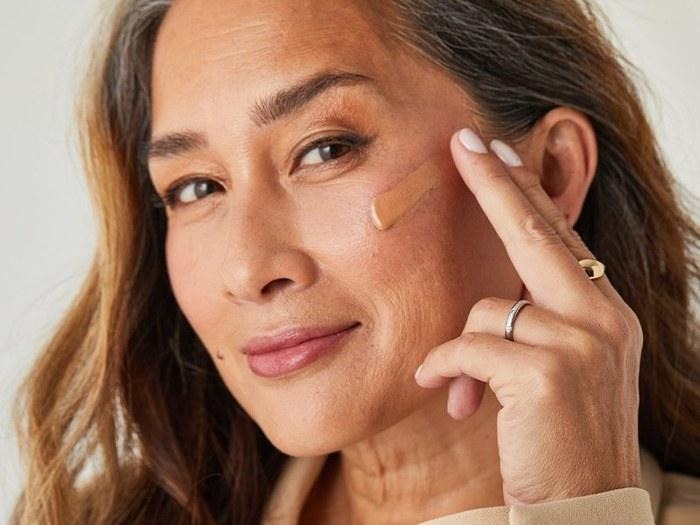
Foundation swiped onto the cheek — blend in with fingers for a skin-like, seamless finish
💡 For dry or mature skin, dense creams and balm moisturisers help plump the skin first, making foundation sit more smoothly and reducing the appearance of fine lines. Prep generously before any coverage product.
Skip: Heavy matte foundation all over Use instead: Tinted moisturiser or light skin tint with SPF
Skip: Powder all over Use instead: Light dusting of powder only on the T-zone
Step 3 Powder — 20 seconds
Powder is not about looking matte — it's about keeping your concealer in place. Apply a pale yellow loose powder only to the under-eye area using a small fluffy brush. Press, don't sweep. Then a light dusting across the T-zone if needed. Dry skin? Skip powder on the cheeks entirely — it emphasises texture and dries the skin further.
⏱ 0:20 Press under-eye first · T-zone only if needed · skip cheeks if dry
💡 Yellow-toned powder is universally more flattering than white or translucent — it warms the skin rather than leaving it looking floury.
Step 4 Brows — 45 seconds
The highest-impact step per second in the whole routine. A well-defined brow lifts the eye area instantly. Using an angled brow brush and a powder shadow one shade lighter than your hair, fill in from the inner corner using light, feathery strokes. Follow the natural shape upward and over the arch. Set with clear brow gel. If brows are sparse, use a pencil first in light strokes, then layer powder on top.
⏱ 0:45 Powder shadow + angled brush · feathery strokes · set with clear gel
💡 Match your hair colour, not your brow colour. If brows have faded, go one shade darker than your current brow — never as dark as your hair if your hair is dark.
Step 5 Blush — 30 seconds
Blush is what gives the face life — it makes you look like you've slept and had fresh air. Smile gently and apply a natural shade on the apples of the cheeks, sweep upward toward the hairline, then soften downward. For dry skin, a cream blush applied with the fingers before powder is more flattering than powder blush.
⏱ 0:30 Apples of cheeks · sweep up toward hairline · soften down

Cream blush swatched on the cheek — the peach tone is the most universally flattering for a healthy flush
💡 For a natural glow in seconds: skip powder blush and use a cream blush or multi-stick in a warm rose or peach tone with fingertips after foundation. It melds into the skin rather than sitting on top.
Step 6 Mascara — 30 seconds
Two coats of mascara on the upper lashes makes the whole face look more awake. Hold the wand parallel to the floor, start at the base of the lashes, and roll the wand as you sweep upward to separate and avoid clumps. Always curl lashes before mascara, never after. True black makes the most impact; brown gives a softer look.
⏱ 0:30 Curl first · base to tip · roll the wand · two coats
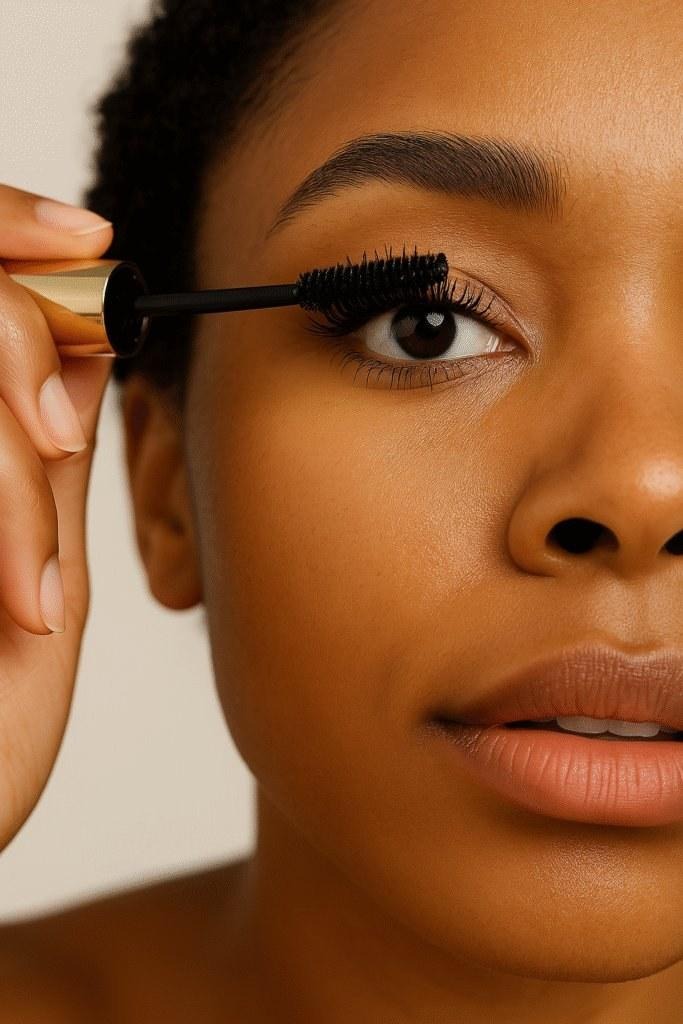
Mascara wand held parallel — start at the root and roll upward to separate lashes cleanly
💡 If your mascara is more than 6 months old, replace it. Old mascara smudges, clumps, and is a bacterial risk. It's the shortest-lived product in your kit.
Step 7 Lip Colour — 20 seconds
Find your neutral — the shade closest to your natural lip colour, slightly warmer or rosier. For mornings, a tinted balm, sheer lipstick, or creamy gloss applied directly from the tube is all you need. Avoid very matte formulas for everyday — they settle into any lines around the lips and dry them out. A creamy, sheer formula with a slight gloss gives the lips a fuller, more luminous look.
⏱ 0:20 Applied directly from tube · no liner needed for neutrals
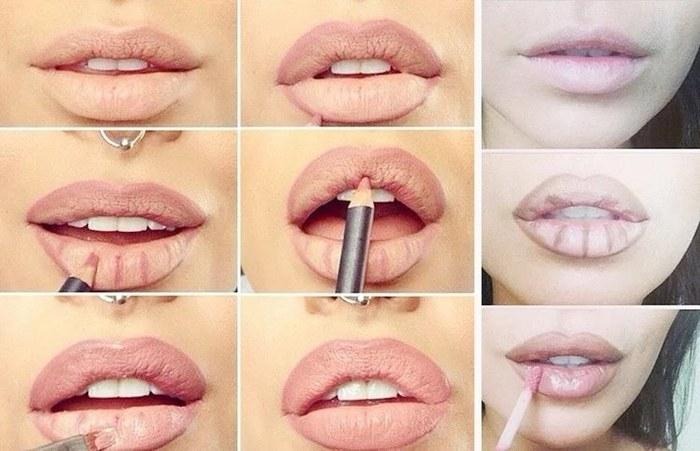
Neutral lip colour options — sheer and creamy formulas give the most natural, flattering finish for everyday
💡 Keep your everyday lip colour on your bathroom counter, not in a drawer — the more visible it is, the more likely you are to use it.
Total Time: Under 5 Minutes
Pre (eye cream) — 20 sec. Concealer — 40 sec. Foundation — 60 sec. Powder — 20 sec. Brows — 45 sec. Blush — 30 sec. Mascara — 30 sec. Lip colour — 20 sec. Total: approximately 4 minutes 25 seconds.
Bobbi Brown: "Makeup is simple. When you know how to apply it and have an organised makeup drawer, it should take only five to ten minutes. Practice is the key."
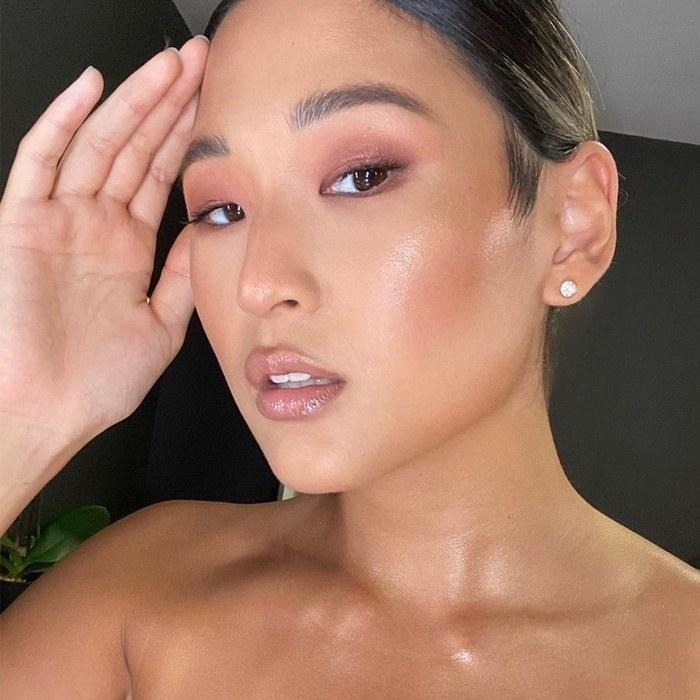
The result — dewy, natural, luminous. Skin that looks like skin, not like makeup
The Formulas That Make the Difference
Swap matte for dewy
Matte foundations, powders, and lipsticks were designed for young, oily skin. On mature or dry skin, matte formulas settle into fine lines, emphasise texture, and flatten the face. Dewy, satin, and cream formulas do the opposite: they fill fine lines with moisture, catch light naturally, and give skin a luminous quality that reads as healthy and rested.
Swap powder blush for cream
Cream blush applied with fingers to freshly moisturised skin blends into the skin rather than sitting on top of it. It lasts longer, looks more natural, and doesn't emphasise dry patches. A pot rouge or cream stick in warm rose works on lips and cheeks from one product.
Swap full foundation for skin tint
A tinted moisturiser, skin tint, or serum foundation gives coverage where you need it while letting natural skin texture show through. The effect looks like your skin has evened out rather than been covered over.
The 2-Minute Version — For Rushed Mornings
Eye cream under eyes → Concealer on dark circles and redness → Tinted moisturiser or BB cream with SPF → One coat of mascara → A sweep of tinted lip balm.
Never skip: Eye cream. Without it, any concealer you apply will crease within an hour. It takes 20 seconds and changes everything.
Building Your Kit — What You Actually Need
Eye cream · Peach or pink corrector (if needed) · Yellow-toned concealer · Tinted moisturiser or light foundation · Pale yellow loose or pressed powder · Angled brow brush · Brow powder shadow · Clear brow gel · Cream blush · Mascara · Creamy neutral lipstick or tinted balm.
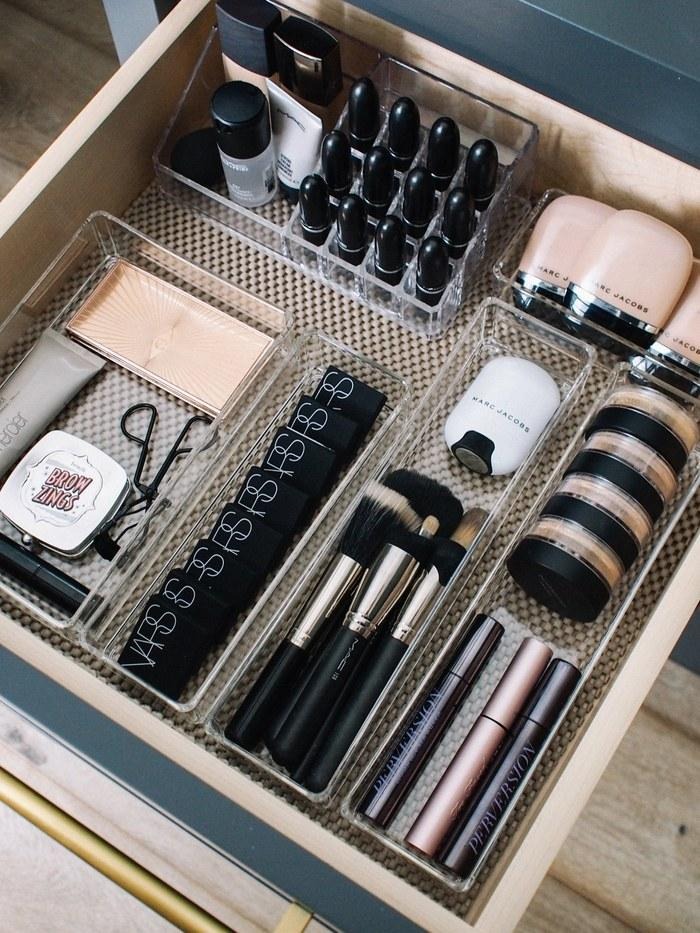
An organised makeup drawer — Bobbi Brown says this alone cuts your routine time in half
Twelve products at most, kept in one organised drawer. That's a five-minute routine every morning.
One Last Thing
The goal of this routine isn't to look like you're wearing makeup. It's to look like yourself — rested, bright-eyed, and put together. The makeup should disappear into your face. What remains is just you, at your best.
Save this — bookmark it, screenshot it, stick it to your mirror →
Leave a Reply